Introduction
CAP is capable of storing media data. But does it work with UI5 upload controls such as UploadSet(*)?
The answer to above question is yes. However, UploadSet doesn’t work out-of-the-box with CAP so you need to write some code to make it adapt to CAP.
The following are the challenges when you try to integrate UploadSet with CAP.
- CAP expects to receive media data with PUT request, while UploadSet sends media data by POST request by default.
- In order to open a file (picture) in UploadSet, it has to be fetched in blob, which doesn’t happen naturally with UploadSet.
The good news is, you don’t have to develop a custom control to upload / download files to / from CAP.
UploadSet has several “hooks” for your own logic and with the help of those hooks, you can integrate UploadSet with CAP.
In this blog I’m going to develop a CAP service (Odata v4) and a simple UI5 app with UpaloadSet.
* UploadSet is a successor of UploadCollection, as UploadCollection was deprecated as of UI5 version 1.88.
Development
1. CAP project
2. UI5 app
i. Uploading files
ii. Downloading files
iii. Set meaningful names to downloaded files (optional)
iv. Show file icons (optional)
* The optional steps are not directly related to UploadSet + CAP integration, but rather to improve the appearance of the app.
1. CAP project
1.1. db/data-model.cds
Important annotations are below.
@Core.MediaType: Indicates that the element contains media data. The value of this annotation is either a string with the contained MIME type or is a path to the element that contains the MIME type.
@Core.IsMediaType: Indicates that the element contains a MIME type
namespace miyasuta.media;

using {
    cuid,
    managed
} from '@sap/cds/common';

entity Files: cuid, managed{
    @Core.MediaType: mediaType
    content: LargeBinary;
    @Core.IsMediaType: true
    mediaType: String;
    fileName: String;
    size: Integer;
    url: String;
}
1.2. srv/media-service.cds
There’s nothing special here. Just exposing Files entity to the service.
using { miyasuta.media as db } from '../db/data-model';

service Attachments {
    entity Files as projection on db.Files
}
1.3. srv/media-service.js
I’ve implemented create handler for filling download URL (just for convenience of the UI).
module.exports = async function () {
    this.before('CREATE', 'Files', req => {
        console.log('Create called')
        console.log(JSON.stringify(req.data))
        req.data.url = `/attachments/Files(${req.data.ID})/content`
    })
}
2. UI5 app
2.1. Uploading files
First, let’s focus on how to upload files.
manifest.json
The CAP OData service is added as datasource with path “/attachments”.
{
    "_version": "1.32.0",
    "sap.app": {
        ...
        "dataSources": {
            "mainService": {
                "uri": "/attachments/",
                "type": "OData",
                "settings": {
                    "odataVersion": "4.0",
                    "localUri": "localService/metadata.xml"
                }
            }
        },
    },
    ...
    "sap.ui5": {
       ...
        "models": {
            "i18n": {
                "type": "sap.ui.model.resource.ResourceModel",
                "settings": {
                    "bundleName": "miyasuta.attachments.i18n.i18n"
                }
            },
            "": {
                "type": "sap.ui.model.odata.v4.ODataModel",
                "settings": {
                  "synchronizationMode": "None",
                  "operationMode": "Server",
                  "autoExpandSelect": true,
                  "earlyRequests": true,
                  "groupProperties": {
                    "default": {
                      "submit": "Auto"
                    }
                  }
                },
                "dataSource": "mainService"
              }
        },
View
Let’s first examine UploadSet’s default upload behavior. To do that, I’ve created the following view, without event handlers for UploadSet.
<mvc:View
controllerName="miyasuta.attachments.controller.App"
xmlns:mvc="sap.ui.core.mvc"
displayBlock="true"
xmlns="sap.m"
xmlns:upload="sap.m.upload"
>
<App id="app">
<pages>
<Page
id="page"
title="{i18n>title}"
>
<upload:UploadSet
id="uploadSet"
instantUpload="true"
uploadEnabled="true"
uploadUrl="/attachments/Files"
items="{
path: '/Files',
parameters: {
$orderby: 'createdAt desc'
},
templateShareable: false}"
>
<upload:toolbar>
</upload:toolbar>
<upload:items>
<upload:UploadSetItem
fileName="{fileName}"
mediaType="{mediaType}"
url="{url}"
enabledEdit="false"
visibleEdit="false"
openPressed="onOpenPressed"
>
<upload:attributes>
<ObjectAttribute
title="Uploaded By"
text="{createdBy}"
active="false"
/>
<ObjectAttribute
title="Uploaded on"
text="{createdAt}"
active="false"
/>
<ObjectAttribute
title="File Size"
text="{size}"
active="false"
/>
</upload:attributes>
</upload:UploadSetItem>
</upload:items>
</upload:UploadSet>
</Page>
</pages>
</App>
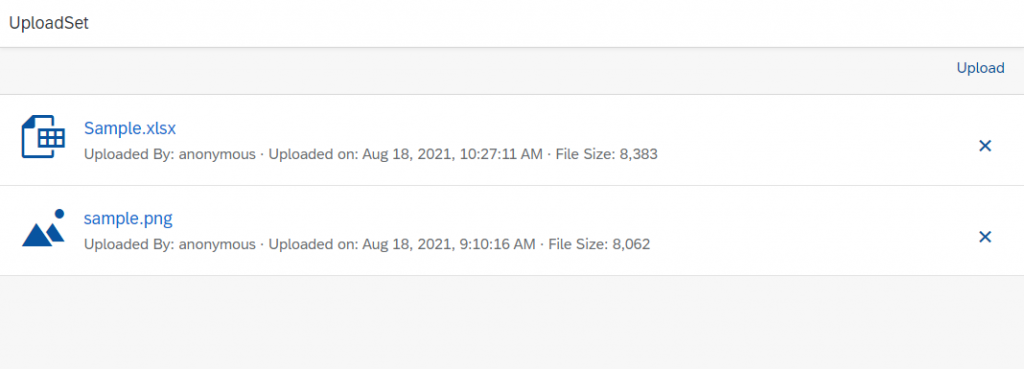
</mvc:View>The app looks like this.
when you upload a file, you’ll see an error below in the backend console. Here you find that data has been sent by POST request.
[cds] - POST /attachments/Files
[cds] - DeserializationError: No payload deserializer available for resource kind 'ENTITY' and mime type 'image/png'
To fix this, make the following changes to the UploadSet properties.
- Set instantupload to “false” to prevent the default upload behavior
- Remove uploadUrl, because we need to set this dynamically after receiving the entity’s key.
- Add event handler for afterItemAdded event. We’ll be uploading a file here.
<upload:UploadSet
					id="uploadSet"
					instantUpload="false"
					uploadEnabled="true"
					afterItemAdded="onAfterItemAdded"
					uploadCompleted="onUploadCompleted"
					items="{
								path: '/Files',
								parameters: {
									$orderby: 'createdAt desc'
								},
								templateShareable: false}"
				>
Controller
The following is the initial state of the controller.
In the method onAfterItemAdded, we first create a new entity of File (method: _createEntity).
After receiving the entity’s key, we then construct an URL and upload a file by PUT request (method: _uploadContent).
sap.ui.define([
"sap/ui/core/mvc/Controller",
"sap/m/MessageToast"
],
function (
Controller,
MessageToast
) {
"use strict";
return Controller.extend("miyasuta.attachments.controller.App", {
onInit: function () {
},
onAfterItemAdded: function (oEvent) {
var item = oEvent.getParameter("item")
this._createEntity(item)
.then((id) => {
this._uploadContent(item, id);
})
.catch((err) => {
console.log(err);
})
},
onUploadCompleted: function (oEvent) {
var oUploadSet = this.byId("uploadSet");
oUploadSet.removeAllIncompleteItems();
oUploadSet.getBinding("items").refresh();
},
onOpenPressed: function (oEvent) {
// to be implemented
},
_createEntity: function (item) {
var data = {
mediaType: item.getMediaType(),
fileName: item.getFileName(),
size: item.getFileObject().size
};
var settings = {
url: "/attachments/Files",
method: "POST",
headers: {
"Content-type": "application/json"
},
data: JSON.stringify(data)
}
return new Promise((resolve, reject) => {
$.ajax(settings)
.done((results, textStatus, request) => {
resolve(results.ID);
})
.fail((err) => {
reject(err);
})
})
},
_uploadContent: function (item, id) {
var url = `/attachments/Files(${id})/content`
item.setUploadUrl(url);
var oUploadSet = this.byId("uploadSet");
oUploadSet.setHttpRequestMethod("PUT")
oUploadSet.uploadItem(item);
}
});
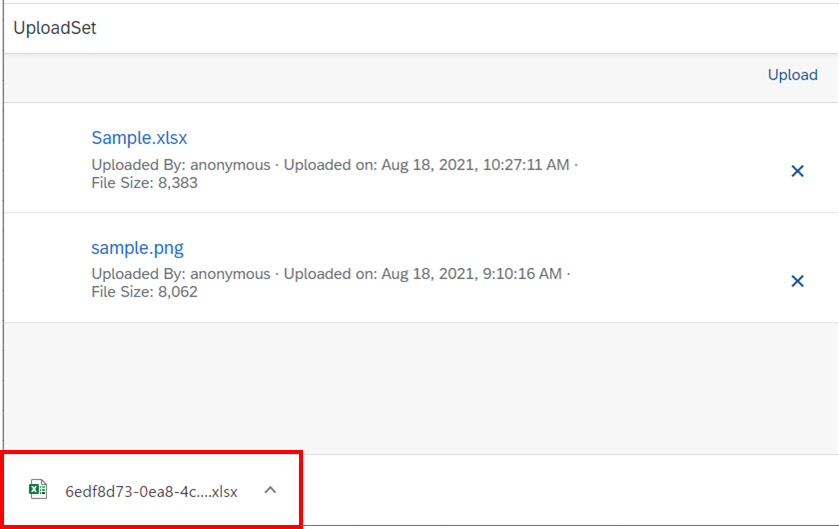
});Now, if you upload an image file, you’ll see it successfully uploaded.
The screenshot below is the result of GET request from Postman. So far, so good!
URL: http://localhost:4004/attachments/Files(<uuid>)/content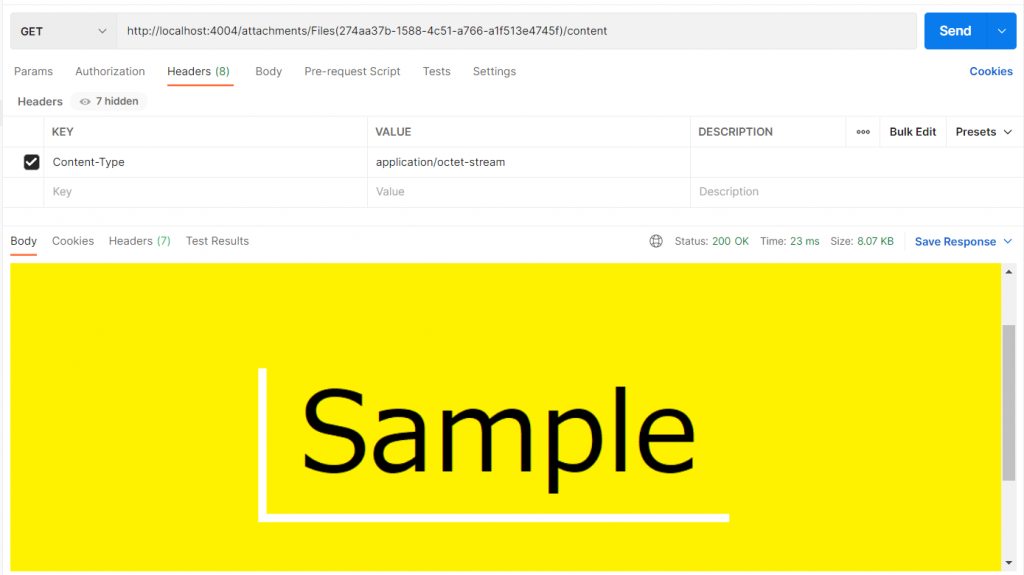
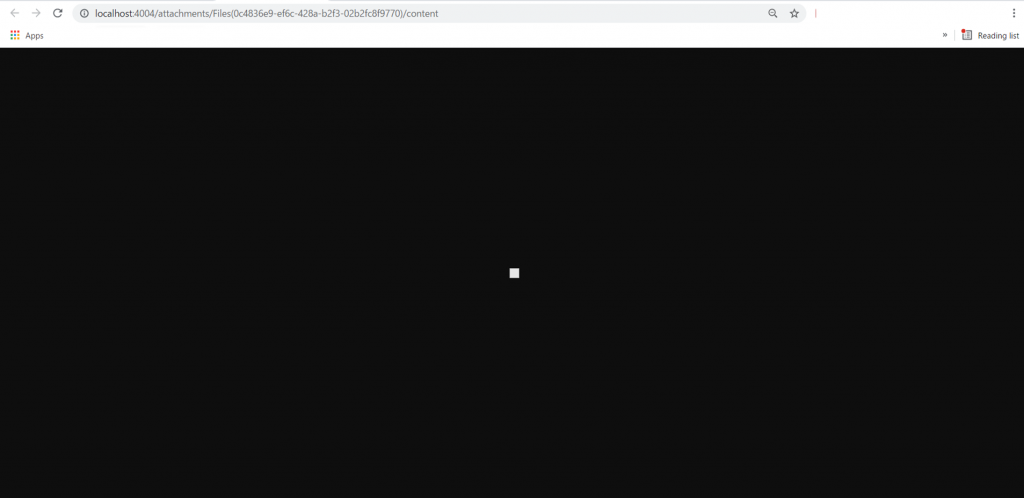
But what if you click the link on the item?
A new browser tab opens with black screen with a small white square in the middle. This is NOT what I’ve uploaded (or, it is supposed to look)!
2.2. Downloading files
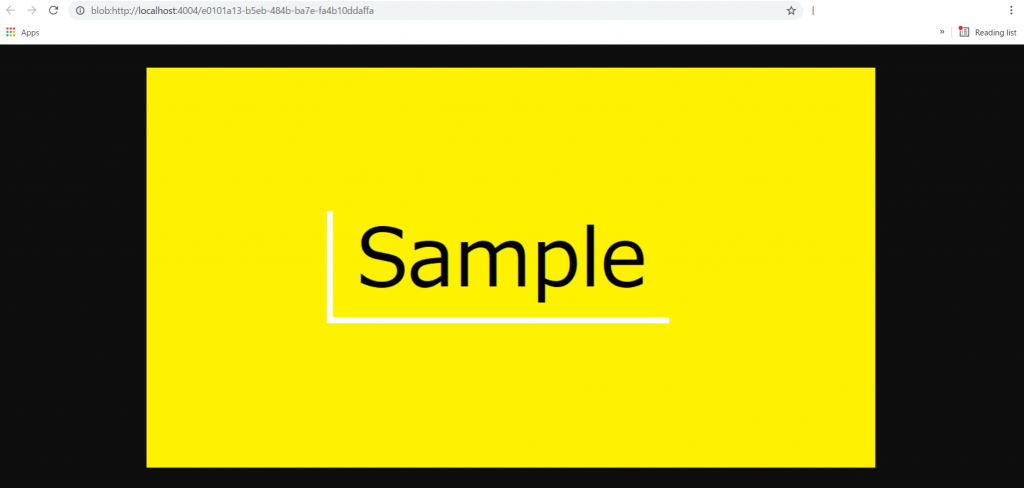
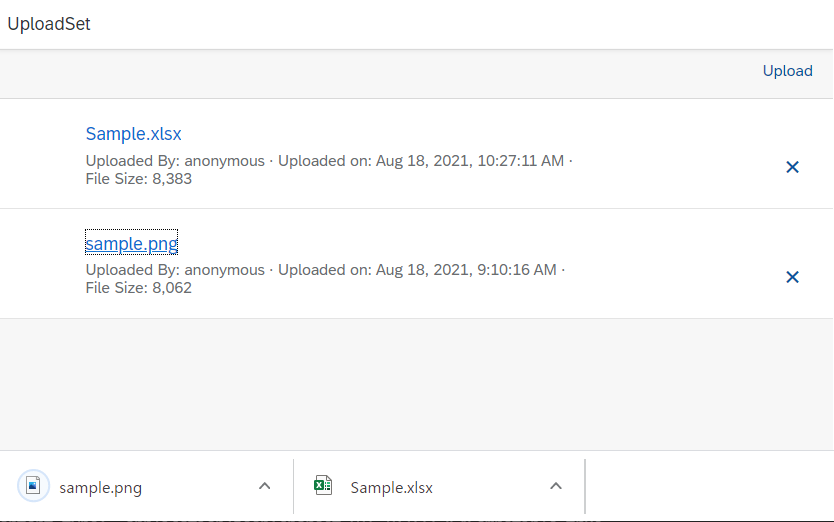
To fix above issue, we’ll implement onOpenPressed method and overwrite the default behavior. To open a picture properly, we need to specify response type as blob (see method: _download ).
onOpenPressed: function (oEvent) {
				oEvent.preventDefault();
				var item = oEvent.getSource();
				this._download(item)
					.then((blob) => {
						var url = window.URL.createObjectURL(blob);
						//open in the browser
						window.open(url);
					})
					.catch((err)=> {
						console.log(err);
					});
			},


			_download: function (item) {
				var settings = {
					url: item.getUrl(),
					method: "GET",
					xhrFields:{
						responseType: "blob"
					}
				}

				return new Promise((resolve, reject) => {
					$.ajax(settings)
					.done((result, textStatus, request) => {
						resolve(result);
					})
					.fail((err) => {
						reject(err);
					})
				});
			},
As a result, the image is shown in the browser correctly.
2.3. Set meaningful names to downloaded files (optional)
While images, pdf files and text files are opened in a new browser tab, other types of files such as Word or Excel are downloaded to PC (I haven’t tested all file types).
Downloaded files get random guids as file name. Can we make the file names more meaningful ones?
To achieve this, I’ve changed the onOpenPressed method to download files, instead of using window.open() method. The following is the revised code.
onOpenPressed: function (oEvent) {
oEvent.preventDefault();
var item = oEvent.getSource();
this._fileName = item.getFileName();
this._download(item)
.then((blob) => {
var url = window.URL.createObjectURL(blob);
// //open in the browser
// window.open(url);
//download
var link = document.createElement('a');
link.href = url;
link.setAttribute('download', this._fileName);
document.body.appendChild(link);
link.click();
document.body.removeChild(link);
})
.catch((err)=> {
console.log(err);
});
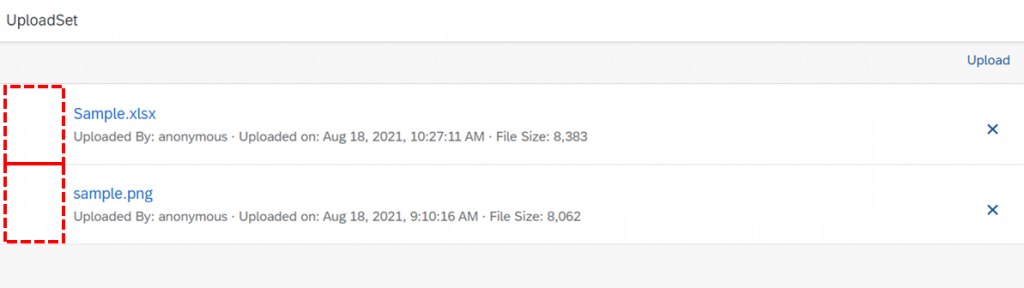
},As a result, downloaded files get their original names.
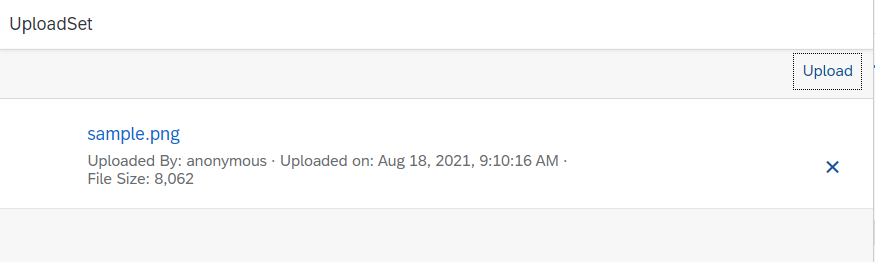
2.4 Show file icons (optional)
You might remember, that when you used UploadCollection, you would see file icons to the left of file name as shown below.
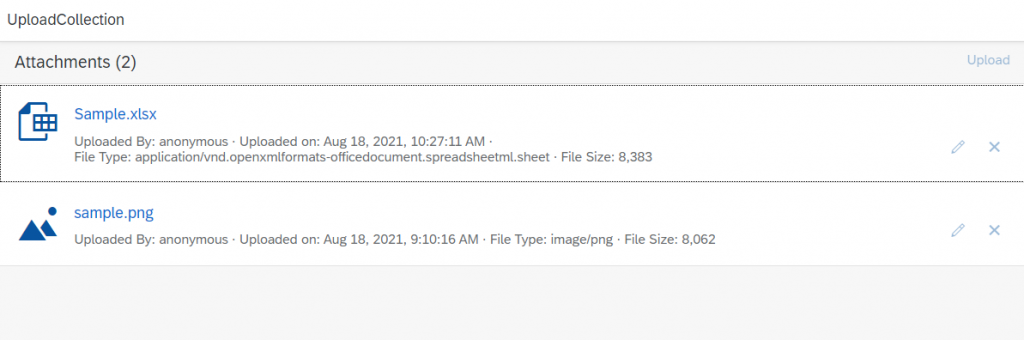
Although UploadSet seems to reserve space for icons, icons are not displayed.
My workaround is to use thumbnailUrl property with formatter. In the formatter, I’ve set an icon URL according to mimeType. But I feel icons should be shown without writhing such code.
If someone knows a better way, please let me know in the comment section below.
<upload:UploadSetItem
							fileName="{fileName}"
							mediaType="{mediaType}"
							url="{url}"
							thumbnailUrl="{
								path: 'mediaType',
								formatter: '.formatThumbnailUrl'
							}"
							...
						>
This is formatter code.
formatThumbnailUrl: function (mediaType) {
				var iconUrl;
				switch (mediaType) {
					case "image/png":
						iconUrl = "sap-icon://card";
						break;
					case "text/plain":
						iconUrl = "sap-icon://document-text";
						break;
					case "application/vnd.openxmlformats-officedocument.spreadsheetml.sheet":
						iconUrl = "sap-icon://excel-attachment";
						break;
					case "application/vnd.openxmlformats-officedocument.wordprocessingml.document":
						iconUrl = "sap-icon://doc-attachment";
						break;
					case "application/pdf":
						iconUrl = "sap-icon://pdf-attachment";
						break;
					default:
						iconUrl = "sap-icon://attachment";
				}
				return iconUrl;
			}
Finally, icons are displayed.