Introduction
Every time I visit a customer and start talking about fiori and the mobile capabilities, customers show curiousity about the possibility of receiving notifications in their cellphones. The typical use case, is managers that want to receive a notification whenever they receive a workflow item in their inbox that needs to be approved.
As you are going to see in this blog, the configuration is very easy and you only need to count with the backend system (S/4hana or ECC), the sap fiori client downloaded from your app store, and a Cloud Foundry SCP account with the Mobile Services service activated. If you are a developer, you could use your trial account.
Landscape of the Solution
Since we are using SAP Cloud Platform Mobile Services from SCP Cloud Foundry, it’s interesting to see how the architecture will looks like.
We are going to create a Hybrid app in the SAP Mobile Services cockpit and include the push and Connectivity capabilities.
The standard SAP Fiori client is going to connect using the Connectivity feature to a S/4HANA backend using the SAP Cloud Connector.

Configuration of SAP Cloud Connector and SAP Cloud Platform
Have in mind, that you only need to configure the Cloud Connector and not the destination.
Keep the Cloud Connector running while you follow this article, so the cloud platform can interact with your backend.
Configuration of Security tab
In order for our application to support Basic Authentication against the S4HANA system, we must first register the Mobile Services as an additional Trust Configuration in the SCP cockpit.
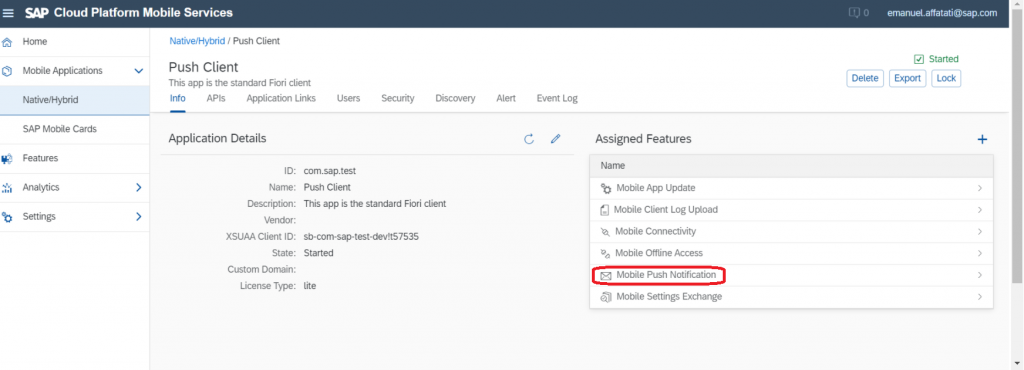
In order to start getting push notifications in your mobile devices, the first thing we must configure is a mobile services app.
First, lunch the mobile service in cloud foundry environment.
Then download the Metadata file from the Security tab of the mobile services dashboard.
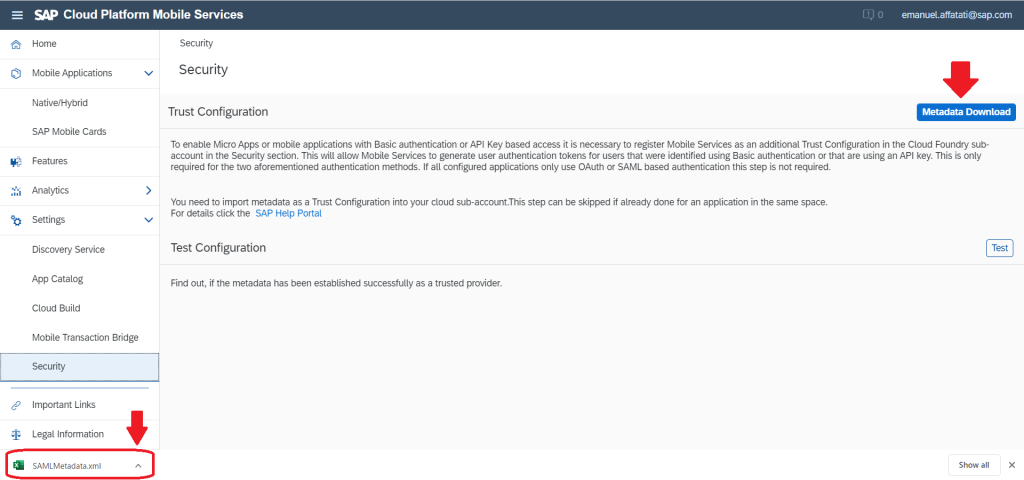
Then move to the SAP Cloud Platform subaccount under “Security > Trust Configuration”, and upload the excel previously downloaded:
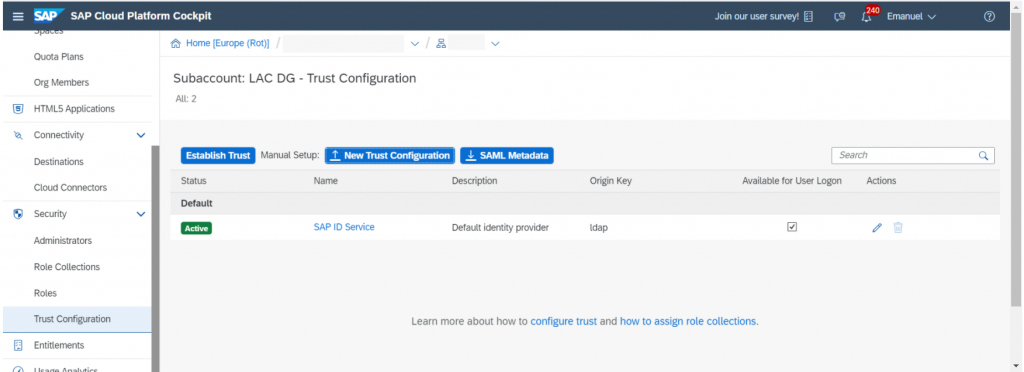
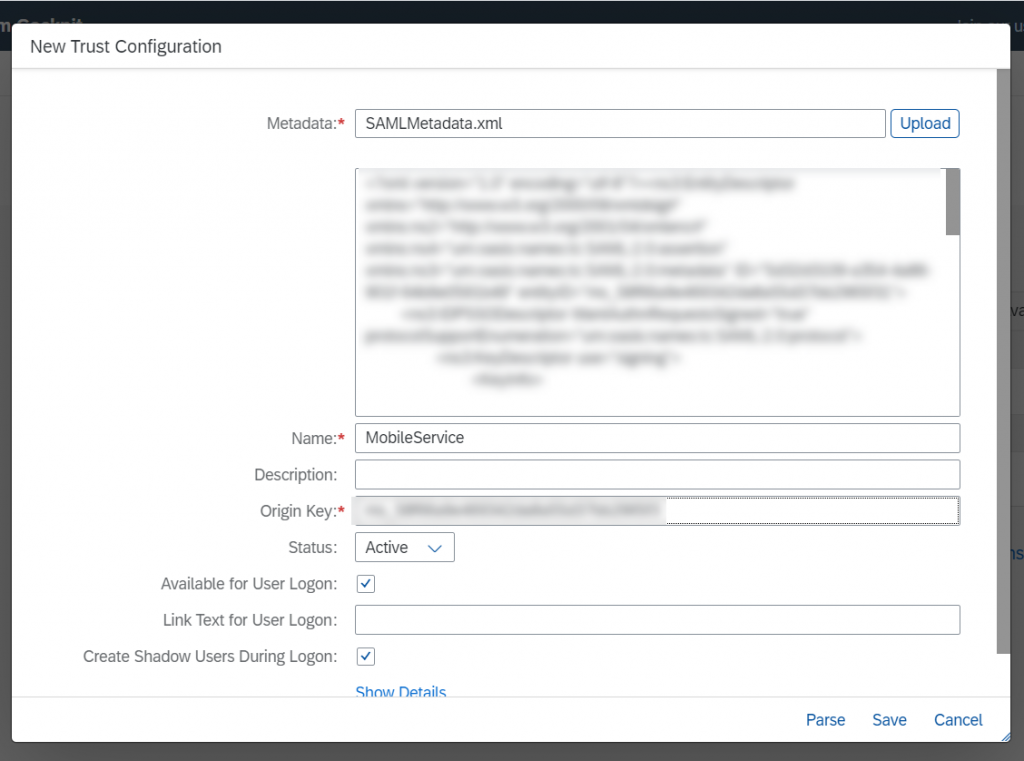
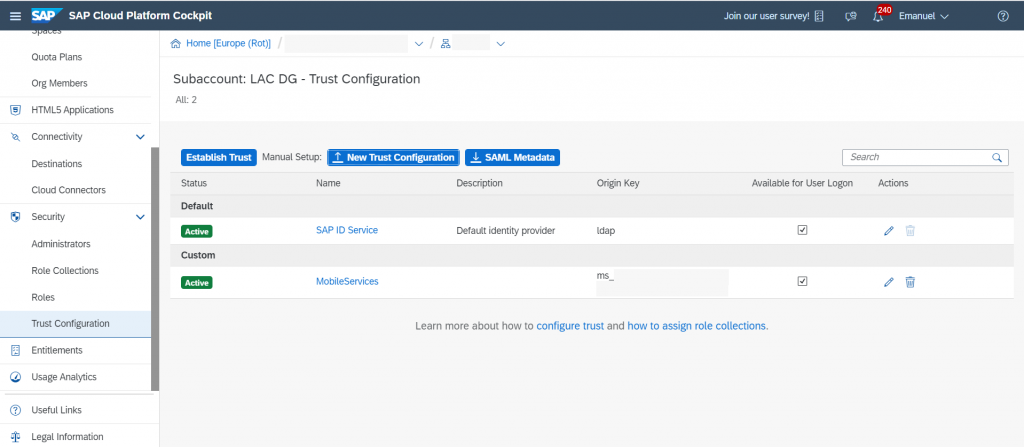
After this, you should see a new line under “Trust Configurations” for your Mobile Service:
Configuration of Mobile Services app
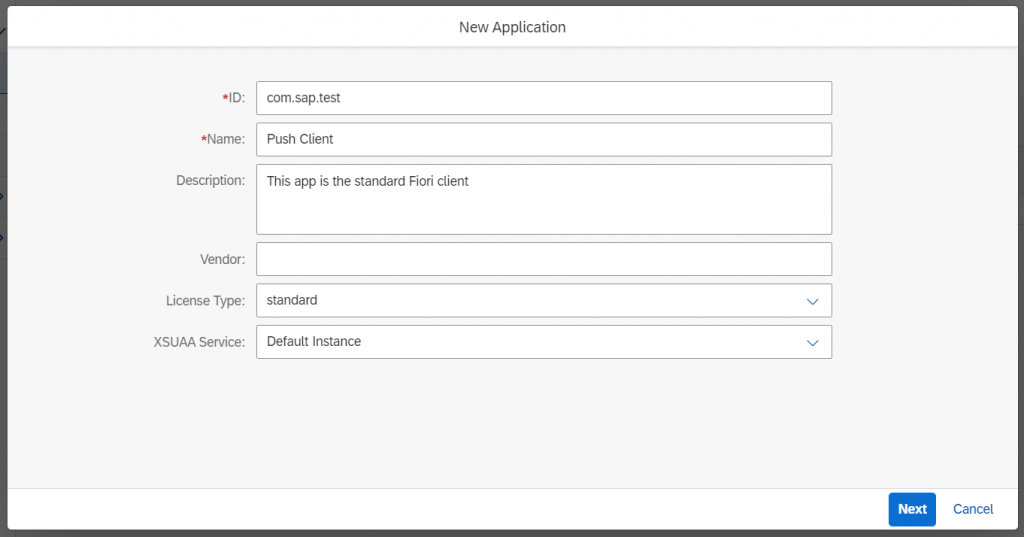
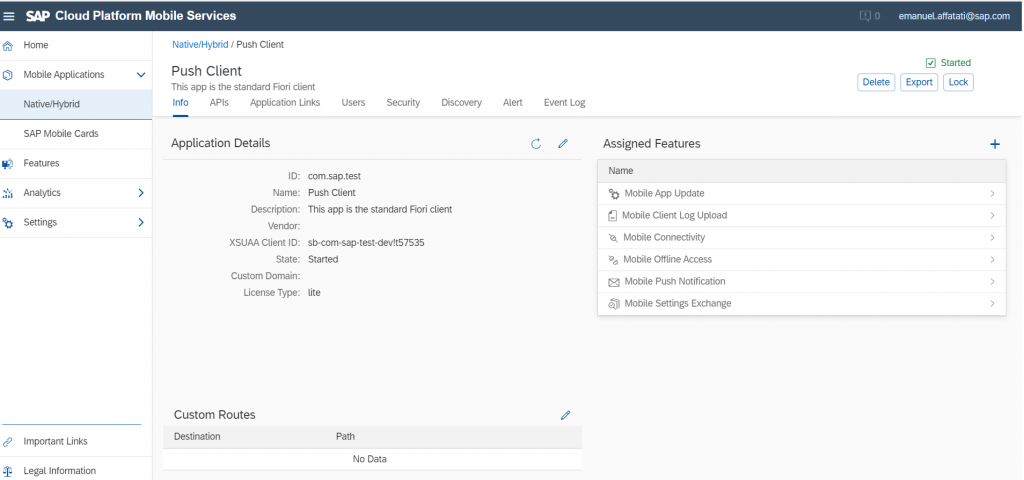
In the Mobile Services coclpit, press the create button and enter the app name com.sap.test (com.<company>.<functionality>) and app type as Hybrid:

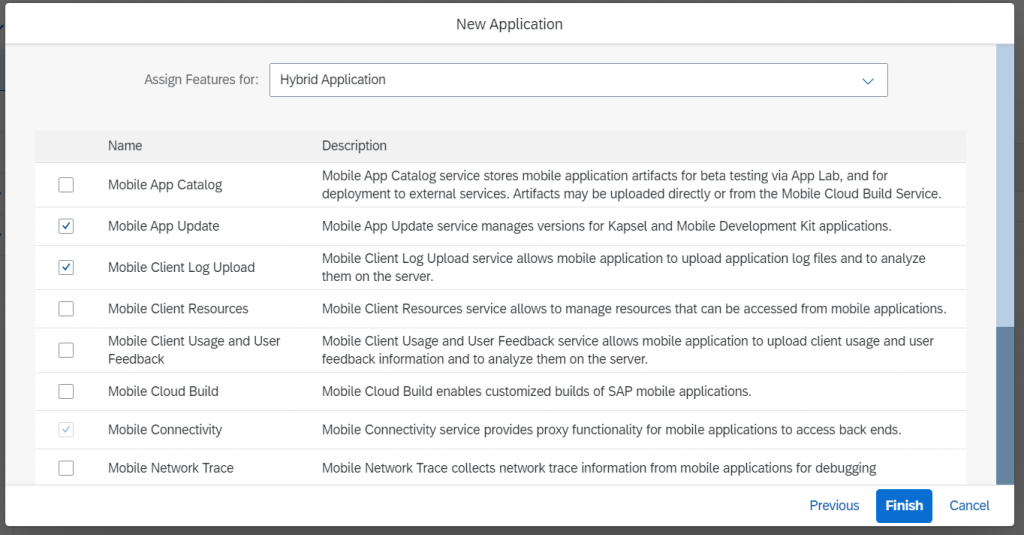
Make sure “Mobile Client Log Upload”, “Mobile Client Usage and User Feedback”, “Mobile Connectivity”, “Mobile Push Notification” and “Mobile Settings Exchange” are checked.
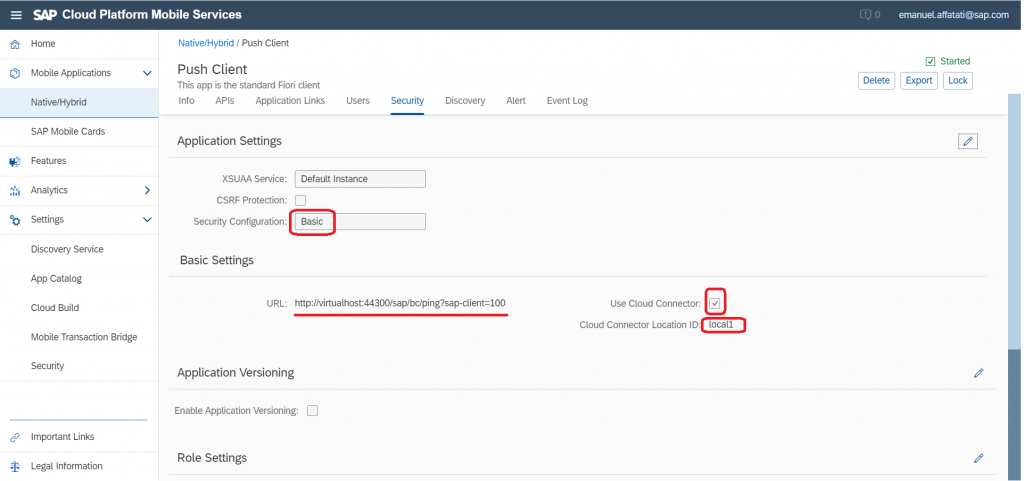
Configuration of Application Security tab
The most common authentication method used by most of the customers to log to their Fiori Launchpads is Basic Authentication (user and Password entry fields), although you can use another methods as the following:
For the aim of this blog, we are going to use Basic Authentication.
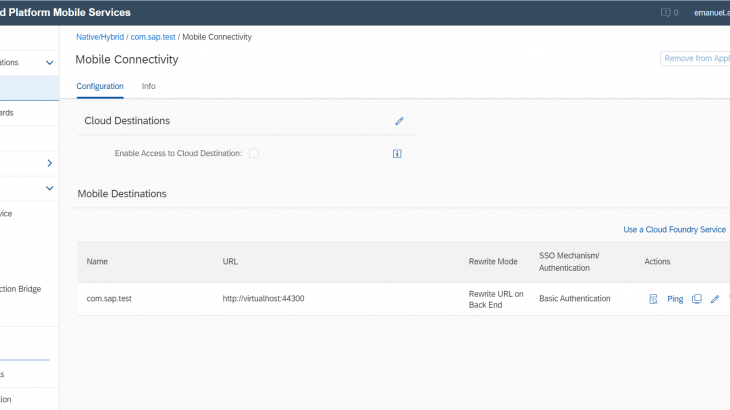
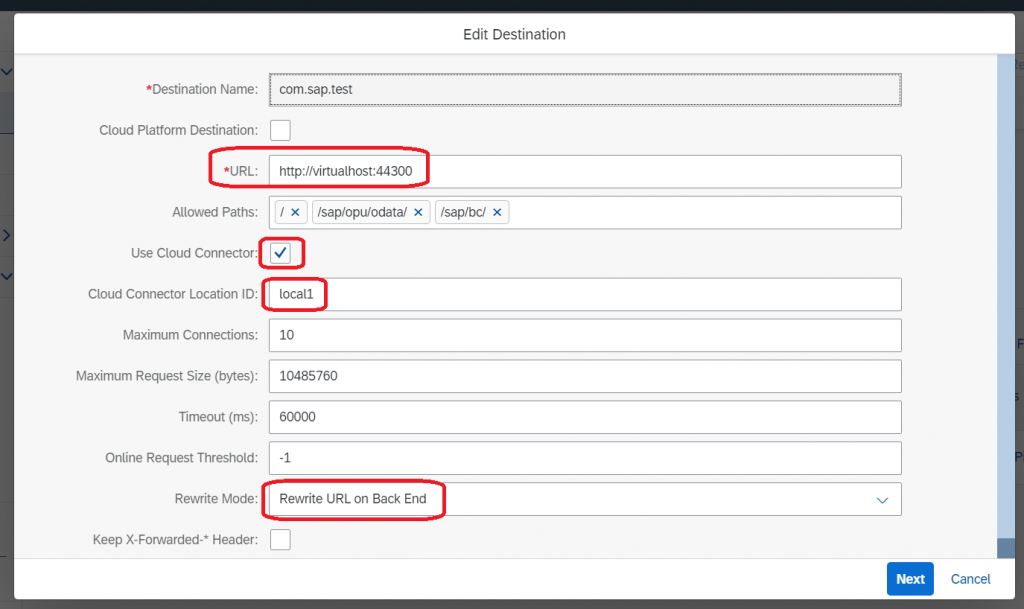
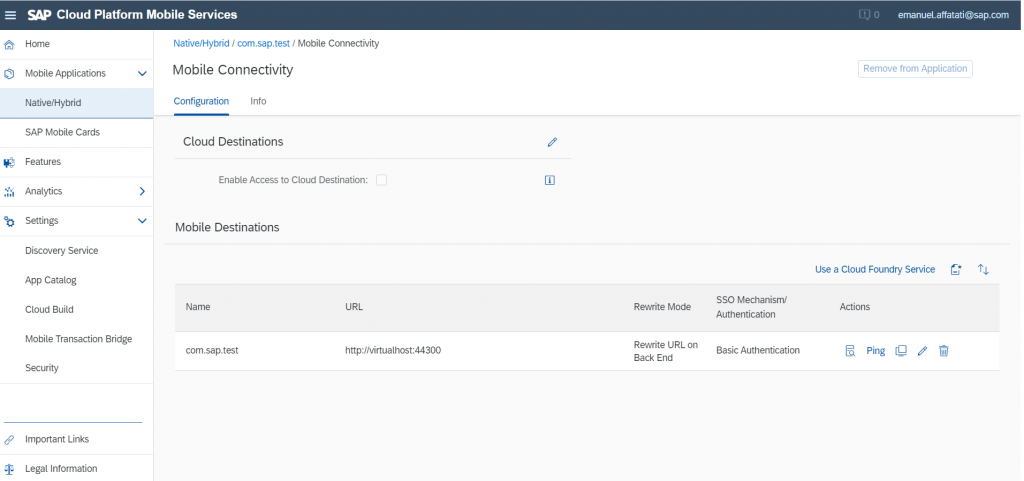
Configuration of SCP Mobile Services destination
In this step we are going to define the backend connection that the fiori client is going to be using to connect to the Launchpad.
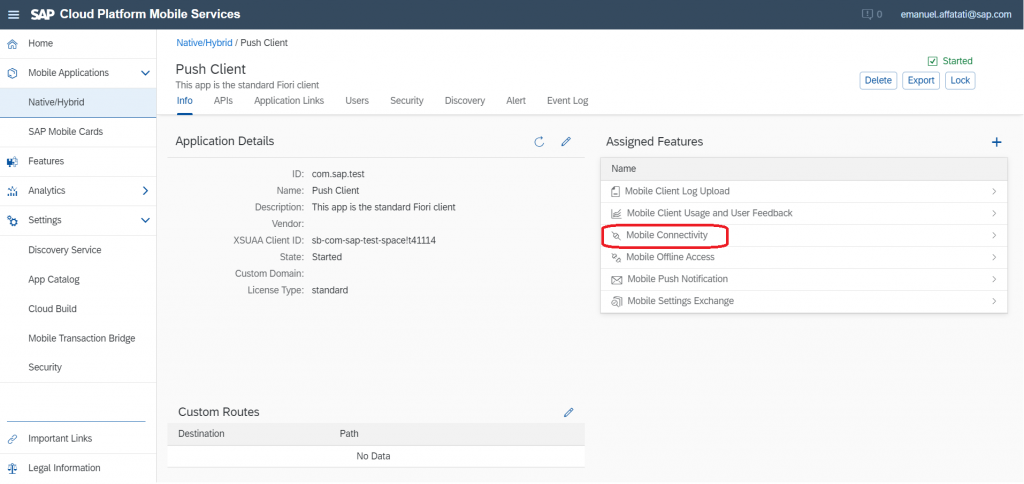
Go to the Connectivity tab of your app:
We are going configure a new destination where we are going to leave empty the Basic Authentication fields, which are going to be fulfilled with the data entry we made in the first login screen displayed by the Fiori client mobile app.
One comment here, for some reason the odata/browser/ping check doesn’t work. But when you configure in the fiori client you get the content.
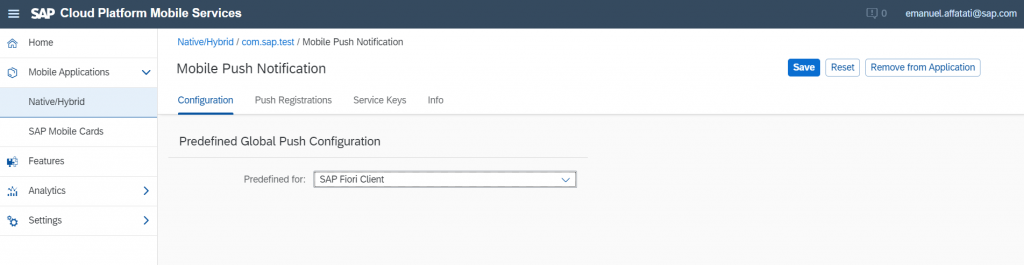
Configuration of Push Notifications
Since we are going to use the standard Fiori client, there is no need to have a APNS or FCM account. We are going to be using the ones that come already configured in the standard SAP Fiori client.
Go to the Mobile Push Notification feature of your app:
Select the value “Predefined for SAP Fiori Client” in the “Predefined Push Configuration” field.
Download and configure Standard SAP Client
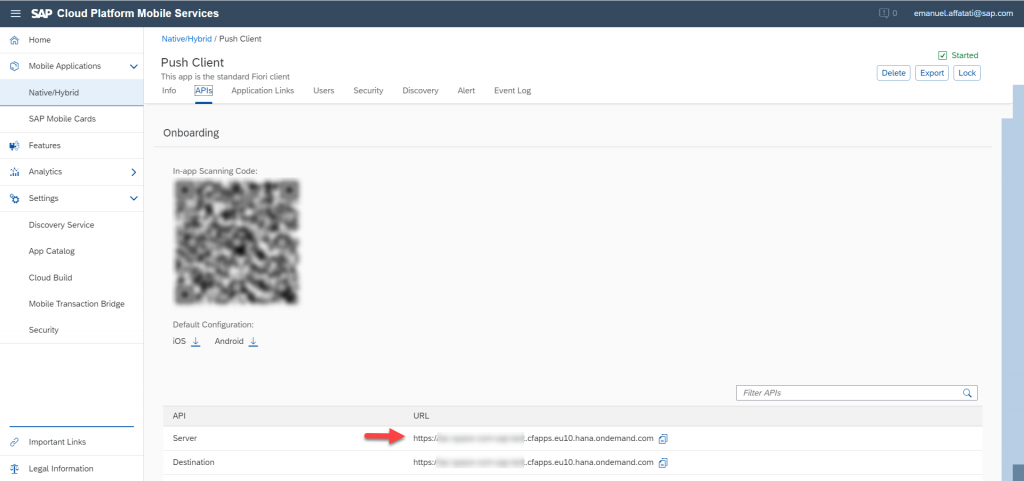
Download the standard SAP Fiori Client from your favorite app store (Apple Store, Google Play).
When the url is prompted, you have to added with the following information:
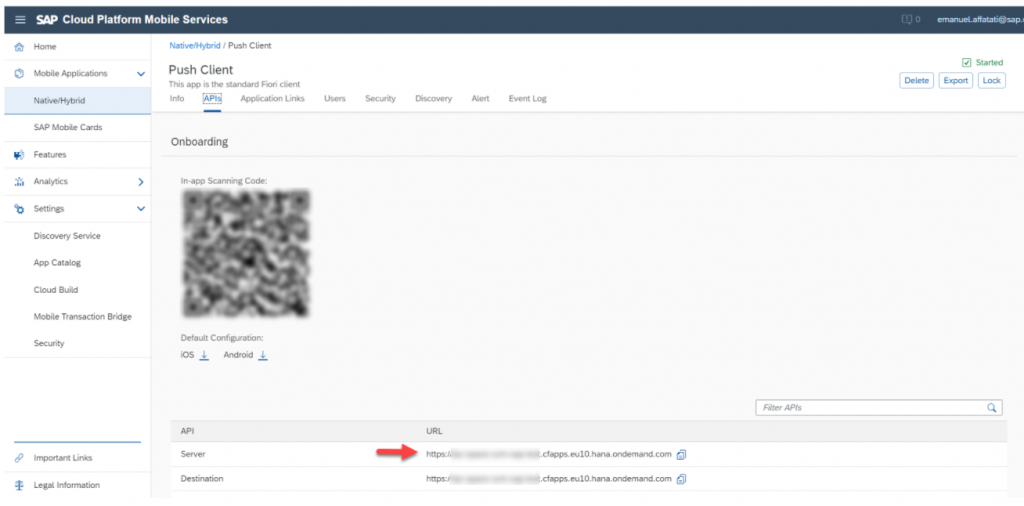
https://<your SCP url>.com/sap/bc/ui2/flp?appid=<appId>&fioriURLIsSMP=trueYou can get you SCP url from the APIs tab:
Following the article name conventions, the url should be the following:
https://<your SCP url>.com/sap/bc/ui2/flp?appid=com.sap.test&fioriURLIsSMP=trueTest Push Notification from SCP Mobile Services app cockpit
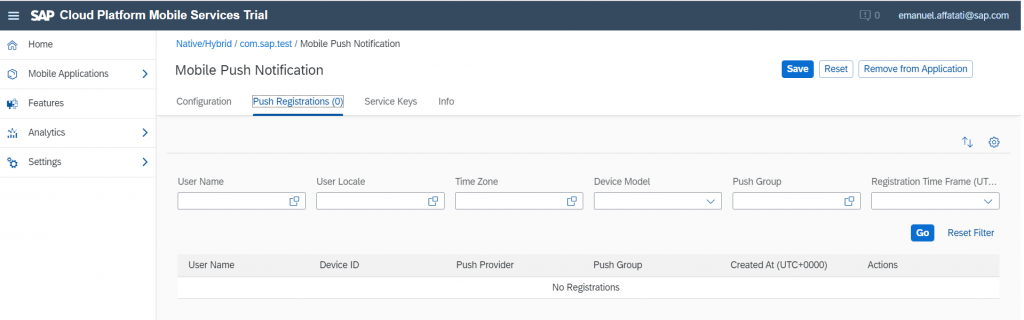
Go to the Push Notification feature.

Go to the Push Registrations tab, and you are going to see there the list of already registered devices. In this case it’s empty because yet I didn’t log any device.
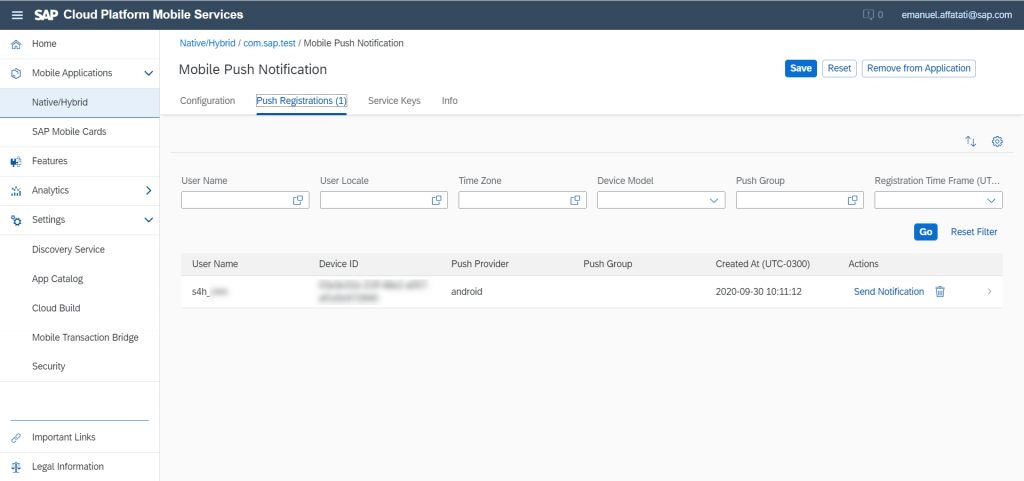
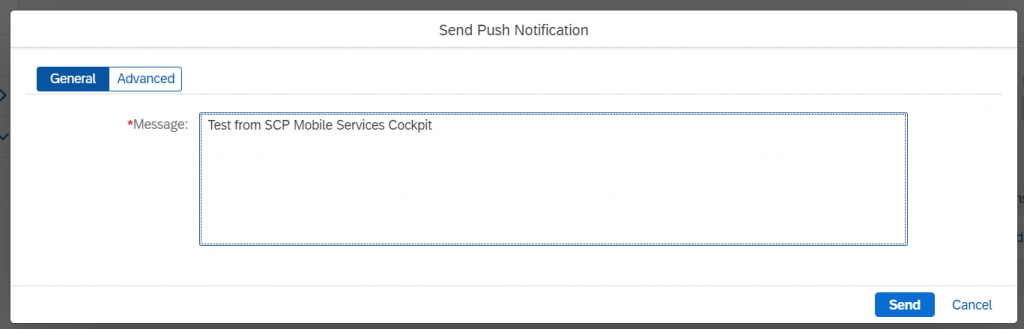
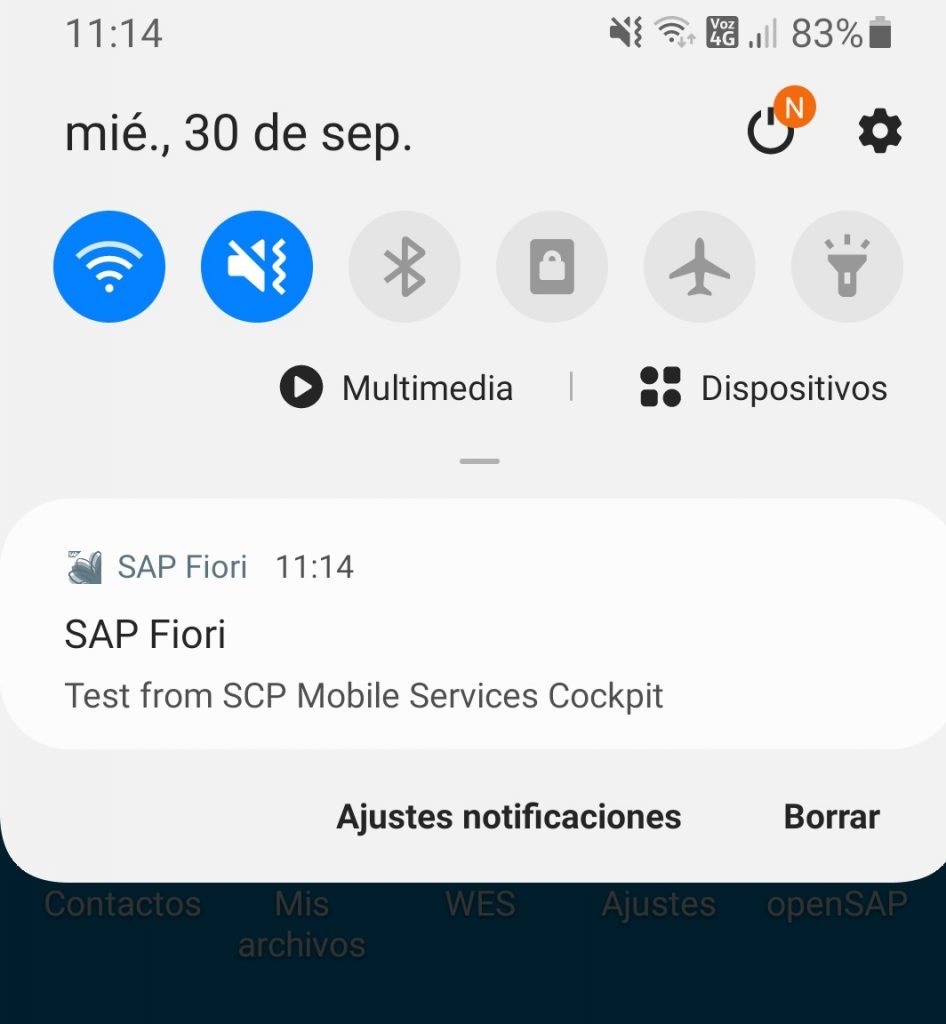
After you logged into the Fiori Launchpad using the Fiori client using the url we have previously seen (https://<your SCP url>.com/sap/bc/ui2/flp?appid=<appId>&fioriURLIsSMP=true), a new line with appear in the list with your User and Device.Go to his line, and press the button “Send Notification”.
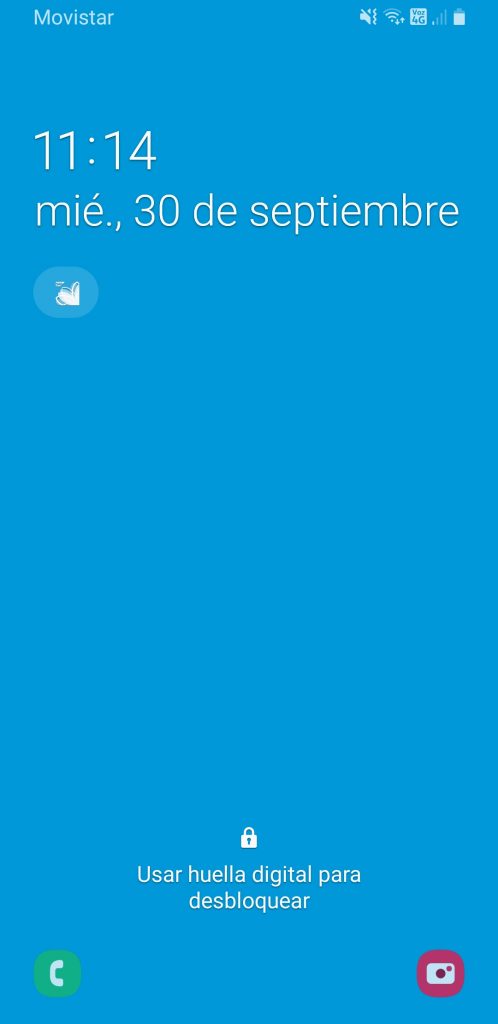
Note: The sap fiori client must not be running in foreground in your cellphone for you to receive the Notification in the mobile device status bar. This is due to standard behaviour of push plugin. You could check notifications running the sap fiori client in foreground using the notification center.
After sending the notification, you should see the notification in your mobile device. If you click in it, the sap fiori client application is going to be opened.
Test Push Notification from Rest Client
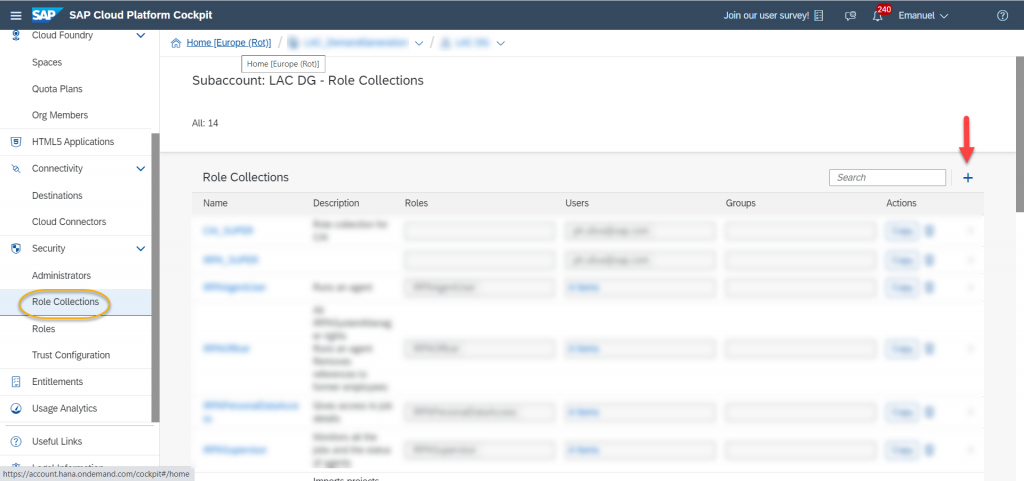
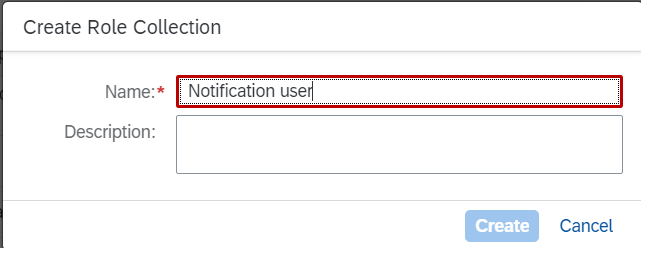
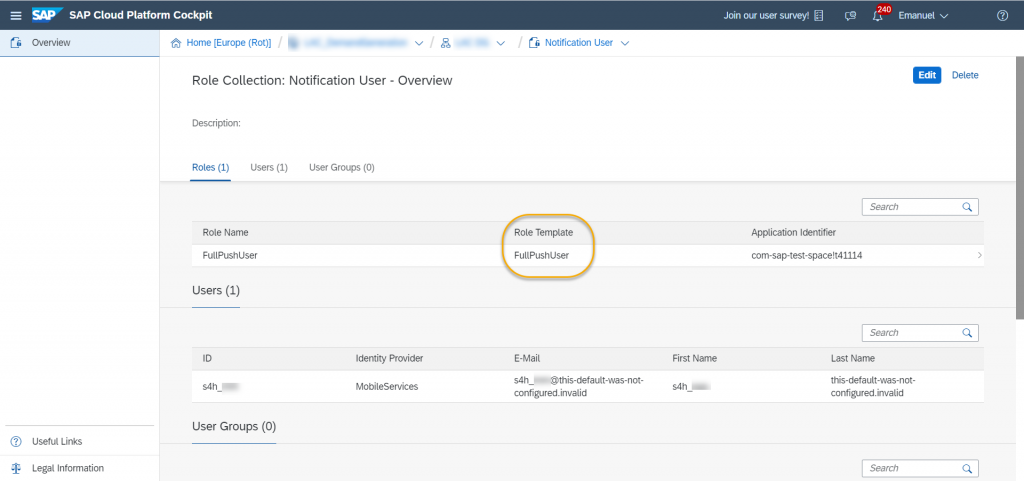
First, you have to assign the “FullPushUser” role template to the user that is going to be responsible of sending the Notifications using the SCPms API.
Go to the SAP Mobile Platform Cockpit, and go to “Security > Role Collections”:
Check the API endpoint for your SCP mobile services api.
Go to your favourite rest client (in this case Postman), and enter the following information
Url:
https://<your SCP url>.com/restnotification/application/com.sap.testHTTP Method: POST
Header:
Authorization: Basic
Enter ther <user> you configured with the “FullPushUser” role template and it’s credentials.
Content-type : application/json
Payload:
{“alert”:”Notification from REST client”, “data”:”For 123″, “badge”:2}If everything went fine, you should received a 201 status message in your response, and see the Notification in the mobile device (remember that the fiori client should not be running).


