Requirement: Export an EXCEL file with data in cell formatted excel sheet with colors, borders, filters in Web Dynpro.
This is a very common requirement in Web Dynpro Reports. But, strangely, not much is there in any forum.
There might be number of ways to achieve it, but the easiest way we figured out is elaborated in this post.
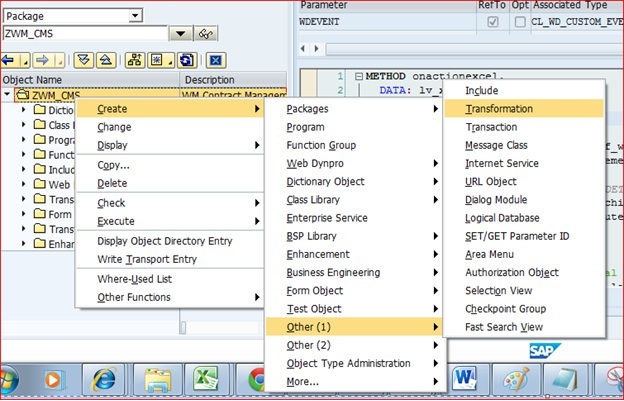
Step 1. Create your Web Dynpro component and application, extract all your data and prepare a final table(s) which you want to download in excel.
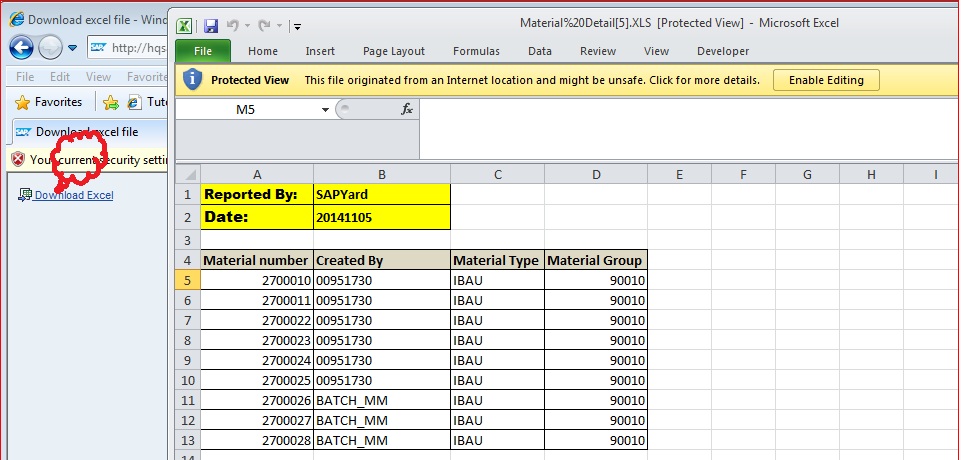
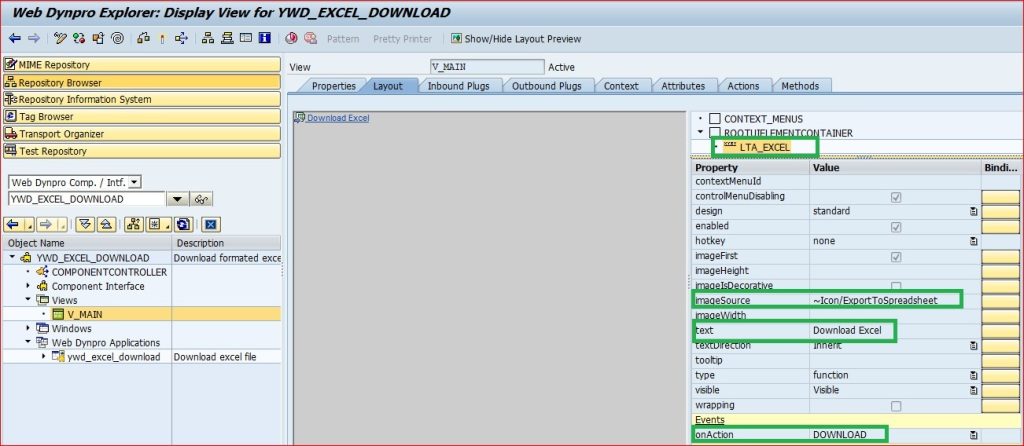
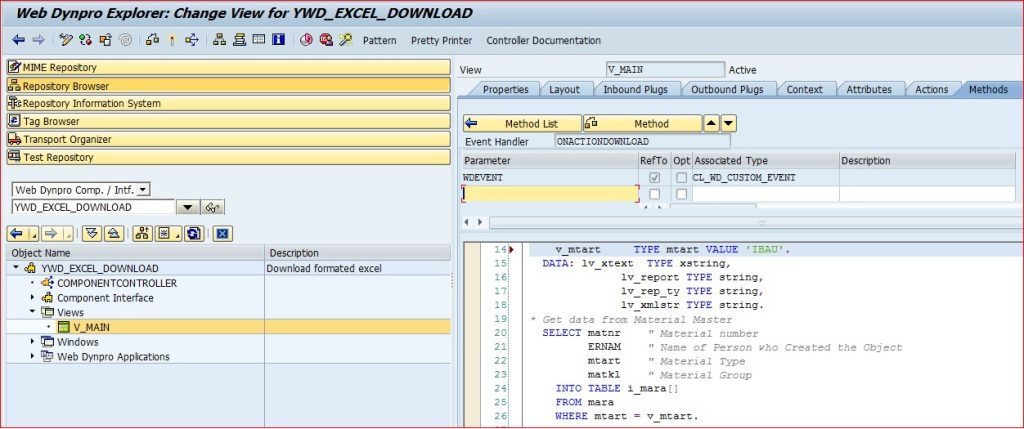
Step 2. For the ease of demonstration, we have created a simple WD application with just one button (LinkToAction) UI element in main view. In the action ‘DOWNLOAD’ we have added a small logic to fetch few columns from MARA. Final table (i_mara) to be displayed in excel is ready.
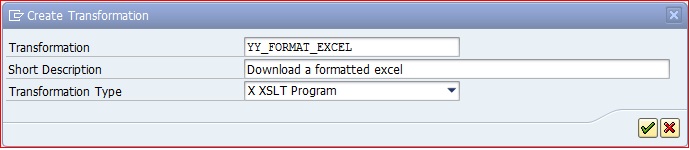
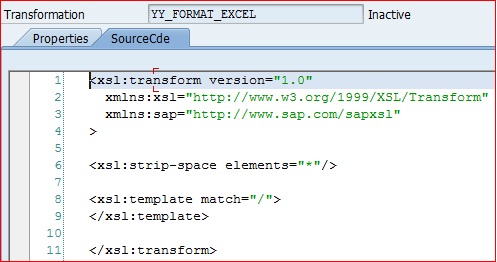
Step 3. Create one Transformation program in SE80 or t-code XSLT_TOOL. Simple Transformation is needed. When you save the Transformation program, xml code would be generated
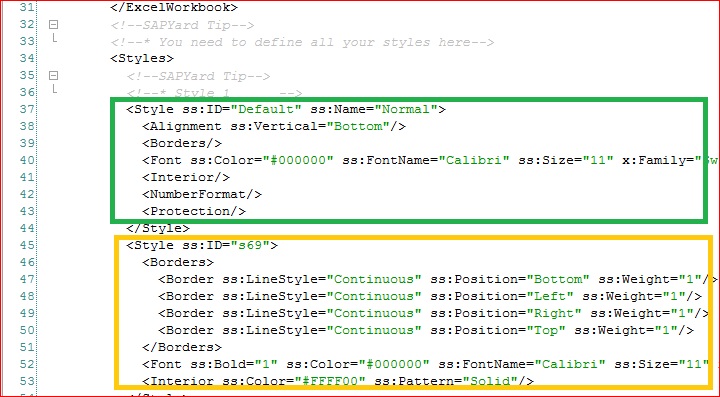
Step 4. Replace the generated xml code with the code in the template xml attached below. We have created this template for the ease of we developers. Places are highlighted in the template where you need to add/change your formats.
Link for xml template: Please look for SAPSPOT Tip in the template to find the hints.
Text File: SAPSPOT Transformation Template
PS: This template can be used for any excel download/formatting. It should be changed / enhanced for extra features. But this template can be used as starting point.
Step 5. Prepare a sample excel page you want as output from Web Dynpro, with all formatting, coloring, borders etc. Make sure you have all the formatting done.
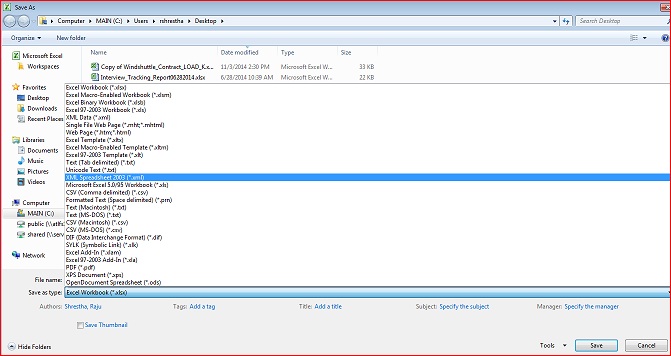
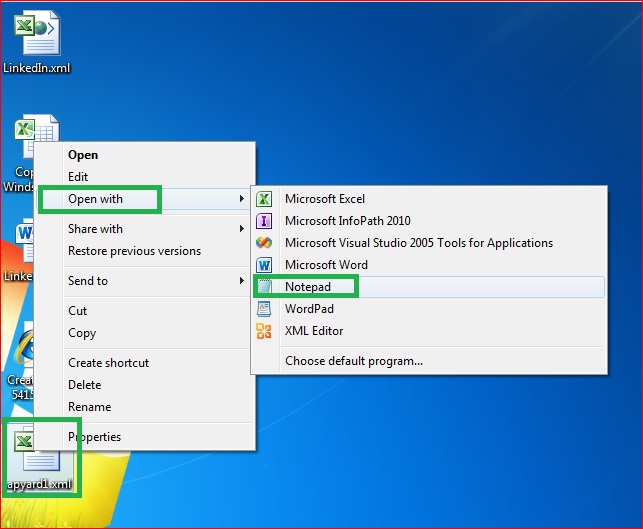
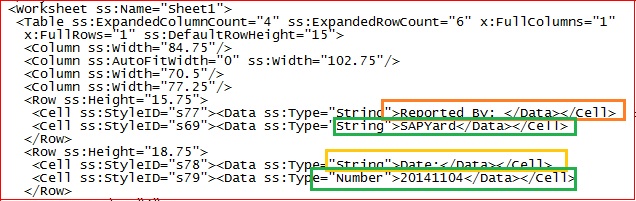
Step 6. Save that excel as .XML. Open that saved XML in notepad/wordpad. You will see XML codes. Scan through the code to get the STYLES. Different Styles will have different format for different rows, cells or columns.
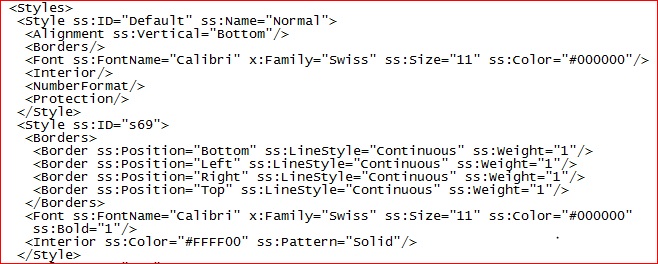
Step 7. Go back to Transformation program XML which is the copy of the XML template attached. Now copy all your STYLES from excel XML to program XML.
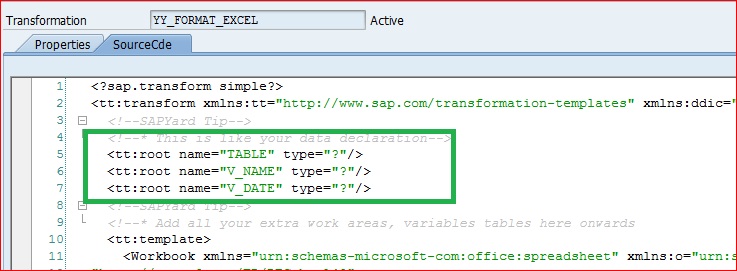
Step 8. At the top of Transformation program, define the tables and variables / workareas which would be imported. TABLE is your internal table which would be sent from Web Dynpro. Make sure to add your TABLE and variables. And remove unwanted.
Step 9. Now, we need to differentiate between hard coding and dynamic value.
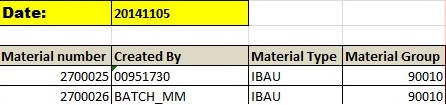
For example: ‘Reported By’ is hard coding. This would be same every time excel is downloaded. But the value of Reported By would be different depending on who executed it. In this case Reported by value is in V_NAME variable.
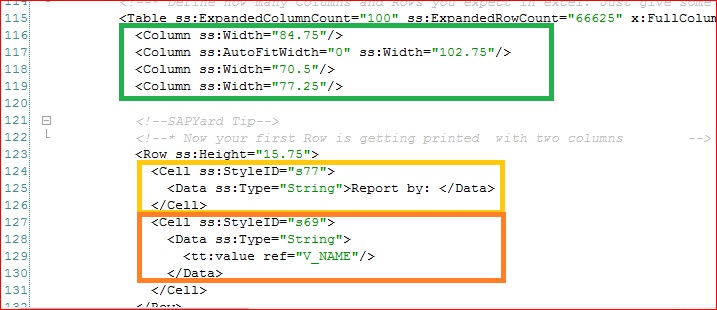
So, make a note of hard coding and values and replace the values with your variable name.
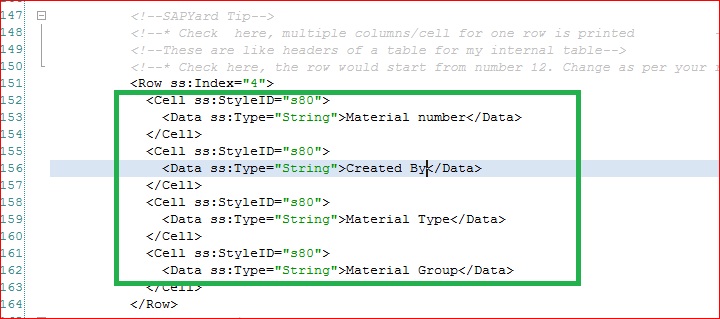
Step 10. Similarly check the Header line of the table ( hard coding). For example Material#, Created By, Material Type, Material Group. This would be hard coded. The styles for this may or may not be same to that of the body of table. We need to check the excel XML to figure out the style and copy the same style to our Transformation Program.

Step 11. The TABLE body is to be populated in LOOP. The values would be assigned from the field name (always UPPER CASE). The sequence in which you call the fields, the structure of the Table is created in that way. See the figure for the fields called and the structure created.
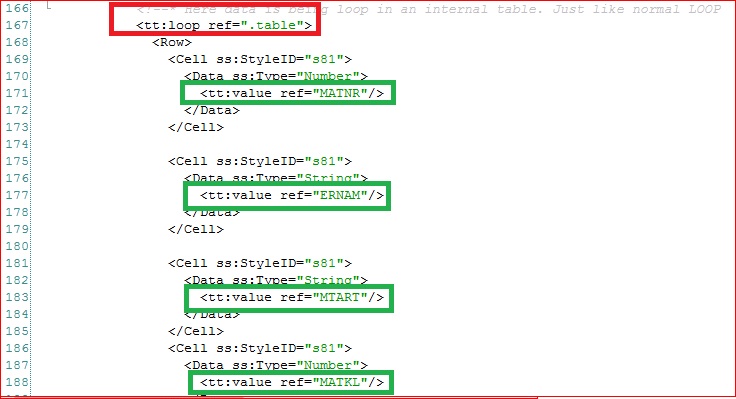
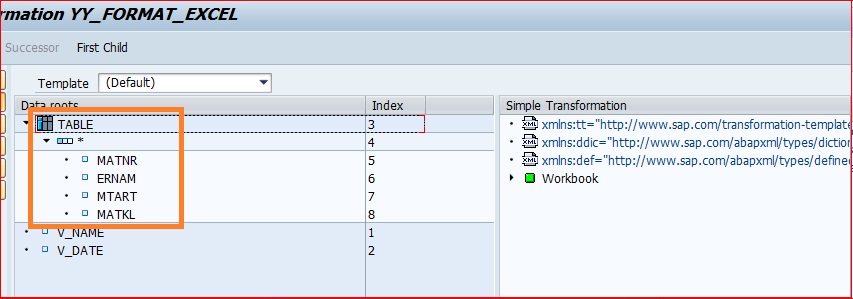
Make sure, your TABLE in transformation program and your Web Dynpro internal table are same.
PS: LOOP has to be closed with
Please check the link below for excel XML code and the final Transformation program code after making change to the Template. Scan through it to see how we enhanced the template.
Raw Excel XML code Final Transformation XML code
Step 12. Call the Transformation program in your WD method. It would import the xml in STRING variable. Convert it to XSTRING. Call WDR_TASK=>CLIENT_WINDOW->CLIENT->ATTACH_FILE_TO_RESPONSE as shown in figure (code in link below).
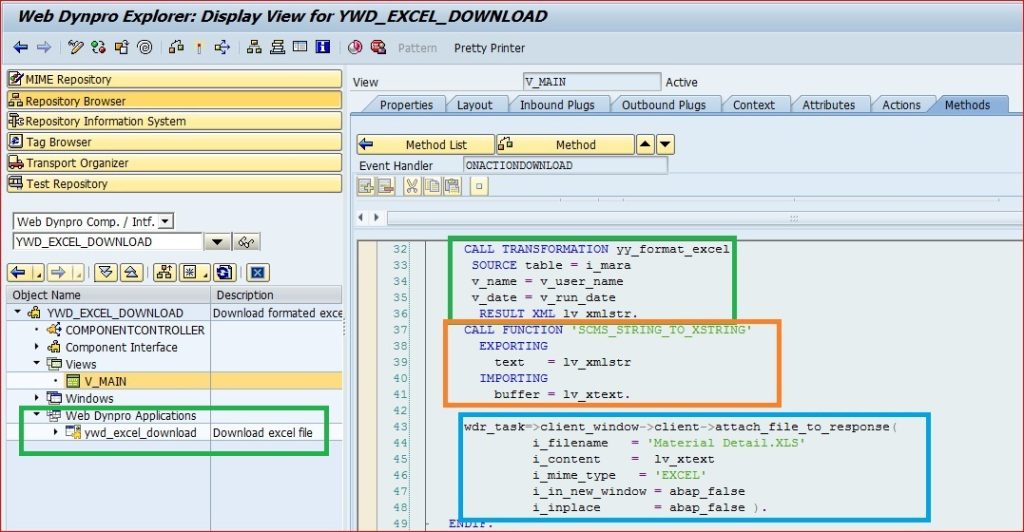
Link for the code snippets related to Transformation call: Sample code in Method
Step 13. Lets test our development. Check, the color, border, text format bold etc are there.