I wrote about how we can create an automation which is calling a SuccessFactors API for performing upsert operations. The automation however also needs to be invoked. For this I worked on developing a chatbot which would call the API based trigger of the automation. I read many blogs on parts of the topic. I intend with this blog to encourage the community members to get some hands on with these wonderful LCNC tools.
In this blog you will learn the following:
- Deploying your SAP iRPA automation from cloud factory
- Creating API based trigger for the automation
- Create an extremely simple chatbot in CAI
- Calling the created API trigger from a CAI based chatbot
- Creating notifiers in iRPA to notify/update our conversation in the chatbot
Here is our process flow:

So let’s start
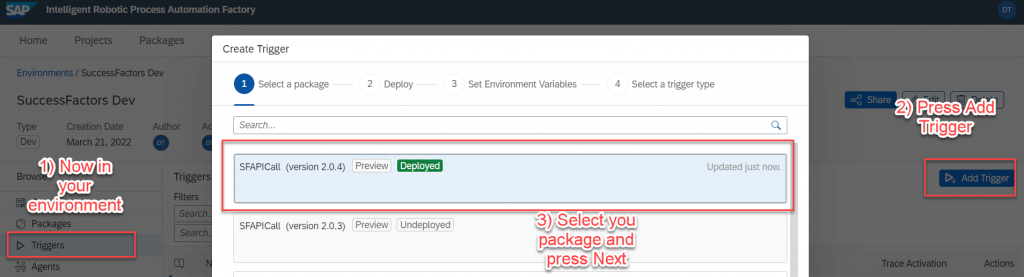
Deploying your SAP iRPA automation from Cloud Factory
To deploy the automation in the cloud factory we need to generate a package within our project. The generated package will be available for deployment into the cloud factory environment.
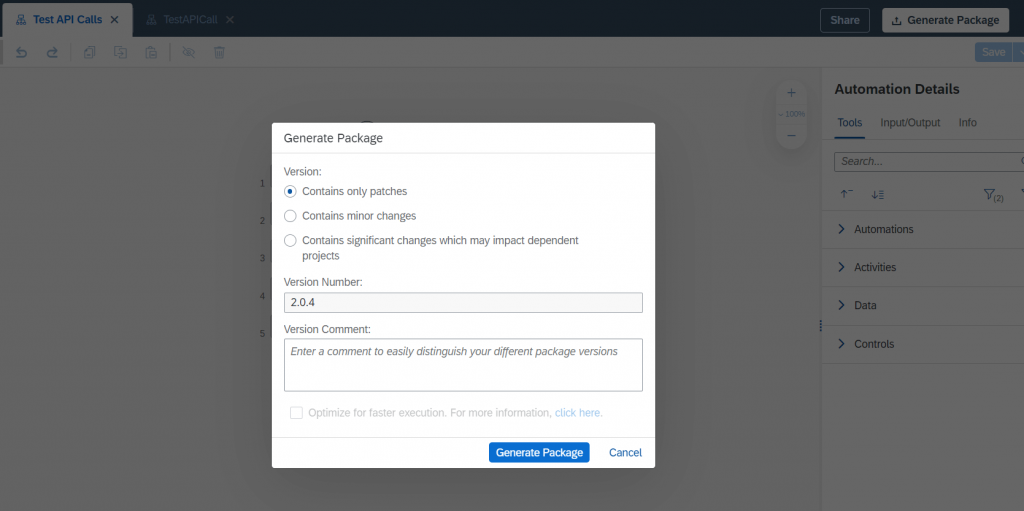
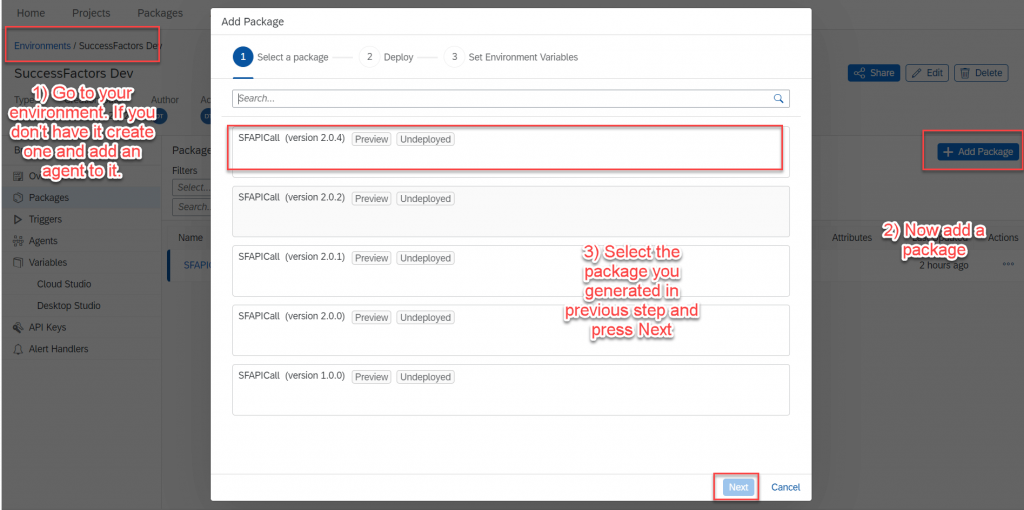
Once the package is generated we go to our environment and deploy the package.
Upon package generation we need to create the trigger to call the automation.
Creating API based trigger for the automation
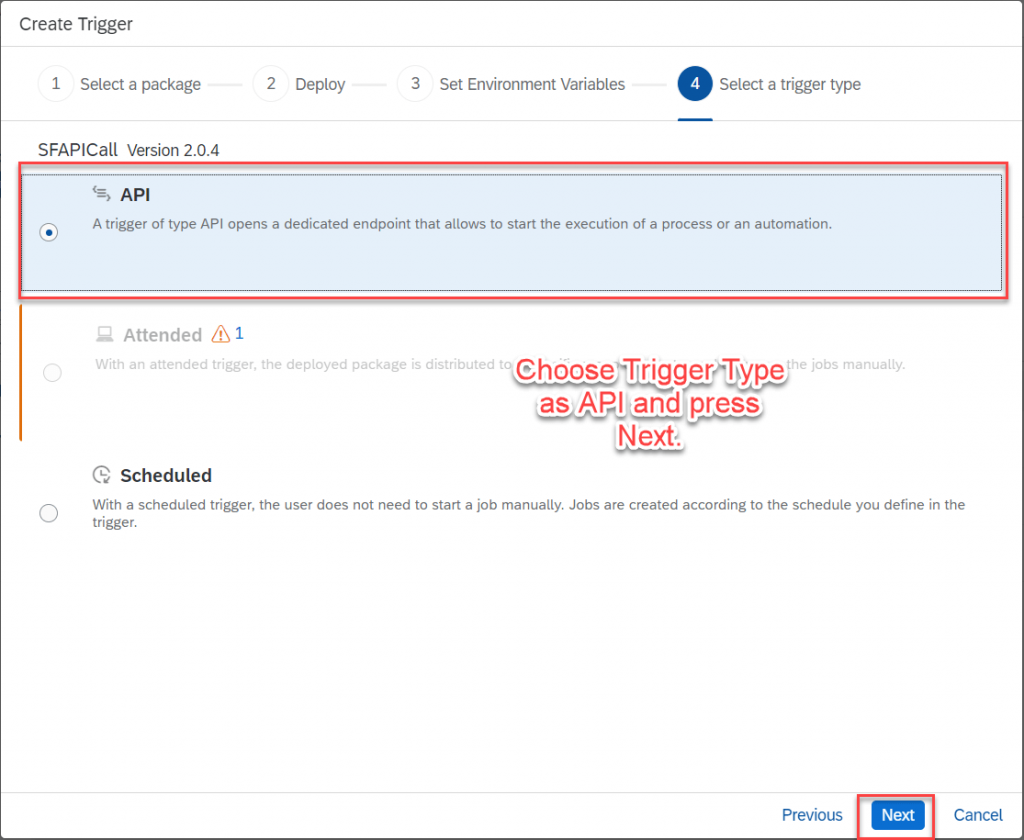
Now we will configure our API trigger
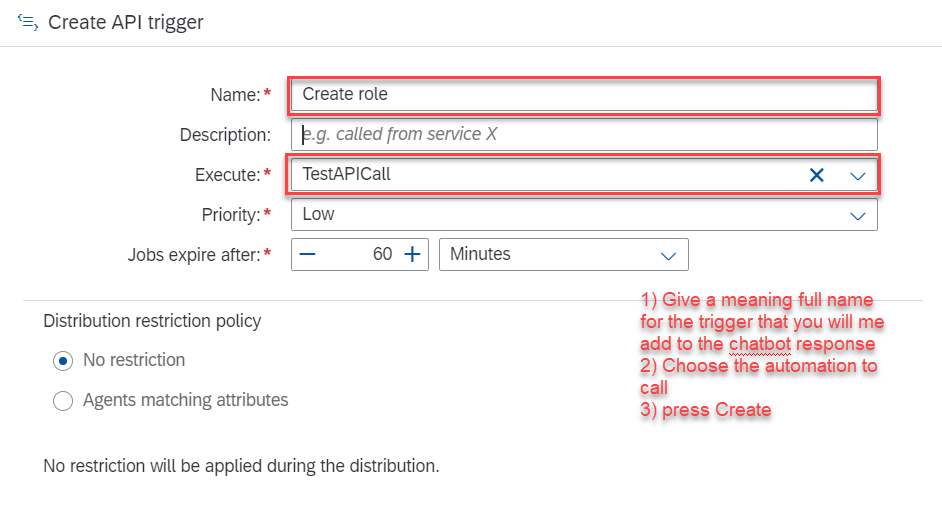
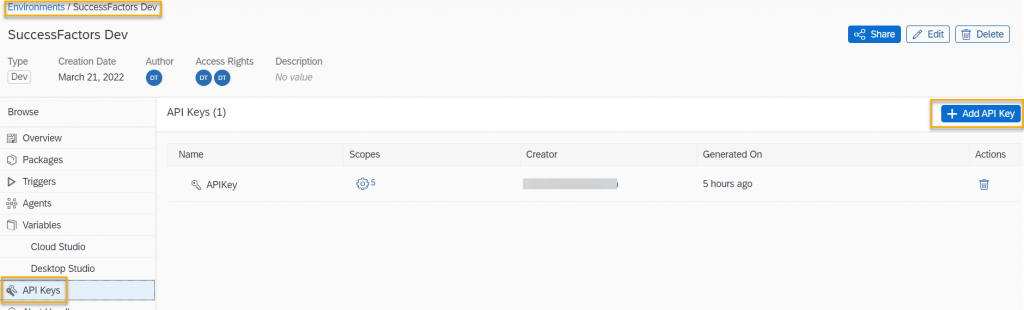
Now that API trigger has been created you can create an API token for the trigger access. Please copy the key to be used later in the chatbot skill’s action .
Create an extremely simple chatbot in CAI
We create a chatbot now in CAI which will invoke our API trigger.
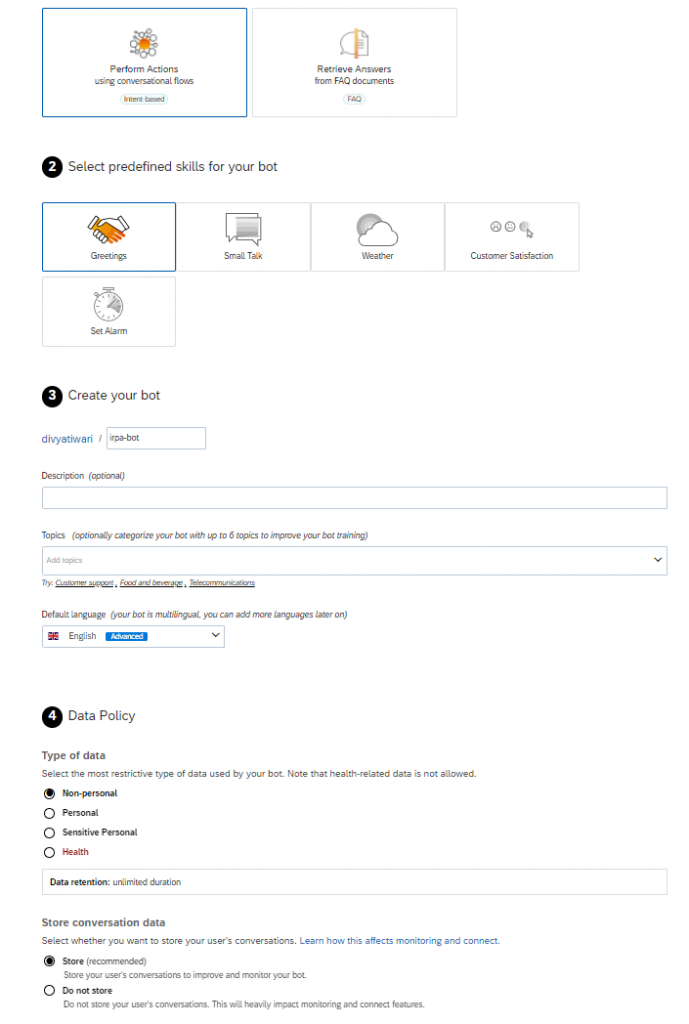
Now add the intent ‘rbp’ with a singular expression ‘Create role’
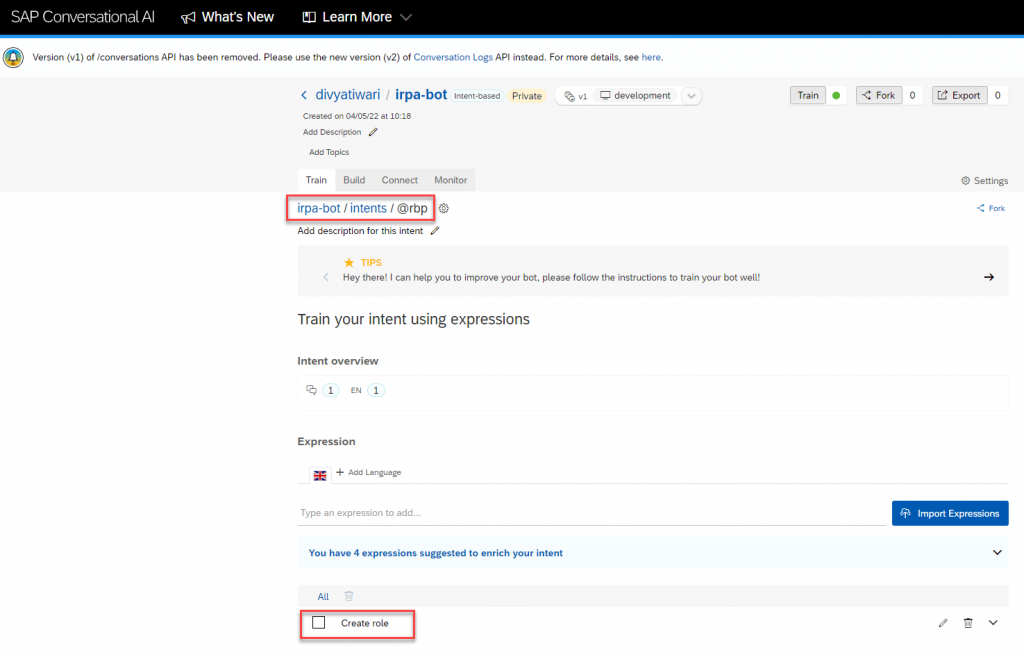
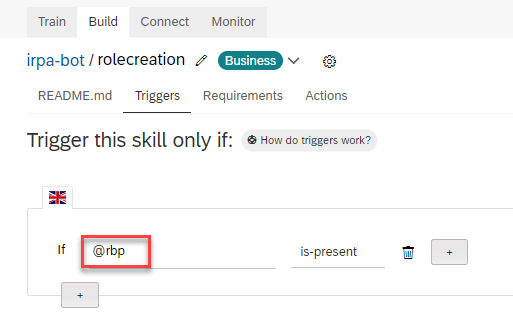
Next we will create a skill that responds to the intent

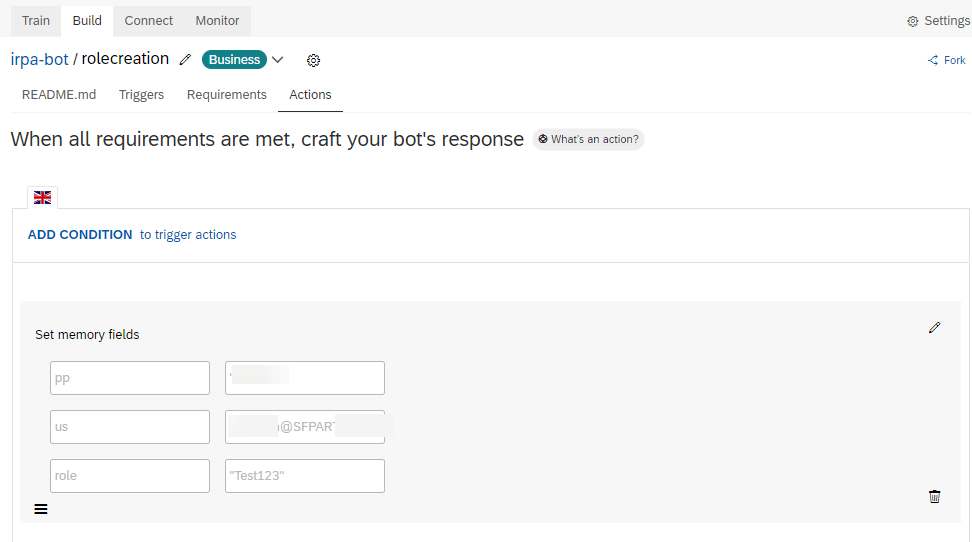
Now for the sake of this proof of concept we hardcode some memory variables needed as input parameters to invoke our iRPA API Trigger
Calling the created API trigger from a CAI based chatbot
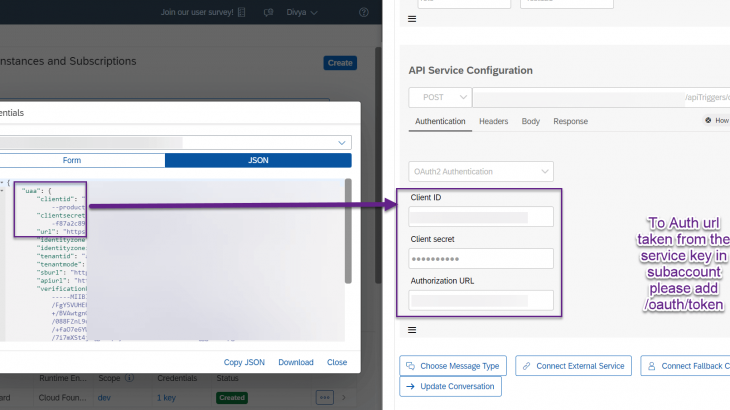
Now let us configure our iRPA API trigger call from the chatbot. We add the action of Create External Service – Consume API Service and add the 3 Header fields as shown in the picture below. Also please see that we will add the service key we generated in iRPA:
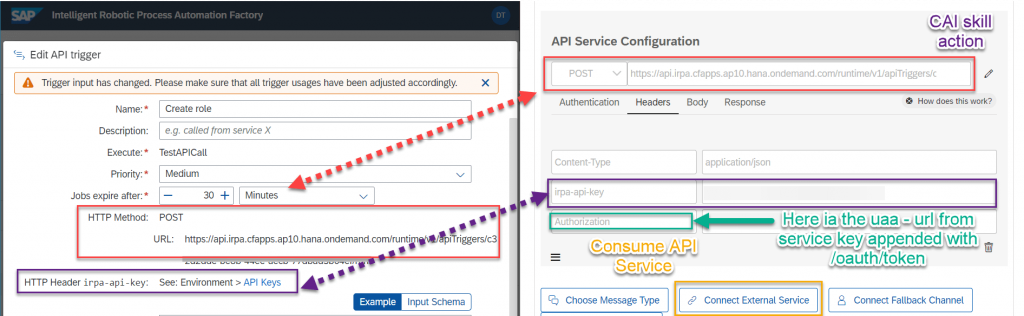
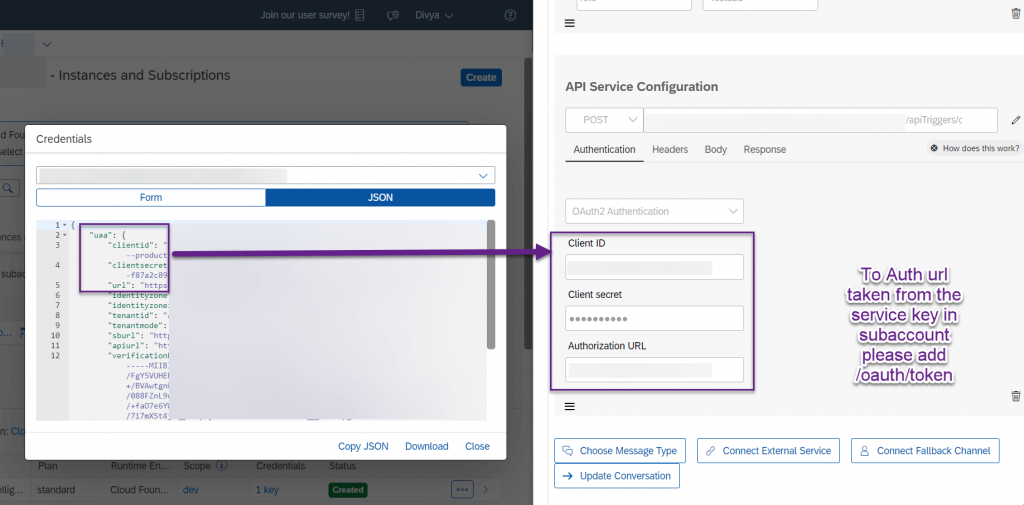
We need to use oAuth2 for Authorization to call the iRPA API trigger. We will get the client credentials from the SAP BTP subaccount, using the service key for iRPA service instance.
For the payload we again need to refer our API trigger in iRPA and add the following to the body
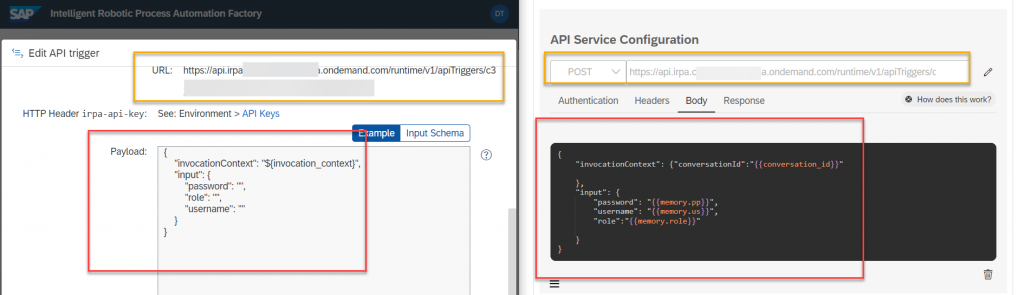
You can refer the following json:
{
    "invocationContext": {"conversationId":"{{conversation_id}}"

    },
    "input": {
        "password": "{{memory.pp}}",
        "username": "{{memory.us}}",
        "role":"{{memory.role}}"

    }
}Please note that here I have an additional input parameter in my automation called role which allows me to pass the role name from the chatbot itself.
I adapted the activity for Web Service call with the script below.
var i = 0;
var temp ="";
var cookieField ="";
if(cookie!=""){
for(i=0;i<cookie.length-1;i++)
{
temp = cookie[i].split(";");
cookieField = cookieField + temp[0] + "; ";
}
temp = cookie[i].split(";");
cookieField = cookieField + temp[0];
}
var data = {
"__metadata": {
"uri": "RBPRole",
"type": "SFOData.RBPRole"
},
"roleDesc": "Created from Irpa;",
"roleName": role
};
var payload = {
resolveBodyOnly : true,
method: 'POST',
url: 'https://apisalesdemo4.successfactors.com/odata/v2/upsert',
headers: {
'Authorization': 'Basic '+ cred,
'Cookie' : cookieField,
'Content-Type': 'application/json',
'x-csrf-token' : csrf_token
},
ignoreClientCertificate: true,
body: JSON.stringify(data)
};
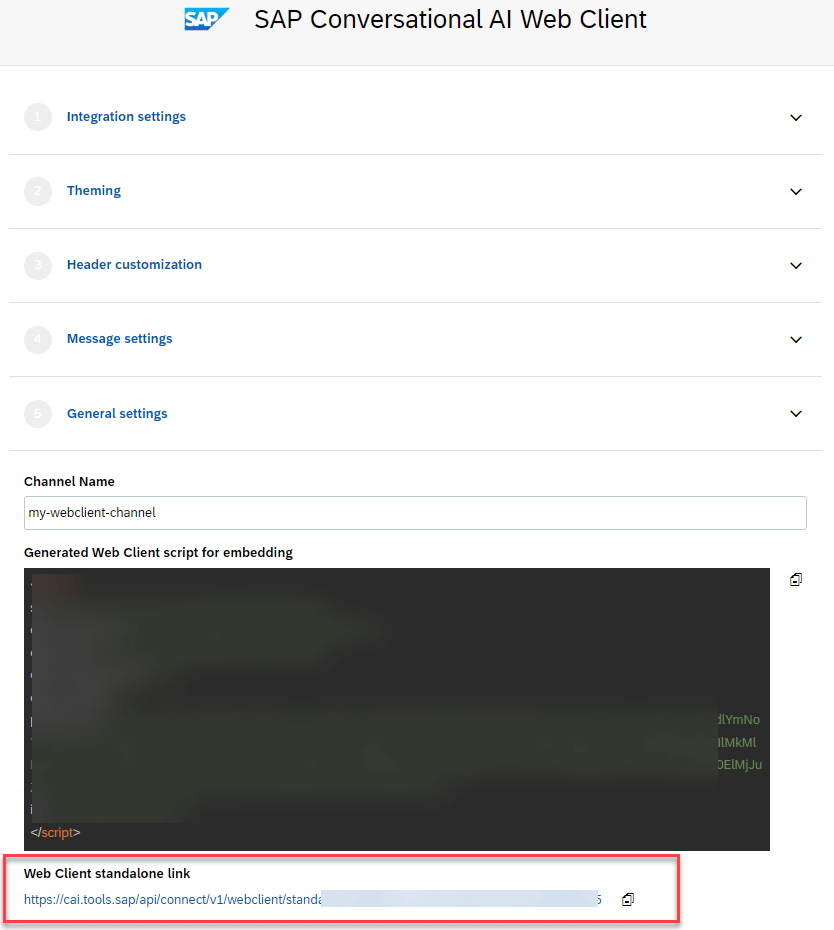
return payload;Now we need to create a Web Client for the CAI chatbot in order to call the iRPA API. This is easy to do from the connect tab.
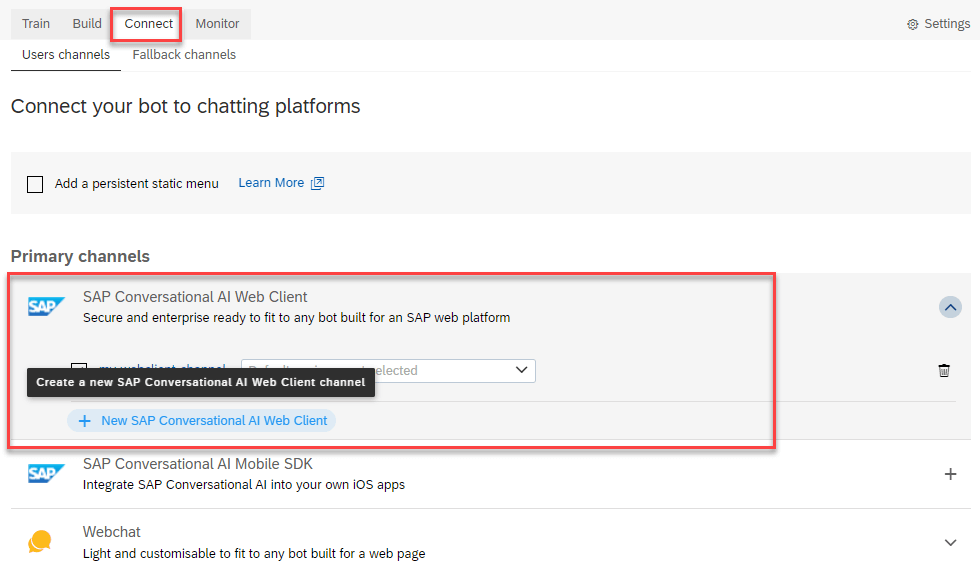
You can access the webclient from the provided url
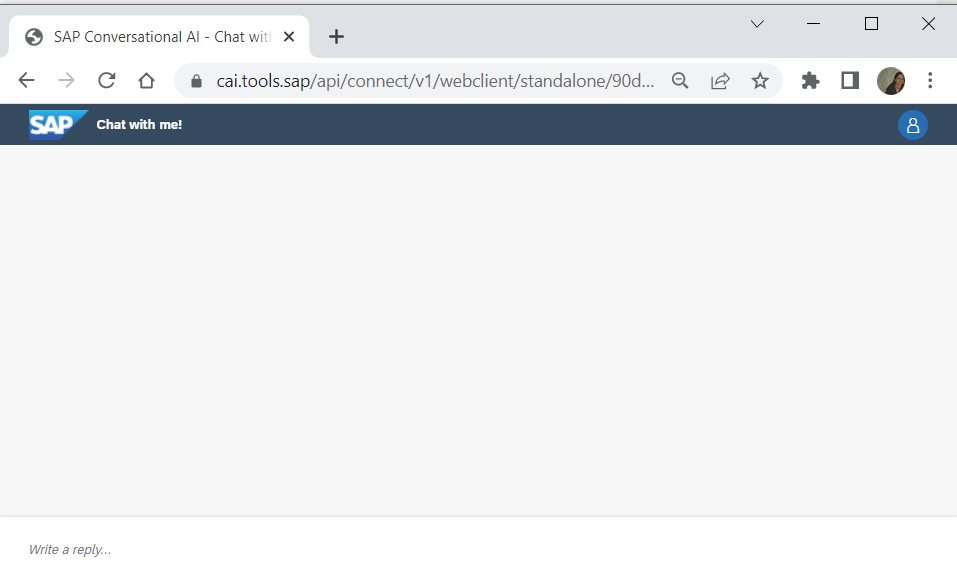
With this configuration in place you should be able to call the API trigger from the chatbot web client already. You will be able to see the run of the job in the cloud factory monitoring. Also the creation of role in SAP SuccessFactors instance.
We still need feedback information about the job status in our chatbot. This brings us to our last topic of this blog.
Creating notifiers in iRPA to notify/update our conversation in the chatbot
For creating notifiers for the API trigger we go back to our iRPA environment.
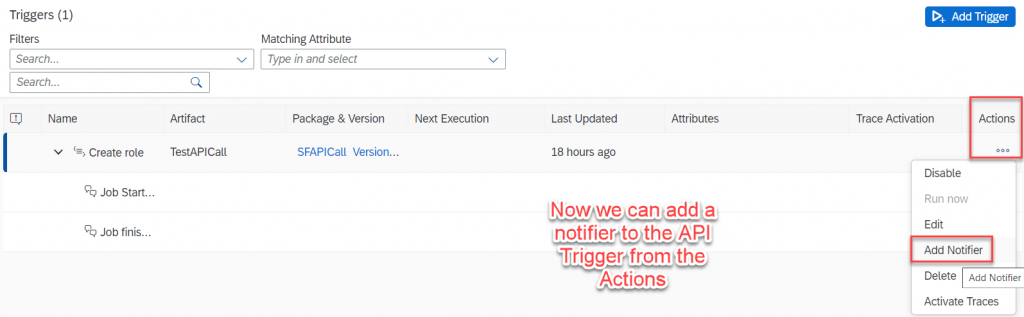
Choose notifier of type CAI.
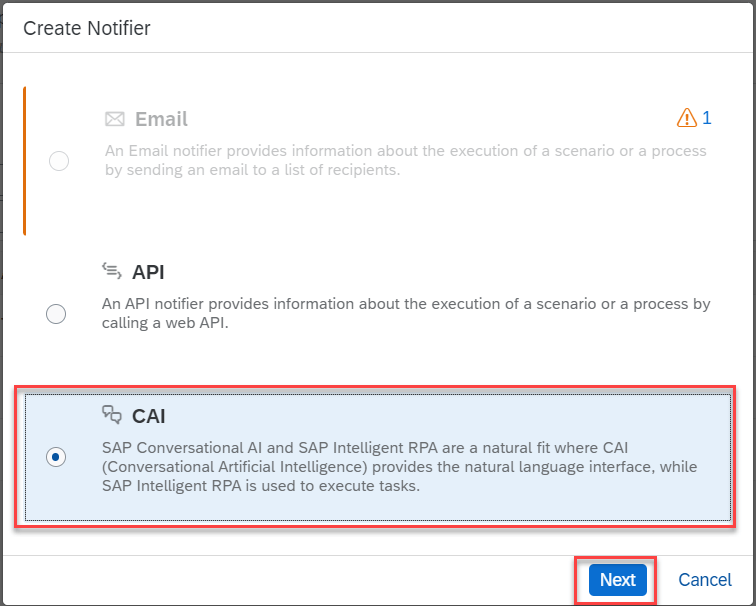
Next we need to add the CAI chatbot conversation id metadata to send messages back to the chatbot
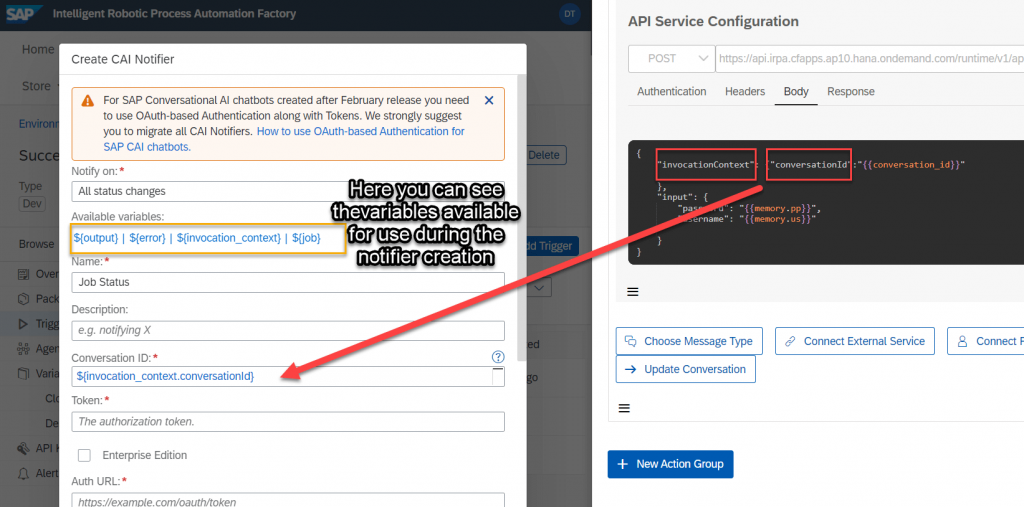
Next we need to add the CAI chatbot client credentials and developer token to the notifier.

Et voila!
You are done.
Lets see this working below
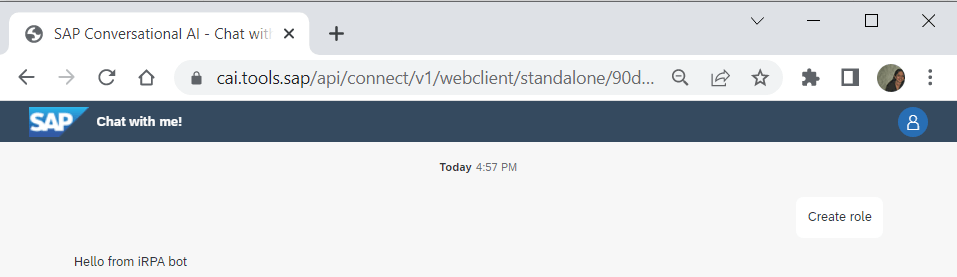
We see the response from our notifier above and also below you see the role created in the SuccessFactors instance.