Introduction
LSMW is tool to convert legacy data to SAP data. Functional consultants also can use LSMW tool to upload data in SAP system. Here I am explaining upload initial stock to SAP from legacy data through Standard batch/direct input method.
Solution
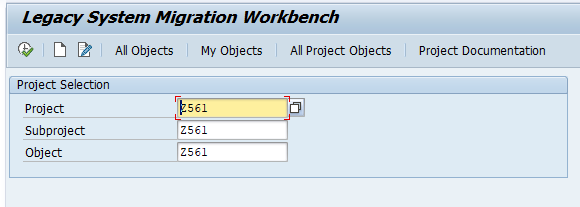
Enter Project, Subproject, and Object names click on create button. Project, Subproject and Object maximum 10 characters.
After click on create button small popup window opens maintain project, Subproject, Object descriptions and click on continue.

Click on execute button.
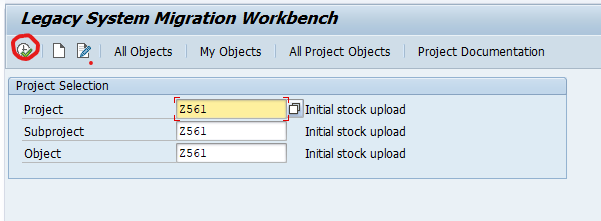
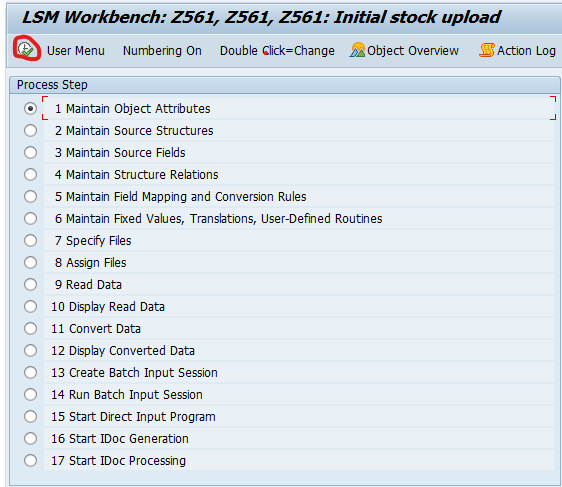
1. Maintain Object Attributes.
System automatically selects Maintain objects attributes click on execute.
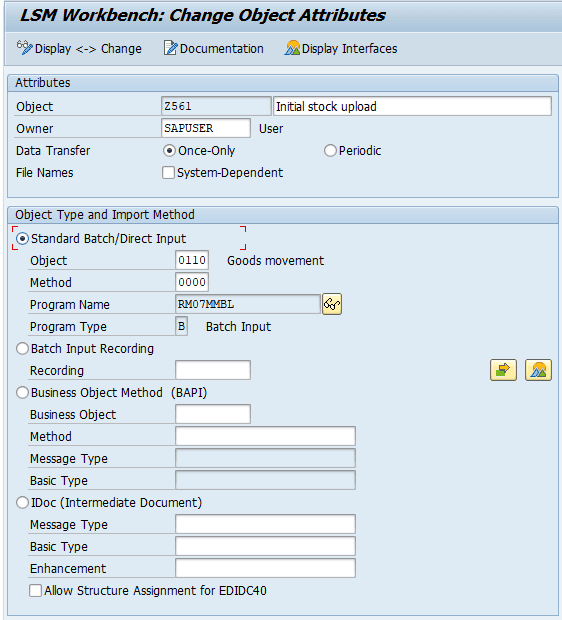
Note – Every step need to click on change button to change data or to add new data.
Select Standard batch/Direct batch radio button. Enter Object and Method as shown in below picture and save come back.
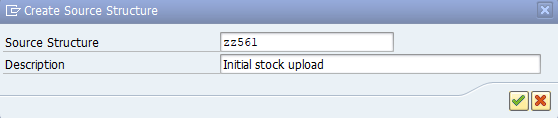
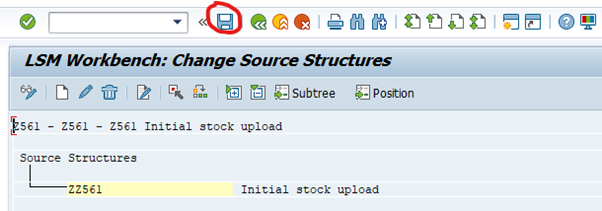
2. Maintain Source Structures.
System automatically selects Maintain source objects click on execute. Click on create. Enter source structure, description and click on continue. Save and come back.
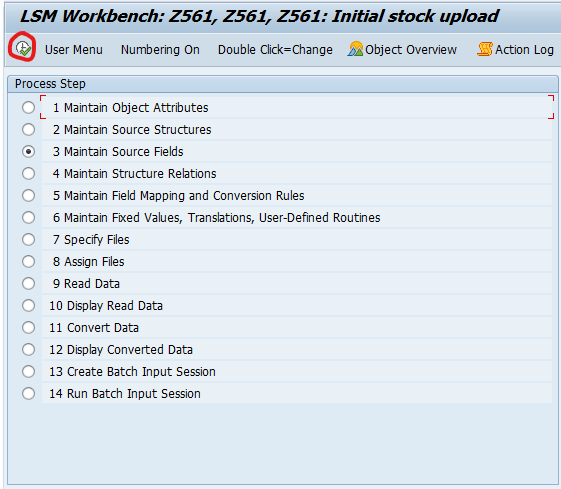
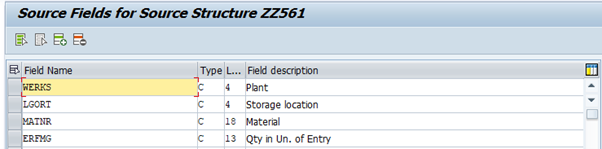
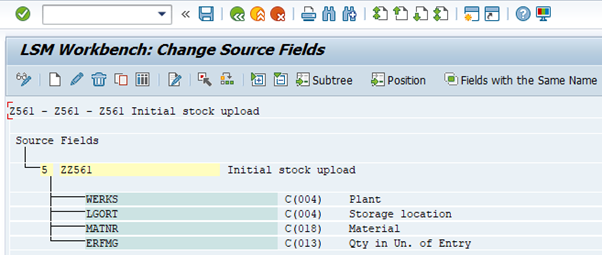
3. Maintain Source Fields.
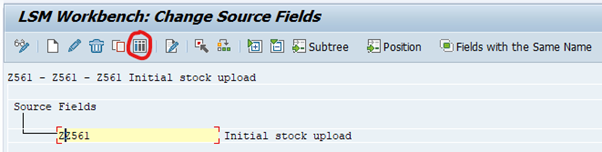
System automatically selects Maintain source fields click on execute.
Keep courser on source structure and click on Table maintenance.
Here enter required fields like below picture and save come back. Plant and storage location description enter manually.
Save and come back once.
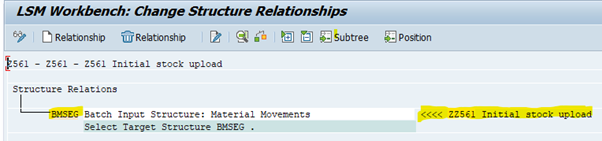
4. Maintain Structure Relations.
In this transaction system automatically selects next step after successfully completion of previous step.
Maintain Structure Relations click on execute button.
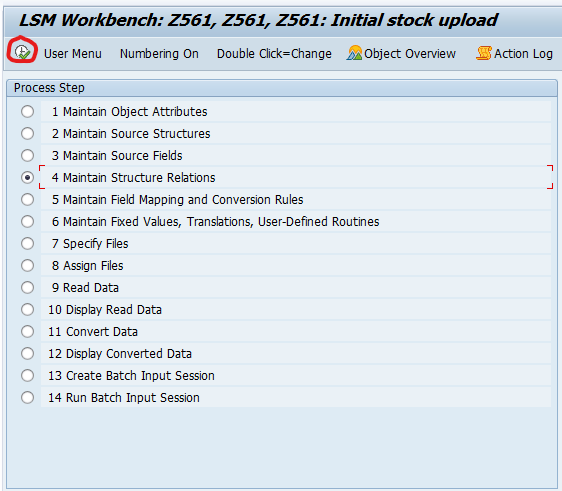
Go to change mode here source structure automatically assigns to source relations click on save and come back.
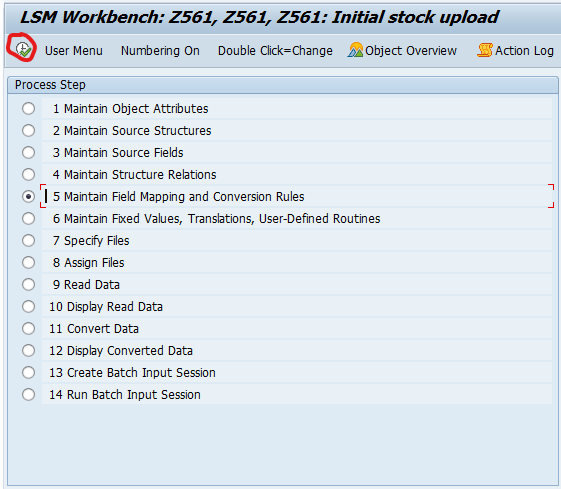
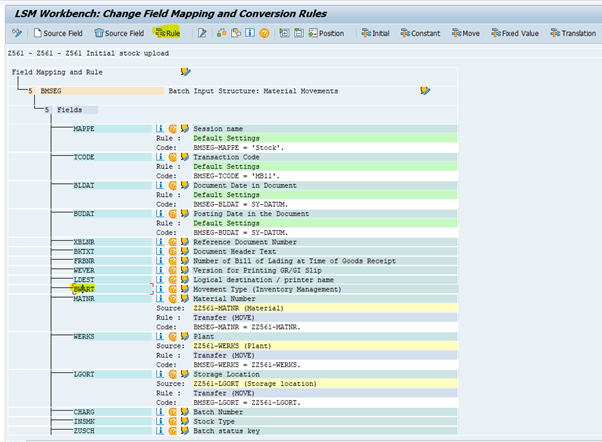
5. Maintain Field Mapping and Conversion Rules.
Maintain Field Mapping and Conversion Rules click on execute.
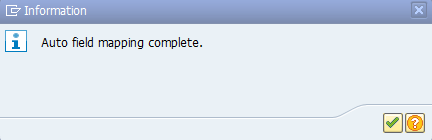
In Menu bar go to Extra and Auto field mapping.
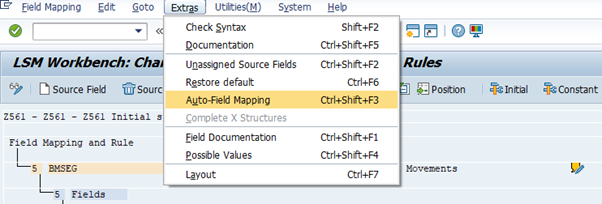
Click on continue.
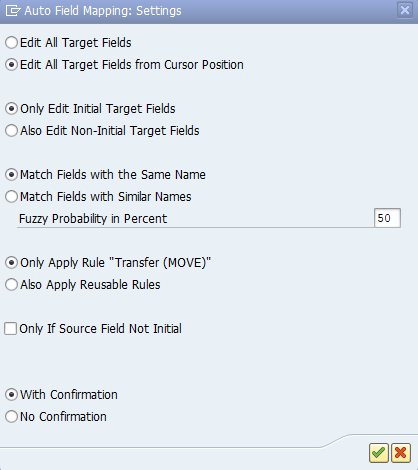
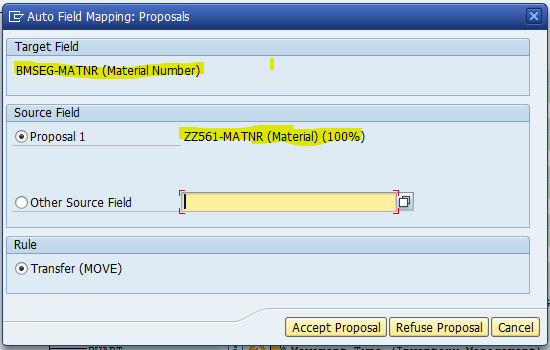
Here we are mapping fields which we maintained in 3rd step. 4 fields we maintained in 3rd step below pop up window repeats 4 time each time check and click on Accept Proposal.
Click on continue after successfully mapping fields.
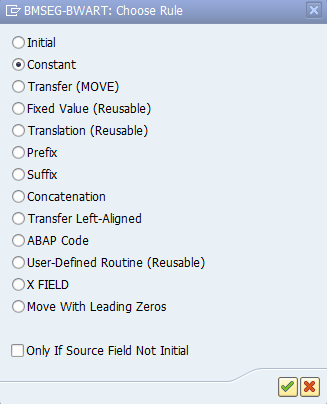
Movement type maintain as constant value. Keep courser on BWART and click on Rule.
Select constant radio button click on continue.
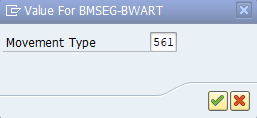
Enter movement type 561 and click on continue.
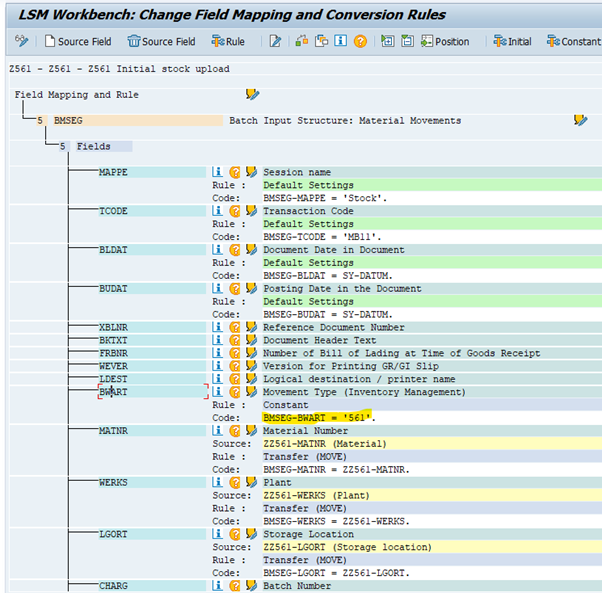
Click on save come back.
6. Maintain Fixed Values, Translations, User-Defined Routines.
Skip this step.
7. Specify Files.
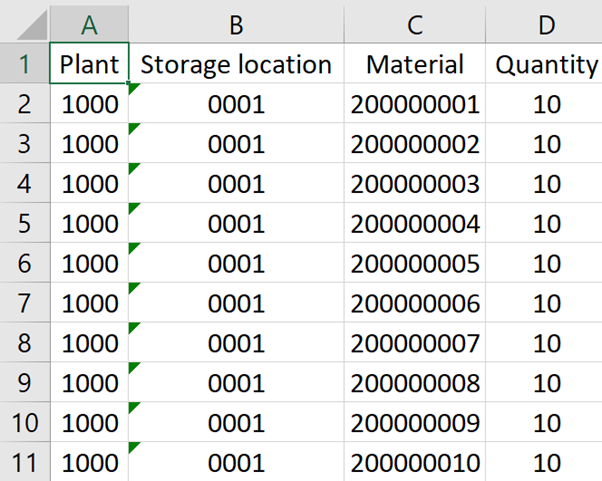
Template convert from excel to text delimited format.
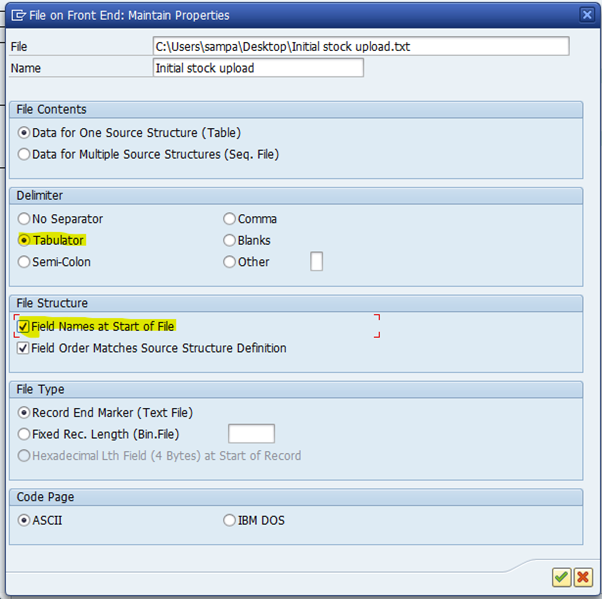
Click on execute. Go to change mode keep courser on legacy data and click on Add entry.
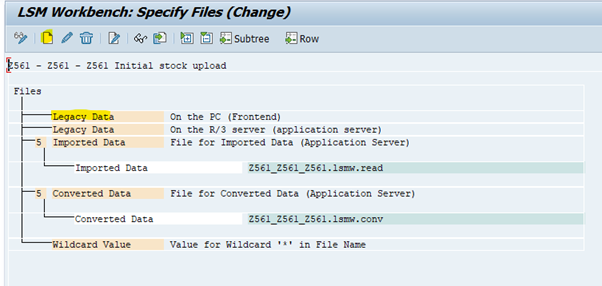
Upload now.
Double click on Converted data enter logical path and Logical file (if not created system creates automatically). Save and come back.
8. Assign Files.
System assigns automatically, save and come back.
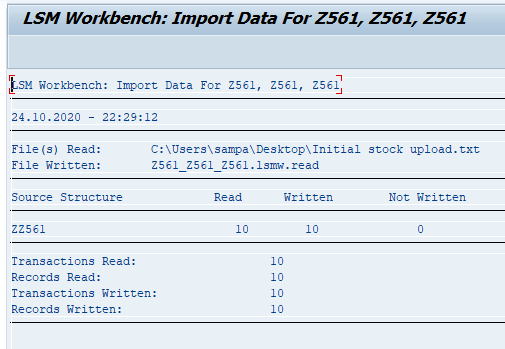
9. Read Data.
Execute this step twice system reads data and shows how many line items i am going to upload. come back twice.
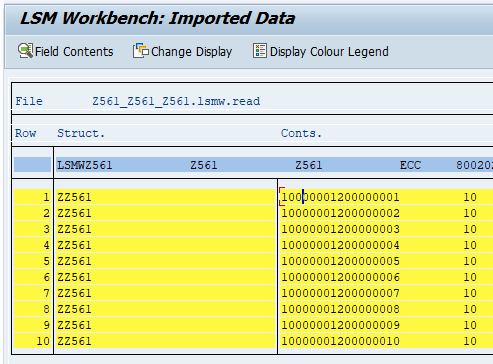
10. Display Read Data.
Execute system shows upload data and can check data by double click on any line item system displays data. come back.
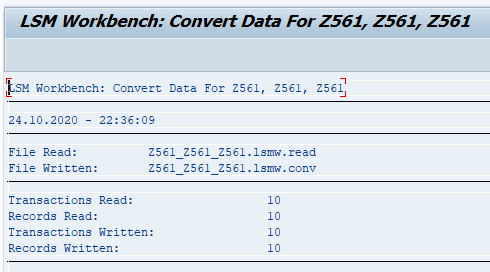
11. Convert Data.
Execute twice system shows number line items i am going to upload 0 Come back twice.
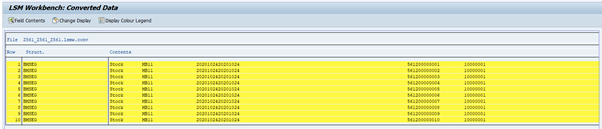
12. Display Converted Data.
Execute this step system shows converted data. We can cross check data.
13. Create Batch Input Session.
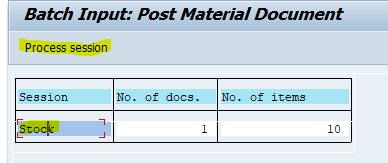
This is the final step. Execute if required increase Max. number of items and execute again. Keep courser on stock and click on process session.
Select line and click on process.
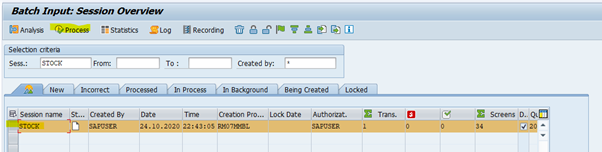
Select display errors only and click on process.


