OVERVIEW
This blog gives an overview of configuration steps required to configure and use Fiori as the front end for SAP GRC 12.0 Access control in HUB deployment scenario.
SAP GRC Fiori apps are an alternative to NWBC for accessing SAP GRC Access Control. SAP provides individual apps for the links for that you find in NWBC including dashboard reports
There are 130 apps provided for SAP GRC Access Control that give you flexibility for assigning access as required.
Another feature that SAP GRC Fiori apps provides is that they are mobile devices compatible
You will also learn to simulate as to how the apps would be displayed on mobile devices
ASSUMPTION
- SAP GRC 12.0 is implemented
PRE-REQUISITES
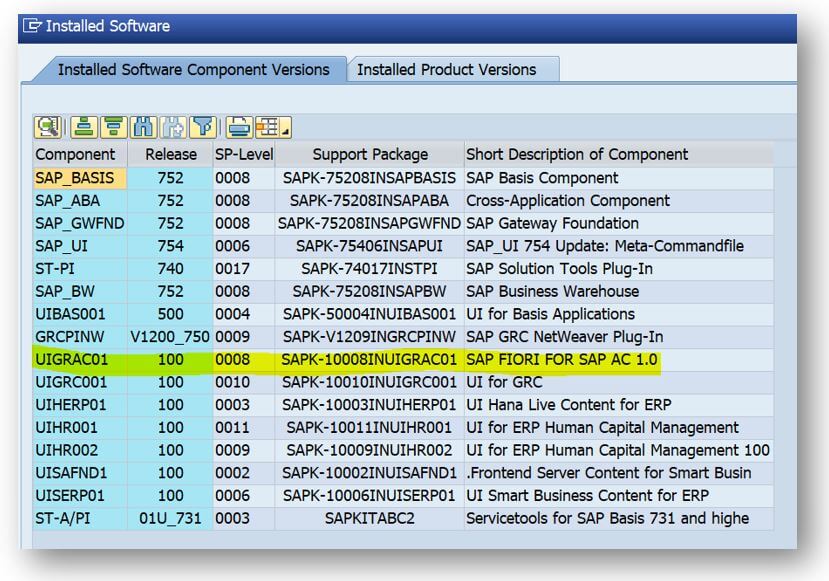
- For integrating GRC for FIORI, ensure that the addon UIGRAC01 with SP02 (minimum) is installed in the FIORI system
- Ensure that ALL users have proper authorizations for authorization objects S_RFC and S_RFCACL (required for trusted RFC connections)
CONFIGURATION
Step 1: Setup Trusted RFC connections from Gateway system to GRC system.
- Ensure that three (four if HTTP connection is considered) Trusted RFC connections are setup to GRC system from Fiori system
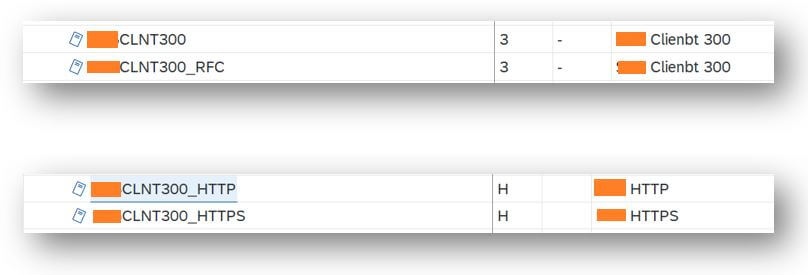
- You have to create one Trusted RFC connection from GRC system to Fiori system
Step 2: Create System Alias for GRC system in FES
- Execute transaction /n/ui2/GW_SYS_ALIAS to create system alias for GRC system or maintain the table /IWFND/V_DFSYAL with the Tcode SM30
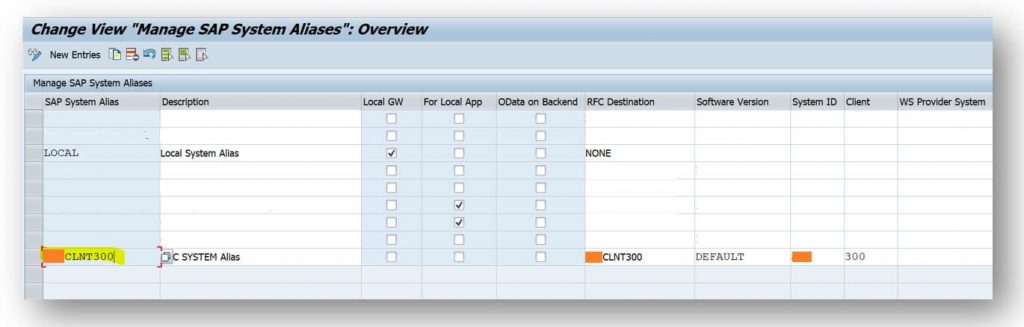
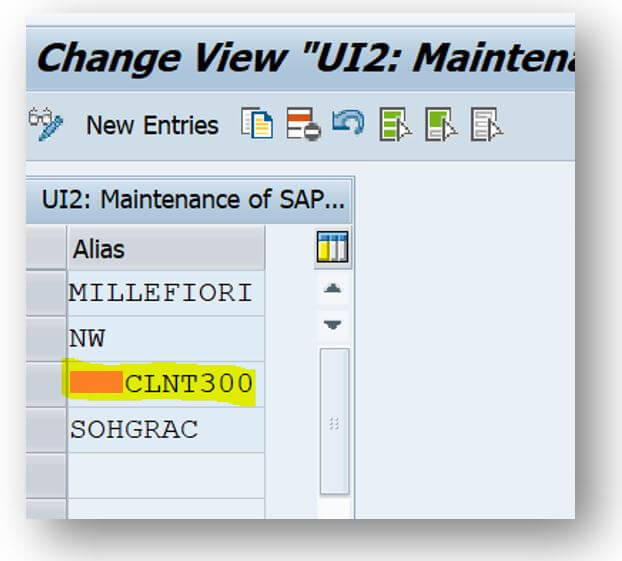
Step 3: Maintain System Alias table
- Verify system alias table /UI2/V_SYSALIAS for SOHGRAC system alias (SAP delivered) for GRC AC and maintain the system alias of your GRC system
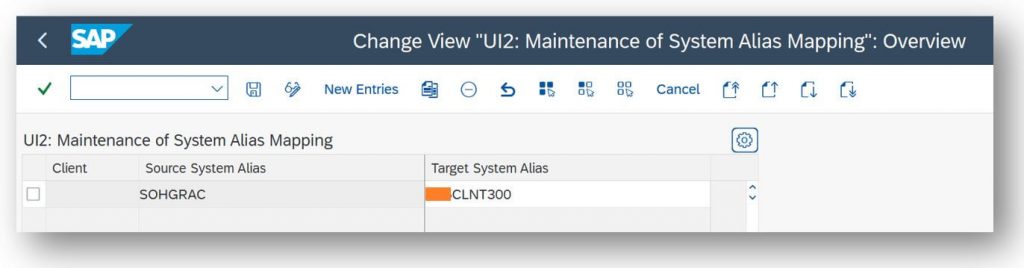
Step 4: Map the Your System Alias to SAP system Aliases
- Map the system alias SOHGRAC to the system alias of your GRC system in the table /UI2/V_ALIASMAP
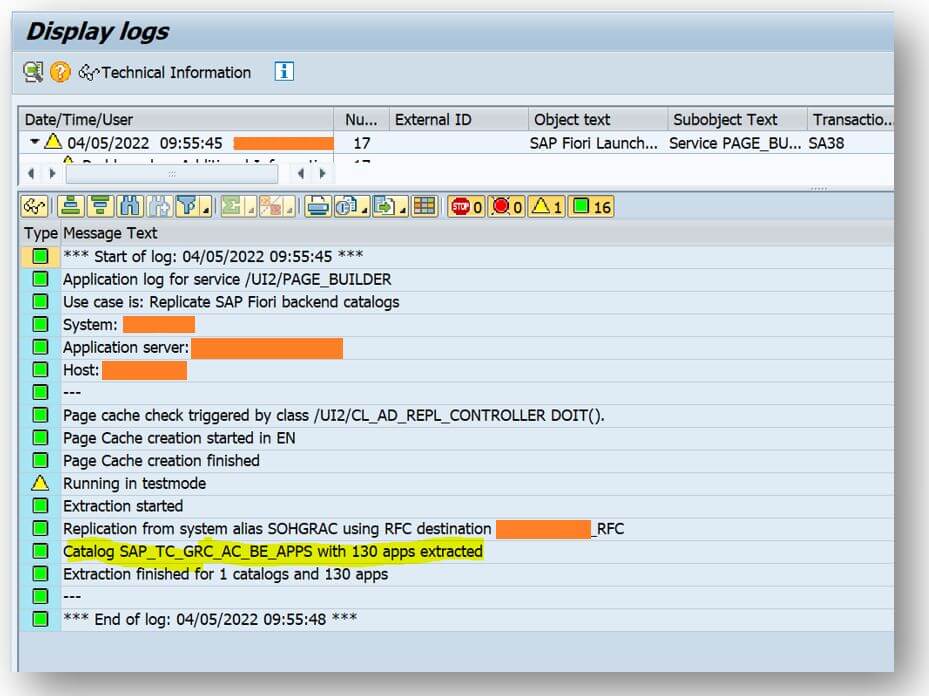
Step 5: Replicate the Technical Catalog from the Back-end System
Search for GRC catalog SAP_TC_GRC_AC_BE_APPS in Fiori Launchpad designer
- It the catalog does not exist in Fiori Launchpad Designer, execute the program /UI2/GET_APP_DESCR_REMOTE_DEV with the following selection criteria
- SOHGRAC – system Alias
- SAP_TC_GRC_AC_BE_APPS – SAP standard back end program for replication
- Replication mode: Full Replication
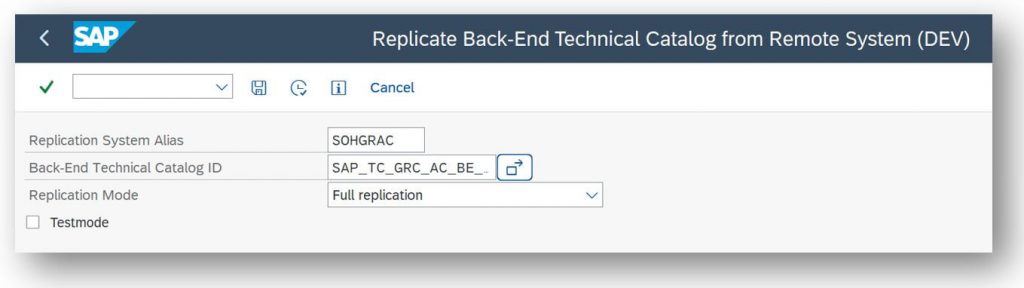
After executing the program, you will get a summary information on the catalogs and number of apps available in the catalog for deployment
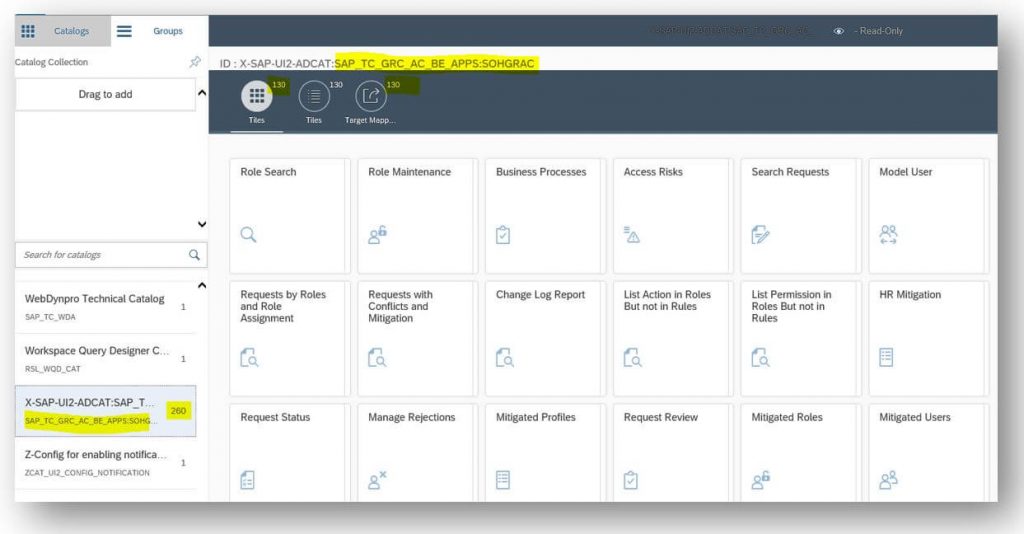
Step 6: Validate the Technical Catalog in the Launchpad Designer
You can validate the catalog availability in the Fiori LaunchPad Designer with transaction code /n/UI2/FLPD_CUST
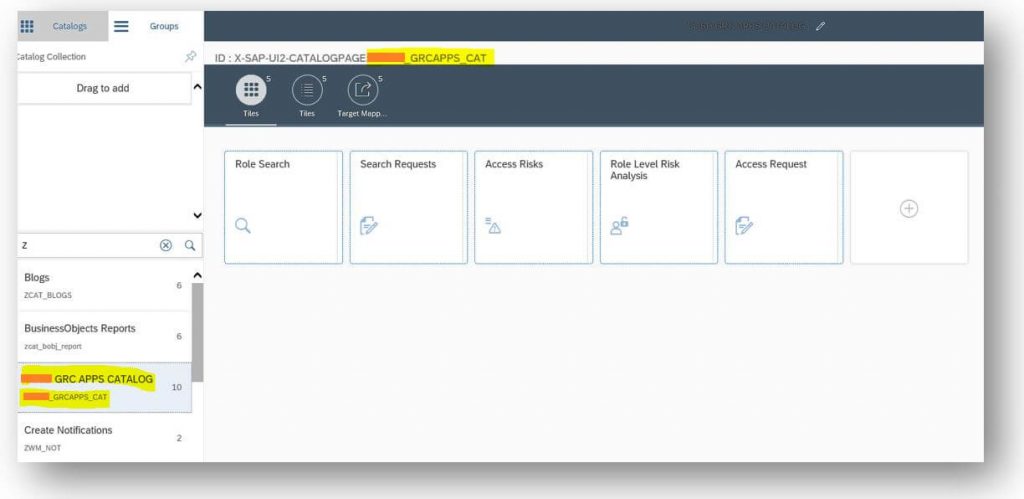
Step 7: Create Fiori Catalog page in font end system
- Create a custom catalog with Access Request apps as per your requirement using the transaction /UI2/FLPD_CUST
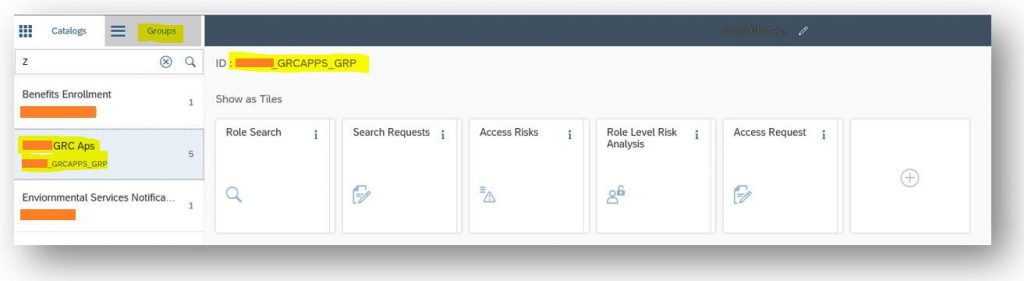
Step 8: Create Fiori Group page in Front End System
- Next, create group with Access Request apps that you want to give access to the users using transaction /UI2/FLPD_CUST
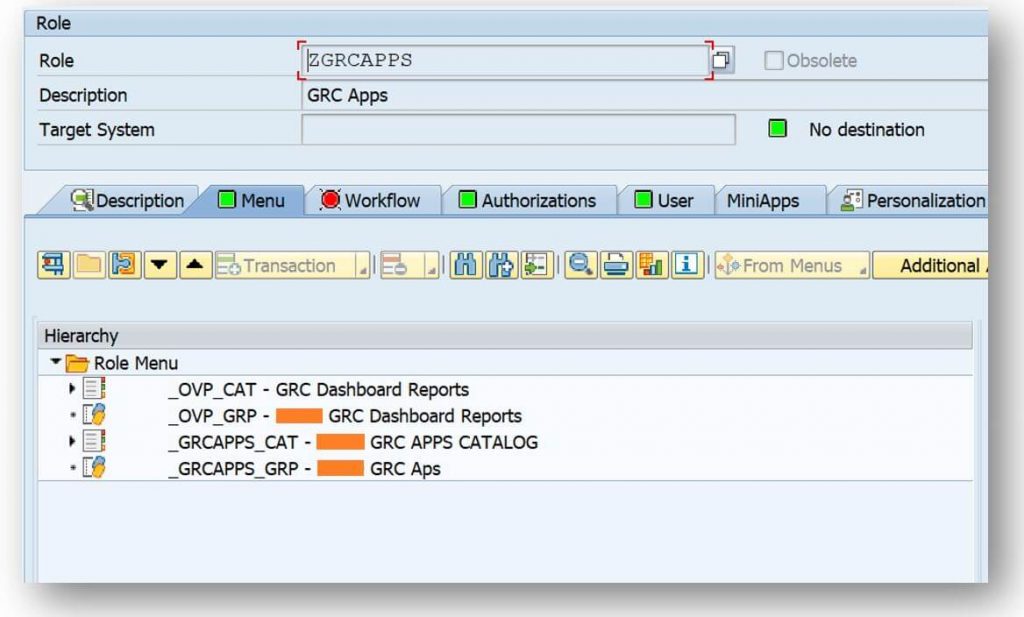
Step 9: Assign the Catalog and Group in PFCG role
- Create a role in FIORI system for the GRC apps based on the catalog and group created by you in the Fiori system
- Assign the catalog id and group id in the Fiori (FES) system
Create a test user id in FES and assign the role to the user id
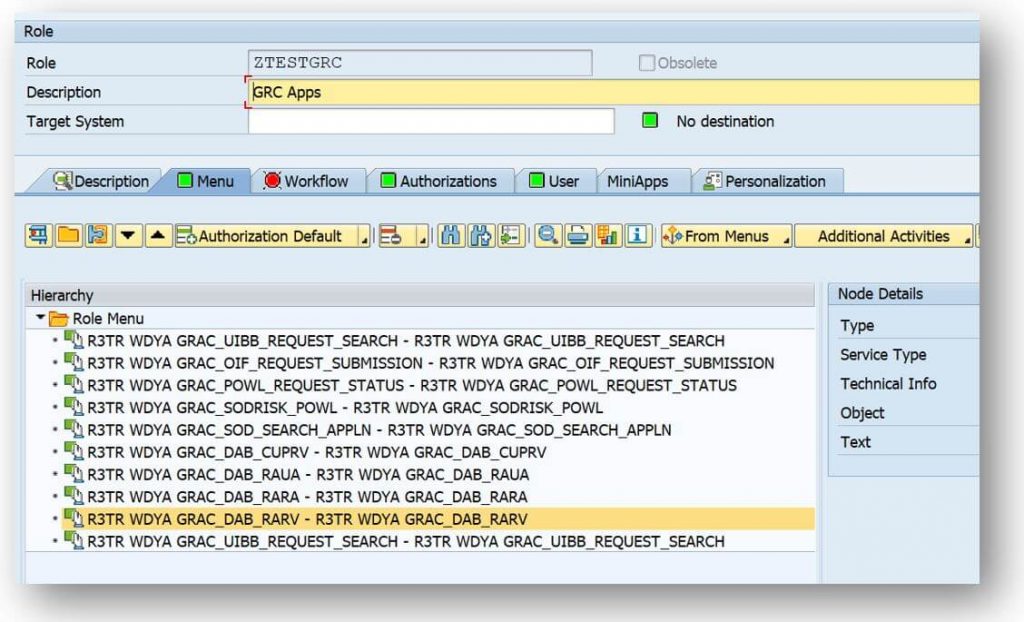
Step 10: Assign the WebDynpros of the GRC apps in PFCG Role in Back-End (GRC) System
- Create a role in FIORI system for the GRC apps based on the catalog and group created by you in the GRC system (BES)
- Assign the Webdynpro service of the apps in the Backend (BES) system
- In PFCG Menu tab, go to Authorizations Default –> TADIR –> WebDynpro (WDYA)
- Assign the Webdynpro service of the apps in the Backend (BES) system
Create a test user id with the same name that you created in FES, in BES and assign the role the user id
Step 11: Validating the Configuration
Login with the test user id and execute the transaction /n/ui2/flp
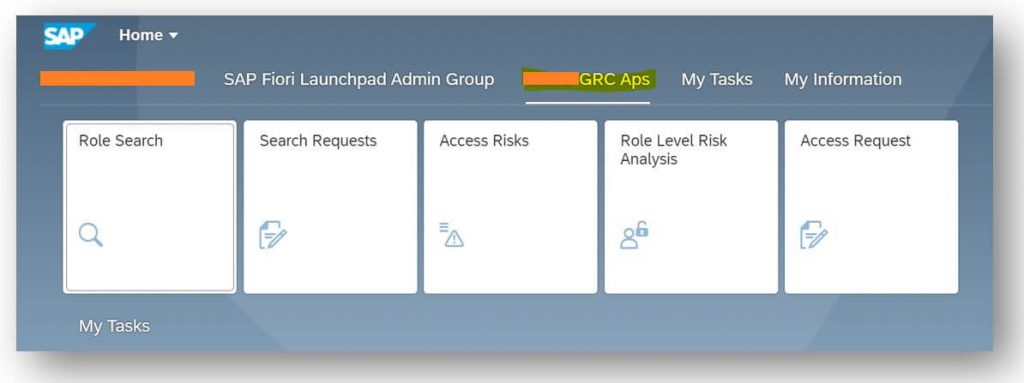
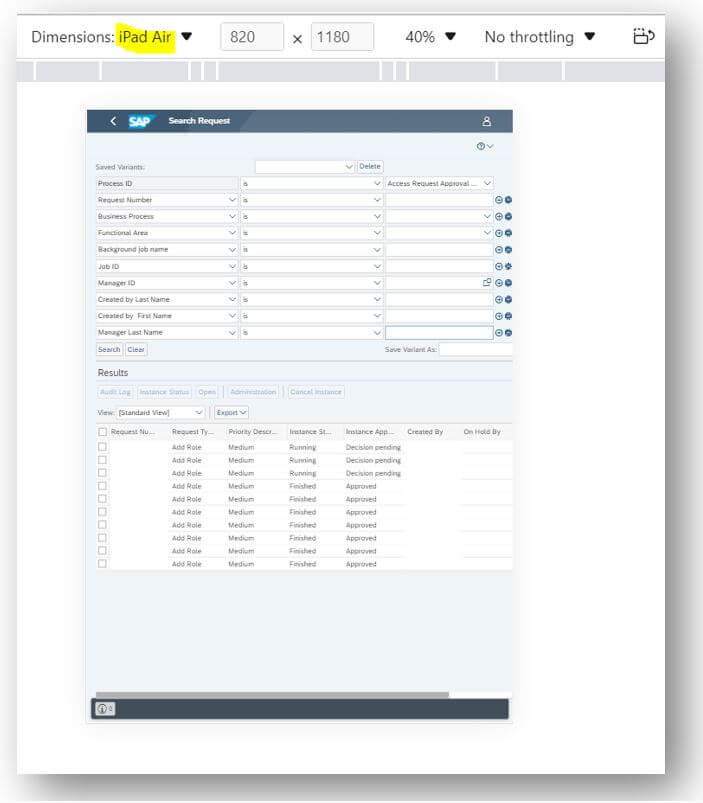
Click on the Group containing your Fiori apps, and then click on the tile that you want to execute (E.g. Search Requests)
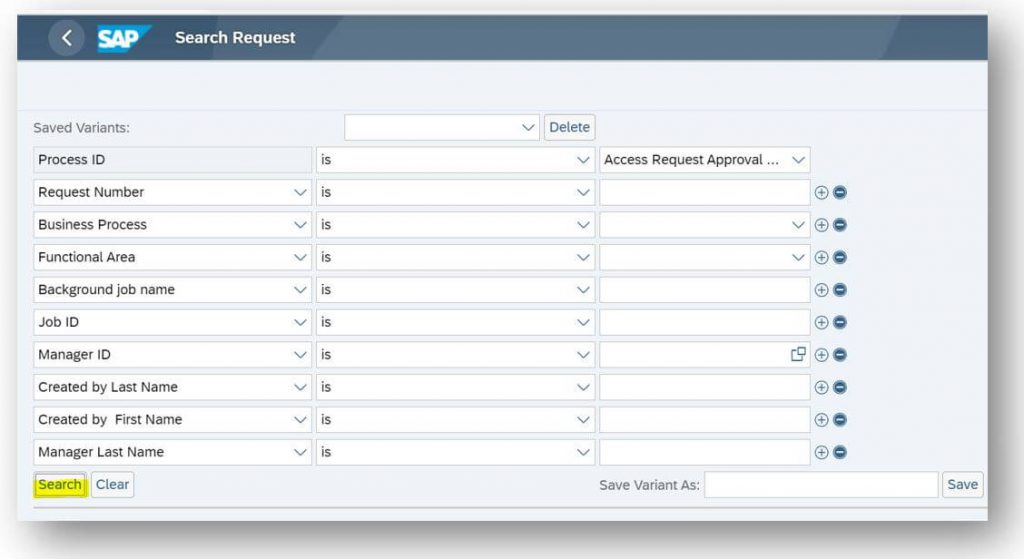
Click on Search button
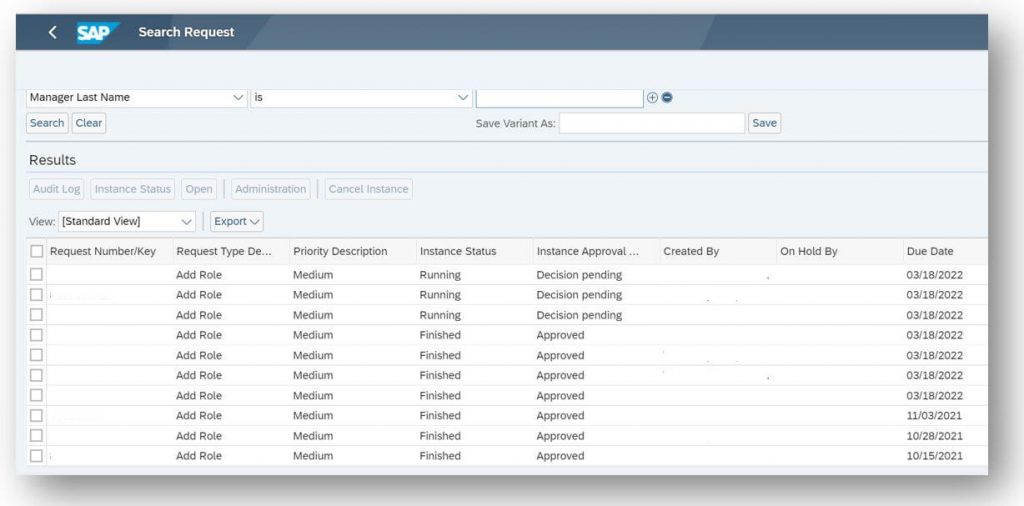
You get a list of access requests
Step 12: Simulating Mobile Display
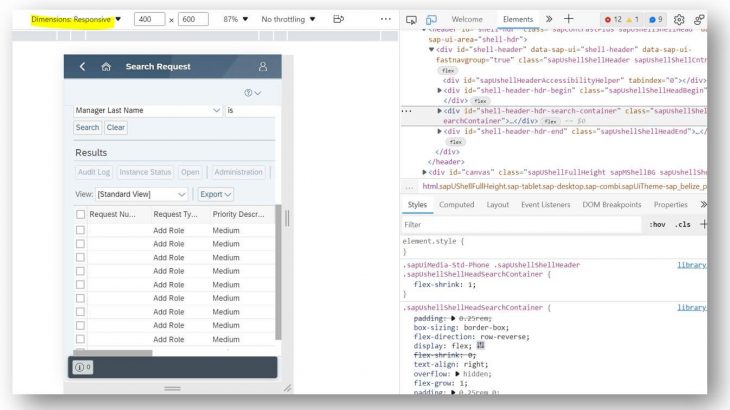
To simulate how the app will look on mobile devices, right click on the browser and click on Inspect
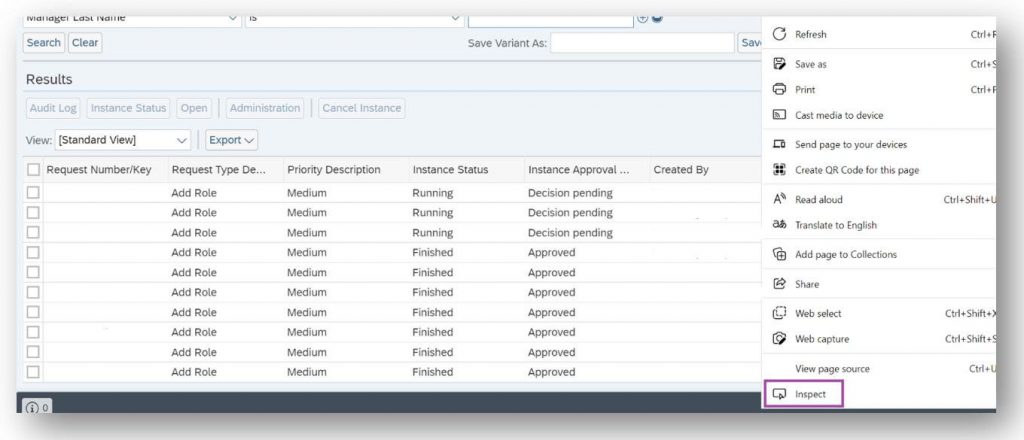
You will get into the debug mode of the browser
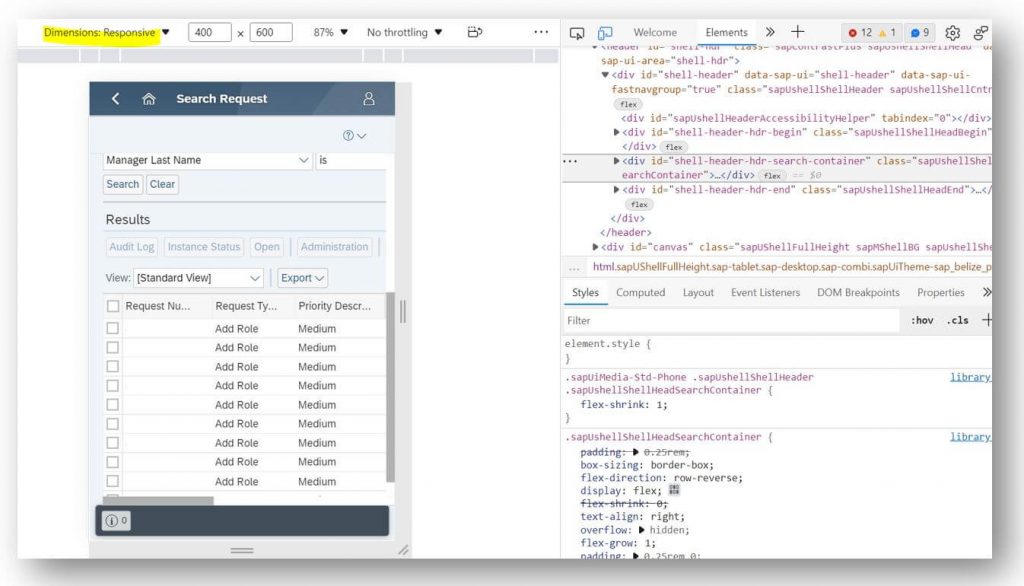
Another section will open on the left side of the browser you will find Dimension Responsive pull-down option
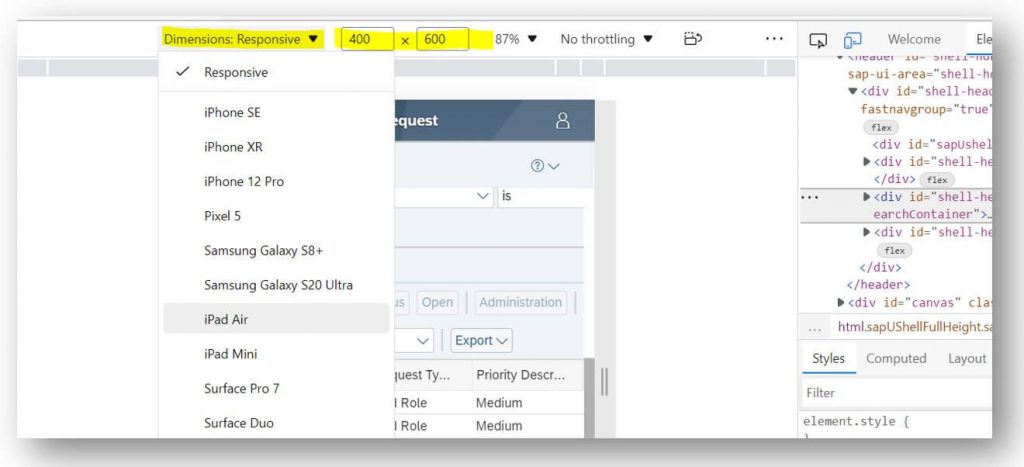
You have the options for selecting the mobile device to check how the app would look like on that particular device
In this example, we are simulating the app on iPad Air device