Introduction
Currently, I am employed as a Business Process Consultant in the SAP Analytics & Insight Team, primarily focusing on SAP Analytics Cloud and SAP Data Warehouse Cloud.
More and more customers are using iFrame to embed SAP Analytics Cloud into external web apps and 3rd party software, e.g. salesforce.com. By modifying the URL parameters of the embedded SAP Analytics Cloud iFrame, it is possible to hide the main menu, toolbar and pagebar and to embed SAP Analytics Cloud in the look and feel of the web app. This creates a homogeneous appearance for the enduser and results in single point of entry.
While using SAP Analytics Cloud embedded, the question on how to update the user profile settings occurs regularly.
It is possible to use the SCIM API (System for Cross-domain Identity Management) to update the user profile (e.g. changing the Data Access Language, Language or Date Formatting) and simultaneously supporting the single frontend illusion.
In this blog I describe the process of updating the user profile using the REST API based on SCIM.
Configuration Steps
Configuration SAP Analytics Cloud
I am using basic authentication against the token service. The first step is to create an Oauth client in SAP Analytics Cloud.
In SAP Analytics Cloud I go to ‘System’ – ‘Administration’ and open the tab ‘App Integration’.
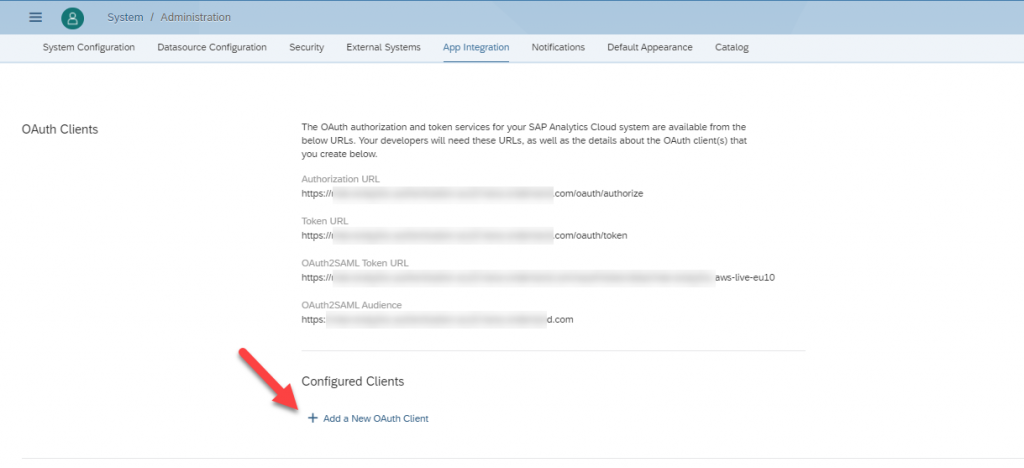
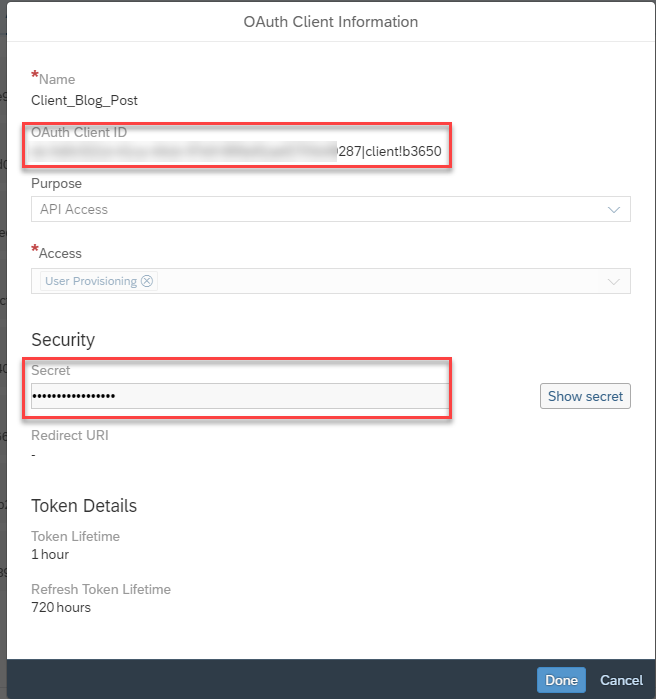
By clicking on ‘Add a New OAuth Client’ a new pop-up window opens
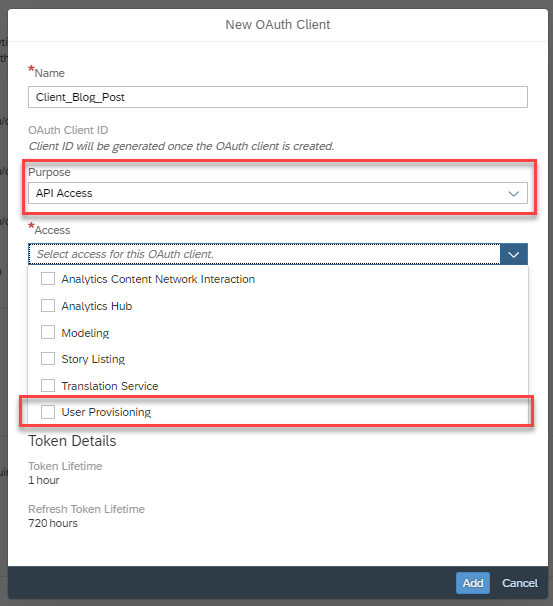
I select ‘API Access’ in the ‘Purpose’-Field. My goal is to update the users, which is the reason for selecting ‘User Provisioning’ in the ‘Access’-Field. After entering the information, I click ‘Add’.
By creating the new OAuth client, I get an ‘OAuth Client ID’ and a ‘Secret’. This is important for the next steps and I copy this information to my clipboard.
General SCIM API
SAP Analytics Cloud exposes a REST API based on SCIM 2.0. This API allows you to
- Create, read, update, and delete users and teams.
- Set user profile preferences.
- Assign existing roles to users and teams.
Basis Authentication against the token service via Postman
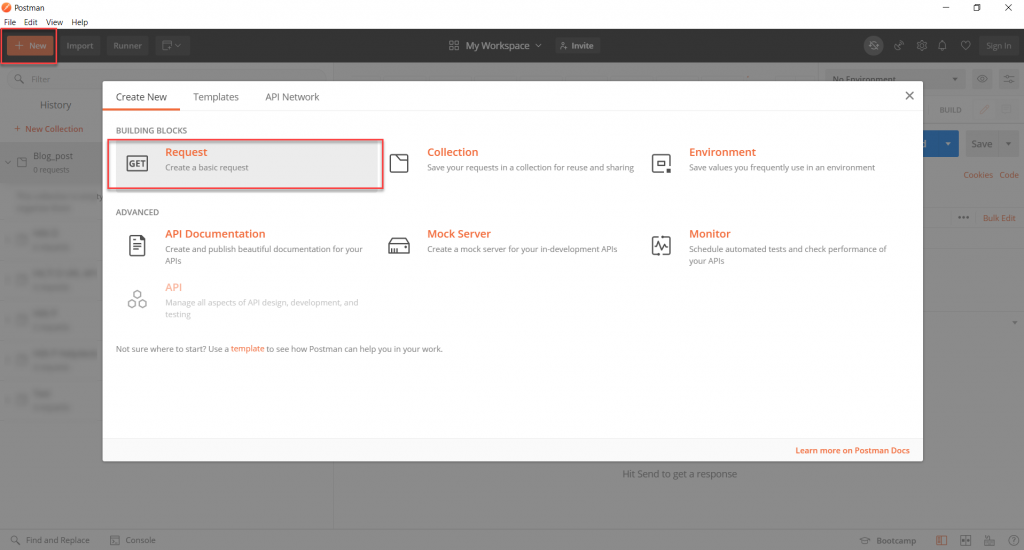
Open Postman
Step #1: Create a new Request
Click on GET Request
In the request I enter the following parameters for connecting to SAP Analytics Cloud:
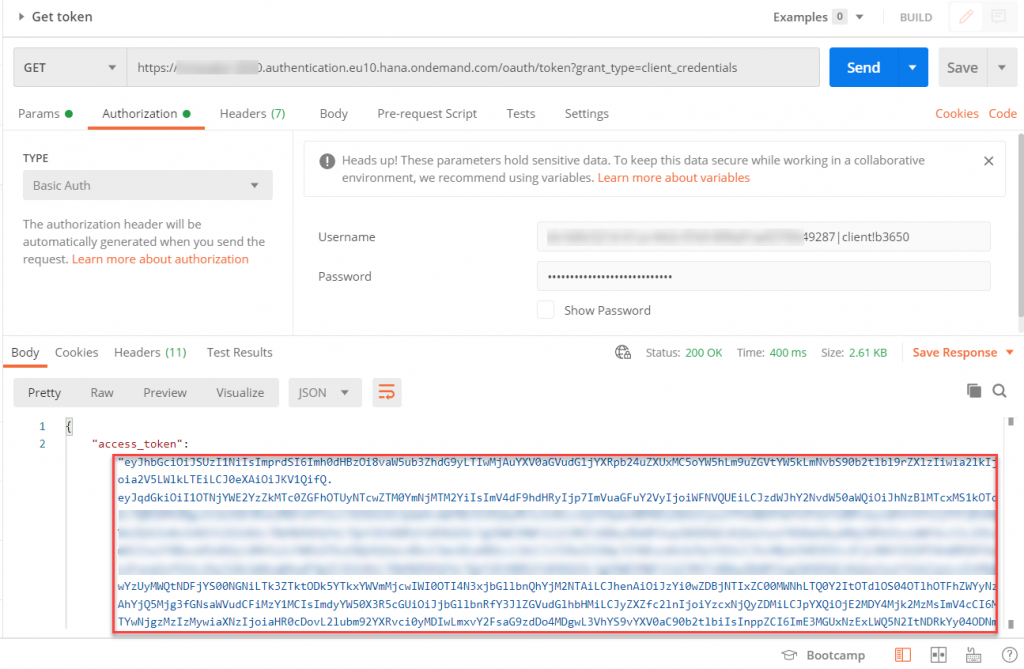
- GET: https://<SAC tenant>.authentication.<Data center>.hana.ondemand.com/oauth/token?grant_type=client_credentials
- Authorization:
   - Select TYPE ‘Basic Auth’
   - Enter the username and the secret from our OAuth client
      - Username Postman = OAuth client ID
      - Password Postman = Secret
I click ‘Send’. If everything is set up correctly, I will get a response with an access token (Status 200). This token is valid for 1 hour.
Response:
- 403: Not authorized
- 400: Bad request
- 200: OK
I must pass this access_token as a bearer token in the Authorization header of all following API requests. It is important to copy the access_token without “”. Having this access_token, I could already post a GET request for getting the users. For changing the users, I need an additional csrf token (Cross-Site-Request-Forgery).
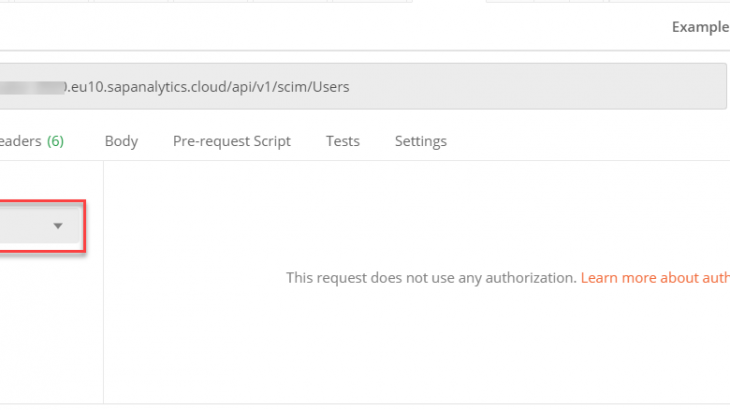
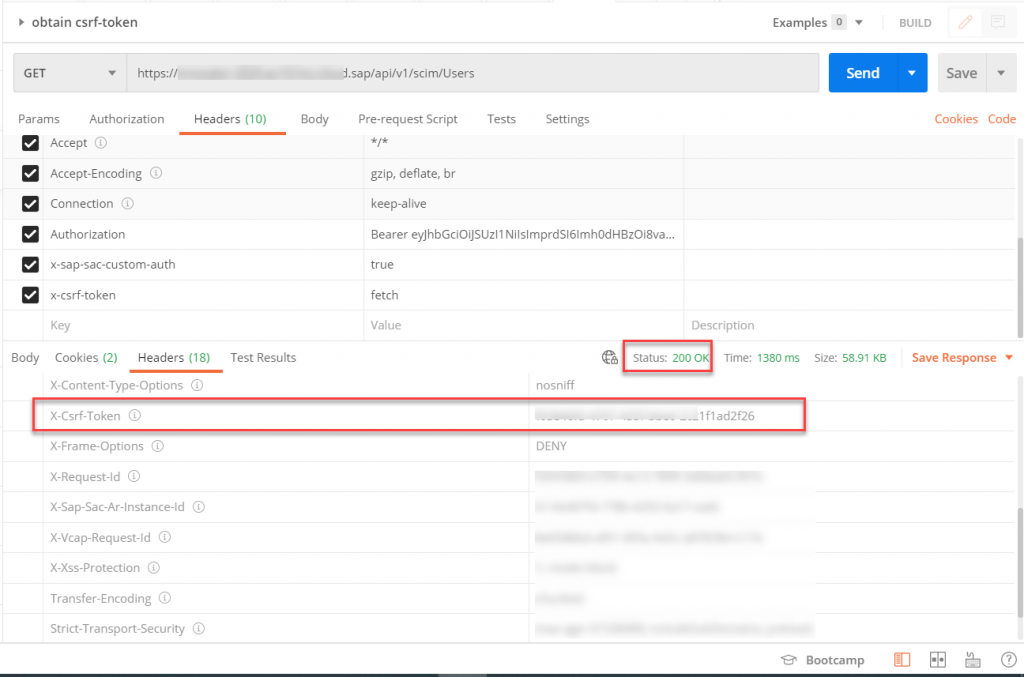
Step #2: Obtain x-csrf-token
- Create a new GET request
- GET: https://<your-SAC-system>.<region>.sapanalytics.cloud/api/v1/scim/Users
- Authorization TYPE: No Auth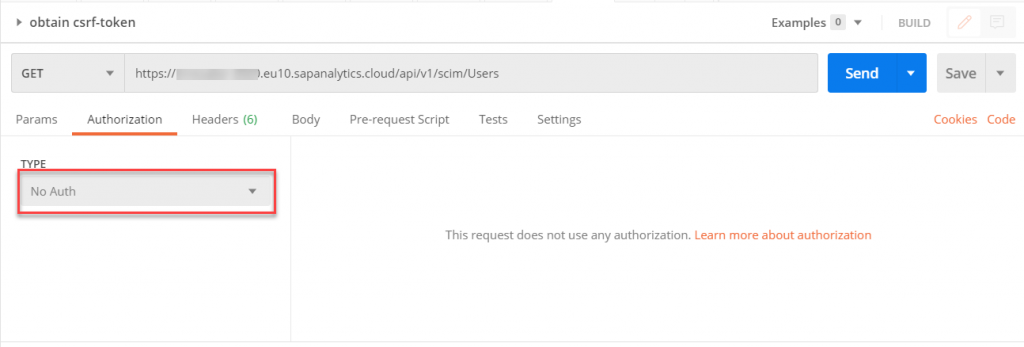
- Include the following headers with your GET request
- Authorization Bearer <Access_Token> (This is the access token I know from step 1)
- x-sap-sac-custom-auth true
- x-csrf-token fetch
- Authorization Bearer <Access_Token> (This is the access token I know from step 1)

- Click ‘Send’
- If everything is set up I will get a X-csrf-token in the Headers of the response.
Step #3: Update user profile
For this step I need the access token and the x-csrf-token that I obtained in the previous steps.
At first, I need to retrieve the current user profile with a GET request.
- Create a new GET request
- GET: https://<your-SAC-system>.<region>.sapanalytics.cloud/api/v1/scim/User/<username>
- Authorization TYPE: No Auth
- Include the following headers with the GET request:
   - Authorization Bearer <Access_Token> (The access token we know from step 1)
   - x-sap-sac-custom-auth true
   - x-csrf-token <x-csrf-token> (Step 2)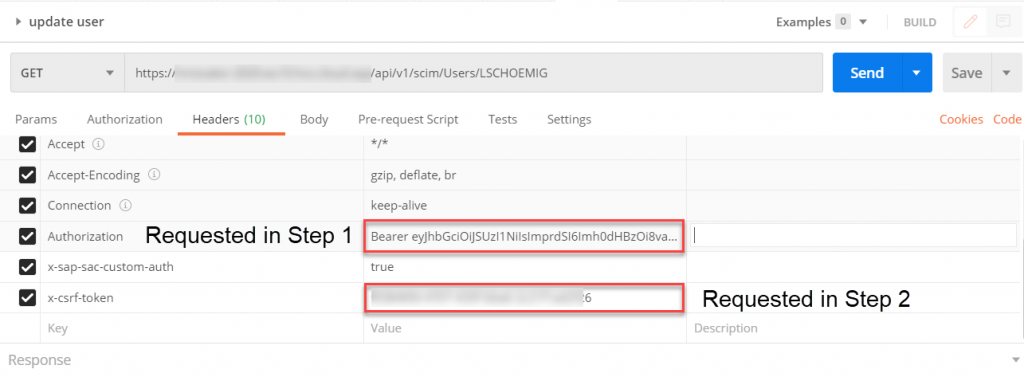
- In the response body I get all the information about the user. I copy this response body.
Now I can update the current user profile with a PUT request.
- Change the request from GET to PUT
- PUT: https://<your-SAC-system>.<region>.sapanalytics.cloud/api/v1/scim/User/<username>
- Authorization TYPE: No Auth
- Include the following headers with the GET request:
   - Authorization: Bearer <Access_Token> (The access token we know from step 1)
   - x-sap-sac-custom-auth: true
   - x-csrf-token: <x-csrf-token> (Step 2)
- Chose raw as format and select JSON from the dropdown box.
- Paste the response body from the previous GET request (i.e. from the GET request which delivered user profile) to the PUT request body and change one of the parameters.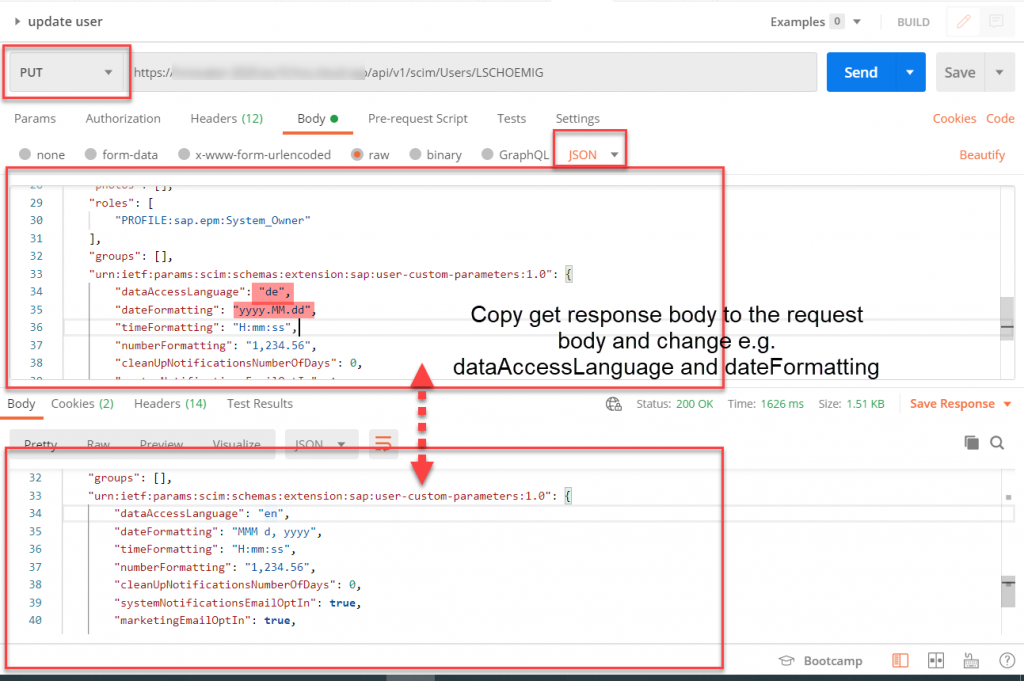
- If everything is correct I will get a “Status 200” notification
- Also, I will see the updated body response of the user.
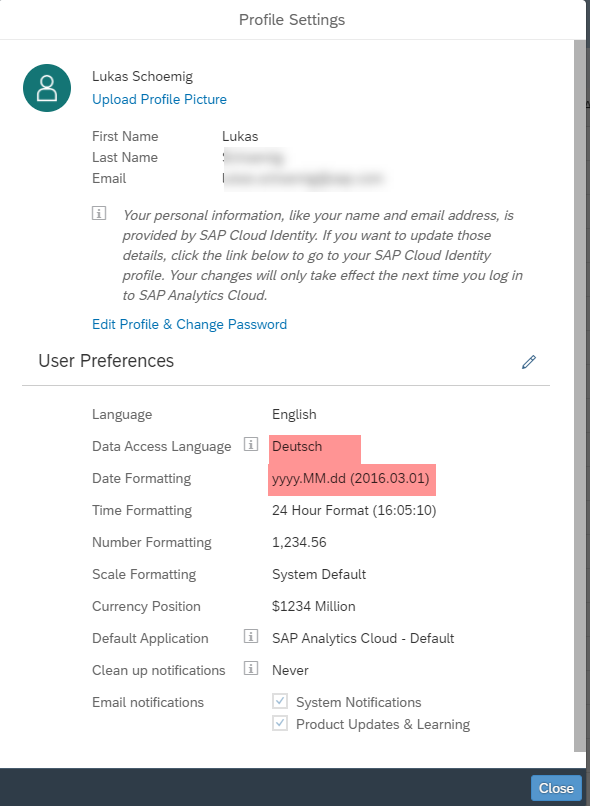
- I can doublecheck the new settings in the SAC Profile settings.
Response:
- 404: Not Found
- 403: Not authorized
- 400: Bad Request
- 200: OK