In this blog, I will provide you with a quick guide on how to use the Mass Maintenance function included in the ‘Maintain Business Roles – Fiori App’ to apply the new Functional Area restriction introduced with the 2402 upgrade of SAP S/4HANA Cloud Public Edition.
Now that you have the basics, let’s follow the steps below:
1 – Go to the IAM Information System Fiori App
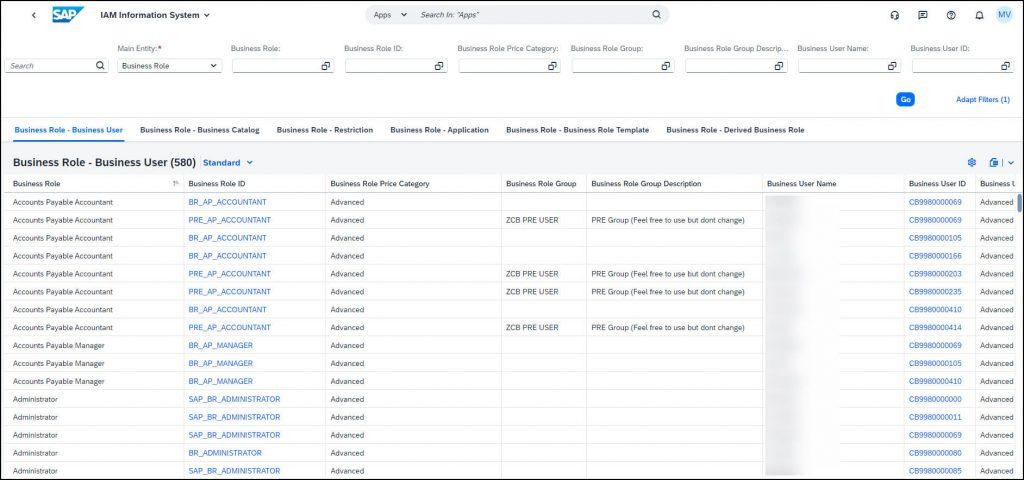
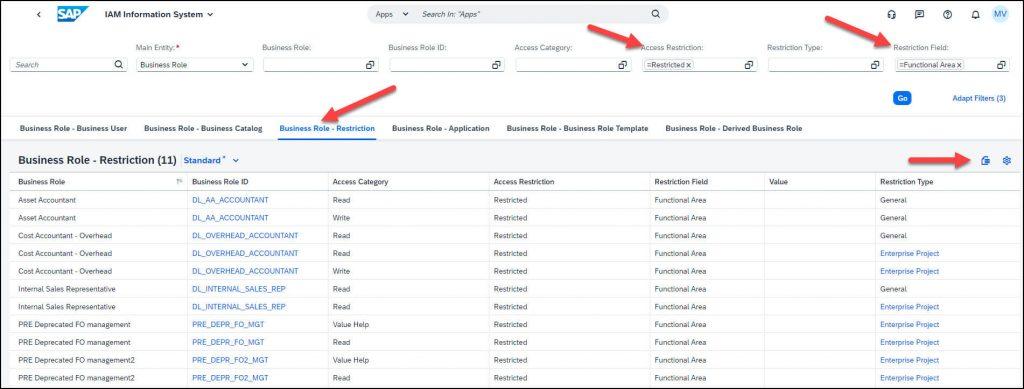
2 – Click on “Business Role – Restriction”, add “Restricted” in the Access Restriction field, and add “Functional Area” in the Restriction field (it needs to be written as is; typing it all in lowercase will not work). Click “Go”.
Next, click on the “Download Items” button to download a spreadsheet containing all business roles with a restricted functional area and no value. This format allows for easy manipulation.
3 – Download your spreadsheet. (Note: I am using Windows.)

4 – Please take a look at the spreadsheet file.
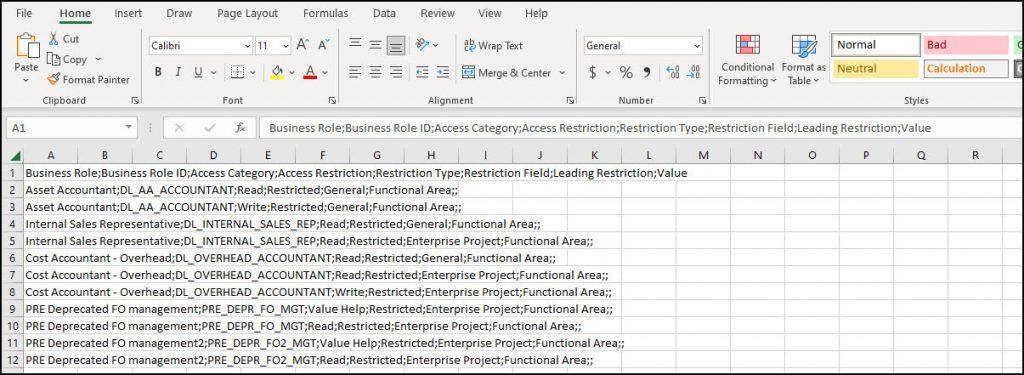
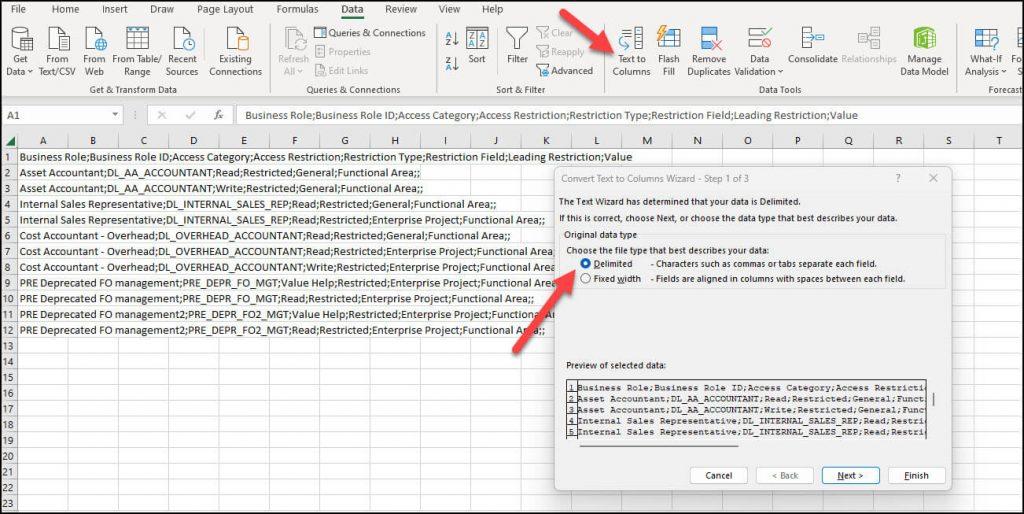
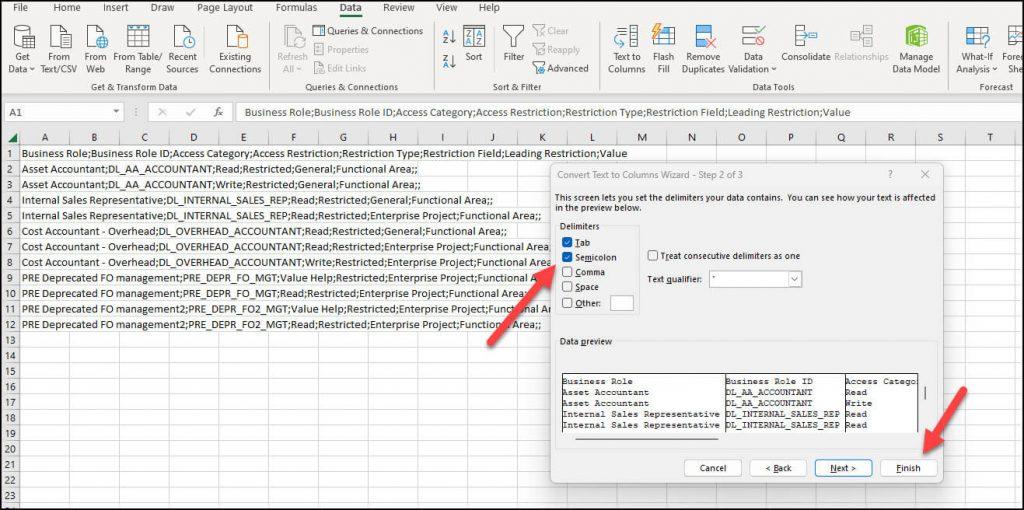
5 – I recommend editing the spreadsheet for ease of reading and filtering information. Please convert the text into columns and then apply the filters.
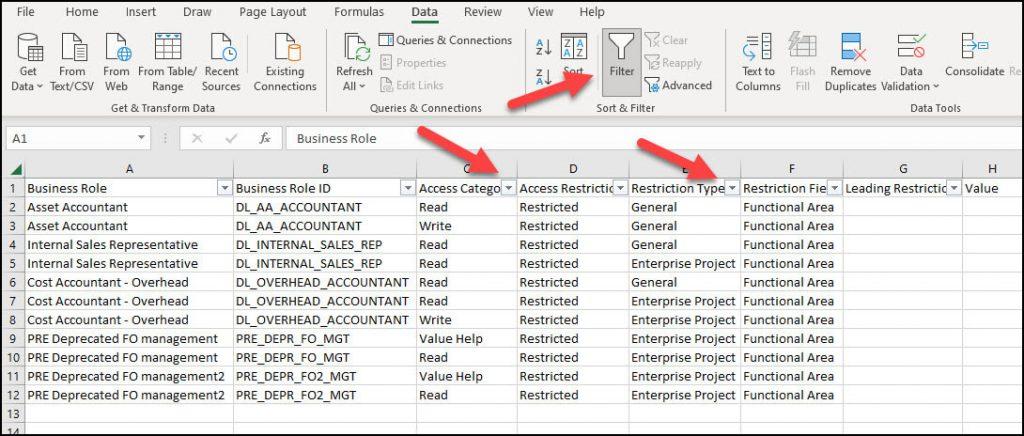
6 – Filter the spreadsheet using fields “Access Categories” and “Restriction Types” – I first selected “Read” as Access Category and “General” as Restriction Type.
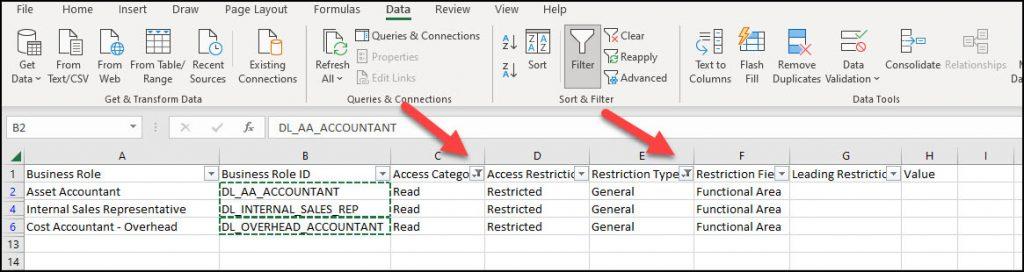
Copy the Business Role ID so you can paste them into the “Maintain Business Roles – Fiori App”. This will enable you to apply the restrictions to this combination: “Read” = Access Category & “General” = Restriction Type.
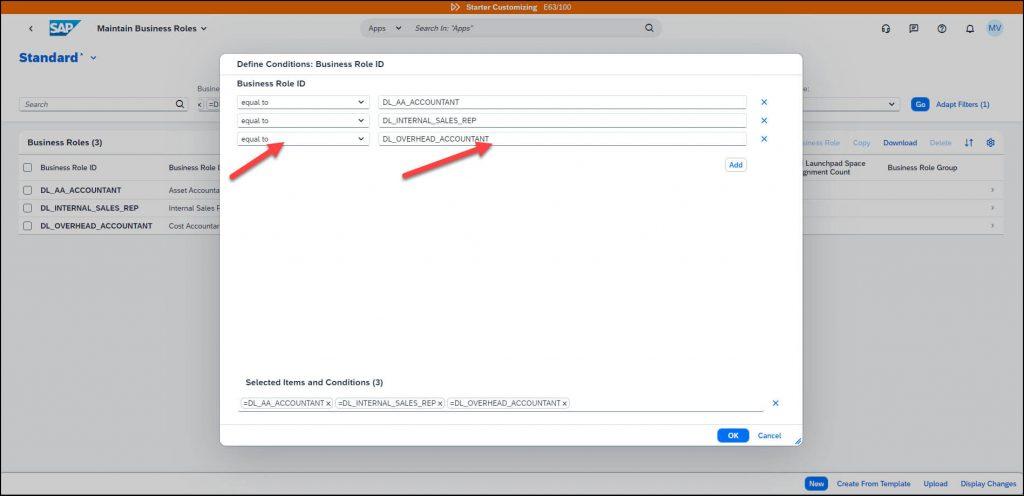
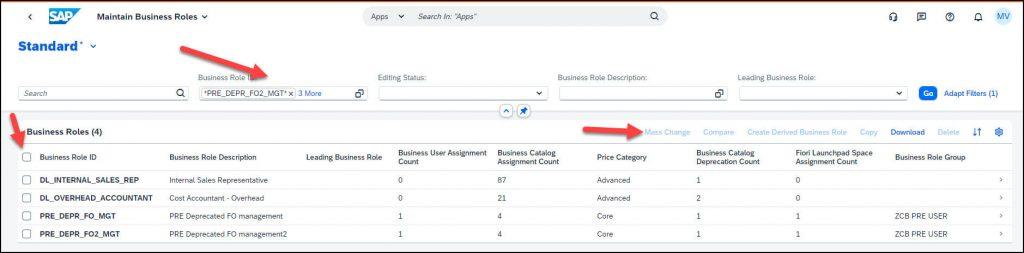
7 – Now, go to the “Maintain Business Roles – Fiori App” and select “Business Role ID”. Change the function to “equal to” and then paste the values you have copied. Please ensure that you set “equal to” as the default value before pasting. If you fail to do this, you risk adding other Business Roles that are not intended to be changed.
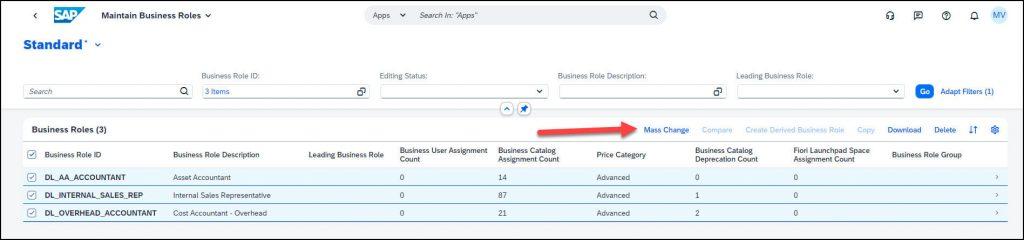
8 – Select all Business Roles, then click on “Mass Change”
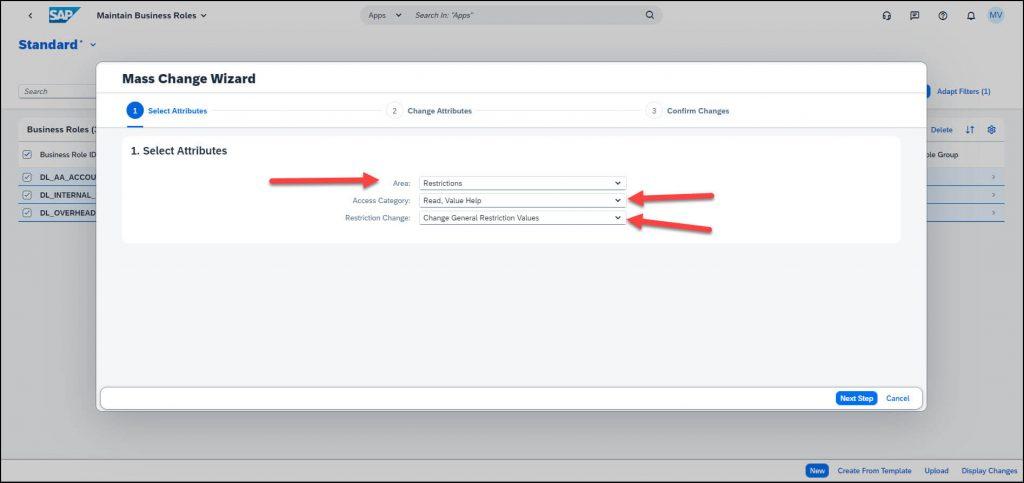
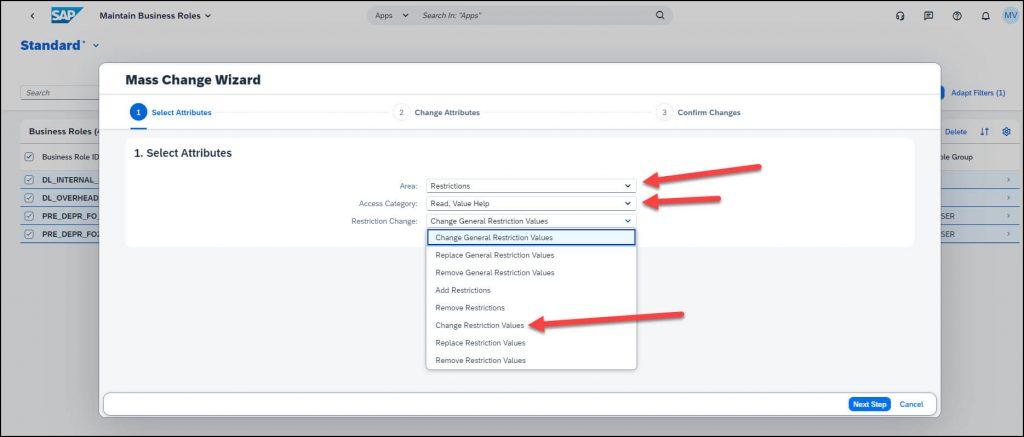
9 – In the “Mass Change” window, you need to select “Restrictions” as the Area, “Read, Value Help” as the Access Category, and “Change General Restriction Values” as the Restriction Change. Keep in mind that this is the exact combination you filtered in the spreadsheet.
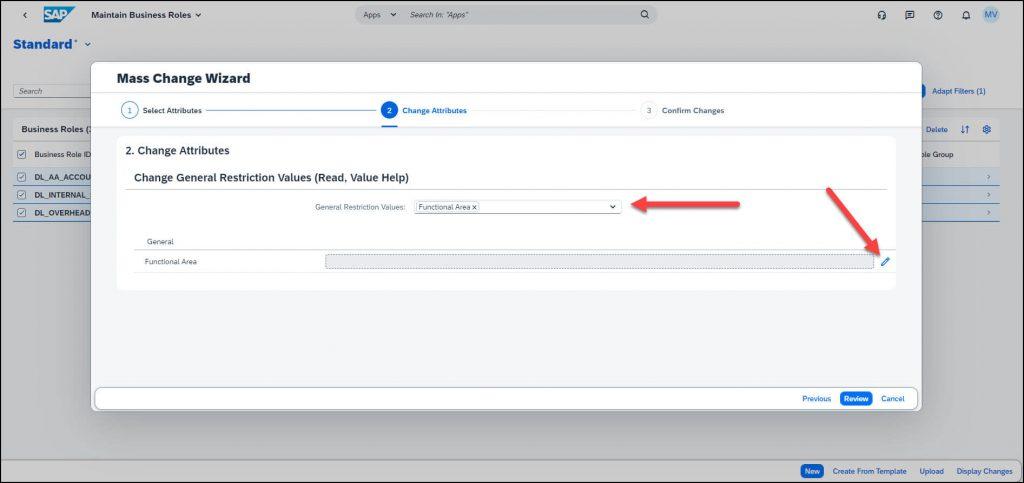
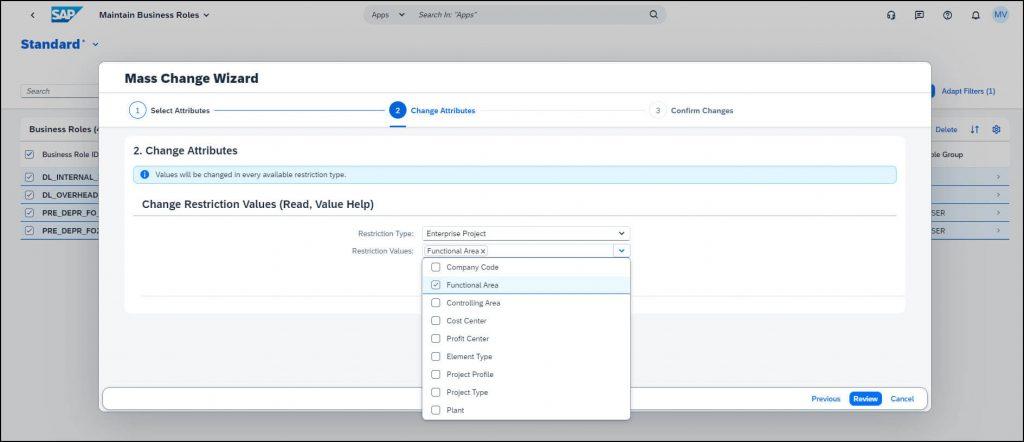
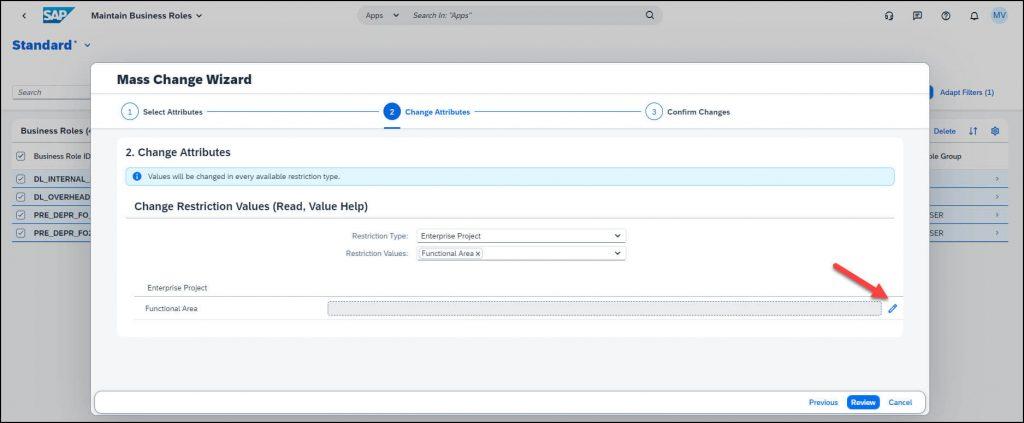
10 – Click “Next Step”. Then select “Functional Area” as the General Restriction Values and click on the pencil icon to edit the restriction value.
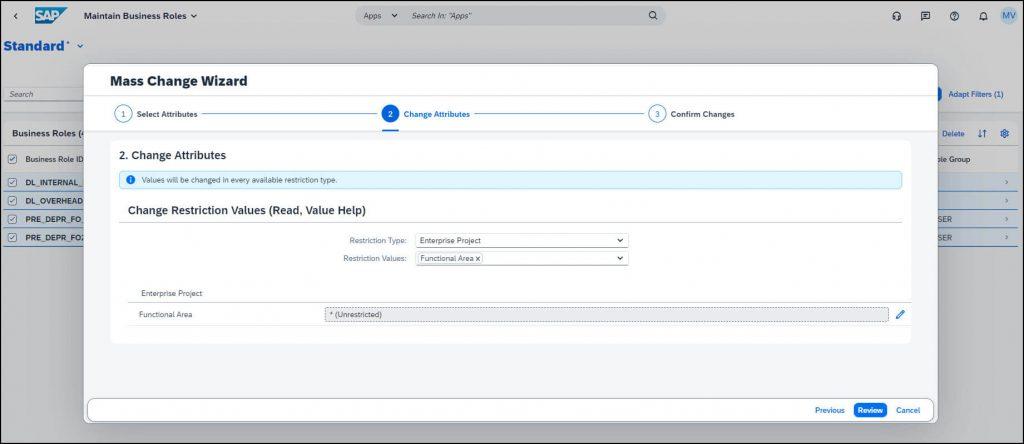
11- Select “Unrestricted Access”
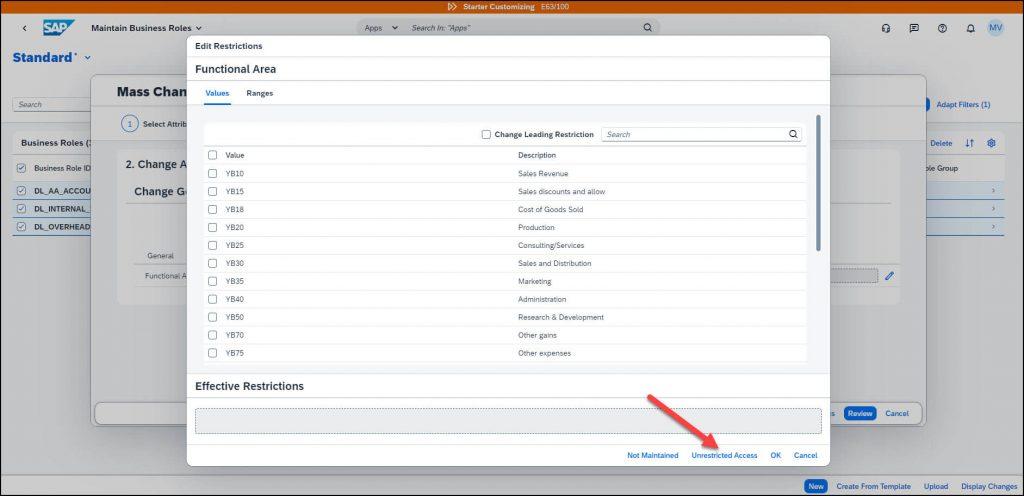
Important Note – As a strategy for risk mitigation, we recommend setting all values to unrestricted access prior to the 2402 Upgrade to avoid disruption to your business users’ authorizations. After the 2402 upgrade, you will then have ample time to apply the functional area restrictions according to your business needs.
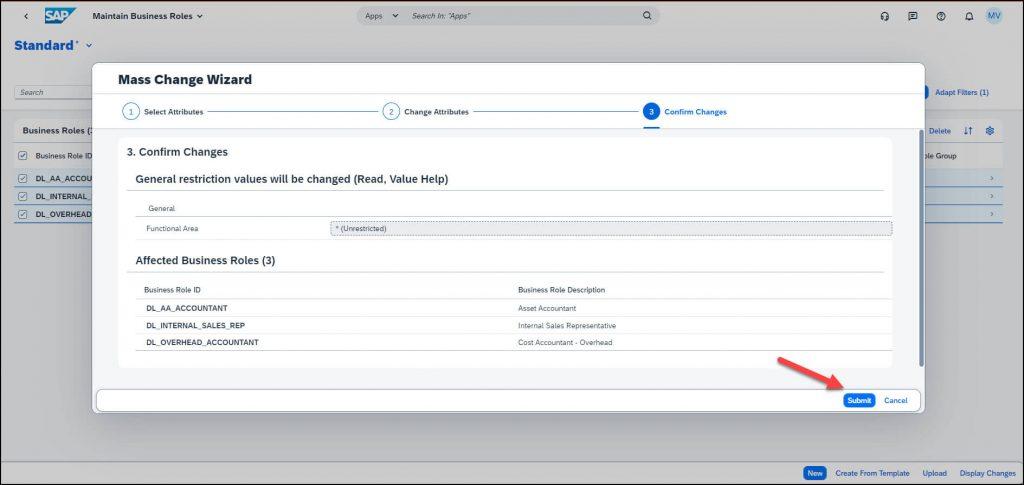
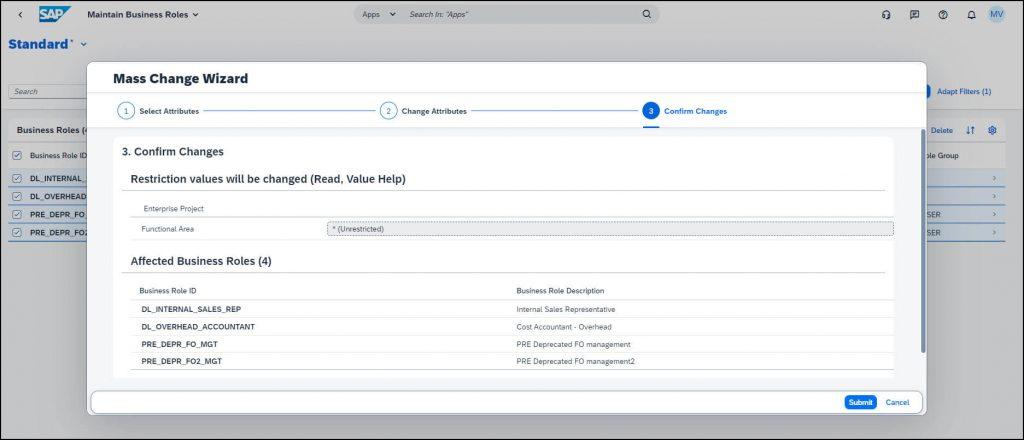
12 – Click ‘Review’, then ‘Submit’.

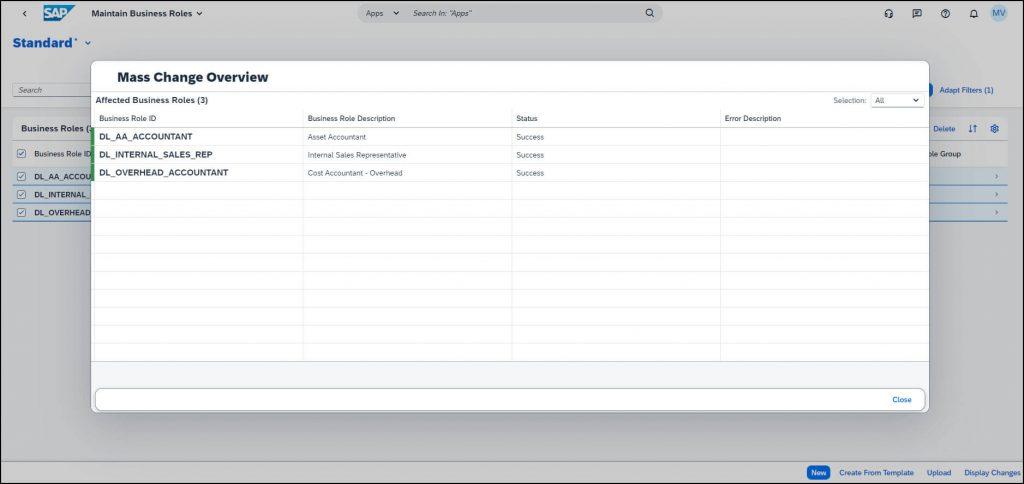
You now will see the “Unrestricted Access” applied to all the selected Business Roles.
You will need to run this process for as many combinations as you have between the Access Category and Restriction Type. In the previous example, we considered the combination where “Read” is the Access Category and “General” is the Restriction Type. Another example would be the combination of “Read” as the Access Category and “Enterprise Project” as the Restriction Type, and so on.
However, there is a minor alteration in the procedure for the last example where the Restriction Type is configured at the Enterprise Project Level. Therefore, you need to select “Change Restriction Values” in the mass maintenance window. Please refer to the screens below for a visual guide:
To filter the spreadsheet based on the last example combination, set “Read” as the Access Category and “Enterprise Project” as the Restriction Type.
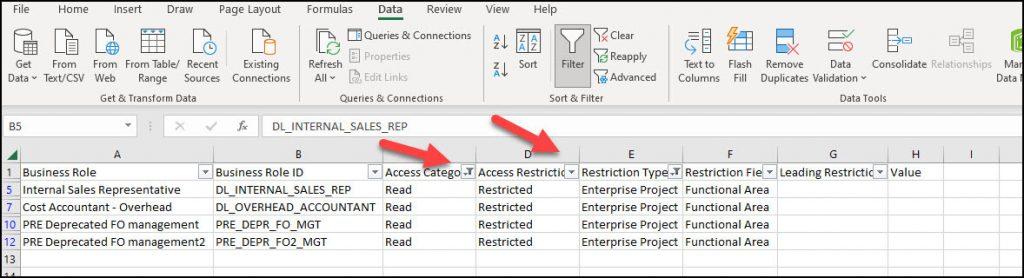
Copy business roles to the “Maintain Business Roles” app as described above.
Select the Mass Change Wizard. However, as described above, instead of selecting “Change General Restriction Values,” you should select “Change Restriction Values.” This change will impact the “Enterprise Project,” not the General Restriction.
Follow the same steps as described above in steps 10 to 12.
After completing the steps go to your next combination.
While the step-by-step guide looks lengthy due to all steps that need to be done, I expect that after your first run the initial combination you can complete this activity really fast.
I recommend to take advantage of this great feature that will allow you to provide more control in your authorizations moving forward.
After you’ve completed the steps, proceed to your next combination. While the step-by-step guide may seem lengthy due to all the tasks that need to be accomplished, I anticipate that after your initial run-through, you’ll be able to complete this activity quite quickly. I recommend taking advantage of the Functional Area, as it will give you greater control over your authorizations moving forward.


