One morning after reaching the office, as usual, I was checking emails when I discovered an email saying that management has decided to upgrade solution manager 7.1 to solution manager 7.2. Did it ever happen to you?
It almost came as a shock and lot of responsibility/work on my end as I was the technical developer/SME for solution manager implementation in my project. As there was a lot of customization in 7.1 and everything had to be redesigned in 7.2 as 7.1 is GUI based ( tcode SOLAR01) and 7.2 is webdynpro (tcode SOLDOC) for creating/ managing documents and there is a significant change in architecture. One of the key requirements in 7.1 was that the word document ( like Technical Specification, Functional, Unit Test ) etc will be routed through workflow to designated approvers and the document had to be attached in the work item as a pdf so that users can check their inbox, review the pdf and approve/reject the work item.
As 7.1 was GUI based this was done through OLE ( ie before triggering the workflow ) word doc content was edited (addition of some headers / footers) and then converted to pdf by using OLE objects / methods and that binary content was passed to workflow container so that it can be later attached to the work items using appropriate API’s.

However in 7.2 since the frontend ie UI is webdynpro so we got an error in the 1st step itself when we tried to call API like GUI_DOWNLOAD to save the word doc, forget about the later part using OLE.
This was a showstopper for this project because there was not enough time/cost for exploring things like using third party software for pdf conversion etc as the entire solution had to be again changed.
So then I started exploring things and spent a considerable amount of time/effort came across the concept of OBN ( Object-Based Navigation) which made my life easy.
In this post, I will discuss OBN at length and also will demonstrate by an easy example how to implement it. I am not going into the details of workflow and complex OLE which is not the intention of the blog. By using OBN you can launch and trigger any GUI transaction/report. OBN is used in Roles (PFCG) to assign an object to a function.
WHAT IS OBN?
Object-Based Navigation (OBN) is a runtime portal capability of navigating and passing business data between applications in the scope of the user roles. Offers to portal users an additional method of navigation based on business objects and its operations to reach/launch target views without knowing what the real target will be. For example, there is a button and the button when clicked will fire the OBN event and during runtime, it will be resolved with the user’s assigned role to decide what application should be started. With different roles with different OBN mappings, different targets can be achieved on click of the same button.
To state simply what basically happens is that the OBN call searches the Roles of the user calling a certain function and when found it launches the corresponding transaction (or other function). Because of that, we will later see, that the OBN is very tightened to the Roles of the user
Each OBN event also contains parameters (in our example the number of the sales order) that is passed to the target application. Now, let’s jump straight to see how it works.
HOW OBN WORKS?
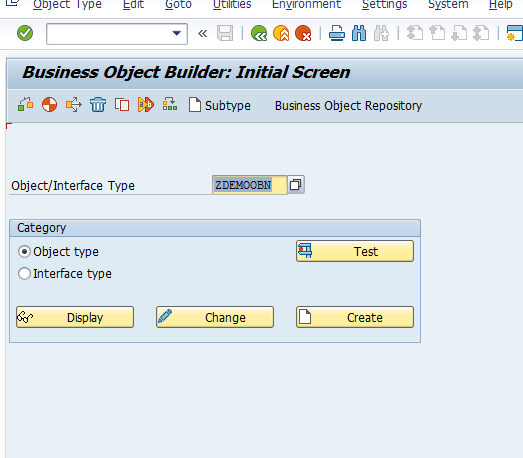
As mentioned, OBN is Business object based so let’s create a Business Object first through SWO1.
Step 1: Creation of business object in SWO1
Provide an object type name and then click on create button.
Then on the next screen provide all the details in the pop-up.
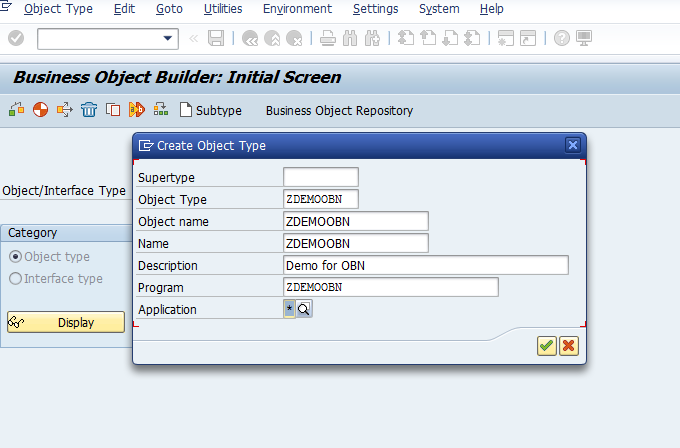
Press enter. By default some methods, attribute and interface will be added.
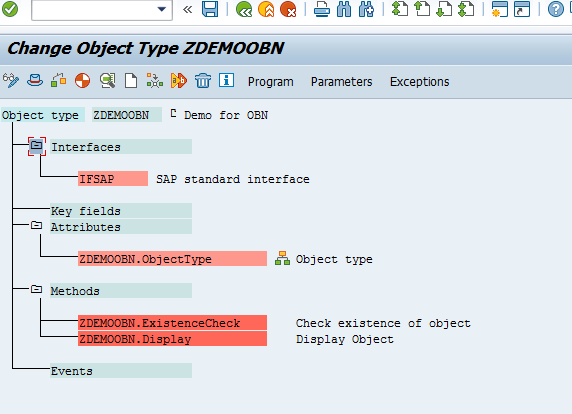
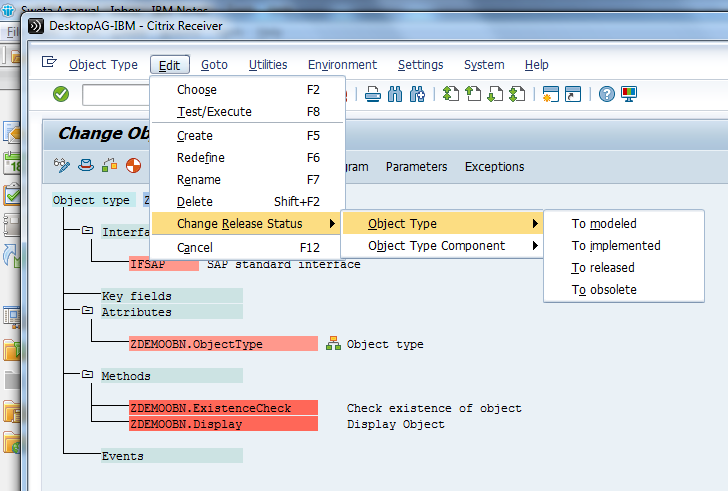
Now we will change the status of this object to ‘Implemented‘ and proceed to step 2.
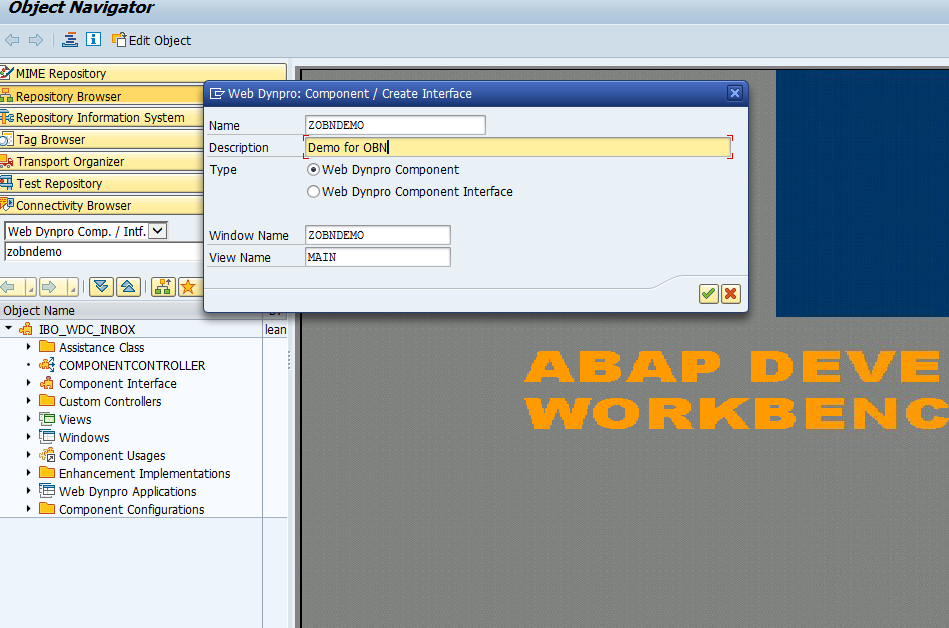
Step 2: Creation of simple webdynpro component with a field and a button.’
Go to SE80 and create a webdynpro component.
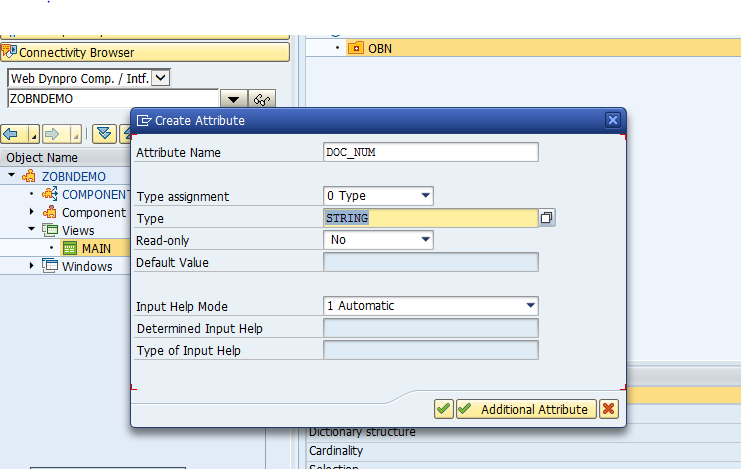
Now navigate to the context and create a node, attribute.
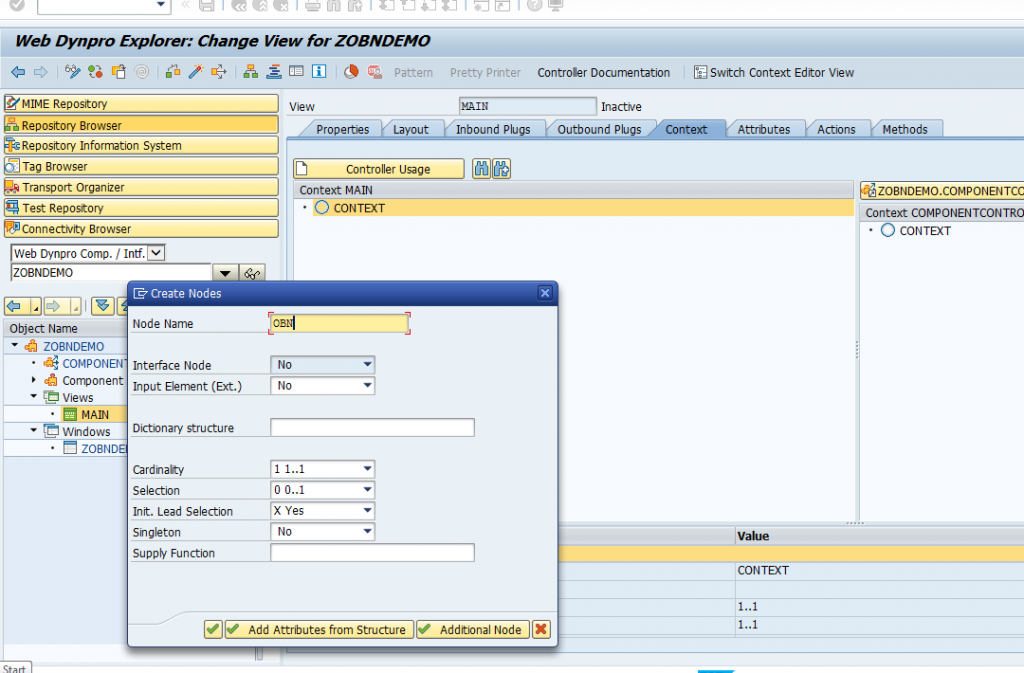
Create Attribute.
Activate the webdynpro component.
Map the view controller context to component controller context.

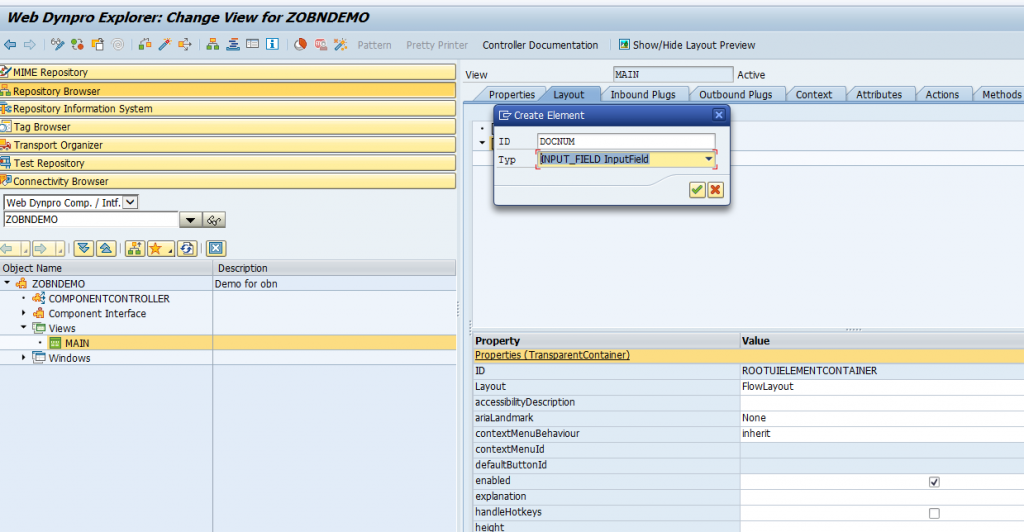
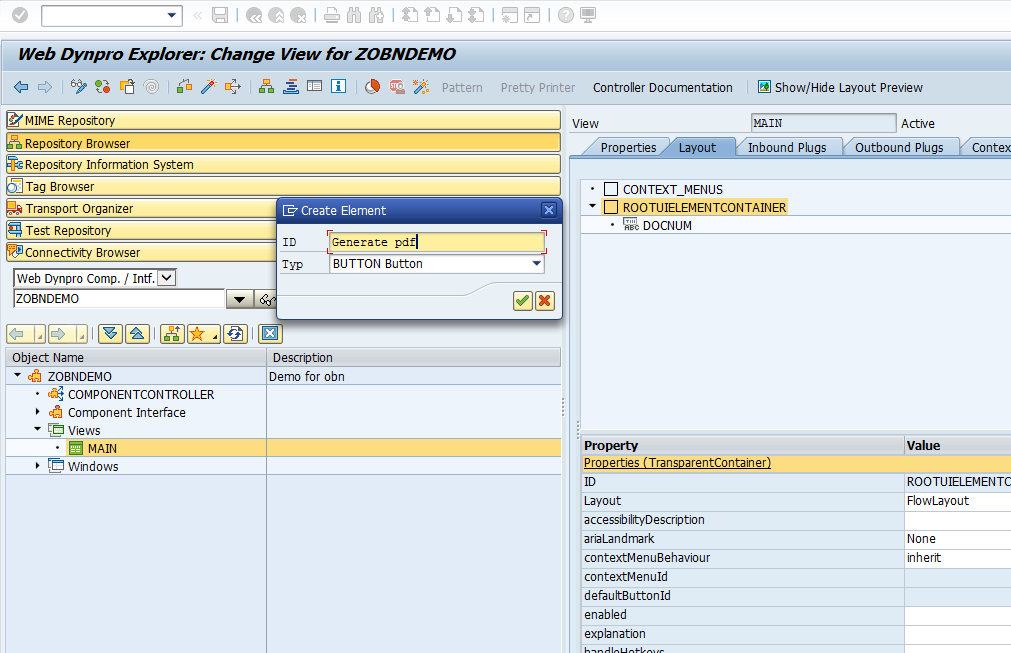
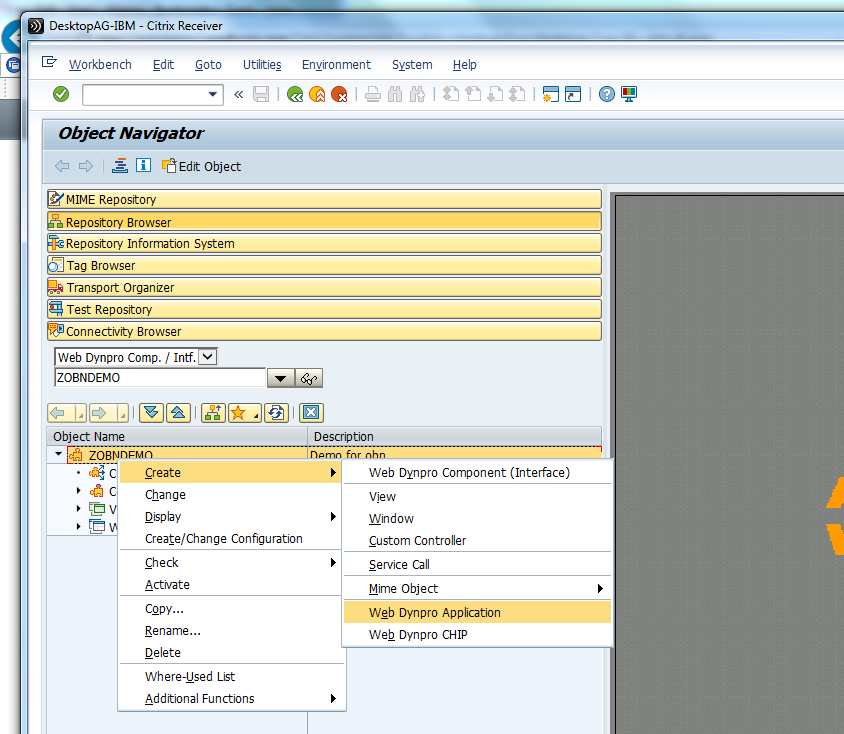
After the button is added create a web dynpro application for this component. Right-click on the component name->Create-> Web Dynpro application.
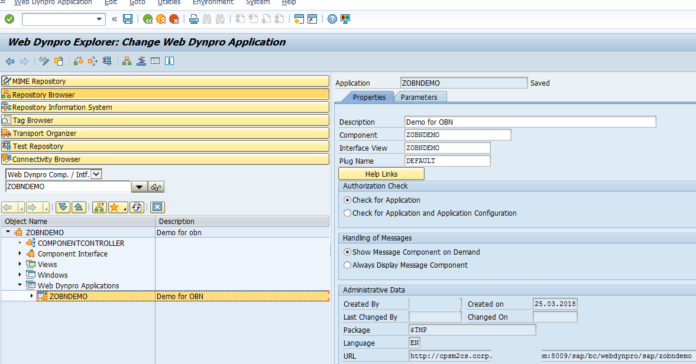
Web dynpro application ZOBNDEMO created.
Implementation of button handler will be handled in later post step 3.
Step 3: Create a module pool program having a screen in which the OLE logic will be handled and then assign the transaction to it. We will not write any code inside this program now. All the coding will be a part of the last step.
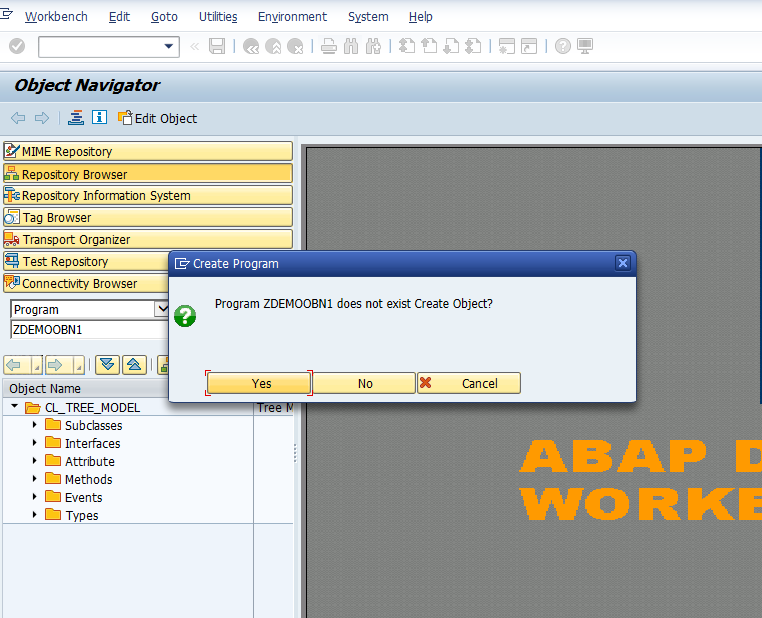
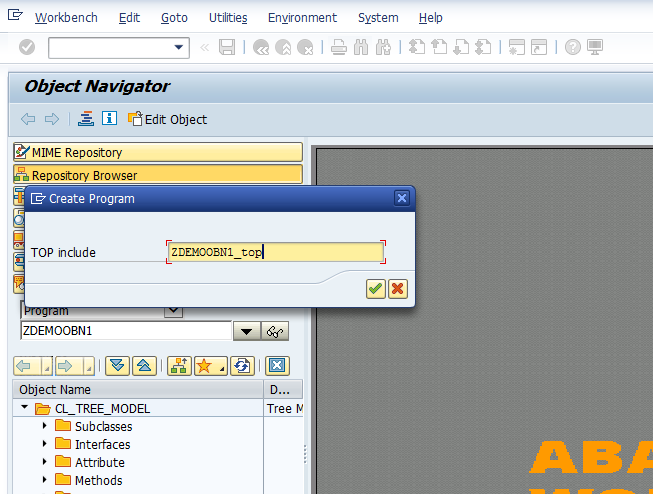
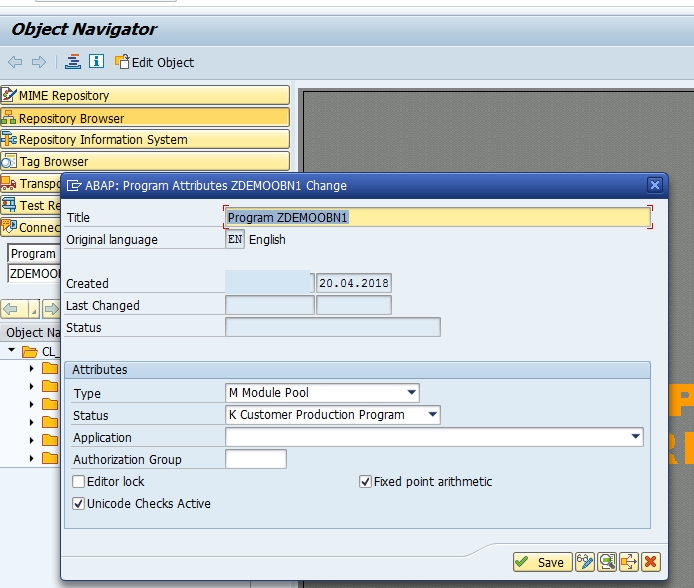
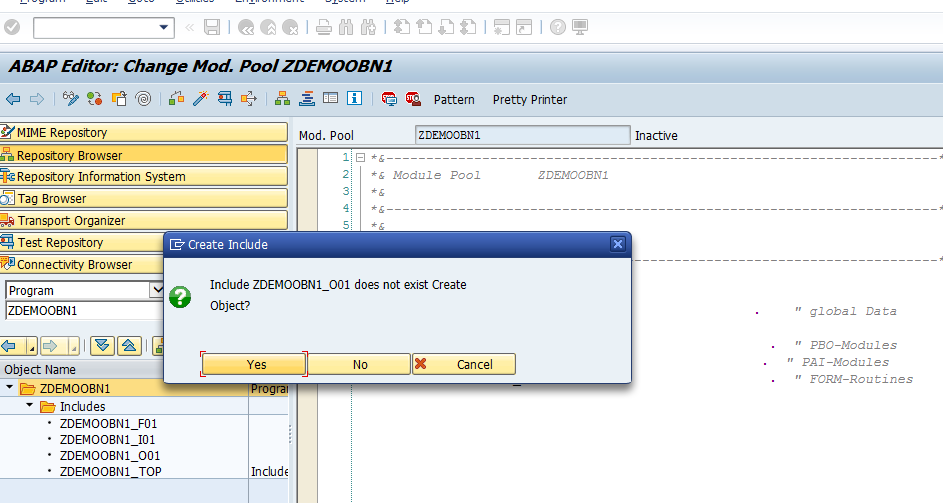
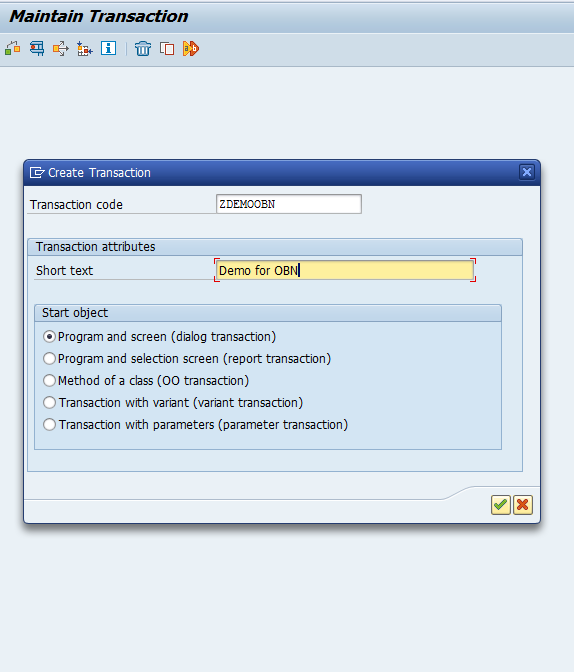
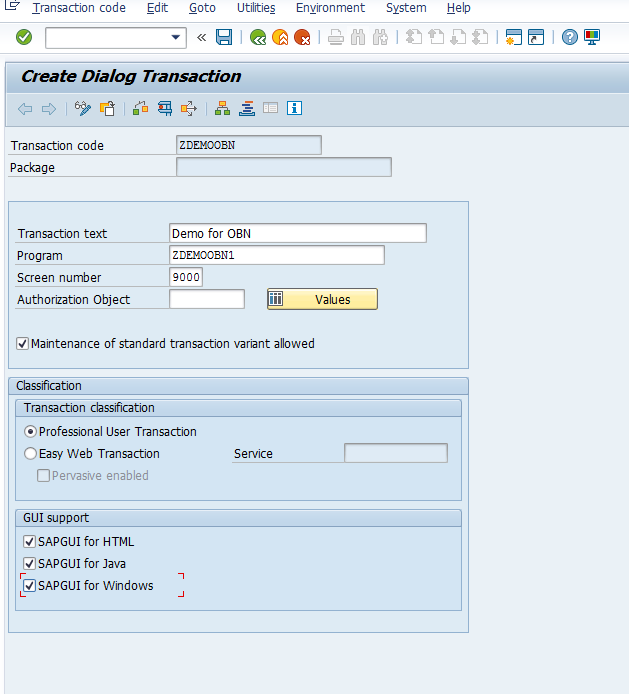
Give program name as ZDEMOOBN1 and save the transaction. This transaction will be later assigned to a PFCG role.
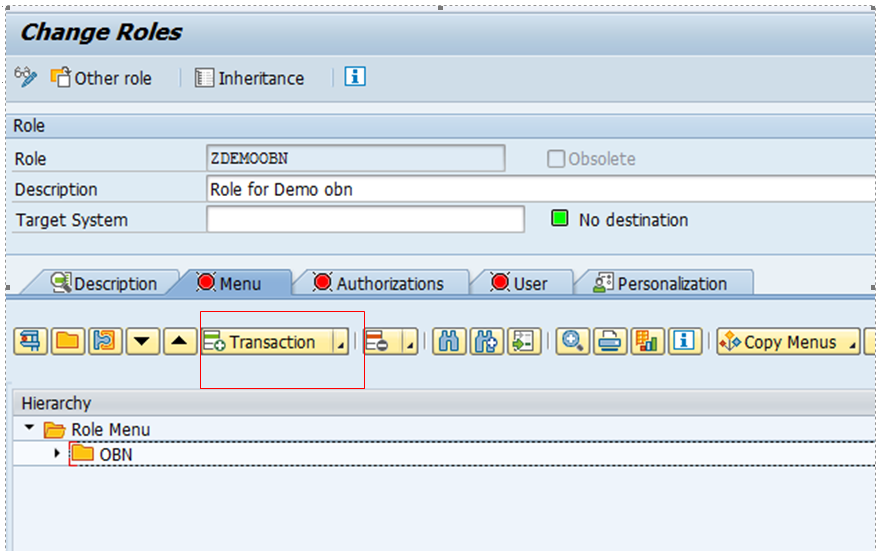
Step 4: Create a PFCG role as below.
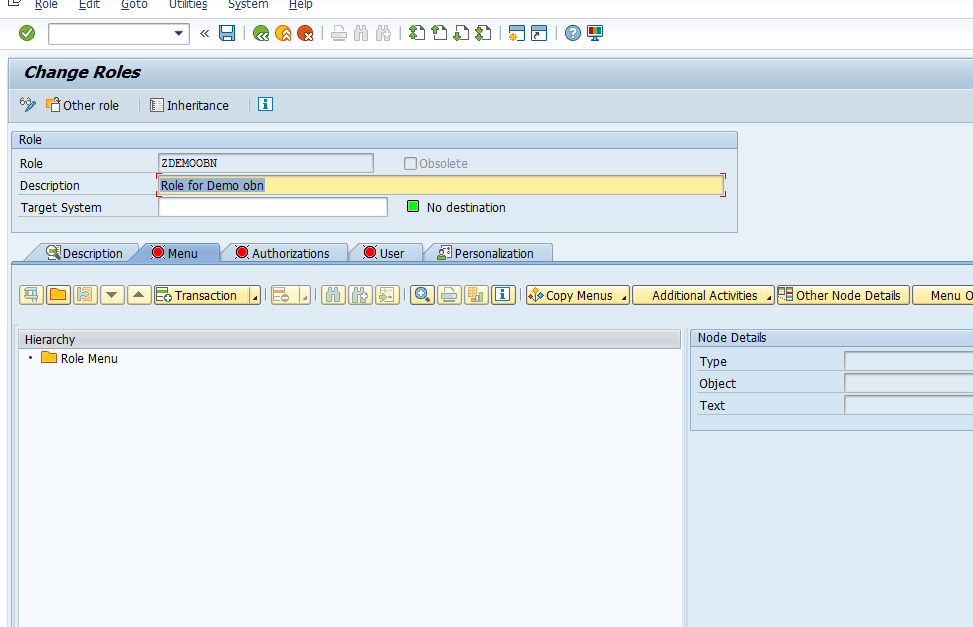
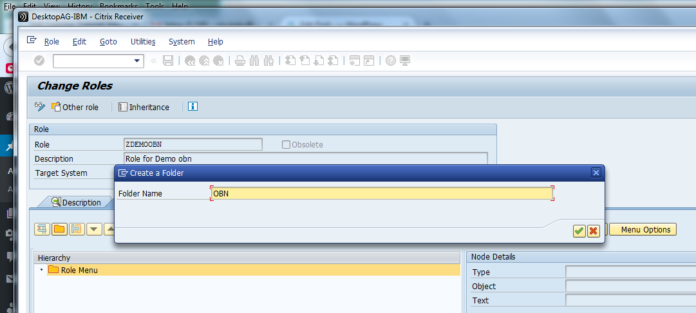
In the menu, we will add another folder by clicking the Create folder button and then inside that the webdynpro application on clicking the Transaction button.
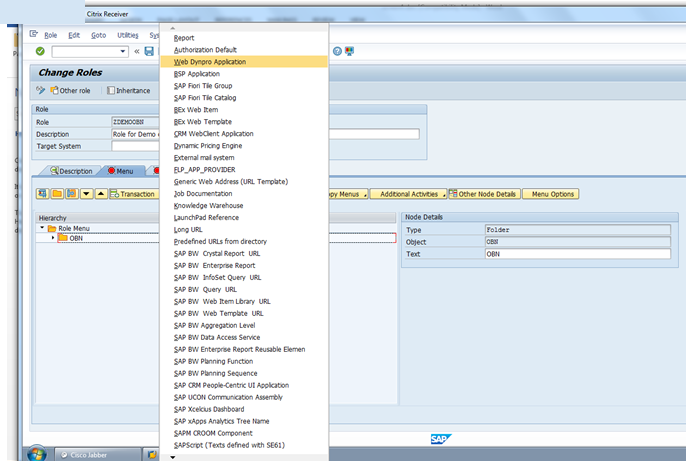
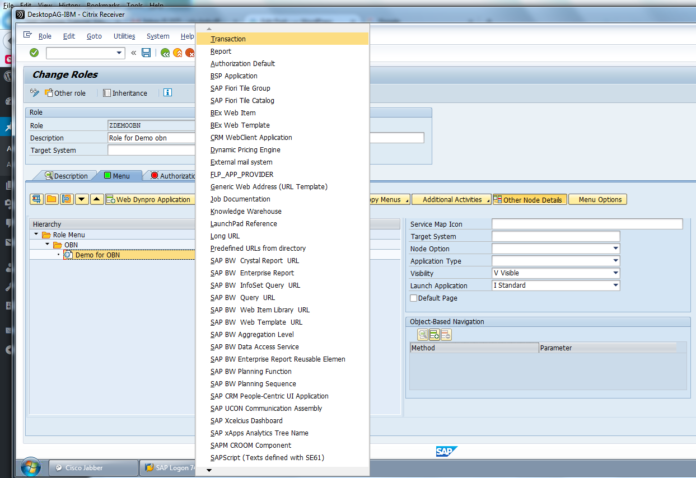
Then add the webdynpro application by clicking the insert node button and choose web dynpro application from the list as shown below.
Then on the next screen provide the web dynpro app from F4 help created above ie ZOBNDEMO.
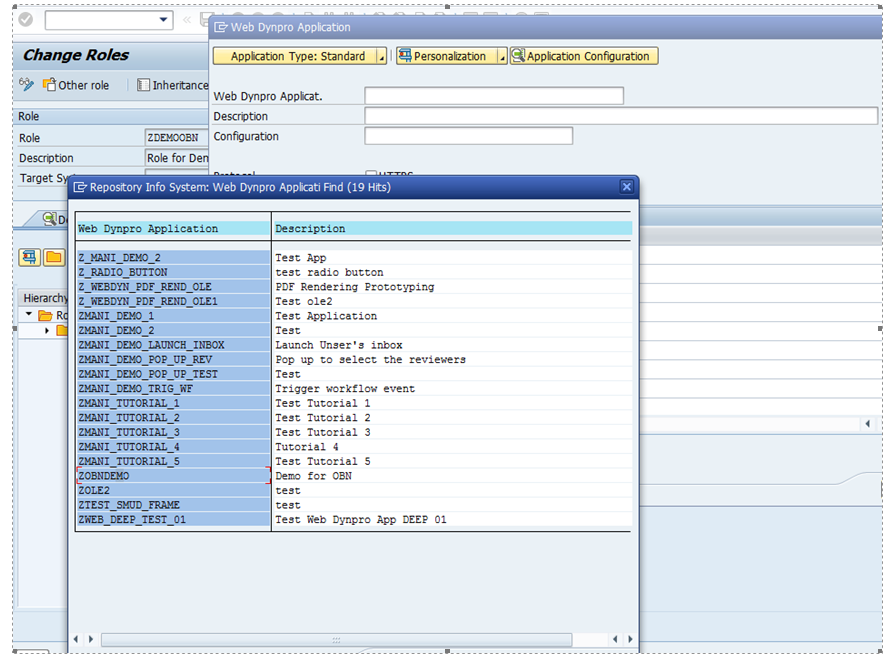
Choose ZOBNDEMO and press enter.
So another node for webdynpro app added in the menu inside OBN folder. Now we will add the transaction created above under web dynpro app by the insert node button and then choose transaction from the list. Then choose ZDEMOOBN from F4 help
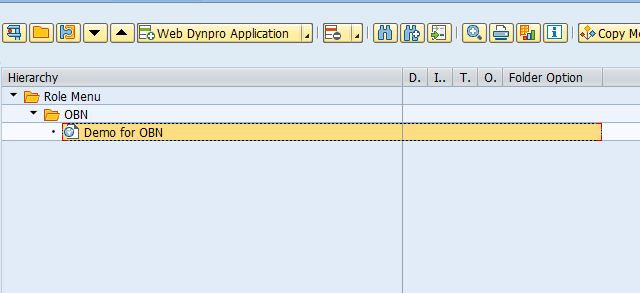

and click on assign transactions button.
Transaction gets added as next level.
So the role created above consist of a Root folder and a Subfolder (NWBC requires at least one lower level). First “pin” is the Web Dynpro Application created in step one – just basic call of a Web Dynpro application.
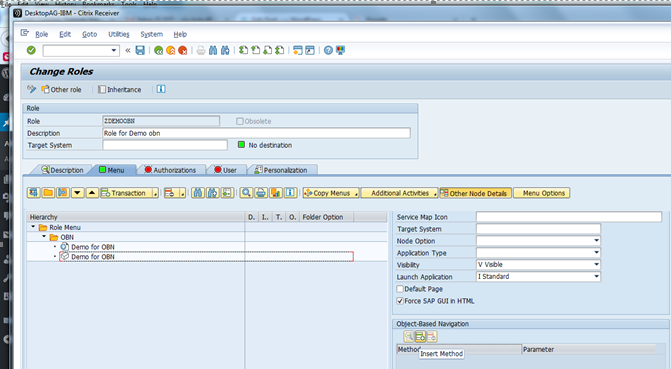
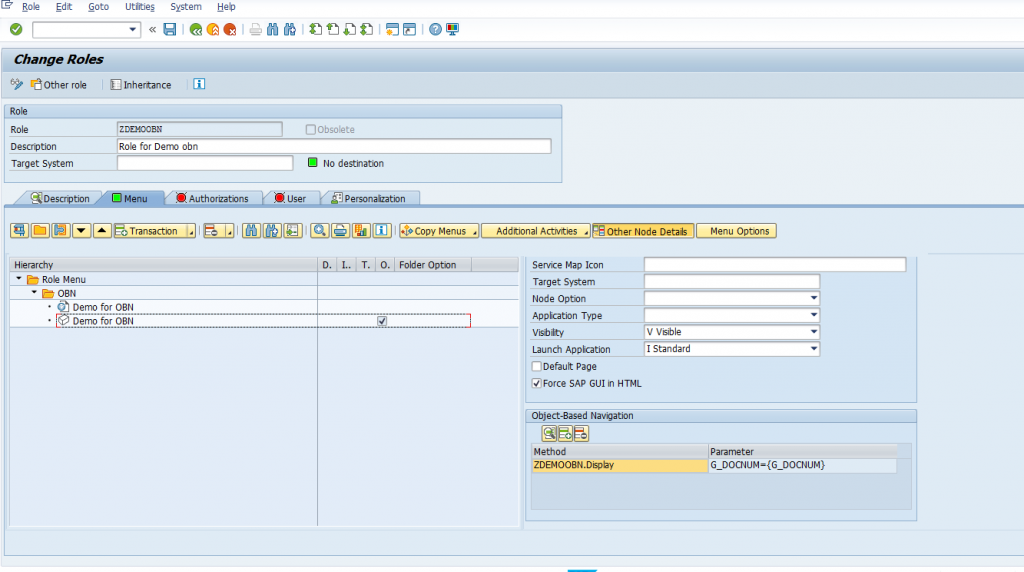
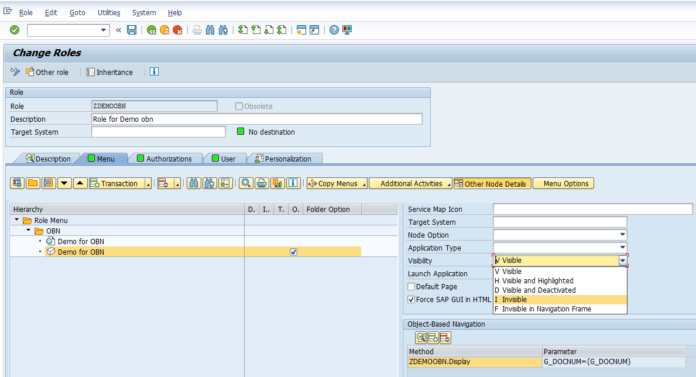
Second “pin” is the z transaction which will call the OLE to save word doc on local desktop.. When you press the Other Node Details button you will notice the OBN part below.
Then check the checkbox ‘Force SAP GUI in HTML’ checkbox. This is very important otherwise webdynpro will not be able to trigger GUI.
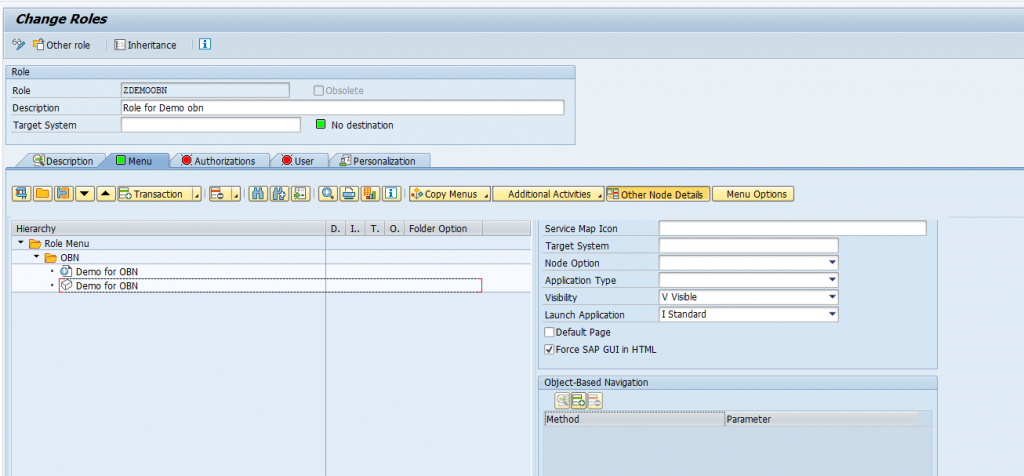
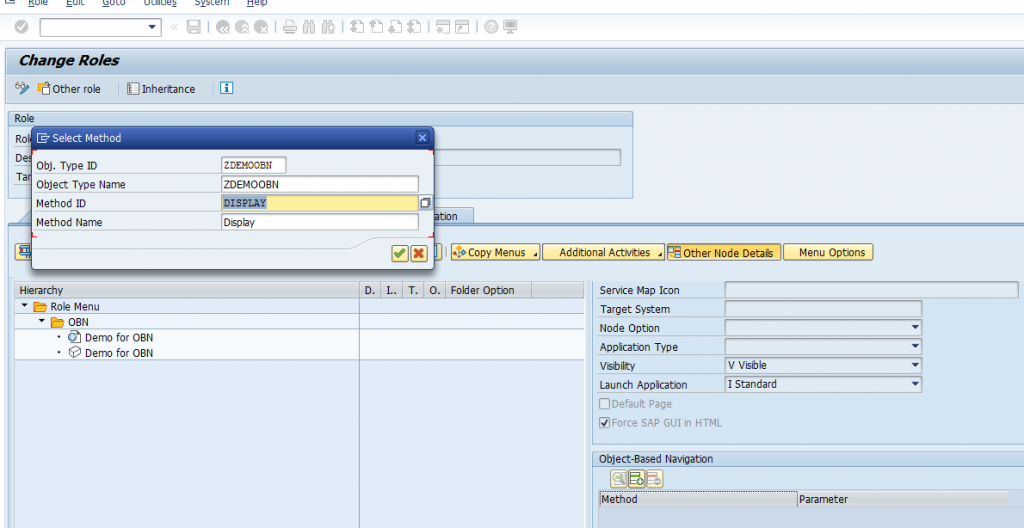
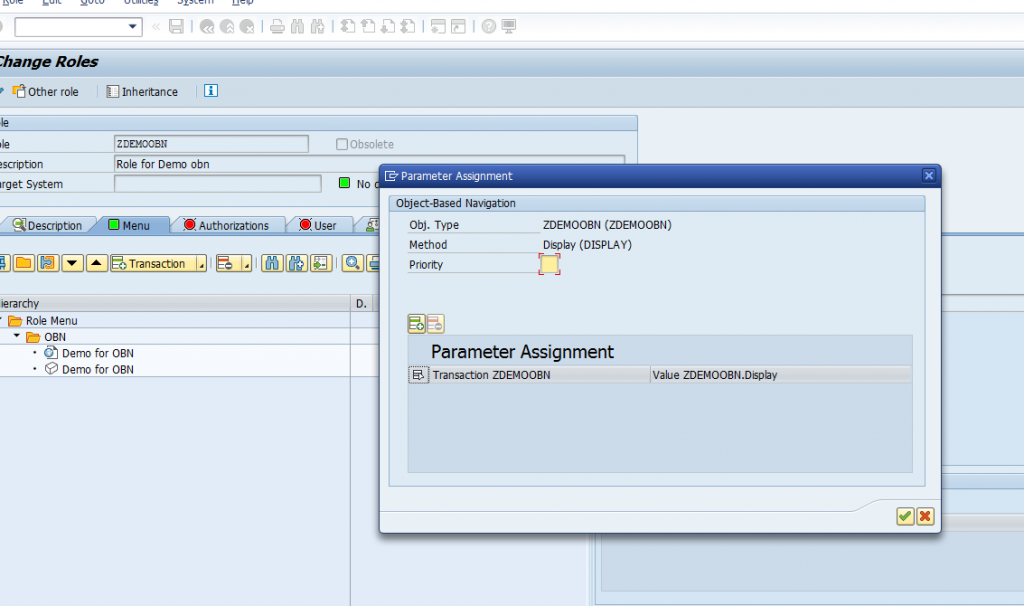
Can you see a section called Object-Based Navigation in the above screenshot? Now that is the trick. We will add the BO object created in step 1 and its method display by clicking on the insert icon. So once we call the OBN ie the object and its method at runtime from this role assignment it determines the transaction. Add the object type id and the Method id the from F4 help so that some of the other fields are auto-populated.
Press enter.
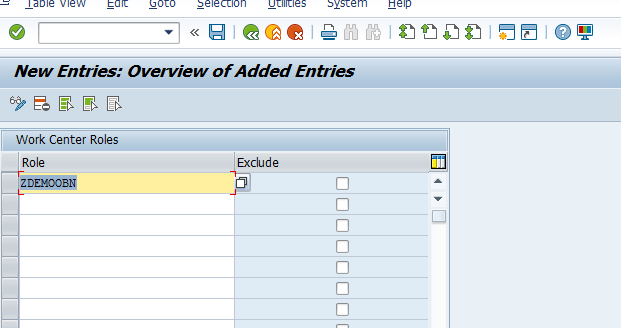
Now if we want to pass some data from web dynpro to OBN we can make use of parameters. As of now let’s add one parameter which is doc num which is on the web dynpro view.
Put the parameter name and the same name in parameter value but in 2nd brackets.
So we have added all the details in Menu tab.
Now come to authorizations tab, propose profile name and then generate the profile and save. Once done the tab will be green.
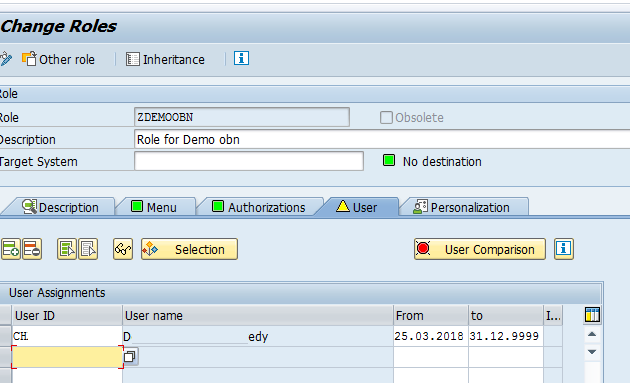
Then come to user tab and then add the users to whom this role should be assigned.
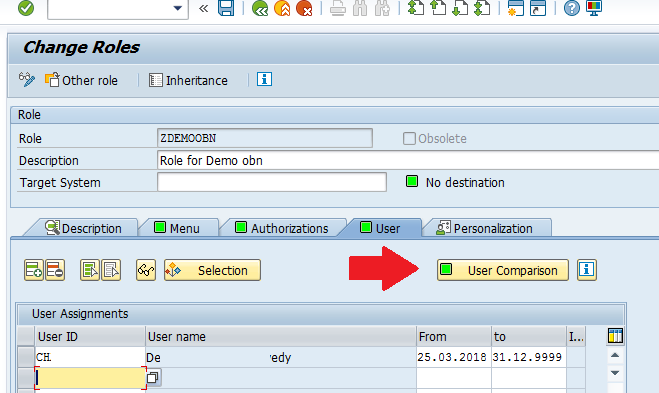
Click on user comparison button.
Once user comparison is done, the user tab will be green status. Then finally click on save.
So our PFCG role creation is completed. This role needs to be tested from NWBC.
So execute NWBC and click on the role ZDEMOOBN from the list of roles.
OOPs, we got the below error. “The user menu tree for user XXXX with role YYYY is empty. Please contact your system administrator”.
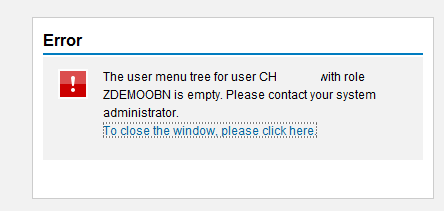
Again it took me some time to discover why we are getting this error and finally got the answer. Hope you would save some time.
The role entry needs to be maintained in a table DSWP_ROLES. So go to SM30 and create a new entry in this table.
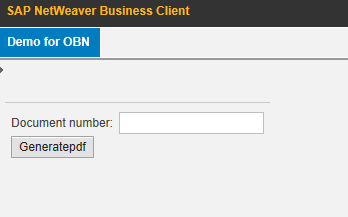
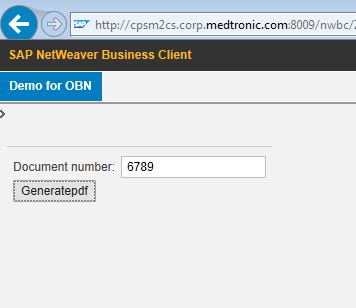
Then save the entry. Now again test in the same way ie go to NWBC and click on role ZDEMOOBN you get the web dynpro opened as below.
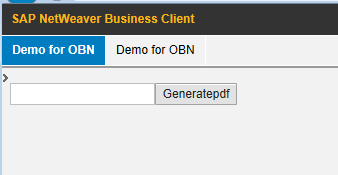
Frankly speaking, the screen does not look clean as the field and the button appears in the same line and also label is not displayed for the field. Also, 2nd tab Demo for OBN should not be visible as its the node for the transaction which will be called on click of the button.
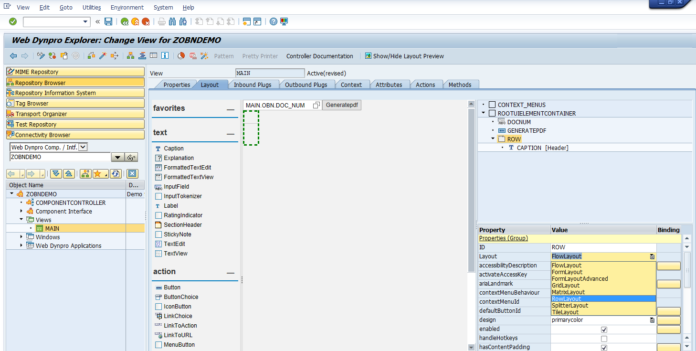
Let’s change the layout of webdynpro first. For that, we need to place the UI elements in a group of type Row layout or Matrix layout as below.
Right click on rootelementuicontainer and create an element of type Group.
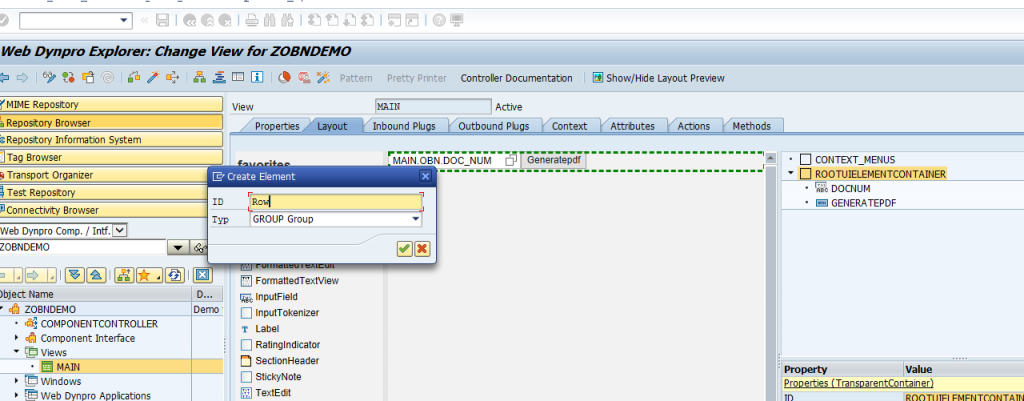
By default, the new group added has flow layout. Change it to row layout from the drop down as below and move both the UI elements in the group.
As the button needs to be in next line in layout data in the properties change the value from row data to row head data.
Also, create a label for document number.
Once the changes are done open the PFCG role and make the 2nd tab as invisible as shown below.
Now execute NWBC with that role again to test the changes.
You can play around with different type of layout and design more complex screens as per requirement. This is a simple crude screen with minimum elements to explain how OBN can be implemented. Now as we are done with the creation of all the objects we will implement the coding in the button event handler and the program that we created above.
Step 4: Implement method onactionclick of the main view as below. First, we need to get the value of the field on the screen.
Click on the wizard with the read operation and in context choose doc_num.
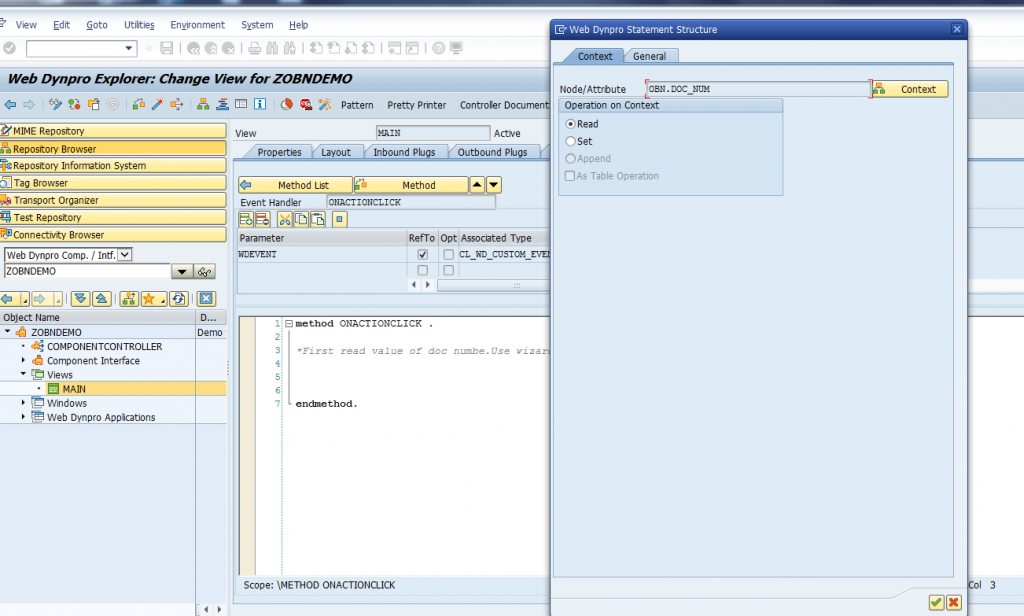
Press enter. Below code is generated by the wizard.
*First read value of doc numbe.Use wizard
DATA lo_nd_obn TYPEREF TO if_wd_context_node.
DATA lo_el_obn TYPEREF TO if_wd_context_element.
DATA ls_obn TYPE wd_this->Element_obn.
DATA lv_doc_num TYPE wd_this->Element_obn-doc_num.
* navigate from <CONTEXT> to <OBN> via lead selectionlo_nd_obn= wd_context->get_child_node( name = wd_this->wdctx_obn ).
* @TODO handle non existant child
* IF lo_nd_obn IS INITIAL.
* ENDIF.
* get element via lead selection
lo_el_obn= lo_nd_obn->get_element( ).
* @TODO handle not set lead selection
IF lo_el_obn ISINITIAL.
ENDIF.
* get single attribute
lo_el_obn->get_attribute(
EXPORTING
name= `DOC_NUM`
IMPORTING
value = lv_doc_num ).
EXPORTINGname= `DOC_NUM`IMPORTINGvalue = lv_doc_num ).
Now the actual part ie calling the OBN with the below code. This is done by calling method navigate_to_object of interface if_wd_portal_integration.
DATA: lo_api_component TYPE REF TO if_wd_component.
DATA lo_portal_manager TYPE REF TO if_wd_portal_integration.
TYPES:
BEGIN OF t_obn_param,
key TYPE string,
value TYPE string,
END OF t_obn_param.
DATA: lt_obn_param TYPE STANDARD TABLE OF t_obn_param.
DATA: ls_obn_param TYPE t_obn_param.
lo_api_component = wd_comp_controller->wd_get_api( ).
lo_portal_manager = lo_api_component->get_portal_manager( ).
CALL METHOD lo_portal_manager->navigate_to_object
EXPORTING
object_type = ‘ZDEMOOBN’ – *Object type created in Step 1
object_value_name = ‘G_DOCNUM’ – *Name of the parameter assigned in PFCG config- Check above
object_value = lv_doc_num – *Value of the above parameter input on the web dynpro screen
operation = ‘Display’ – *Method of the object type which will resolve OBN
The system was told to call a Business Object called ZDEMOOBN with the method Display (ZDEMOOBN.Display). When that call was executed it searches the Roles assigned to the logged in user for an entry with the OBN assignment ZDEMOOBN.Display.
When found in the Role, it will execute the transaction assigned to that menu point and passed the value from the Screen field to the parameter G_DOC_NUM in transaction ZDEMOOBN.
In case you need to pass more than 1 parameter method NAVIGATE_TO_OBJECT has a parameter called business_parameters. In that case, we need to make use of this parameter instead of object_value_name and object_value.
For example add the parameters as below.
ls_obn_param-key = ‘p_param1’.
ls_obn_param-value = ’17’.
APPEND ls_obn_param TO lt_obn_param.
ls_obn_param-key = ‘p_param2’.
ls_obn_param-value = ‘X’.
APPEND ls_obn_param TO lt_obn_param.
CALL METHOD lo_portal_manager->navigate_to_object
EXPORTING
object_type = ‘ZDEMOOBN’
operation = ‘Display’
business_parameters= lt_obn_param.
In our case, we will make use of only 1 parameter.
Done with the basic coding of webdynpro view. Now we will implement the code required to save a word doc on the desktop in the report and then do end to end testing.
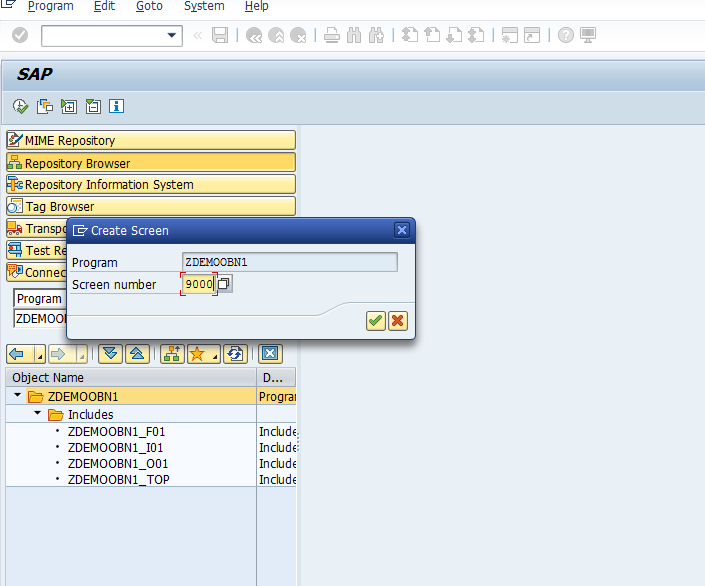
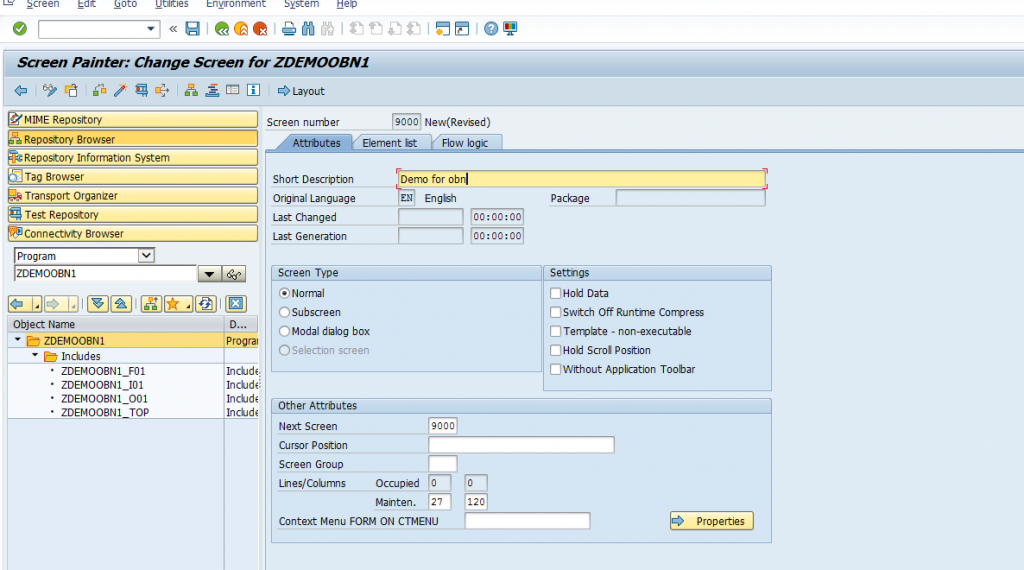
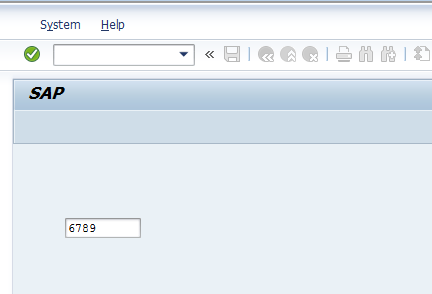
Remember we created a screen 9000 in module pool program ZDEMOOBN1 and not a simple report program. Well, the reason is that whatever parameters are being passed through OBN the program can receive those parameters with screen fields of the same name. Took some time for me to understand this.
So, in this case, we will create a screen field with name G_DOCNUM so that the value of G_DOCNUM which in this case is the document no input on the webdynpro screen.
Let’s run NWBC with the desired role and check whether the value of doc number input on webdynpro UI screen gets flowed to the GUI program or not.
We have not written any logic. Just will check the behavior.
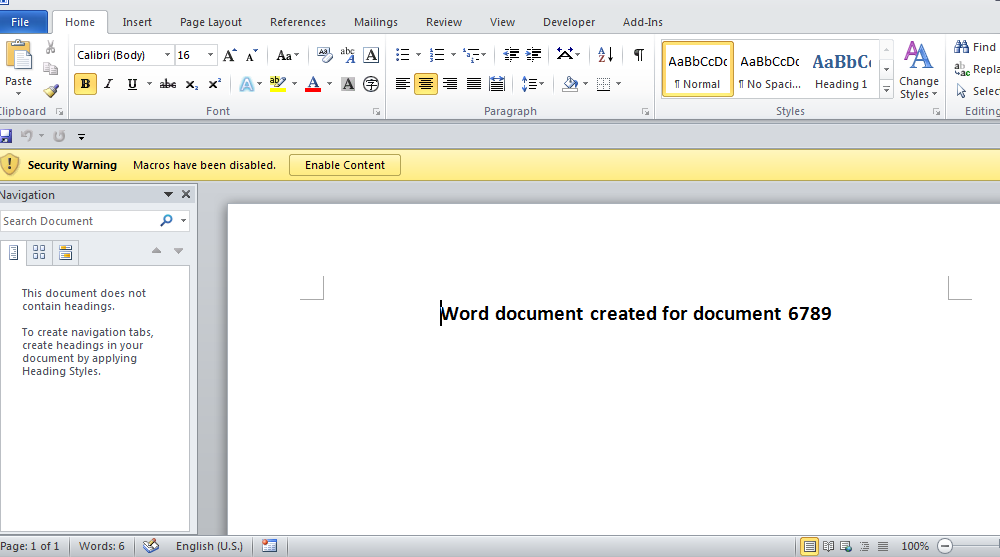
Since we do not need the user show this field we will make the field no – display and generate a word document in local drive with a text ‘ Word document created for document G_DOCNUM value ‘.
In PBO make screen field as no-display.
if g_docnum is not initial.
loop at screen.
if screen-name = ‘G_DOCNUM’.
screen-active = ‘0’.
modify screen.
ENDIF.
endloop.
endif.
Code for saving the word doc on the desktop using OLE.
Code in PBO of screen 9000 just after the above code.
DATA: w_word TYPE ole2_object,
w_actdoc type ole2_object,
w_document TYPE ole2_object,
w_add type ole2_object,
w_selection TYPE ole2_object,
w_font TYPE ole2_object,
w_paragraphformat TYPE ole2_object,
w_system(10),
w_line(80).
if g_docnum is not initial.
* Create OLE automation object of type Word.Application.
CREATE OBJECT w_word ‘Word.Application’.
* Display MS-Word when executing the program.
SET PROPERTY OF w_word ‘Visible’ = 0.
* Add a new blank document.
CALL METHOD OF w_word ‘Documents’ = w_document.
CALL METHOD OF w_document ‘Add’ .
* call method of W_WORD ‘Activate’.
get property of w_word ‘ActiveDocument’ = w_actdoc.
* Add data to the new MS-Word document.
CALL METHOD OF w_word ‘Selection’ = w_selection.
CALL METHOD OF w_selection ‘ParagraphFormat’ = w_paragraphformat.
CALL METHOD OF w_selection ‘Font’ = w_font.
* Use bold, a bigger font and center the title.
SET PROPERTY OF w_paragraphformat ‘Alignment’ = 1.
SET PROPERTY OF w_font ‘Size’ = 16.
SET PROPERTY OF w_font ‘Bold’ = 1.
CONCATENATE ‘Word document created for document’ g_docnum
INTO w_line SEPARATED BY space.
* Export title to Word document.
CALL METHOD OF w_selection ‘TypeText’
EXPORTING #1 = w_line.
CALL METHOD OF w_selection ‘TypeParagraph’.
GET PROPERTY of w_word ‘ActiveDocument’ = w_actdoc.
CALL METHOD of w_ACTDOC ‘SaveAs2’
exporting #1 = ‘H:\demoobn9.docx’
2=12
CALL METHOD OF w_word ‘Quit’.
ENDIF.
Testing steps:
- Execute NWBC tcode and click on role ‘ZDEMOOBN’
- On the webdynpro screen give doc number as 6789 and click on generate pdf.
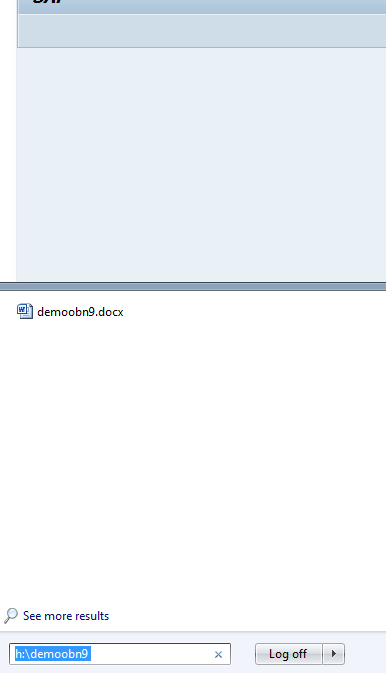
- GUI transaction will be called and a word doc ‘Demoobn9’ will be saved in H drive.
So the word doc will be generated as below.