Purpose:
The purpose of this blog is to explain how SAP DWC task chain can be scheduled or executed from SAP BTP cloud foundry environment using Node JS, so that SAP BTP can be used as a universal scheduling platform.
SAP DWC Task Chain:
SAP Task Chain is used to execute series of task like Table Replication, View Persistency and Data Flow runs. We can compare SAP DWC Task Chain with SAP BW Process Chain.
- In this blog Sample Task Chain to persist view will be created.
- That task chain will be executed from SAP BTP Cloud Foundry environment using Node JS.
- For Authentication purpose Oauth 2.0 will be used
SAP Data Warehouse Cloud provides a public OData API to execute APIs inside DWC.
Here OAuth2.0 authorization with grant type Authorization Code is being used to authenticate request from Node JS.
Technical Details:
Let’s first create a simple Task chain which will persist data of a remote table.
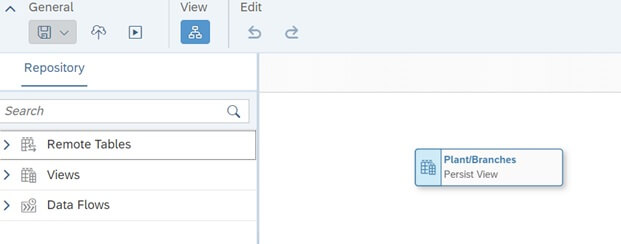
Let’s find out the backend executable link generated while executing Task Chain in DWC.
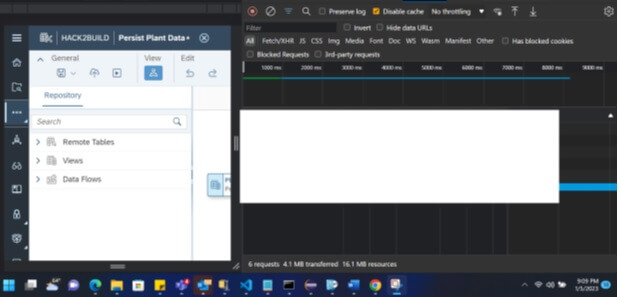
Open inspect from browser before executing Task chain. Open network tab as shown in below screenshot.
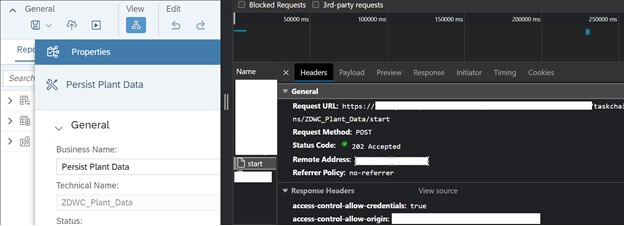
Now hit Execute. As shown in below screenshot request url “*/start” is being used in backend to execute task chain in SAP DWC.
Now we will execute this “*/start” URL from node js to execute task chain.
Technical set-up:
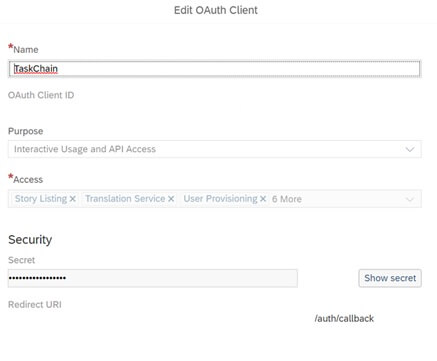
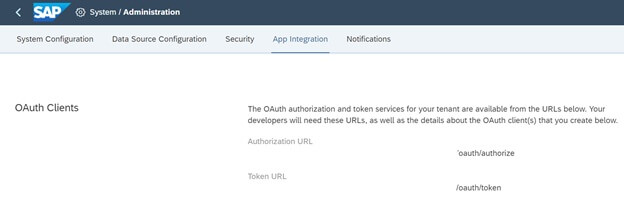
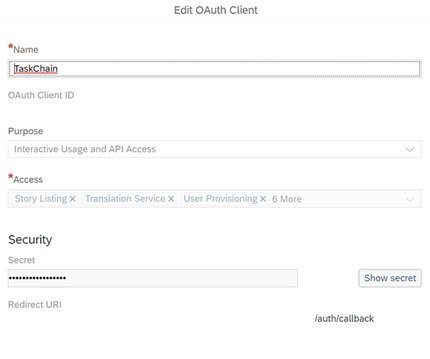
In SAP Data Warehouse Cloud, create an OAuth Client with the following specifications:
Purpose: Interactive Usage
Redirect URI: We will discuss about this URL later
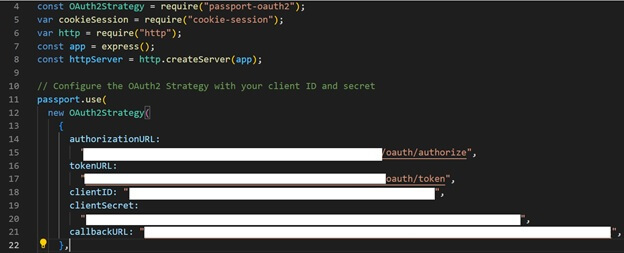
Note down OAuth Client ID and Secret code, we will use this information in Node JS to execute Task Chain.
Note down below authorization URL and Token URL from SAP DWC App Integration
Now let’s create Node JS project to execute Task Chain
Passing Authorization URL, Token URL, ClientID, Client Secret & Call back URL from SAP DWC as mentioned earlier to get access token from SAP DWC.
Lets try to post “*/start” with above information in Postman to check if this process is working.
Go to Postman and enter Authorization URL, Token URL, ClientID, Client Secret & Call back URL.


After entering above information click Get New Access Token
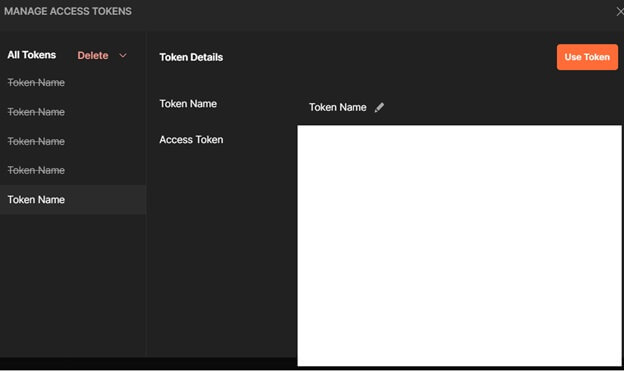
After successful authentication clink Use Token. Then click on Send

Status Code 202 – Job successfully executed, check SAP DWC integration monitor if the Task chain is running.

Task Chain ran successfully in DWC.

Let’s get back to Node JS code.
Passing access token for validation of request.
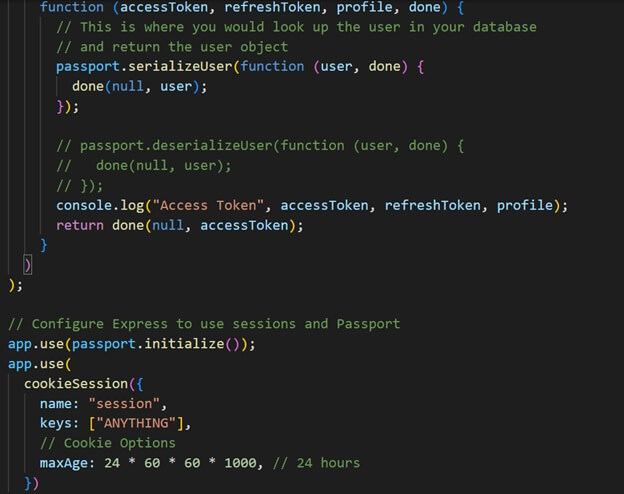
Here is the main code to Post start URL with Access Token and Cookies generated from above code.
Now let’s Push this code in SAP BTP Cloud Foundry.

App successfully deployed in Cloud Foundry.
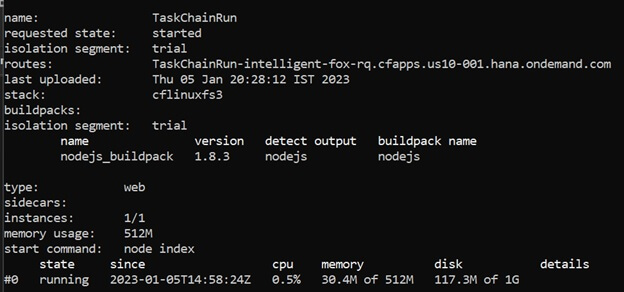
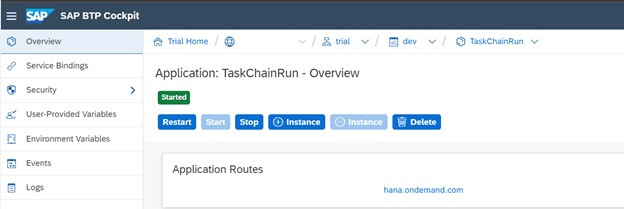
Now go to SAP BTP Cloud Foundry and get the URL of the deployed APP.
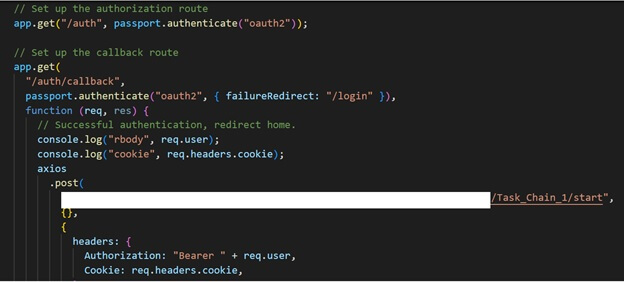
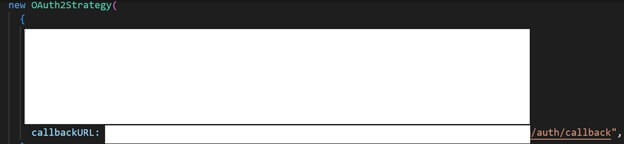
Now take the URL and add “/auth/callback”, this will be redirect URL. We have mentioned same URL in Node JS as shown in below screenshot.
Put this URL in OAuth client Redirect URL section in SAP DWC.
Now execute App URL from SAP BTP with “/auth” added at the end.
Lets check Integration Monitor in SAP DWC. Task Chain started running.

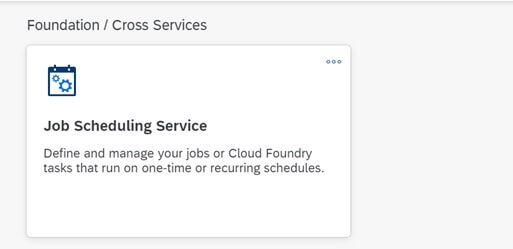
We can schedule this node JS application periodically from SAP BTP Job Scheduling Service.
To execute failed Task Chain replace “start” with “/retry” in the execution URL.
Appendix 3: All Project Files
In this appendix you can find all files required to run the described sample application.
manifest.yml
---
applications:
- name: TaskChainRun
  random-route: true
  buildpack: nodejs_buildpack
  memory: 512M
  command: node index
package.json
{
  "name": "node",
  "version": "1.0.0",
  "description": "",
  "main": "index.js",
  "dependencies": {
    "axios": "^1.2.2",
    "cookie-session": "^2.0.0",
    "express": "^4.18.2",
    "express-session": "^1.17.3",
    "nodemon": "^2.0.20",
    "passport": "^0.5.3",
    "passport-oauth2": "^1.6.1"
  },
  "devDependencies": {},
  "scripts": {
    "test": "echo \"Error: no test specified\" && exit 1"
  }
}
index.js
const express = require("express");
const axios = require("axios");
const passport = require("passport");
const OAuth2Strategy = require("passport-oauth2");
var cookieSession = require("cookie-session");
var http = require("http");
const app = express();
const httpServer = http.createServer(app);
// Configure the OAuth2 Strategy with your client ID and secret
passport.use(
new OAuth2Strategy(
{
authorizationURL:
"*/oauth/authorize",
tokenURL:
"*/oauth/token",
clientID: "clientid",
clientSecret:
"clientSecret",
callbackURL: "*/auth/callback",
},
function (accessToken, refreshToken, profile, done) {
// This is where you would look up the user in your database
// and return the user object
passport.serializeUser(function (user, done) {
done(null, user);
});
// passport.deserializeUser(function (user, done) {
// done(null, user);
// });
console.log("Access Token", accessToken, refreshToken, profile);
return done(null, accessToken);
}
)
);
// Configure Express to use sessions and Passport
app.use(passport.initialize());
app.use(
cookieSession({
name: "session",
keys: ["ANYTHING"],
// Cookie Options
maxAge: 24 * 60 * 60 * 1000, // 24 hours
})
);
// Set up the authorization route
app.get("/auth", passport.authenticate("oauth2"));
// Set up the callback route
app.get(
"/auth/callback",
passport.authenticate("oauth2", { failureRedirect: "/login" }),
function (req, res) {
// Successful authentication, redirect home.
console.log("rbody", req.user);
console.log("cookie", req.headers.cookie);
axios
.post(
"*/Task_Chain_1/start",
{},
{
headers: {
Authorization: "Bearer " + req.user,
Cookie: req.headers.cookie,
},
}
)
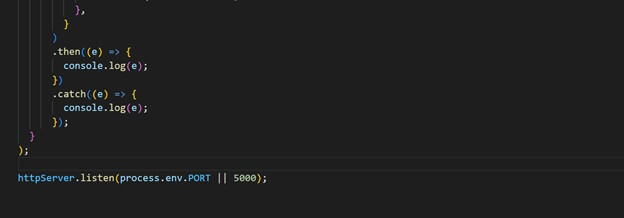
.then((e) => {
console.log(e);
})
.catch((e) => {
console.log(e);
});
}
);
httpServer.listen(process.env.PORT || 5000);Using the command line client dis recommended, as it is faster (and you’ll anyways need it, once you have to update a service)
Deploy:
Use cf push from command promt
Logs:
cf logs my App –recent


