Introduction
In SAP S/4HANA Cloud Master Data, there are 2 useful apps ‘Export Master Data’ and ‘Mass Maintenance for Master Data’ that can be used for the Product Master and Business Partner areas to allow a customer to export master data to Excel for filtering/reporting purposes and also for mass update of data to reduce manual effort
A little-known gem of these apps is that it also allows the Export / Mass update of Classification as well!
For Classification, the initial creation is uploaded using the Migration Object ‘Object classification’ in the app “Migrate your data” but afterward if you wish to mass update the classification assigned to an object such as Material (class type 001) there is no Classification app like transaction CLMM for SAP S/4HANA Cloud.
The API and Interface API_PRODUCT_SRV and PRODUCTMDMBULKREPLICATEREQUEST respectively support the update of ( POST / PATCH / PUT ) for Product Master Data fields but does not include Classification
There is an API for Classification which is API_CLFN_PRODUCT_SRV but it only allows READ operation and not update (POST / PATCH / PUT ) as of SAP S/4HANA Cloud Essentials Edition 2102
The use of these 2 apps ‘Export Master Data’ and ‘Mass Maintenance for Master Data’ allow update of classification as a workaround till dedicated classification apps / APIs are available in future releases
What Apps and Roles are needed to follow this blog post to mass update material classification?
The following example was tested in an SAP S/4HANA Cloud 2102 Essentials System.
The User involved has 2 roles SAP_BR_PRODMASTER_SPECIALIST and
SAP _BR_PRODUCT_CONFIG_MODELER assigned.
With the role SAP _BR_PRODUCT_CONFIG_MODELER you are able to access the ‘Manage Characteristic’ and ‘Manage Class’ apps to create the characteristics involved and to add them to a new class of type 001 ( Material Class )
With the role SAP_BR_PRODMASTER_SPECIALIST you are able to follow the process of creating the products involved and then use the apps ‘Export Master Data’ and ‘Mass Maintenance for Master Data’ to download, change and reupload to mass change the classification
Creating the Test Data
The example consists of 2 products, 4 characteristics of different formats, and 1 class of type 001 – Material Class
Step 1: Creating the characteristics
- Open the app ‘Manage Characteristics’
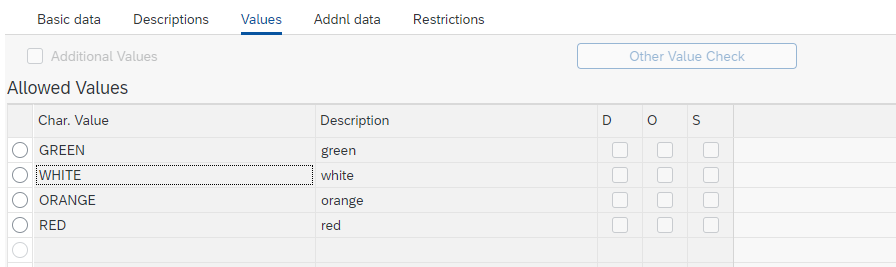
- Input characteristic name, for example, COLOUR and Create button
- Input description and in the dropdown for Data Type, select ‘Character format’
- Under Value assignment – select “Single-value”
- Press Enter
- For the field ‘Number of chars’, input a value for a number of chars, for example, 8
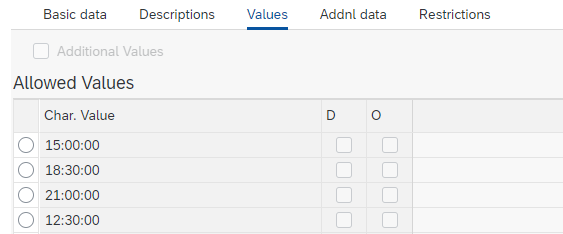
- Navigate to the values tab
- Input a char value’s and description
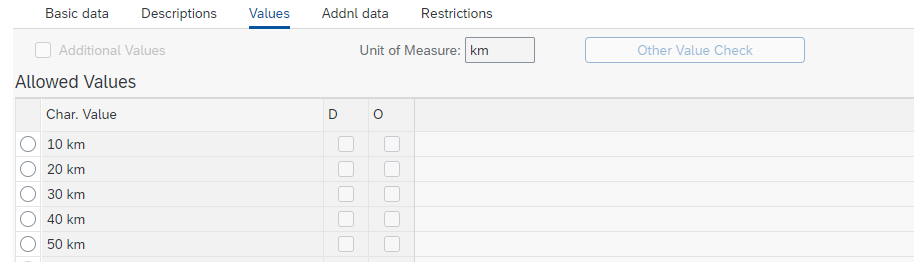
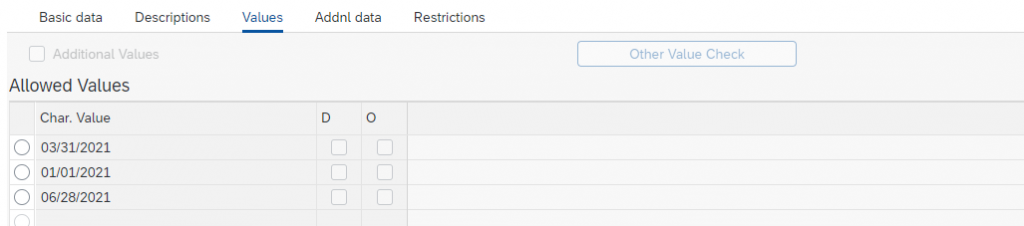
Repeats steps 1 to 8 and create different characteristics of type ‘Numeric Format’,’ Time Format’ and ‘Date Format’
All characteristics have the Value assignment – select “Single-value”
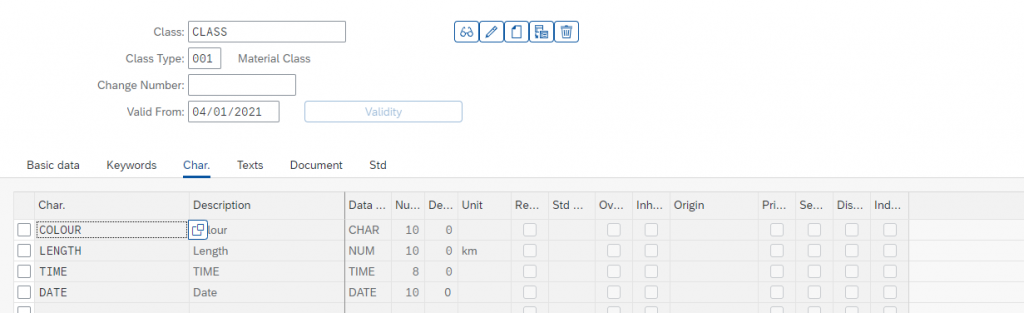
Step 2: Creating the Class
- Open the app ‘Manage Classes’
- Input class name
- Input class-type 001
- Press create button
- Input class description
- Navigate to char. Tab
- Input chars created from Step 1
- Press save
Step 3 Creating the product (s )
- Open the app ‘Manage Product Master Data’
- Click on the create button
- In the Create Master Data Record popup, input a product number (for example PRODUCT_1), Material Type (FERT Finished Product ), Base Unit ( EA ), and a product description
- Press ok
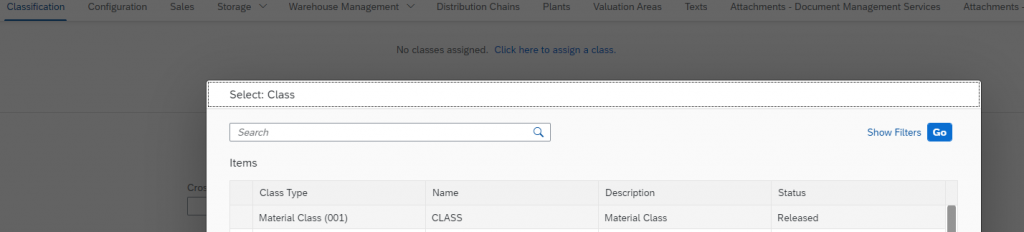
- Navigate to the Classification tab
- Click on the button “Click here to assign a class”
- In the popup that appears, input the class created previously in Step 2 (of type 001)
8. In the dropdown for each characteristic, select a value

9. SAVE when finished evaluating all characteristics
Repeat steps 1 – 9 for how many materials you wish to test with
Process for mass updating the material classification
Exporting the material and its classification to excel using the app ‘Export Master Data’
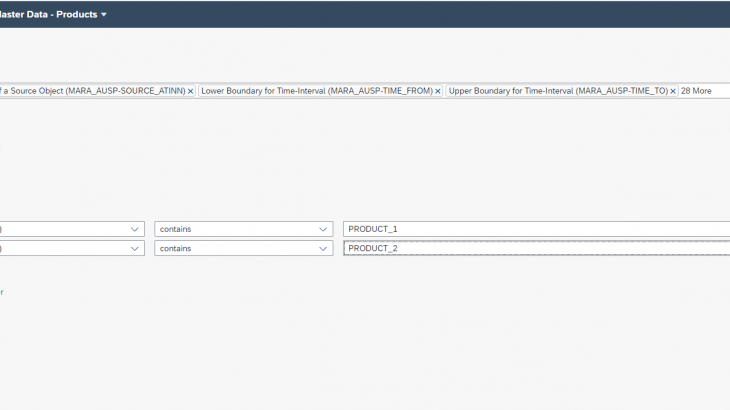
- Open the app ‘Export Master Data – Products’
- For the field “Select specific Fields” – press the F4 / popup window
- Press the button ‘show filters’
- Search for field MARA-MATNR_EXTERNAL
- Press the select button
- In the ‘Table Name’ field, input AUSP
- Clear the field ‘Field Name’ (was MATNR )
- Press the ‘Go’ button
- Select all entries returned
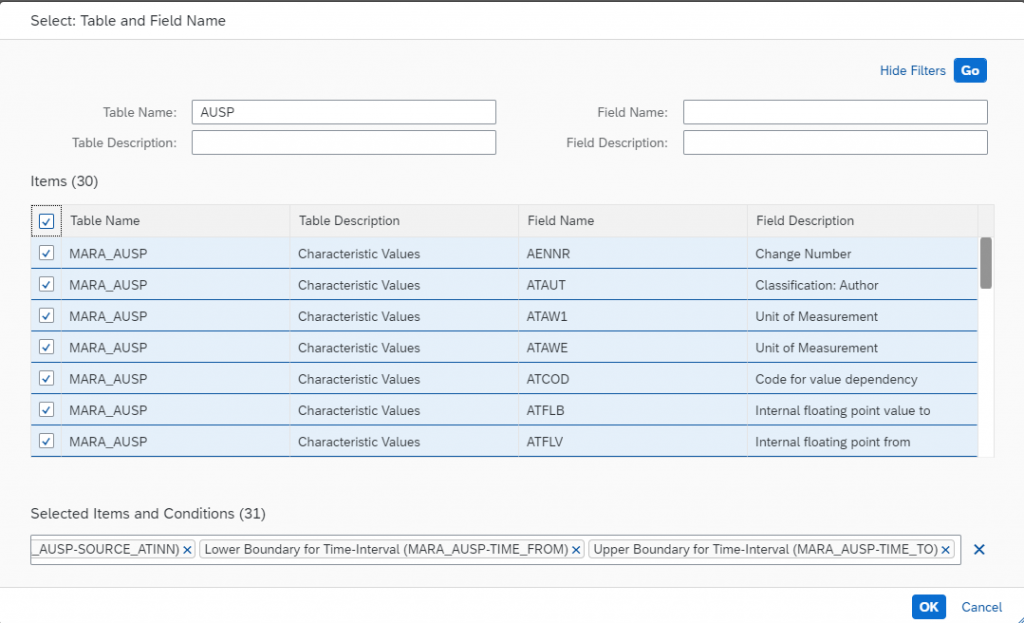
10. Press the ‘Ok’ button
11. Under “Select Products”, input the materials you created previously in Step 3
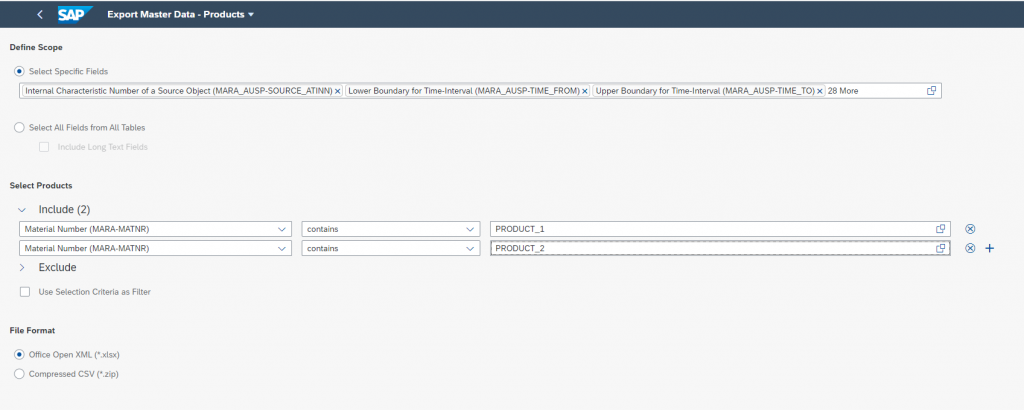
12. Under ‘File Format’ – select ‘Office Open XML (*xlsx )
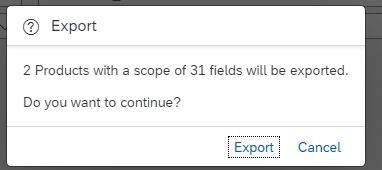
13. Press the Export button
14. Press ‘Export’ on the popup
Changing / Understanding the Exported File
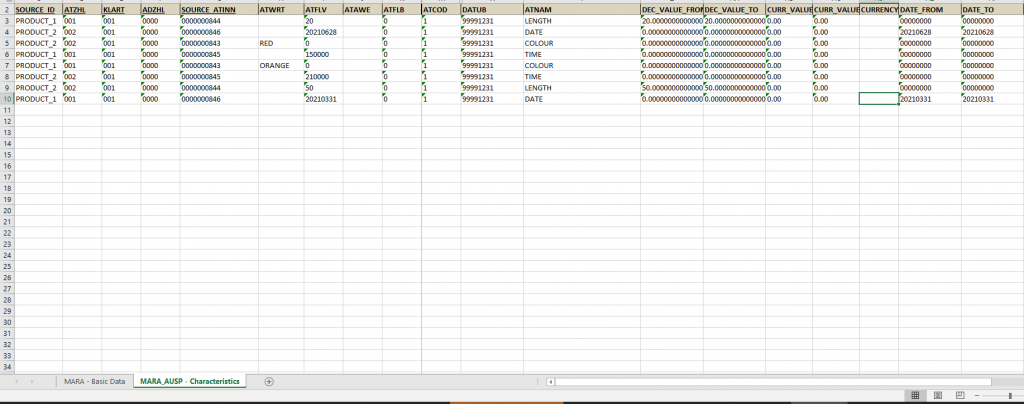
Open the Excel file created in the previous step. The Excel file has 2 tabs‘MARA – Basic Data’ and ‘MARA_AUSP – Characteristics’
The Tab ‘MARA – Basic Data’ contains the materials and ‘MARA_AUSP – Characteristics’ contains the characteristic values
The characteristic values for an object are maintained in the columns ATFLV, ATWRT, DEC_VALUE_FROM, DEC_VALUE_TO, DATE_FROM, DATE_TO, TIME_FROM, and TIME_TO
Update the excel sheet with new values ( in accordance with what is already defined for each characteristic in the Manage Characteristic app )
Uploading the changed Excel sheet and mass updating the Product Classification
- Open App ‘Start Mass Maintenance – Products’
- Press the Browse button
- Navigate and select the Excel sheet that was updated with the new classification values
- Press Open
- Maintain a Description and press save
- a message ‘ A new process is being created is shown
- A screen will appear with the number of records (Products) to be changed and the field MARA_AUSP-ATWRT shown under “Fields in Scope”
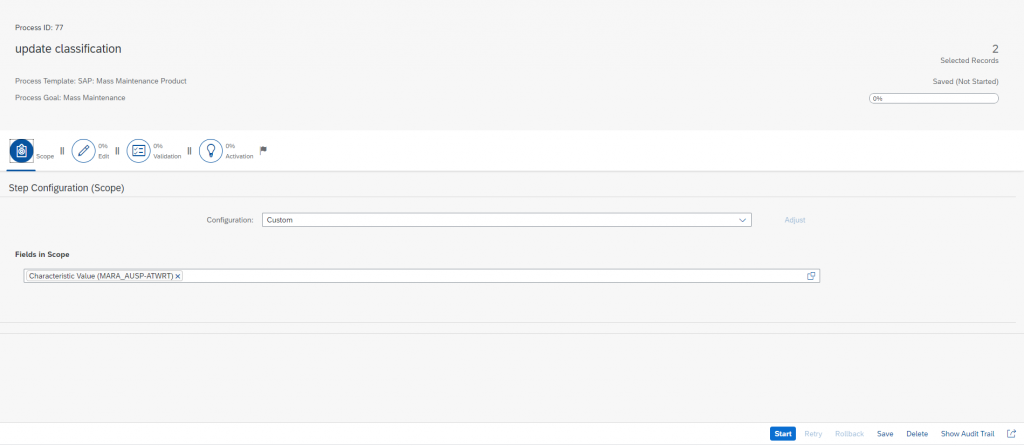
8. Press the ‘Start’ button
9. A message ‘ Process started’ is shown
It is now in the stage ‘Stopped for Review (Edit)’.
Here you can see under the bar graph what is planned to be changed ( in orange ) and what is left unchanged ( in blue )
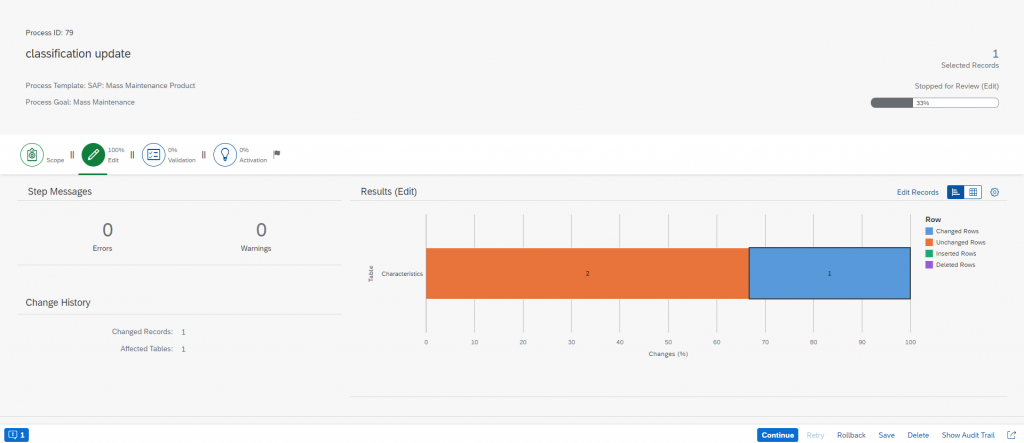
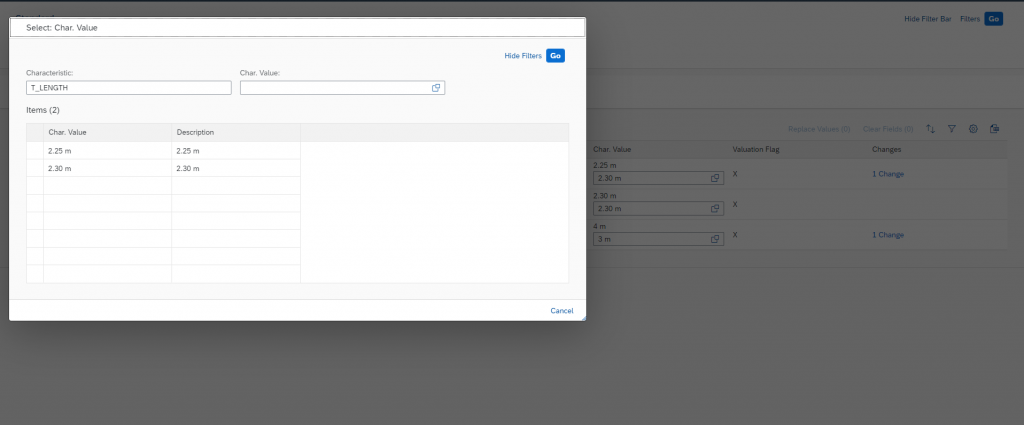
If you wish to review in more detail the values that are planned to be updated, please use the button ‘Edit Records’ and navigate to tab Characteristics. Here you can manually update a value if it was not set in the excel sheet that was uploaded. Press the back button takes to the ‘Stopped for Review (Edit)’ page.
10. if you are happy with the intended changes, please continue the message ‘Process continues’
11. The progress will finish in status ‘Completed’ and the Bar chart will appear in Green
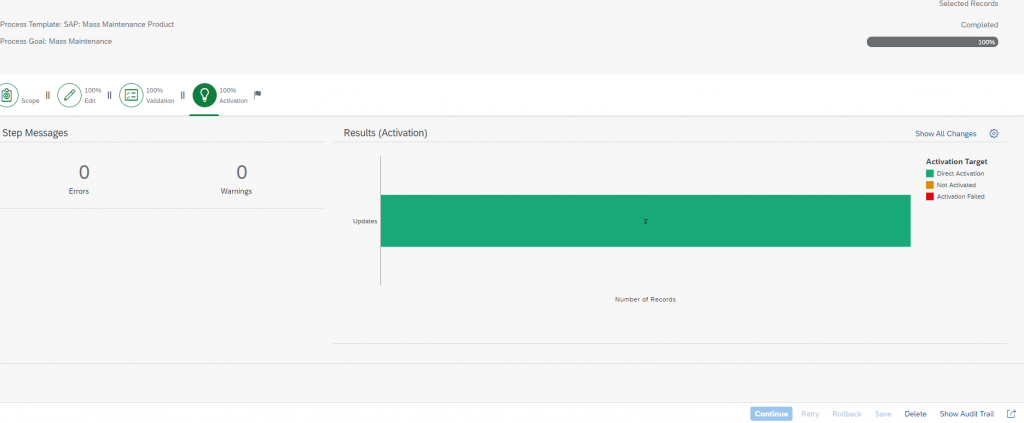
If you check now in the Manage Product Master Data app, the products should now be updated with the new classification!


