1. Introduction
1.1. Background
Jeff possesses extensive expertise in SAP BW, SAP BW on HANA, SAP BW4HANA, Native Hana, Business Objects, Data Services, SAP DataSphere, and SAP Analytics Cloud (SAC). He is currently based in Brisbane, Australia.
1.2. Purpose of this Post
In my role as an SAP Data Analytics Consultant, my experience with Cloud and the SAP Cloud Application Programming Model (CAP) solution is limited. However, I welcome the opportunity to build a Proof of Concept (POC) focused on creating SAP HANA Calculation views in HANA Cloud and generating insightful stories through SAP Analytics Cloud (SAC).
1.3. Calculation View VS CDS View
We are constructing a custom solution directly within SAP HANA Cloud, with no direct integration with S/4HANA Cloud. Therefore, the most optimal approach is to create Live SAP Analytics Cloud stories through HANA Calculation Views. There will be no involvement of SAP Datasphere since there is no hyperscaler scenario.
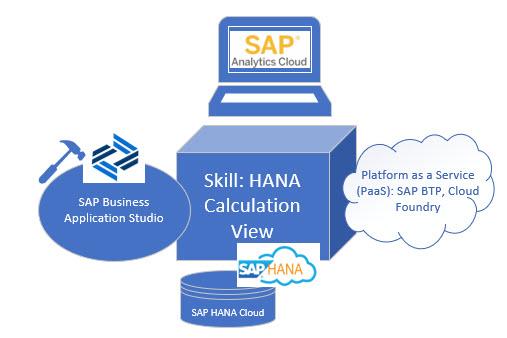
1.4. High Level Architecture
2. Steps by steps in SAP HANA Cloud
2.1. Get access to the SAP HANA Cloud and relevant tools.
Please follow the link to request a free trial access to SAP HANA Cloud and set up SAP Business Application Studio.
2.2. Create Database Artifacts in SAP HANA Cloud.
Create tables in SAP HANA Cloud that will be joined in the SAP HANA Calculation view later.
2.3. Build the Calculation View and deploy it.
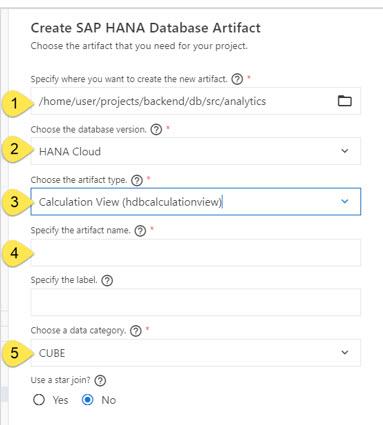
Click “Ctrl+Shift+P” / Go to “View” in toolbar & select “Find Command” > Create “SAP HANA Database Artifact”

Fill up all the details and below and create a unique artifact name for your calculation view (eg. CV_TEST_QUERY).
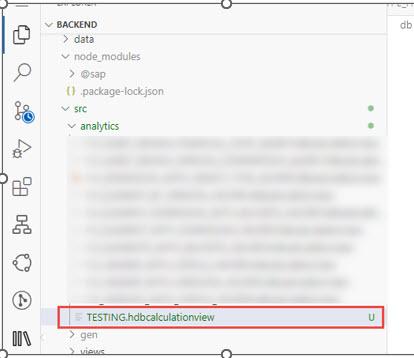
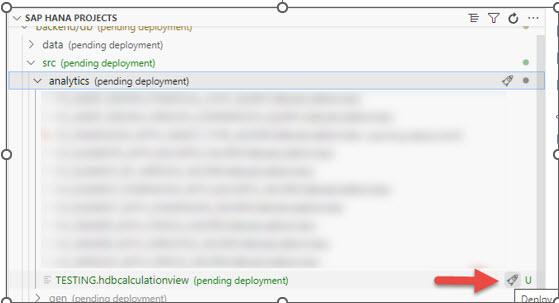
The Calculation View that has been successfully created will now be visible in the selected folder.
Use the “Rocket” icon to deploy single file/ entire analytics folder and you should get a successfully deployed message in your console at the bottom.
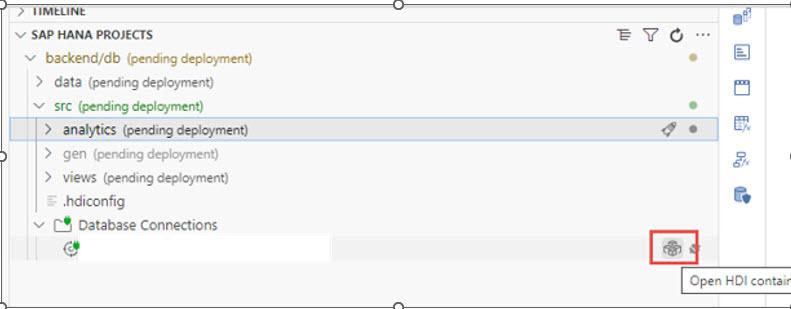
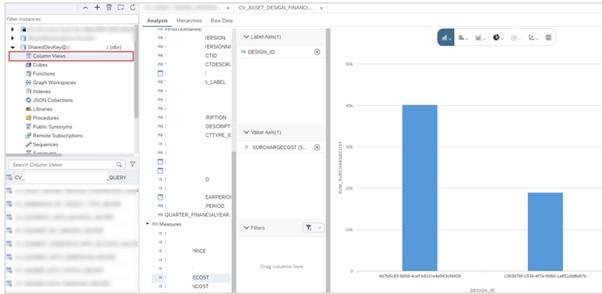
To verify the calculation view is deployed properly and validate the data you can open the SAP HANA database explorer and run the calculation view to visualize the data.
Full detail steps to create the HANA calculation view can follow the steps via this link.
2.4. Get the connection details from SAP BTP Cockpit
Log into the SAP BTP Cockpit. Select the relevant Subaccount.
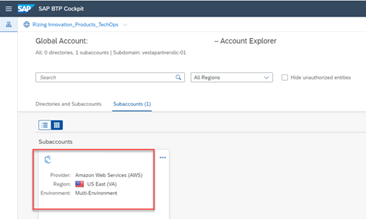
Select the relevant space.

Select Services > type the instance name > click on it.
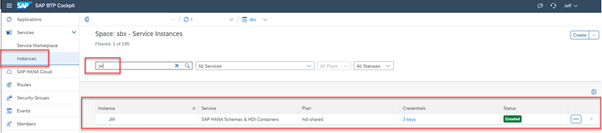
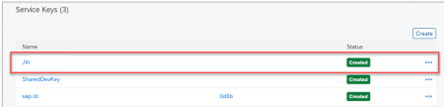
Select the right service key.
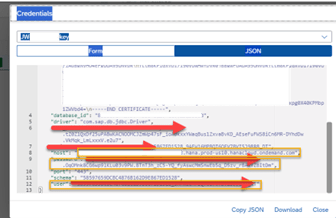
Copy the host, user and password for the connection details which needed in SAC.
3. Steps by steps in SAC
3.1. Access to SAC.
You may request SAC free trail account via this link.
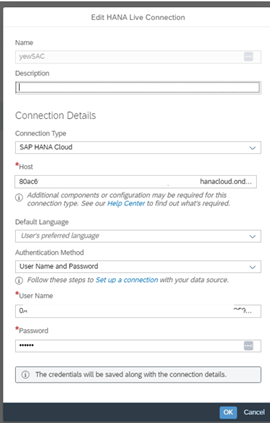
3.2. Create HANA Cloud Connection
Note: You might not have the authorization to create HANA Cloud connection via SAC free trail account.
Select Connection > “+”
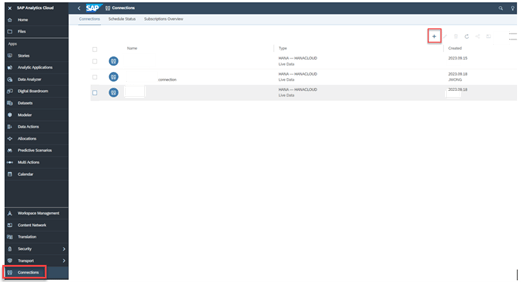
Enter the host, username and password from step 2.4
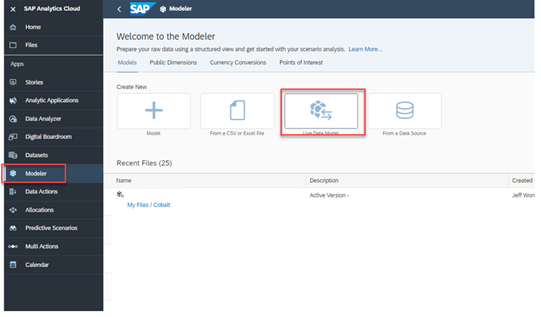
3.3. Create Live Data Model.
I need to add the SAP HANA Calculation view into the Live Data Model.
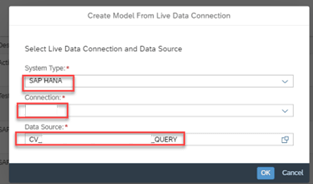
Select Modeler > Live Data Model
Select the System Type “SAP HANA”, relevant connection that just created and search the Calculation View.
Have a quick view in the measure and rename the descriptions.
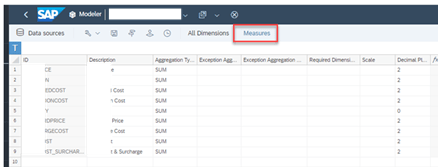
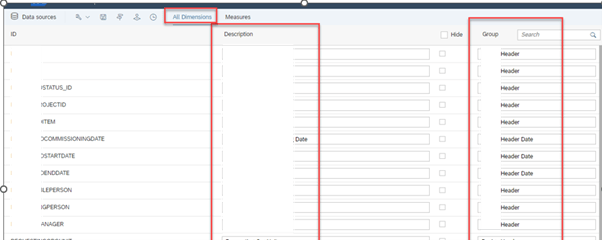
Select All Dimension > Update the descriptions and update the groups as well. This is helpful when you try to drag and drop the dimensions in SAC stories. Remember save the Model.
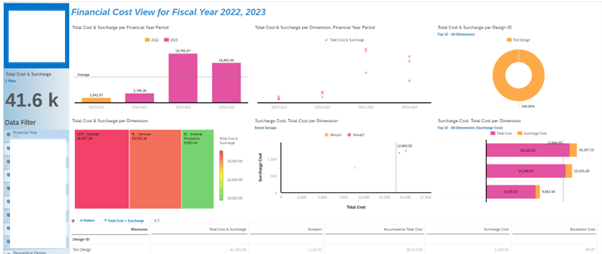
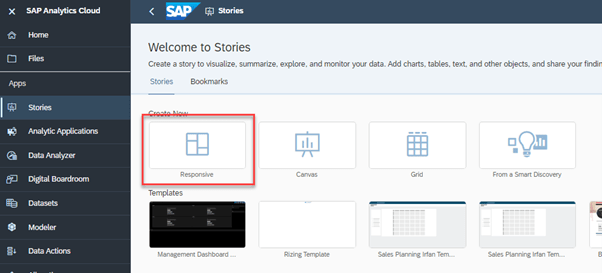
3.4. Create Stories
Select Stories > Responsive.
Below is the sample story that created. The performance is great even though the server is located in US and I’m based in Australia.