The frequent occurrence of accidental data deletion is largely attributed to human error and can result in the loss of critical employee or system data which may cause dominoes effect across the system landscape, and other consequences. While there are remedial measures such as running audit reports and data retrieval to address such incidents, it is essential to acknowledge that prevention is preferable to cure.
Therefore, organizations should take a proactive approach to prevent such incidents from occurring. Both technical and non-technical measures can be employed, but this article focuses on a technical solution that can prevent accidental data deletion
In this blog post, we’ll discuss how to remove delete option for any custom portlet to avoid accidental data deletion
Let’s delve into two scenarios under each of the options – RBP and Configuration UI – to help you find the best fit for your needs.
Role Based Permissions (RBP):
Let’s start with the RBP option. This option is perfect if you want to grant different permissions for different roles, allowing you to keep the delete option for a few roles and remove it for others. However, keep in mind that this option can be time-consuming as you’ll need to update all the concerned roles with the required permission for the concerned objects.
Scenario 1: Portlet with base object which has effective dating
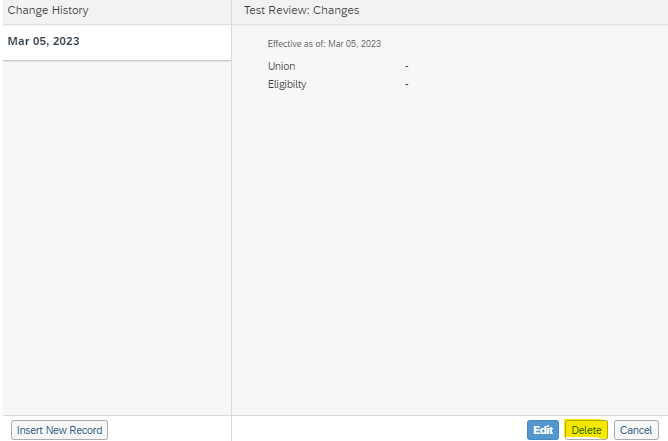
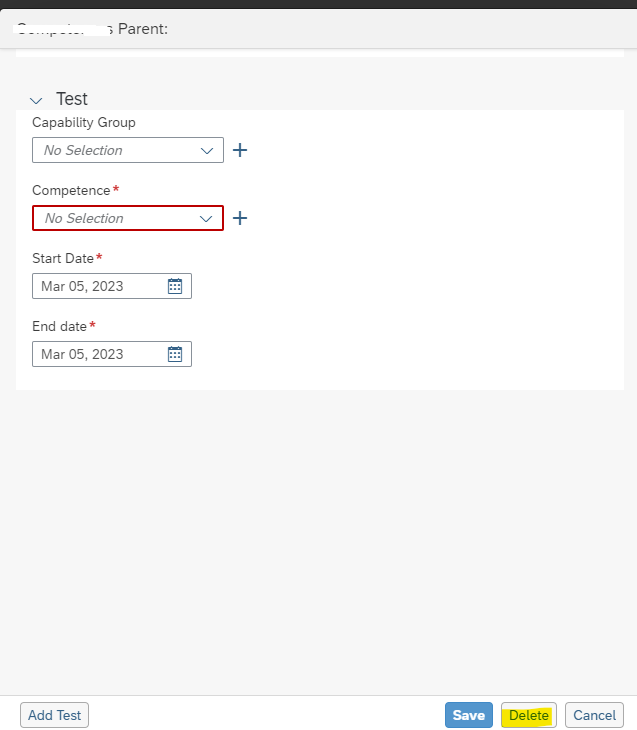
Lets go through the steps to remove the “Delete” button of the portlet highlighted below
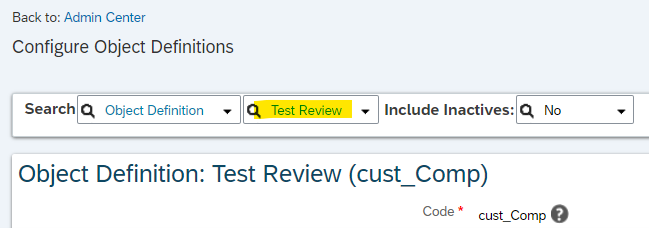
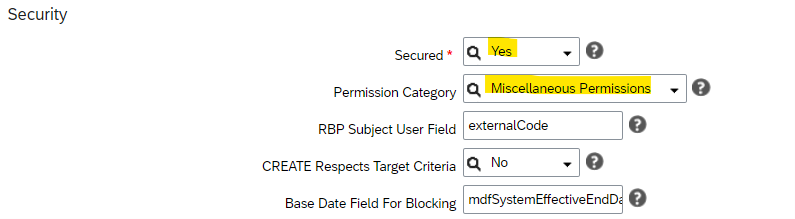
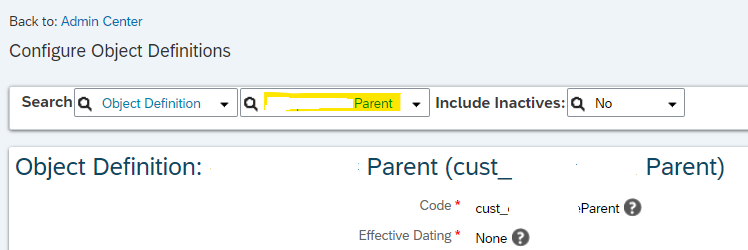
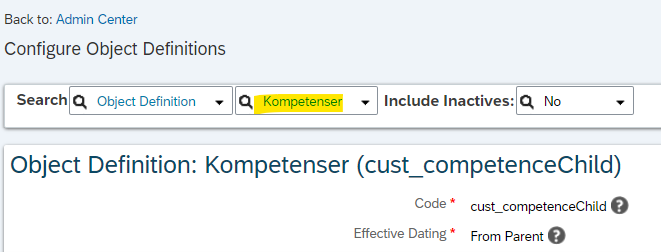
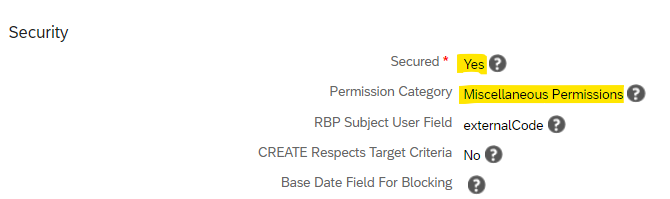
First, make sure to secure your MDF object, head to “Configure Object Definitions,” choose the required object, and update the security section’s fields as highlighted in the screenshot and save the object
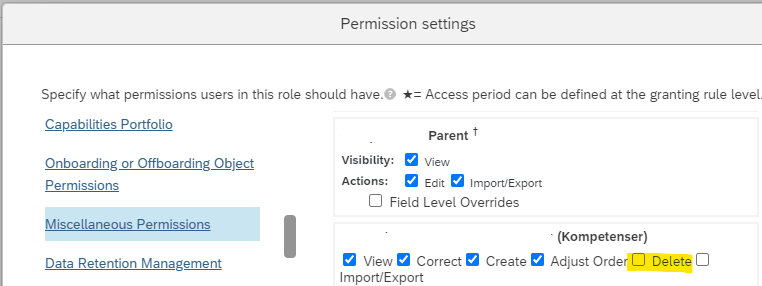
Once you’ve secured the object, go to “Manager Permission Roles” to remove the delete option for the concerned role. Open the required role, click on the permission button to see permission settings, and uncheck the delete option in the selected permission category before saving the role.
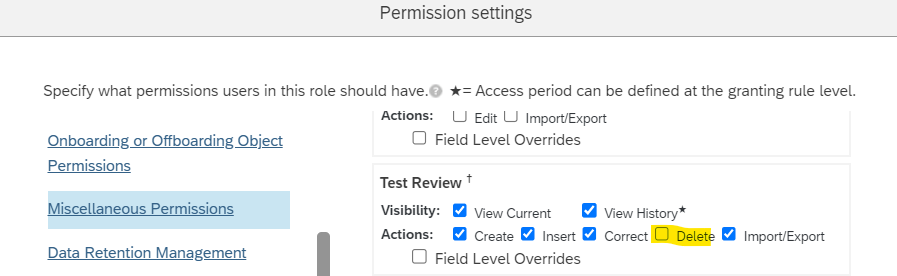
You’ll no longer see the “Delete” button for the people who have that role.
In scenario 2: Portlet which has a base object with no effective dating
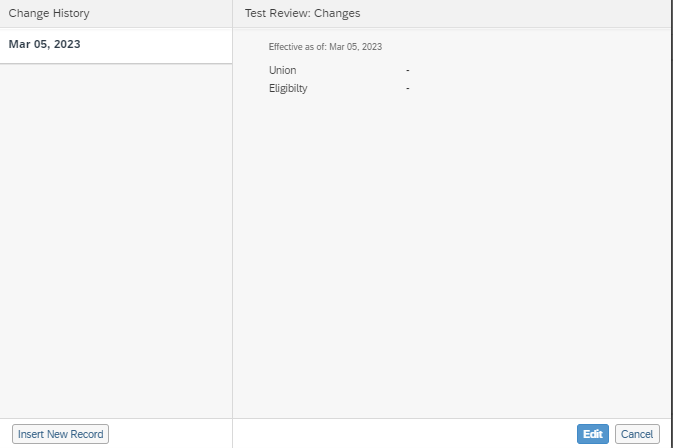
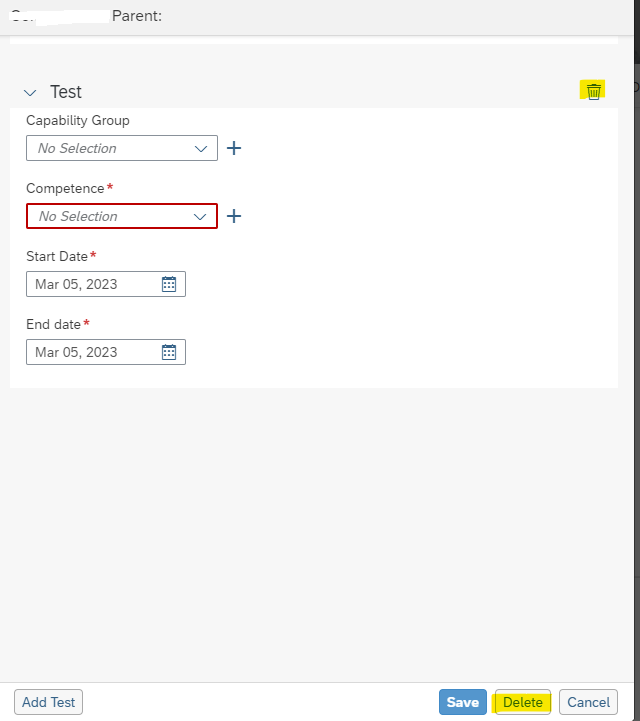
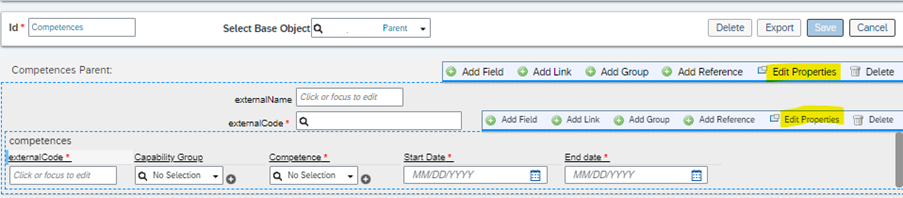
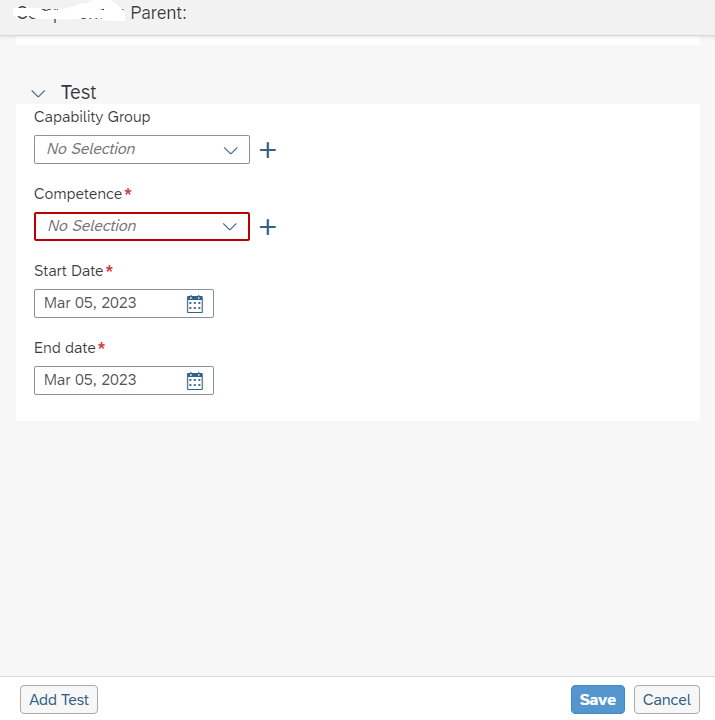
For the portlet which has composite association you can see “Trash” icon for each child record along with the “Delete” button at the bottom portlet as in scenario one
You’ll need to secure both the parent and child objects using “Configure Object Definitions” as in scenario 1
Following parent object has effective date as none and has composite association with child object

Child object has effective dating from parent
Update the security section of both objects as below
Once securing the object go to “Manager Permission Roles” to remove the delete option for concerned role as in scenario 1
As you can see there is no delete option for parent object as it has no effective dating ,its only available for child object. Uncheck delete option for child object and save the role
Unfortunately, the delete permission of the child object only works for the “Trash” icon and not for the “Delete” button of the portlet, as it’s one of the limitations under RBP option for objects without effective dating.
Configuration UI:
If you’re looking for an easier option, the Configuration UI option is the way to go. This option removes the delete option for all roles, saving you the time and effort of updating individual roles. Here we don’t need to perform any of the two steps which performed under RBP option
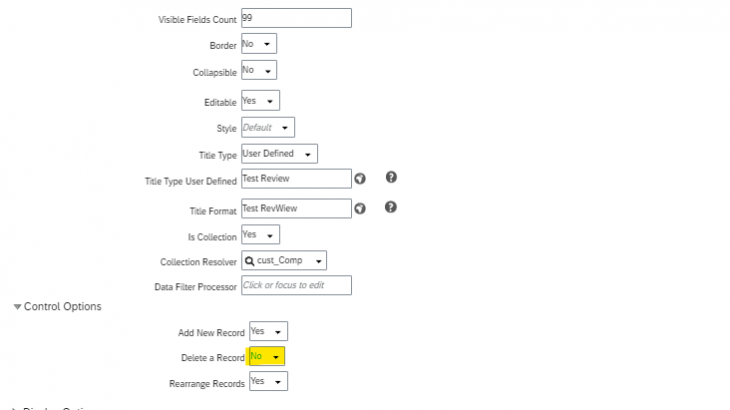
Scenario 1: Portlet with base object which has effective dating
Go to “Manage Configuration UI,” search for the UI ID created for the base object, click on edit properties and set the delete record field to “No” under control options section and save

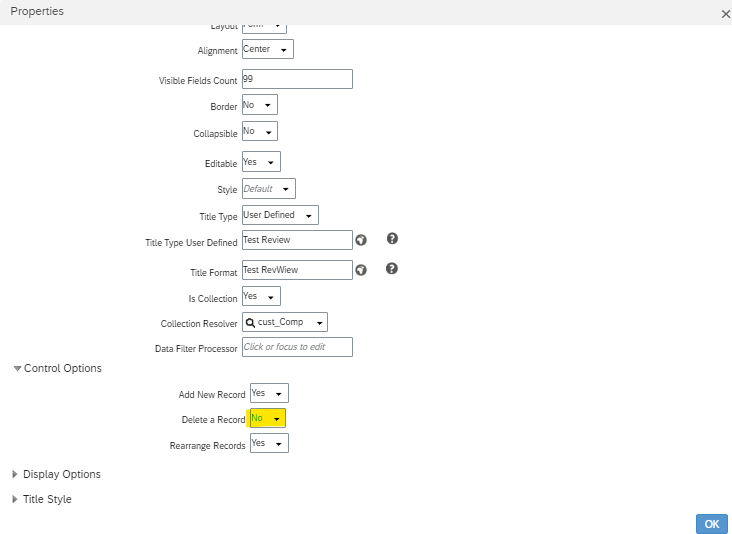
This will remove the “Delete” button for all the roles as this change is at the UI level

In scenario 2: Portlet which has a base object with no effective dating
Go to “Manage Configuration UI” and search for Id the UI which you have created for the base object.
Click on edit properties and set the delete record field to “No” under control options section for both parent and child objects
You’ll no longer see both “Trash” icon and “Delete” button for the portlet.
In conclusion, by using one or both of these options, organizations can rest assured that their MDF portlets are safe from accidental deletions. This can help prevent data loss, reduce downtime and ensure that the applications run smoothly. It is important to assess the specific needs and requirements of the application to determine which option or combination of options will provide the best protection for the MDF portlets.


