If you are setting up a Frontend /Backend Servers scenario for the SAP Fiori Launchpad, you might find yourself doing some pretty time consuming investigations. At least this was true for me, when I tried to setup a Frontend system for a certain use case, without knowing the right tools. In an Embedded system scenario you would go about and simply run transaction STC01 with task list SAP_FIORI_CONTENT_ACTIVATION for a rapid deployment solution – the quickest and most comfortable way to setup the Fiori Launchpad apps. In a distributed scenario, this is more difficult and also not the recommended setup (as per SAP Note 2590653).
Anyway there are various scenarios where the Hub Deployment makes sense, in the following I’ll share how to identify the apps for activation and then mass activate the apps with the help of some task lists.
Identify what you need
This is the part which was the most difficult one for me. Where do I get a list with all technical requirements for the apps I want to activate? Worry no more, these can be obtained from the SAP Fiori Apps Reference Library with a few simple clicks.
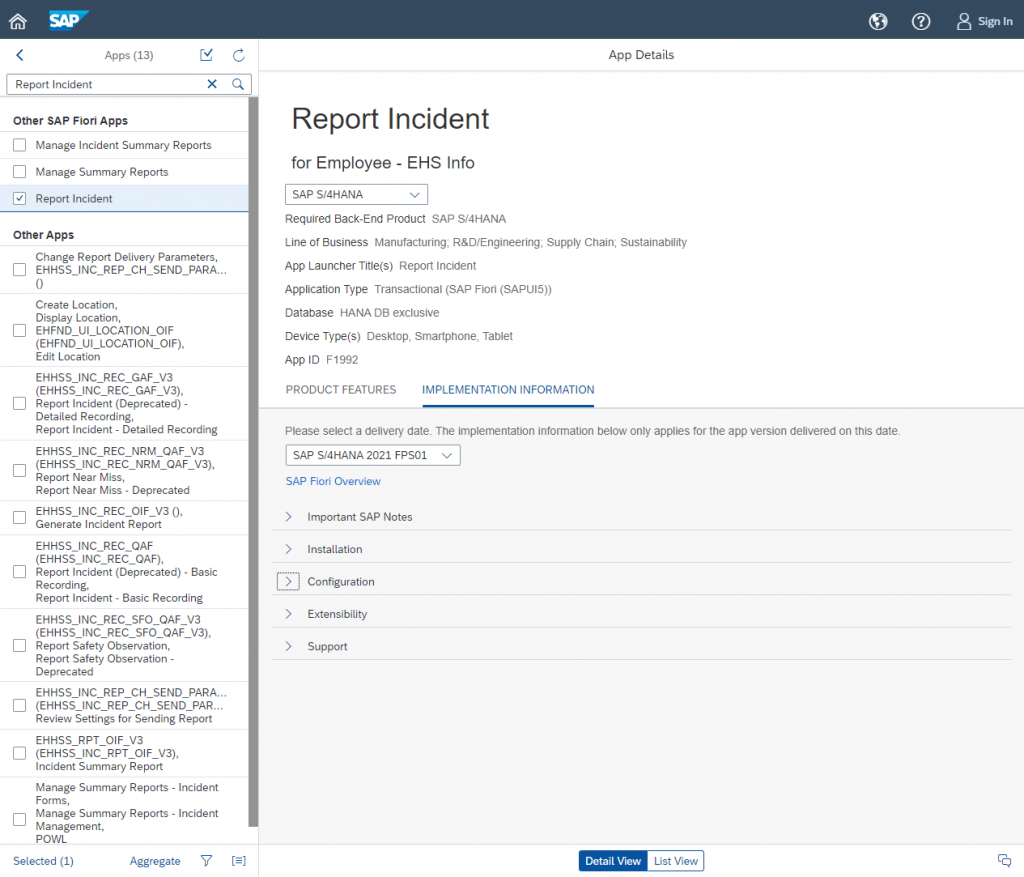
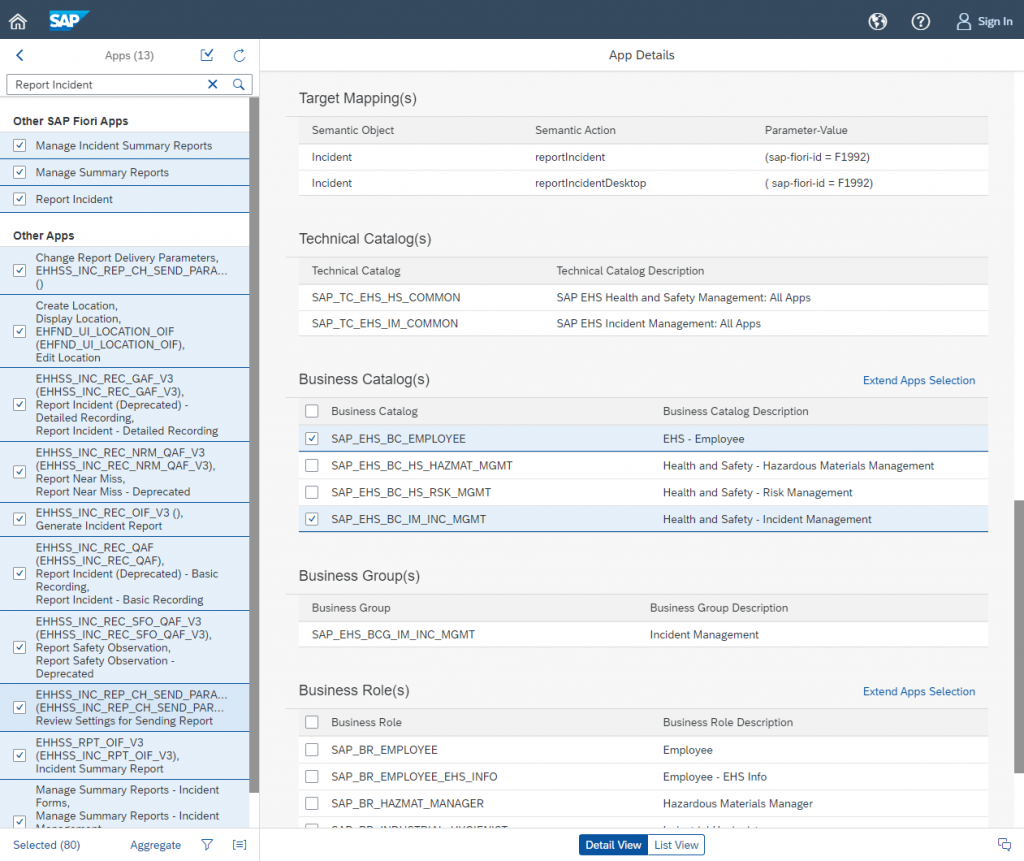
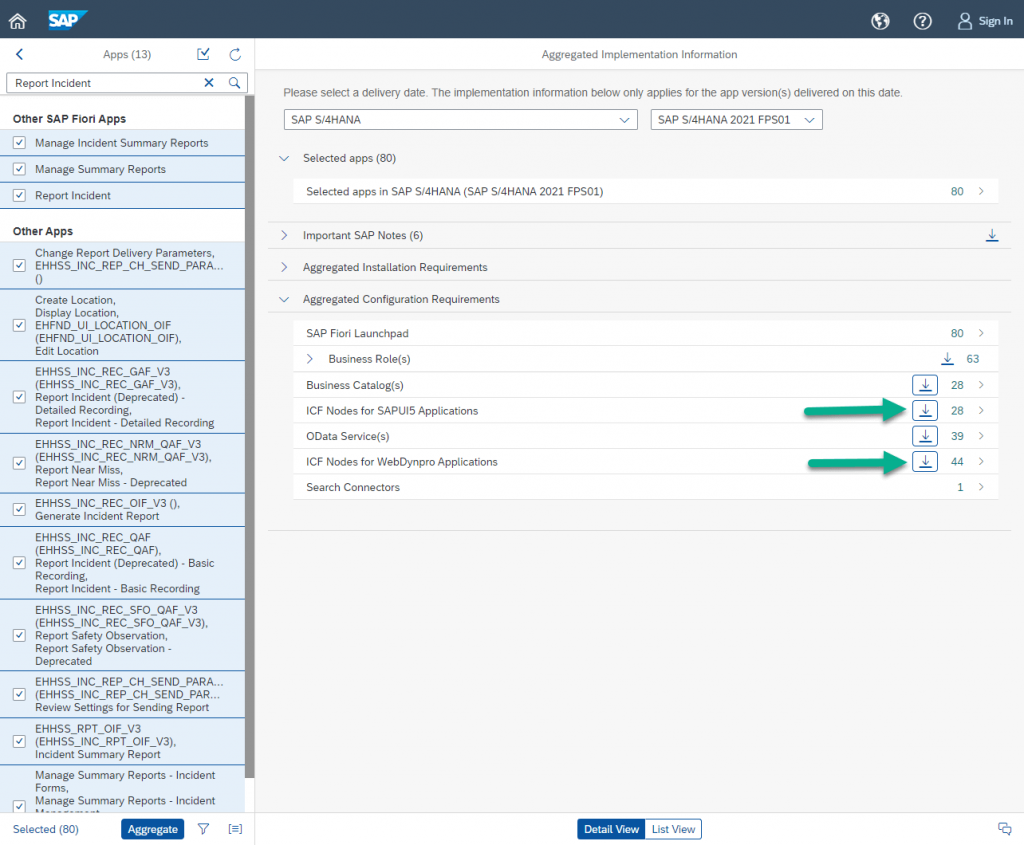
From the overview page navigate to All apps and then search for an app you know is required for your business case. In this example I’m looking for an app to report incidents in a company. Next choose the app you’re looking for from the list, in my case the Report Incident App and navigate to the Implementation Information section. Choose the relevant release for your system and expand the Configuration tray.
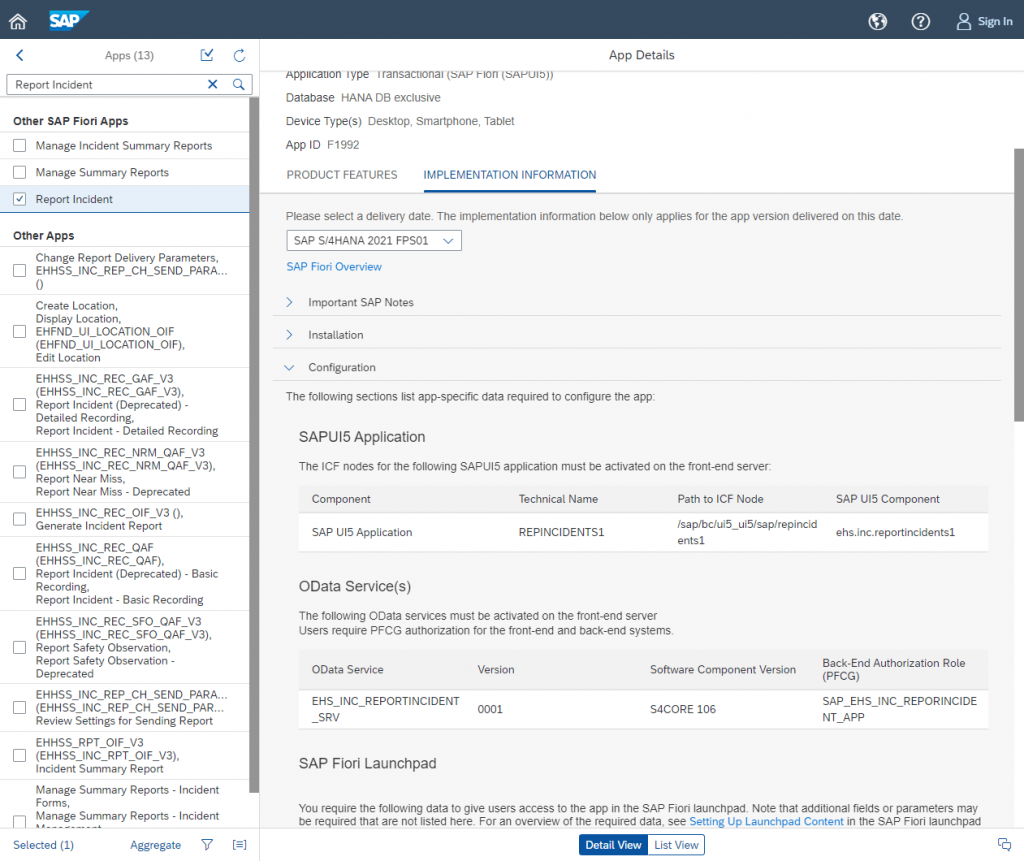
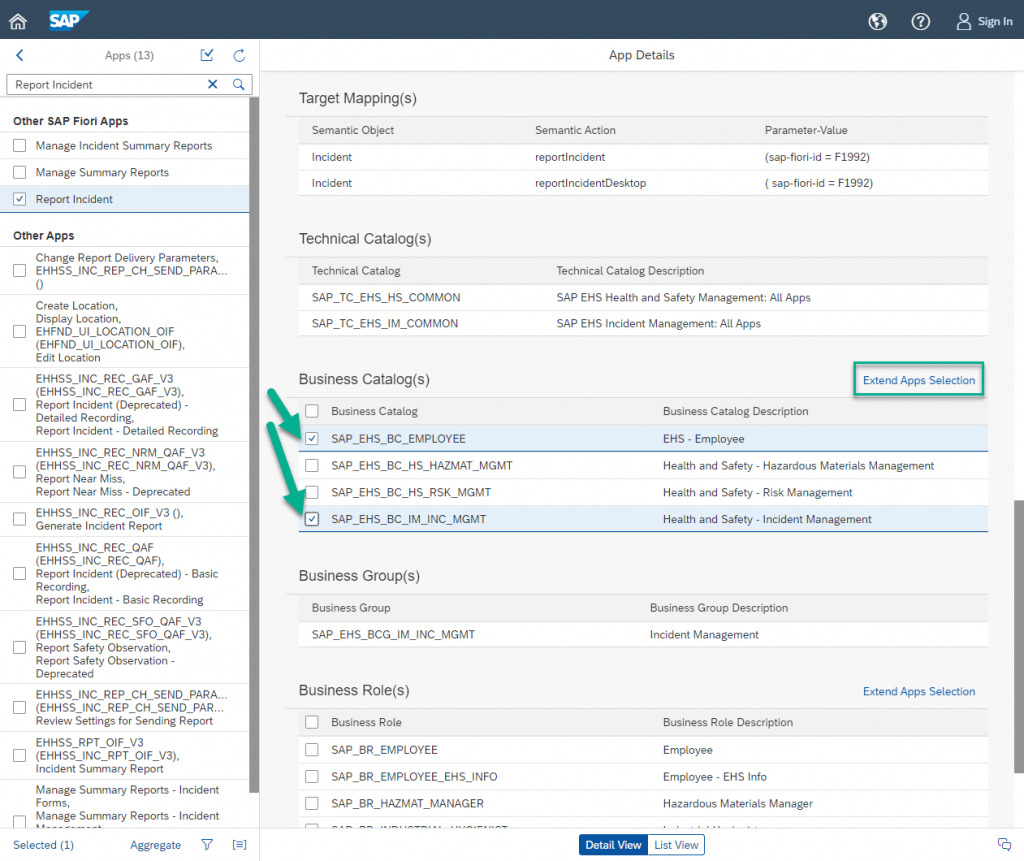
This section contains all important information to configure and activate this specific app. We, of course, are looking for more than one app to activate, so scroll further down to the Business Catalog section. The table contains all Business Catalogs, where this app is included. In this example I’m mostly interested in Incident Management related applications, so I select the employee and Incident Management Catalogs. Please note, this could also be done using the Business Roles further down in the Details.
The next step helps us to automatically identify all apps for these Catalogs, therefore click on Extend Apps Selection.
The popup which now opens, is the complete list of apps contained in the selected business catalogs. Depending on your scenario this list can become pretty exhaustive. For this example I’ll select all apps from the Catalogs, in a productive environment it will make sense to be more selective.
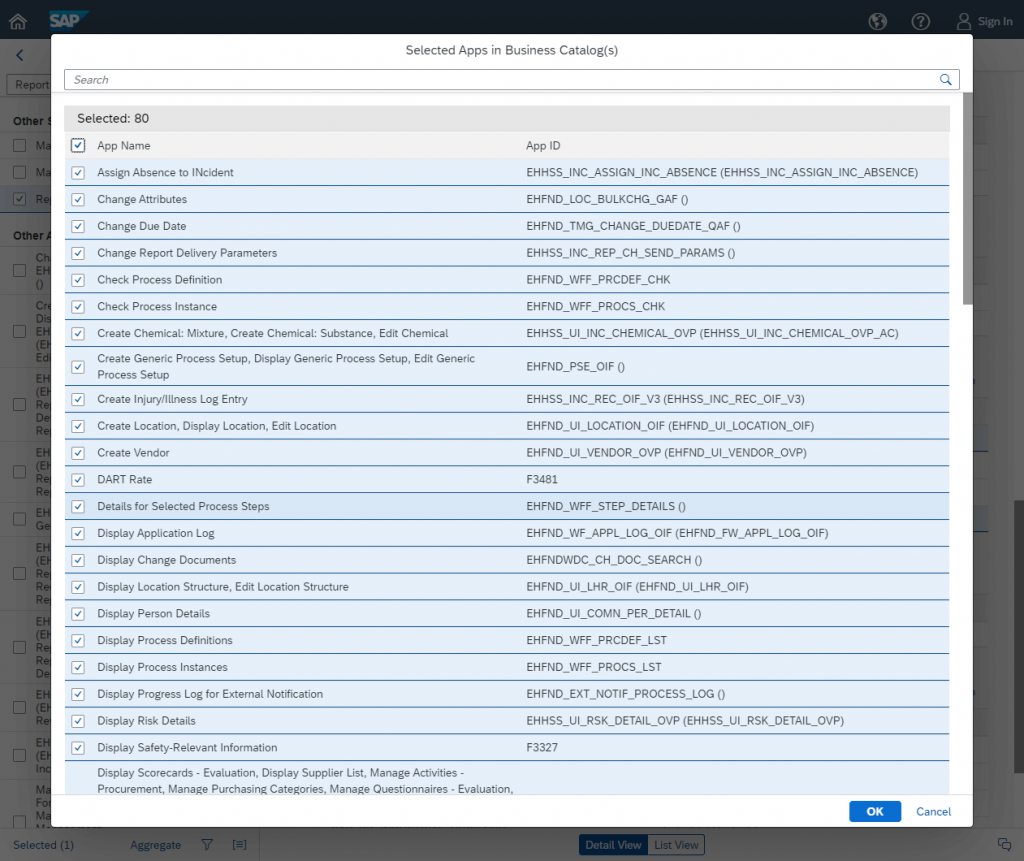
When you continue with the OK button, you’ll notice that the selection in the app list to the left has been extended. The selection range should contain the apps, that have been previously identified in the popup window.
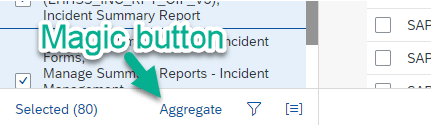
In the next step, the actual magic comes into play. You might have already noticed the small Aggregate button at the bottom of the list. This button can be used to combine similar attributes of the apps.
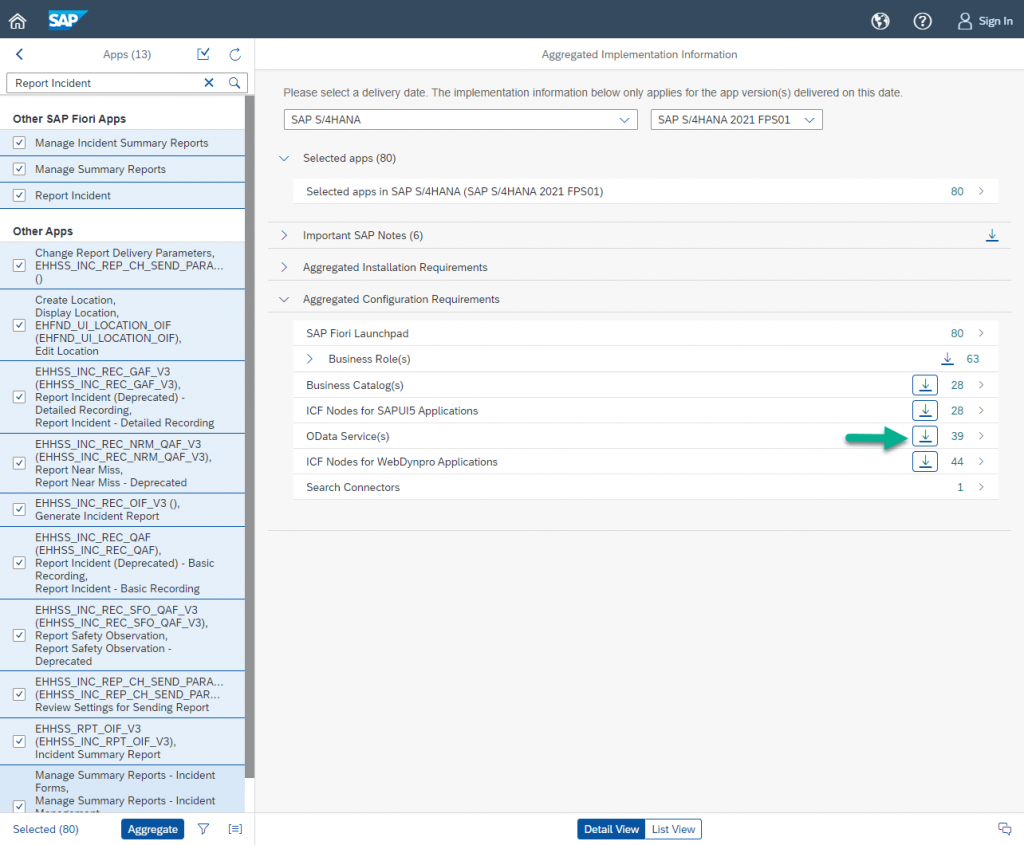
On the right side of the window we now receive the combined list of Aggregated Configuration Requirements. This is what we have been looking for – a more or less complete list of ICF Nodes and OData Services. For the next step download the OData Service(s).
Mass Activate OData Services
Open the downloaded list of OData Services for the next step, the list should contain all relevant services, which are required to start the app. It might happen, that in some cases navigation targets are not working within the apps, but these cases can be troubleshooted after activation with the App Support tool.
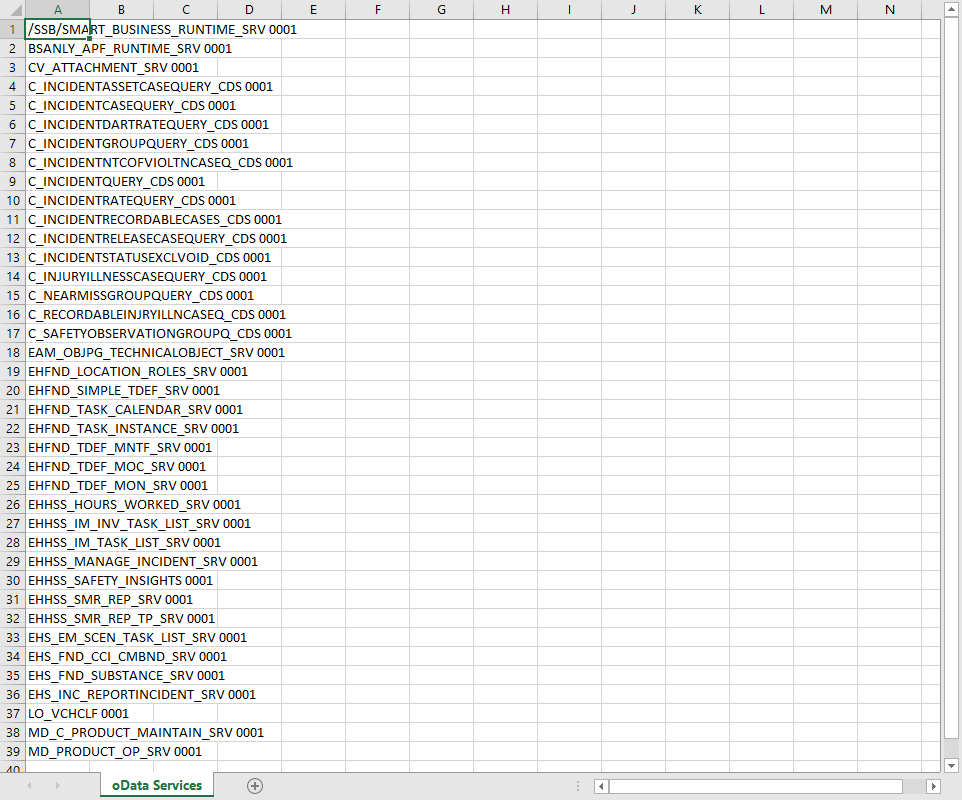
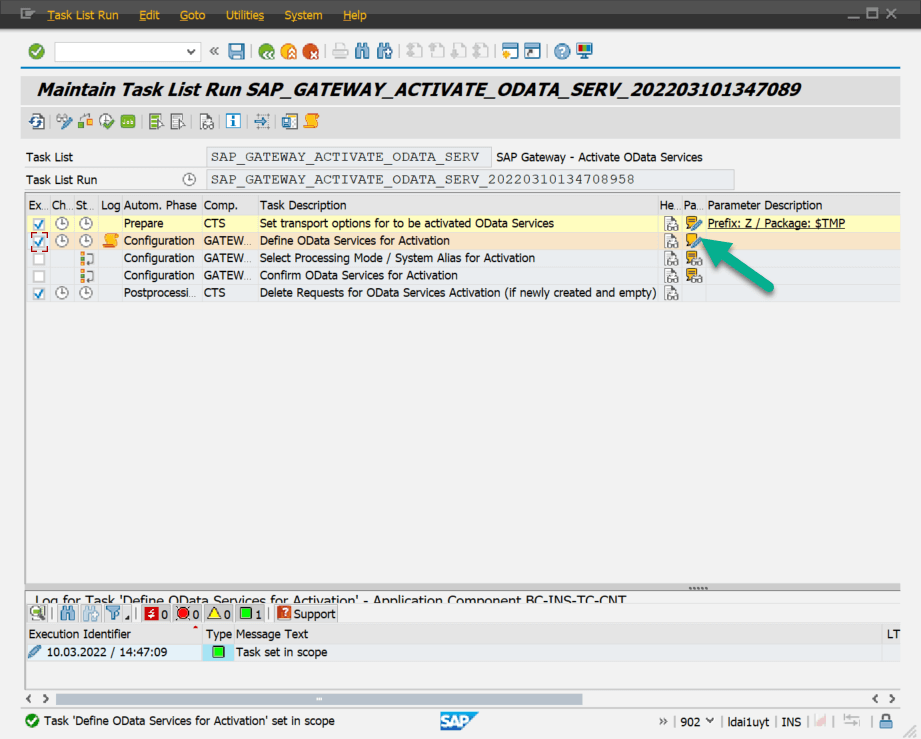
We can now use this list to activate the OData Services on the Frontend System using the task list SAP_GATEWAY_ACTIVATE_ODATA_SERV in transaction STC01.
We can now use our list of services to feed them into Step 2 of the task list.
The OData Services from the CSV file can now be added via copy and past to the popup:
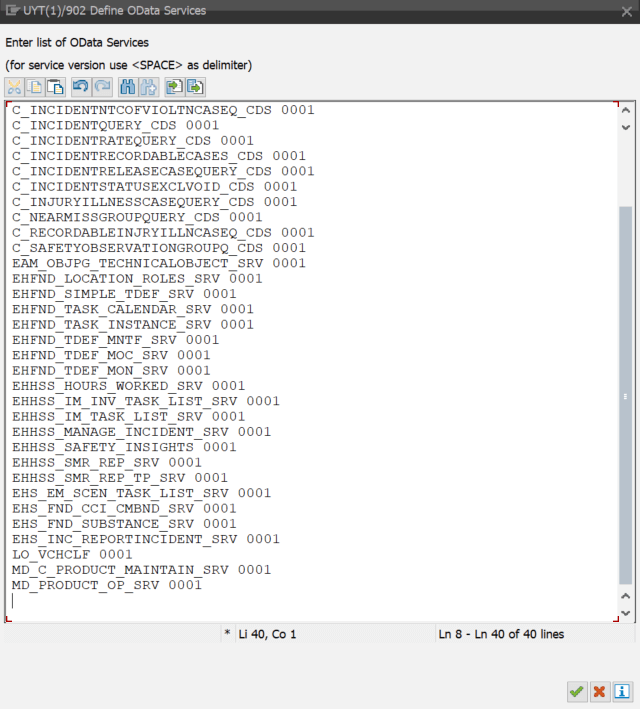
Confirm the popup window and proceed with the task list execution as described in the blog post for this task list. Take special care to select the right backend system via SAP System Alias selection in the next step. We are after all in a distributed scenario, right.
Activate SICF Nodes
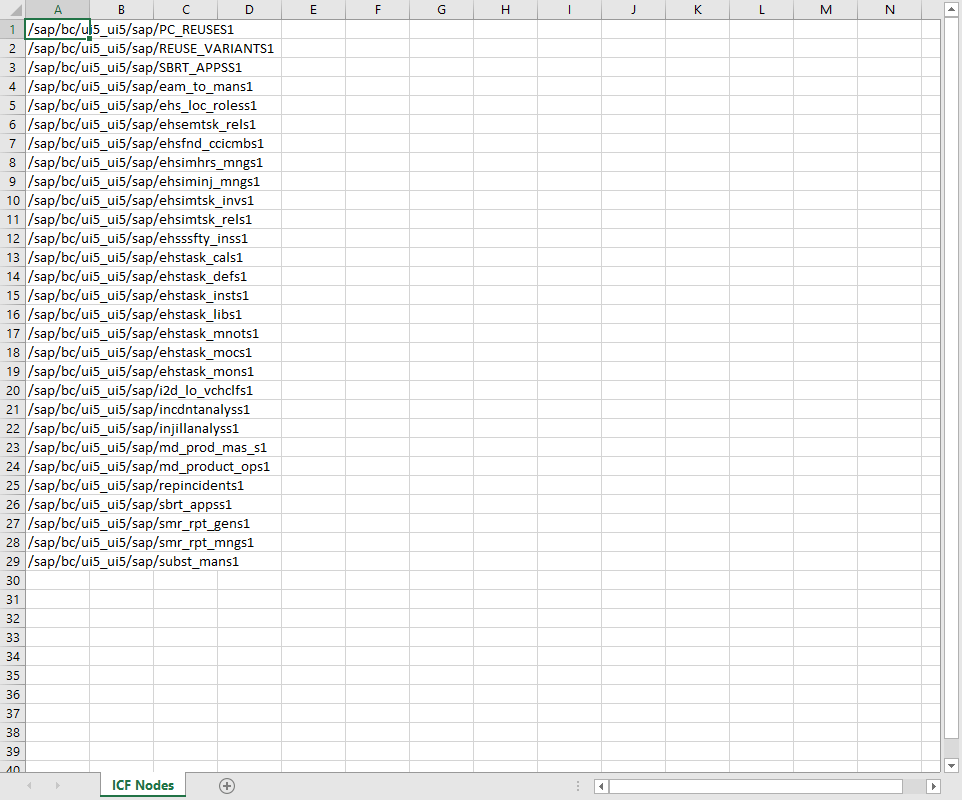
Back in the SAP Fiori Apps Reference Library we can now continue the configuration by downloading the Internet Communication Framework (ICF) nodes. The nodes are split up in SAPUI5 applications and WebDynpro Applications. This makes perfectly sense, because the nodes for the SAPUI5 application have to be activated in the Frontend system and the WebDynpro nodes in the Backend system. In both cases the activation of the ICF nodes is required to allow access to the UI part of the applications. Both lists can be downloaded as before.
The list of UI5 ICF nodes can now be used to feed them into task list SAP_BASIS_ACTIVATE_ICF_NODES.
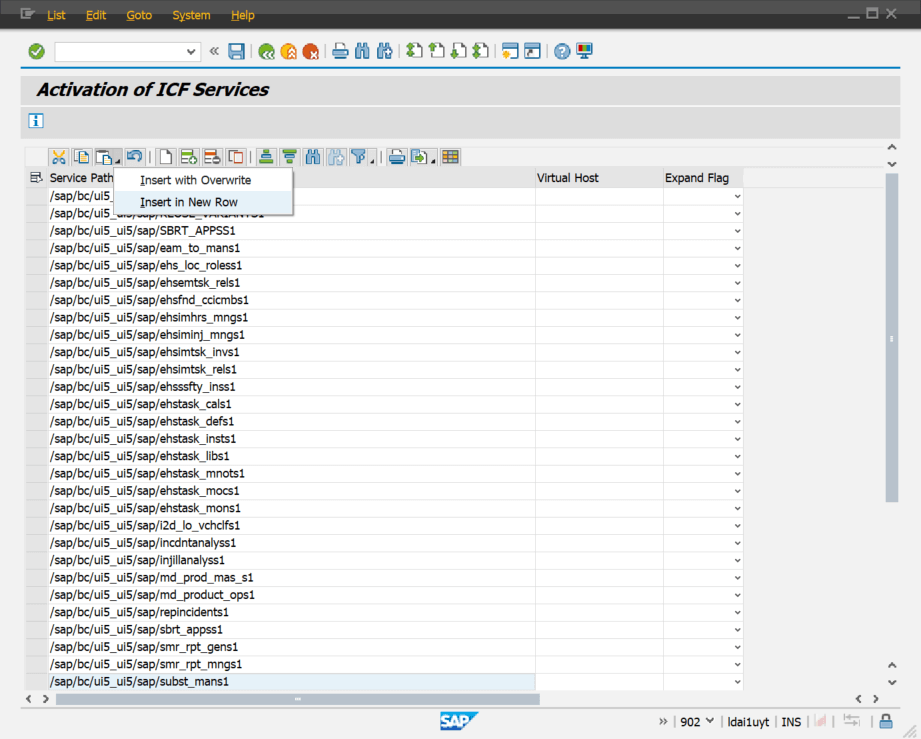
On the Frontend system navigate to transaction STC01 and enter task list SAP_BASIS_ACTIVATE_ICF_NODES. Select the Configuration step and add the nodes from the CSV file.

The data can be entered with copy and paste from the CSV file, I recommend to use the Insert in New Row command. For all entries the Virtual Host needs to be maintained, most likely this is DEFAULT_HOST and the Expand Flag should be set to X.
After activation of the ICF nodes open the list of WebDynpro applications. Repeat the steps for activation above, but make sure you’re working in the Backend system.
Almost Done
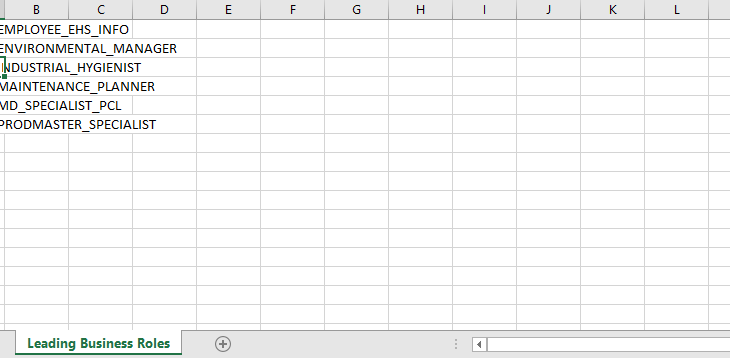
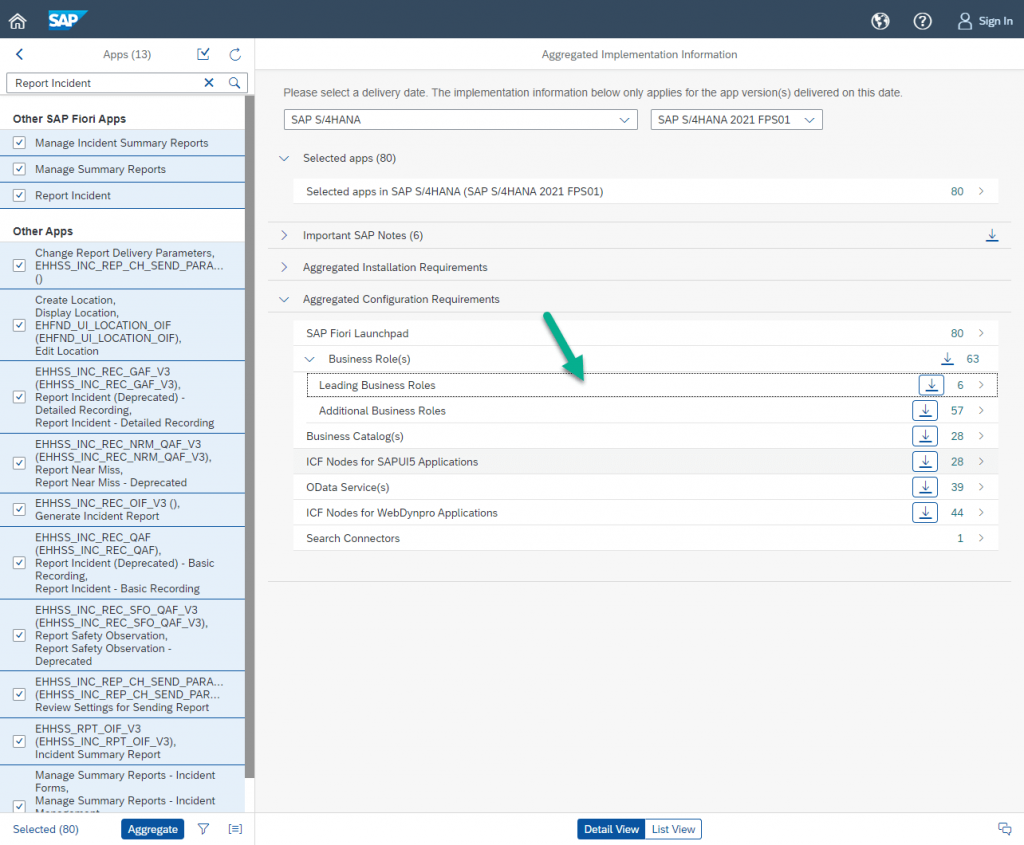
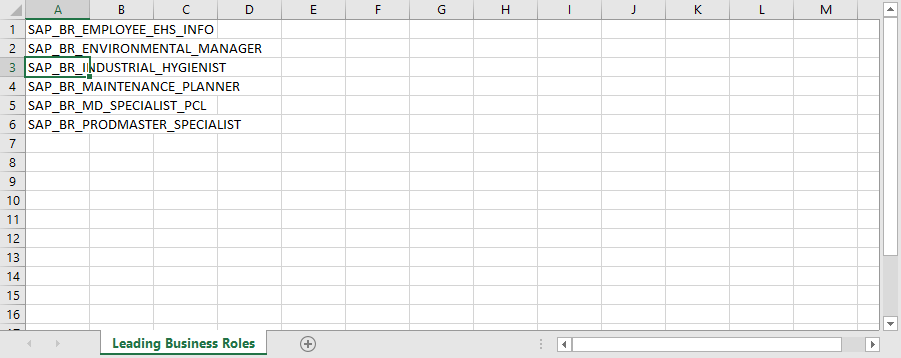
Unfortunately there is yet another tricky part. The apps are up an running, but the common user won’t be able to see them, unless the right business roles are assigned to their profile. The required business roles can again be identified from the SAP Fiori Apps Reference Library. When we expand the business roles and click the Leading business roles we get a list of the main roles, which are required to display the activated apps in the SAP Fiori Launchpad. The other business roles might be relevant, when navigating through the applications and to get the complete setup.
For this example I think it is a bit over the top, so I just use the employee and industrial hygienist roles. The best practice is to copy them into customer namespace, so usually starting with Z*.
Navigate to transaction PFCG in the Frontend system and copy the roles into customer namespace.
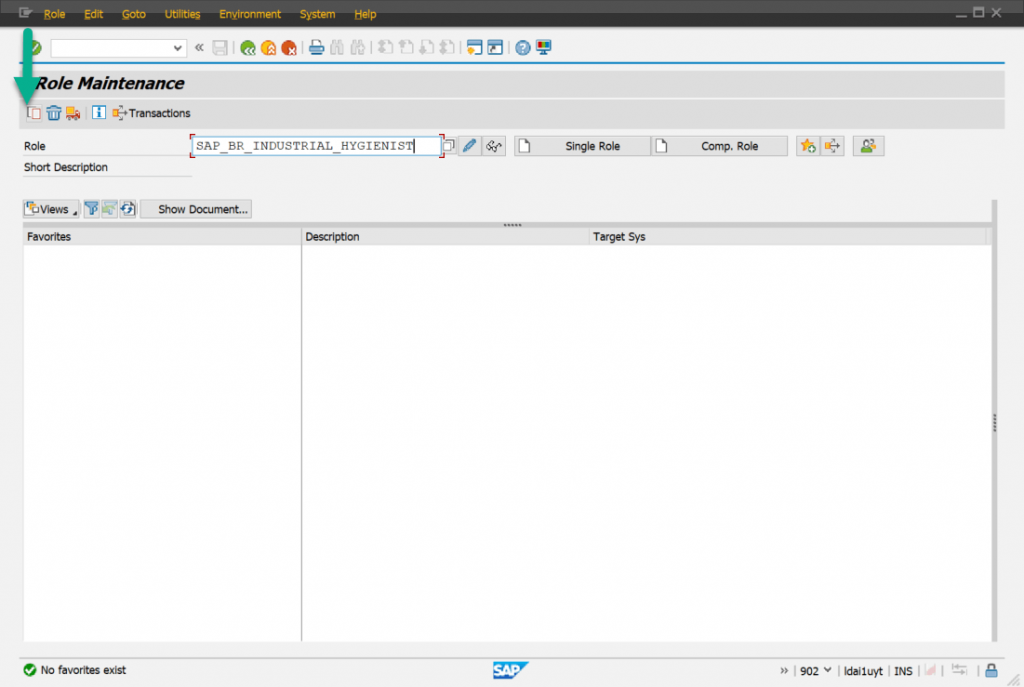
Alternatively for a larger amount of roles it is possible to utilize the task list SAP_FIORI_CONTENT_ACTIVATION. In this case only the steps for the role creation and assignment should be executed. For more details please have a look at SAP Note 2902673.
These new Z-roles now need to be assigned to a user, either directly in transaction PFCG or via user management, for example transaction SU10. Finally you should be able to see the app tiles, when you start the SAP Fiori Launchpad from the Frontend system with transaction /UI2/FLP.
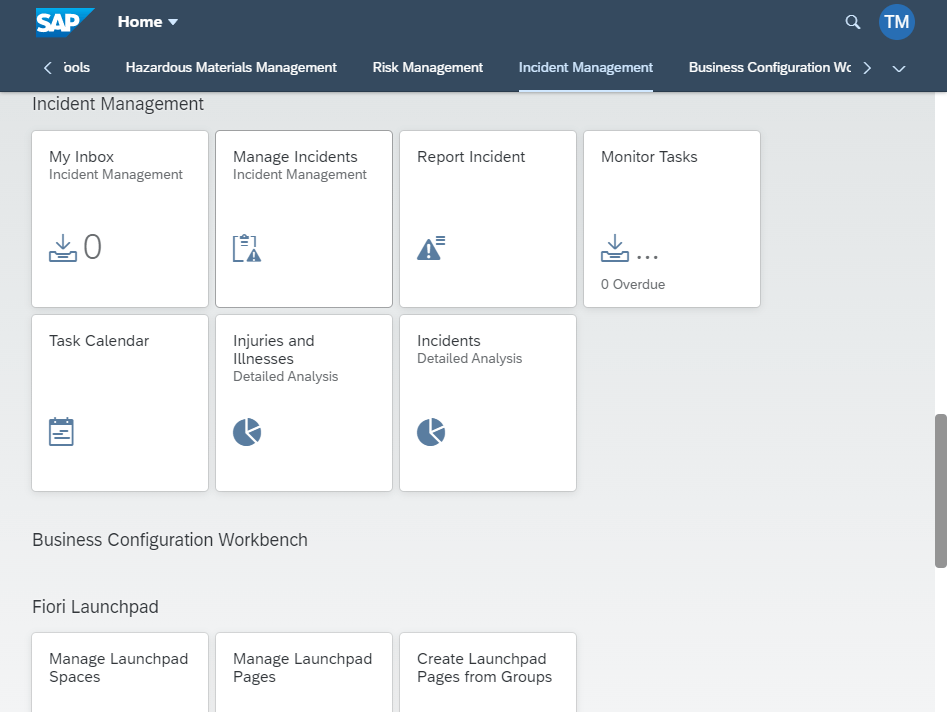
If you run into problems in the Apps themselves, I can recommend the usage of the App Support tool especially for troubleshooting backend authorization issues it can be a real time saver. Otherwise this concludes this setup guide.


