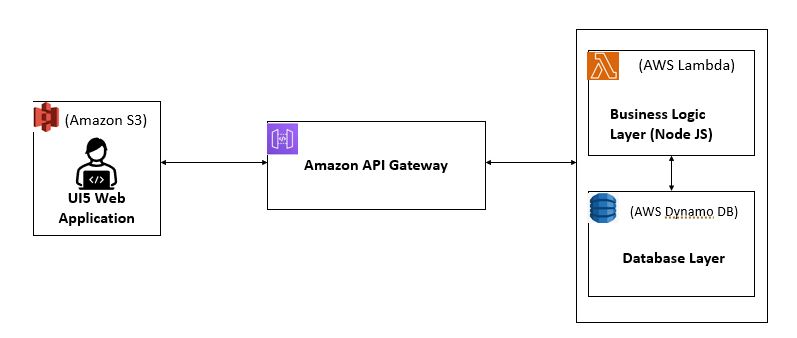
The following blog will guide you to deploy a UI5 application on AWS S3 with Dynamo DB as backend database, Lambda as the business logic layer and API gateway which acts as a connection between the client(UI) and Lambda.
Now lets tackle these layers one by one.
- Amazon S3:
Head over to your AWS account and search for S3. Click on the Create Bucket option as shown below.

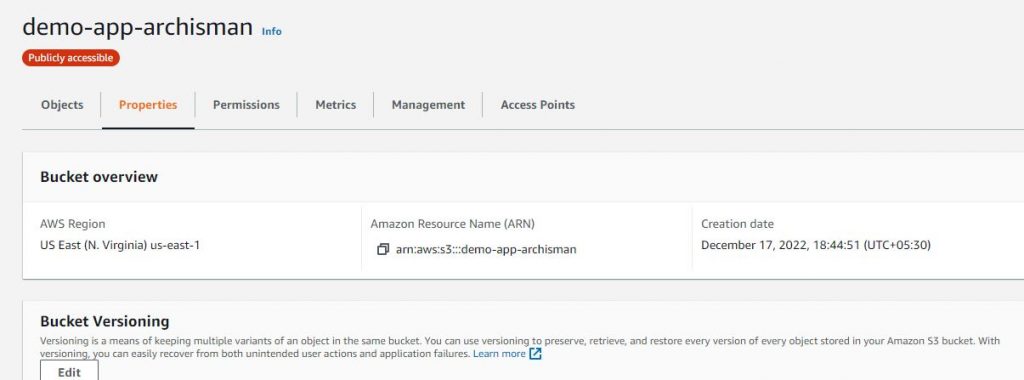
In the window that appears, type in a unique name for your bucket. Please note that the name must be unique across all accounts and regions, which means that if I choose my bucket name to be demo-app-archisman, you will not be able to use the same name although you are working on your own private account(and maybe in a separate region).

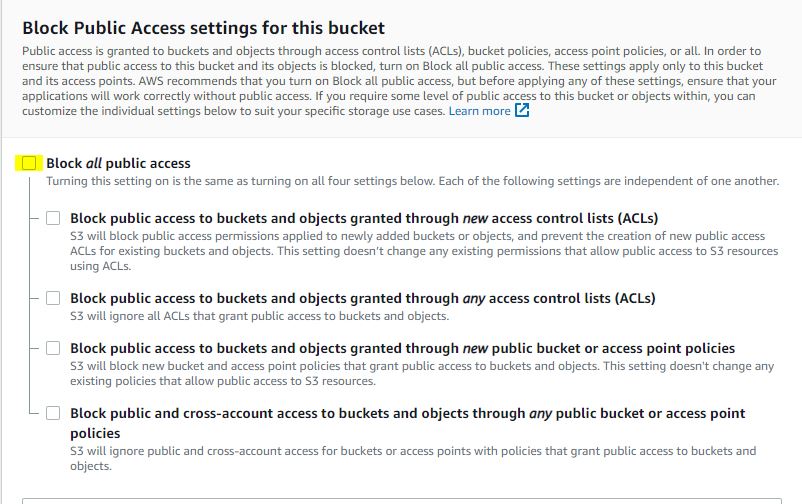
Uncheck “Block All Public Access” as shown below.
Keeping the rest of the settings as default, hit the Create Bucket button. You should be able to see a new public bucket created.
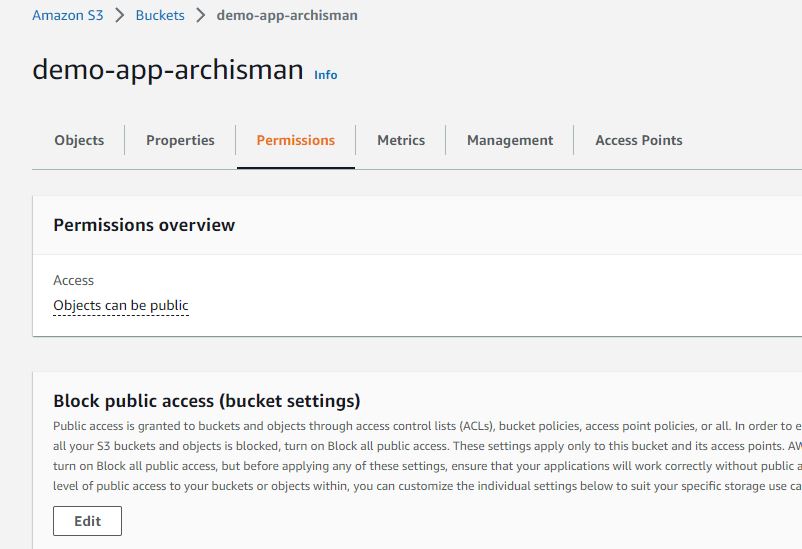
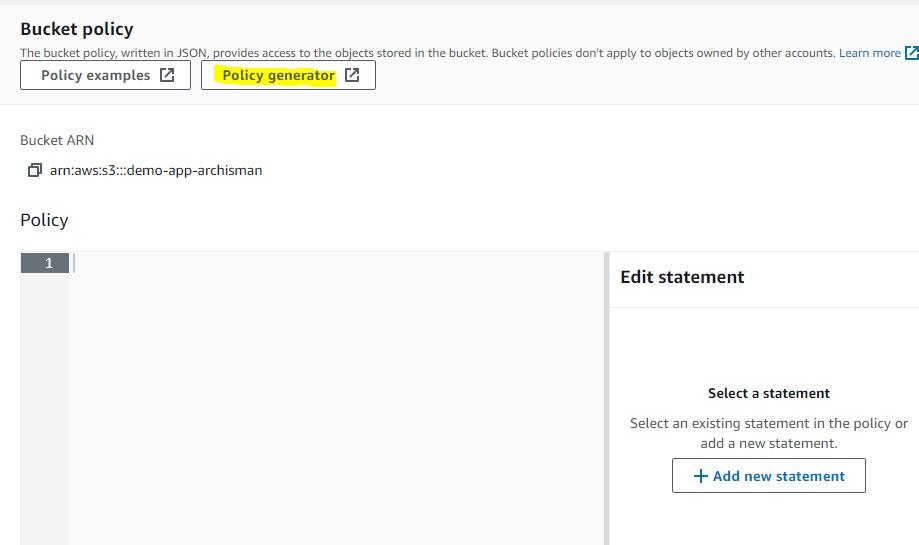
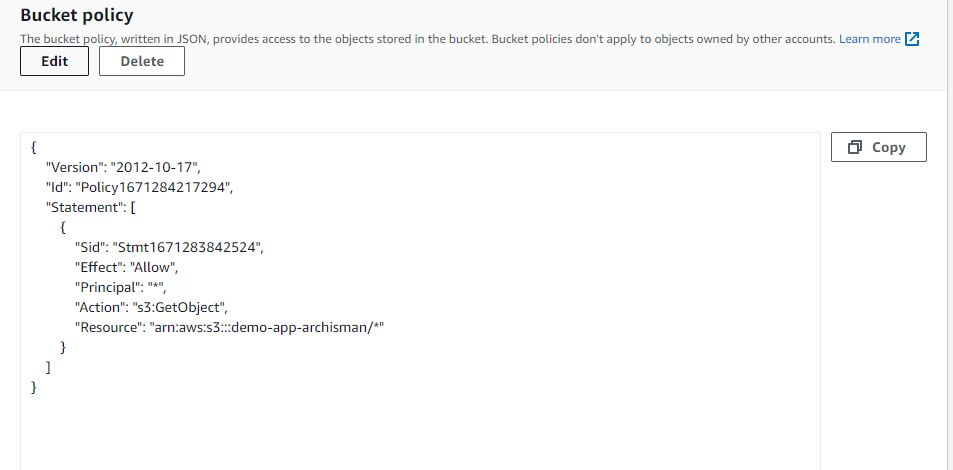
Next, we will navigate to our bucket and edit the bucket policy to “Allow” Get access to all the objects stored on our bucket.
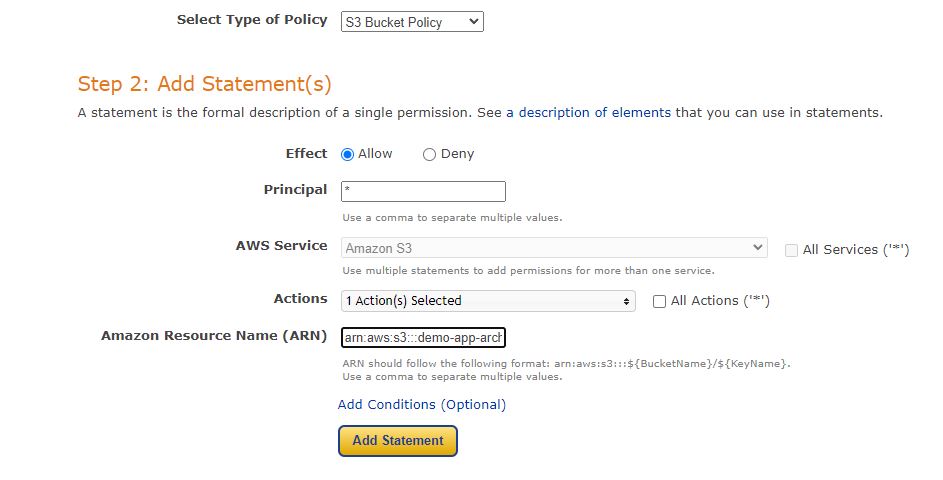
Type Of Policy: S3 Bucket Policy
Effect: Allow
Principal: *
Action: GetObject
ARN: arn:aws:s3:::demo-app-archisman/* (make sure to paste your own unique Amazon Resource Name here and append /* at the end which means we are granting GetObject access to all the objects within our bucket)
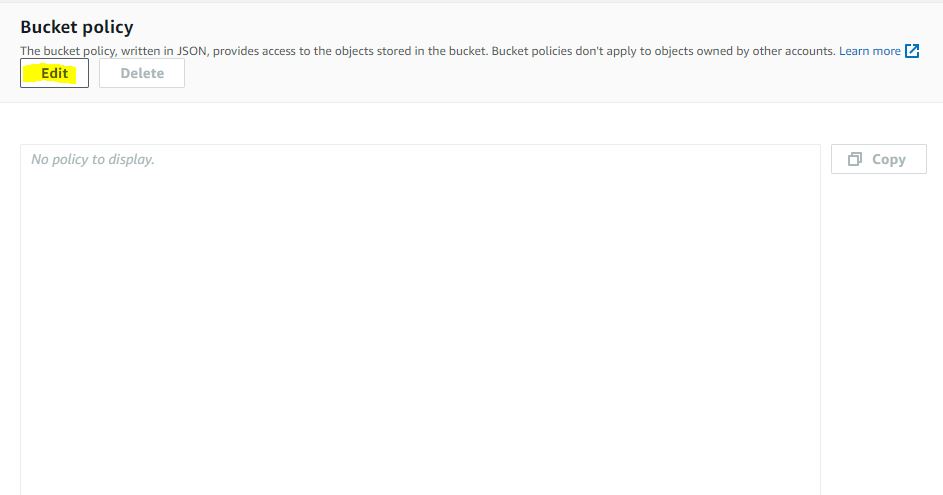
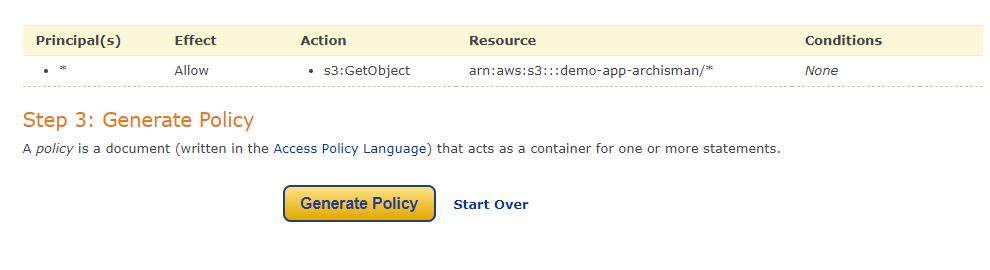
Once you have correctly added the above statement, generate the policy.
You should be able to see a window pop up with the generated policy in JSON format. Copy it to clipboard.
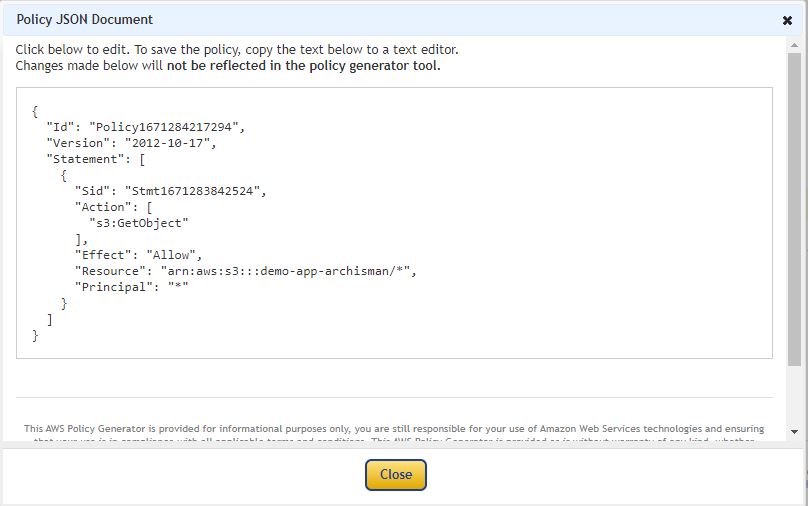
Paste the above copied JSON into the bucket policy text area as shown below and save the changes.
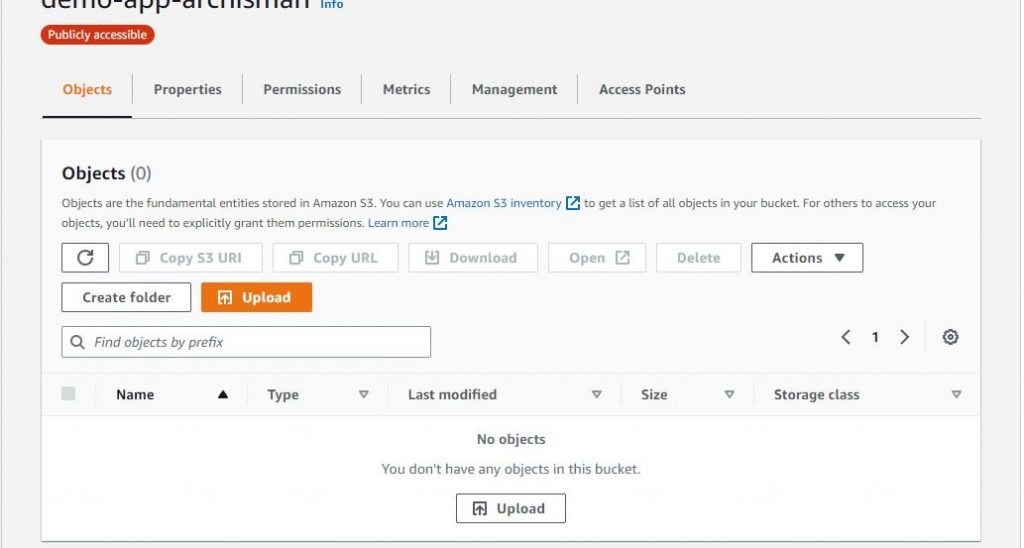
Now that we have got the bucket policy out of our way, let us upload our UI5 web application onto S3. Navigate to Objects tab and click on the Upload button.
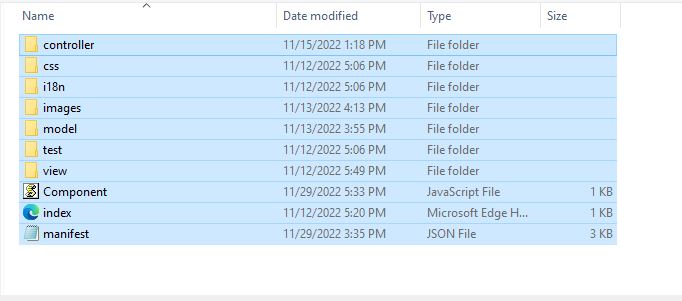
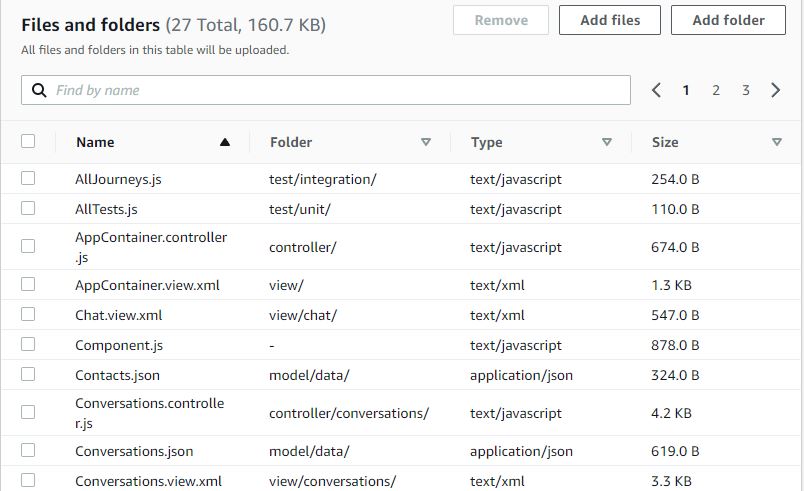
Select all the files and drag and drop them to the Upload Section.
Click on Upload. Once upload is completed, you will be able to see the uploaded files and folders in the Objects tab.

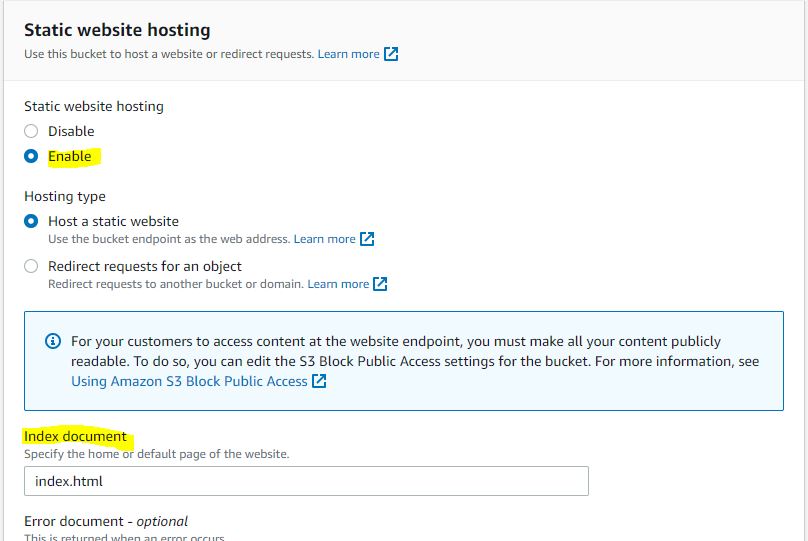
Now that the web application files are uploaded, we need to explicitly tell S3 that we are going to be hosting a static website.
Navigate to the Properties tab and in the very last section click on the Edit button for “Static Website Hosting”.

Edit the below properties and save changes.
Go back to the same section of Static website hosting and you should be able to see an endpoint Url. Click on the Url and your UI5 application is up and running.
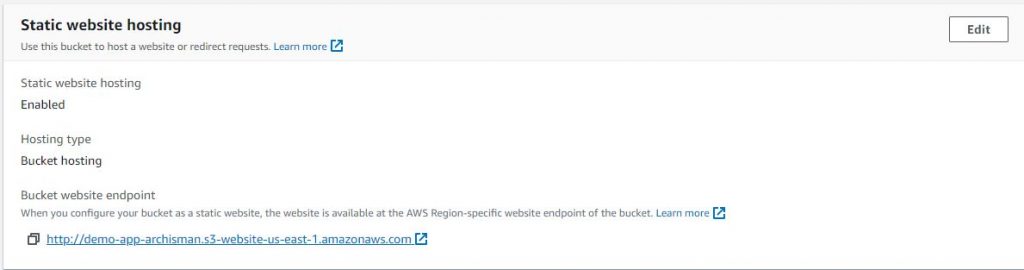
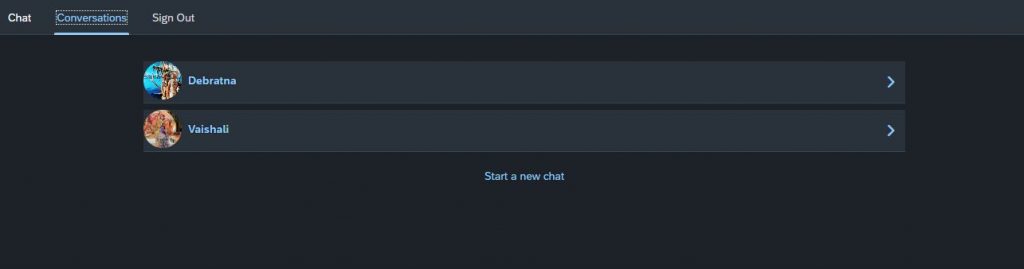
For me, its a simple Chat Application interface.
Now that we have a static website up and running, lets work on the backend in order to make our application interactive.
- Dynamo DB:
Our choice of database here is Dynamo DB which very much resembles NoSql Mongo DB. Keeping with the theme of our application, this database again is server-less thus we do not need to worry about provisioning the right server to host our database.
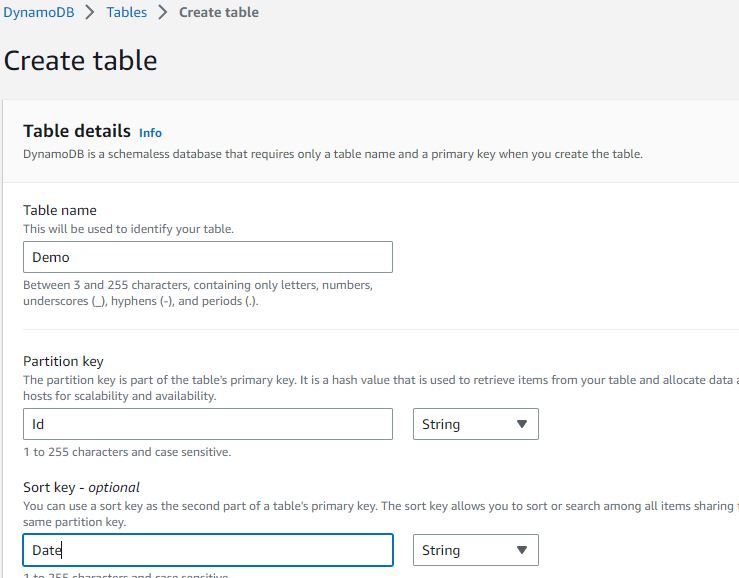
Head over to the AWS service Dynamo DB and click on Create Table.

Type in your table name, the partition key(synonymous to primary key from SQL) and sort key(which is optional). If you are unsure about the Read Capacity Units and Write Capacity Units keep them as default. However, it is important to understand these while designing a production ready application as they determine how well your database performs. These units help Dynamo DB decide the number of partitions to create and in turn how efficiently the database returns the output of a query.
Click on Create Table.
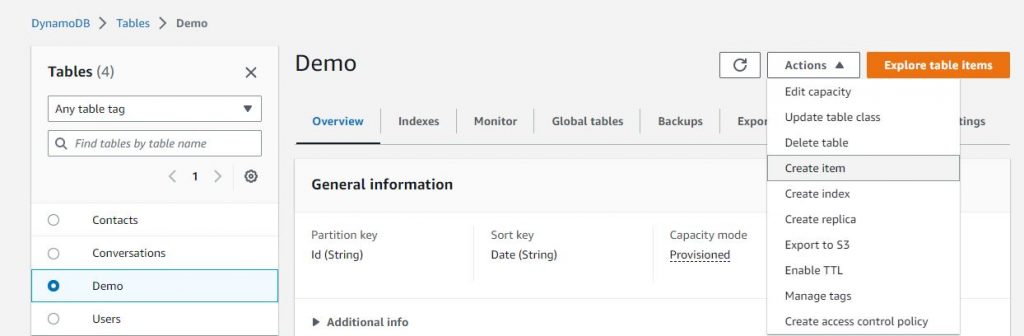
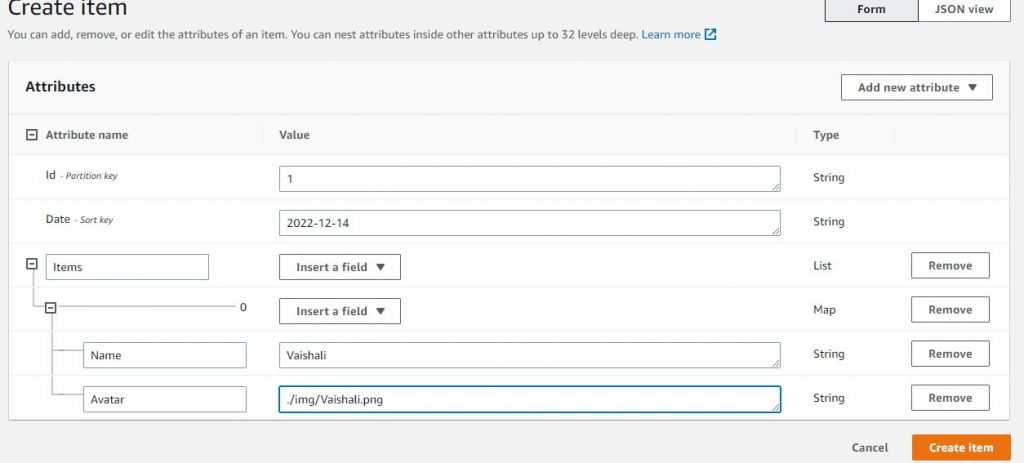
Once the table is created, navigate to the table and create a few items (rows).
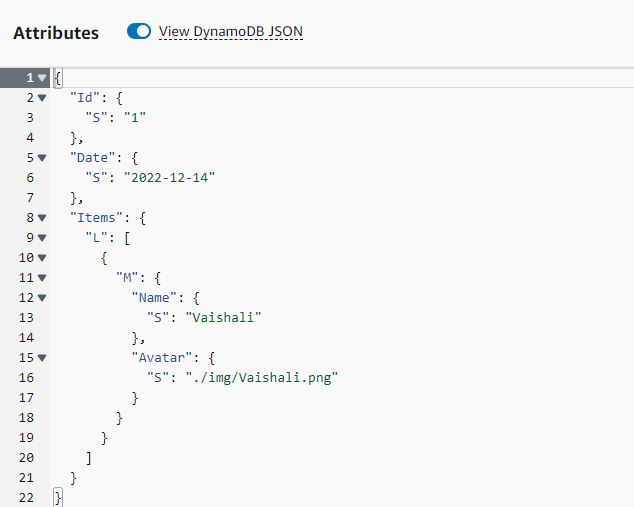
JSON View for the above item. I wanted to show this Dynamo DB view of the JSON especially as this understanding of the structure will be needed when you write your lambda functions. “S” denotes string, “L” denotes list/array and “M” denotes map/object.
Create as many tables as your application demands and move on to creating the business logic layer i.e lambda functions.
- Lamda Functions:
Our lambda functions will basically interact with our above database tables to perform CRUD operations. Head over to AWS Lambda service and create your lambda functions as per your application requirement. Here we have used Node as the scripting language.
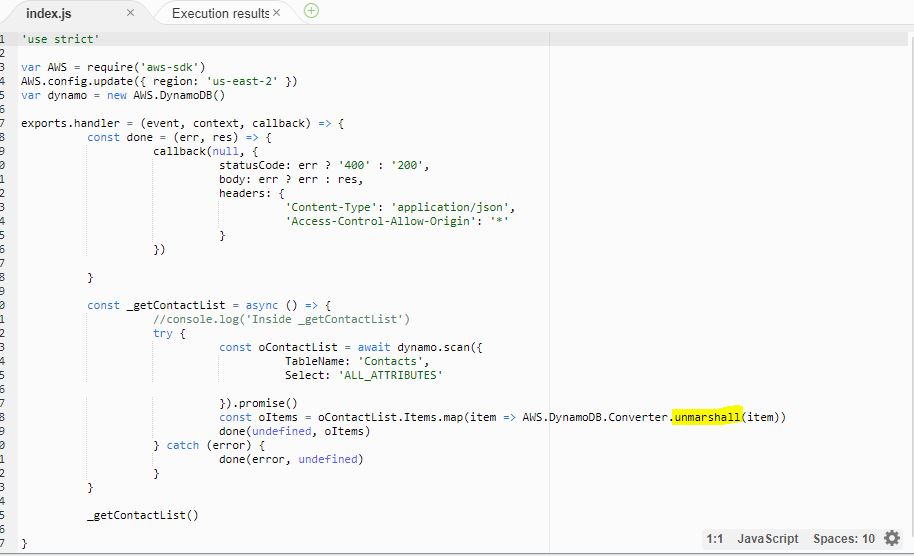
GET Operation:
The below lambda function shows how to fetch all the records from the database table. The highlighted “unmarshall” function converts the item from a dynamo db object(as shown above) to a normal JSON object that we are familiar with.
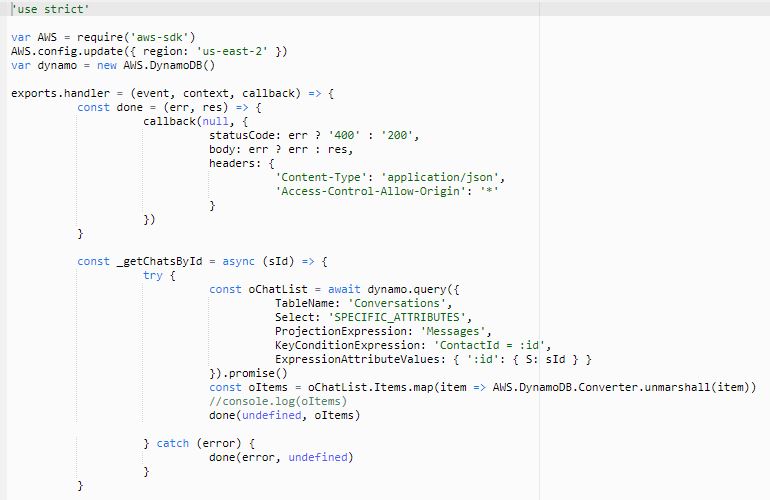
GET Operation by Id
The below lambda function shows how to fetch records from the database table based on primary key.
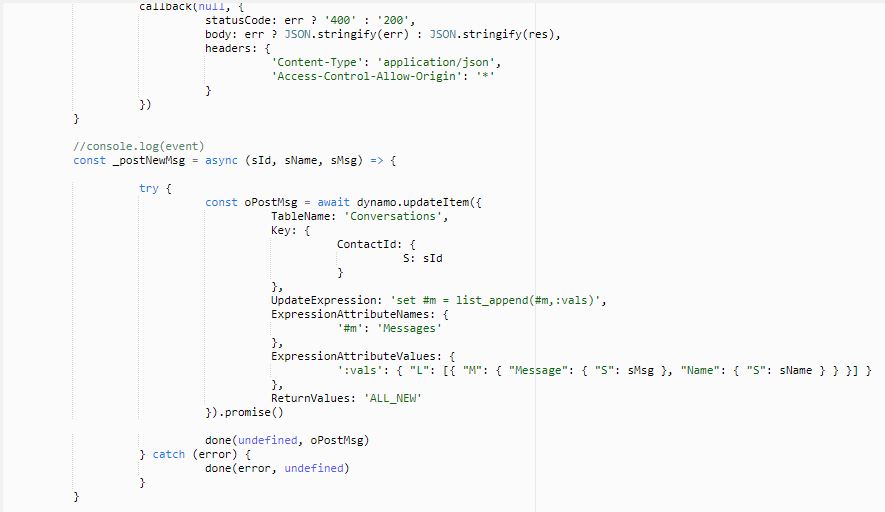
POST Operation
Below lambda function shows how to insert a record to the database.
Now that we have our UI and backend logic set up, the only thing remaining is to connect these 2. That is where the API gateway comes into the picture.
- API Gateway
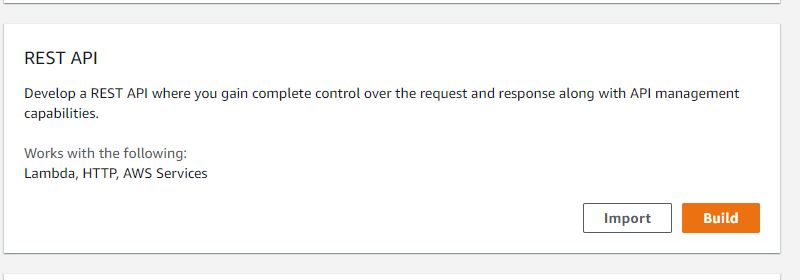
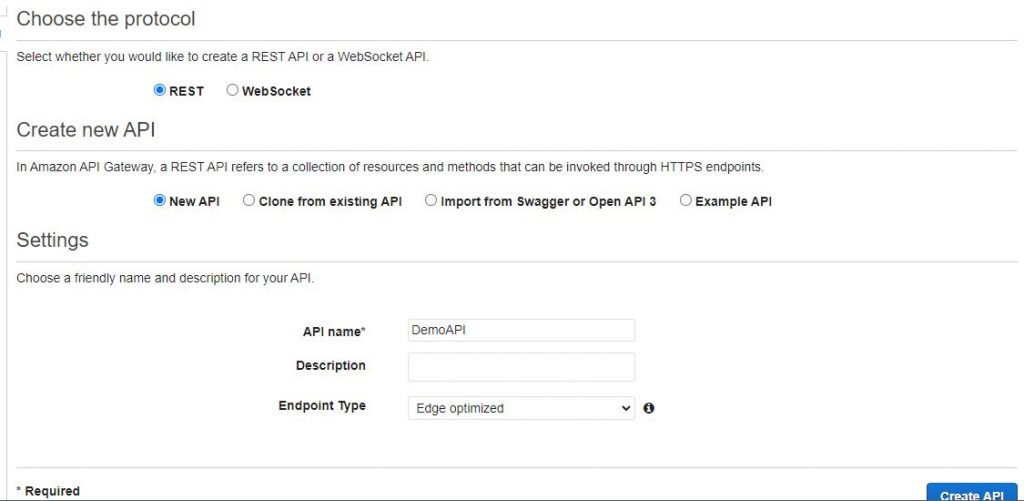
Head over to AWS service API Gateway and click on Create API. Choose the REST API service and click on Build.
Give your API a name and make the endpoint type as Edge optimized. Click on Create API.
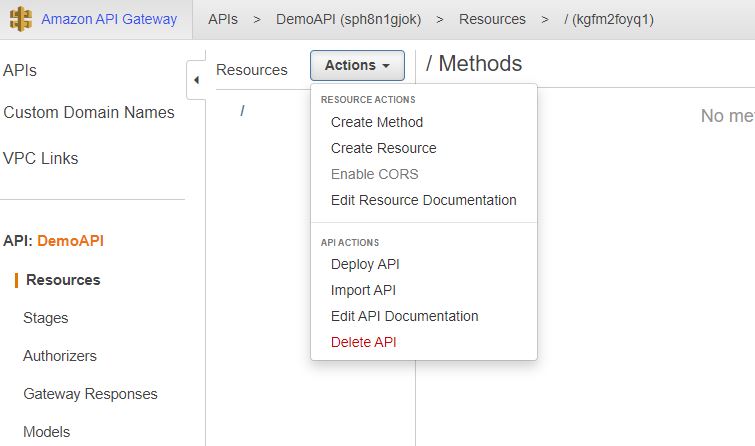
Once the API is created, click on Actions and hit Create Resource.
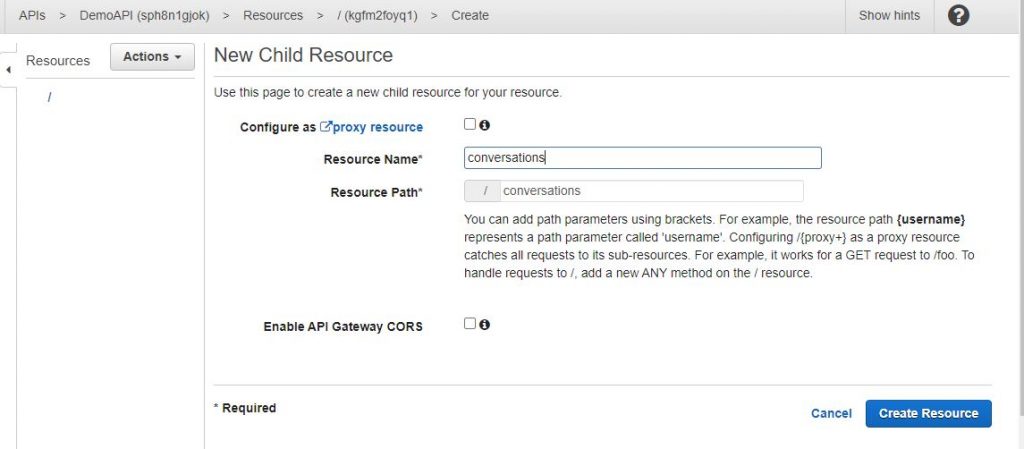
Type in the Resource Name and click Create Resource.
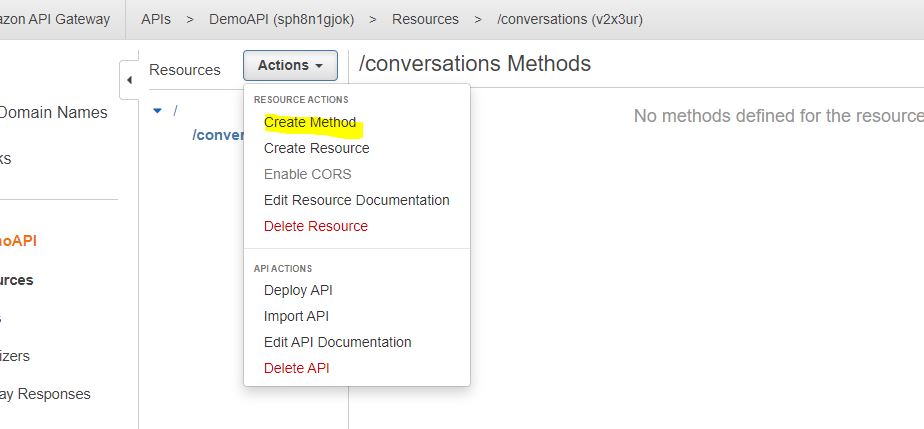
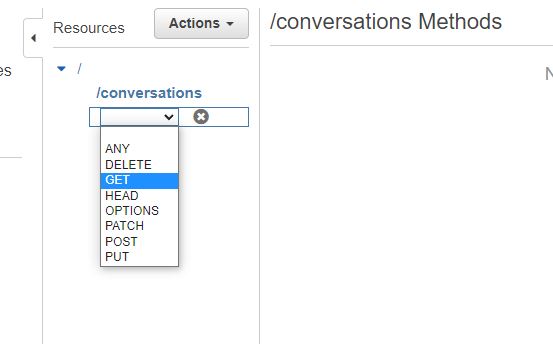
Now on this resource we want to create a GET method.
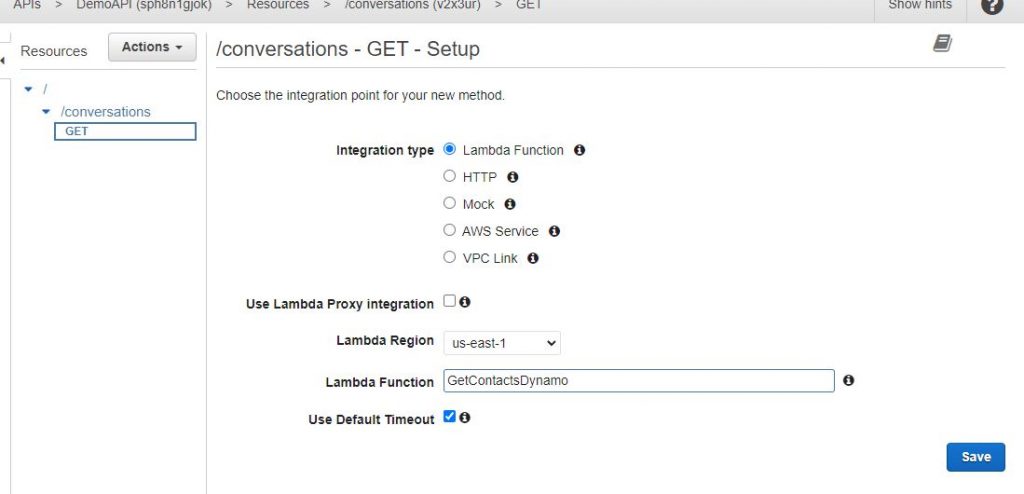
In the following window, type in your lambda function name and hit save.
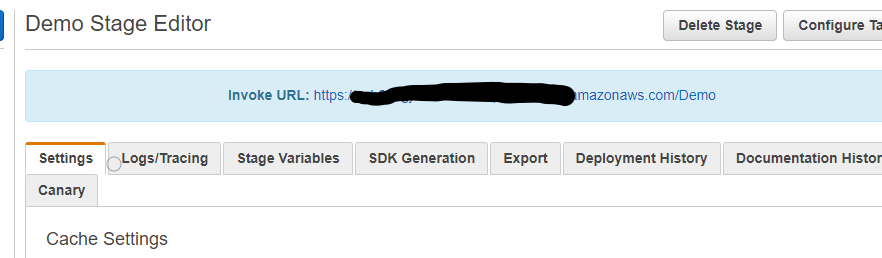
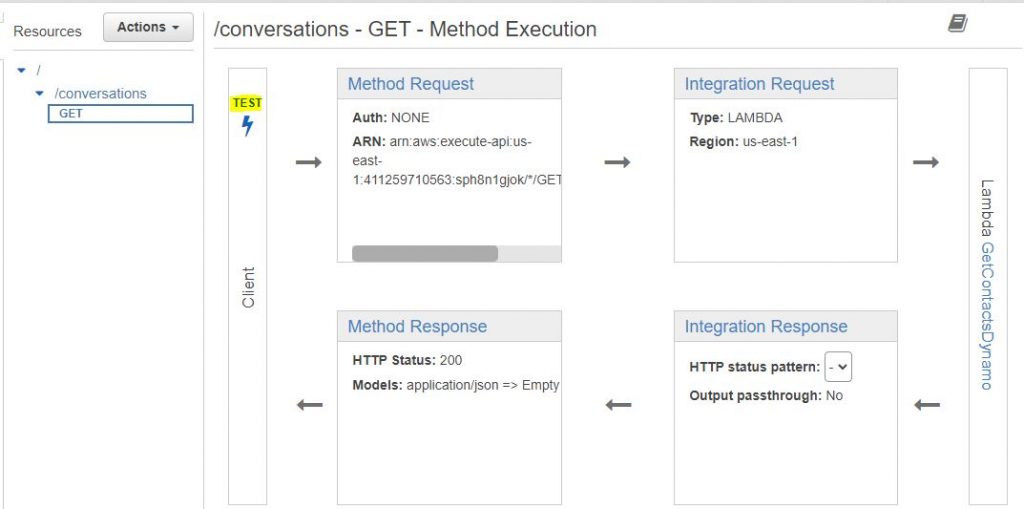
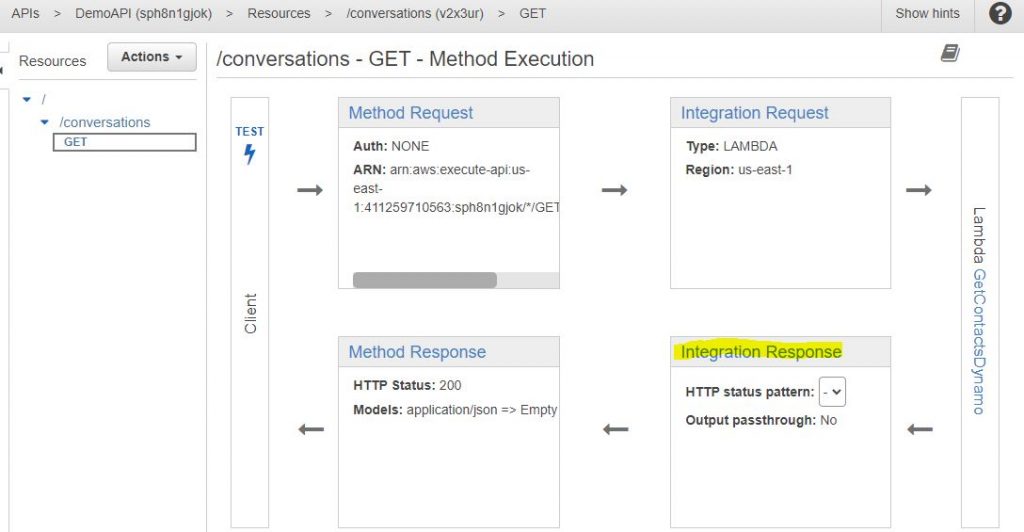
Once saved, you should be able to see this sort of a pipeline created.
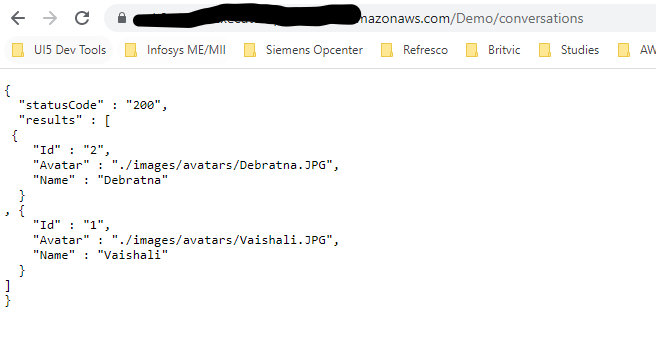
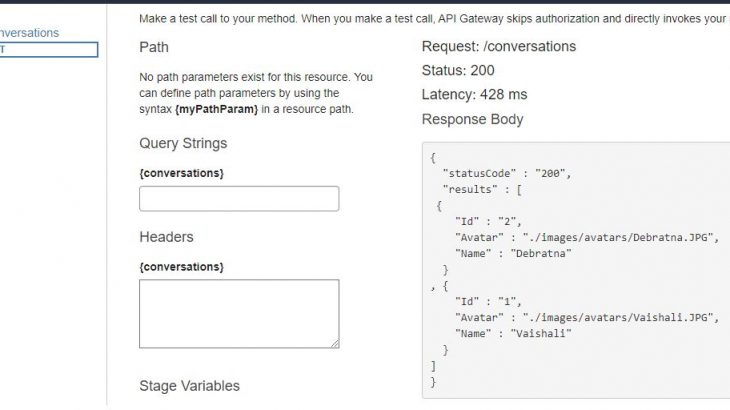
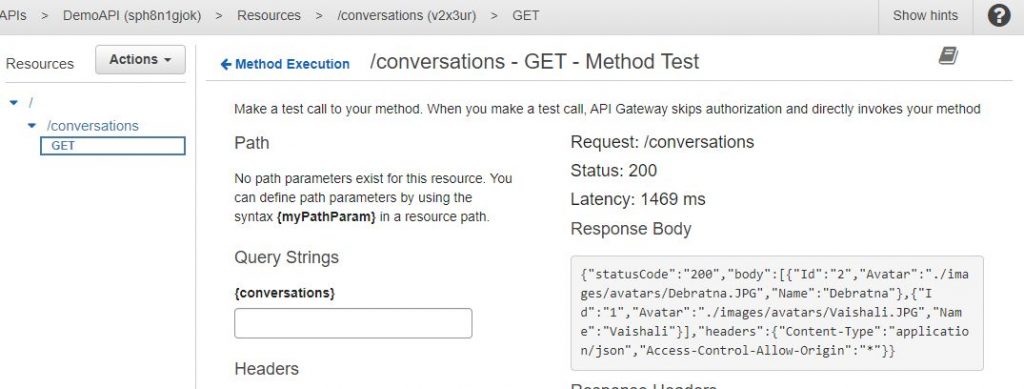
Click on Test. In the following window again click the Test button. You should be able to see the output of your lambda function being returned as shown below.
Now suppose your team is divided into different front end and backend teams and your lambda function is returning some redundant information which you do not want to percolate to your UI layer. In the above scenario, headers is a section that my client side will have no interest knowing about. API Gateway provides modeling feature using which we can reshape/filter our output structure as required by the client side application. It uses Velocity Templating language and a simple version is shown below.
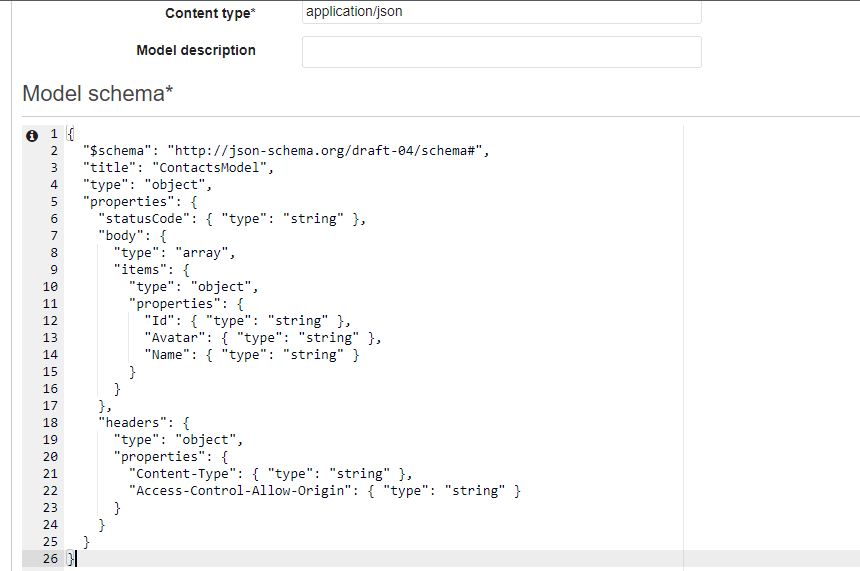
Go to the Models section and create a new model.
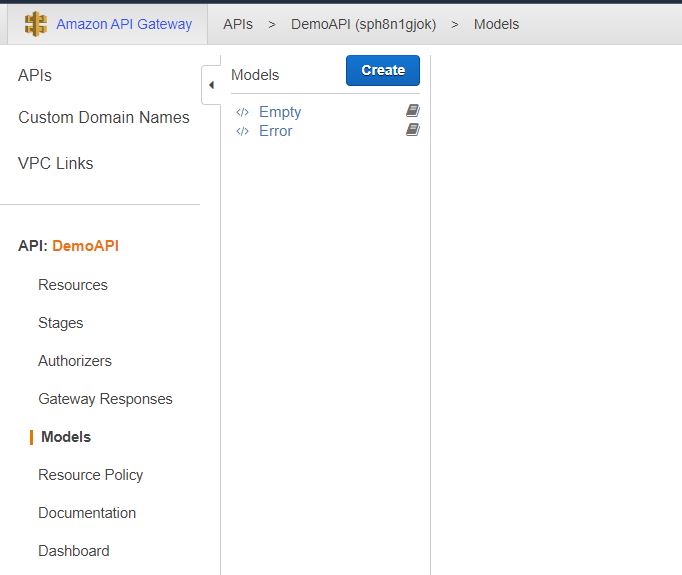
Create a JSON schema of the output being returned by the lambda function and save your model.
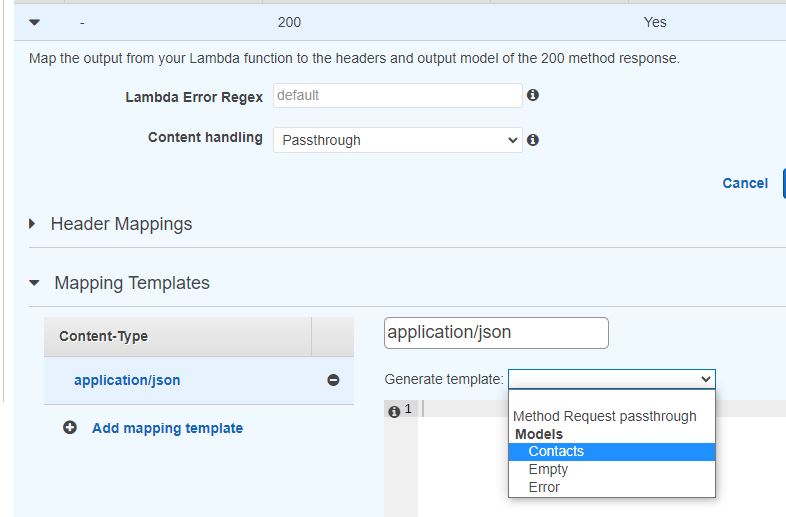
Now come back to Resources and click on Integration Response.
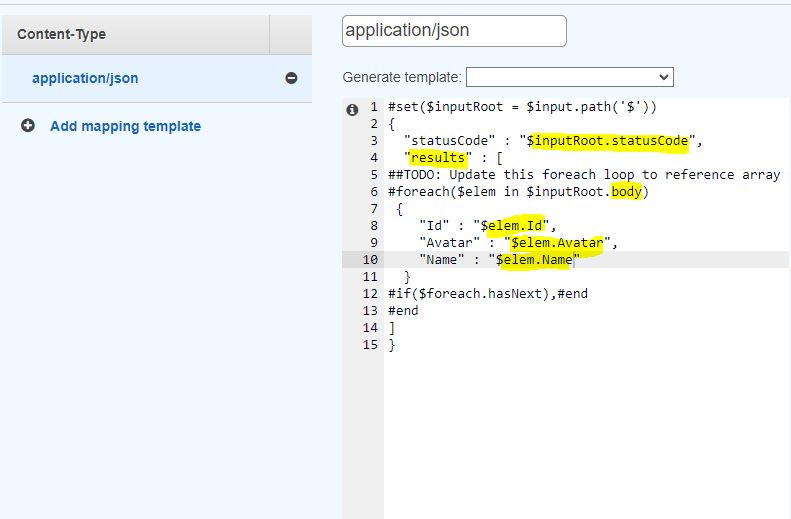
Add an “application/json” type template and from the Generate Template dropdown select the model that you created in the previous step.
Below is the template generated from the model.
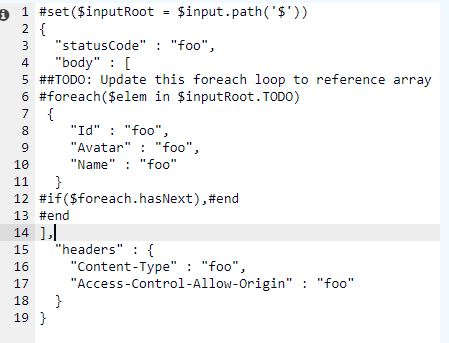
In the above template, I will be removing the headers section ( as i don’t want that information to flow to my UI), I will rename the “body” key to “results” and will replace TODO with body. Also the dummy values need to be replaced with the actual name of the key. The changed template will look as below.
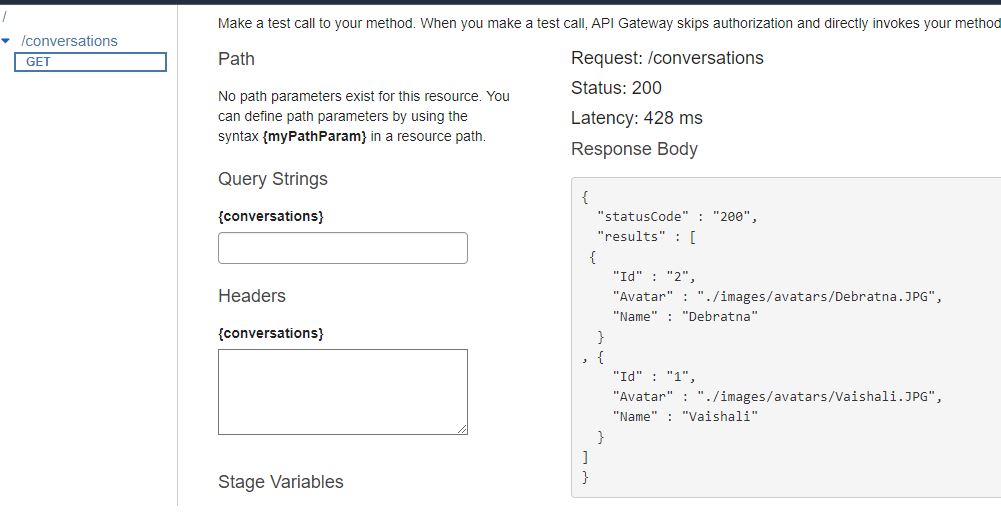
Save the template, return to Method Execution and again test the GET API. The response will be changed from the one that we previously tested.
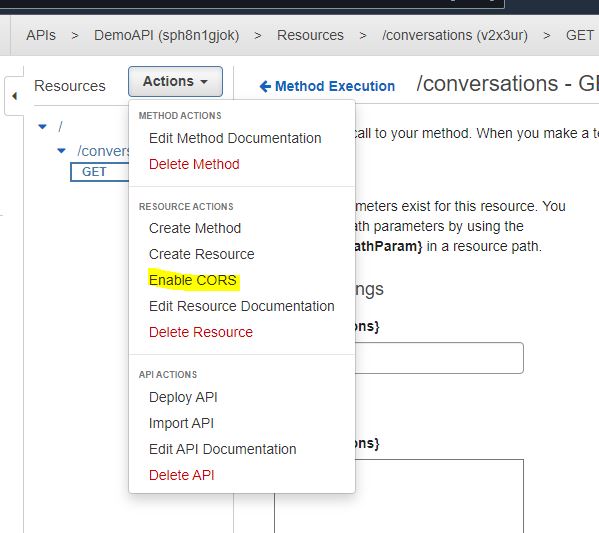
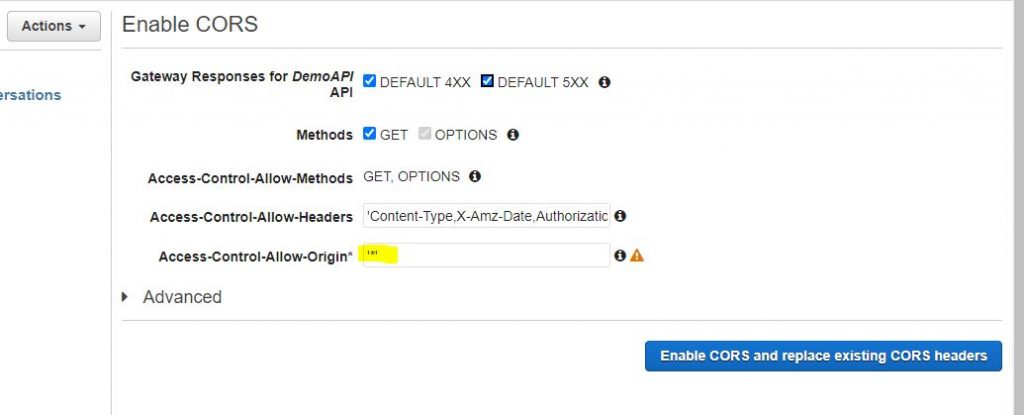
Click on Action, and Enable CORS so that the API is accessible to the client application.
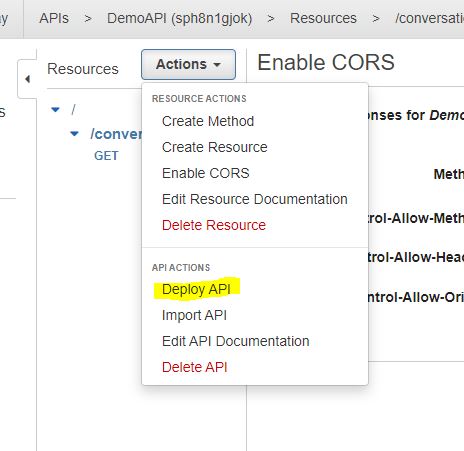
Again click on Actions and select Deploy API.
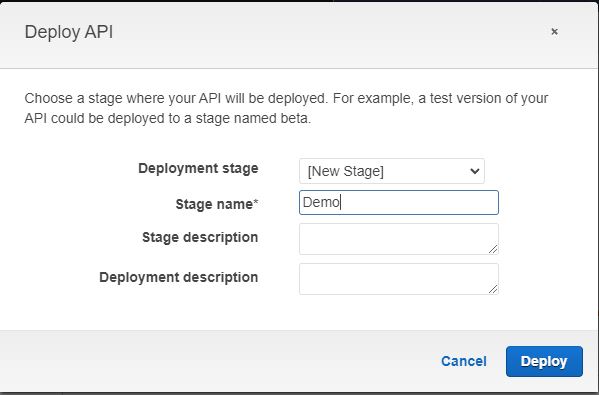
A URL will be generated. Plug this URL in your application and voila, you have now created and end to end application.