Getting started with SAP Health Data Services for FHIR is now much easier and hassle-free. In this blog, I’ll talk about the Booster that will guide you in every step like a partner.
Booster is a guided way that helps you set up services on SAP Business Technology Platform.
There are many boosters available for different services on SAP Business Technology Platform. Now we’ve Booster for SAP Health Data Services for FHIR, which helps you to prepare an account in simple steps.
In the next section, I’ll describe all the steps in this specific Booster in more detail.
Search Booster
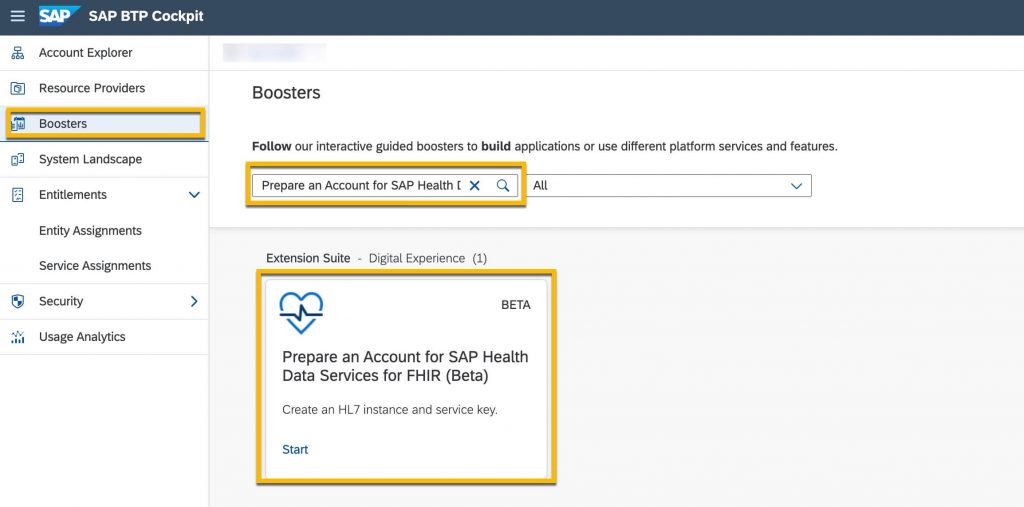
Go to your global account in the SAP BTP Cockpit. In the left navigation pane, select Boosters. Search for “Prepare an Account for SAP Health Data Services for FHIR (Beta)”.
Booster Landing Page
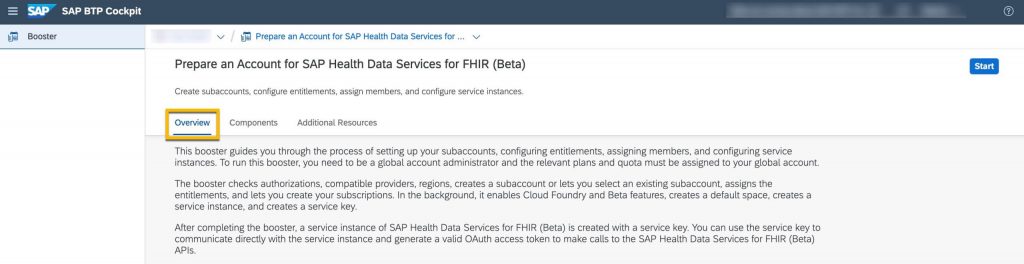
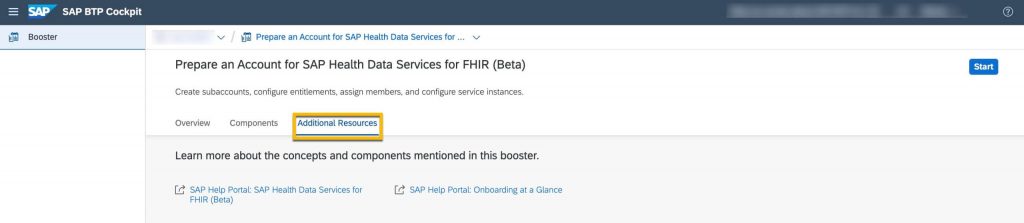
Click on the Booster card for “Prepare an Account for SAP Health Data Services for FHIR (Beta)”. This will display initial view for the Booster. There are three sections in this view that are described as follows.
Overview: Provides you with summary for this Booster.
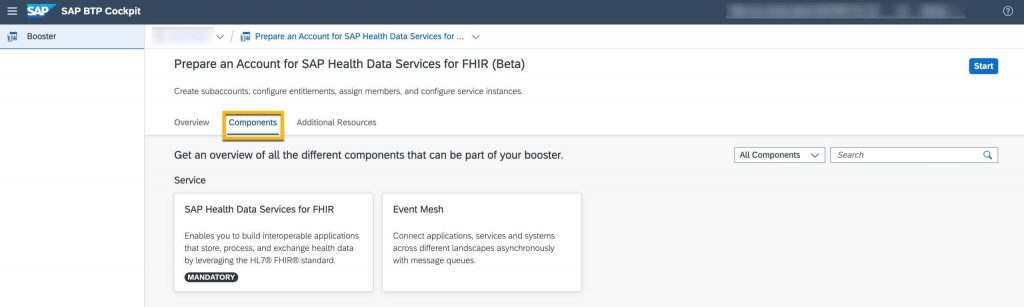
Components: Provides you with different services that are consumed with the Booster.
Additional Resources: Links for the detailed documentation about the booster steps and service.
Booster Execution
After reading and understanding all the information about the Booster, click on “Start”, top-right corner of the page, to begin booster execution. This will perform all the necessary step as described in the overview section. Outcome of the booster execution is a consumable instance of SAP Health Data Services for FHIR.
At each step, you can also view more information using the icon
If there’s any error condition at any step, you’ll get detailed message about the issue on the page.
Let’s dive into each of the steps. Additional information could be found here at the onboarding section.
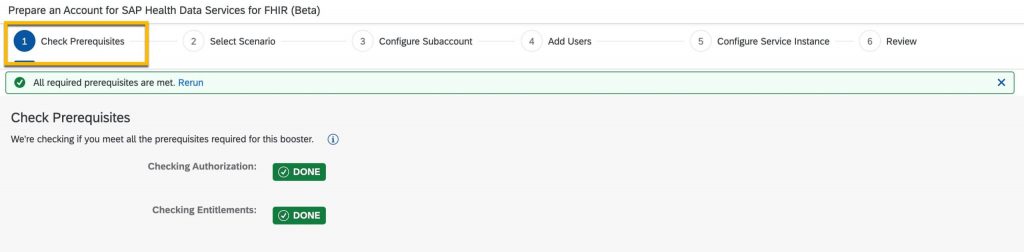
1. Check Prerequisite
This is an automated step with no manual input. It checks if all the necessary authorisations and entitlements are available. You need to be “Administrator” for your SAP BTP global account with necessary privileges to manage entitlements and quotas. This step will check and return error in case some privileges are missing. In case, all privileges are assigned, it will show you successful message as follows.
2. Select Scenario
This step helps you to setup a Subaccount. There are two choices as shown. Let’s have a look at both the options.
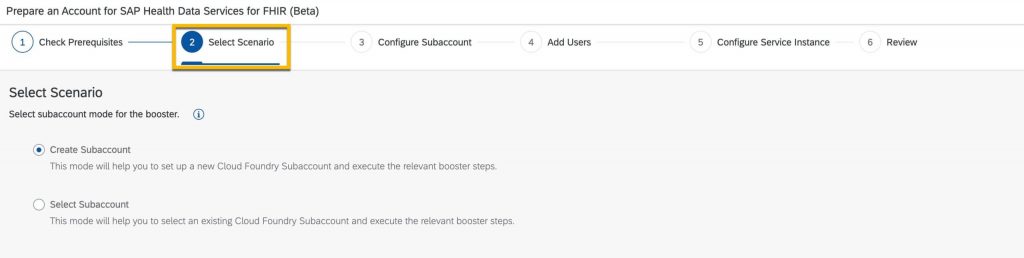
Create Subaccount: Using this option, you can create entirely new subaccount. All the necessary inputs required can be entered manually in simple manner.
Select Subaccount: Using this option, you can select existing subaccount. For this, you need to be a member of the selected subaccount. Other inputs can be provided as shown.
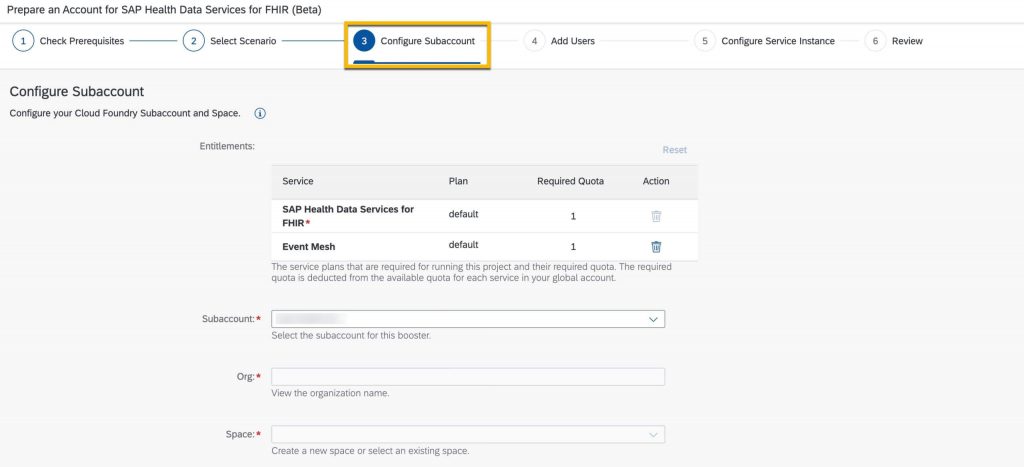
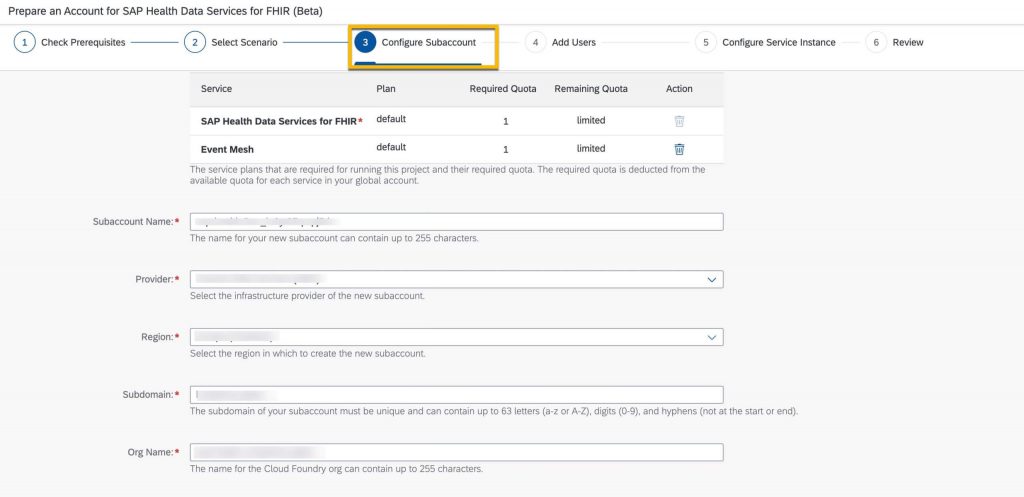
3. Configure Subaccount
This step allows you to configure Subaccount based on your need. This is already covered previously based on the selection of the option for the Subaccount.
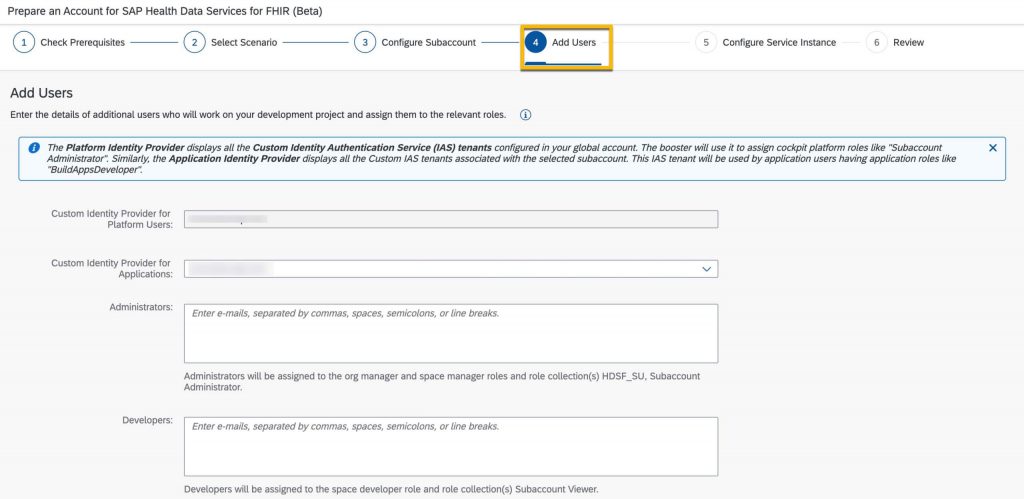
4. Add Users
Using this step, you can add users as “Administrator” and “Developers”. You need to have Identity Provider configured as prerequisite. Note that this is an optional step. As described here, this is applicable only for the business user flow.
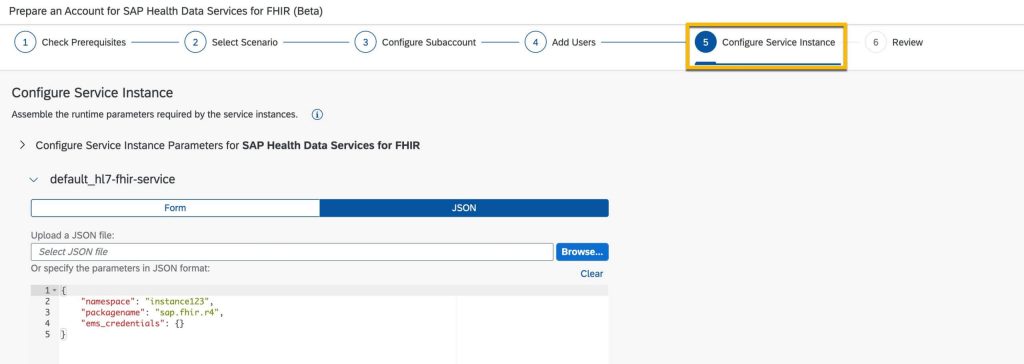
5. Configure Service Instance
In this step, you’ll provide onboarding and configuration parameters for SAP Health Data Services for FHIR and Event Mesh.
Parameters for SAP Health Data Services for FHIR: You must provide parameter in the JSON format. Example parameter:
{
    "namespace": "instance123",
    "packagename": "sap.fhir.r4",
    "ems_credentials": {}
}
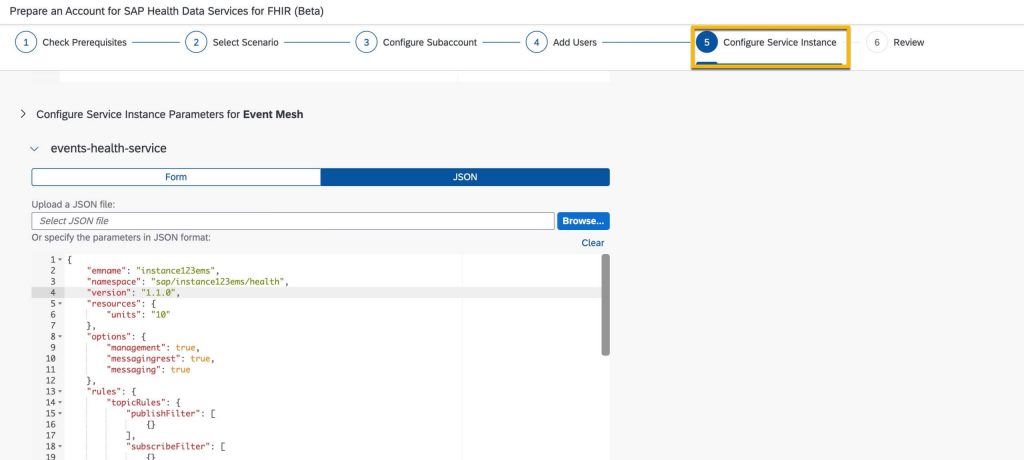
Parameters for SAP Event Mesh: You must provide parameter in the JSON format. Example parameter:
{
  "emname": "<emname>",
  "namespace": "<namespace e.g. a/b/c>",
  "version": "1.1.0",
  "options": {
    "management": true,
    "messagingrest": true,
    "messaging": true
  },
  "rules": {
    "queueRules": {
        "publishFilter": [
            "${namespace}/*"
        ],
        "subscribeFilter": [
            "${namespace}/*"
        ]
    },
    "topicRules": {
        "publishFilter": [
            "${namespace}/*"
        ],
        "subscribeFilter": [
            "${namespace}/*"
        ]
    }
  },
	"xs-security": { //optional//
     "oauth2-configuration": {
      "credential-types": [
        "binding-secret",
        "x509"
      ]
    }
  }
}
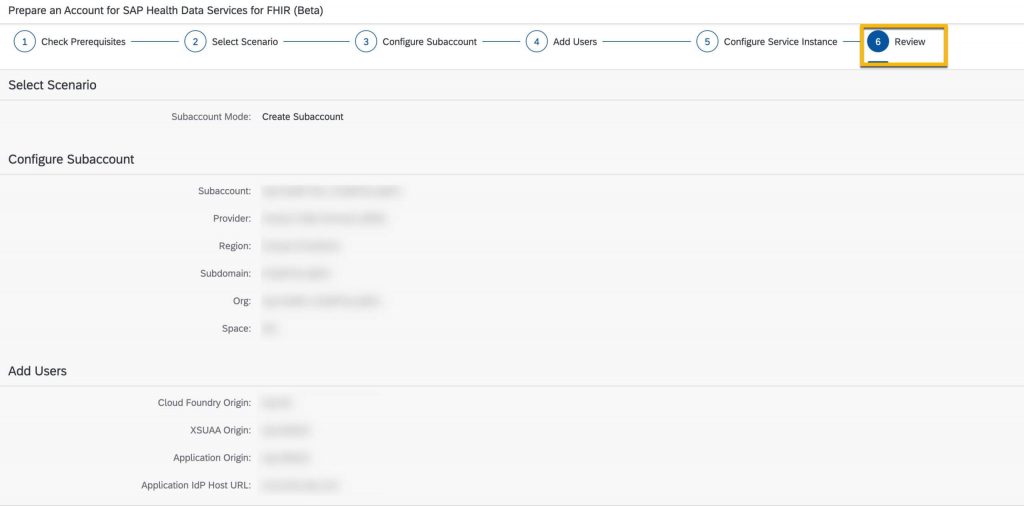
6. Review
The final step provides you with summary for all the selections and inputs. Once you confirm, booster will set up SAP Health Data Services for FHIR service instance, as you need and ready to use.
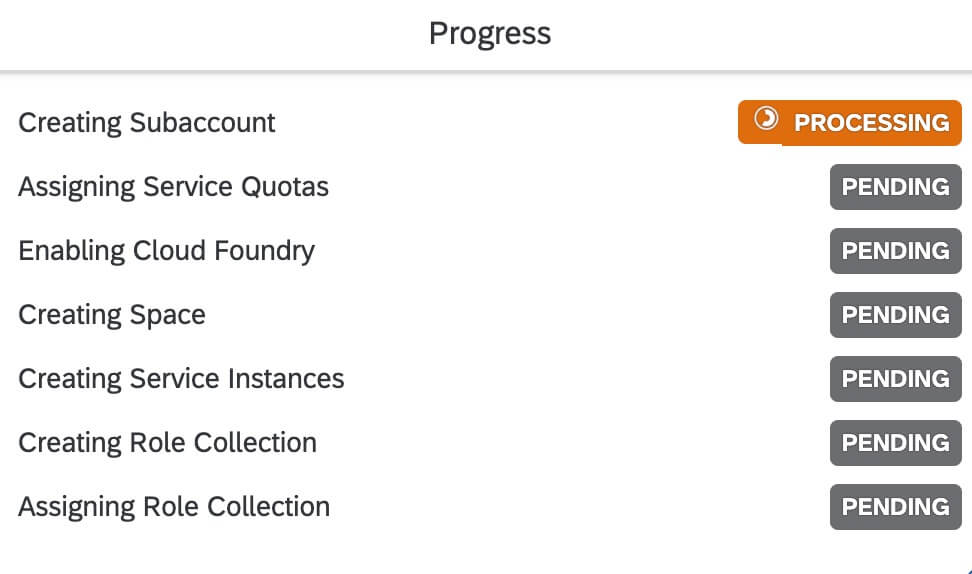
Progress
Booster execution progress is available right in front of you. Based on selection, steps will vary. It will take only few minutes to set up fully usable SAP Health Data Services for FHIR service instance.
If there are errors, you’ll also get inline information on the progress window.
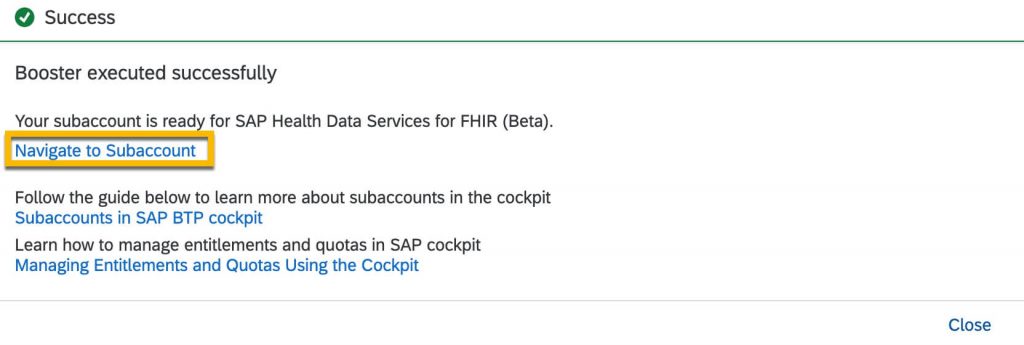
Successful execution will provide you with option to navigate to the Subaccount containing instance of SAP Health Data Services for FHIR.
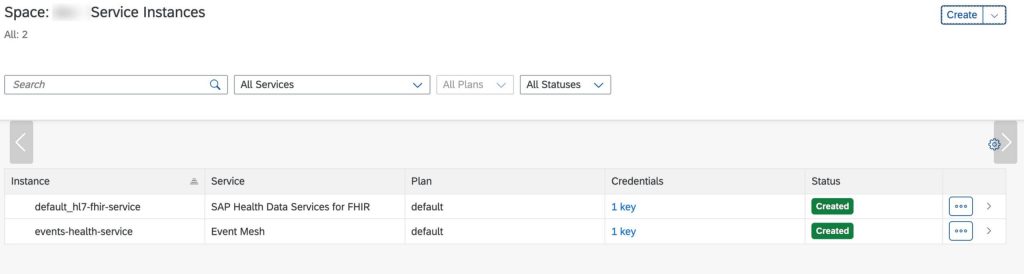
Check your Service Instances
After successful completion of the booster execution, you can navigate to the corresponding subaccount and space to view instances. Based on input and selection, result could differ. You’ll see result as following along with corresponding service keys.