Introduction
QR (Quick Response) codes are two-dimensional barcodes that are widely used for storing and sharing information. They are particularly useful because they can be read quickly and easily by a smartphone or other device equipped with a camera and a QR code reader app.
If we can add a QR code to our app/oData call, it can open a wide area of fields for implementation.
Step-by-Step Procedure:
- Create a page format as of QR size: If we do not create a page format then the QR will be shown in the whole A4 size page and a lot of space will be left empty. Use tcode SPAD for creating.
- Create a Barcode: We will use SE73 to create a barcode.
- Create a smartstyle: To create a character format for QR.
- Create a smartform: To display the
- Create a class: To convert text to xstring. This xstring will be passed to the oData call.
- Table Creation: Create a table to store the data to be displayed in form of a QR code via oData.
- Create oData Service: Finally, we will be creating an oData service.
- Publish and test the Odata service.
Let’s start the development now in the steps mentioned above.
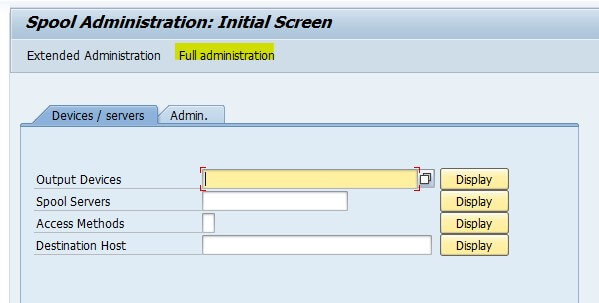
STEP 1: Create a page format: Go to tcode SPAD.
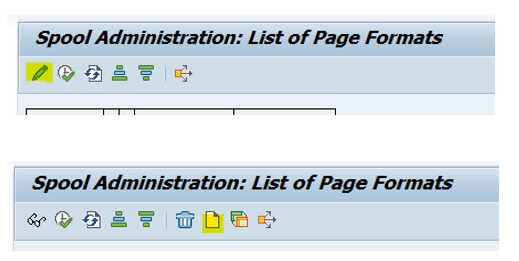
1.1 Click on the full administrator and go to the tab Device Types and click on display.
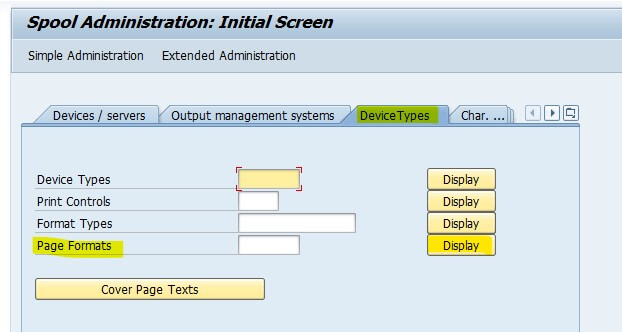
1.2 Click on the pencil button to come to change mode and then click Create to create a new page format.
1.3 Save the page format with the below settings. One thing to notice is that depending on the data, the QR code can increase its size a bit as it has to hold more data in it. Play and change these settings as required.
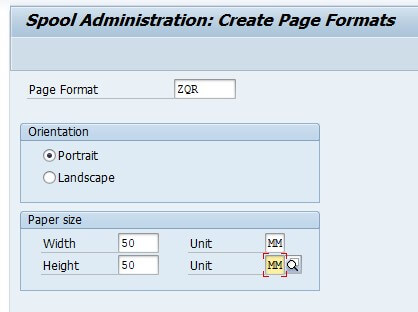
1.4 Our first step completes here.
STEP 2: Create a barcode.
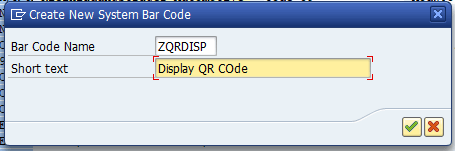
2.1 Go to tcode SE73 and create a new Barcode.
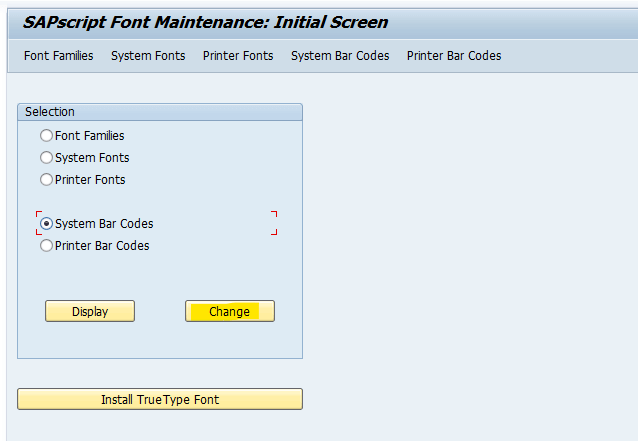
2.2 Create a new barcode.
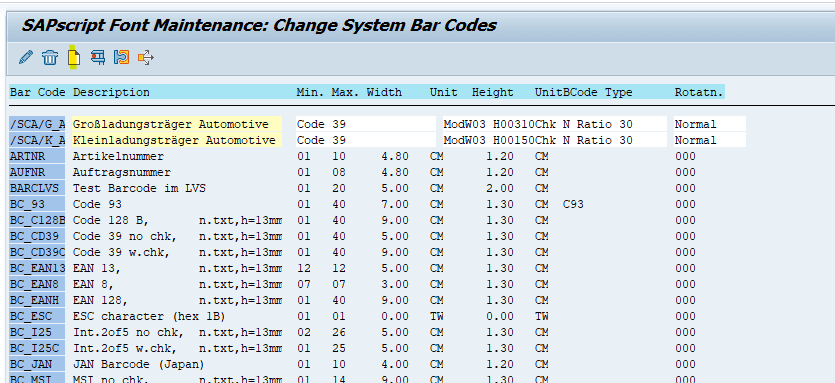
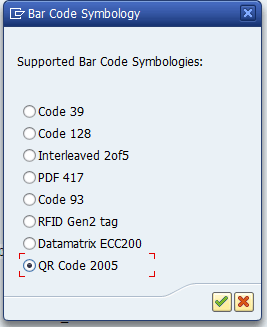
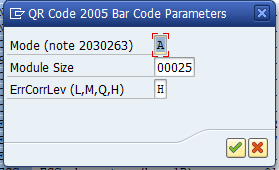
2.3 Use the below setting to create the barcode.

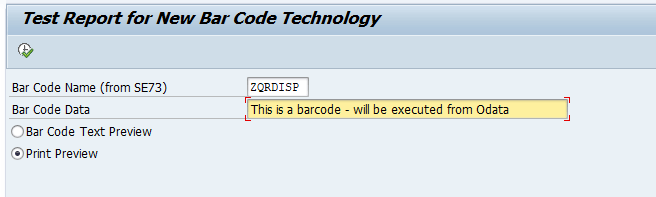
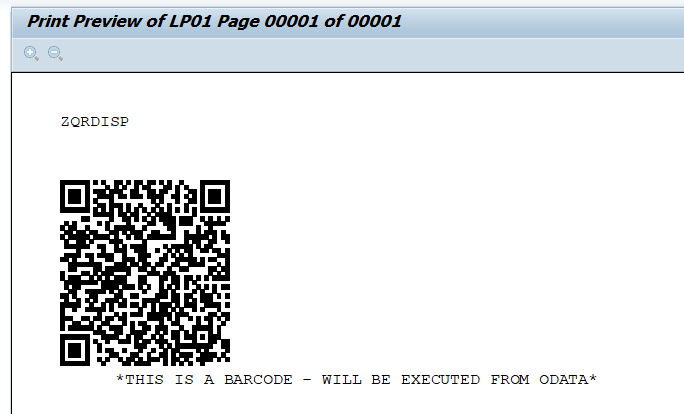
2.4 QR Code is created. Now it’s time to test the QR code. Place your cursor on the new barcode, in our case it is ZQRDISP, and hit F6 (execute barcode). I guess we all are excited to see the QR code in this development for the first time.

2.5 Execute the report with any text.
2.6 Tada! Our QR code is ready.
STEP 3 : Create Smartstyle
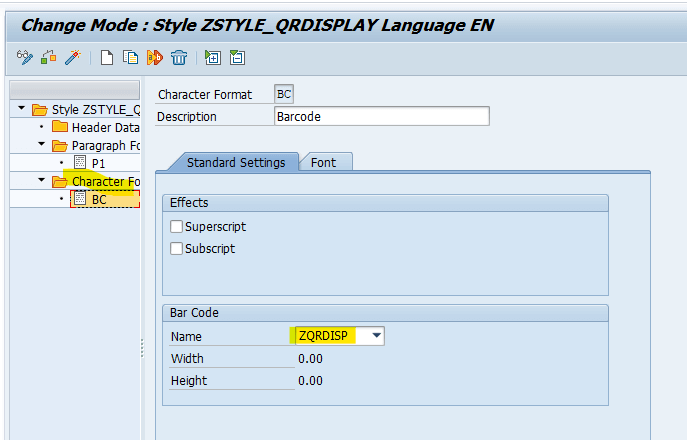
Let’s create a smartstyle on the top of created barcode.
3.1 Create a smartstyle with character format as the created barcode. Also, create a default paragraph to add to the header data.
STEP 4: Create Smartform
Let’s move on to create a smartform.
4.1 This smartform will have an input parameter of type string and we will pass this parameter to the text element so that it can be displayed as a QR code. Add recently created smartsytle via the output options tab of the text element.
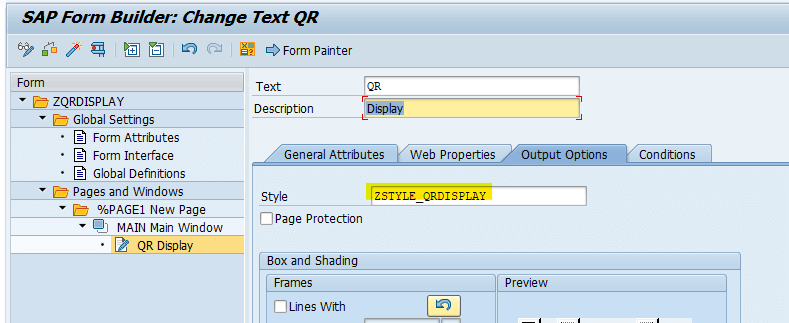
4.2 Save and activate it.
4.3 It’s time to execute the smartform, let’s see what the output looks like. Pass any text to input field. Voila, we got a QR code!🕺🕺🕺
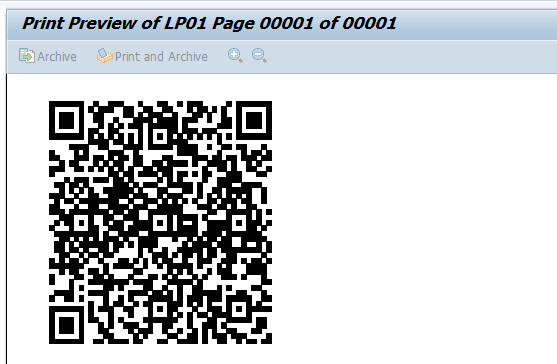
4.4 Do scan the QR code and it will take you to like to read another oData blog.
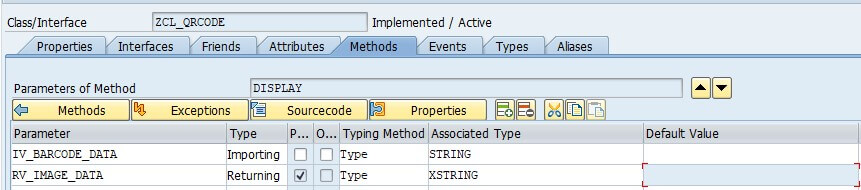
STEP 5: Create Class
5.1 Create a class that will take a string as an input. It will take that string and pass it to smartform, generate the QR from it, and then finally the QR will be converted to pdf xstring. As oData can not process images directly, we are converting it to xstring.
5.2 Below is the snippet of the code. We are performing the below activities in the code:
- Get Device type.
- Set relevant output options of the smartform.
- Call smartform.
- Convert the smartform output to OTF format.
- Pass back the OTF xstring as a returning parameter.
METHOD display.
DATA :
lv_fm_name TYPE rs38l_fnam,
ls_output_options TYPE ssfcompop,
lv_language TYPE tdspras,
ls_control_parameters TYPE ssfctrlop,
ls_output_data TYPE ssfcrescl,
lv_pdf_len TYPE i,
lv_pdf_xstring TYPE xstring,
lt_lines TYPE TABLE OF tline,
lv_devtype TYPE rspoptype,
lt_tstotf TYPE tsfotf.
* language
lv_language = sy-langu.
TRANSLATE lv_language TO UPPER CASE.
ls_control_parameters-langu = lv_language.
* set control parameters to get the output text format (OTF) from Smart Forms
ls_control_parameters-no_dialog = 'X'.
ls_control_parameters-getotf = 'X'.
ls_control_parameters-preview = space. "No preview
* get device type from language
CALL FUNCTION 'SSF_GET_DEVICE_TYPE'
EXPORTING
i_language = lv_language
* i_application = 'SAPDEFAULT'
IMPORTING
e_devtype = lv_devtype
EXCEPTIONS
no_language = 1
language_not_installed = 2
no_devtype_found = 3
system_error = 4
OTHERS = 5.
* set device type in output options
ls_output_options-tdprinter = lv_devtype.
* Set relevant output options
ls_output_options-tdnewid = 'X'. "Print parameters,
ls_output_options-tddelete = space. "Print parameters
CALL FUNCTION 'SSF_FUNCTION_MODULE_NAME'
EXPORTING
formname = 'ZQRDISPLAY' "Smartform name
IMPORTING
fm_name = lv_fm_name
EXCEPTIONS
no_form = 1
no_function_module = 2
OTHERS = 3.
* Call Smartform generated FM
CALL FUNCTION lv_fm_name
EXPORTING
control_parameters = ls_control_parameters
output_options = ls_output_options
user_settings = space
gv_text = iv_barcode_data
IMPORTING
job_output_info = ls_output_data
EXCEPTIONS
formatting_error = 1
internal_error = 2
send_error = 3
user_canceled = 4
OTHERS = 5.
APPEND LINES OF ls_output_data-otfdata[] TO lt_tstotf[].
* Convert to OTF
CALL FUNCTION 'CONVERT_OTF'
EXPORTING
format = 'PDF'
IMPORTING
bin_filesize = lv_pdf_len
bin_file = lv_pdf_xstring " binary file
TABLES
otf = lt_tstotf
lines = lt_lines
EXCEPTIONS
err_max_linewidth = 1
err_format = 2
err_conv_not_possible = 3
err_bad_otf = 4
OTHERS = 5.
IF sy-subrc = 0.
rv_image_data = lv_pdf_xstring.
ENDIF.
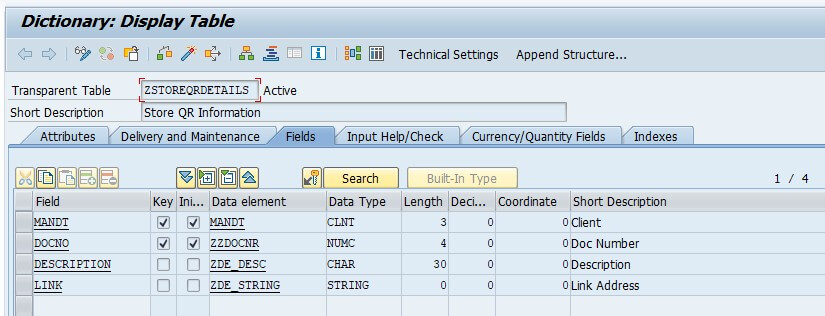
ENDMETHOD.STEP 6: Create a Table
6.1 This table will store the data information and also will be used while creating the oData service.
STEP 7: Create an oData service
7.1 Finally we reached the step where we will be creating the oData service. If it’s your first oData service then I would recommend visiting A Step by Step process to create Odata services.
7.2 Once the oData service is created, import the table created.

7.3 Do remember to check the checkbox “Media”.

7.4 Now we are all set to generate the oData service. Once oData is generated, goto DPC extension class and redefine method /IWBEP/IF_MGW_APPL_SRV_RUNTIME~GET_STREAM.
METHOD /iwbep/if_mgw_appl_srv_runtime~get_stream.

    DATA:
      lt_keys     TYPE /iwbep/t_mgw_tech_pairs,
      ls_key      TYPE /iwbep/s_mgw_tech_pair,
      lv_customer TYPE s_customer,
      lv_xstring  TYPE xstring,
      ls_stream   TYPE ty_s_media_resource.

    lt_keys = io_tech_request_context->get_keys( ).

* docno is the specified key
    READ TABLE lt_keys WITH KEY name = 'DOCNO' INTO ls_key.
    IF sy-subrc IS INITIAL.

* We will convert field LINK as QR code
      SELECT SINGLE link FROM zstoreqrdetails INTO @DATA(lv_link)
      WHERE docno = @ls_key-value.

* Method display of Class zcl_qrcode will convert the data to QR to xstring
      lv_xstring = zcl_qrcode=>display( iv_barcode_data = lv_link ).

      ls_stream-value = lv_xstring.

      ls_stream-mime_type = 'application/pdf'.

* Pass the QR's xstrinh back to oData
      copy_data_to_ref( EXPORTING is_data = ls_stream
                        CHANGING  cr_data = er_stream ).

    ENDIF.

  ENDMETHOD.
7.5 In this step we will goto MPC extension class and redefine method DEFINE.
METHOD define.

    DATA:
      lo_entity   TYPE REF TO /iwbep/if_mgw_odata_entity_typ,
      lo_property TYPE REF TO /iwbep/if_mgw_odata_property.

    super->define( ).

* QR_Detail is the entity name
    lo_entity = model->get_entity_type( iv_entity_name = 'QR_Detail' ).

    IF lo_entity IS BOUND.
* Field Link will be converted to media
      lo_property = lo_entity->get_property( iv_property_name = 'Link' ).
      lo_property->set_as_content_type( ).
    ENDIF.

  ENDMETHOD.
7.6 That’s it. We are done with the development. In the next step, we will test it.
STEP 8: Testing
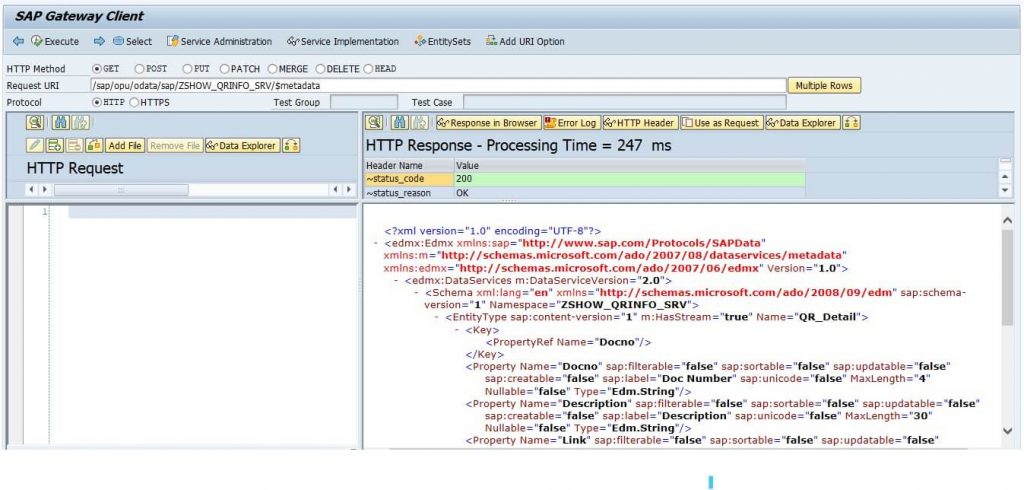
8.1 Register your oData service.
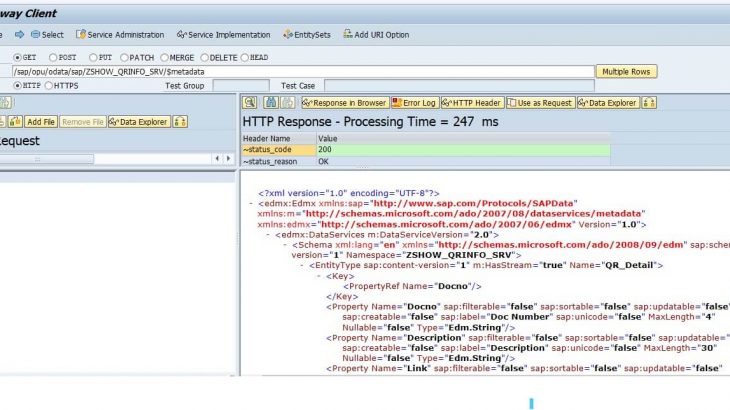
8.2 Once registered, let’s see if metadata is loaded.
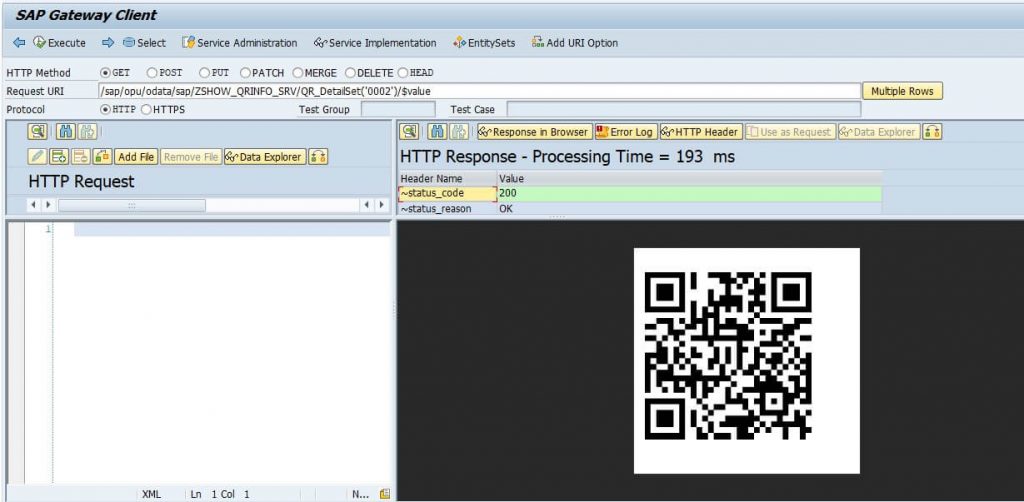
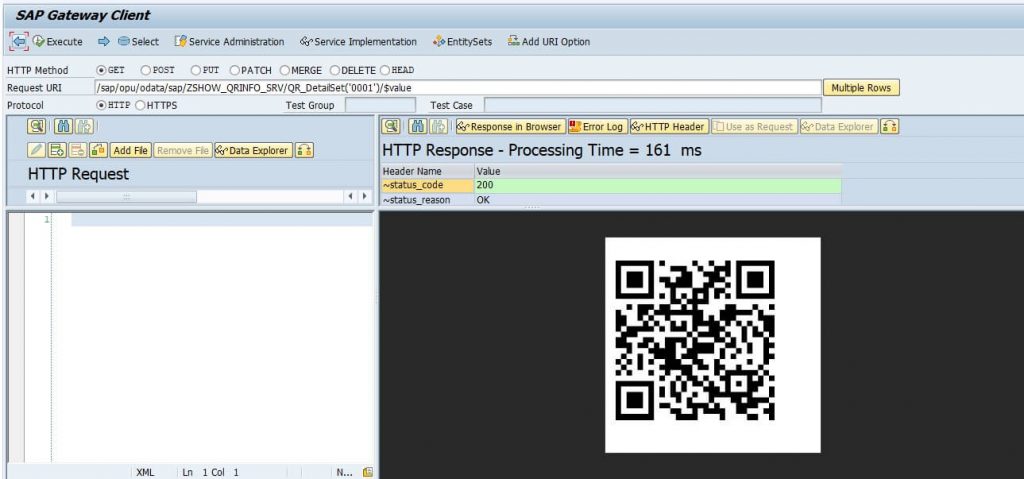
8.3 Guys, please open your QR scanners as we are now going to get them. Execute the below URL and we will get the QR code as output.
/sap/opu/odata/sap/ZSHOW_QRINFO_SRV/QR_DetailSet('0001')/$value
8.4 Let’s execute another case.
/sap/opu/odata/sap/ZSHOW_QRINFO_SRV/QR_DetailSet('0002')/$value