This blog is about our experience with Customization of flexible workflow for Purchase Orders, the issue we faced and the resolutions for the same. The below information can also be used as a reference for the configuration of flexible workflow for other scenarios.
Prerequisite:
- Ensure that the automatic Customizing is active for the workflow functionality in SWU3 TCode.
- My Inbox relevant customizing should be in place
- Manage Workflows for Purchase order and Maintain Email template tile is available in the Fiori Launchpad
Now Let’s start with the step-by-step Journey!
1. Open the Manage Workflow for Purchase Orders. The application is blank with the message “There are currently no scenarios available”.

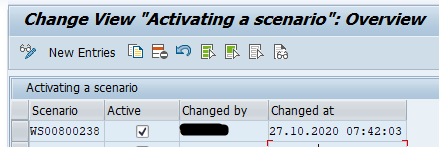
2. Go to the following the path in SPRO: SAPNETWEAVER –> Application Server –> Business Management –> SAP Business Workflow –> Flexible Workflow –> Scenario Activation
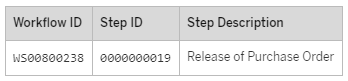
3. Maintain new entry for WS00800238 and set it as active
4. If the issue on point 1 still persists assign the below authorization object:
i. Authorization Object: S_WFFLXDEF
ii. SWFFLEXSCN -> Scenario Id (for example, WS00800157)
iii. ACTVT -> At least you will need to have authorization to display (03)
5. This should solve the issue in point 1
6. Click the Add button to create a new workflow for purchase orders. This will open the New workflow page
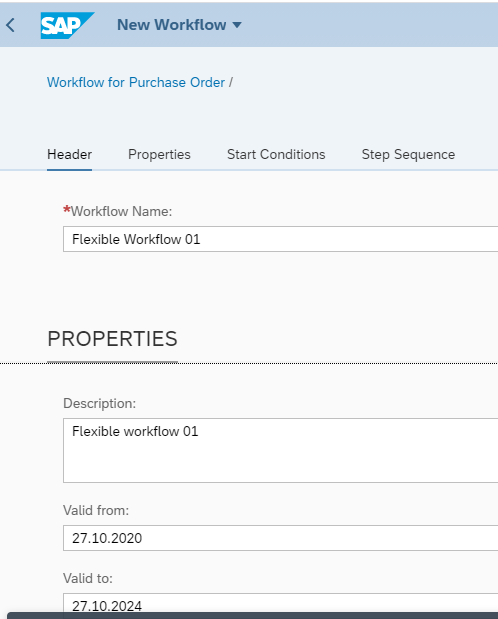
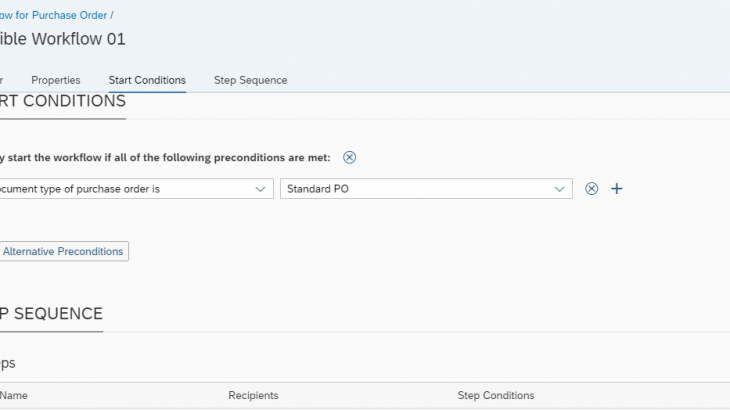
7. Enter Workflow Name, Description, Valid From, Valid To. Enter the Start Condition for the workflow.
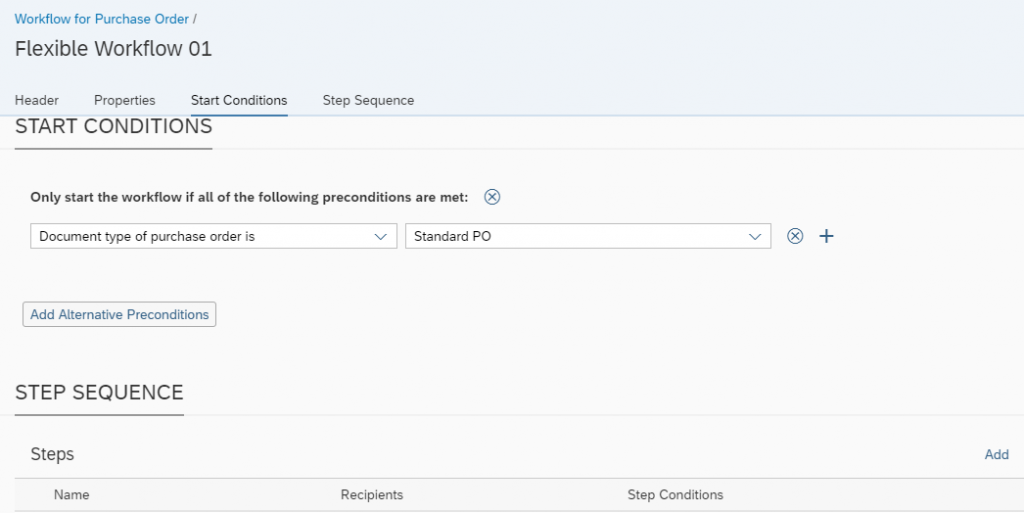
8. To add the Step sequence click the add button in the Step Sequence Section. In the New Step page, Enter the Step Name and Step Type as Release of Purchase Order

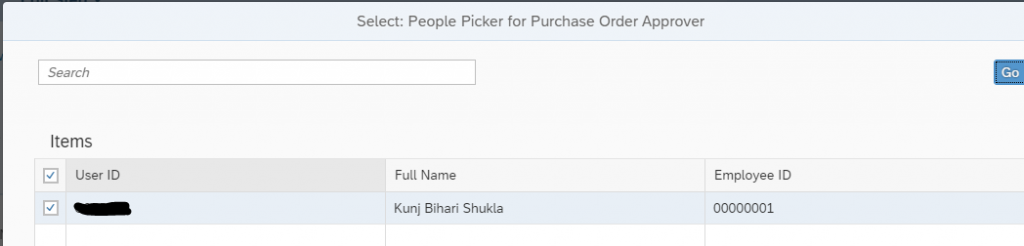
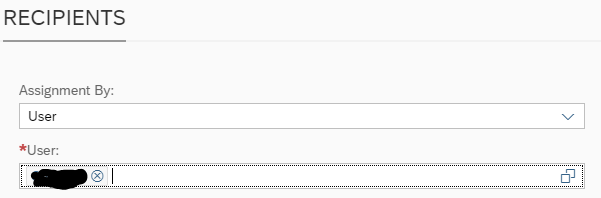
9. For Recipients Select User for Assignment By. For the user field, select a user from the Search help.
10. If the search help return no data follow the below steps
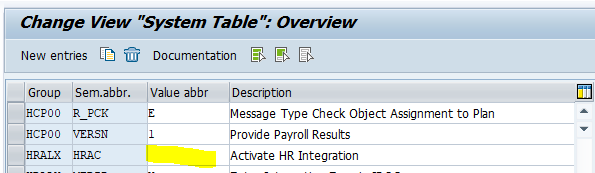
i. Activate HR Integration –> Goto SM30 –> Maintain table T77S0 –> search for entry group: HRALX, sem.abbr.: HRAC and set the value abbreviation value to X
ii. Go to the customizing path
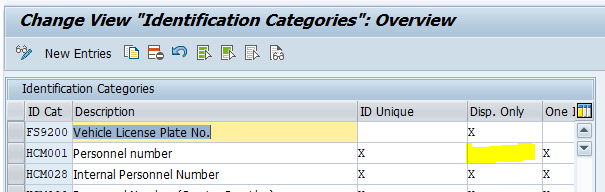
SPRO -> Cross-Application Components -> SAP Business Partner -> Business Partner -> Basic Settings -> Identification Numbers -> Define Identification Categories.
iii. unSet Identification Categories for HCM0001 for Disp. Only
iv. Check the below blog for the step by step instruction to fix this issue. Make sure to finish steps 10.i, 10.ii, 10.iii before going to the blog employee as a business partner and synchronization with hr data Once done the data will be visible in the search help
11. In the Step Conditions tab, provide the relevant triggers for this specific step. We can provide as many conditions as we want, these conditions will be responsible for triggering this step
12. No change is needed for Deadlines or Exception Handling, click the Add Button to Add the above step to the workflow.
13. Click the Save button to save the workflow.
14. Repeat Steps 8-9-11-12 to add additional steps to the workflow. Click the Activate Button for the workflow to be activated.
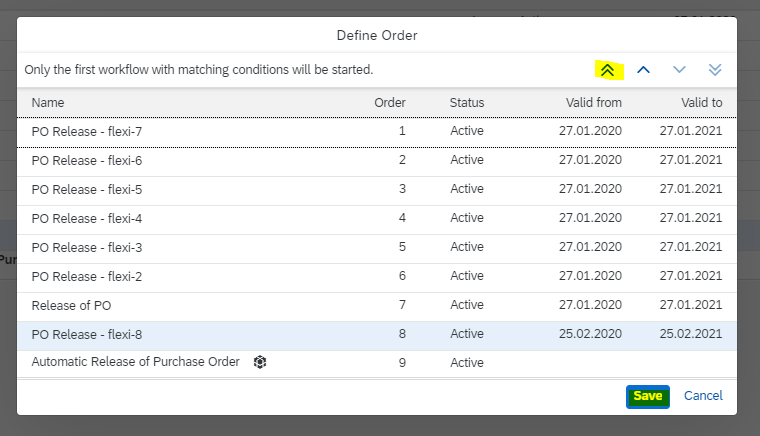
15.Click the Define Order button to ensure that the workflow gets triggered if the Start conditions are met.
16. Once done our workflow will appear on top.
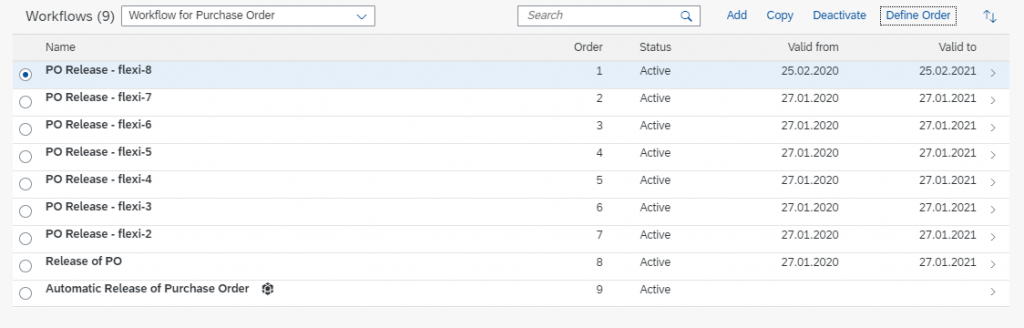
Significance of Order field: If the start/trigger conditions of our workflow at order 1 are not met then it will check the start/trigger conditions of the workflow at order 2 (given the status is active) and so on. Now, let us test it!
17. create a Purchase order in the Manage Purchase order application. We can see the Approval Details for the Purchase Order in the Approval Details tab.
18. Open the My Inbox application for If the relevant task is not visible do the below steps
19. In SPRO goto Materials Management –> Purchasing –> Purchase Order –> Flexible Workflow for Purchase Orders –> Activate Flexible workflow for Purchase Orders
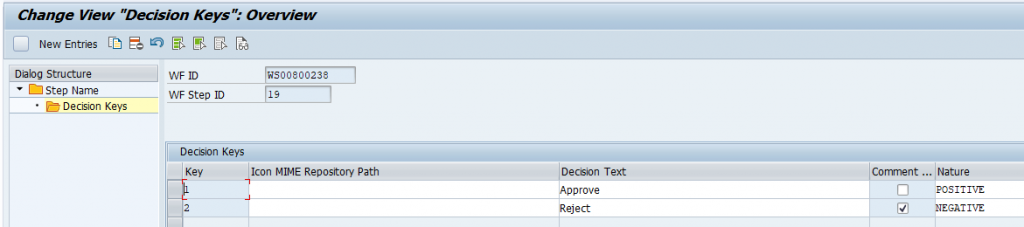
20. goto SAP Gateway Service Enablement –> Content –> Workflow Settings –> Maintain Task Names and Decision Options
i. In the Step Name: Overview
ii. Select the above entry and click on Decision Keys and maintain the two Decision keys as below
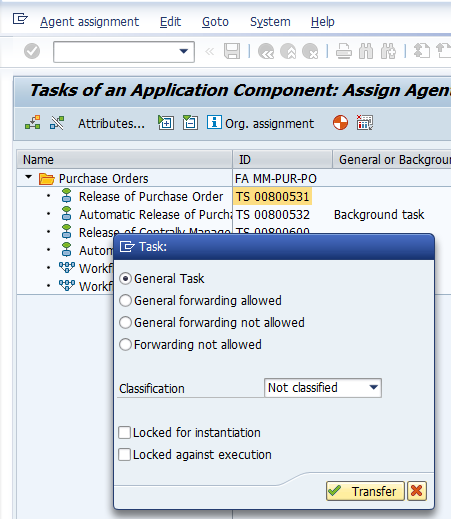
21. Assign Agents and Activate Event Linkages for Workflow ID WS 00800238 and TS 00800531
i. SAP Netweaver –> Application Server –> Business Management –> SAP Business –>Workflow –> Perform task-specific Customizing
ii. Navigate to the SAP application component MM-PUR-PO
iii. Click Assign Agents –> select line with TS00800531 –> Click Attributes and select General Task–>clickTransfer
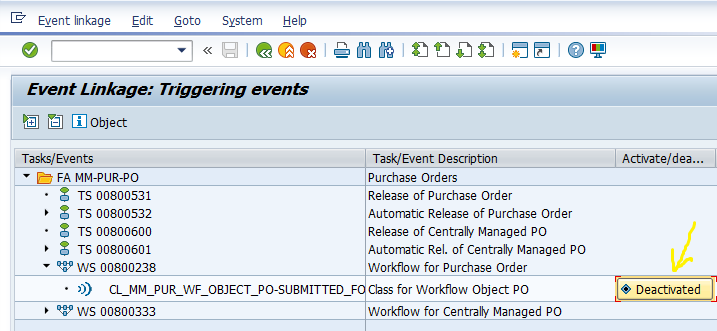
iv. Click Activate Event Linking–>Expand the hierarchy to display the relevant event for WS00800238 –>Activate the linkage for the listed event by clicking on the Deactivated button
v. Once done the task will be visible in the My Inbox application, but still, there is no mail received by the recipient.
22. Now let’s set up the Email transmission. The prerequisite to set up the Email is as below:
i. In Transaction Code S_ATO_SETUP, set up Adaptation Transport organizer with specific data using YY1_ as prefix and sandbox prefix as YY9_.
ii. SOST and SCOT configuration should be in place
iii. Ensure Email address is maintained for the users in su01
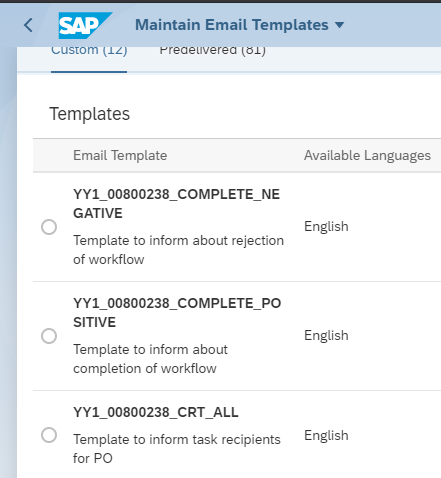
23. Open the Maintain Email Template application. In the pre-delivered section find the template SWF_CRT_NOTIFY_RECIPIENTS.
24. Copy the above-mentioned template for each of the workflow scenarios. e.g. YY1_00800238_CRT_ALL for PO. This workflow template will be triggered to notify the recipients of the newly created PO, or whenever there is a PO task for approval.
25. Copy the pre-delivered template SWF_WORKFLOW_COMPLETE_NOTIFY for each of the workflow scenarios. e.g. YY1_00800238_COMPLETE_POSITIVE for PO. These workflow templates will be triggered to notify the recipients of the completed POs, whether completed positively or negatively.
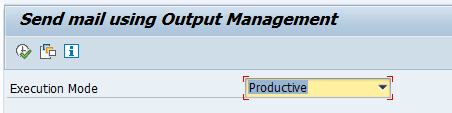
26. Test again by creating a PO. If the mail is still not getting triggered Report RSWF_OUTPUT_MANAGEMENT needs to be executed manually with parameter productive in order to release the emails manually
With this, we conclude the configuration required for Flexible Workflow for Purchase Order including the email trigger functionality.


