In this blog post, we will learn how to build the XSODATA services used to expose our data model to the user interface.
This tutorial is designed for SAP HANA on premise and SAP HANA, express edition. It is not designed for SAP HANA Cloud. I have used SAP HANA XS Advanced (SAP Web IDE).
When you want to expose data from a HANA database to a third party (In my case they were going to use the data to build a user interface application using ReactJS), the recommended best practice is to use OData.
xsodata services use the proprietary XSJS dialect of JavaScript to create an OData service. To use XSJS, SAP adds Node.js modules to provide XSJS compatibility.
Before we proceed further, let’s have a quick look at our system.
Our Project name is DUMMY_PROJECT and DB name is DUMMY_DATABASE.
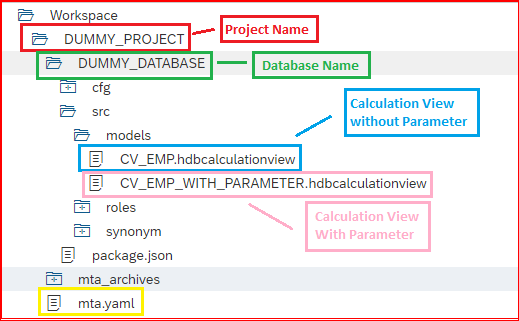
There are two calculation Views: –
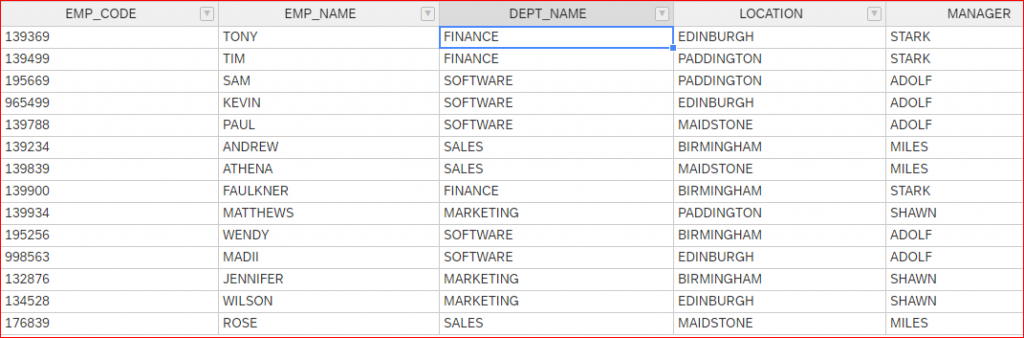
1. CV_EMP – calculation view without parameter.
Its Output: –
2. CV_EMP_WITH_PARAMETER – Same calculation view as above but with parameter on
‘DEPT_NAME’ column named as IP_DEPARTMENT.
Its Output: – With ‘FINANCE’ as an input for the Input Parameter IP_DEPARTMENT.


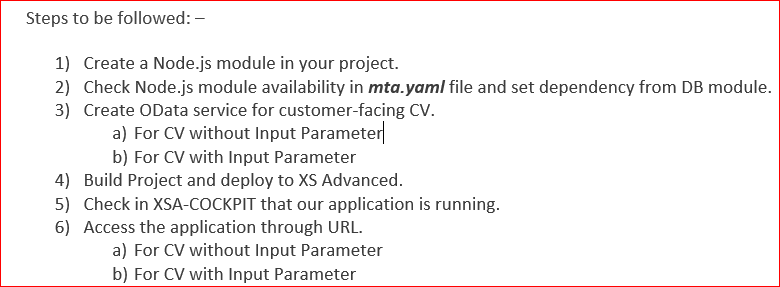
Step 1: Create a Node.js module in your project
Right-click on the project (DUMMY_PROJECT) and select New->Node.js Module.
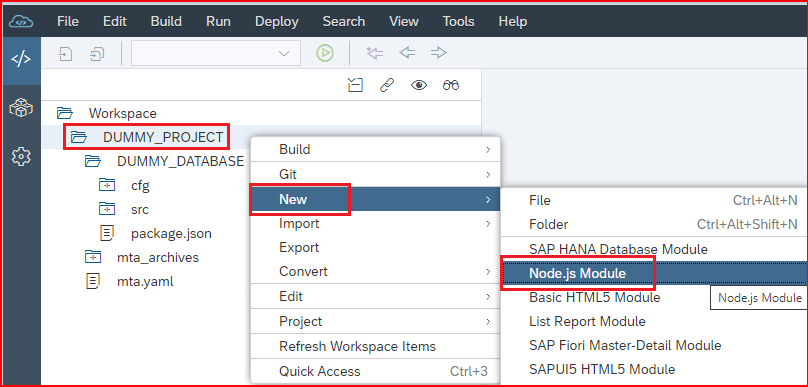
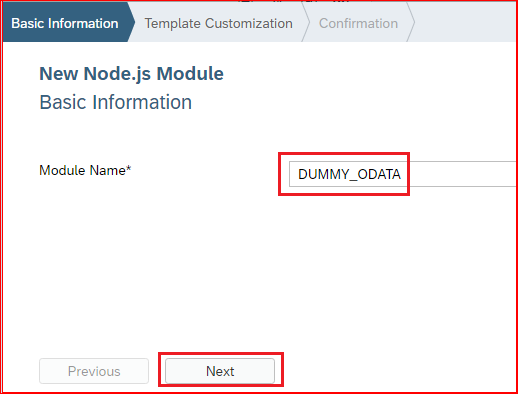
Give it a name (DUMMY_ODATA) and click “Next”, on next screen add description (Dummy OData Application) and be sure to Enable XSJS Support by selecting a checkbox:
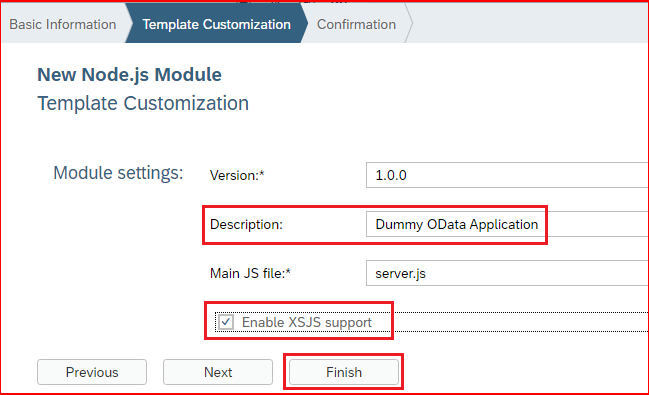
Click “Finish” and validate that module is available under the project as shown below.
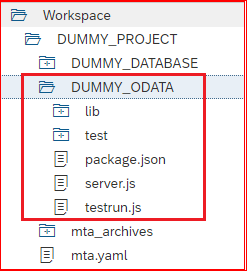
Right click on Node.js module just created (DUMMY_ODATA) and build it.
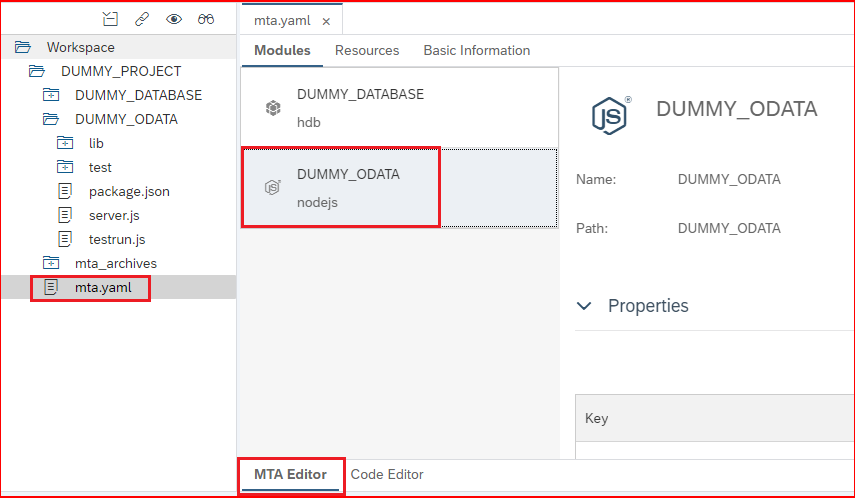
Step 2: Check Node.js module availability in mta.yaml file and set dependency from DB module
Double click on mta.yaml file and switch to “MTA Editor” view, Node.js module (DUMMY_ODATA) should be available there.
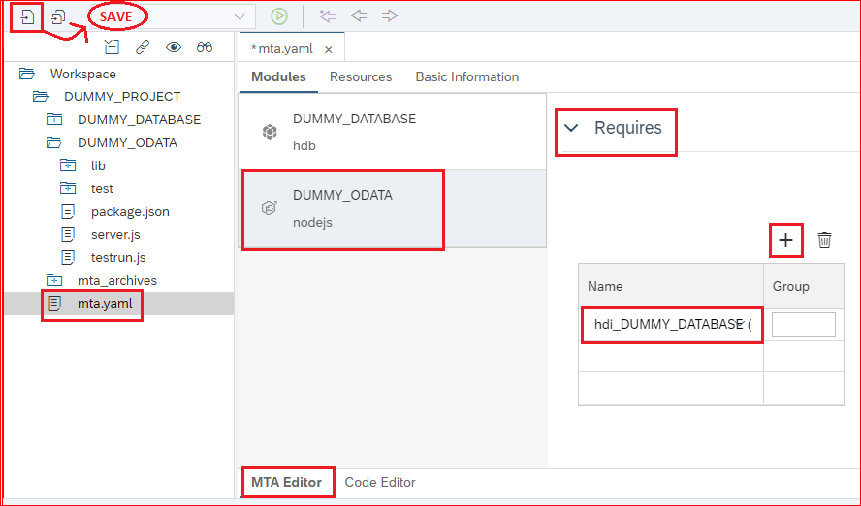
For Node.js module to be linked with DB module scroll down to “Requires” section, hit “+” icon and select our reporting container DB(DUMMY_DATABASE) for it to appear as on screenshot below, and save the changes.
Step 3: Create OData service for customer-facing CV
- For CV without Input Parameter
- For CV with Input Parameter
- For CV without Input Parameter
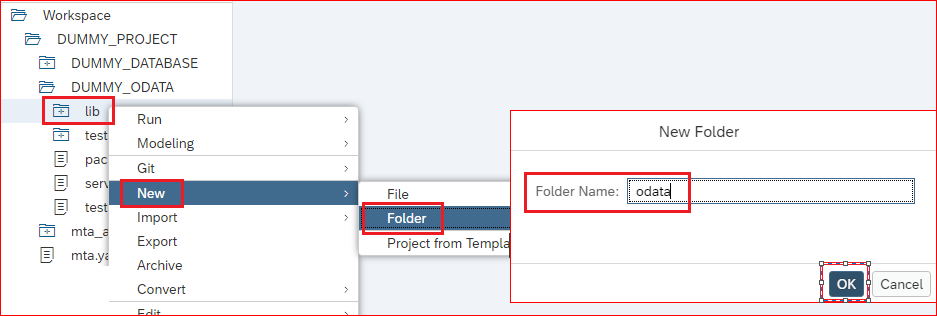
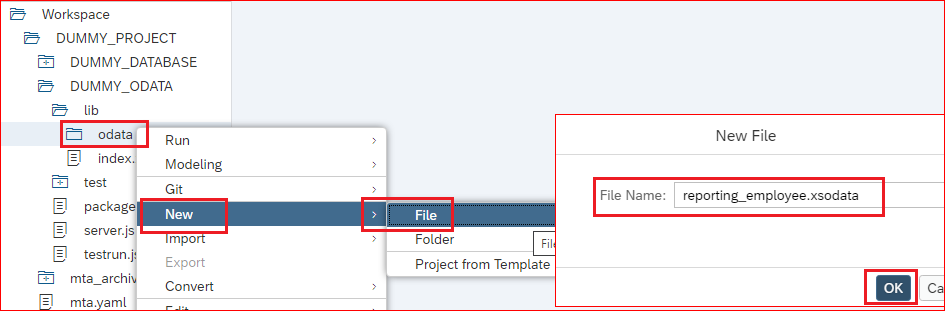
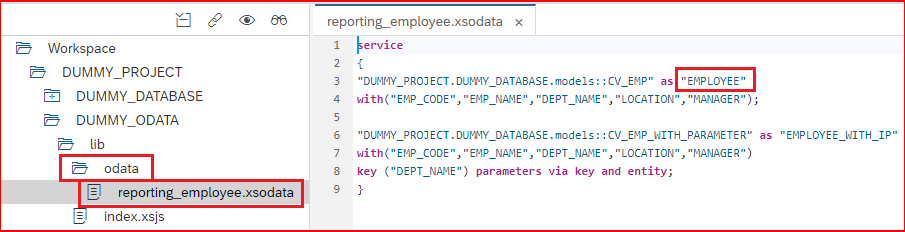
Let’s create new folder under “lib” folder and name it “odata”. This will be the place where we will store OData service files.
Right click on our newly created “odata” folder and create new file with “.xsodata” extension for our CV_EMPLOYEE Calculation View as “reporting_employee.xsodata”.
Double click on created file to open code editor and specify code as below.

service
{
"DUMMY_PROJECT.DUMMY_DATABASE.models::CV_EMP" as "EMPLOYEE"
with("EMP_CODE","EMP_NAME","DEPT_NAME","LOCATION","MANAGER");
}
Path to calculation view, “with” section where we specify fields for output and specify which column is a key (in current key is not defined).
Save file and build Node.js module (DUMMY_ODATA in our sample).
1. For CV without Input Parameter
Double click on created file in the above step “reporting_employee.xsodata” to open code editor and specify code as below.
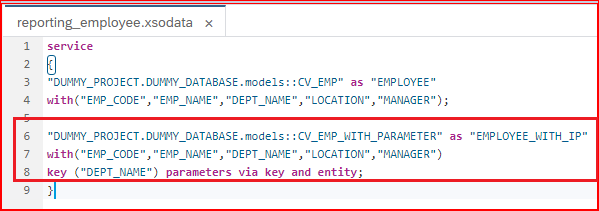
service
{
"DUMMY_PROJECT.DUMMY_DATABASE.models::CV_EMP_WITH_PARAMETER" as "EMPLOYEE_WITH_IP"
with("EMP_CODE","EMP_NAME","DEPT_NAME","LOCATION","MANAGER")
key ("DEPT_NAME") parameters via key and entity;
}
Path to calculation view, “with” section where we specify fields for output and specify which column is a key and for CV with input parameter, we also need to specify by which entity parameters will be used (“DEPT_NAME” in our sample).
Save file and build Node.js module (DUMMY_ODATA in our sample).
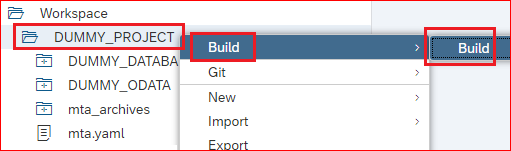
Step 4: Build Project and deploy to XS Advanced
Right click on project name (DUMMY_PROJECT) and click on “Build”-> “Build”.
If build successful, we will see appropriate message in log.
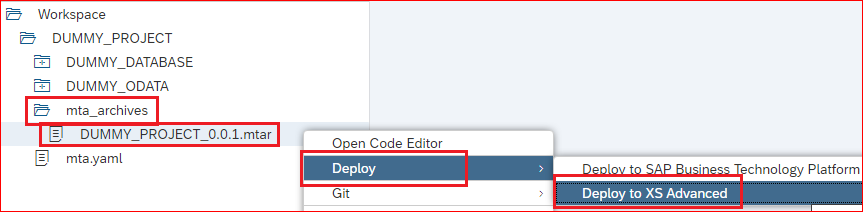
Building a project will form/update an .mtar file under mta_archives folder.
As a final step we need to deploy our project .mtar file to XS Advanced.
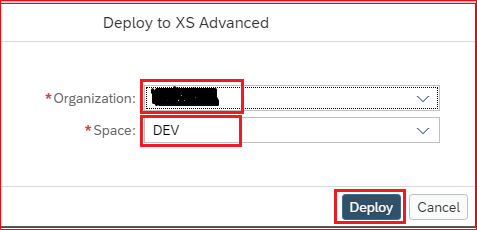
Right click on it and click on Deploy -> Deploy to XS Advanced.
Choose Organization and Space and click “Deploy”.
After successful deployment we should see appropriate message and entry in logs.
Step 5: Check in XSA-COCKPIT that our application is running
click on Tools -> SAP HANA XS Advanced Cockpit. A page will be opened in a new tab.

Click on the Organization Space and search with Node.js module / Application (DUMMY_ODATA in our sample).

Click on our application name DUMMY_ODATA and copy application Routes link/URL which we will use:

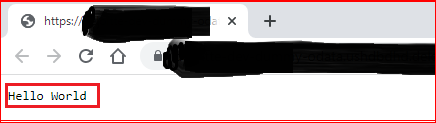
Click on this URL and a new tab will open with message something like this.
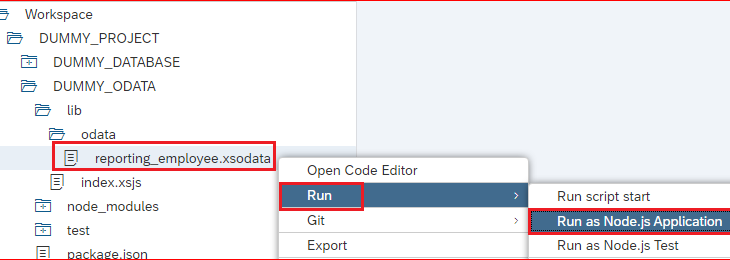
Apart from this you can also get a link or URL by following the below steps.
Right click on xsodata file (reporting_employee.xsodata) and click on “Run”-> “Run as Node.js Application”.
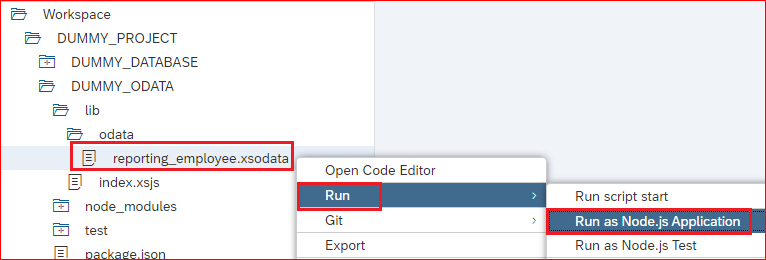
After successful run we should see appropriate message and link/URL generated in logs.

Click on this URL and a new tab will open with same message as above “Hello World“.
NOTE: – Both the links/URLS generated might differ, but both will work, because the one which is generated from the XSA cockpit is DB deployed version that is from the DB host server and the second one is from the local server. However, better is to use the link generated using SAP HANA XS Advanced Cockpit.
Step 6: Access the application through URL
1. For CV without Input Parameter
2. For CV with Input Parameter
3. For CV without Input Parameter
To access that service/OData URL works correctly we can check it via link which is formed by combination of
Link or URL generated in the above step (ABOVE_GENERATED_LINK) + Path to service as shown below: –
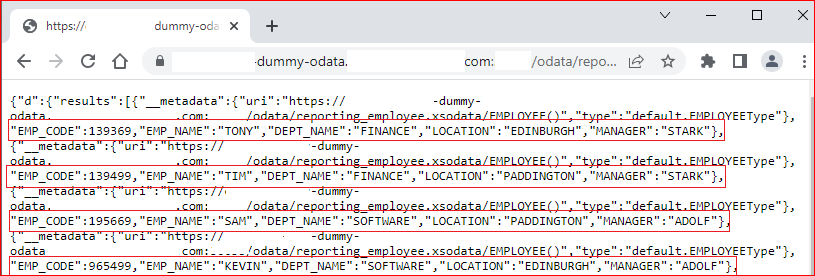
ABOVE_GENERATED_LINK/odata/reporting_employee.xsodata/EMPLOYEE –> Paste this URL in a web browser to see data.
Data/Output: –
1. For CV with Input Parameter
Link or URL generated in the above step (ABOVE_GENERATED_LINK) + Path to service + Input Parameter Value as shown below: –
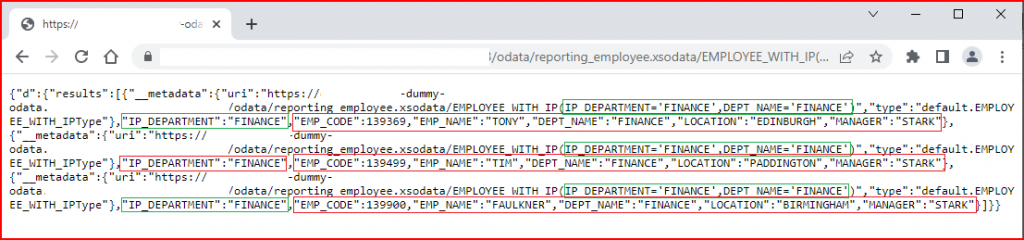
ABOVE_GENERATED_LINK/odata/reporting_employee.xsodata/EMPLOYEE_WITH_IP(IP_DEPARTMENT=’FINANCE’) Paste the above URL in a web browser to see data
Data/Output: – You will get the output in JSON format as shown below
1. For CV with Input Parameter
Link or URL generated in the above step (ABOVE_GENERATED_LINK) + Path to service + Input Parameter Value as shown below: –
ABOVE_GENERATED_LINK/odata/reporting_employee.xsodata/EMPLOYEE_WITH_IP(IP_DEPARTMENT=’FINANCE’) Paste the above URL in a web browser to see data
Data/Output: –