In this blog post I want to showcase the new offering in a hands-on fashion, making use of a multichannel sample application that will be deployed into the cloud as well as on mobile.
Prerequisites
To get started, you’ll need a productive Cloud Foundry global account on SAP Business Technology Platform, and for the time being, this account must be located on the EU10 (AWS) Data Center located in Frankfurt, Germany. Other Data Centers are currently not supported. In the coming weeks we will be adding the support for Free-Tier as well. Note that we will not provide this offering on the trial landscape.
In the steps below, I assume you have some exposure to the global account and subaccount cockpit pages and know how to add service entitlements. Please also be aware of potential cost aspects, as we will be using charged services (e.g. HANA Cloud database).
Low-code Booster
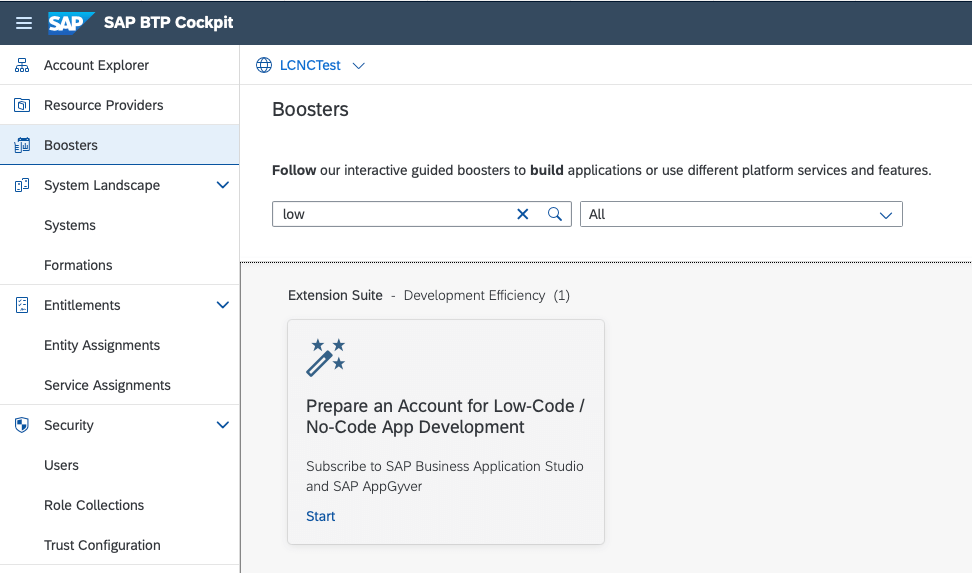
To make it easier to configure your subaccount, we provide a Booster that helps you subscribe to the necessary services and defines the roles and role collections required for starting your development journey. You’ll have the option to create a brand new subaccount, or apply the Booster to an existing subaccount. In your global account cockpit, please select Boosters and start the Booster called Prepare an Account for Low-Code / No-Code App Development.
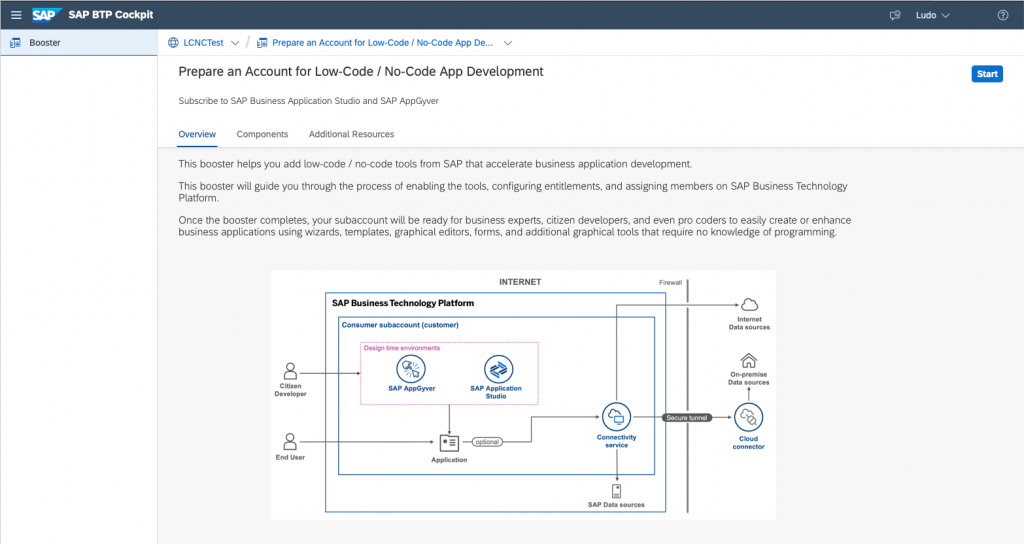
The Booster provides a quick overview, lists the components involved and links to documentation. Select Start.
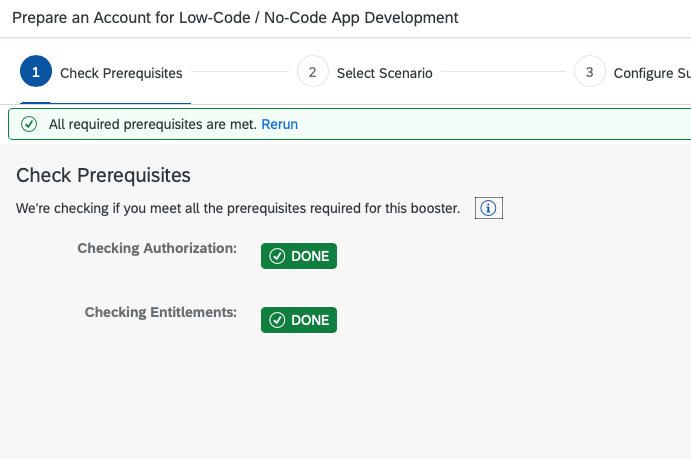
On the next page, the prerequisites are checked. If your global account does not have the entitlements required, it will alert you about this. You can add the entitlements through the Control Center.
On the next page, select whether you want to create a new subaccount, or select an existing subaccount to configure.
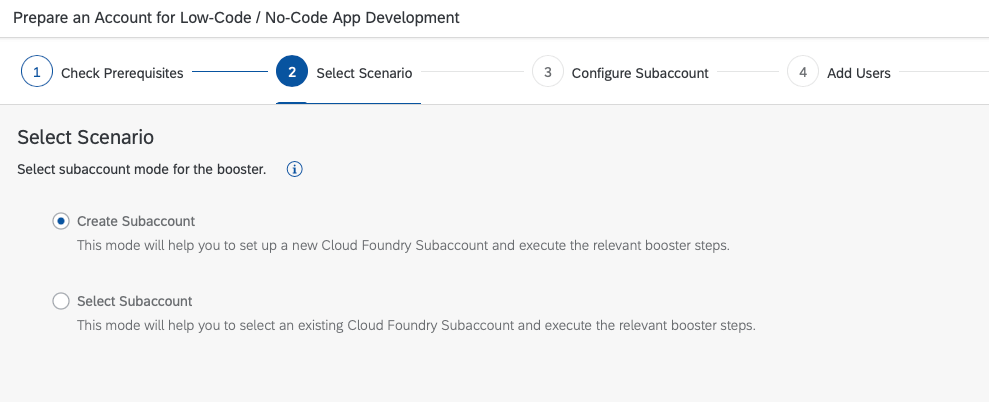
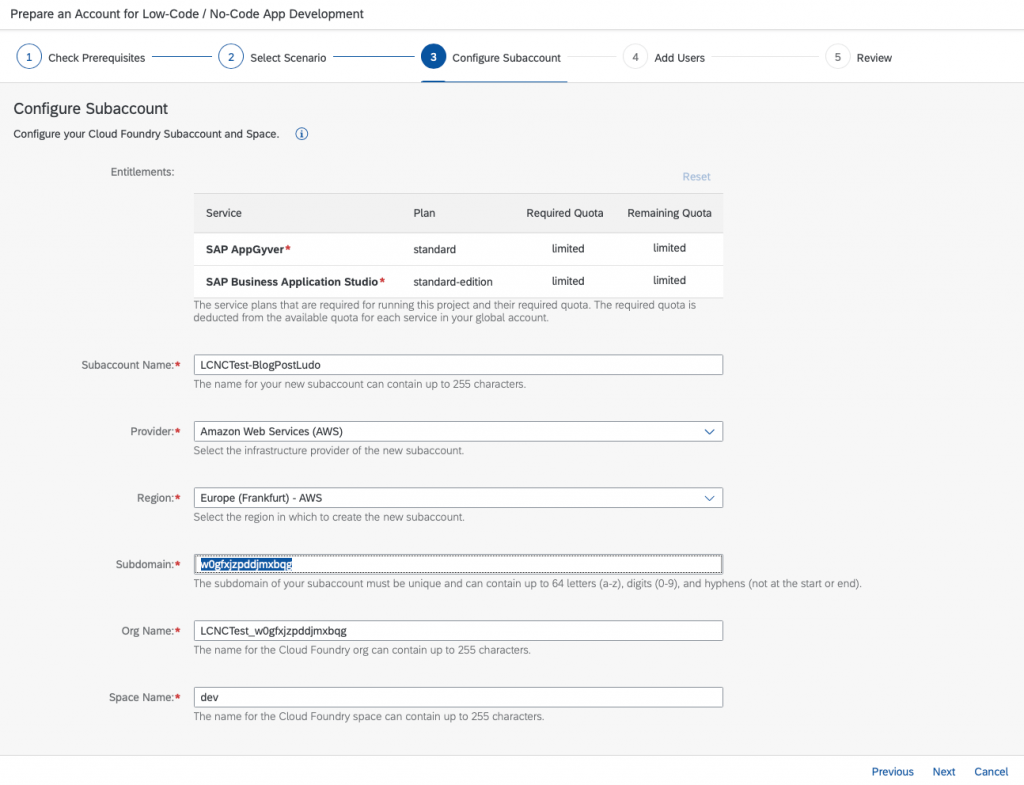
In my case, I choose to Create Subaccount. You will see exactly which entitlements and plans are going to be added, and you can change to generated names if you want.
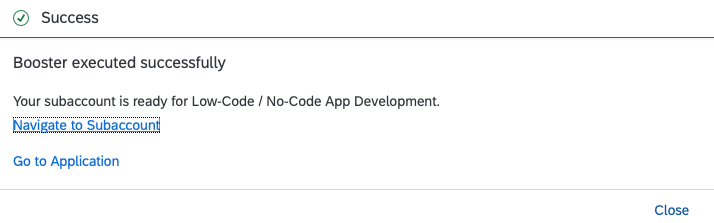
Go through the remaining pages and the Booster will create the subaccount specified. At the end of the creation phase, a dialog will be shown. Select Go to Application. This will open the Application Development page in a new browser tab. You can now start your low-code / no-code development. However, for deployment of your application, you will need to prepare more on your subaccount. Therefore, please go back to the browser tab where you’ve started the Booster and close the dialog.
Note: if you quickly want to get started developing apps, you can skip the below set up steps. However, please remember to come back here once you are ready to deploy your application.
Workflow Management Booster
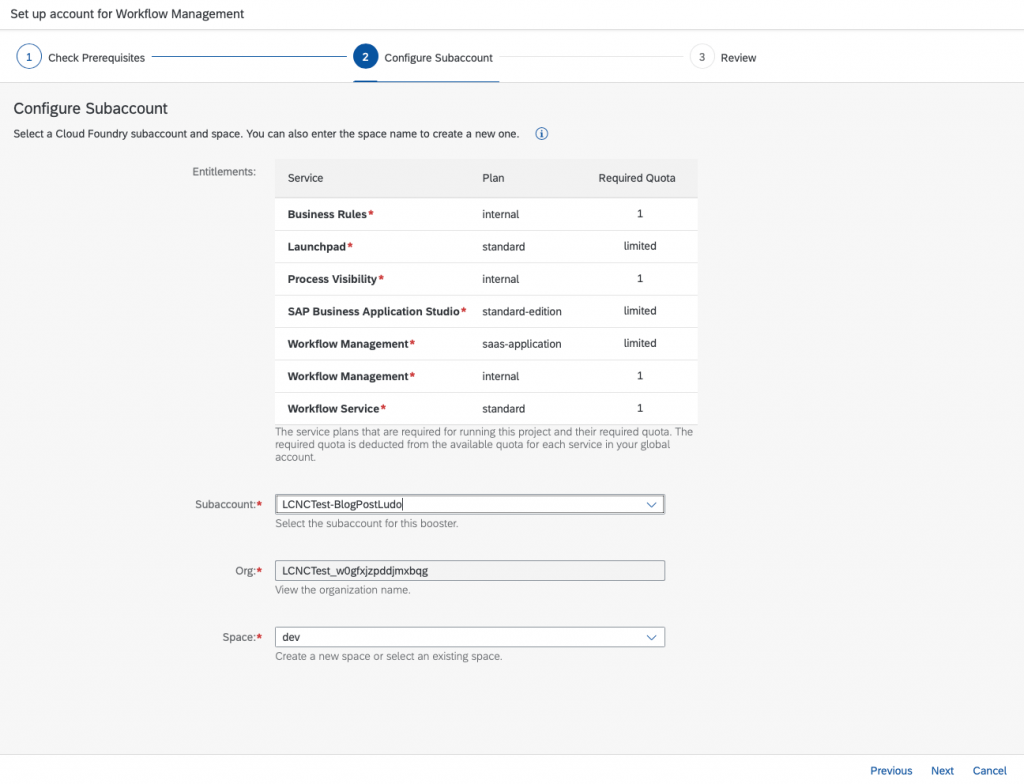
The low-code environment also supports the development of workflows. For this you will need to configure your environment with the Workflow Management Booster. In your global account, select Boosters and search for Set up account for Workflow Management.
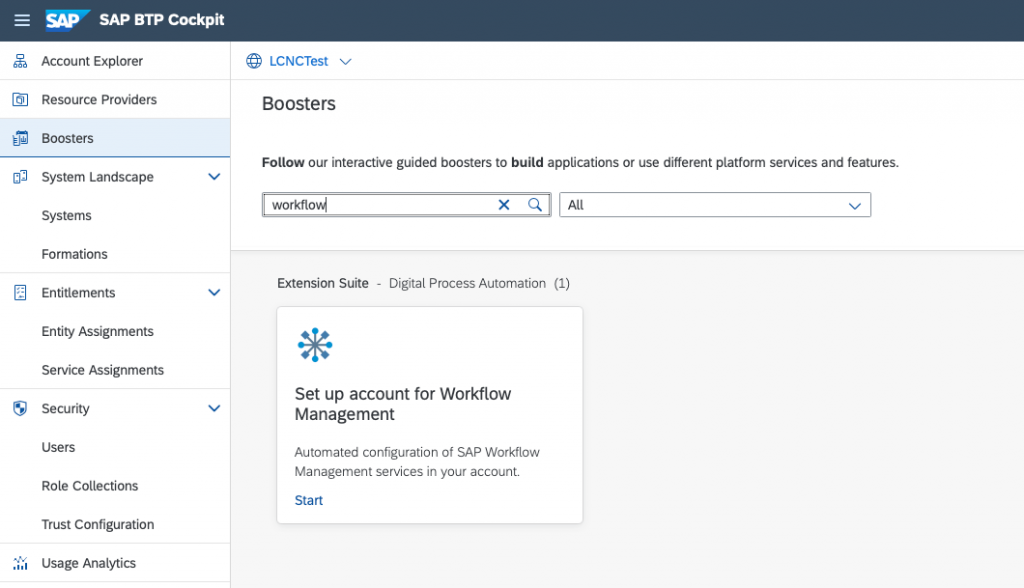
Select the subaccount you’ve created or updated with the previous Booster.
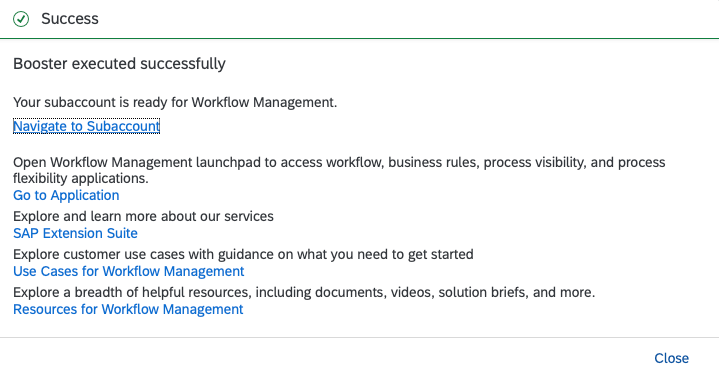
Once this Booster completes successfully, select Navigate to Subaccount.
HANA Cloud Database
For previewing your application, we will use a ‘locally’ running SQLite database available within the SAP Business Application Studio environment. However, once you are going to deploy your application, you will need a HANA Cloud database to store your application’s data. If you already have a subaccount set up with a HANA Cloud database instance, then you can use this subaccount as deployment target for your applications as well. However, this really depends on how your organisation manages the cloud environments.
In my case, I am going to use the subaccount created earlier as target environment as well. I therefore need to add the HANA Cloud database to this subaccount, using the following steps.
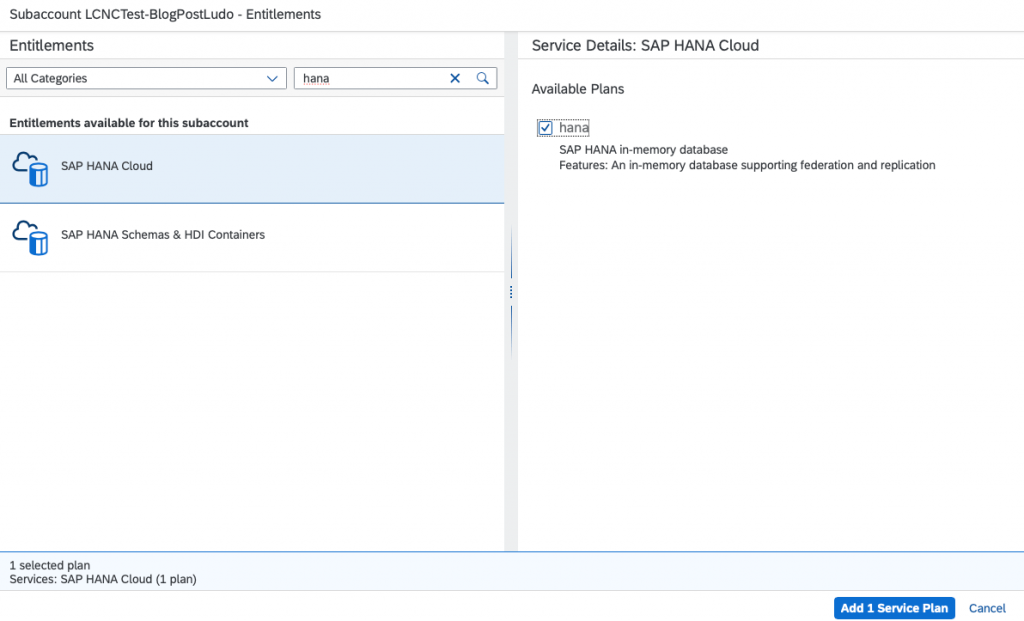
Assign the entitlement SAP HANA Cloud to the subaccount.
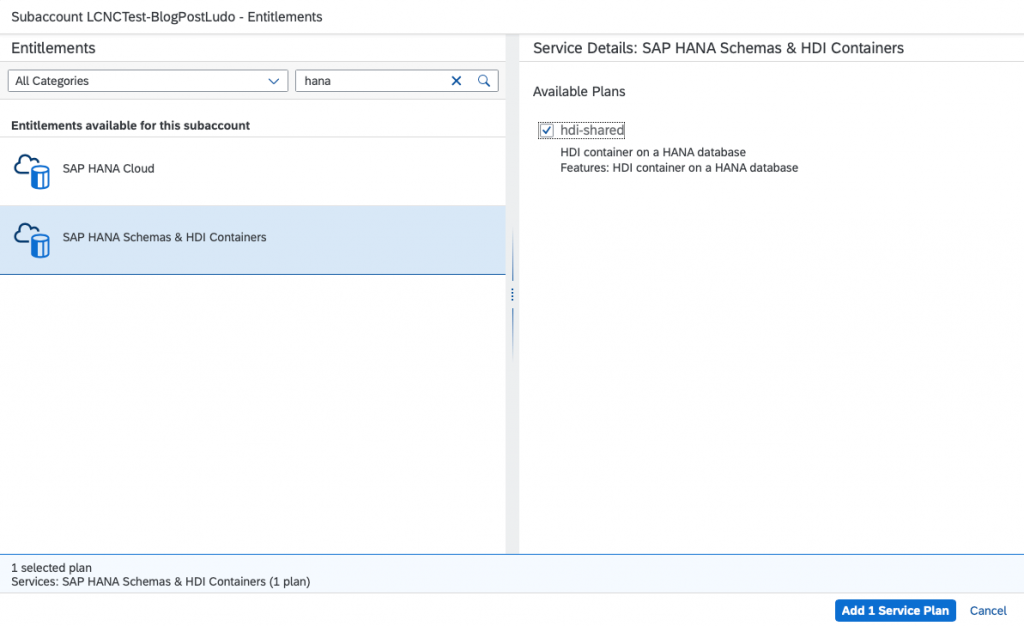
And also add the entitlement SAP HANA Schemas & HDI Containers.
In your subaccount’s cockpit, go to the Service Marketplace and search for HANA. Select SAP HANA Cloud and click Create.
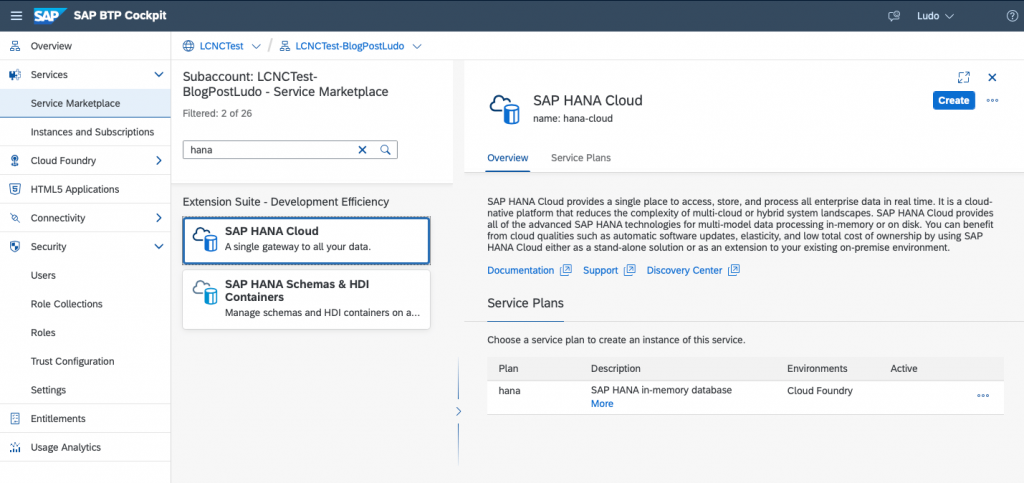
In the follow dialog, you will not be able to select Create. Instead, click the link to manage SAP HANA Cloud instances.
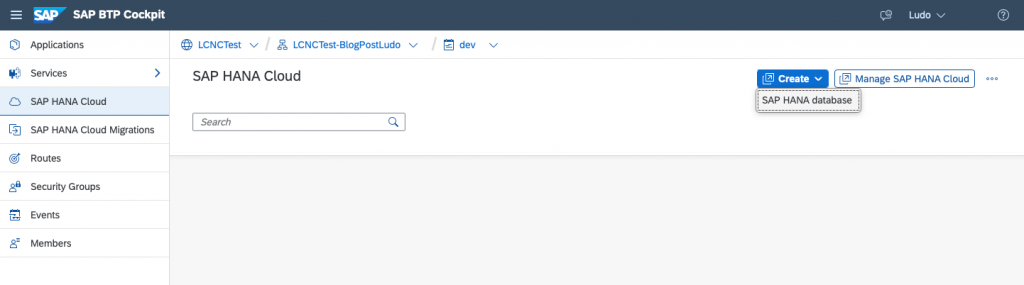
This will bring you to another configuration page in the Space you’ve selected. Select Create, and SAP HANA database.
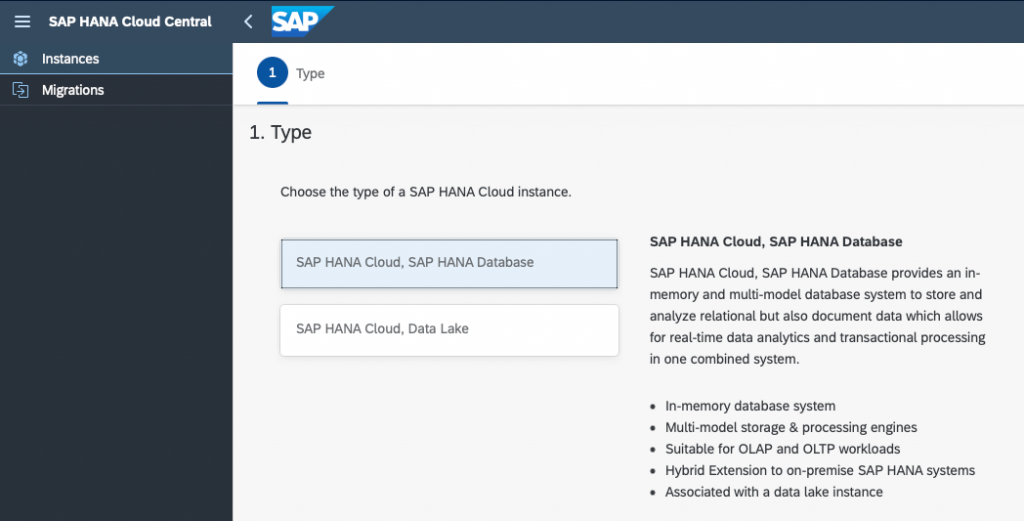
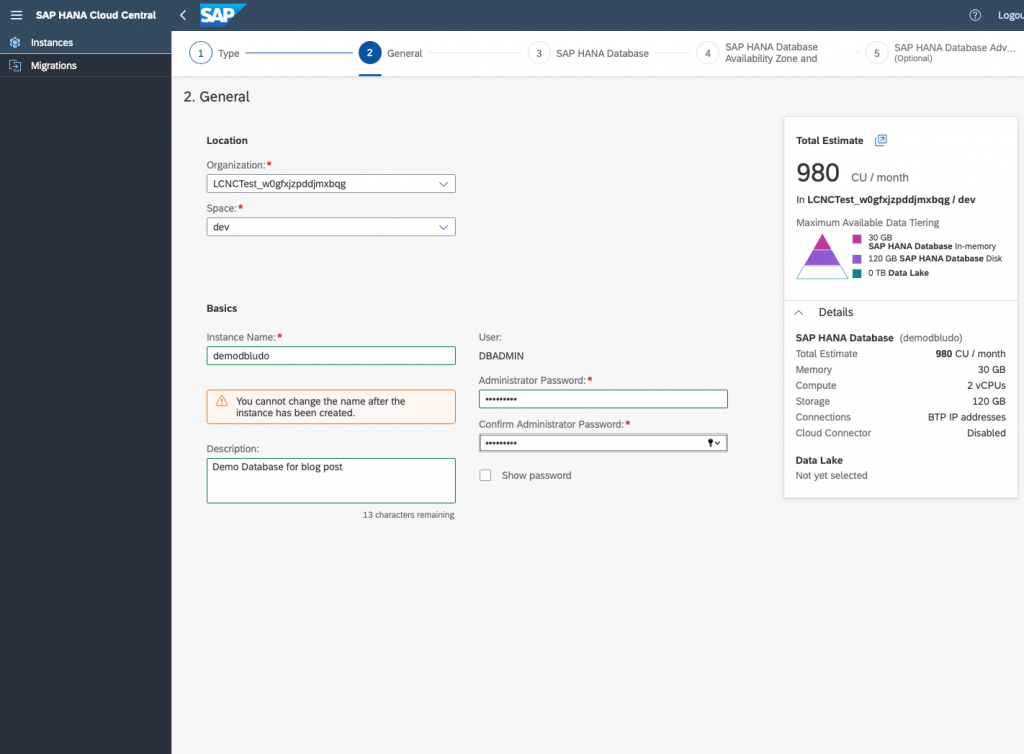
This will bring you to the SAP HANA Cloud Central. Once loaded, select the type of instance you need. In this case, select SAP HANA Cloud, SAP HANA Database.
Ensure the correct Cloud Foundry organisation is selected, provide the instance name and admin credentials. Then, click Create Now.
This will bring you to a page showing all database instances and their status. Take note that the creation will take time (typically more than 10 minutes). This page will not update the status automatically. Hit the refresh button to check the status.
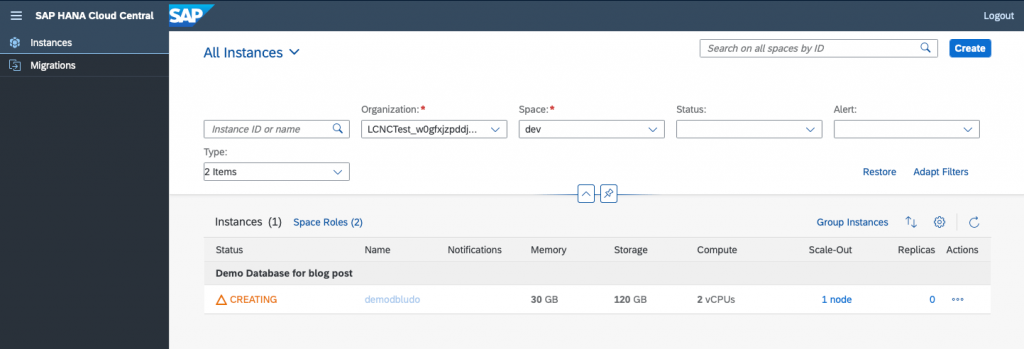
Once the creation is done, the newly created database will be in RUNNING state.
Cloud Foundry Runtime
For the initial development steps, you won’t need this, but in order to deploy and run processes on the SAP Business Technology Platform, you will need to configure Cloud Foundry Runtime (memory). If you had to set up a subaccount for deployment in the previous step, then you will also need to add the runtime here.
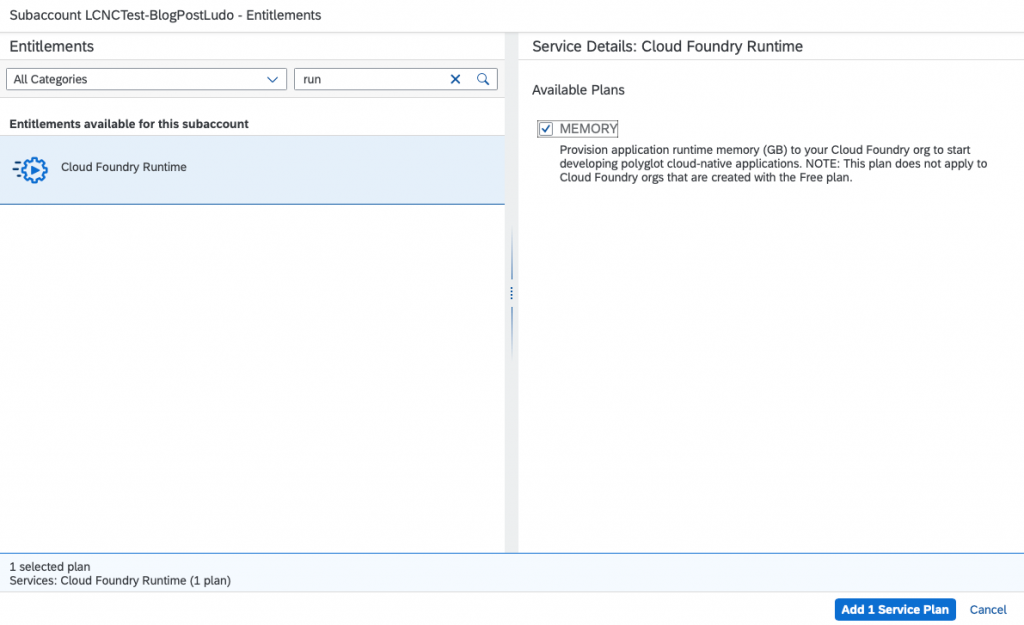
Depending on the size of your application, you might need to configure more runtime units. In my case, I have added 2 units (equivalent to 2 GB) to my subaccount.

SAP Mobile Services
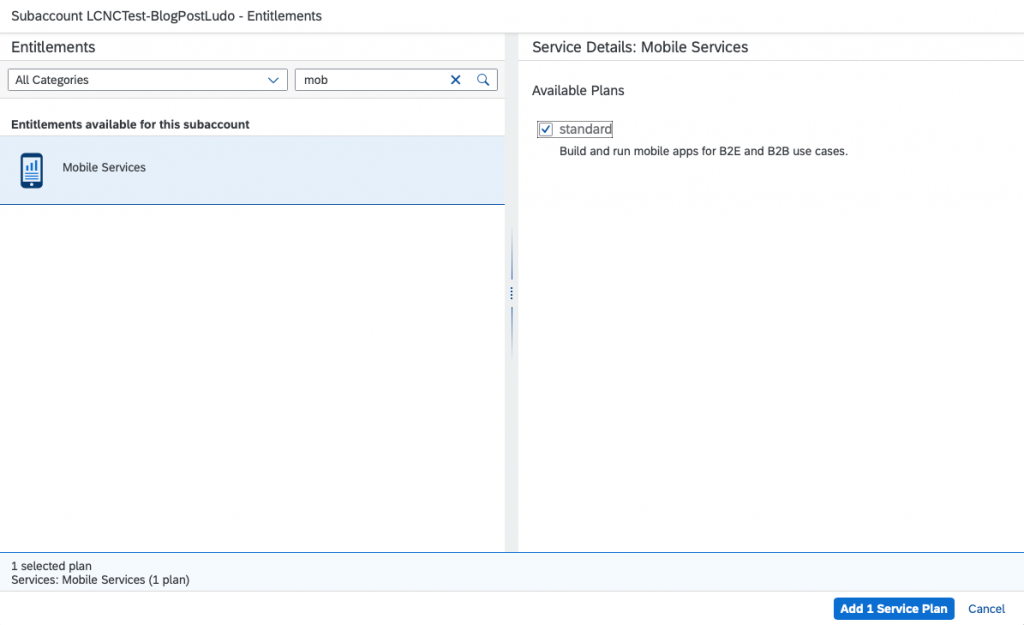
The last service we need to add, is SAP Mobile Services. This service requires a separate license. In your subaccount’s cockpit, add the Mobile Services entitlement. We need this service in order to deploy the mobile application as part of the multichannel sample app demonstrated here.
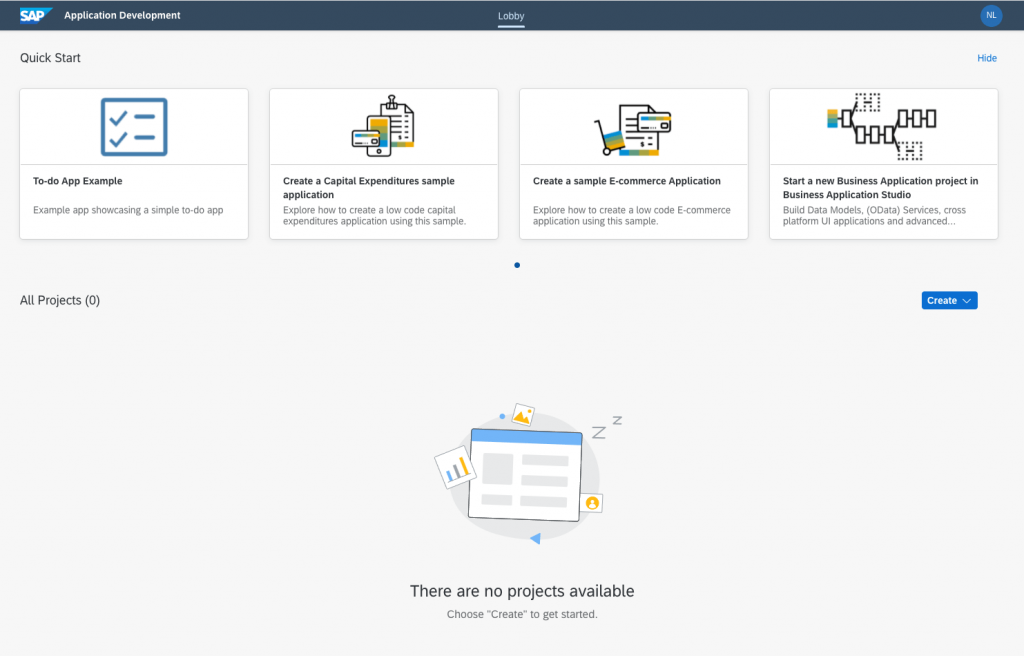
Application Development
Once the subscriptions are in place on your subaccount and the roles are configured for your user, you can access the Application Development page. This is the central entry point for all your low-code and no-code development. From here you are able to create projects in SAP AppGyver as well as SAP Business Application Studio for low-code development.
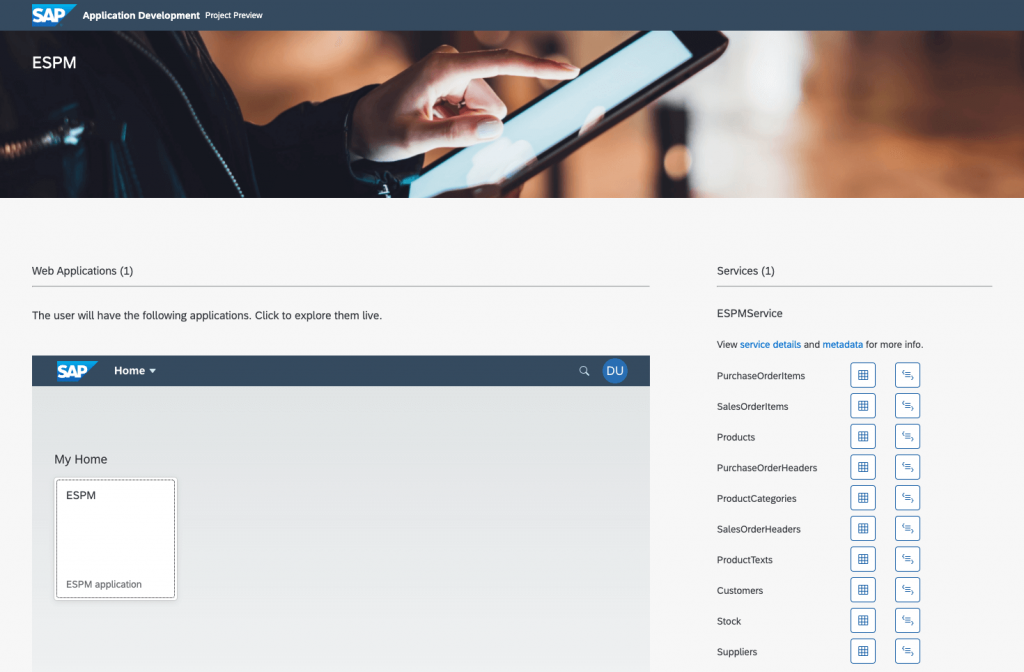
The top of the page shows a few quick start links that allow you to explore what is possible. For this blog post, we will be using the link to create an e-commerce application that we have published on GitHub. All the code is available for you to explore and modify for your learning. Select the tile Create a sample E-commerce Application.
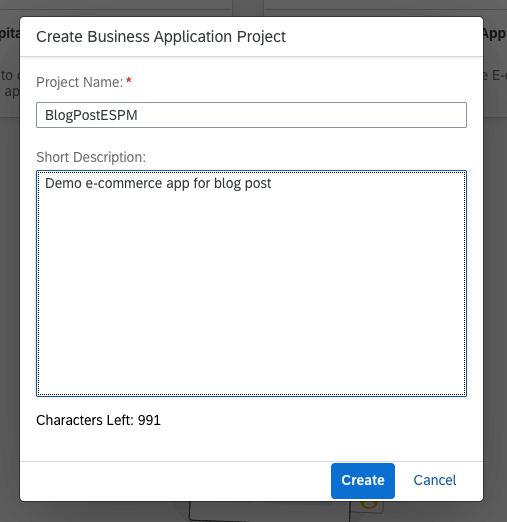
A dialog appears for creating a Business Application Project, where you provide a project name and a short description that will be visible in the project overview on the Application Development page.
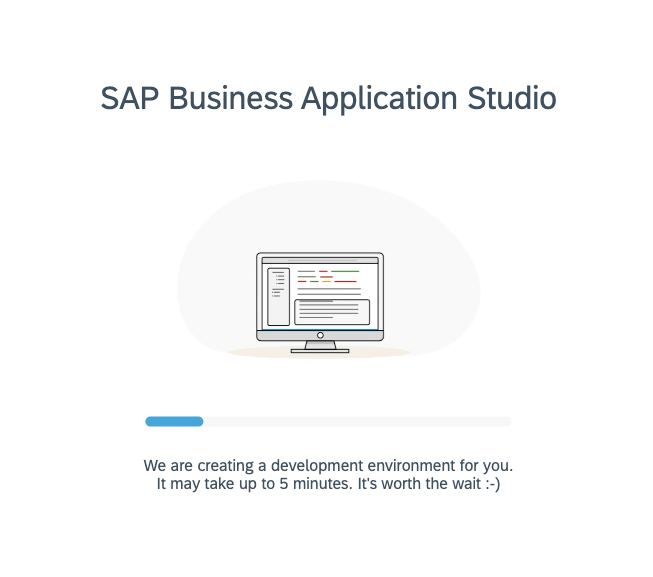
Once you hit the Create button, a special instance of SAP Business Application Studio opens:
SAP Business Application Studio for low-code development
Many of you will already be familiar with Business Application Studio. However, to make it easier for citizen developers to get started, we have created a simplified perspective that is able to gradually grow into a more advanced environment as the developer is learning and growing into it. The first time you start your development environment, it takes a few minutes to load as the container is created and spinning up.
Once fully loaded, you will see a tab called Guided Development, which introduces you to the basic steps in developing your first app. However, since we are opening a sample e-commerce app, we can skip this for now and select the Home tab instead. This will bring you to the Project Homepage.
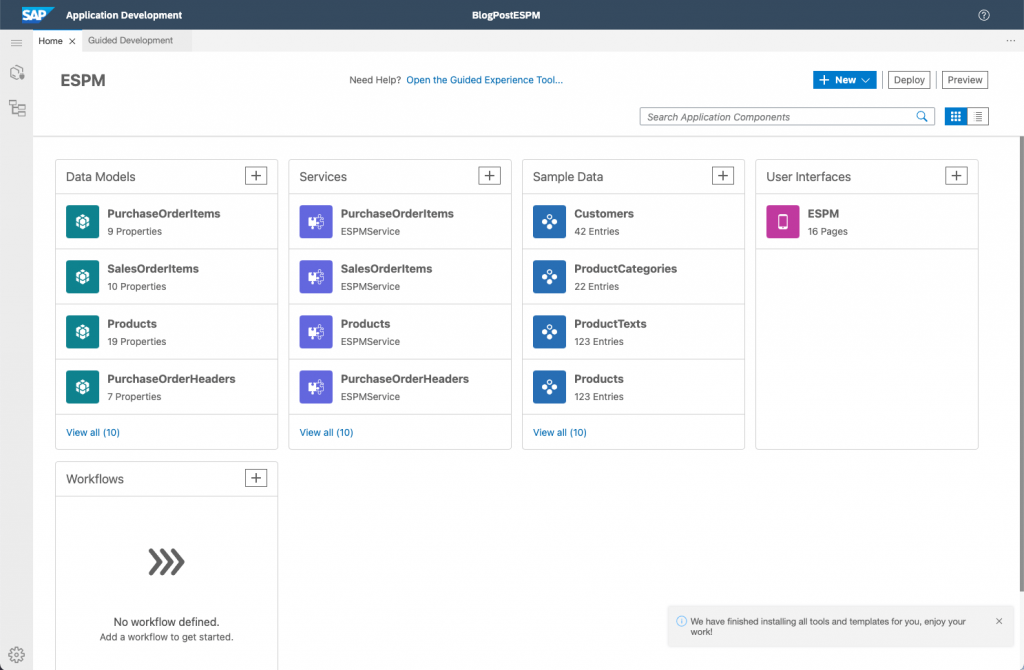
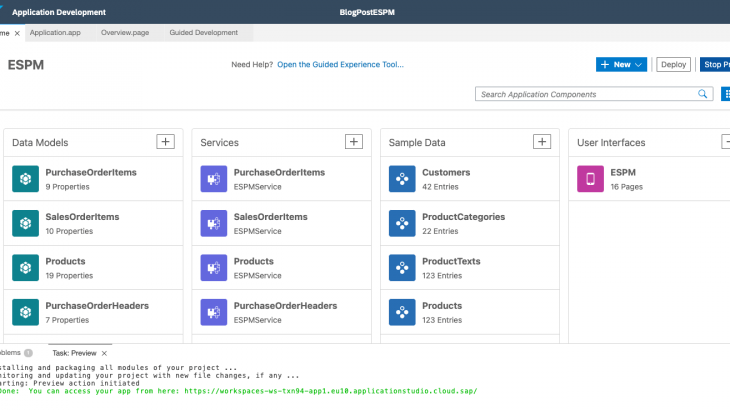
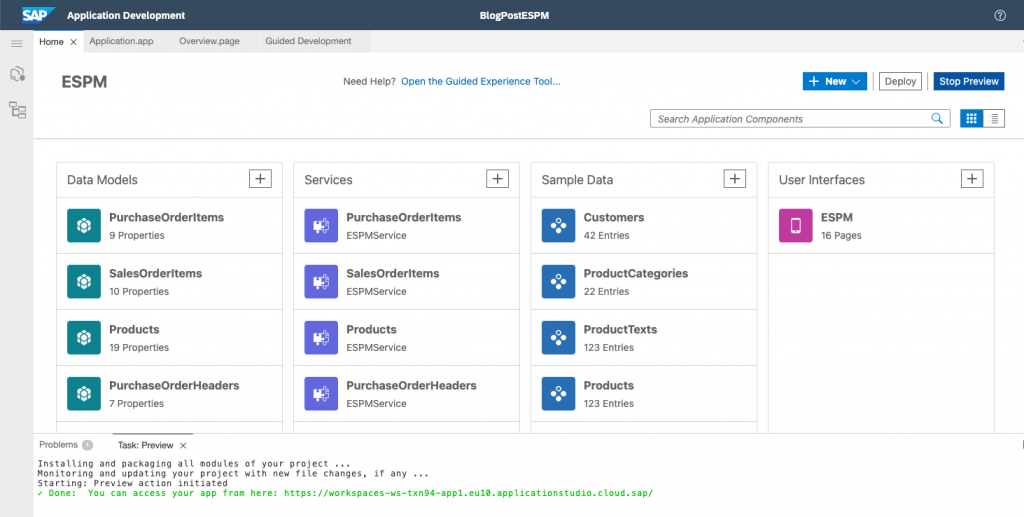
Project Home Page
The Project Homepage provides a quick overview of the project’s contents. The ESPM project contains a full-stack application comprising a data model, data services, sample data and a user interface application. The parts can be shown in a default tile view, but also in a list view. From here, you are also able to navigate to the Storyboard.
Data Model Editor
Selecting one of the data entities will open the CDS Graphical Modeler in a low-code mode. Those who have read my blog posts covering Mobile Backend Tools will notice that the editor is looking quite similar. Indeed, this editor is based on the very same core and is capable of handling CAP data models and service definitions.
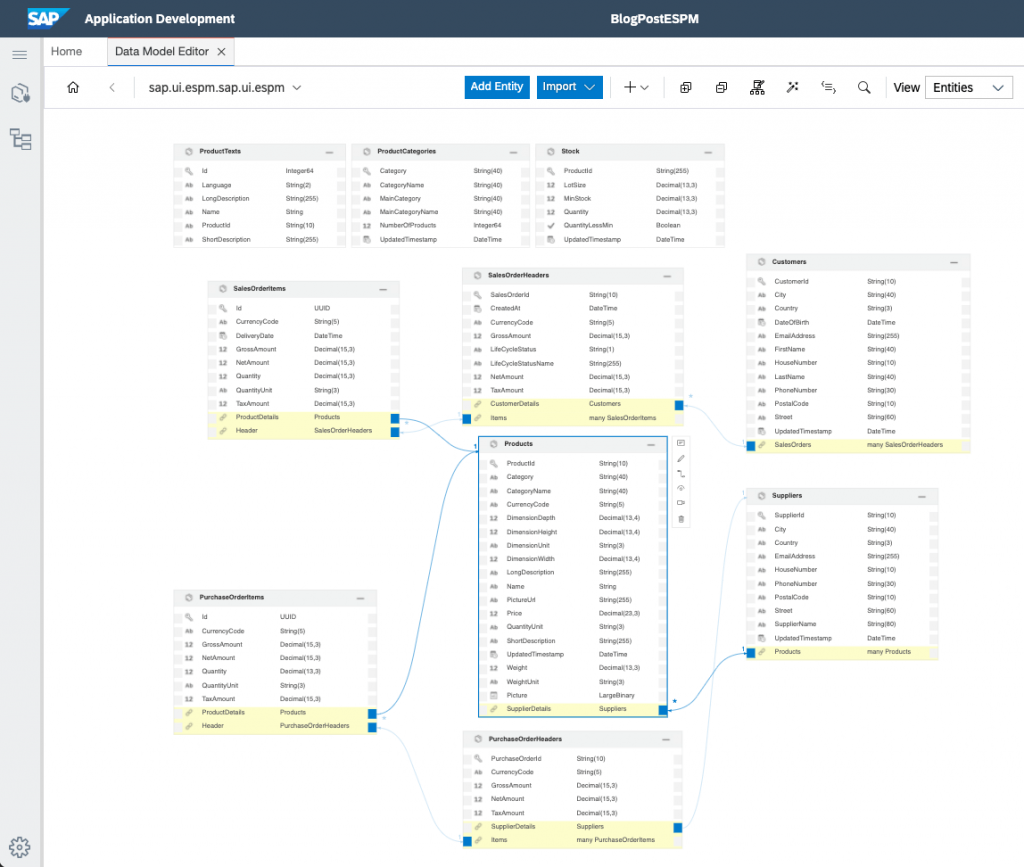
Besides the data model that defines the database tables and relationships, the editor can also be used to create data services to expose this data through OData endpoints. And the code to enable this in your application will be completely generated; no coding required.
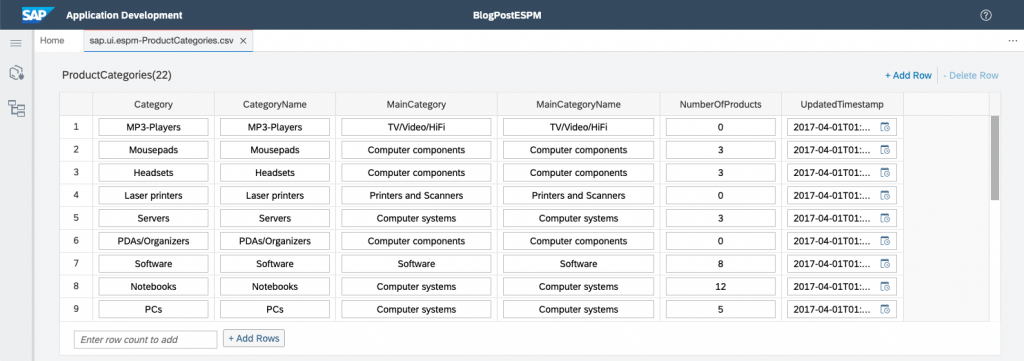
Sample Data Editor
Exposing an empty database through data services is not going to help you develop a user interface on top of it. You need some sample data to get started. For this, we have added a sample data editor. Using this editor you can manually add sample data, or let the editor generate it for you. The editor will validate that the content matches the data types. The resulting data is stored in csv files that are used by CAP.
Project Tree
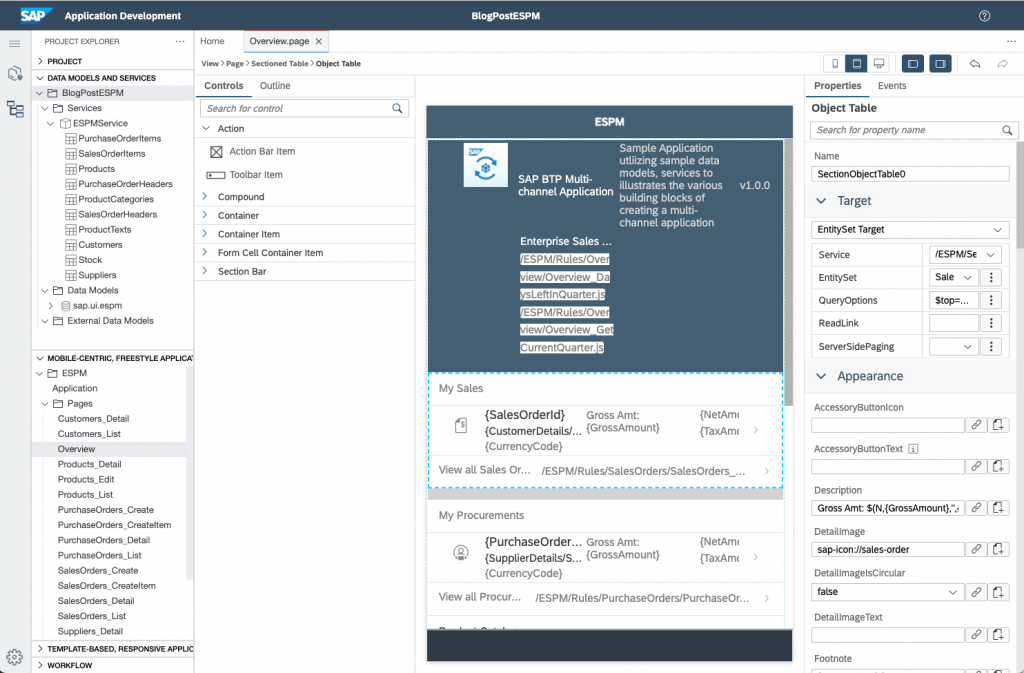
The standard Business Application Studio chrome will show several icons for the various built-in features. For low-code development, we have reduce this to only a few icons on the left hand pane. One of them is called the Project Tree, which you can open to browse a semantical overview of the project’s contents. The Data Models and Services section will show the data entities and service entities. The Mobile-Centric, Freestyle Application section shows the build blocks of the MDK based UI application. From here you can explore and modify the application’s pages, actions and rules, as some of you already know from MDK development. When you select the Overview page, it will open up the MDK editor as shown below.
Preview
After exploring the project, let’s have a quick look at the resulting application. We can do this without any deployment step. On the Project Home page, click the Preview button. This will trigger the installation of some dependent modules, and generate / update some of the project’s files. We will be using a locally running (that is, localyl within the cloud development environment) SQLite database to temporarily store data. The user interface is served from within the development environment as well.
Once the preview is generated, a launchpad is opened, showing the application’s tile as it would be available in a Launchpad. Besides that, you can explore the data services exposed in this application. You can view the data in ‘raw’ JSON format, or consumed through a simple Fiori Elements application, allowing you to filter the information you need.
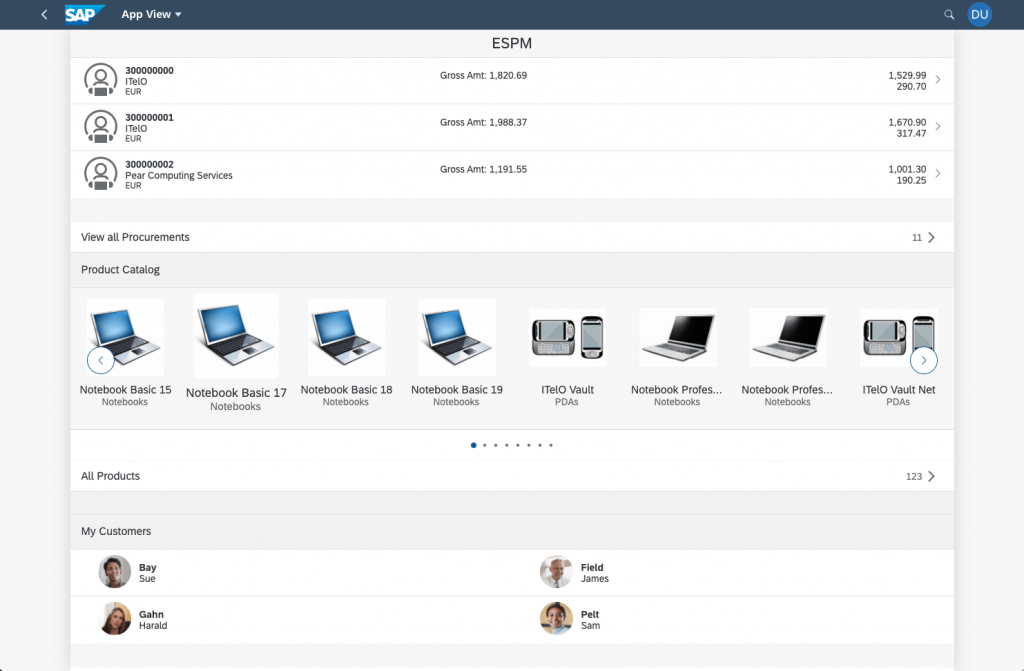
When you select the ESPM tile, the MDK based web application will be loaded. You will be able to browse the (sample) data and add or modify the data using the application. However, do take note that data is only stored in a temporary database while in Preview.
Deployment
Once we are done with developing the application, it is time to deploy it to Cloud Foundry. For this, go to the Project Home page and hit the Deploy button. If you have not logged into your target subaccount yet, you will be prompted to do this first. In my case, I will use the same subaccount as created for development.
If the deployment fails, you are advised the open the log file available in the user folder and check the reason for the failure. Make sure to complete all prerequisites mentioned in the setup.
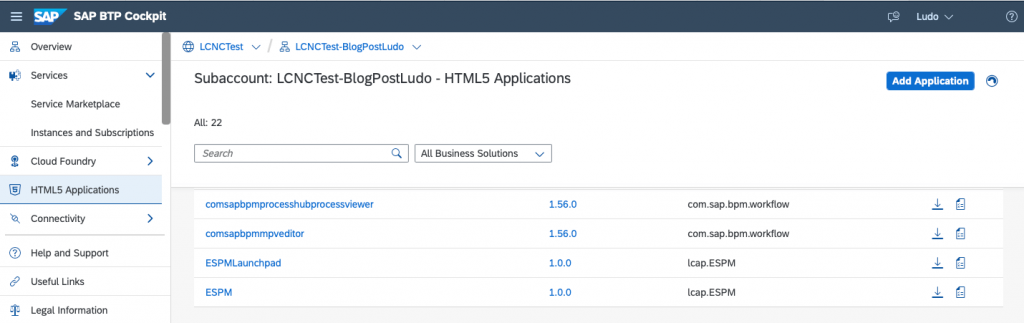
Once the application is deployed, you will find 2 HTML5 applications in your subaccount’s cockpit: ESPMLaunchpad which is the same Launchpad as available in Preview, and ESPM, which is the actual UI application.
In this case the application’s data is stored in the HANA Cloud database and changes or additions made through the UI apps are persisted.
Deployment to Mobile Services
What we have running until now, is basically a web application. Using the exact same source code, we can turn this into a native mobile app for iOS and Android.
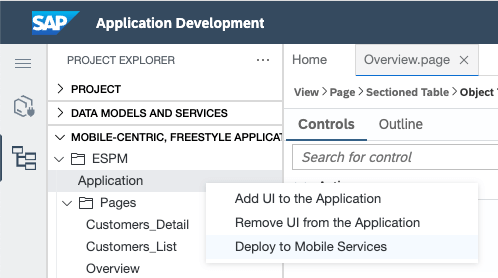
In the Project Tree, right click on the Application in Mobile-Centric, Freestyle Application. In the context menu, select Deploy to Mobile Services. This will create an application definition in SAP Mobile Services. It also triggers a build that generates a metadata bundle which is uploaded into SAP Mobile Services. From there SAP Mobile Services will take care of the distribution of the app to mobile devices, and act as a proxy to interface between your mobile devices and your OData services.
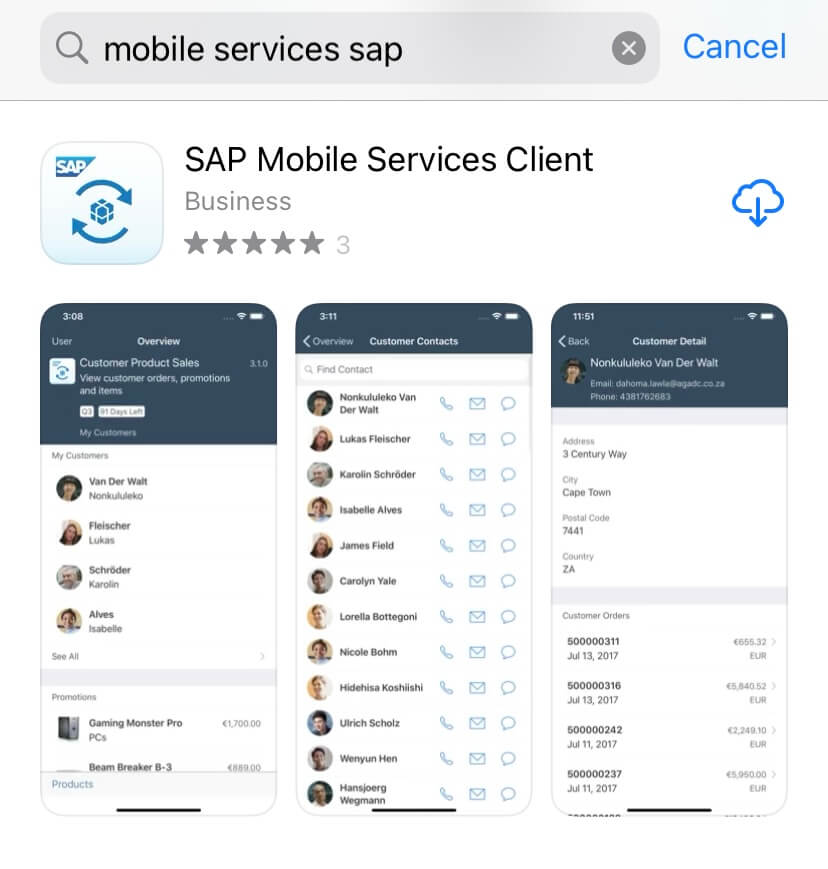
While waiting for the build and deployment to finish, let’s make sure you have the required SAP Mobile Services Client app on your mobile device. Please visit the Apple AppStore or Google Play store and download the app onto your device.
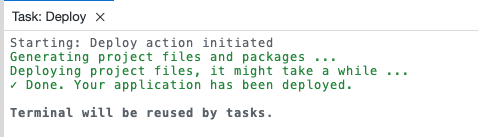
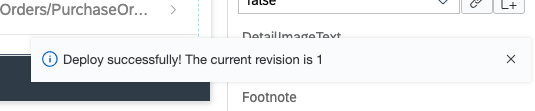
Once the deployment is finished, you will see the below message, with the revision number. Every time you deploy and update, this revision number will automatically increase.
Open the SAP Mobile Services App on your device.
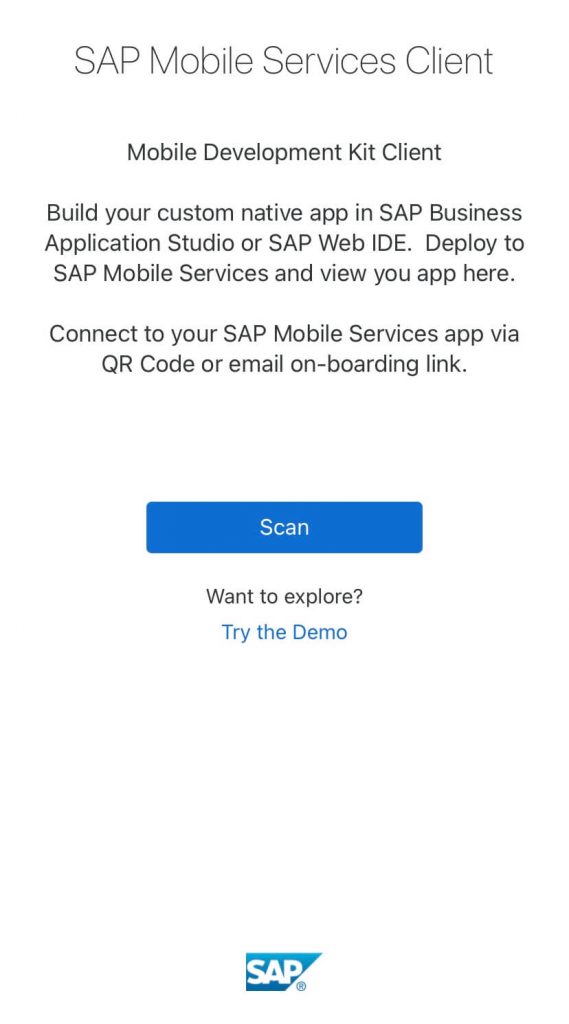
Using the mobile app, scan the deployed application’s QR code. Where do you find the QR code? In the Project Tree, left-click on the Application to open the Application Editor. You will notice there is a button to show a QR code for onboarding with the mobile client app.

Scan the QR code shown.

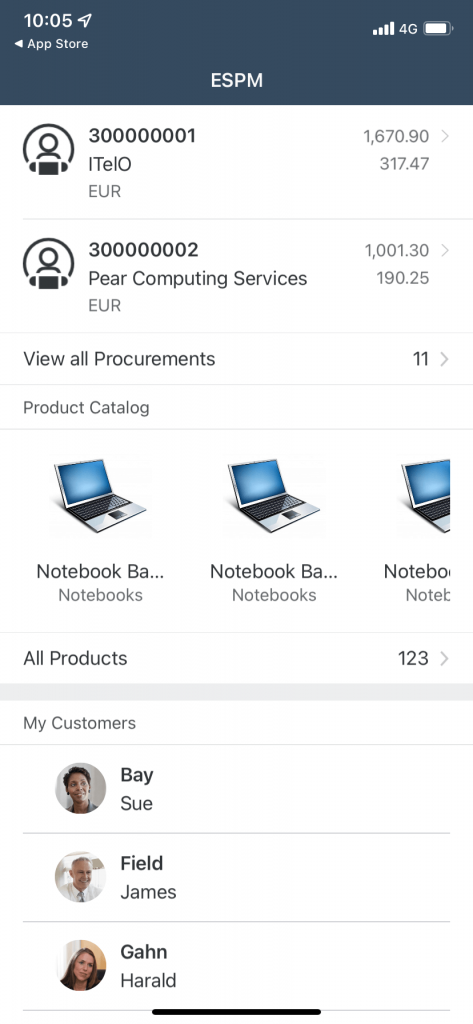
Enter your SAP account’s credentials on your device and you will see the e-commerce app as native app on your device. The app is responsive and will adapt its layout depending on your device’s orientation. It supports phones and tablets as well.
Rapid iterations
Now that you have gone through the whole flow and have the mobile app running on your device, you can easily make changes to the app and deploy the updates to Mobile Services. Once the SAP Mobile Services Client app detects a revision change, it will automatically ask whether you want to update the mobile app to the latest revision. The mobile app can also be shared with other users for easy validation.


