Introduction:
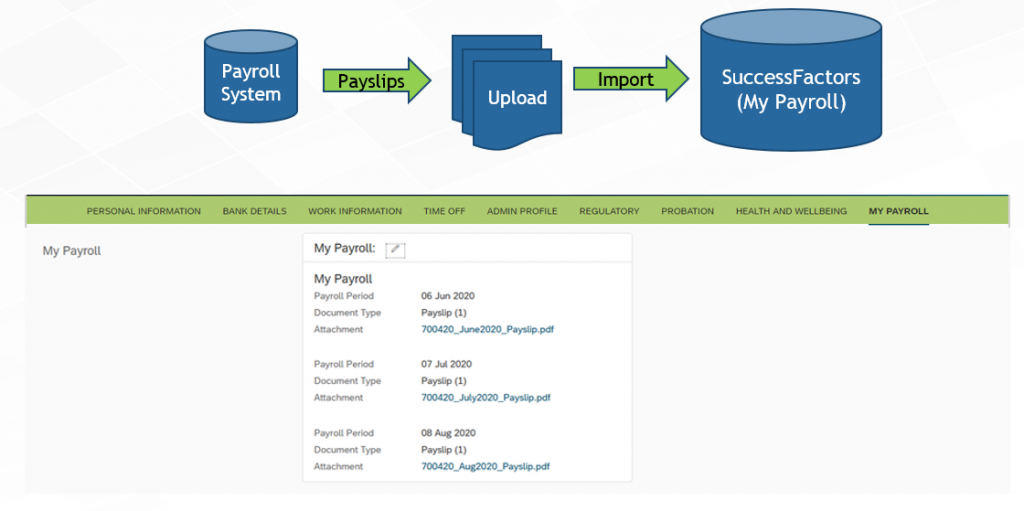
As more and more organisations move the cloud, they are beginning to realise the benefits of SuccessFactors. In the payroll space the Employee Central payroll offering is second to none in terms of a seamless integrated solution whilst meeting the needs of payroll administrators and employees alike. However, many organisations have not yet had the chance to invest in this space and are currently left having to deal with a separate payroll solution which may have a separate login and different look and feel. Harmonising the employee experience between the two systems and keeping security aligned becomes a challenge. This is where you can start to get creative with using SuccessFactors to support this by granting end-users access to view any payroll related documents and allowing payroll admins to import this data directly on an employee’s EC record.
With this solution we reap the benefits of EC security and permission structure, allowing employees to only see what is granted to them. With the onus today on remote working, this payslip solution is fully catered to support this. It is important to note, I would recommend full EC Payroll as a long-term solution, but this is a great stepping-stone until your organisation is in a position to do so.
This solution will require us to create an MDF object and place this on the employee file as a separate portlet. Here we will be able to store employee payslips and any additional payroll supporting documentation, such as a P60 or pension statement information.
Detailed Implementation Steps:
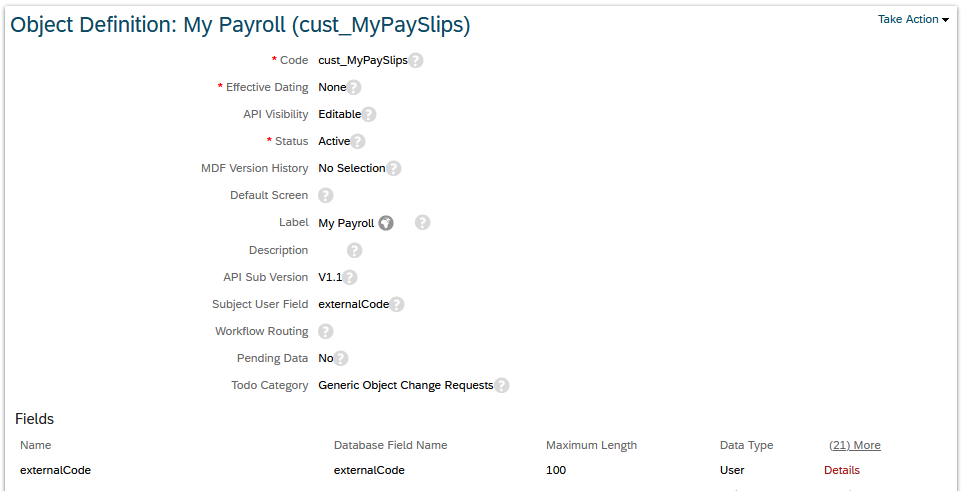
Step 1. Configure Payroll Object: Include custom fields if required
The first task will be to create the parent object, this object with become the portlet we will be using to upload employee payroll documents too. To do this, navigate to configure object definitions and create the object. It is important to clearly outline the external code and there are also some notable options that must be selected. We must also select the external code field as a user field, this will be used to determine which payroll documents align to an employee.
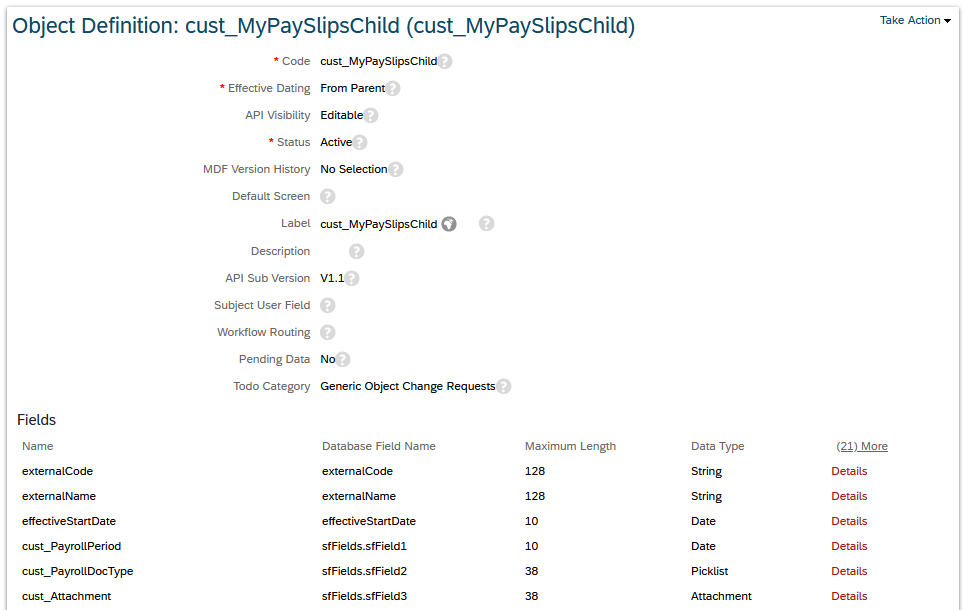
Step 2. Configure Payroll Child Object
Next, we must create the child object to be associated to the parent. Again, ensure all settings are aligned, and here we must add fields which must be populated by members of the payroll team, when either manually adding or via import. We need a child object so multiple records can be added, for example, a payslip will be uploaded each month.
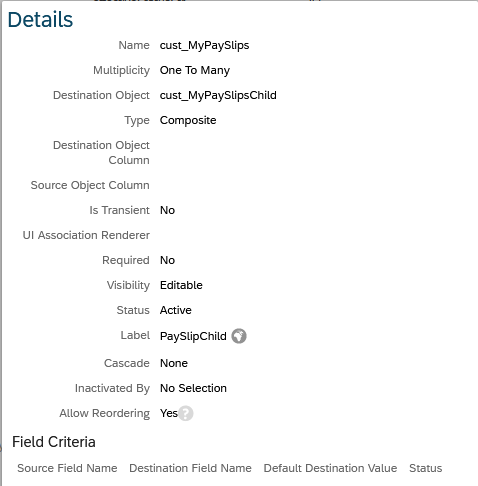
Step 3. Create Association in Parent Object
In the parent object, we need to build the association to the child object. This is a one-to-many association. You can name the association to clearly indicate its purpose. Under details, select the following settings;
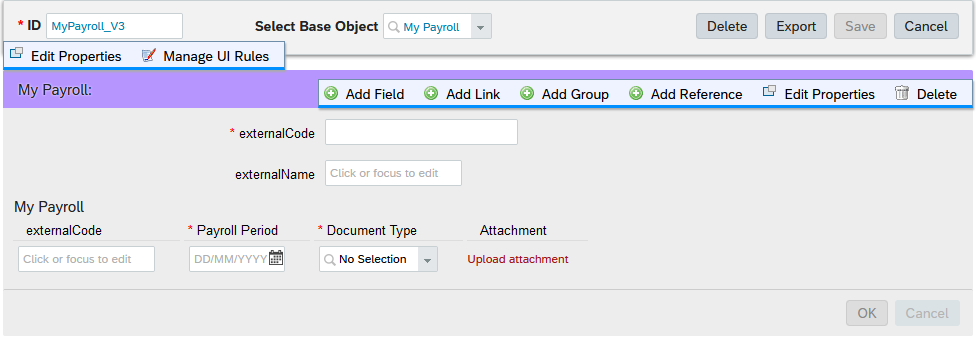
Step 4. Configure UI: Select object as parameter, add any fields, UI rules and save!
Now we have the objects created, we need to create the UI that will be viewed by the organisation. Employees will see this portlet on their employee central record, so it is important the UI is clear and user-friendly. This configuration can be done in “Manage UI”.
Firstly, we need to select our object as the parameter, this will allow us to bring in our fields we have created. You can add fields and sections to customise the UI to best fit your requirements. In this screenshot, you can see some typical fields which have been used for this example. You can also add any UI specific rules on the portlet if required.
Step 5. Permission Objects to respective roles and groups
The next step requires us to permission both objects, the parent, and the child. Navigate to manage permission roles and select the specific role you wish to edit. The permissions you need to grant will be found under “Employee Views” and “Miscellaneous Permissions”
I would suggest view permission for employees to see their payslips, edit and import access for payroll teams and any system admins. The later roles here will be completing the uploading tasks.
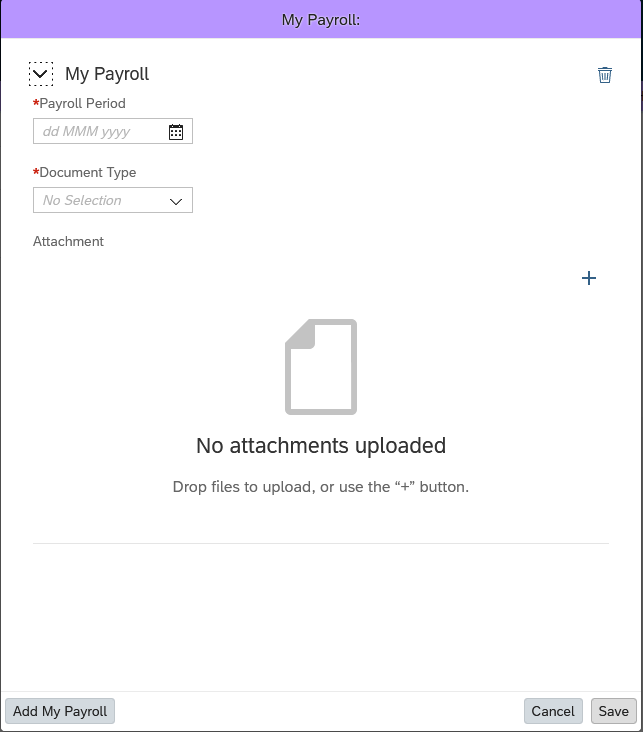
Step 6. People Profile
The final step before this Payroll portlet becomes visible is assigning it to the profile. Navigate to “Configure People Profile”. Here you can either attach this new UI to an existing section or create an entirely new section that focuses on this payroll solution. Once a section has been selected, pull in the Live MDF Profile Information and select the UI created in the previous step.

Step 7. Testing
Test, test, test! It’s important to think of as many scenarios as possible to attempt to break the solution before considering going live in production. In my experience, testing needed to be thorough when adding records in this portlet manually and via importing on mass. Finding these issues beforehand can avoid big headaches down the line.
Think about the scenarios which may occur for your use-case.
- Will there be multiple payslips per month?
- Can you save a record without populating all fields?
- Can you have more than one of the same document type?
Step 8. Import Tips, Tricks and File Formats
A key part of this solution allows HR and Payroll teams to import employees’ payslips on mass, possibly on a monthly basis. To do this we need to import this data as a ZIP file. But first we need to create a template that can be used.
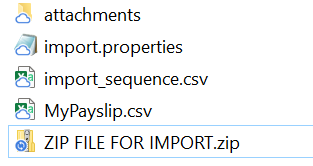
Firstly, you will need to download the import template of the child object from “Import and Export Data”. Once you have the files saved in a secure folder you will need to gather a few things;
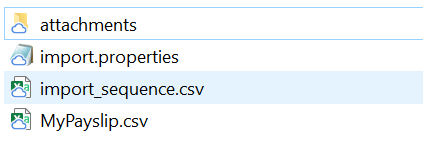
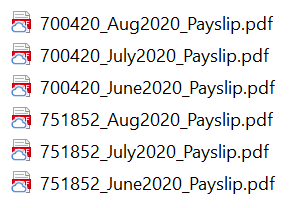
The attachments you wish to import. This could be payslips or other related documents. These should be stored within the attachment folder and be labeled correctly. For example, you could use the User ID as an indicator. It is important to remember these labels as they will be required in the import file.
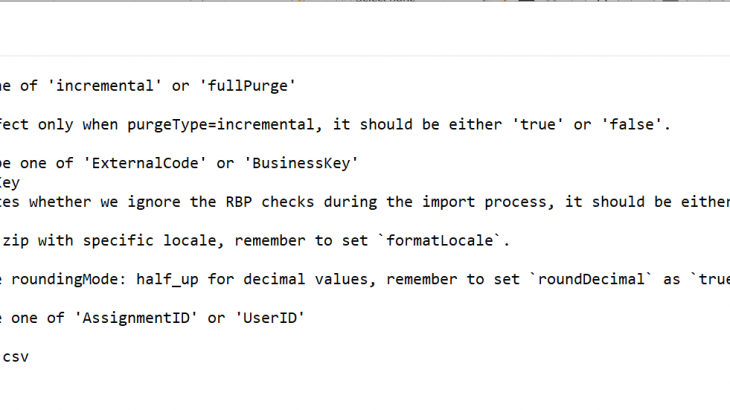
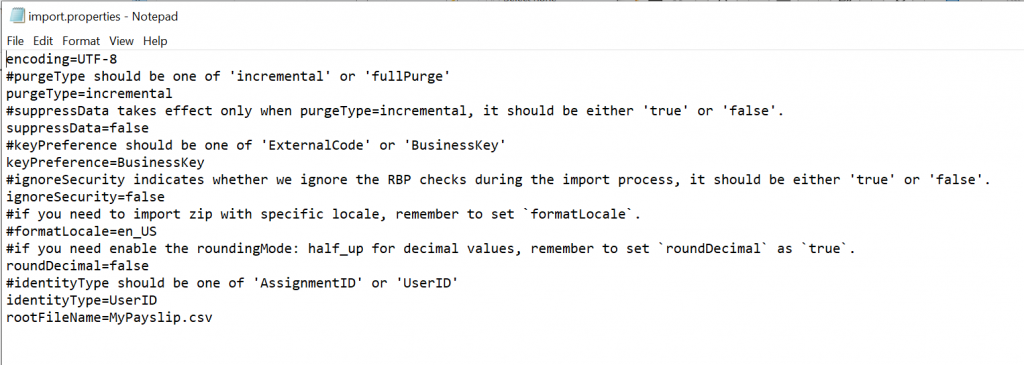
Secondly, we have the import properties file, you should set all settings to match the below. Be sure to update the rootFileName to match the source data file.
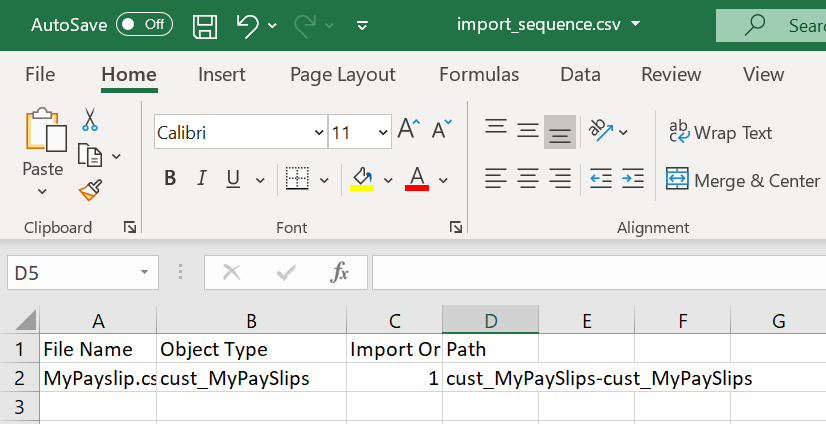
Third, we have the import sequence file. This file is essentially telling SuccessFactors where we want this data to go.
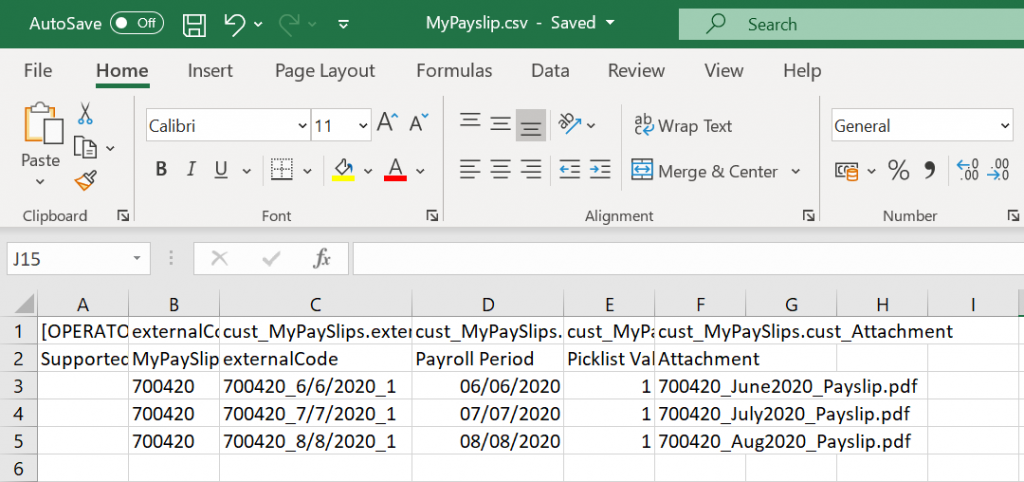
Next, the Data file. This file is the most important, as we are setting the field values in our object. As we have set the User ID (who’s record we will update), the payroll period (what date), the document type (displayed as a picklist value), and a reference to the attachments sitting in the attachment file.
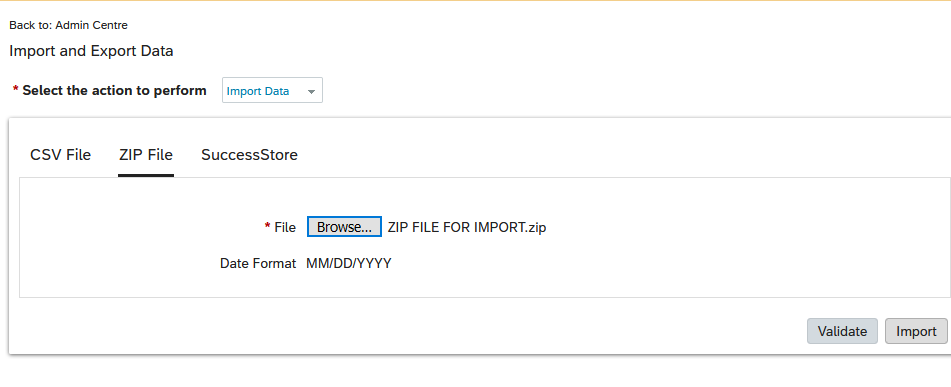
Now all files are completed we need to ZIP the file. This essentially pulls all the files together allowing them to be imported as one.
We can now import the ZIP file into SuccessFactors via “Import and Export Data”. Ensure you validate the file before importing it.
Once imported you can check the employee’s record.

Step 9. Go-live
Once fully tested and signed off we can move to the cutover phase. I would suggest recording all configuration steps in a cutover plan with detailed documentation of each task. This allows that tricky period to run smoother and with everything tested, there should be no issues allowing you to be confident with your solution when it lands in production.


