In the SAP SuccessFactors 1H 2021 Release, there is a new method available to perform bulk data changes multiple Position data objects in SAP SuccessFactors Employee Central Product using Mass Data Management: ECT-147023 – Mass Data Management
Processing mass transactions is critical for any organization irrespective of the size (large/medium/small). It is especially relevant to current workforce models where there is a continuous organization-wide realignment to support agile workforce. With the clear trend of moving responsibilities from central service centers to local HR admins or HR managers, there is a strong market demand to support bulk position changes for non-technical users. This comes with a clear need for a simplified and efficient experience which enables the user to change positions in bulk such as update all position in a certain department with a new cost center.
Mass Data Management is a new method for performing data modifications in bulk. It replaces the traditional method of configuring rules and scheduling jobs to perform mass changes with an adaptive and intuitive user experience. The tool is simple to use – no technical knowledge is required.
This tool enables HR admins or even managers to efficiently perform changes to multiple objects in one transaction. From H1 2021, this solution will be General Availability (GA) to perform mass changes to position data object.
Let’s look at an example of how to perform a simple cost center change for multiple positions.
Pre-Requisite: You need to enable all the newly introduced permissions to access Mass Data Management UI and configuration (All feature permissions and one-time configuration steps are described in the last section of this blog.)
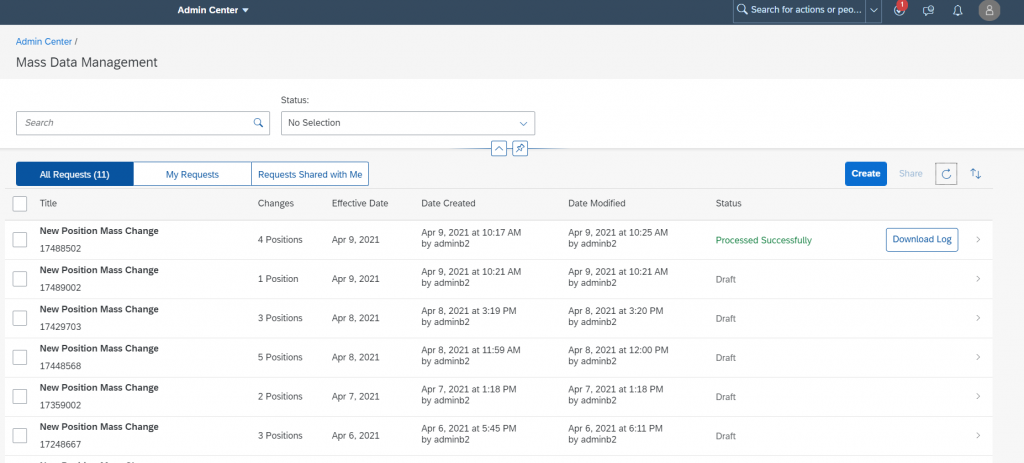
Once you have the required permission, go to Admin Center > Mass Data Management. On the landing page, you can see all the existing mass change requests with relevant details.
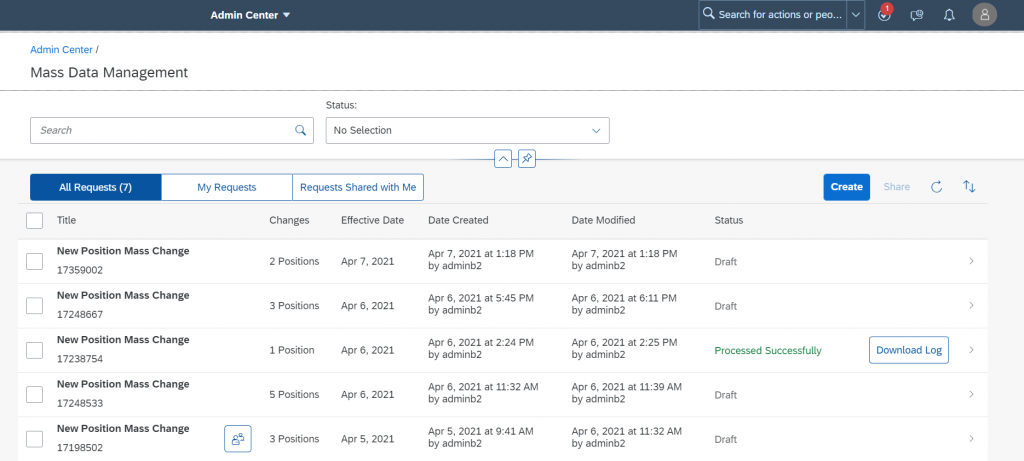
You can perform sorting as well as filtering of the existing mass change requests (based on different statuses such as Draft, Processing, Processed Successfully, Processed with Errors) in the landing page.
To create a new mass change request, you need to select Create which will re-direct you to the overview page for creating a new request. To create a new mass change request, you need to select Create which will re-direct you to the overview page for creating a new change request.
Filtering Position Records
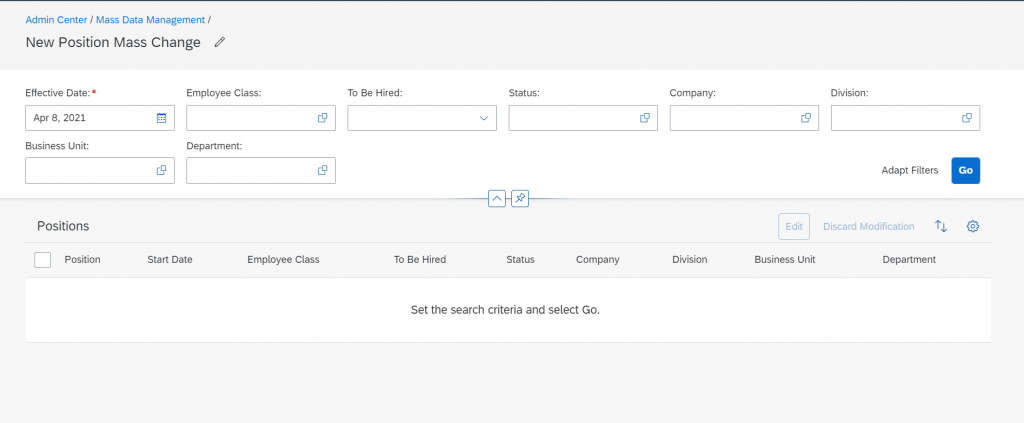
You will be presented with set of default filters as deifined in the configurationconfiguration (explained at the last section of this blog). Here you can set multi-value filters based on your requirement. You can select up to a maximum of 18 filter values across all filters.
You also have the flexibility to choose different filters from the Adapt Filters feature to maintain a maximum of 8 different filter fields (excluding effective date) in the UI.
The effective date filter is mandatory and always defaults to the current date. You can modify the default value to select a date in the past or future date and depending on other filter values, all position records effective on that particular date are fetched in search results.
RBP Permissions: For accessing the filter fields you need to have at least the VIEW permission of the data objects (specifically Generic Object fields of Positions). The filter fields will be hidden from the UI in case of no RBP permission to the filter field object.
Select GO to initiate a search and fetch records matching the filter criteria.
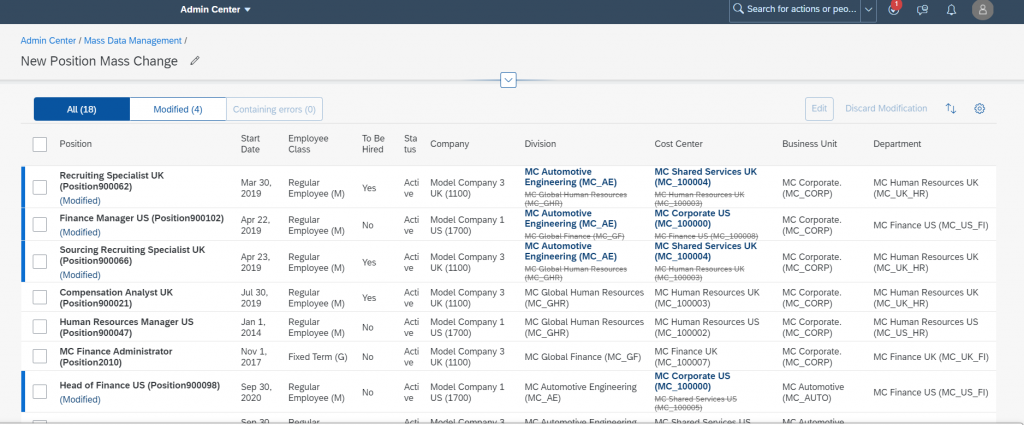
Viewing Position Records
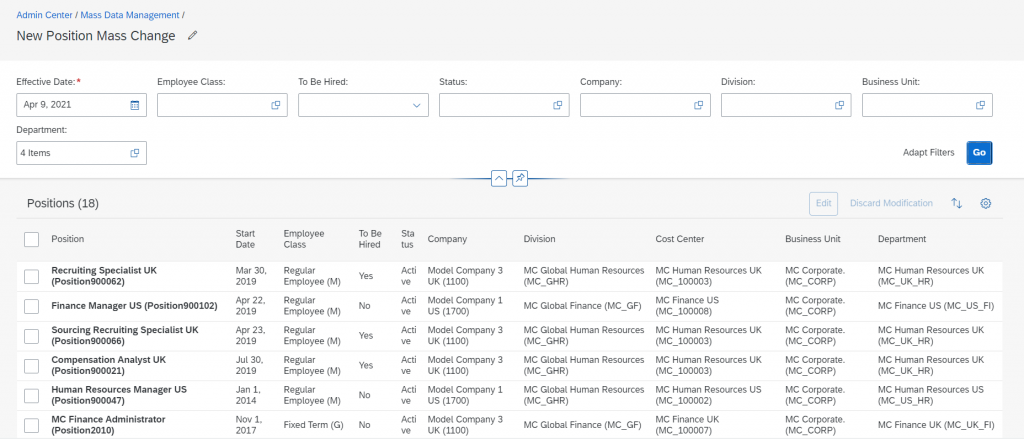
The new tool can fetch search results up to a maximum of 1000 records. If the search results in more than 1000 records, it will prompt you to refine your search criteria. with an addition of Position and Start date as first 2 columns. You can also have additional columns based on your cfrom the settings icon (we recommend having a maximum of 15 columns for better user experience).
Note: FO field sorting is not supported currently.
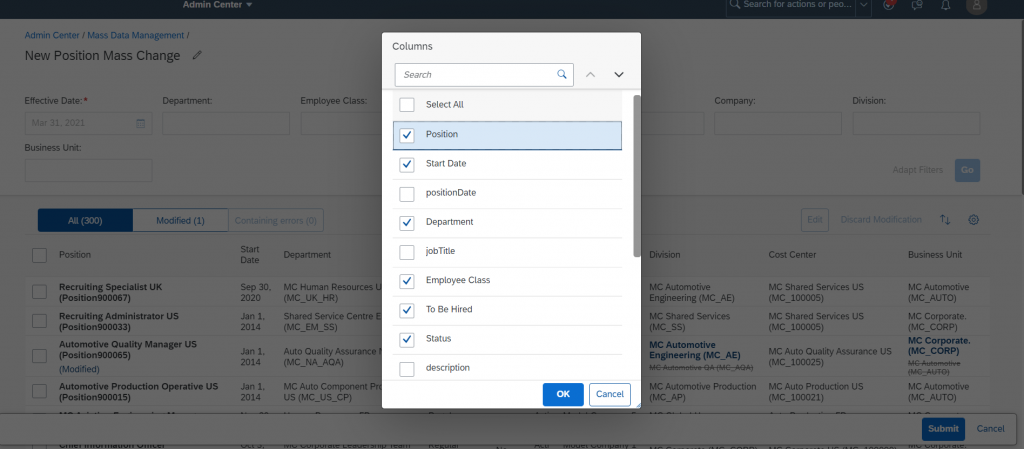
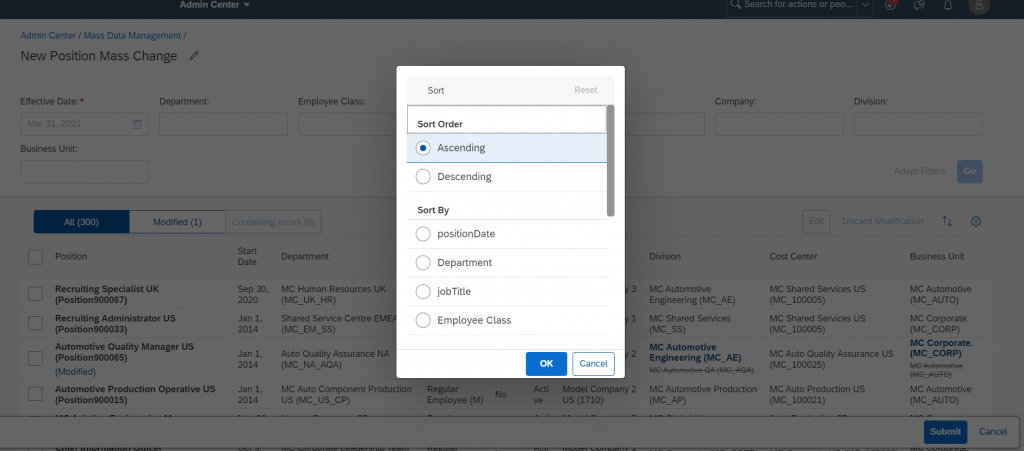
You can also perform sorting based on the different fields available in the search table.
RBP Permissions: Depending on the user permissions, search results will be shown to the end user. If the user has no right to see positions, it will not be displayed. If the user don’t have permission to view a position field, search results will have an empty column corresponding to that field.
Editing Position Records
Once you have the search results, select records to be modified and select edit. Either single selection or select all is possible.
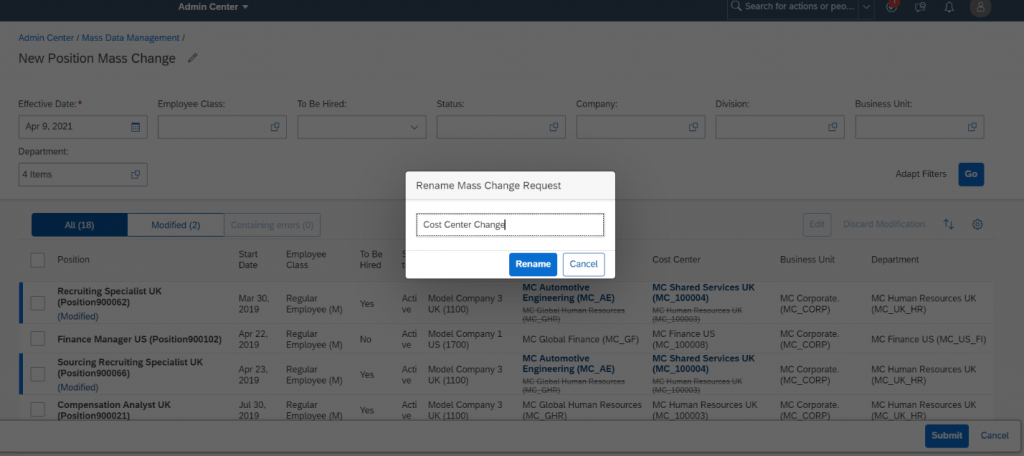
Let’s make a cost center change for 2 of the positions from this list.
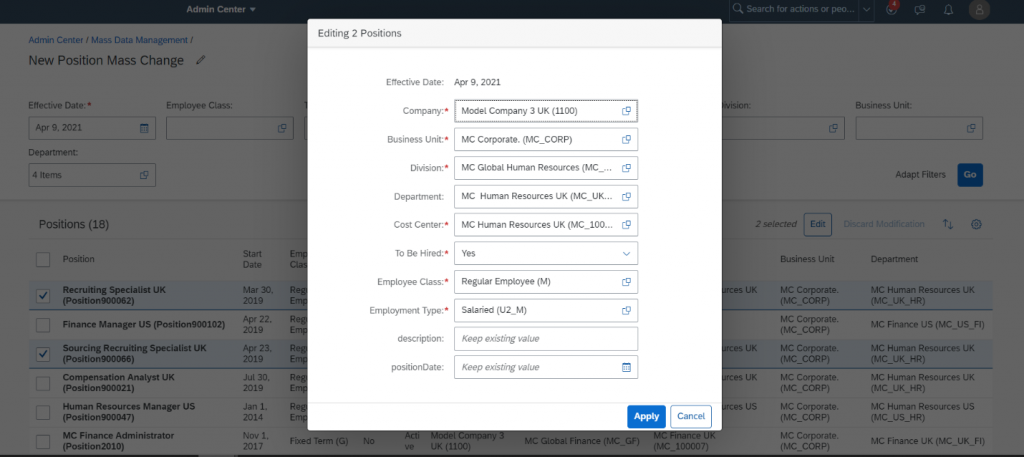
RBP Permissions: In the edit screen, all editable fields depending on one-time configuration and user RBP permission will be available for mass updates. For fields where the user doesn’t have permission to edit values, it will be greyed out in edit pop-up screen.
The effective date will be a read-only field with date as per the search criteria. All the changes will be applicable from this effective date. Wherever there are different values for different records, the field value will be displayed as ‘Keep existing Value’. The field value will be displayed in case all the selected records have the same value. If there is a field association involved between editable fields, dependent child field will be greyed out and will be enabled only when the parent field is selected..
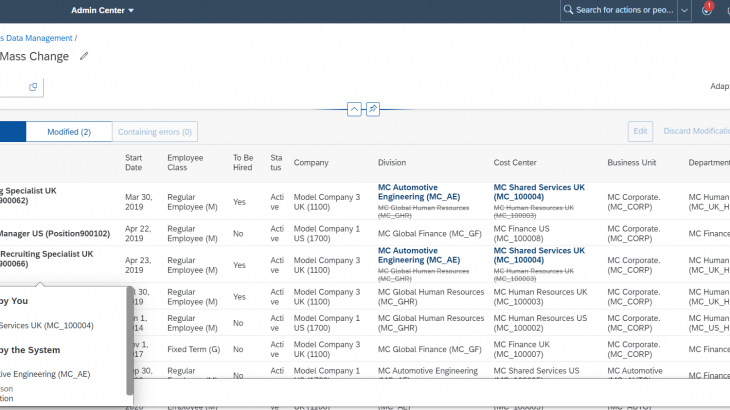
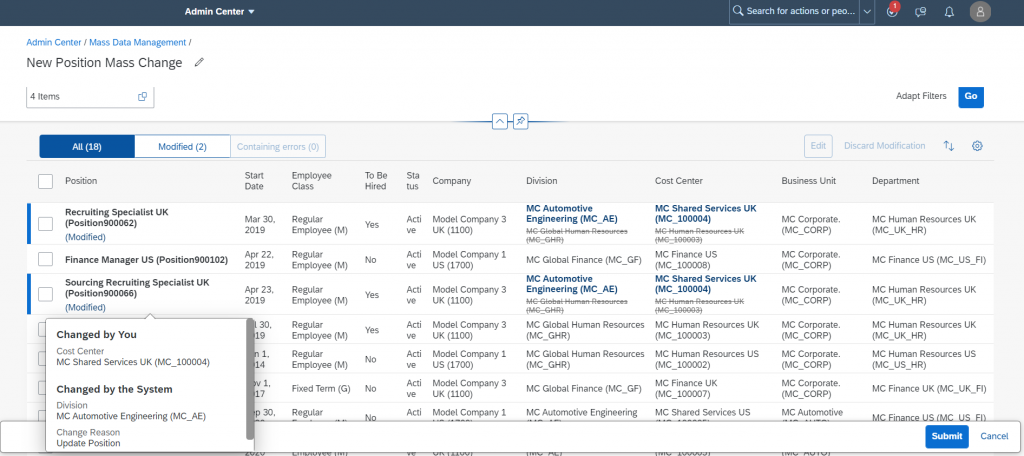
Once changes are applied to the records, your mass change request is automatically saved as a draft. Both user-defined changes and business rules(onChange) are applied to the draft. The user will be able to see all the records that are modified under Modified tab and modified records having errors under Containing errors tab. You can click on Modified link under a position record to see all the changes.
At this stage, you have 3 options to proceed further.
- You can continue making a different set of field value changes in the same draft
- You can submit the draft and get the changes applied to position objects
- You can leave the draft in the current state and share it to other users for review before submission (explained below in a separate section)
The new tool offers lot of flexibility at this stage to make further changes to this existing draft. You can discard changes to a single or multiple record from the existing list of changes. You can also modify another set of records from the same list of search results. In short, a new mass change request can have multiple different changes to multiple sets of records under a single draft. Once all changes are made, you can submit the request. In the above request, let’s make 2 other cost center changes for a different set of positions under the same search results.
You also have an option to rename the mass change request any time when it is in a draft stage.
A mass change request is successfully created, and you’re redirected to the landing page. The change request is saved in the PROCESSING status. Once it is processed, the status will change to PROCESSED SUCCESSFULLY or PROCESSED WITH ERRORS depending on job execution. You will also receive an email notification after the job submission, if any workflows are configured for the position update, they will be triggered.
By default, position to job sync is executed and changes will be reflected to incumbents.
Note: You can have a maximum of 10 draft requests at a given point of time. Drafts that remain unchanged for 30 days from the date of creation are automatically deleted.
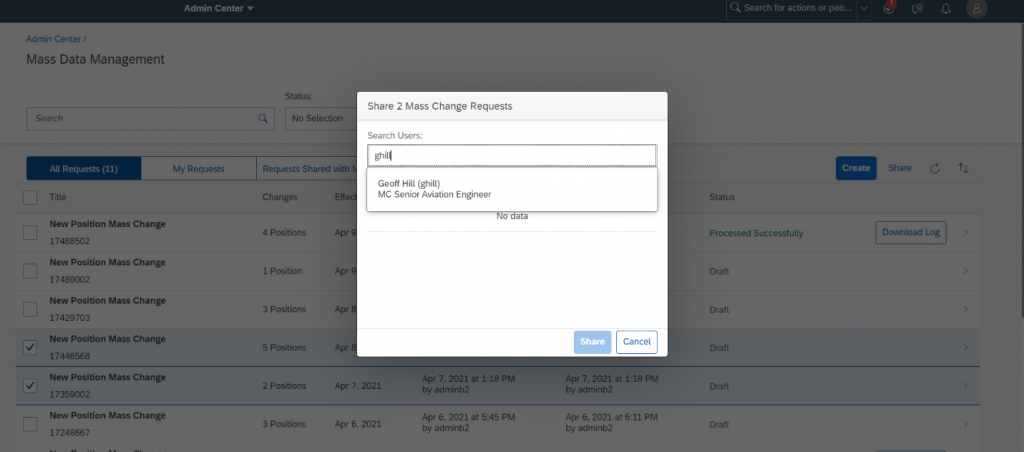
Share Mass Change Requests
Another feature that is useful when you have created a draft and need additional review from any colleague is the Share functionality. You can share a mass change DRAFT job to any user for their review. An email notification will be sent to the reviewer, and they can review the changes offline. Please note a reviewer cannot modify the changes or submit the job.
Note: You can share a draft to a maximum of 5 users.
Configuration
Before creating the mass change request, you need to enable the feature permissions and create a new MDF object configuration.
Let’s look at the permissions first.
Permissions:
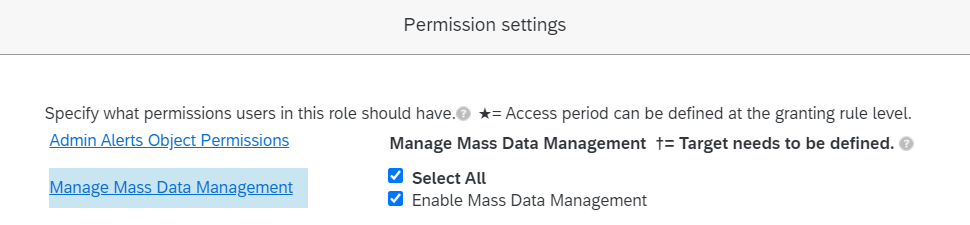
The above permission is required for all roles to access Mass Data Management feature.
For the users who create the mass change requests, at least a VIEW permission is required on both the above permissions.
For the user or the admin who sets up the mass changes job configuration, you need to enable both the above permissions with VIEW and EDIT actions.
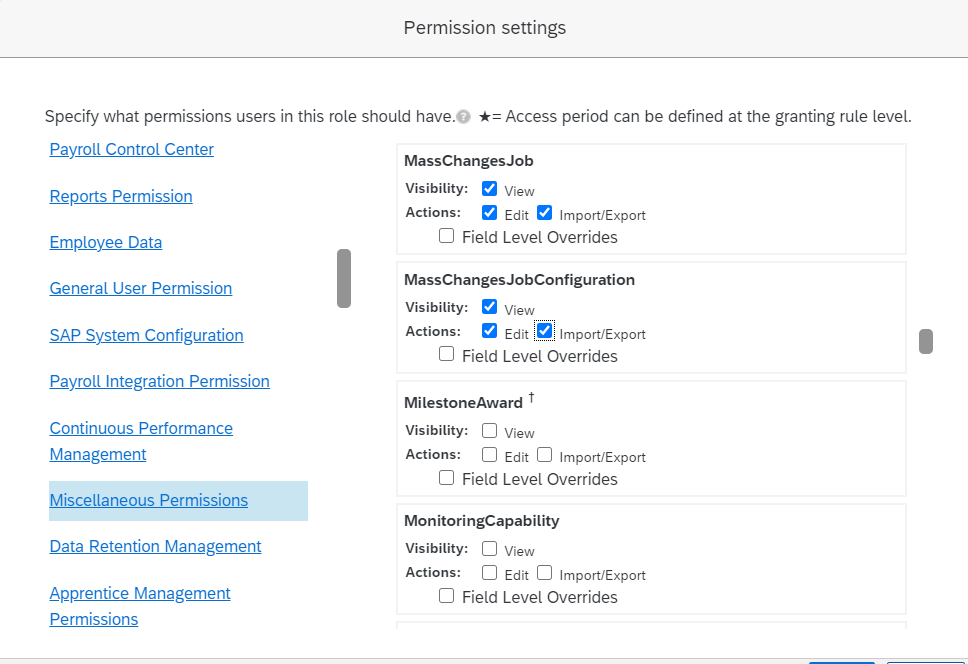
By enabling the above permissions, you are now good to access Mass Data Management Configuration. The next step is to configure the Mass Change Configuration (MDF object) to define the position fields that are available and editable in Mass Data Management UI
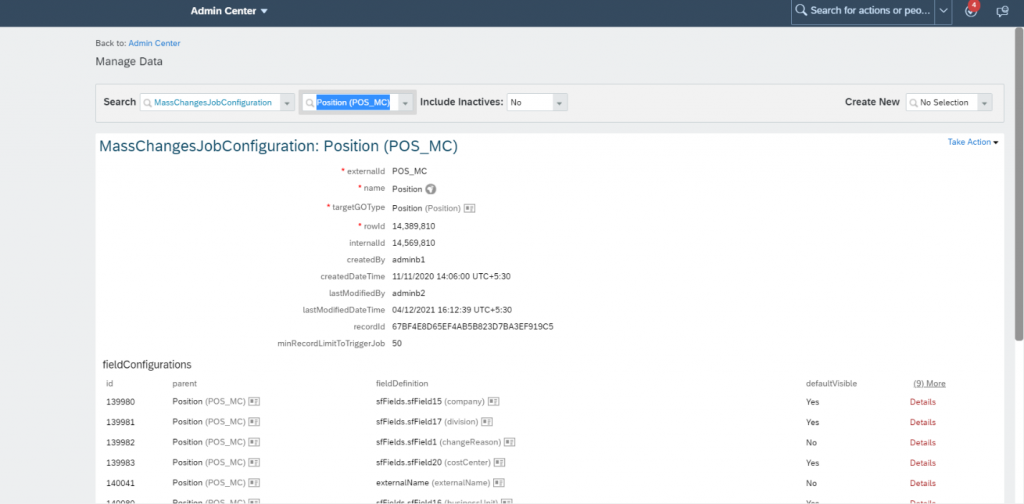
- Go to Admin Center > Manage Data
- Create a new MassChangesJobConfiguration.
- Enter an externalId, name, and select the targetGOType as Position
- (Optional) Modify the default value set on the minRecordLimitToTriggerJob field. This value decides whether a mass change request changes in UI gets processed synchronously or asynchronously. You can define any value between 1 and 50. For example, if you enter a value of 25 in this field, and if you perform mass changes for more than 25 position records, the draft mass change request will be processed asynchronously to prevent timeout and any other performance related UI issues from business rule execution. ,If you don’t enter any value, 10 is considered as the default value.
- Add fields the position data object to the configuration, by selecting from the fieldDefinition dropdown
Note: By default, effective status field is added to the configuration and cannot be removed
Important: User data type fields and standard position associations such as right to return, position matrix relationship and parent position are not supported currently
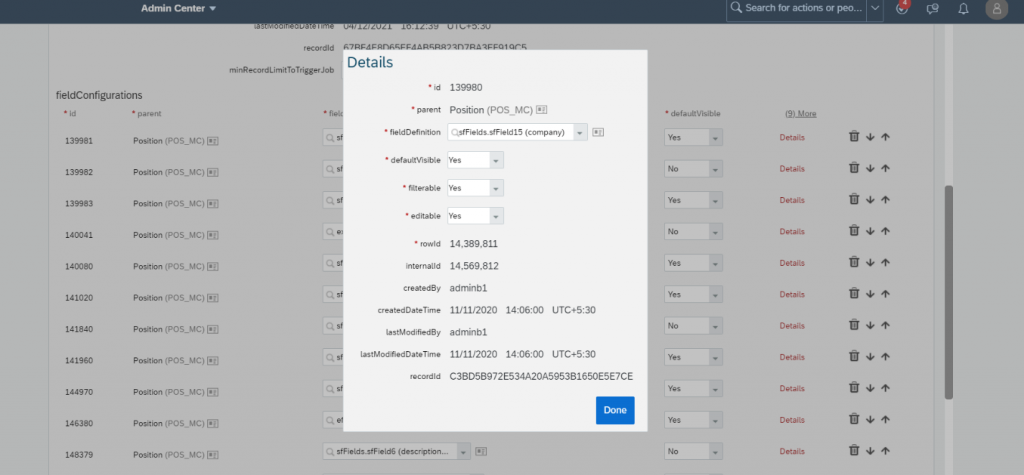
1. To configure a field to be visible by default on the mass change UI, select the corresponding defaultFiltervalue to Yes. You can define a maximum of 8 default filters under this MDF object.
Note: Selecting a field as defaultFilter will automatically set the field as filterable while saving.
2. To configure a field as a filter, select Details and set it as filterable.
3. To configure a field to be editable as part of a mass change request, select Detailsand set it as editable
Note: If you have added a dependent child field, ensure to add the parent field to the configuration and have similar field settings to perform mass changes.
4. Save Configuration
Note: You can also add a field as part of the object configuration with all attributes as No. This will ensure that the field is part of UI configuration and it will be available for viewing in search results table (by manually selecting the field from Settings icon)


