INBOUND POSC (MULTI-STEP MOVEMENT)
Purpose
The purpose of this article to understand INBOUND POSC and how does it work in EWM. In this blog post I will discuss the configuration and master data settings in EWM for one of the Inbound process consisting of multi-step movements.
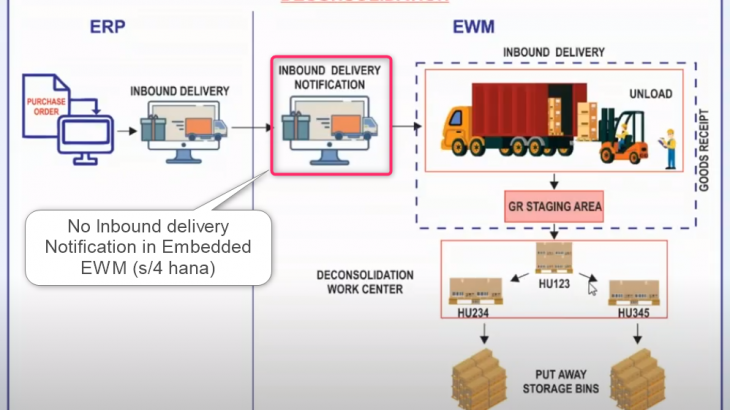
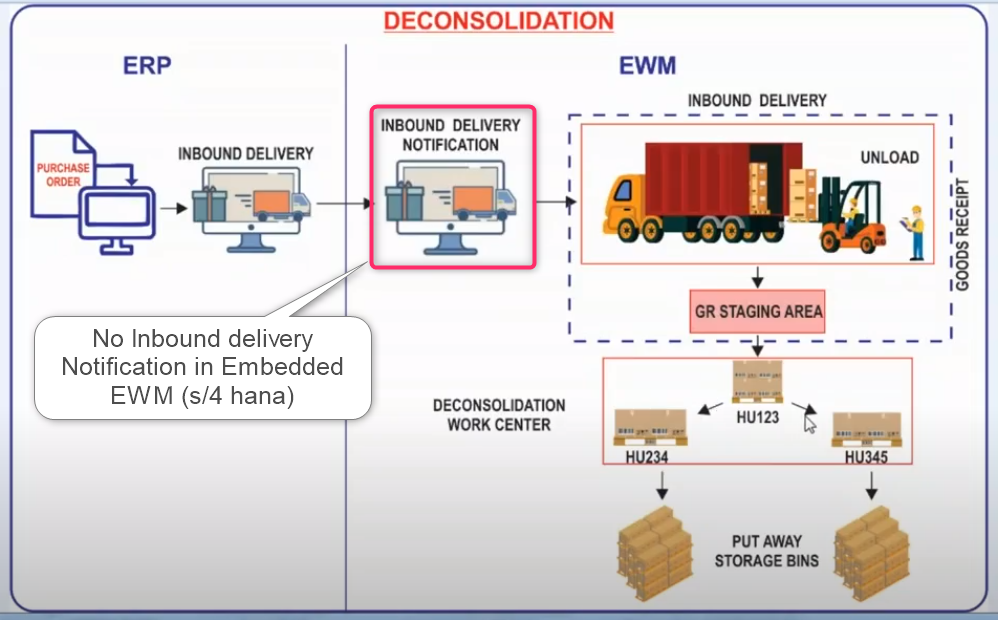
- In this Inbound POSC Scenario we discuss about Deconsolidation/Re-pack process of a product. Here we received a product packed inside HU from the supplier and before placing the product to final bin, we first take out the product from the HU and re-pack in different HU and placed it in final bin.
CONFIGURATION: –
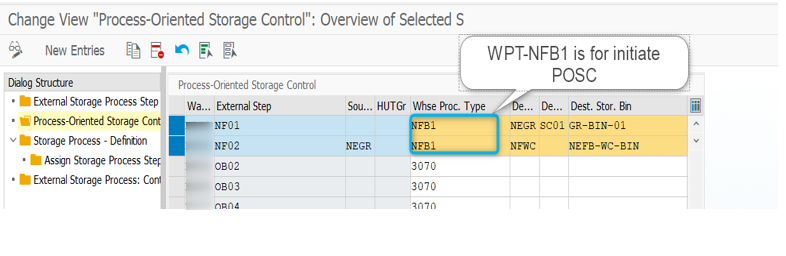
1.1 Define Process Oriented Storage Control:
In this area, maintain storage process with external steps and process-oriented storage control.
PATH: Spro—Img—SCM EWM—EWM—Cross process setting—Warehouse Task—Define Process Oriented storage control
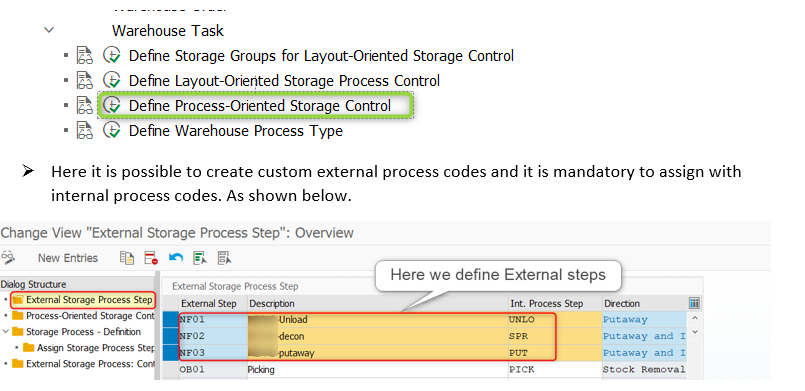
Here we can use Standard External steps also (IB01, IB02, IB03)
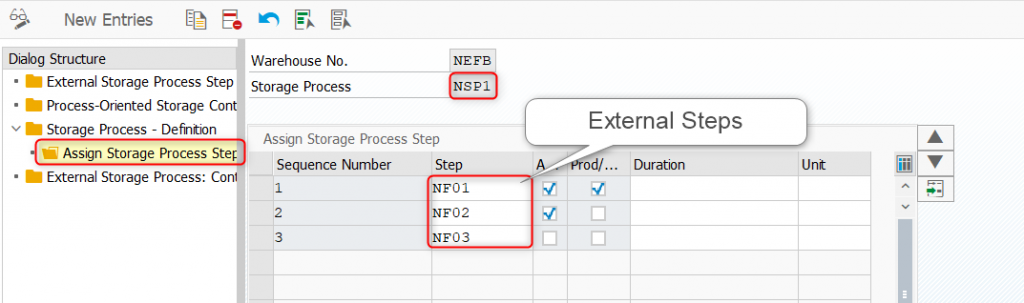
1.2 Define Storage Process:
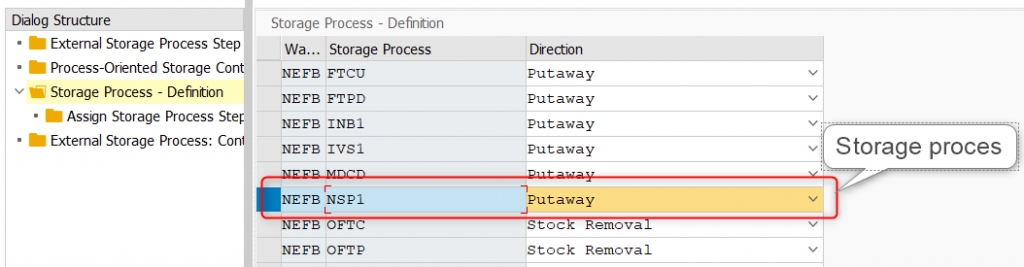
- After Creating Storage process, we need to assign External process codes to storage process. As shown below-
1.3 Define Process Oriented Storage Control:
PATH: Spro—IMG—SCM EWM—EWM—Cross process setting—Warehouse Task—Define Process oriented storage control
1.4 Define Warehouse Process Type:
PATH: Spro—IMG—SCM EWM—EWM—Cross process setting—Warehouse Task—Define Warehouse Process Type
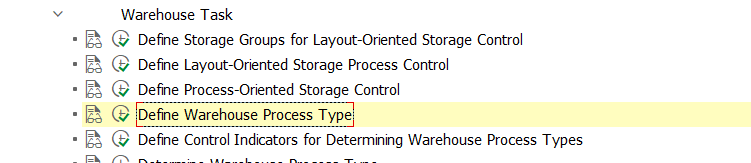
- Here we define WPT for put away process and assign storage process to it, means sequential multi-step trigger to finish the process.

1.5 Define Control Indicator for Determining Warehouse Process Type:
PATH: Spro—IMG—SCM EWM—EWM—Cross process setting—Warehouse Task—Define Control Indicator for Determining Warehouse Process type.

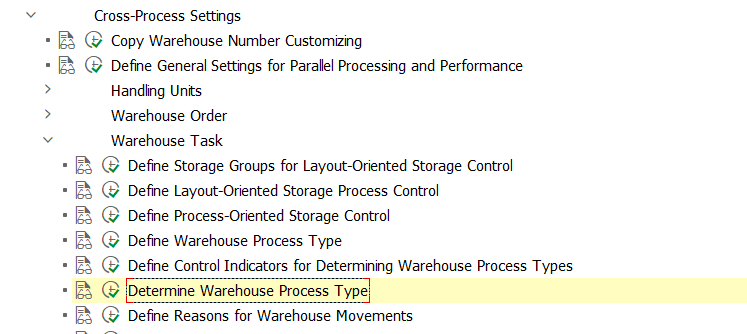
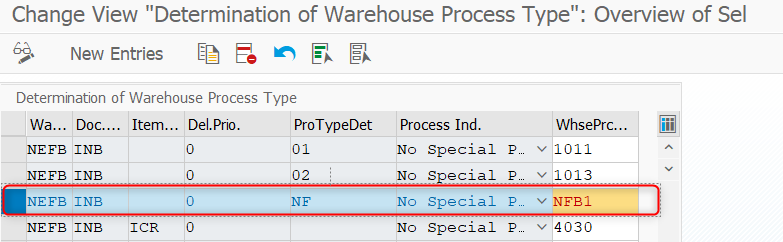
1.6 Determining Warehouse Process Type:
PATH: Spro—IMG—SCM EWM—EWM—Cross process setting—Warehouse Task—Determine Warehouse Process Type
- Here the system determines the WPT according to Document type, Item type, Delivery priority and Process type determination control indicator.
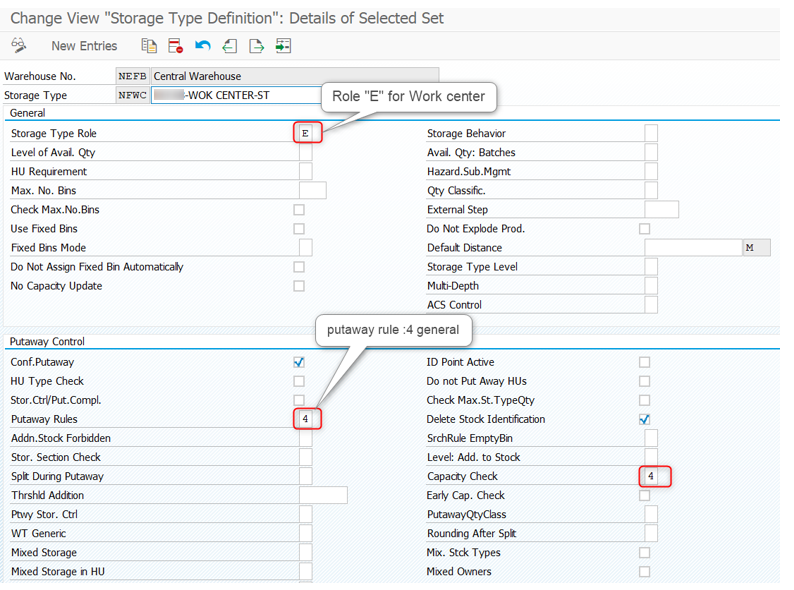
1.7 Define Storage type for Work center:
PATH: Spro—SCM EWM—EWM—Master Data—Define Storage Type

- Here one Storage type with role “work center” is required to assign work center to execute deconsolidation process.
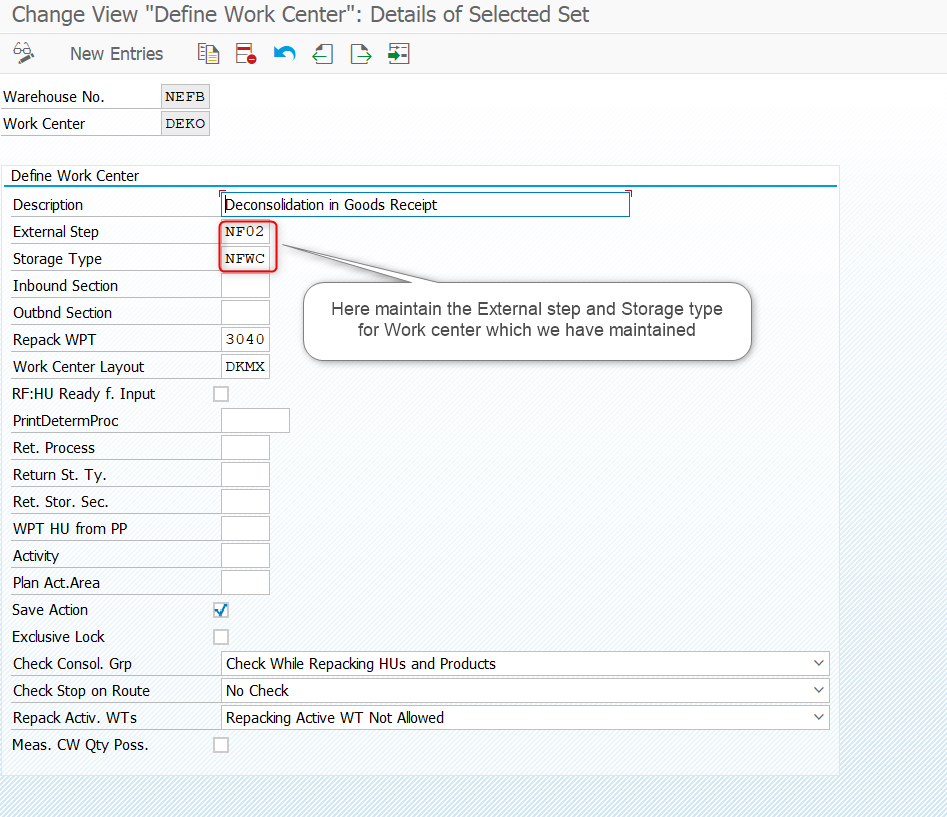
1.8 Define Work center:
PATH: Spro—SCM EWM—EWM—Master Data—Work Center—Define Work Center

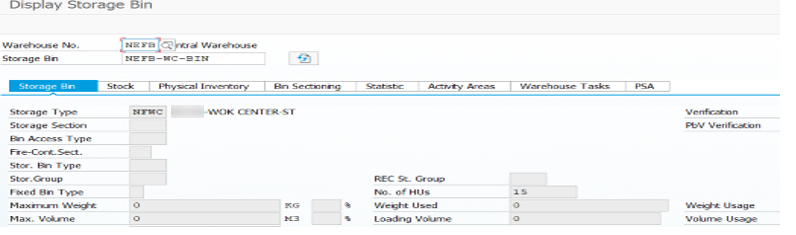
1.9 Create Storage Bin for Work center:
- Storage bin is required to assign for work center, this storage bin create against storage type, which is assigned to work center.
PATH: Sap Easy Access—EWM—Master Data—Storage Bin—Create Storage Bin

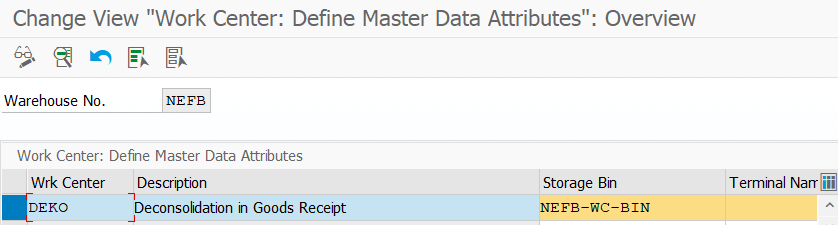
2.0 Define Master Data Attributes for Work center:
PATH: Sap Easy Access—EWM—Master Data—Work center—Define Master Data Attributes


TEST CASE
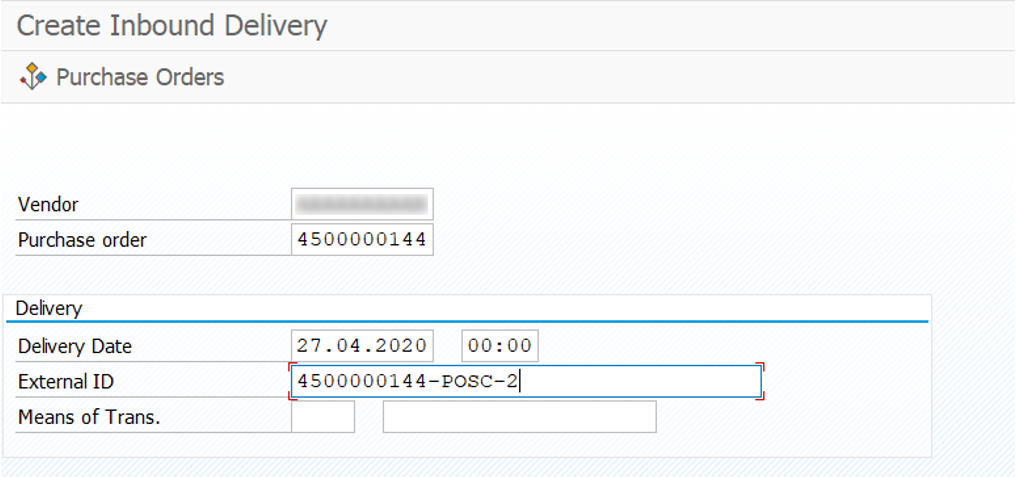
3.1 Create Inbound Delivery:
Transaction: VL31N
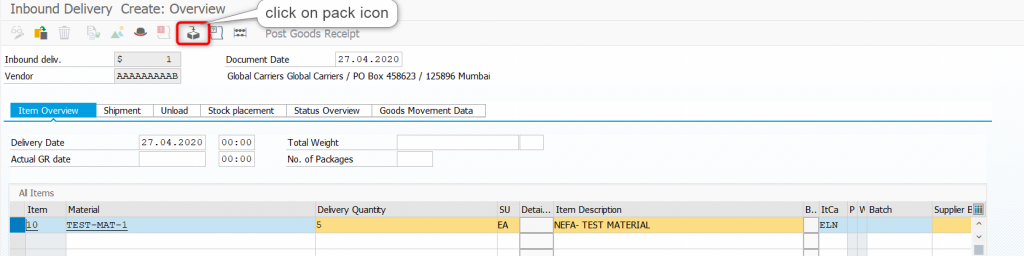
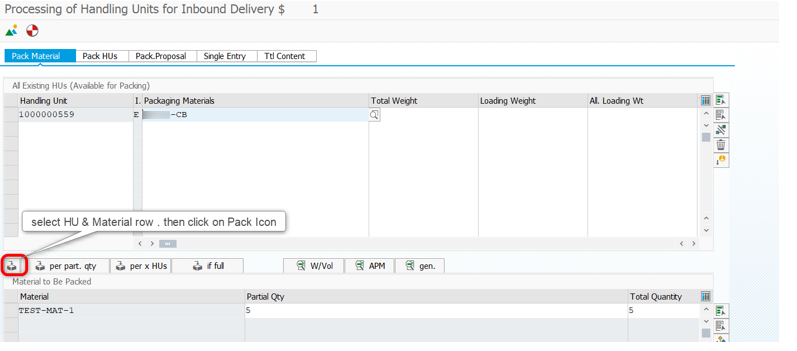
- Once Material is packed then click on SAVE button. Inbound deliver is transfers to EWM.

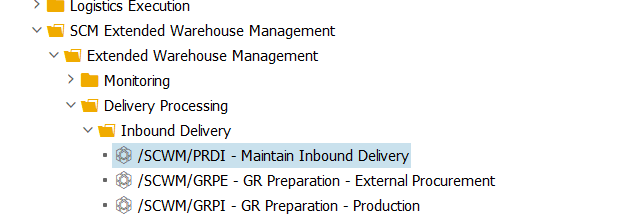
3.2 Maintain Inbound Delivery:
Transaction: /N/SCWM/PRDI
- To view HU detail, click on HU TAB to view the HU details.

- Create Warehouse Task
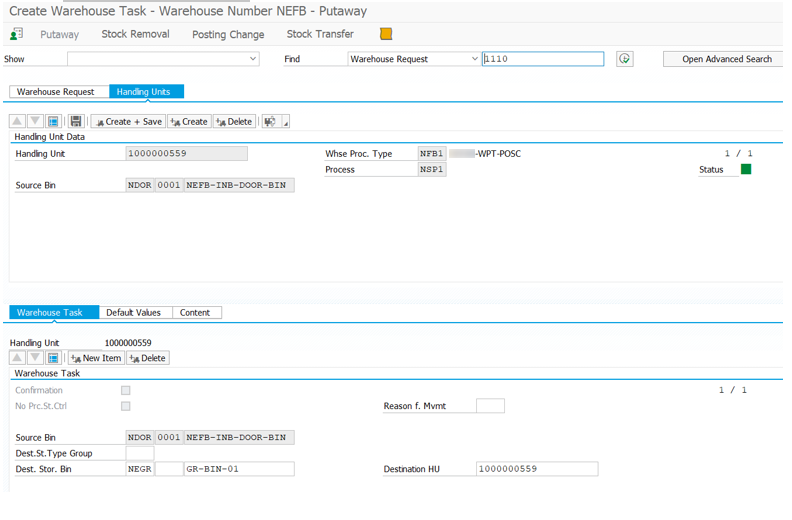
- Here HU is mandatory to work with POSC. HU Warehouse task creates for Warehouse request (IBD), Where Source is “DOOR” and Destination is “GR-STAGE”
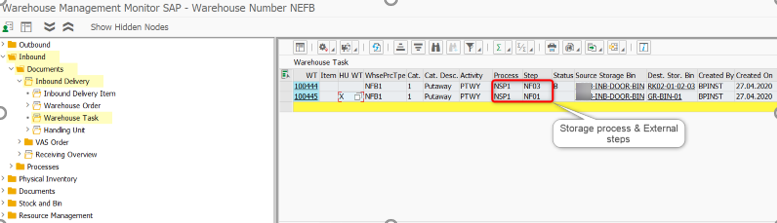
3.3 Check Monitor for WT details:
Transaction: /N/SCWM/MON
- Warehouse monitor provides WT information with reference to inbound delivery.
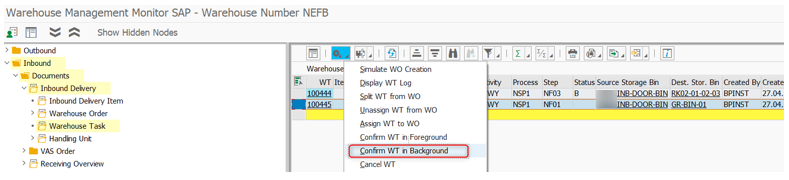
- Once confirm the WT (UNLOAD), there new WT’s will be created, one is Confirmed WT and other is Waiting WT.
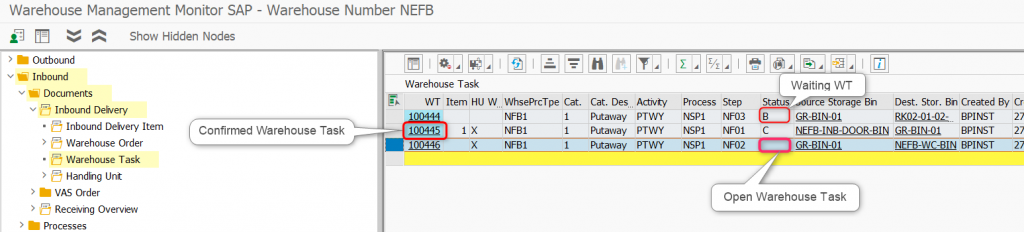
- Once confirm the open WT, HU will be available at deconsolidation work center.
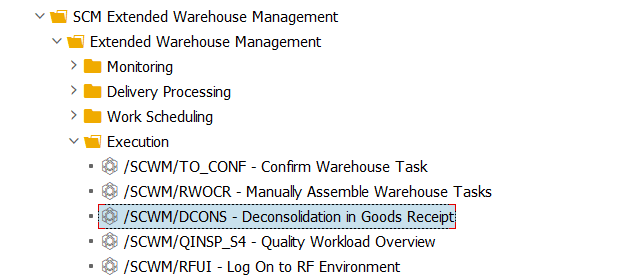
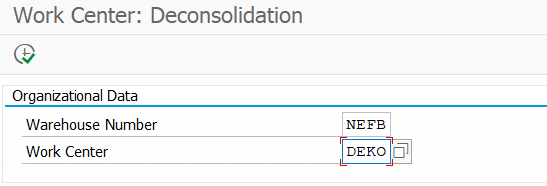
3.4 Deconsolidation at Work Center:
Transaction: /N/SCWM/DCONS
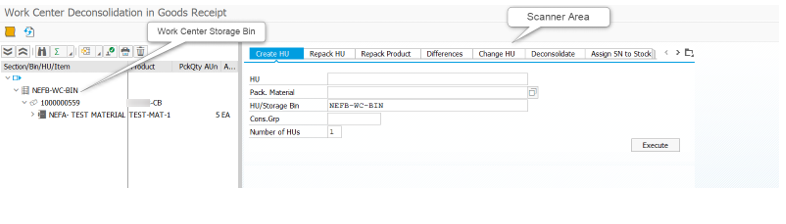
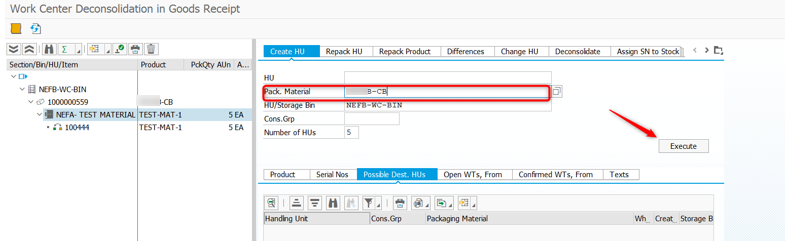
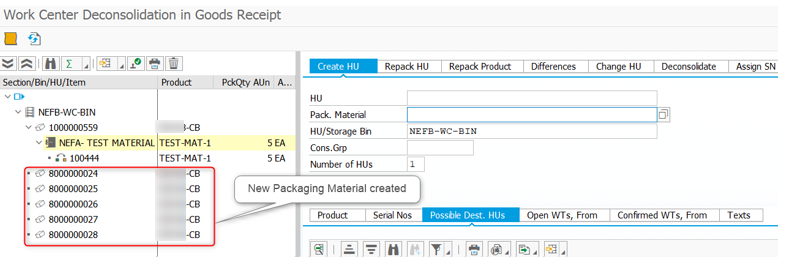
- Now create new HU for transferring the materials from old HU to new HU.
- Now Enter the Source HU, destination HU (new/empty HU) under Deconsolidation Tab & select open WT
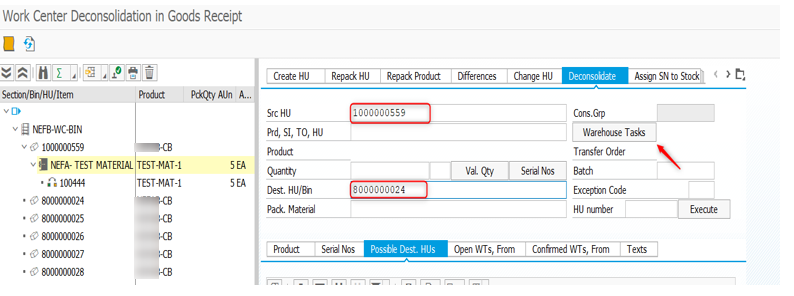

- Now, Open WT appear under “Deconsolidation” tab
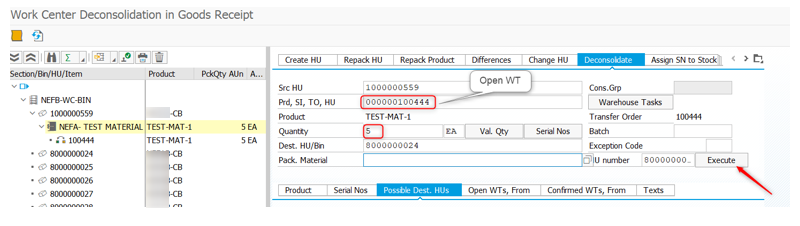
NOTE: It is possible to change Qty of open WT, system will create a new WT for QTY. Once executed, product will be packed in new HU (Destination HU).

- Until ‘complete HU step ‘for individual HU’s, deconsolidation will not be completed.
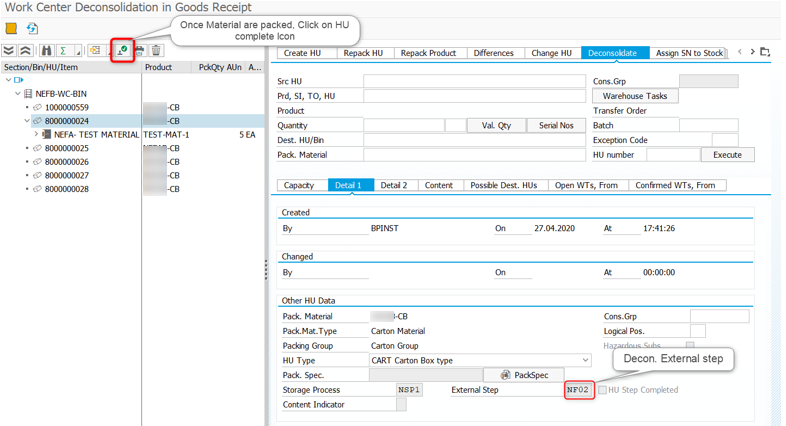

- Once after complete HU steps, then only waiting WT will be opened.
- Once it is opened click on Confirm WT in Background, as shown below-
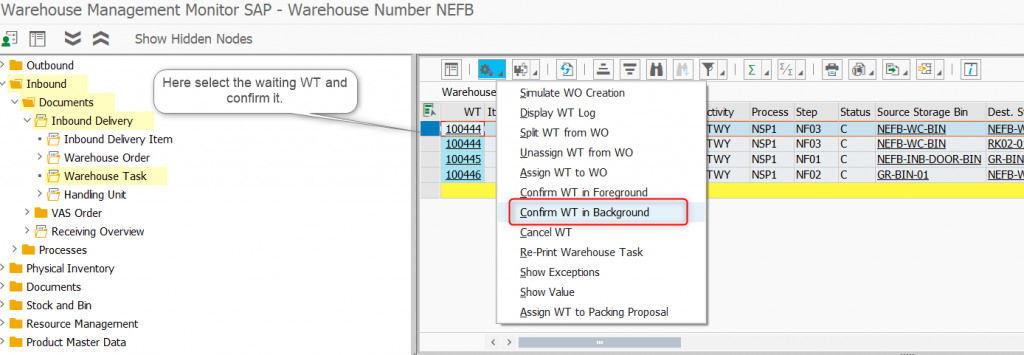
- Below you can see Waiting WT status has been confirmed and material has been transferred to Destination storage Bin.


