Introduction
In this post, the objective is to help you to understand data fields in standard template and successfully migrate object “Condition record for Pricing” by file load approach under ERP to S/4 HANA migration scenario in new version S/4 HANA 2020 OP. As described in many other posts about Migration Cockpit and the standard template delivered by SAP, I will show that it is not much difficult to populate correct field value in the template to meet migration cockpit program.
- Understand Foreground Work
- Understand Technical Table
- Hands On DMC Template
- Hands On Fiori Migration Cockpit
1. Understand Foreground Work
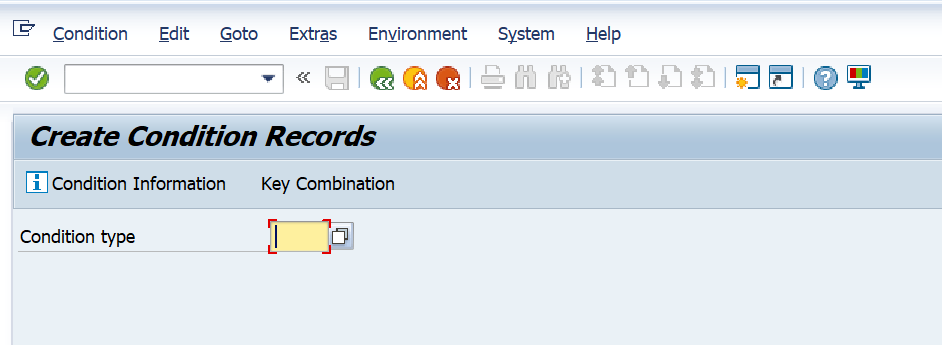
First, to start with foreground work, we need to know how to manually create price master data under Transaction Code VK11.
Understanding Data Field Maintenance Sequence and Relationship in Creation is helpful for following template value filling.
The first data field when we enter in screen is “Condition Type” in price condition. In business requirement, we need to acquire data value about what kinds of condition type from business users side need to be migrated.
So here we will take an example of condition type as “PR00” which is frequently used in purchasing price condition.
In condition type PR00, there are 3 types of Key Combination. And here we need to understand those 3 Combinations in fields differences. Because different Combinations need different data fields in the header.
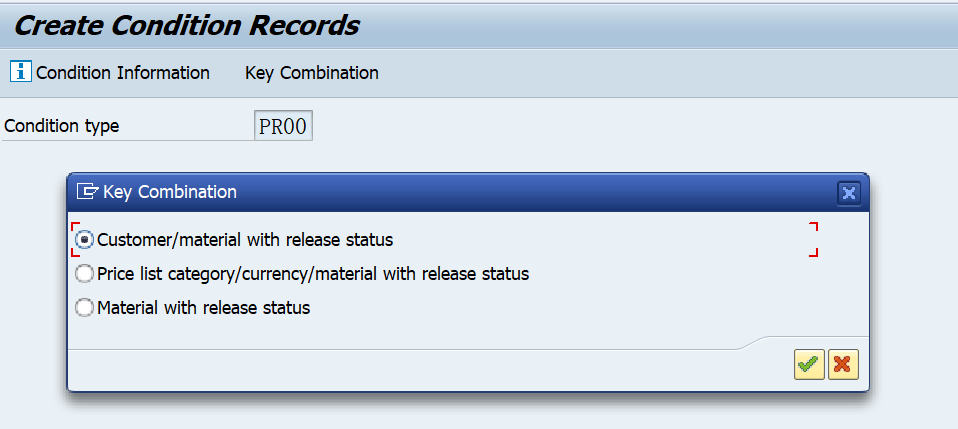
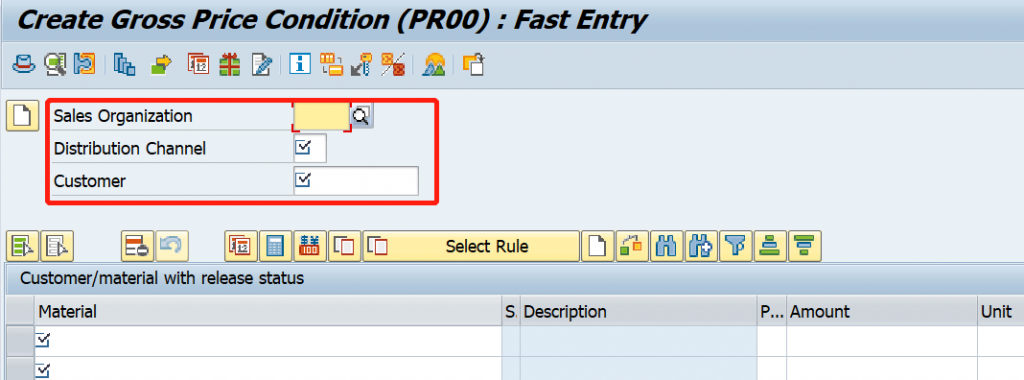
1) In combination “Customer/material with release status”, it needs fields as mandatory are “sales organization/distribution channel/customer” in the header.
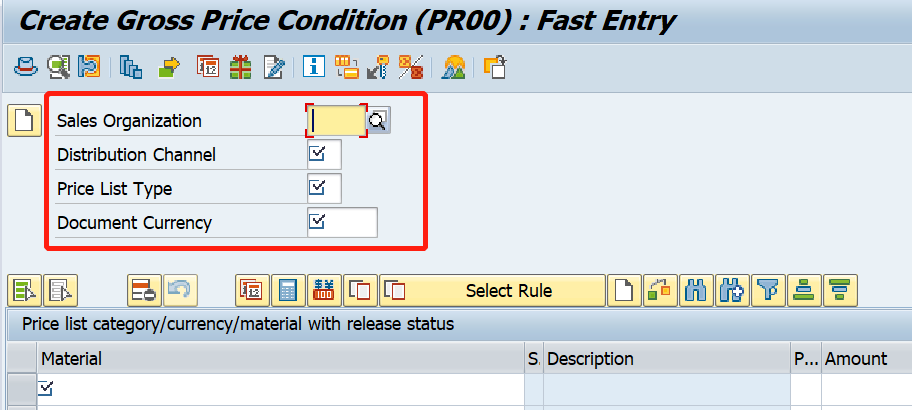
2) In combination “price list category/currency/material with release status”, it needs fields as mandatory are “sales organization/distribution channel/price list type/ document currency” in the header.
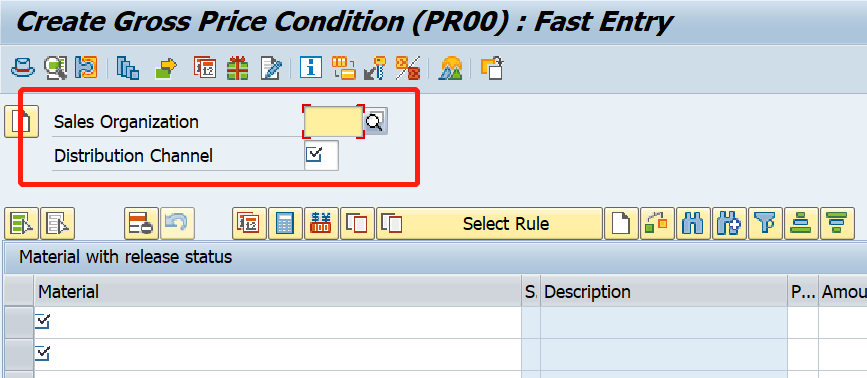
3) In combination “material with release status”, it needs fields as mandatory are “sales organization/distribution channel” in the header.
Therefore, we need to check which combination needs to migrate from legacy table.
2. Understand Technical Table
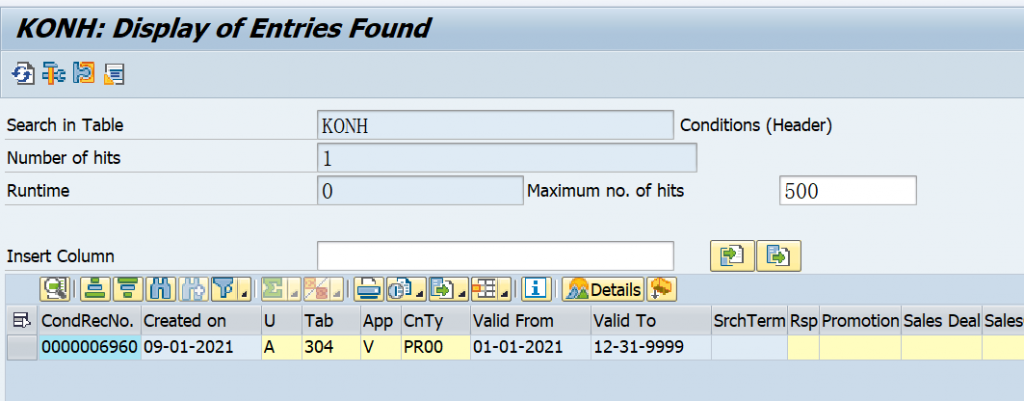
Let’s move to technical table – KONH (Conditions Header) and KNOP (Conditions Item).
In the foreground screen, there are different types of Key Combination. Here we run Transaction Code SE16N to check what value is recorded in legacy table.
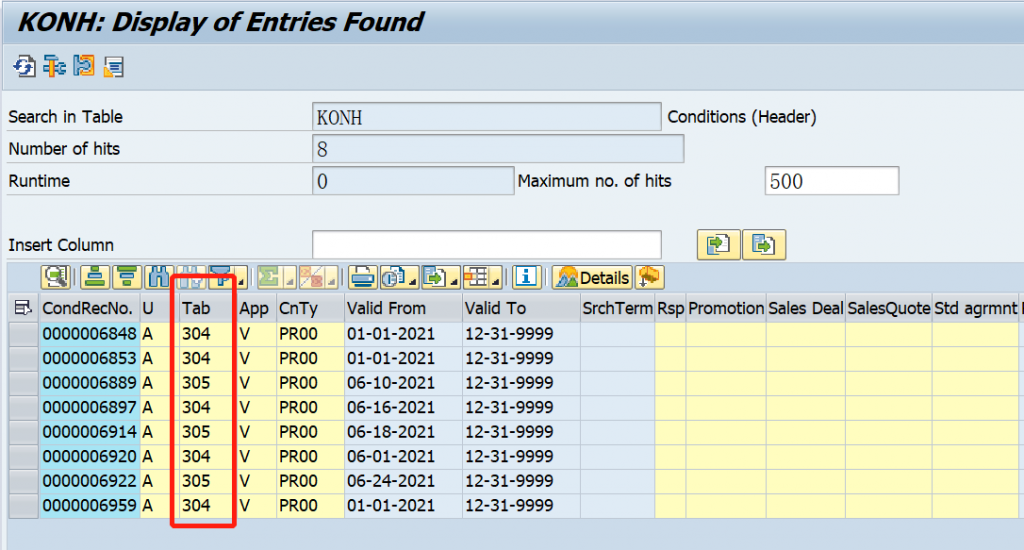
Input the filter condition that the condition type equals to PR00, then execute it.
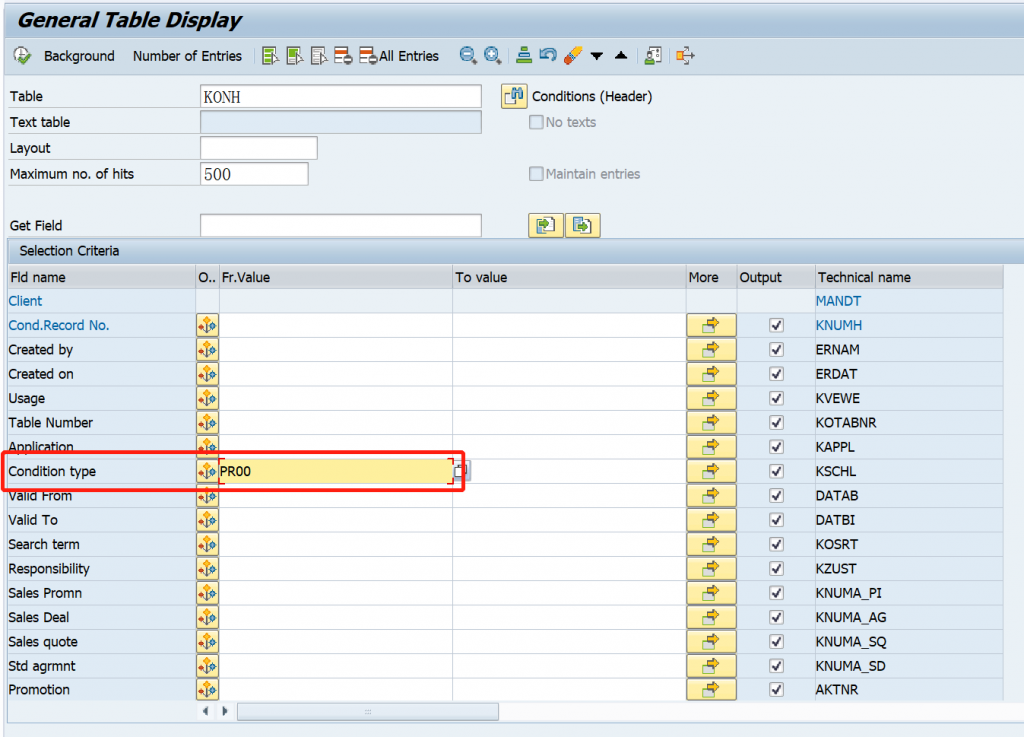
Here we got the “table” field which we need to query it from technical table “A + table field value”, e.g. “Table” value is 304, then we need to go to Technical Table “A304” to get key combination field.
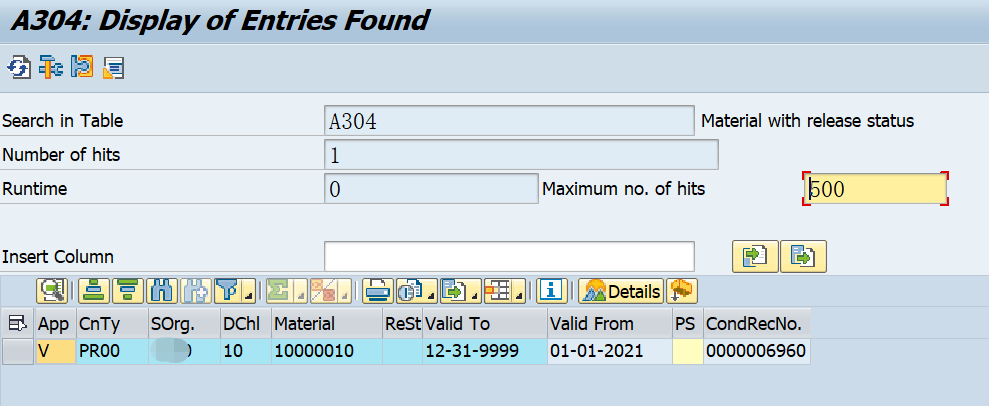
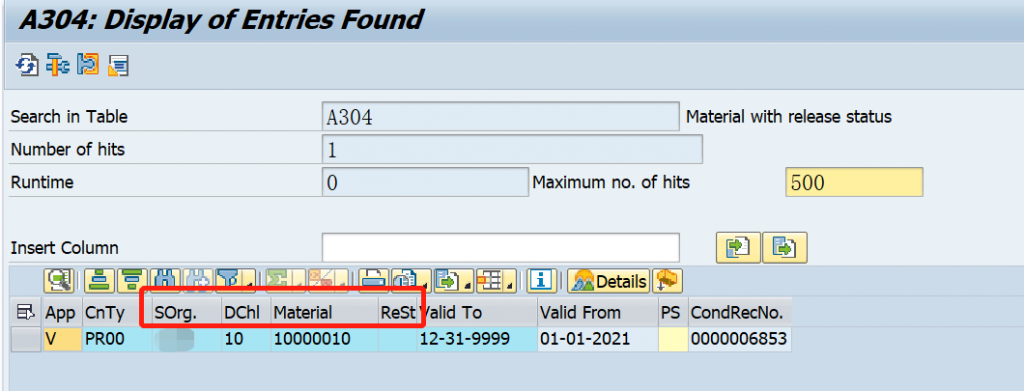
Here we run Transaction Code SE16N to go into technical table A304. Input the filter condition that condition record number we need to migrate, then execute it.

From table A304, we also have the table name “Material with release status” to know which combination is as same as foreground work.
In foreground work, combination is “Material with release status”, it needs two mandatory fields “sales organization/distribution channel” in the header.
Also we can get details from table header to know that it needs fields “sales organization/distribution channel” as mandatory.
3. Hands On DMC Template
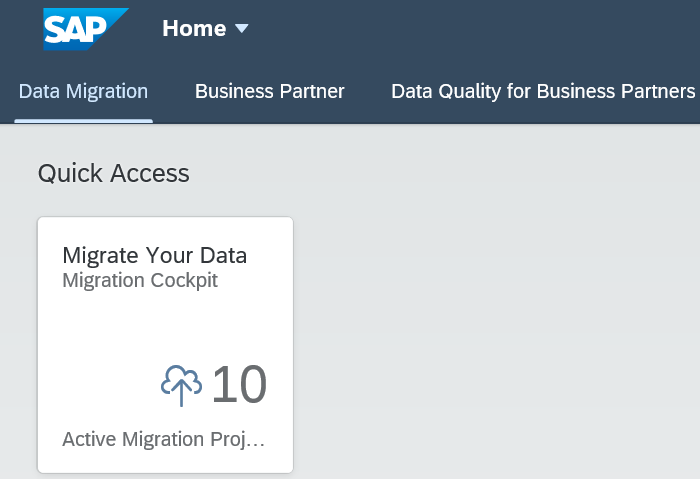
Now we need to get load template from Fiori Migration Cockpit. Open Fiori by Transaction Code /UI2/FLP and click “Migrate Your Data”.
Choose “Create->Migrate Data Using Staging Table”
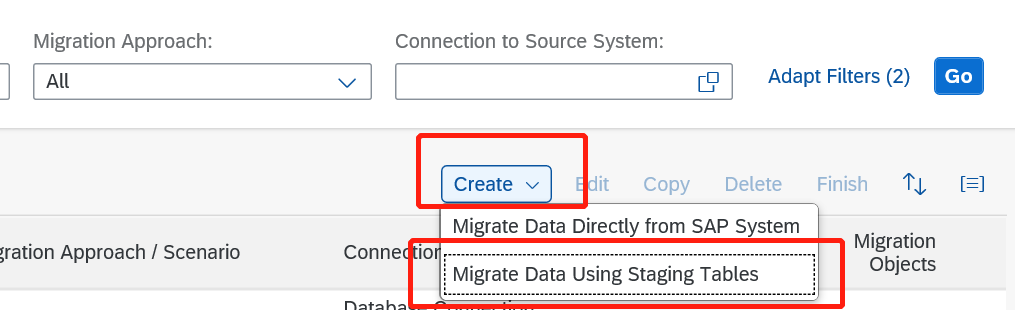
Fill project name and keep option as below. Click Step 2.

Input “condition” to search, and tick it from left list to right list, and click “Review”.
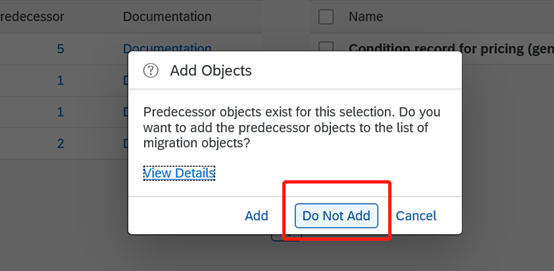
There are many migration objects for condition, but we choose the general template which is suitable for all scenarios.

Choose “Do Not Add”
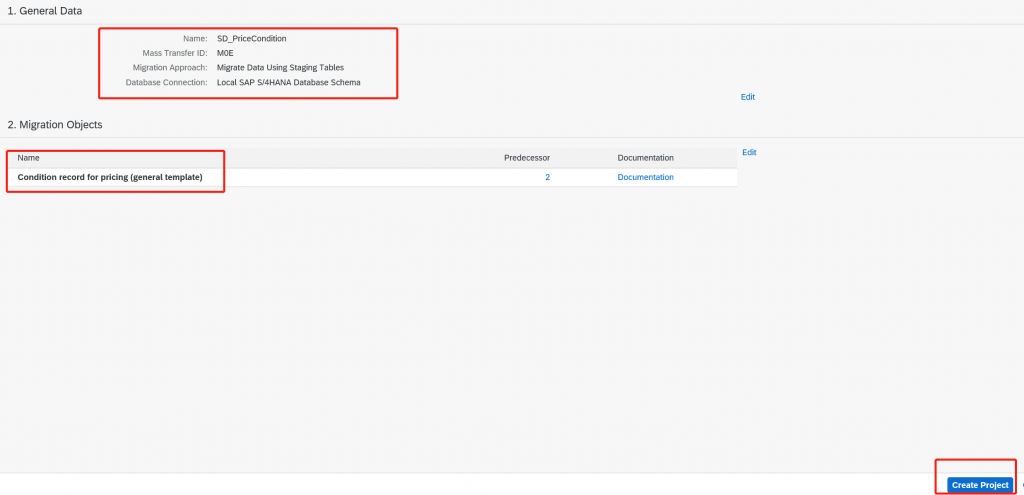
Click “Create Project”
Double confirm project name and object and create project.
Click the down arrow and choose “Download Template” and save template.
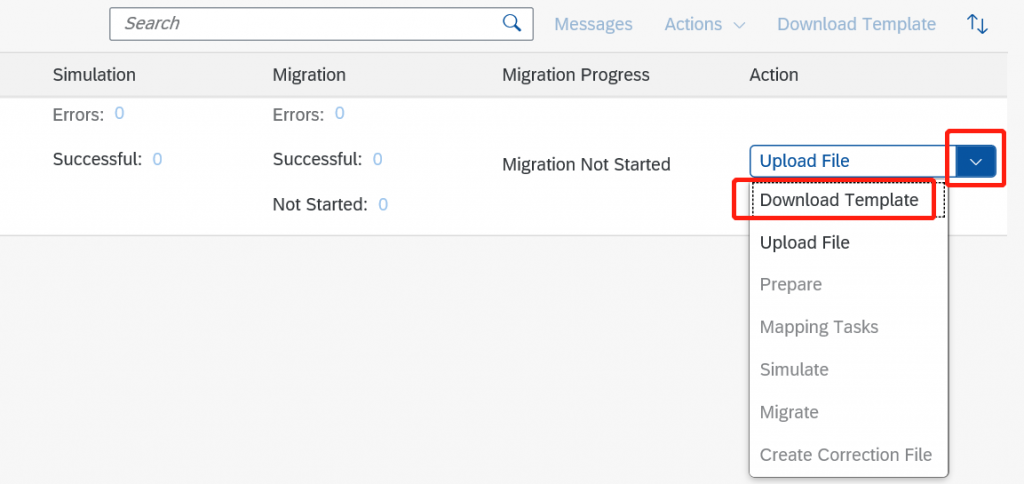
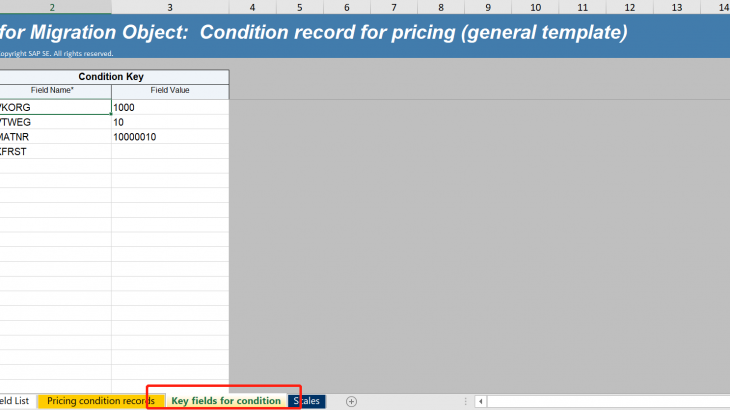
In the template, there are 2 sheets in orange color which are marked as mandatory. And data fields in background header table meet it in those 2 sheets.
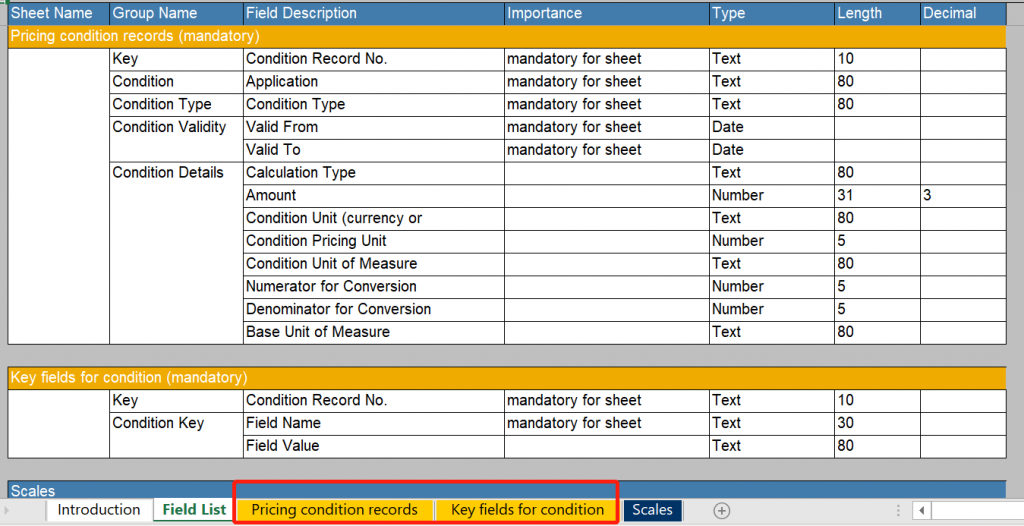
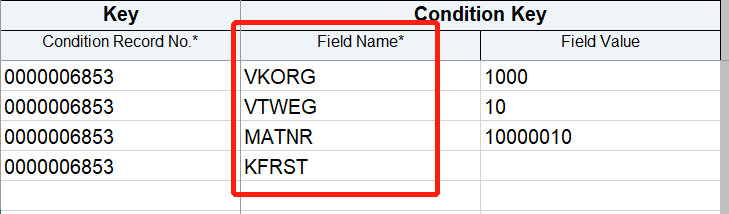
Now we can progress fields mapping by the fields name or description from legacy background table to template. But here we need to pay more attention to is that “field name” in sheet of Key field for condition needs to transform into field technical name. “Field Name” is the field that refers to key combination, we need to identify how many combination fields are in one condition record No. Here it needs to be checked by “table” field in KONH.
There is the scope of “Field Name” delivered by SAP. If your migration scenario is new implementations, pls refer to note 2332748 to check the field value which is mandatory in field name.
Below is the mapping list about Field name frequently usage in condition.
| Field Name | Description |
| KFRST | Release status |
| KUNNR | Customer number |
| LIFNR | Supplier’s Account Number |
| MATKL | Material Group |
| MATNR | Material Number |
| PERNR | Personnel Number |
| SPART | Division |
| VKORG | Sales Organization |
| VTWEG | Distribution Channel |
| WERKS | Plant |
| PLTYP | Price List Type |
| KDGRP | Customer Group |
| KUNAG | Sold-To Party |
| KUNRG | Payer |
| KUNWE | Ship-To Party |
| KUNWE | Sales Unit |
| WAERK | SD document currency |
| UKONM | Material pricing group of main item |
| UPMAT | Pricing reference material of main item |
| VARCOND | Variant condition |
| BSTME | Order unit |
| BUKRS | Company Code |
| EKORG | Purchasing Organization |
| ESOKZ | Purchasing info record category |
| EVRTN | Purchasing Document Number |
| EVRTP | Item Number of Purchasing Document |
| INFNR | Number of purchasing info record |
| INCO1 | Incoterms |
| LAND1 | Country Key |
| LLAND | Country of Destination |
| REGIO | Region |
| LIFRE | Different Invoicing Party |
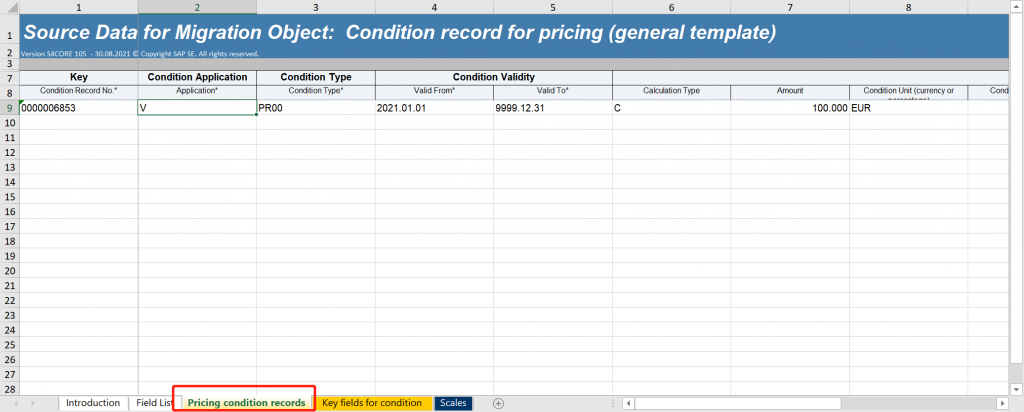
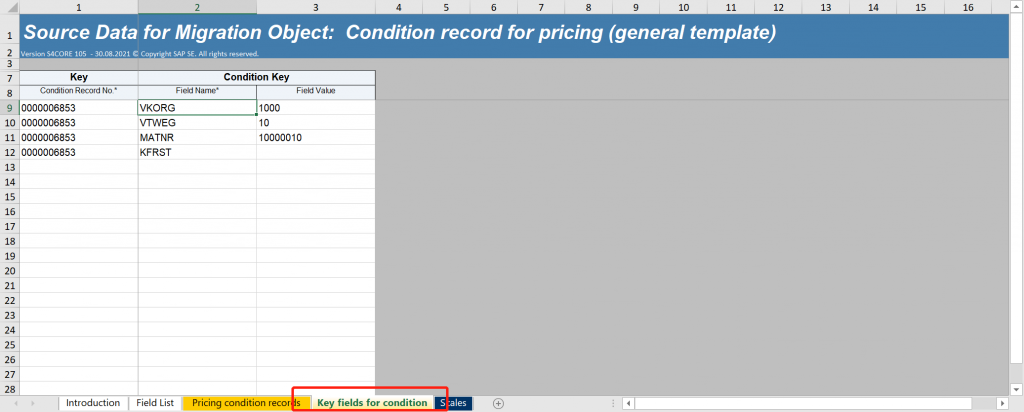
Now we understand background table and template requirement, we can fill the correct fields value in the template as below.
4. Hands On Fiori Migration Cockpit
Now we have correct value in the template. The next step is to load template into Fiori migration cockpit.
Access project object and upload file.

Click upload and locate file in PC.

Here we need patience to wait for upload status, once it reminds “Data Successfully Transferred to Staging Tables”, back to mapping task.

We can see instance record change into 1 record. Click “Prepare”.

Click “Mapping Task”.

Complete the batch of 8 open mapping tasks.
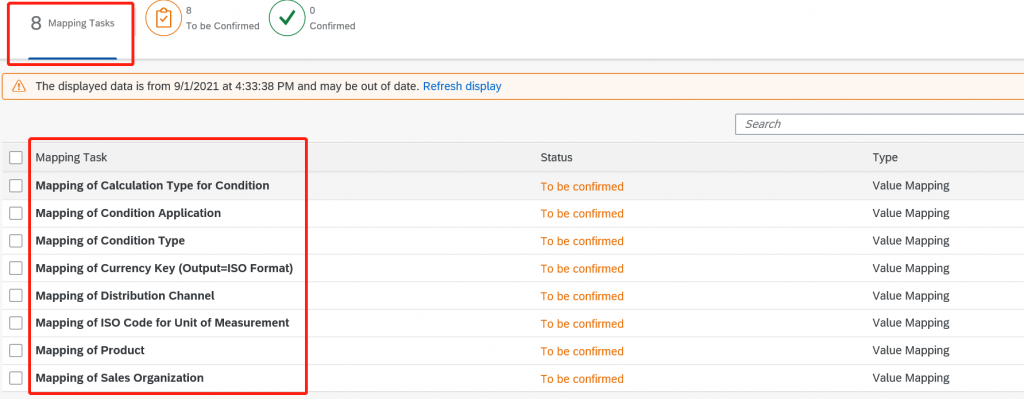
There are 3 ways to complete mapping task:
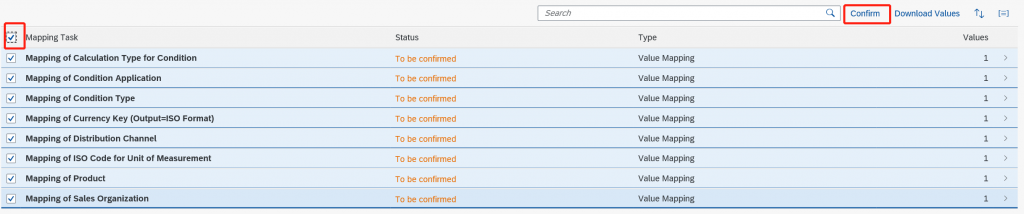
- choose all 8 mapping tasks and click confirm.
- select mapping object one by one, go into details to change and
- confirm value. Download mapping template, upload mapping value through template.
Here we have simple example, we will take the first one simple approach.
After mapping task done, click “Simulate”

We get the successful simulation status, then click “Migrate”, the data will be officially transferred into S/4 HANA.

The last step is to check background table to validate the data.