Pre-requisite:
1. Install Node.js
2. Install CDS Tools for CAP Development ( npm i -g @sap/cds-dk)
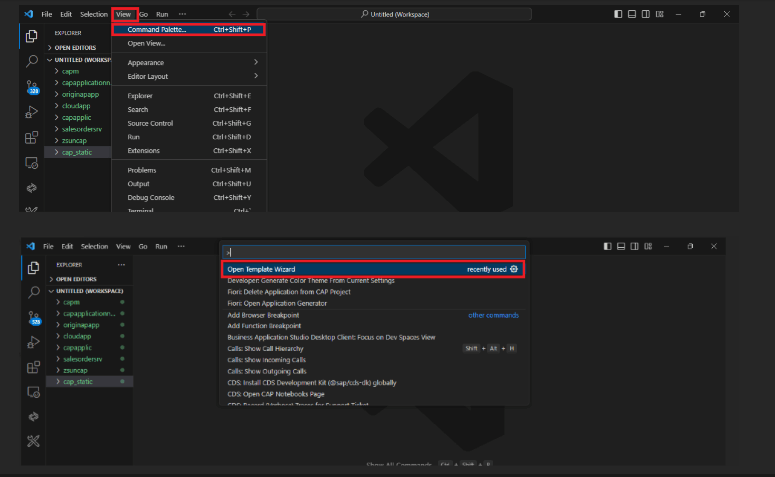
Step 1: Go to View tab and Click on Command Palette.
Step 2: Search for Open Template Wizard
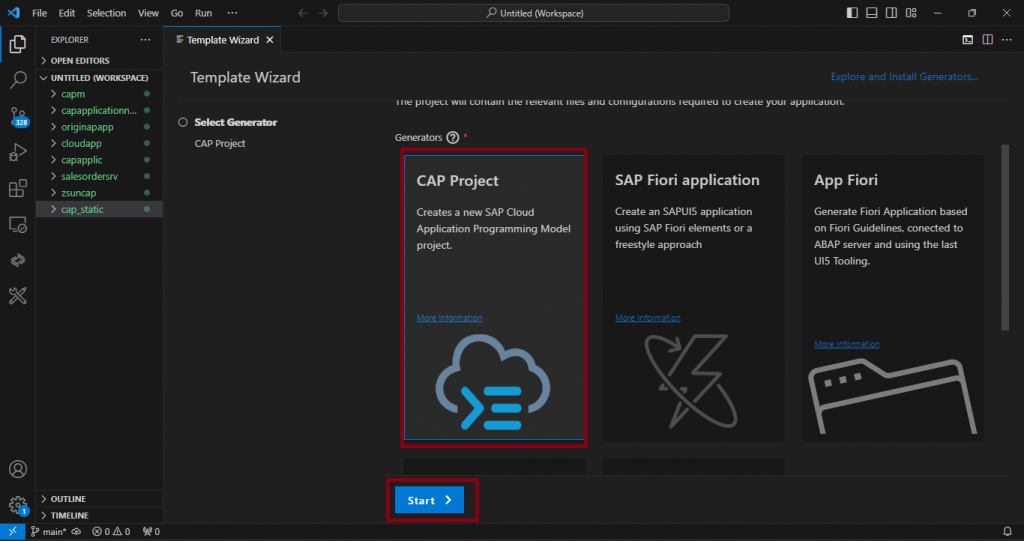
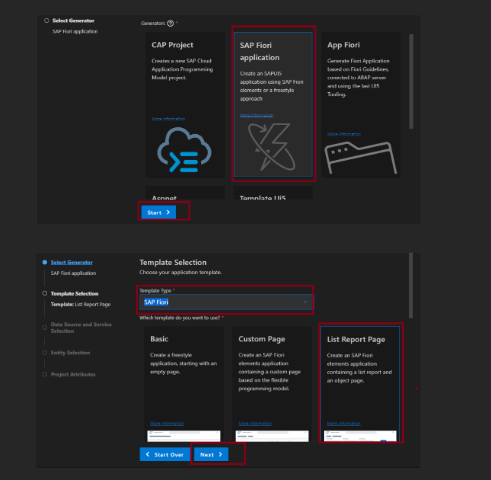
Step 3: Select CAP Project and Click on Start.
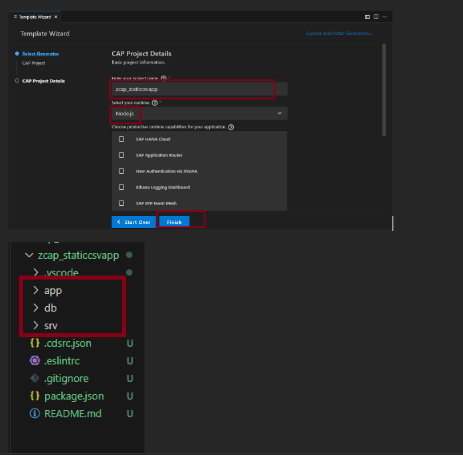
Step 4: Provide your CAP Application name and runtime as Node.js and click Finish.
The above image is the skeleton developed for my CAP application containing “app.db,srv” till now.
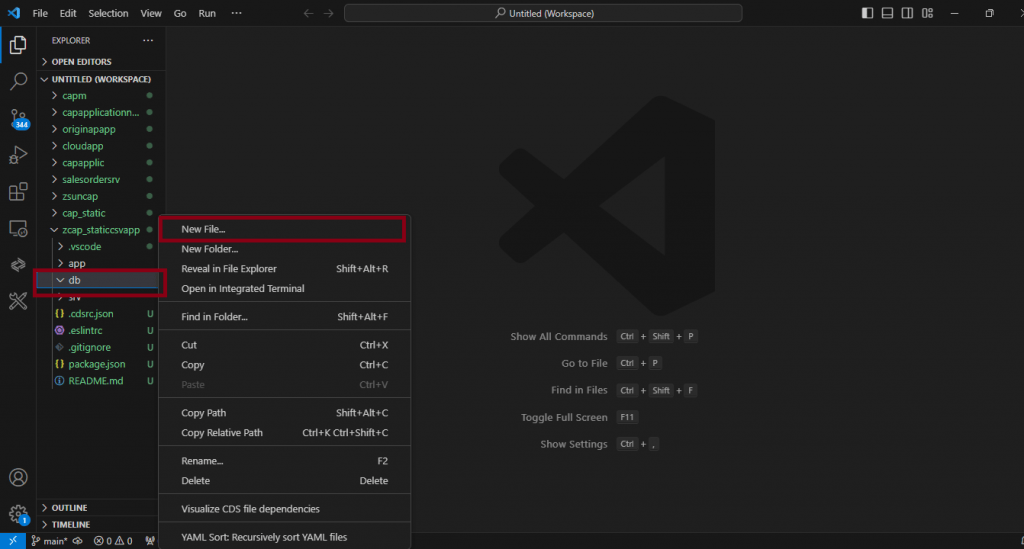
Step 5: Right click on “db” and select new file.
Step 6: Provide your new file name with “.cds” extension.
In my case it is “datamodels.cds”
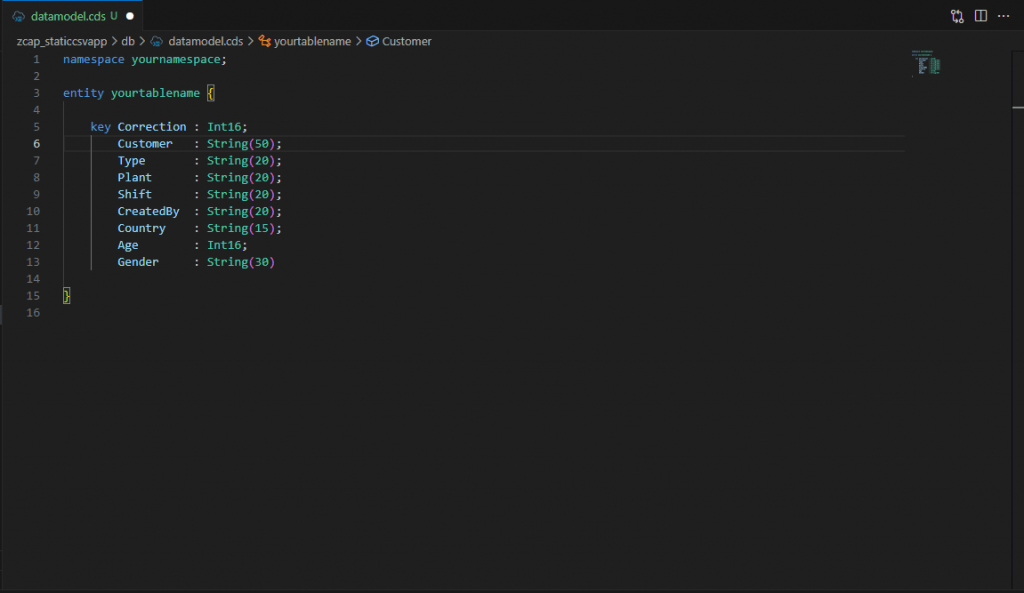
Step 7: Provide name space. In my case it is “yournamespace”
Step 8: Provide your table name. In my case it is “yourtablename”
Step 9: Now provide the fields with their type and length. Make sure to maintain at least one key field as shown below. It is mandatory to maintain the fields as same as your excel file.
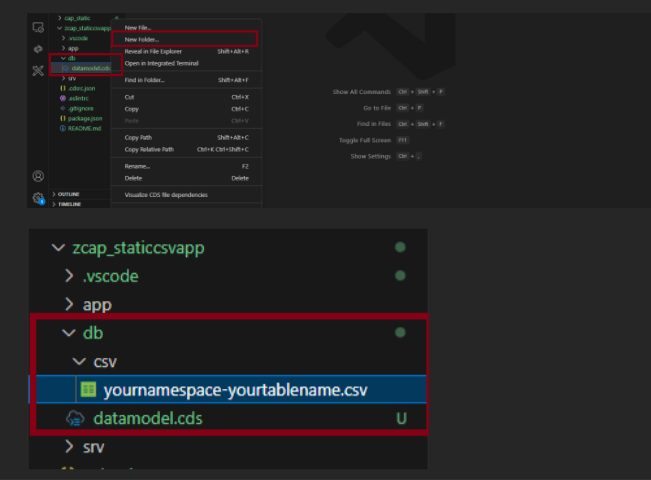
Step 10: Now right click on your “db” and select new folder.
Provide new folder name as “csv”
Step 11: In that csv folder create a file following a naming convention like(“your_namespace-your_tablename.csv”). In my case it is “yournamespace-yourtablename.csv” .So, till now my application skeleton looks like below.
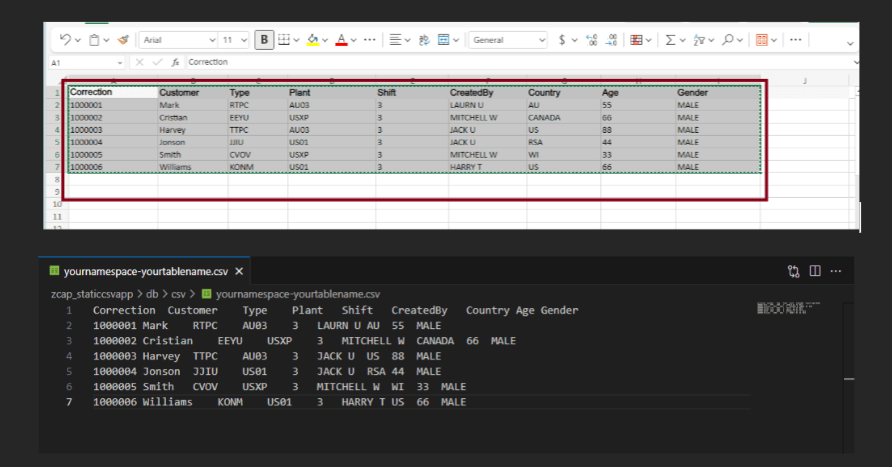
Step 12: Now copy your excel file data with the fields taken from excel file and paste it in the .csv file you have created just below.
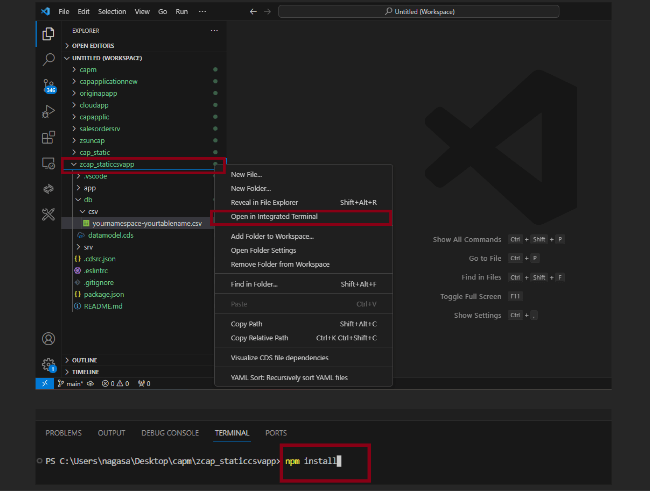
Step 13: Now open your application terminal by following the screen shot above.
Step 14: And run the following Command “npm install”.
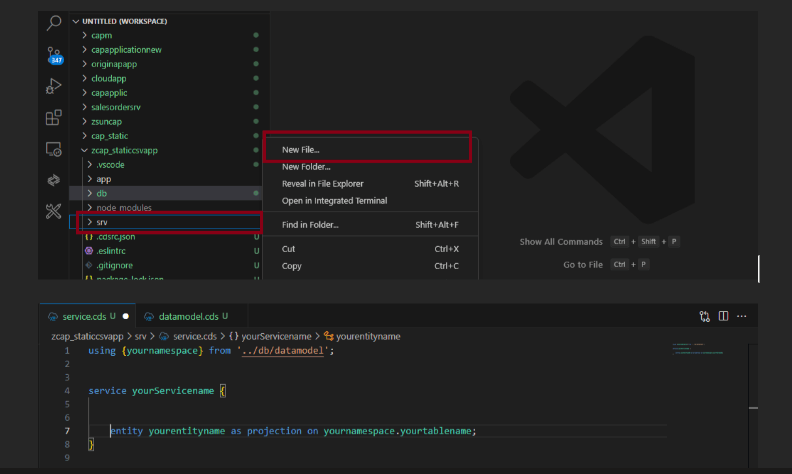
Step 15: Right click on “srv” folder and select new file.
Step 16: Keep the name of the new file created as “service.cds”
Now write the code accordingly as shown below. Give your entity name as you like.
In my case it is “yourentityname”.
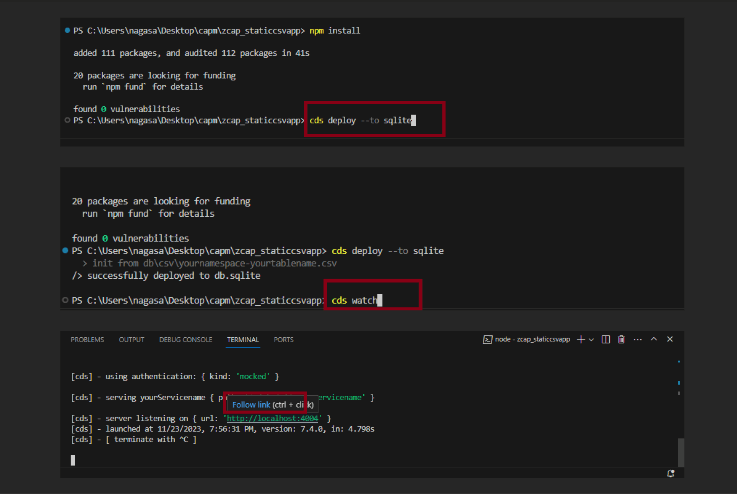
Step 17: Now run the following command to deploy to sqlite database.
Step 18: Run the following command “cds watch” .
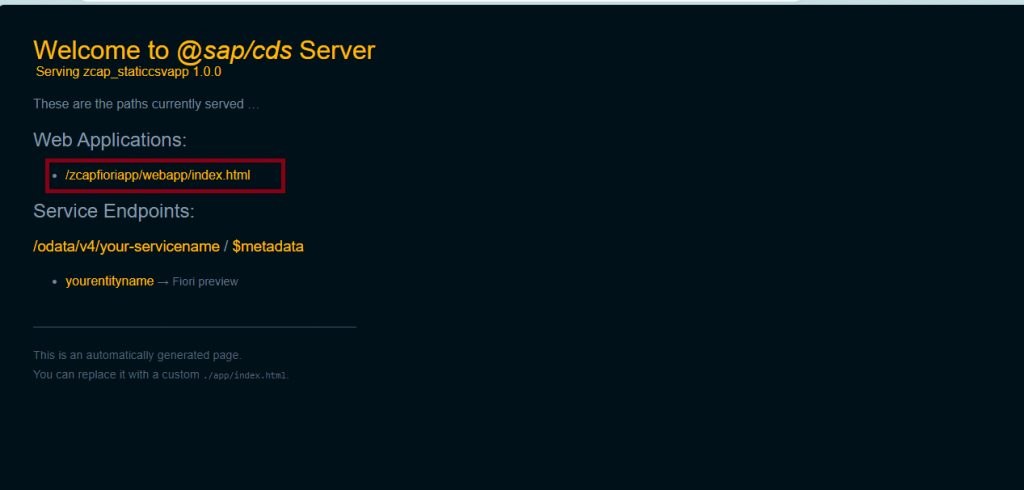
Step 19: Now click on Follow link to see the output.
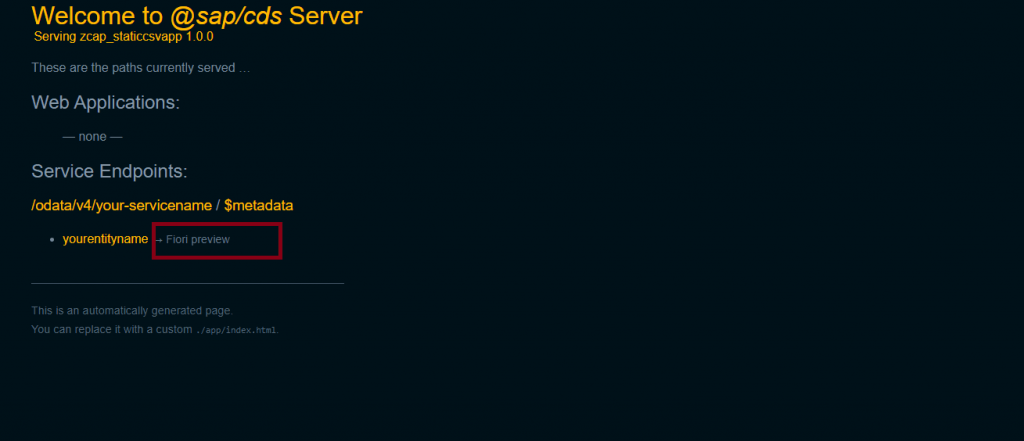
Step 20: Now select Fiori preview.
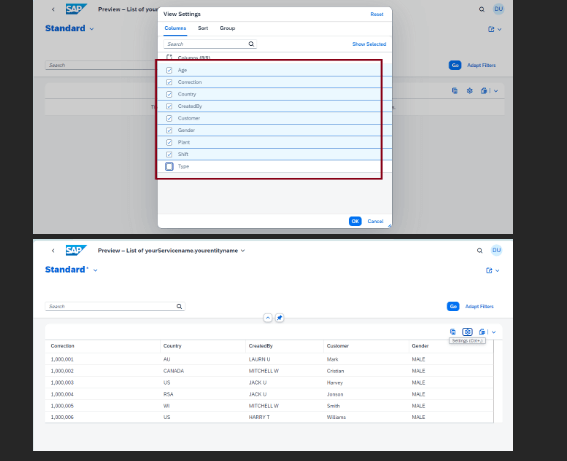
Step 21: Now select the fields you want to display on your screen.
Step 22: To link our cap app with the Fiori element and display the data in a List Report.
Step 23: Now repeat Step 1 and Step 2 and Select SAP Fiori Application and click start.
Step 24: Select SAP Fiori and select List Report page and select Next.
Step 25: Follow the above image
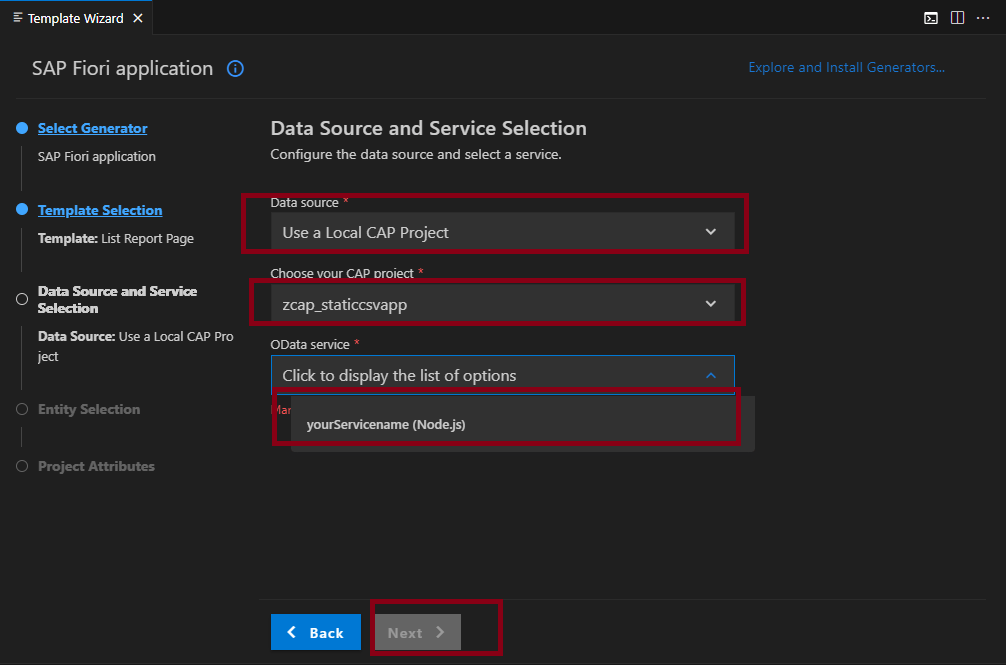
Step 26: Choose your cap project to link up with and select your service as shown above.
Step 27: Select your entity from drop down and select “Yes” radio button then Next.
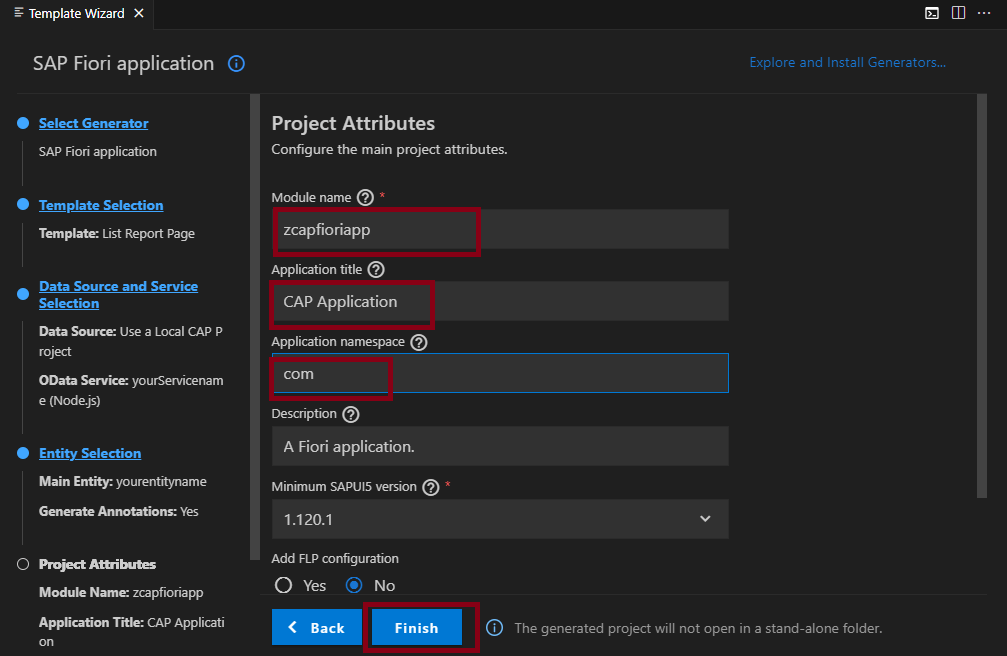
Step 28: Now provide your Fiori application details as shown above and click finish.
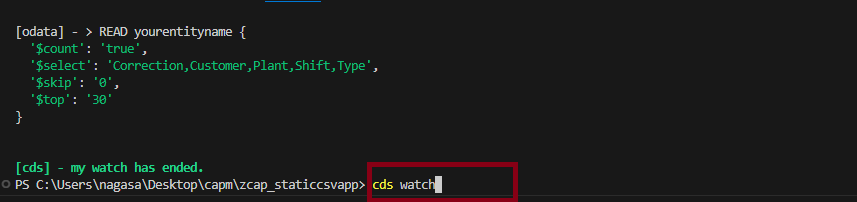
Now to terminate the initial cds watch rendering click “cntl+c”.
So that you came to see above image and run the cds watch command to see the output in a List Report Application.
Again follow step 19.
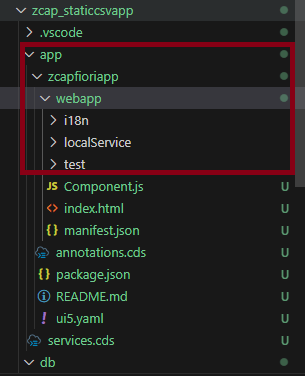
Step 29: This time select your web application as shown below.
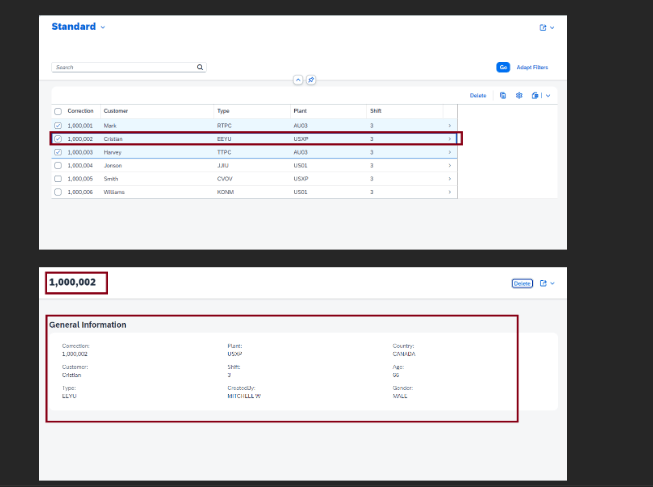
Step 30: Click on a particular record it will navigate to object page which looks like below.


