In this Post we will cover:
- Development using on-prem OData service
- Deployment of SAPUI5 application on SAP on-prem system
- Troubleshooting
Let’s see these activities step by step.
1. Development using on-prem OData service:
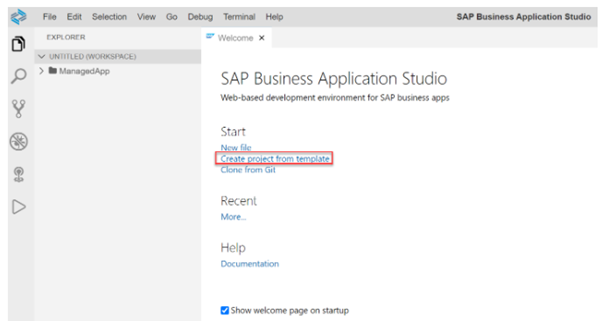
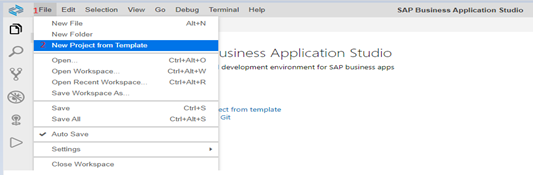
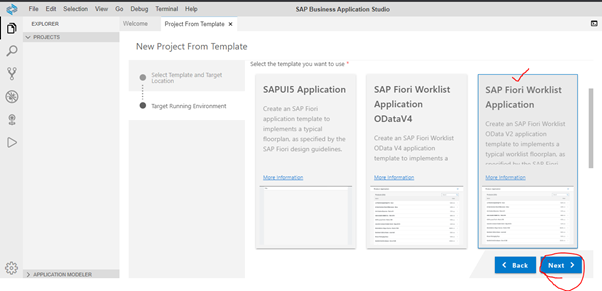
Click on File->New Project from Template – this is the same option which we used to select while developing application from template in WebIDE.
OR
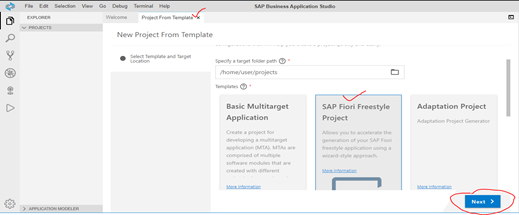
Select Fiori Freestyle Project:
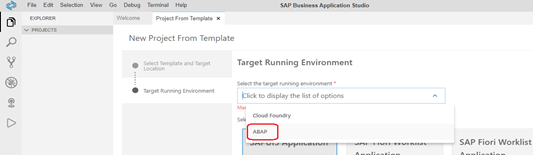
Select the running environment which you want to connect, here we are selecting ABAP for SAP system, if you have any services on cloud foundry you can select cloud foundry.
Select the worklist Application template: this is the same option which we is available on WebIDE.
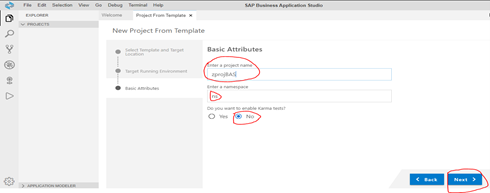
Set the project name and namespace as per your convenience:
Provide application title and description:
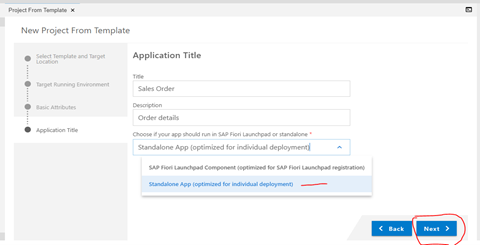
Here we are selecting standalone App, as we want this application to run as standalone ui5 app, in case wish to launch this app on fiori launchpad style you can select first option.
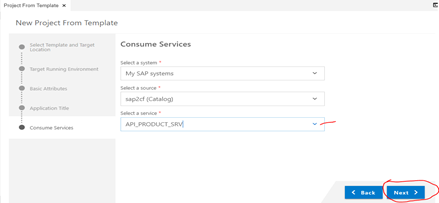
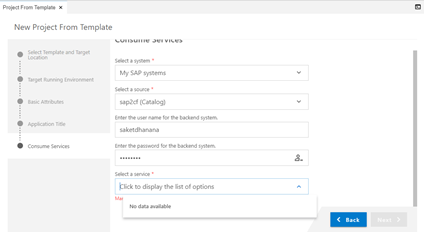
Select the system as MY SAP System as all destinations which you configured will come under My SAP Systems
Select destination as sap2CF.
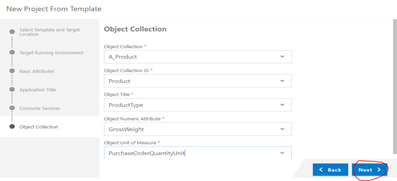
And select OData service which is available on SAP system.
Set the entitySet and properties of entitySet from odata service which you wish to display on view.
Once done it will show success message as Project has been created and open the in New Workspace, else close the message:

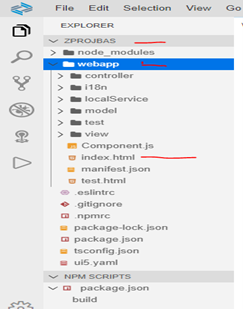
The newly created UI5 project will look like:
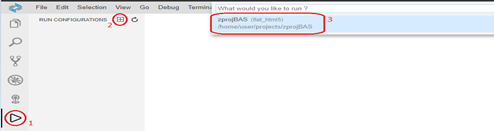
Select Project Name and click on Run Configuration:
Click on + button to add configuration to run the app (this step is almost similar in WebIDE).
It will prompt project name which you wish to create run configuration for:
Select index file to run the app locally on browser:

Select the UI5 plugin version to run the app:

Finally select the project name which you wish to run:

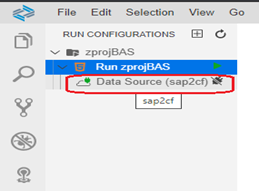
Now you can see new configuration under Run Configuration section:
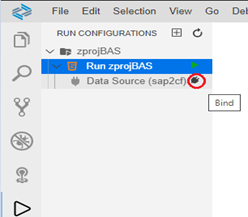
Now still we are not done, we need to connect our data source to this configuration by selecting Bind option on Data Source as shown in above image.
It will ask you to select which destination you wish to connect this run configuration to.
select the destination which we created on CF:

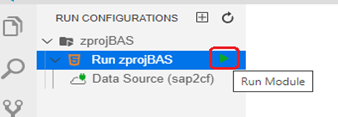
Now if you see data source turned into green on left side and with plugged icon on right side, which means our Run configuration is ready to test on app.
Now click on run icon on Run zprojBAS to launch the app:
It will process the app which can be seen in console.
It is asking to expose and open port 6004 for application usage, click on it:

It will ask you to set description for the above port configured:
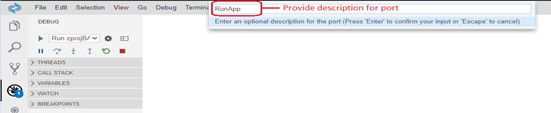
It will launch the application on new tab on browser to test app locally:
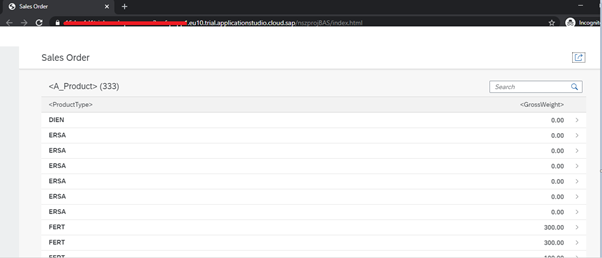
You can now test the app which you build localy on browser before deploying the app to ABAP system.
2. Deployment of SAPUI5 application on SAP on-prem system:
Before we deploy the app to ABAP system, let’s do a quick check on pre-requsites:
- See the prerequisites listed in Developing an SAP Fiori Application Based on an SAP S/4HANA System.
- Make sure that your WebIDEUsage includes dev_abap for deploying to the SAPUI5 ABAP Repository. (For example, your WebIDEUsage includes odata_abap,dev_abap).
- Make sure to add the HTML5.Timeout= 60000 additional property to your destination.
- For deploying to SAP S/4HANA on-premise, you need to set up an on-premise destination and the cloud connector. See Cloud Connector.
- For deploying to SAP S/4HANA on-premise, you should add the sap-client additional property to your destination.
- For deploying to SAP S/4HANA Cloud, you need to set up a destination to an S/4HANA Cloud system with SAML Bearer Assertion authentication. See Using SAML Bearer Assertion Authentication.
- Target ABAP system must include the SAP_UI 753 SP00 or higher version of the software component.
Once all the pre-requisites are in place and the application is tested successfully, we are good to go for deployment of application to SAP on-prem system which we configured on cloud connector.
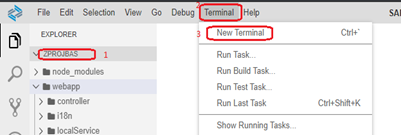
Select the project and click on Terminal and click New Terminal:
Now for the first time we need to run few command
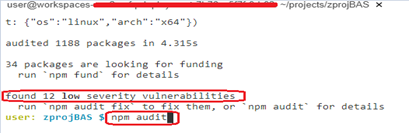
- Enter npm install: (make sure your run this command from your project directory)

Once npm is install it will create npm folder under project directory.
if you see any vulnerabilities you can run npm audit:
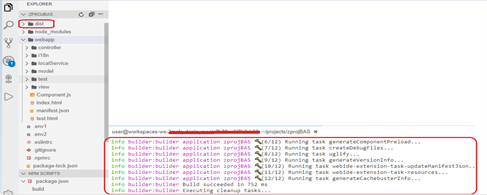
- Enter npm build:

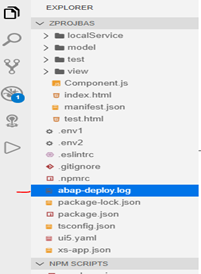
once the project is build, it will look like:
- Enter abap-deploy:
(if you wish to deploy with logs: abap-deploy –log-level=error), log level could be (off, fatal, error, warn, info, debug, trace) and will be are written to the abap-deploy.log file which will get created under project.

It will ask to select the source folder (dist by default): hit enter

Now it will display list of destinations from your cloud account, select the desired destination as a target system where you wish to deploy the application:

it will display project name which you are about to deploy on target system:


Now it will ask to provide package and Transport Request number:
You can deploy app using $TMP also in case you do not have package and TR.
Note: TR should be workbench request.
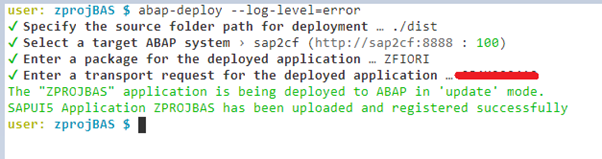
And you are done with deployment. Application is successfully deployed to your Target System (SAP ABAP).
Once the app is deployed with setting log level as error, abap-deploy.log file will get created in project automatically:
Now let’s test the application from SAP ABAP System where we just deployed the app.
Login to SAP system to test the app.
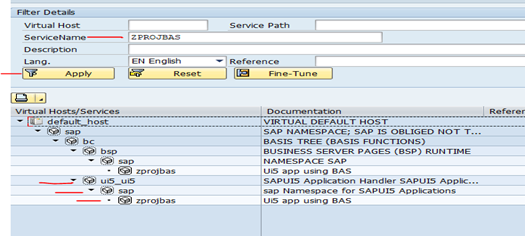
Open t.code SICF and search for the project name which we use while deployment zprojBAS in service name and execute (F8):
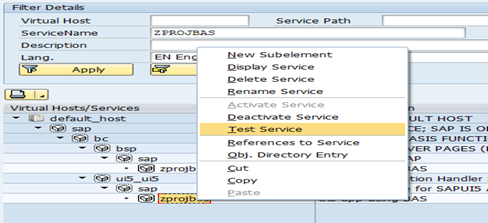
Right click on service and click Test:
It will open the application on browser and will ask for your SAP credentials:
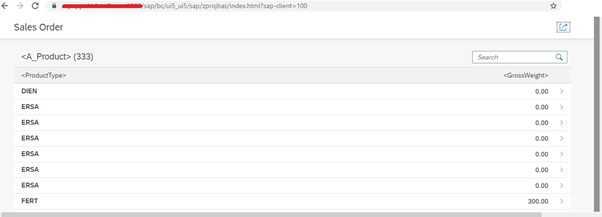
You can now configure the application to Fiori Lauchpad.
3. TroubleShooting
Now let’s see few troubleshooting which may occurs in deployment of app.
Deployment of application fails with 403 error: Failed to deploy Application: <Request failed with status code 403>

– Check error on GW server using t.code: /n/iwfnd/error_log:

i. No service found for namespace ‘/UI5/’, name ‘ABAP_REPOSITORY_SRV’, version ‘0001’
ii. No service found for namespace ‘/BSNAGT/’, name ‘FIORI_MONI_SRV’, version ‘0001’
Maintain above odata services on GW server and error will be resolved.
- Wizard keeps asking for SAP backend credentials While setting OData service from Destination while creation of application:
– Check your cloud connector has same CF account active and in running state,it is not in running state, please connect and try again.

After going through this post you should be develop and deploy SAPUI5/Fiori like application by utilizing OData service from on-premise SAP system using SAP Business Application Studio (BAS) which is next generation of WebIDE.


