In this blog, how to create SAP CAP service using Low-Code No Code from the TechEd 2021 session.
Pre-requisites
- SAP BTP environment with Low-Code/No-Code Entitlements.
- SAP AppGyver
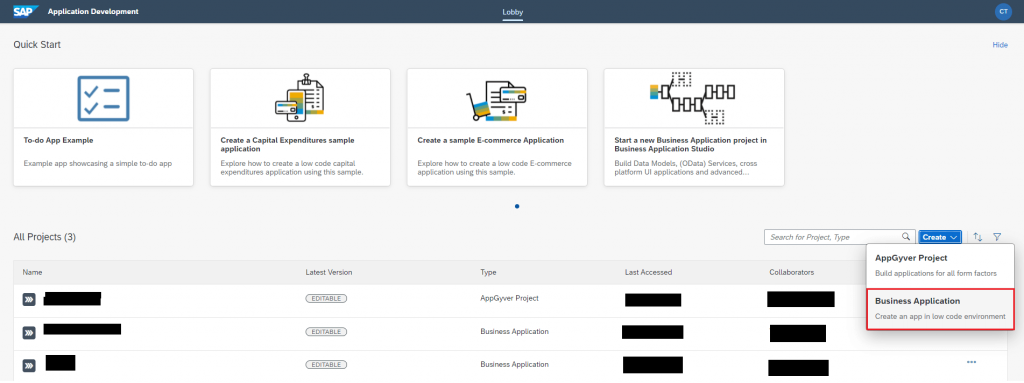
Step 1: Open Development Lobby, Click on Create and choose Business Application and provide the project name and click on Create.
Provide the project details as below

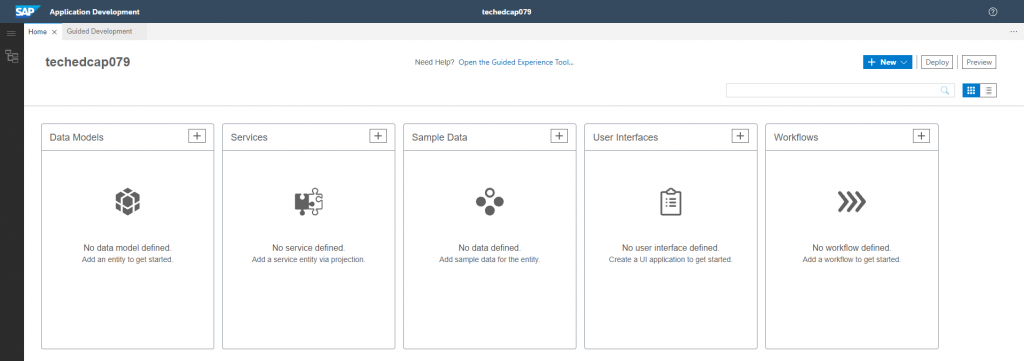
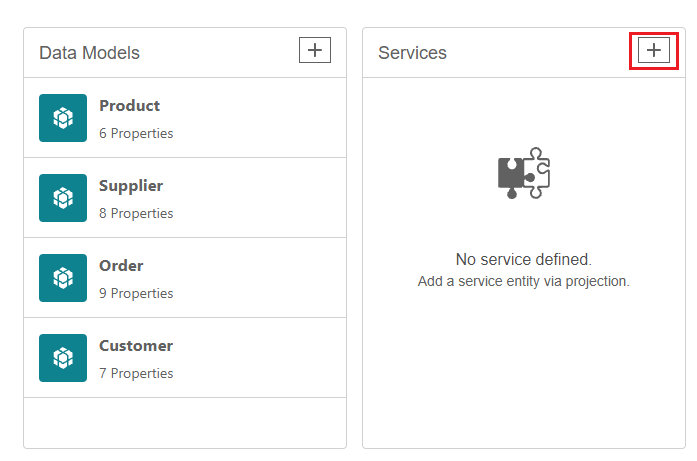
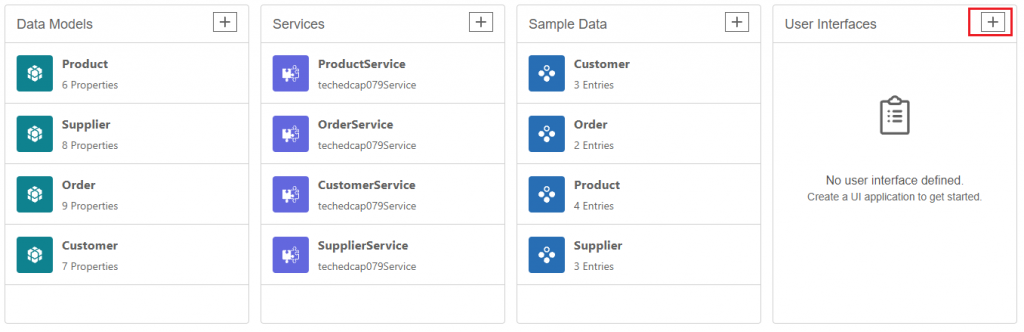
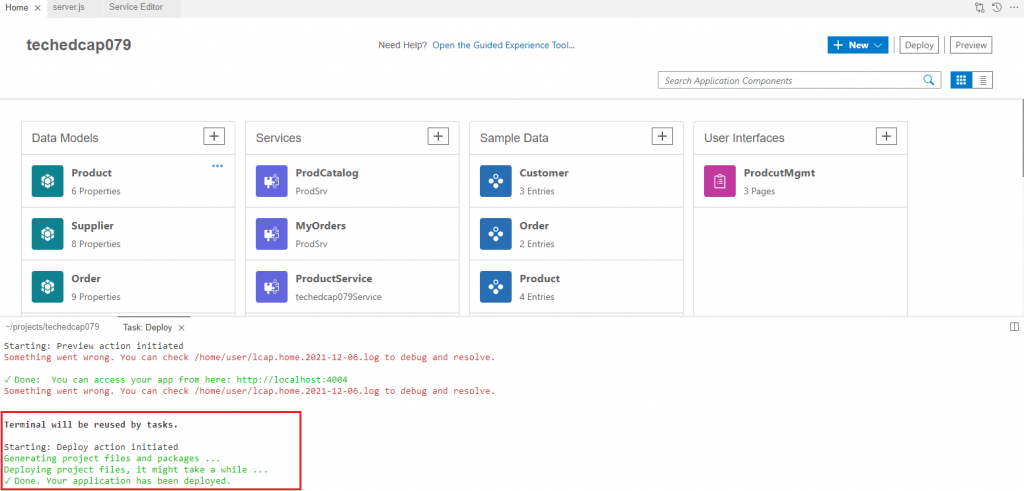
Step 2: Project will be opened in a separated window as below. Here we can see LCNC platform is providing the capability to add Data Model, Service, Sample Data, UI and Workflow to our project directly.
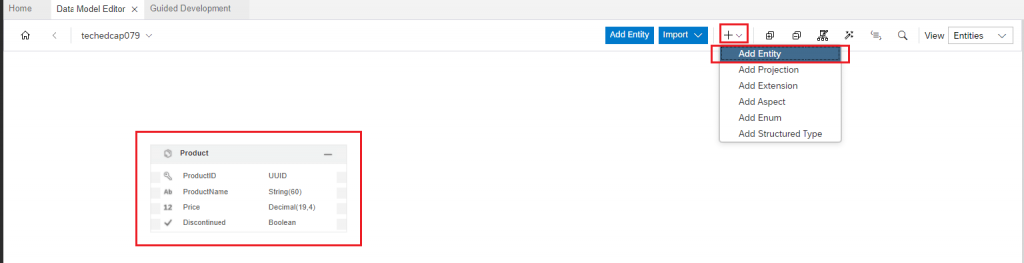
Step 3: Now let us create a data model by clicking on the + icon under Data Models.

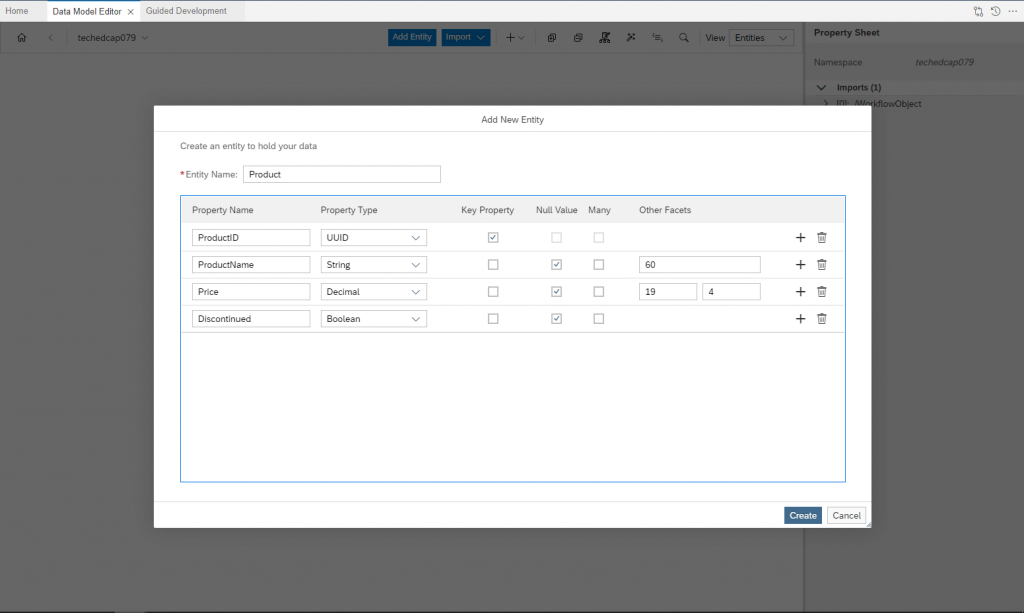
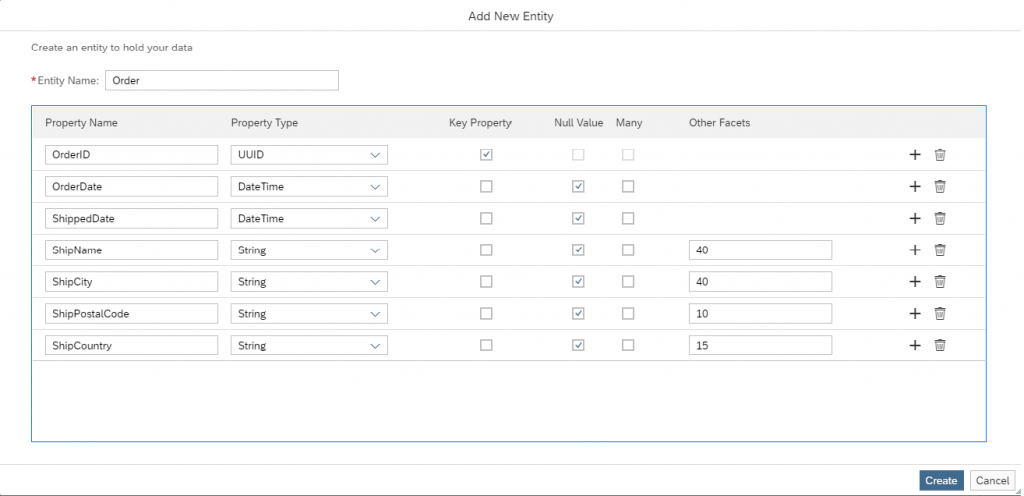
Step 4: It will launch Data Model Editor, with a dialog to provide entity details. Provide entity details for Product as below and click on Create.
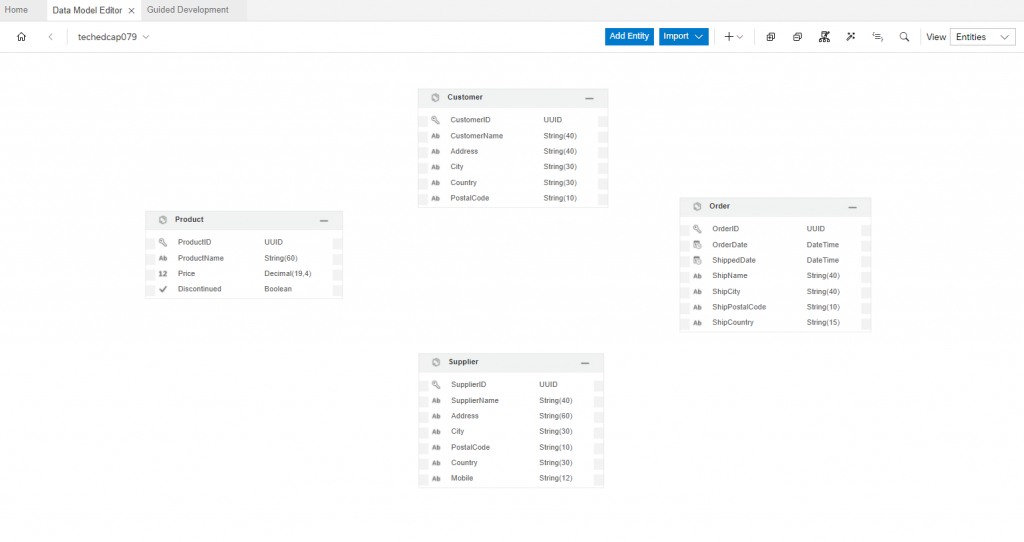
We can our entity in the data model editor. We need to follow the same way, to add other entities by choose add entity under + sign.
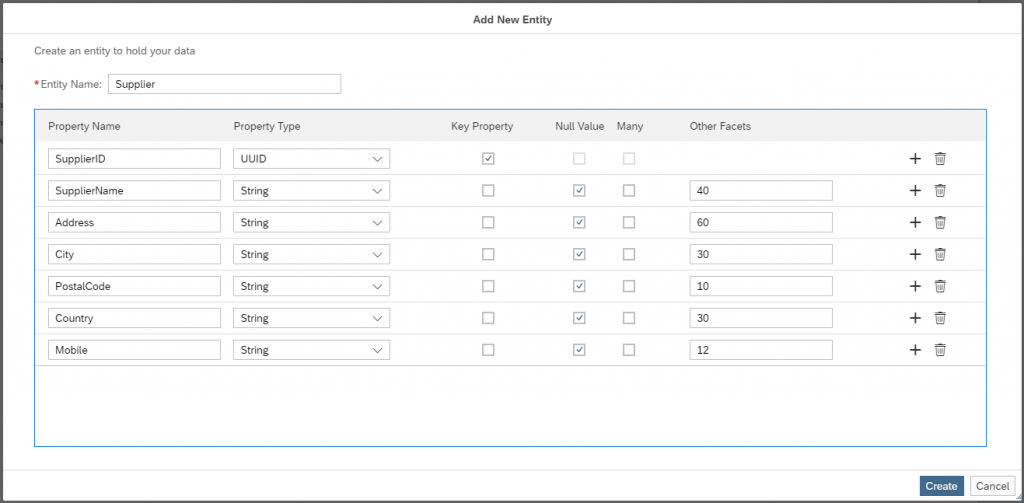
Supplier Entity
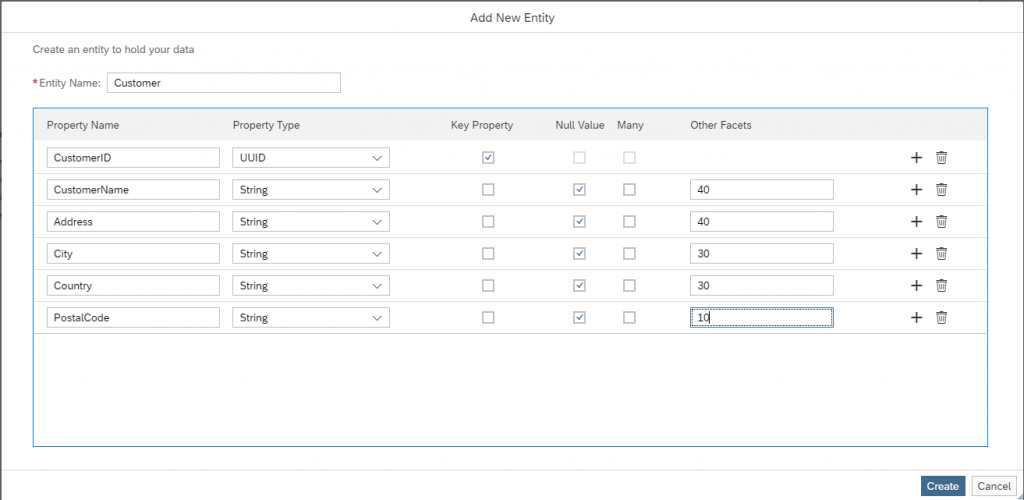
Customer Entity
Order Entity
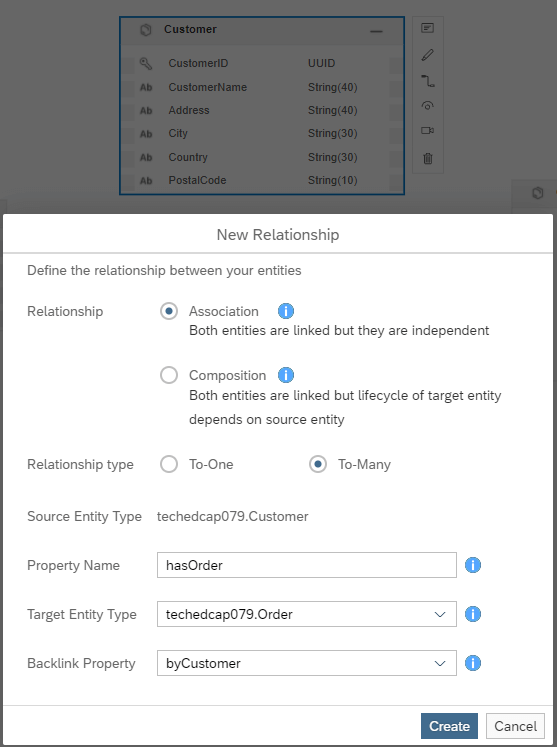
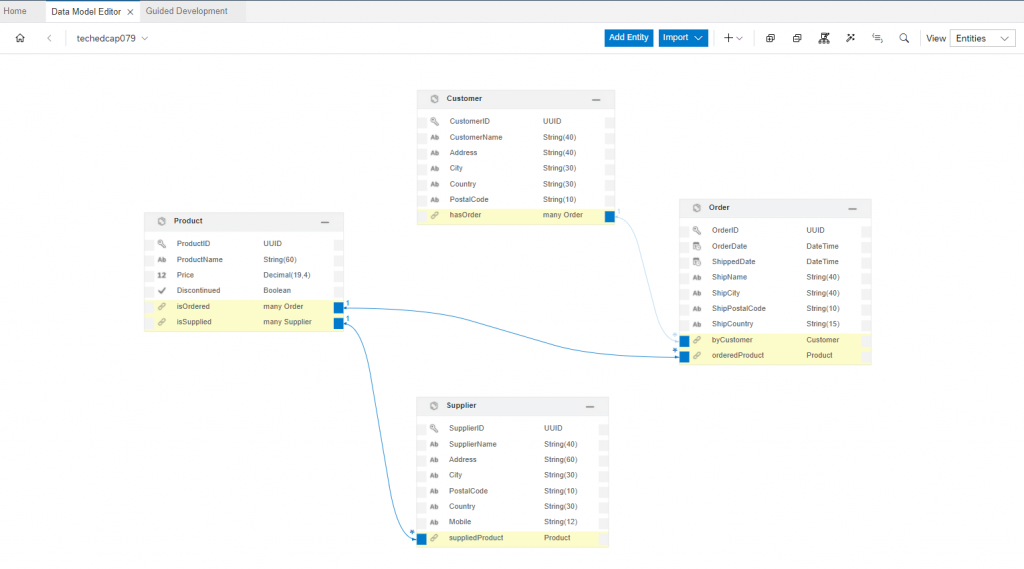
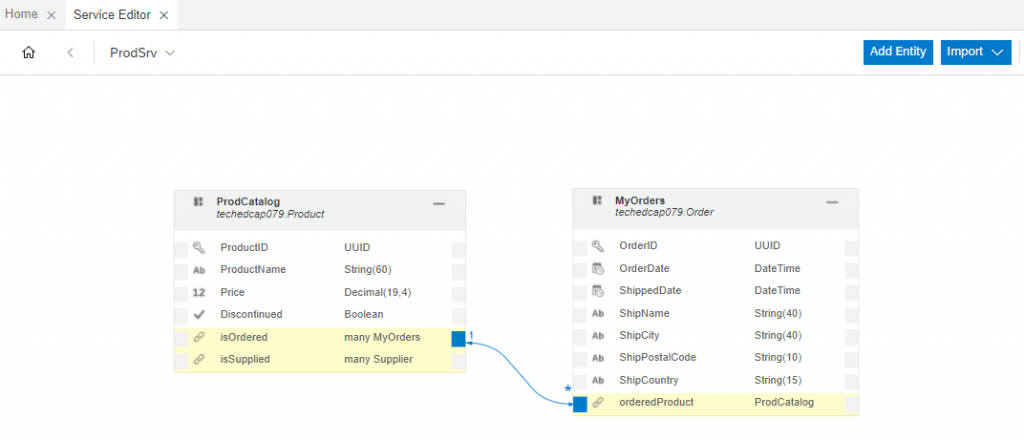
Step 5: Now we need to create the relationship (association) between these entities. Click on Customer entity, an overlap will come on the right side. Click on the relationship icon (3rd icon from the top), new dialog will open and provide the details as below.
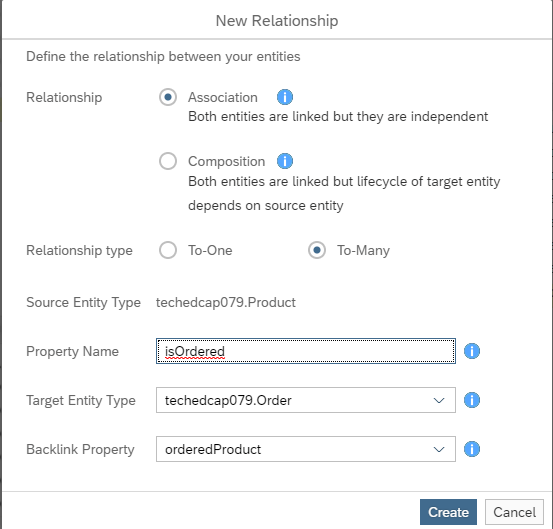
Follow the same for Product, Supplier
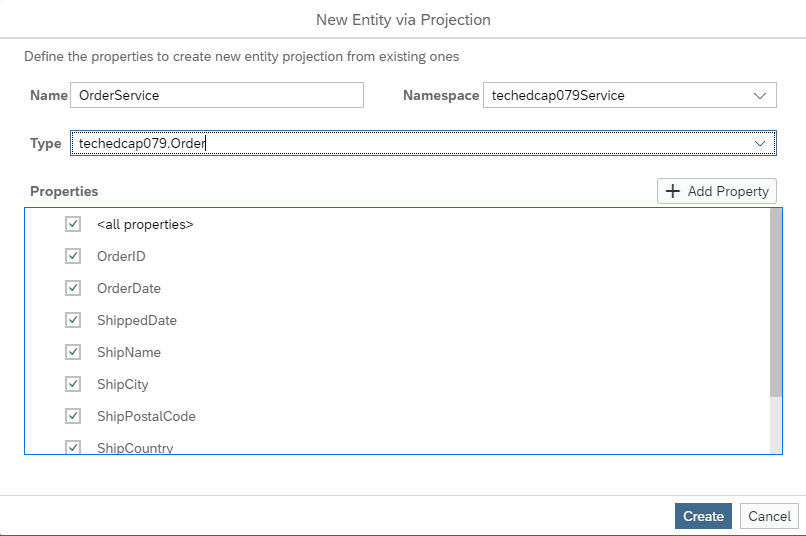
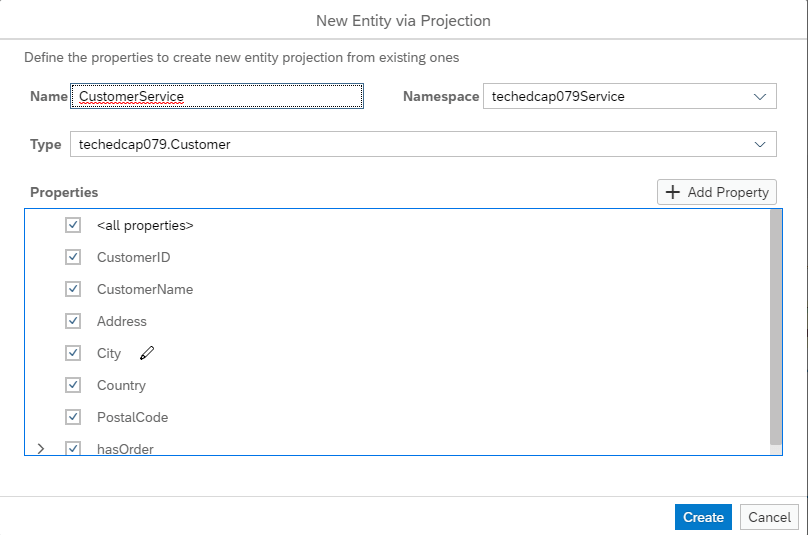
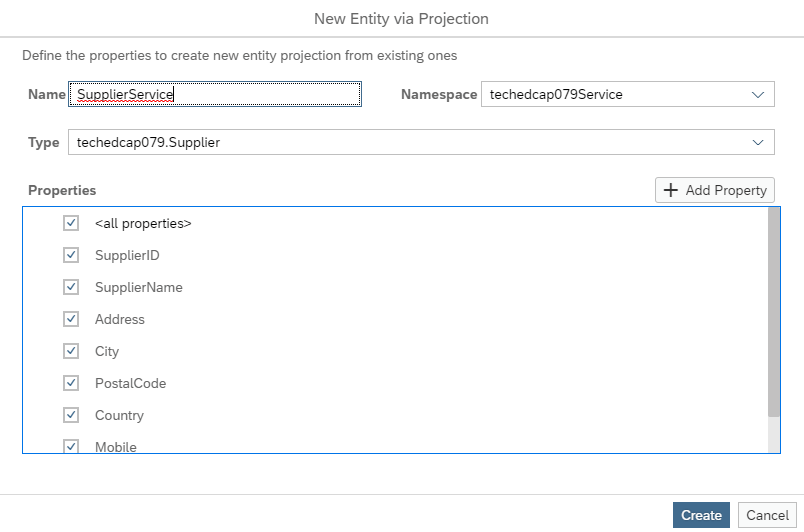
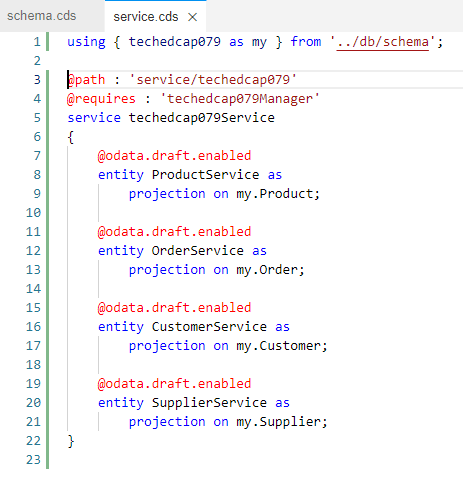
Step 6: Now lets us create a service. Go to the home screen and click on the + icon under the service.
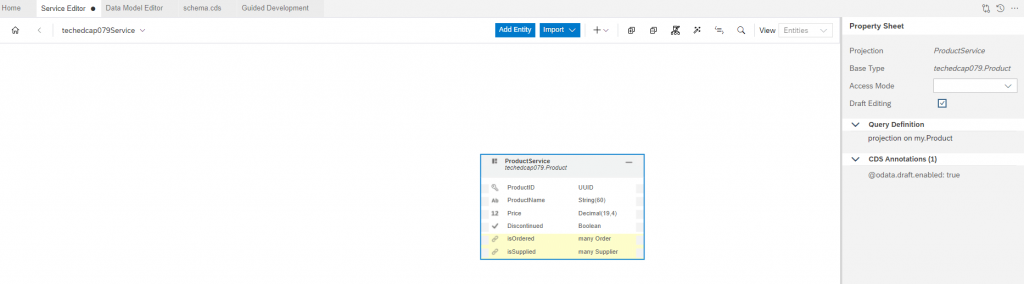
It will launch the Service Editor, with the dialog box opened as below. Provide the required details and click on the create.
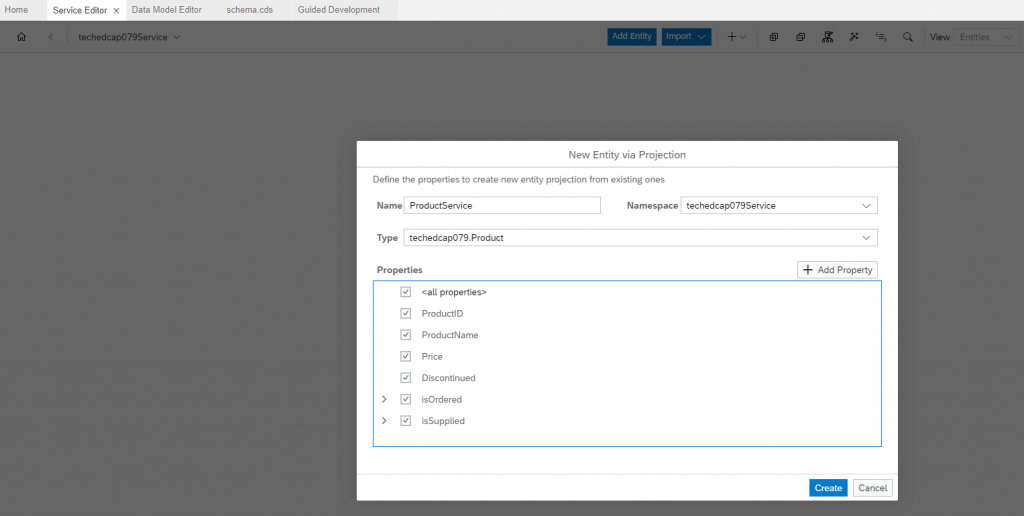
Also check Draft Editing checkbox if you want to enable draft functionality.
Repeat the same for other services.
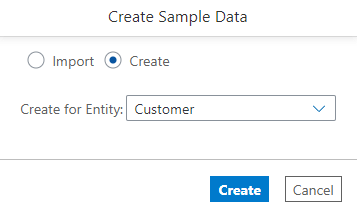
Step 7: Lets add some test data by clicking on the + icon under Sample Data.
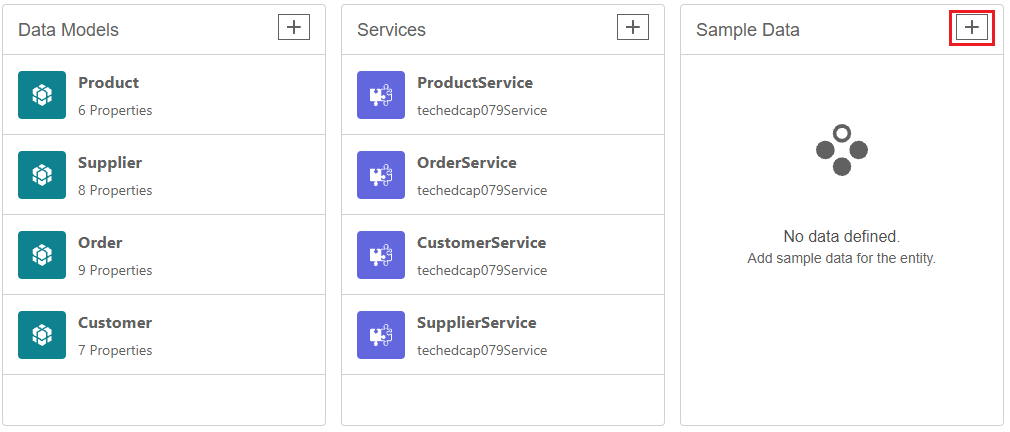
Below dialog box will open, choose the Create and select the entity from the dropdown and click on the Create.
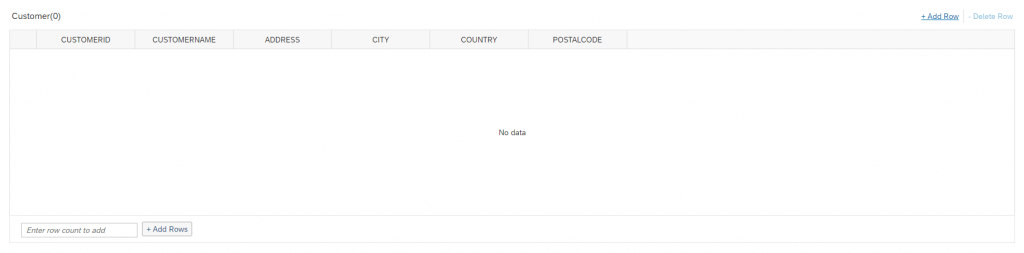
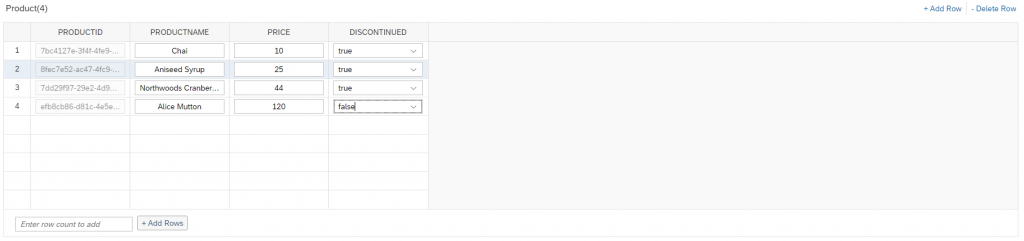
It will launch the screen as below, click on Add Row on the top right and start entering the details as below. Data will be saved automatically, if not use Ctrl+S.
Customer
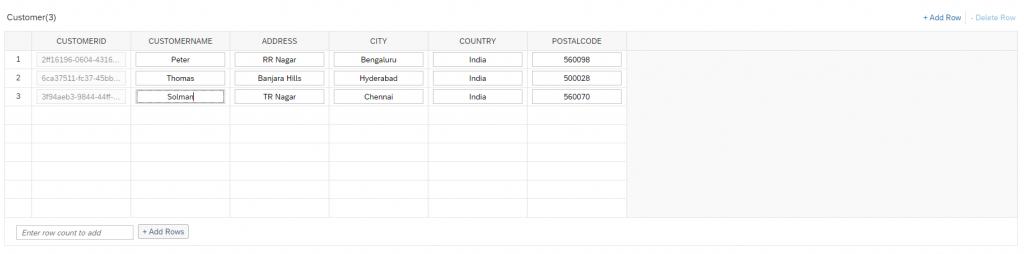
Repeat the same for others in a sequence as Product, Supplier & Order
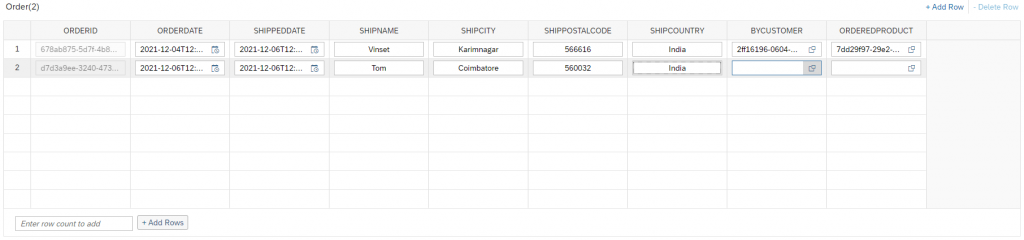
Order
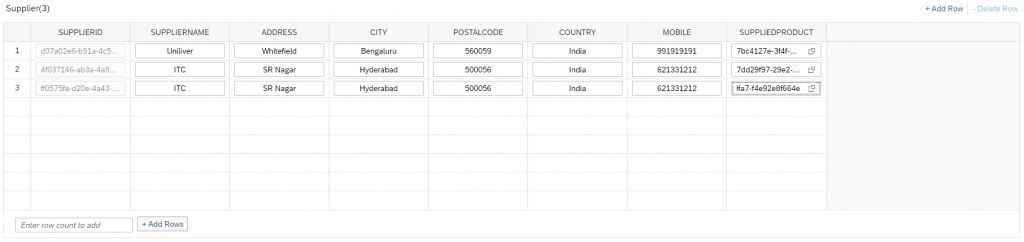
Supplier
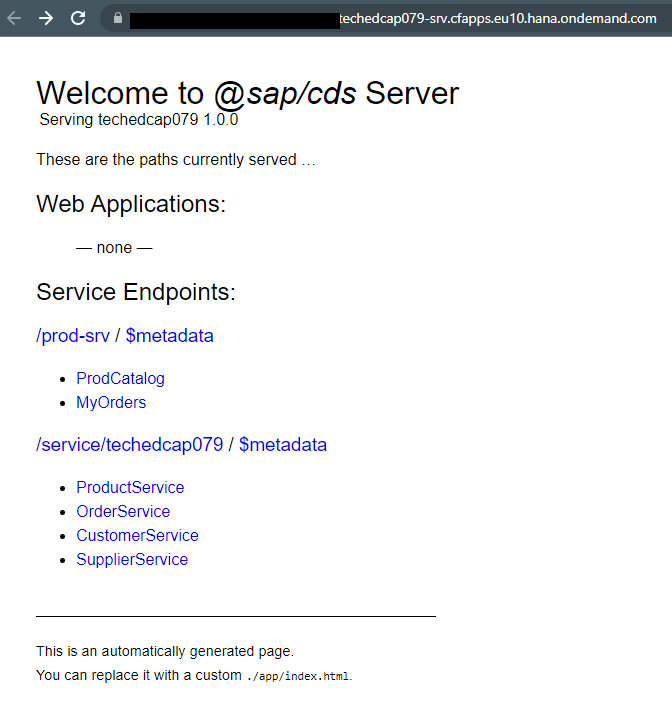
Step 8: Lets us run the service now. Go to Home screen, click on the Preview button on the top right corner. After few seconds, server will start, we can see that under the Task Preview. Click on the link showing under Task Preview.
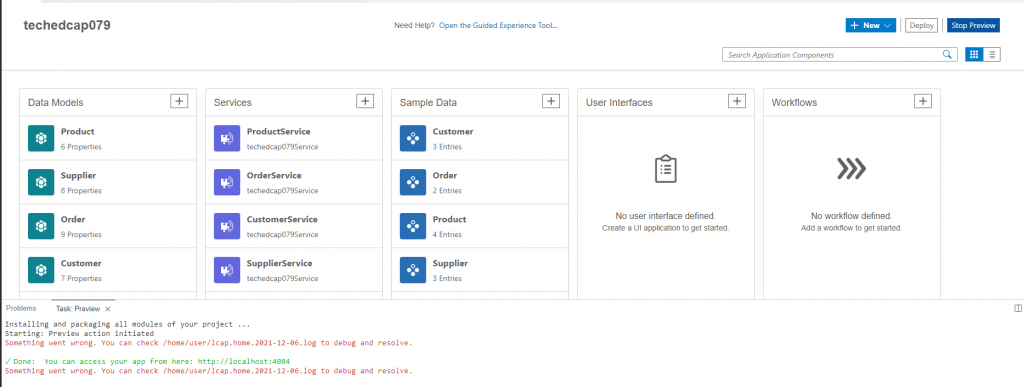
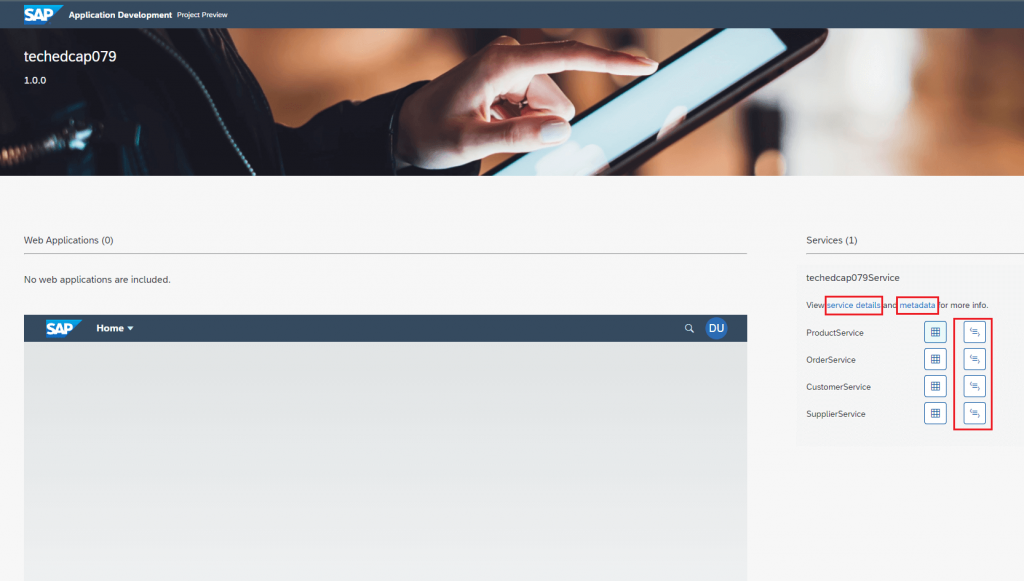
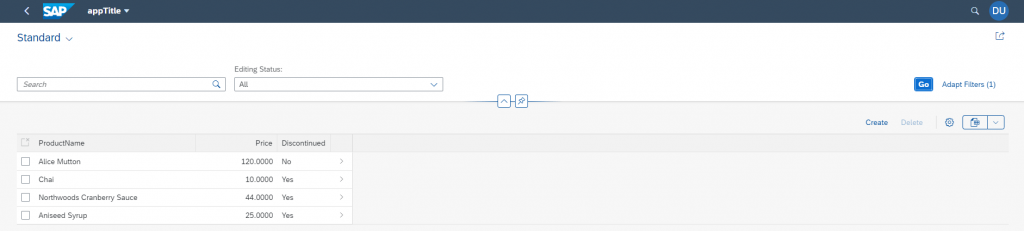
Step 9: Service will be launched in the new window as below. We have multiple actions like metadata, service details, data which are highlighted
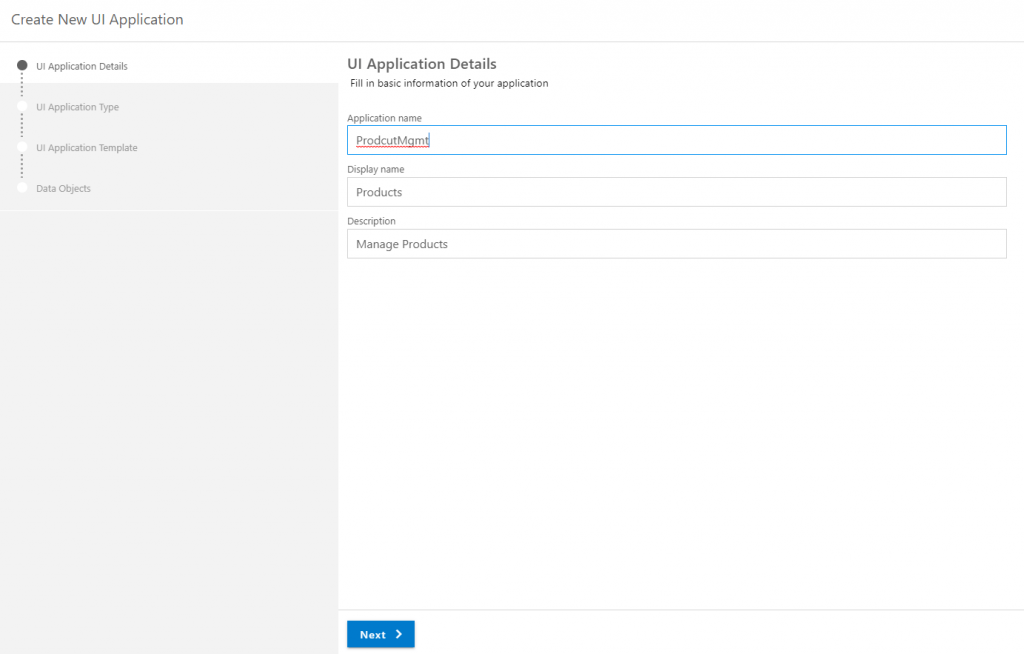
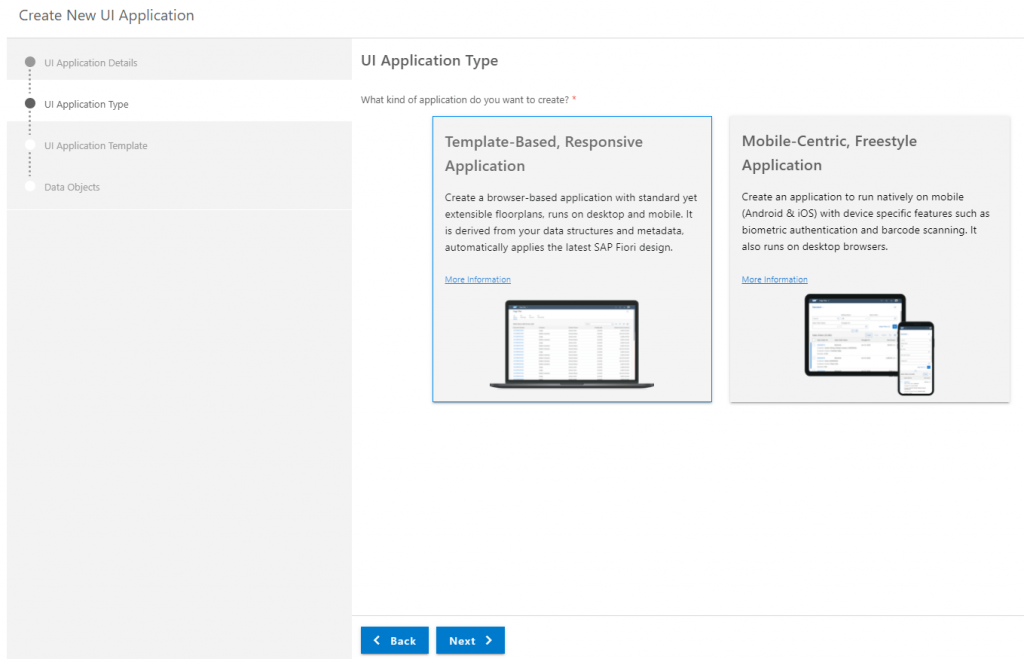
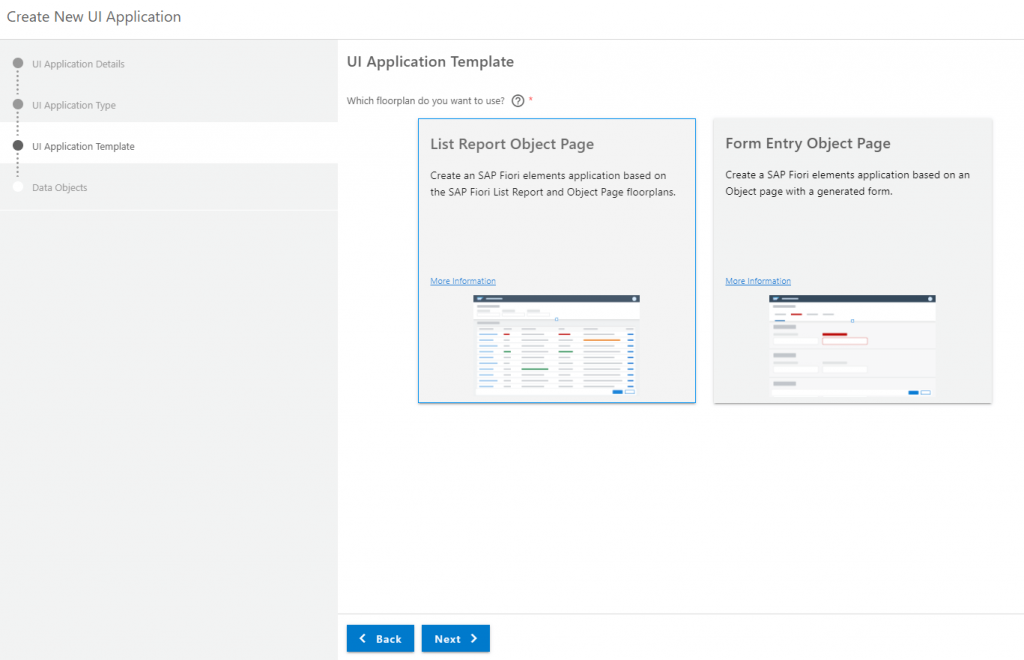
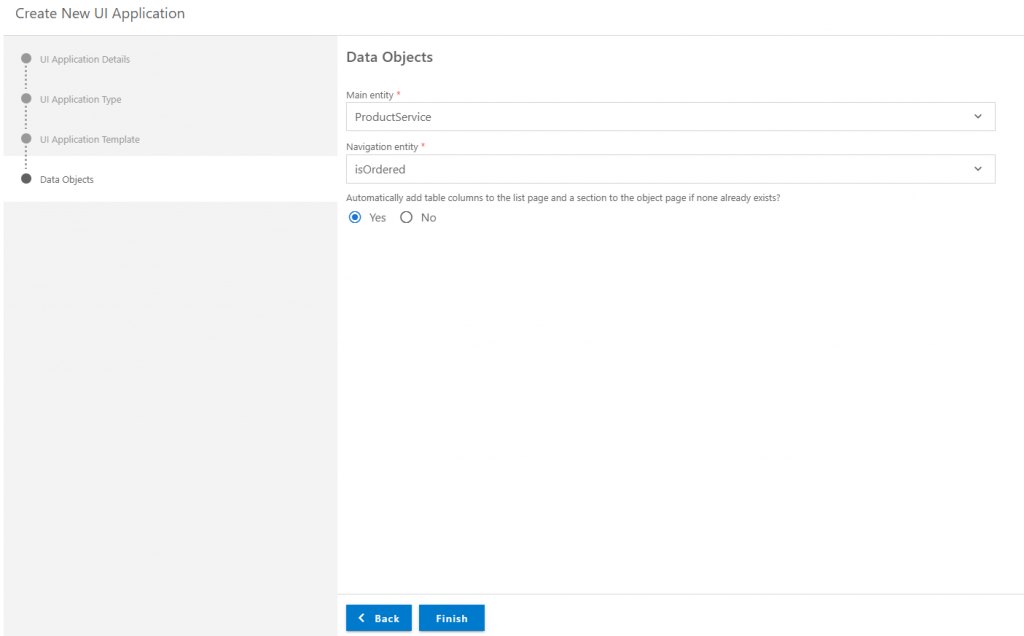
Step 10: Lets us add UI to our project. Click on + icon under User Interface.
Enter the UI details as below
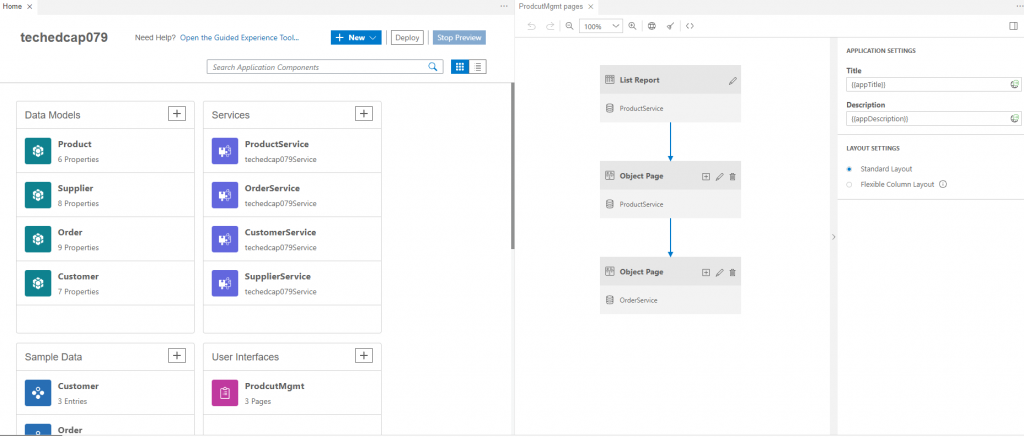
Step 11: Now, let us check the generated code so far based on the activities we performed.

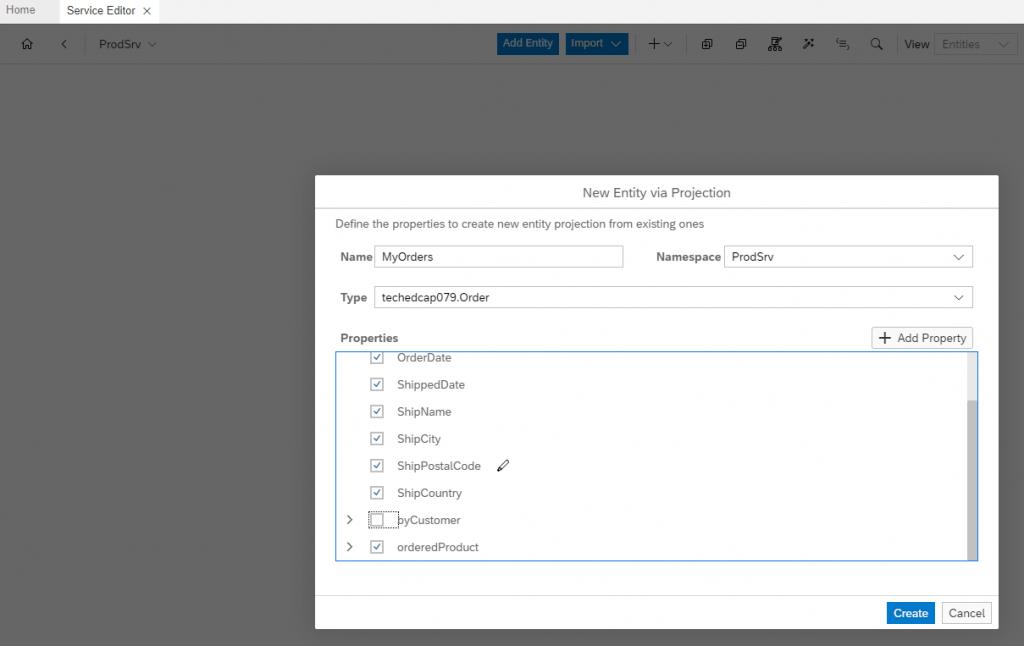
Step 12: Lets us create a new service, which we will be using later in the next blog.
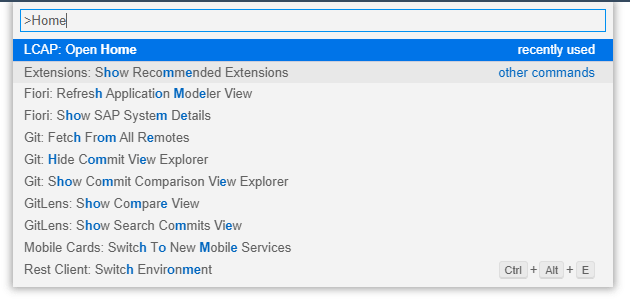
Go to Home tab (if closed already, click Ctrl+P and search for Home)
From home Tab ==> Go to Service Editor ==> Click on the New Service on the top

Now click on the Add Service and add the details as below

Step 13: To use this service through AppGyver, we need CORS support. Open the terminal and execute below command
npm i cors
Also we need to add new file server.js in the srv folder with below code
"use strict";
const cds = require("@sap/cds");
const cors = require("cors");
cds.on("bootstrap", app => app.use(cors()));
module.exports = cds.server;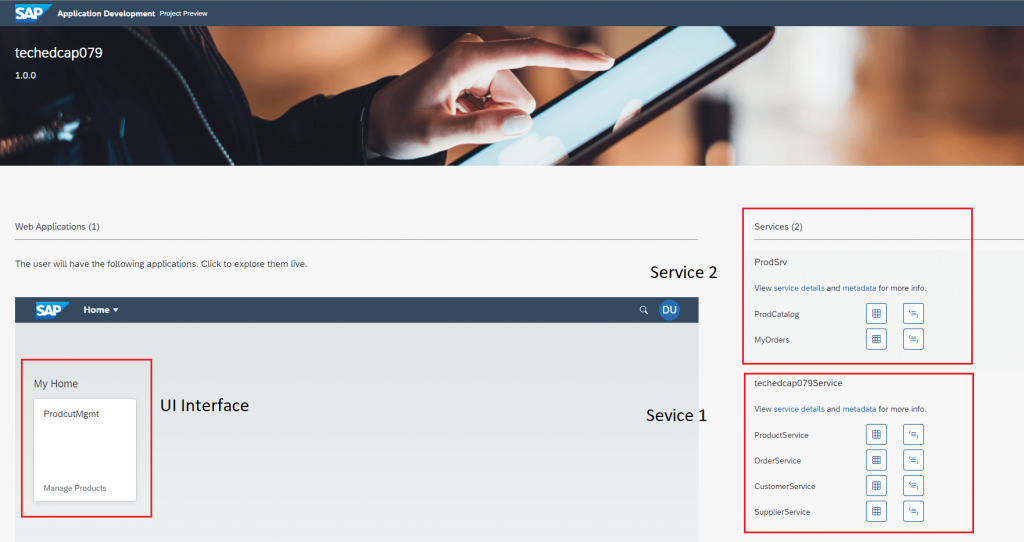
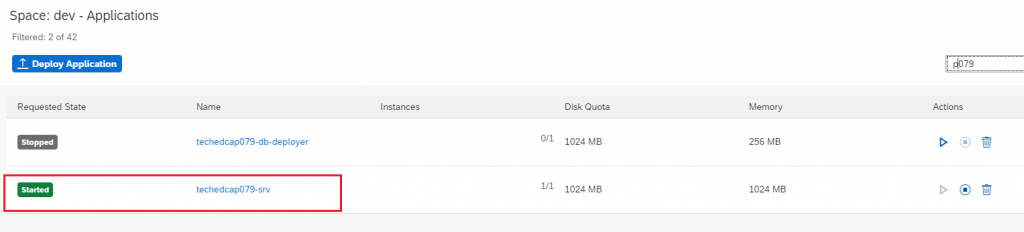
Step 14: Now will the deploy our project to SAP BTP. Open Home tab, on the top right we can see an option to deploy. Click on the Deploy button. If we are not logged in already, it will prompt for CF credentials and project will get deployed.
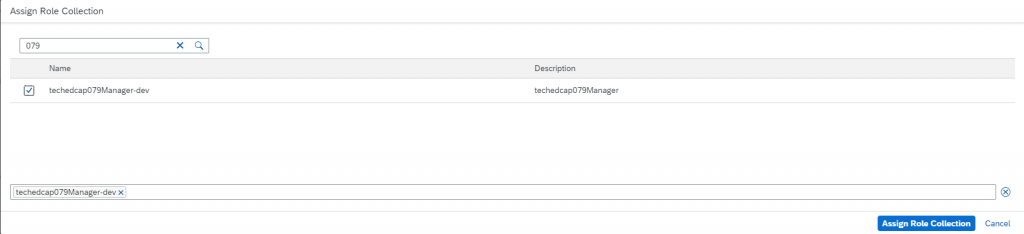
Step 15: Once app got deployed, we need to default role to our user id so that we can access the service.
Go to SAP BTP cockpit ==> CF subaccount ==> Users ==> Search our user ==> Add Role Collection ==> Search for project name, add that role to the user id.
Go to HTM5 App ==> Search for project name, we should be able to see our project