Introduction
In this blog post you will learn, how to create a basic business service using Core Data & Services (CDS), Node.js, and SQLite, by making use of the SAP Cloud Application Programming Model (CAP) combined with a SAP Fiori Worklist Floorplan.
Basically, the same thing can be done by using Visual Studio Code with the extension for SAP CDS Language Support. I choose the Business Application Studio, because this gives me the opportunity to make use of the layout editor, which is not yet available in Visual Studio Code.
Motivation
I love to go out cycling or walking and I noticed, that depending on the season or the weather or the location, some garbage bins are often overflowing while others that are more remote, remain empty.
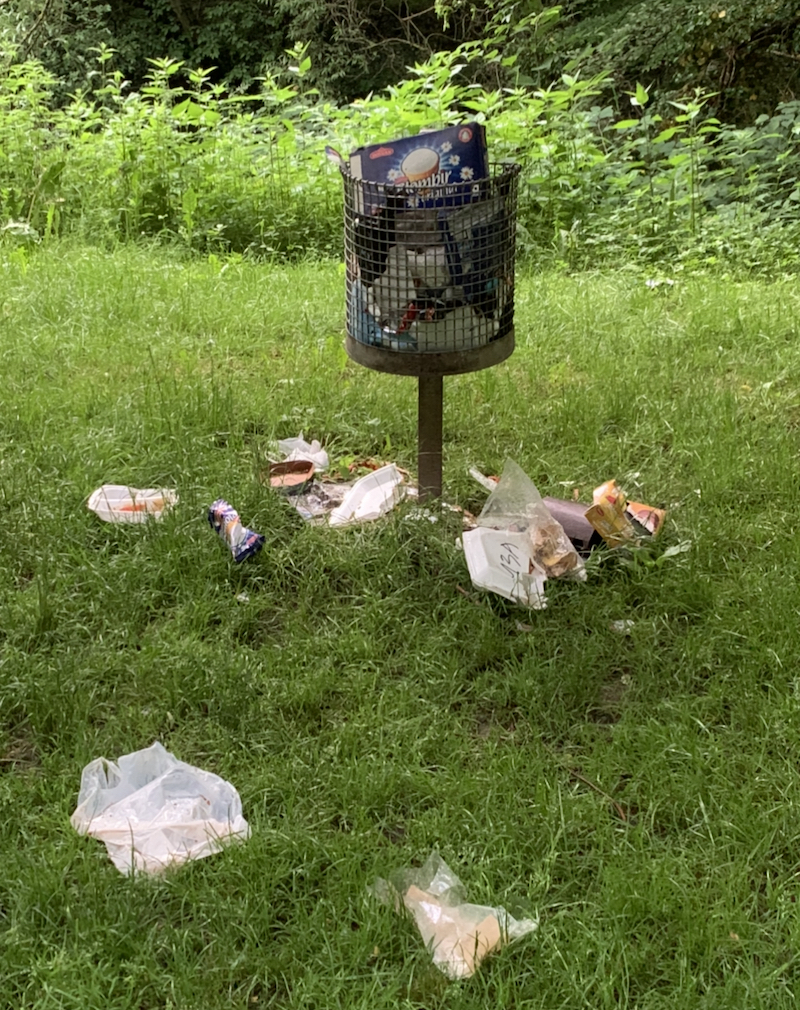
So, I thought about a business service which every community can integrate in their SAP landscape, to keep their community clean.
The idea is to build an app, that shows the level of each garbage bin or glas container. Every bin or container has a sensor(in this tutorial simulated by a Postman collection) that reports the level to the SAP app via OData service, so the waste collector can empty the bin or container.
Thinking about the near future, this can trigger a self driving garbage collector to empty the garbage bin or glas container on demand. To simulate such a scenario I have build a little proof of concept with a self driving toy car, controlled by a Raspberry Pi and a Bosch connector, that reports the level of a bin or container to the SAP app. This tutorial will focus on the SAP business app though.
Prerequisites
For this job is to have set up an free account on SAP BTP TRIAL:
https://developers.sap.com/tutorials/hcp-create-trial-account.html1. Create Dev Space on SAP BTP TRIAL account
Got to SAP BTP Trial and click on(or go directly to) SAP Business Application Studio
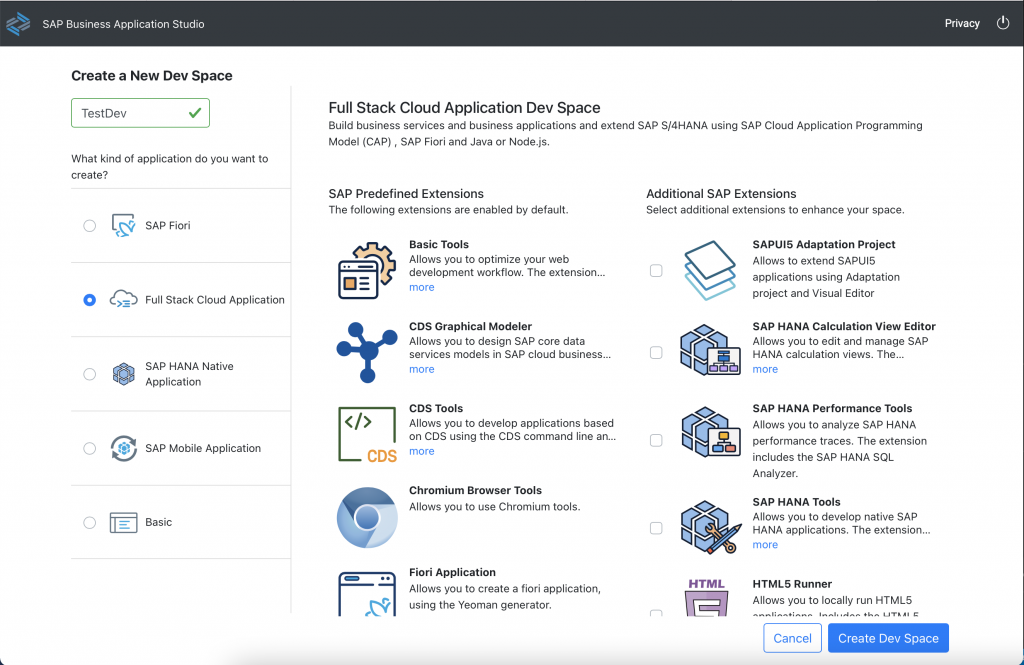
Then “Create Dev Space”
Give your Dev Space a name, I called it TestDev and choose “Full Stack Cloud Application”. Click on “Create Dev Space”:
Then the Dev Space needs a minute or two to get started.
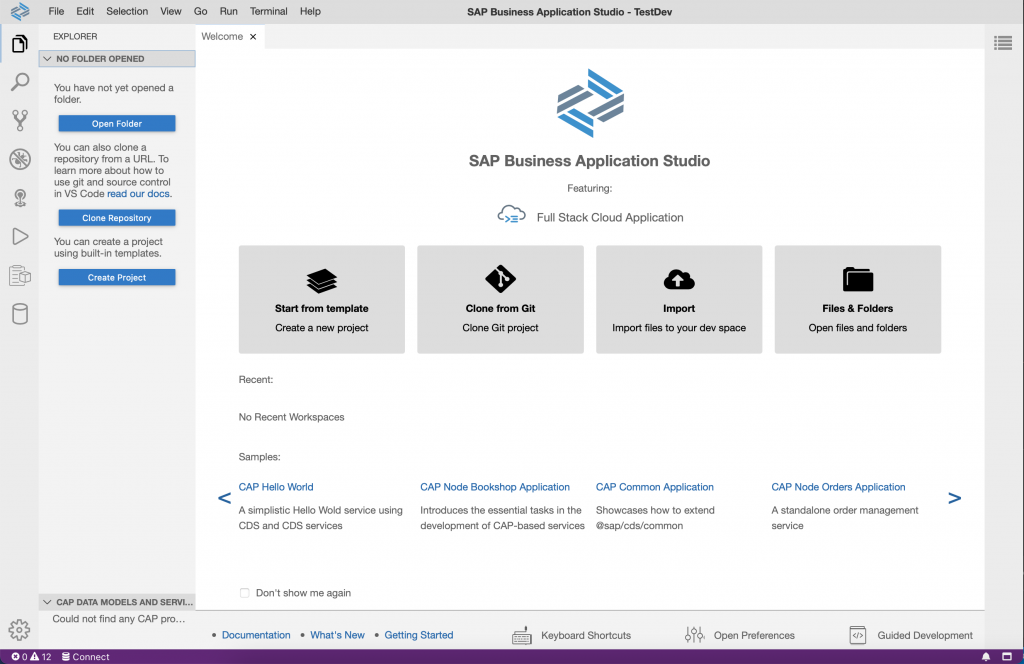
Open your TestDev Space and the SAP Business Application Studio shows up:
2. Deploy a data model to an SQLite database
Add a new file to the “db” folder by right-clicking and “New” and call it data-model.cds.
Add the following code to data-model.cds:
namespace my.communitymanager;
using { managed } from '@sap/cds/common';

entity Buckets {
key ID : Integer;
title : String;
location : Association to Locations;
locationName : String;
level : Boolean;
}

entity Locations {
key ID : Integer;
name : String;
bucket : Association to Buckets on bucket.location = $self;
long : Decimal;
lat : Decimal;
}

entity CallsForDisposal : managed {
key ID : UUID;
bucket : Association to Buckets;
level : Boolean;
}
Add a new file to the “db” folder by right-clicking and “New” and call it csv/my.communitymanager-Buckets.csv to create a the file in the new folder csv.
Add the following code to my.communitymanager-Buckets.csv:
ID;title;location_ID;locationName;level
101;Bucket1;201;Dietmar-Hopp-Allee;false
102;Bucket2;202;Rudolf-Diesel-Strasse;true
103;Glas-Container1;203;Daimlerstrasse;false
104;Glas-Container2;204;Robert-Bosch-Strasse;true
Add a new file to the “db” folder by right-clicking and “New” and call it csv/my.communitymanager-Locations.csv to create a the file in the new folder csv.
Add the following code to my.communitymanager-Locations.csv:
ID;name;long;lat
201;Dietmar-Hopp-Allee;8.642059;49.293005
202;Rudolf-Diesel-Strasse;8.644433;49.291635
203;Daimlerstrasse;8.645690;49.289374
204;Robert-Bosch-Strasse;8.647599;49.291037
Save with Ctrl + S.
If CDS server is running, stop it with CTRL + D in the terminal.
Install SQLite3 packages:
npm i sqlite3 -DDeploy the data model to an SQLite database:
cds deploy --to sqlite:db/my-communitymanager.dbOpen SQLite and view the newly created database:
sqlite3 db/my-communitymanager.db -cmd .dumpTo stop SQLite and go back to your project directory, choose CTRL+D.
Start CDS server again:
cds watch3. Build a Business Service using CAP and Node.js
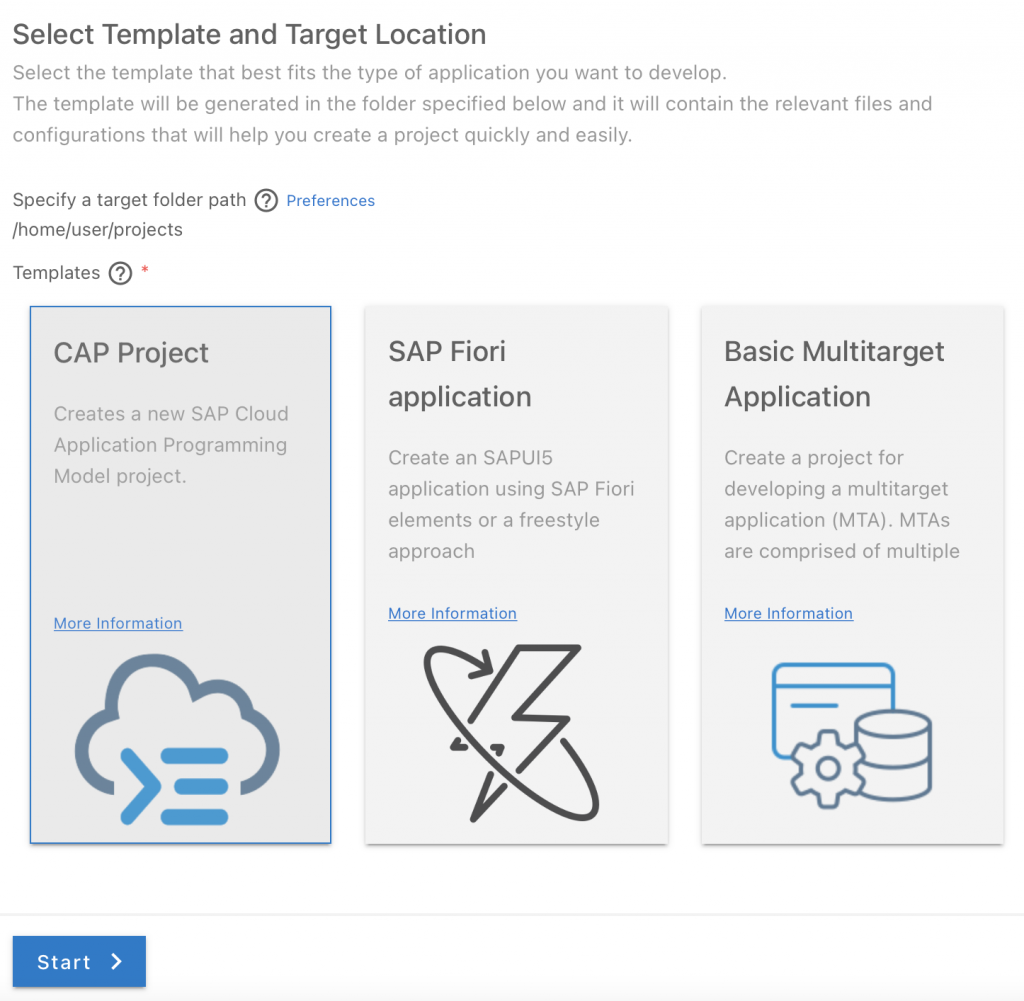
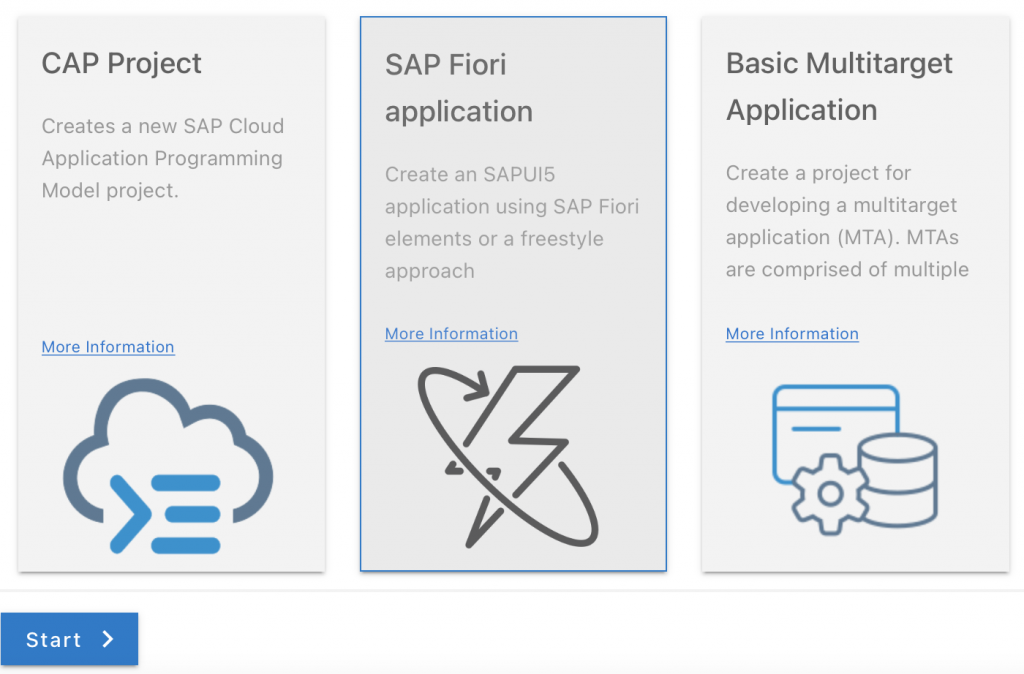
Choose “Start from template” to create a new project.
Choose “CAP Project” and click “Start”:
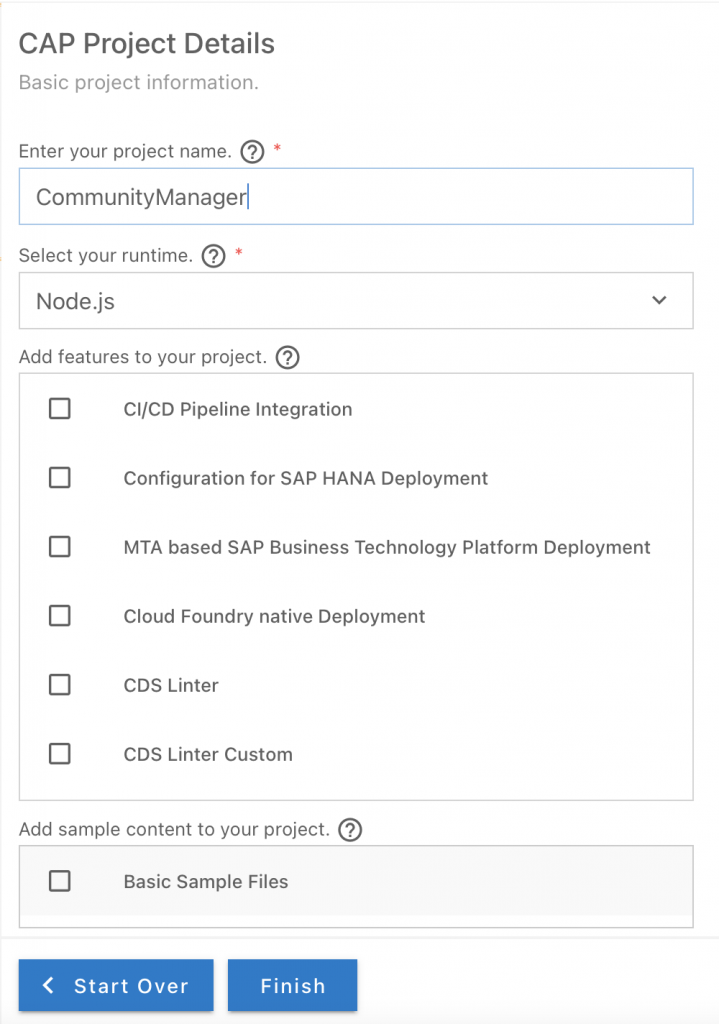
Give it a name. I called it CommunityManager and click “Finish”:
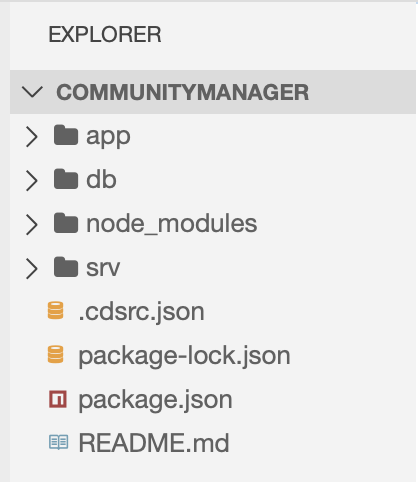
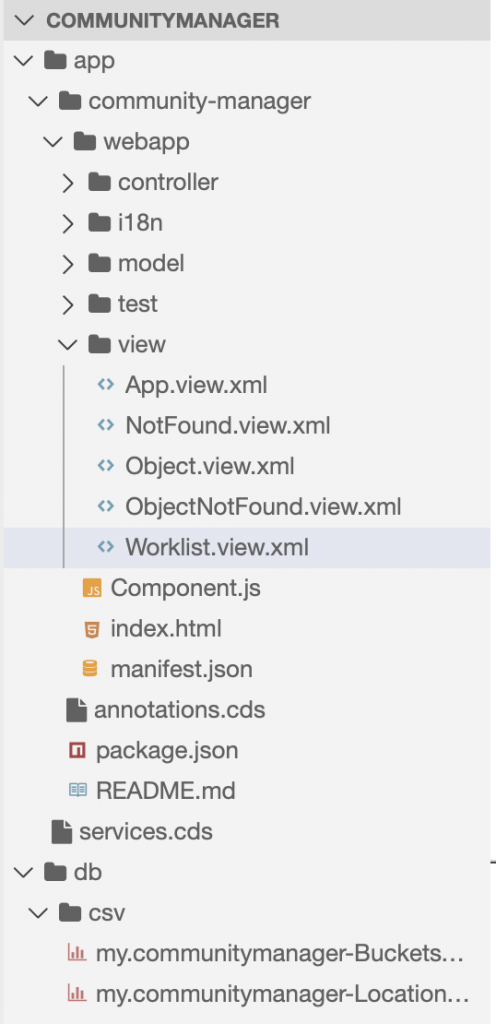
You will see the following structure in the EXPLORER:
Open a new Terminal by clicking Terminal -> New Terminal and run:
npm installand:
cds watchThis will try to start the CDS server. As there’s no content in the project so far, it just keeps waiting for content.
Add a new file to the “srv” folder by right-clicking and “New” and call it com-service.cds.
Add the following code to com-service.cds:
using my.communitymanager as my from '../db/data-model';

service DisposalService {

entity Buckets @readonly as projection on my.Buckets;
entity Locations @readonly as projection on my.Locations;
entity CallsForDisposal @insertonly as projection on my.CallsForDisposal;

}
4. Create an OData service for CRUD operations on database
Add a new file to the “srv” folder by right-clicking and “New” and call it com-service.js.
Add the following code to com-service.js:
module.exports = (srv) => {

const Buckets = 'my.communitymanager.Buckets'

// Set level of bucket. True -> Full, False -> Empty
srv.before ('CREATE', 'CallsForDisposal', async (req) => {
const disposal = req.data
if (disposal.level == 1) console.log('level = true')
if (disposal.level == 0) console.log('level = false')
const tx = cds.transaction(req)
const affectedRows = await tx.run (
UPDATE (Buckets)
.set ({ level: disposal.level})
.where ({ ID: disposal.bucket_ID})
)
})
}
5. Build a Fiori Worklist Floorplan
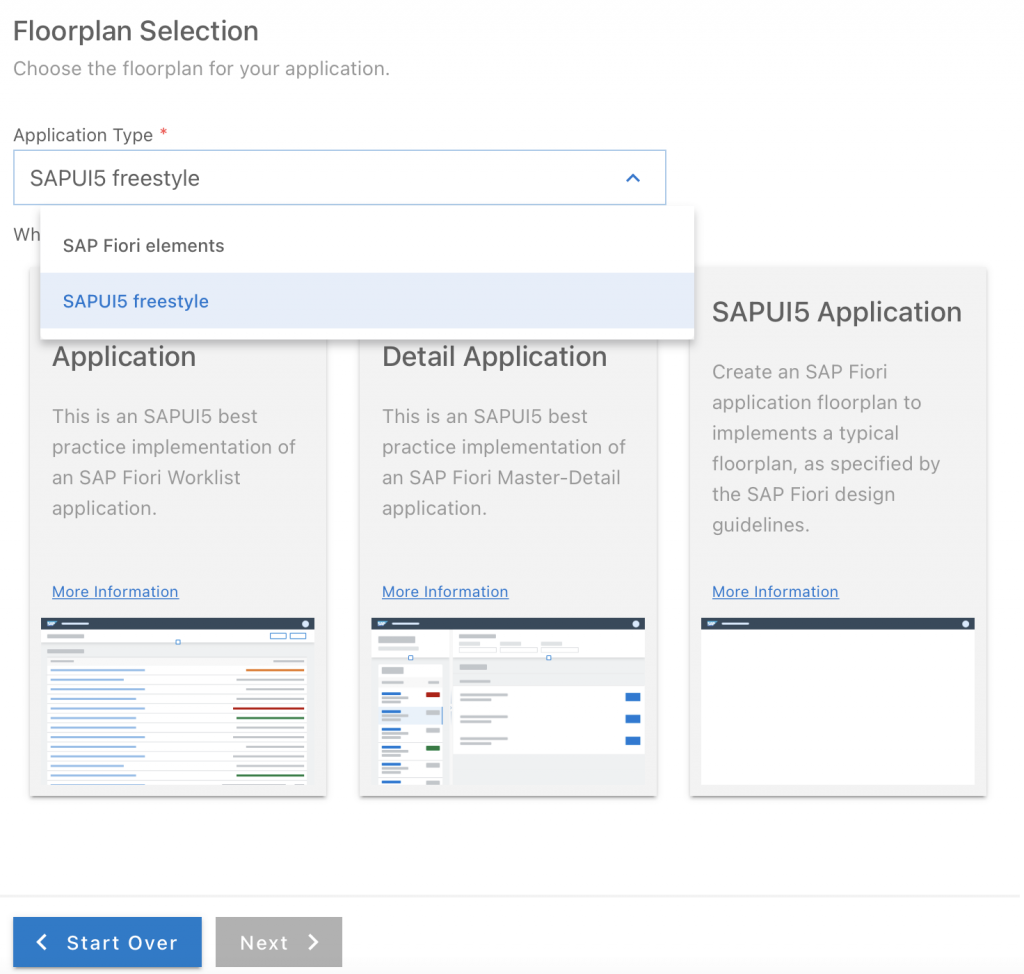
Choose “SAP Fiori Application” to create a new project:
Choose “SAPUI5 freestyle” and then “SAP Fiori Worklist Application”:
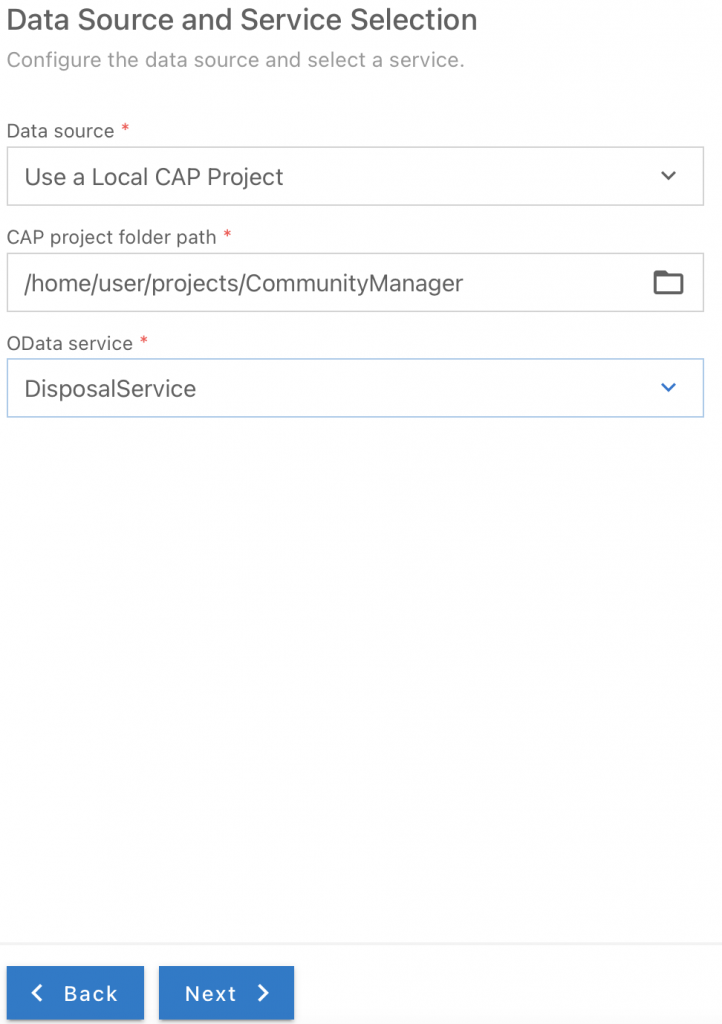
Choose “Use a Local CAP Project” as data source, select your CAP project as project folder and connect the “DisposalService” as OData service:
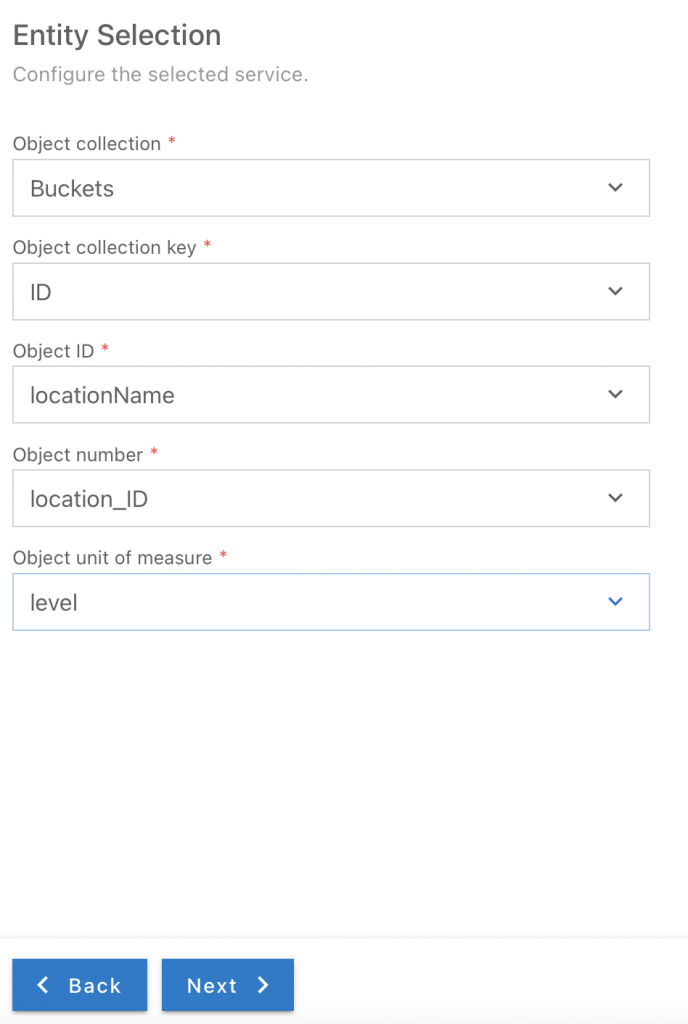
Configure the selected service as following:
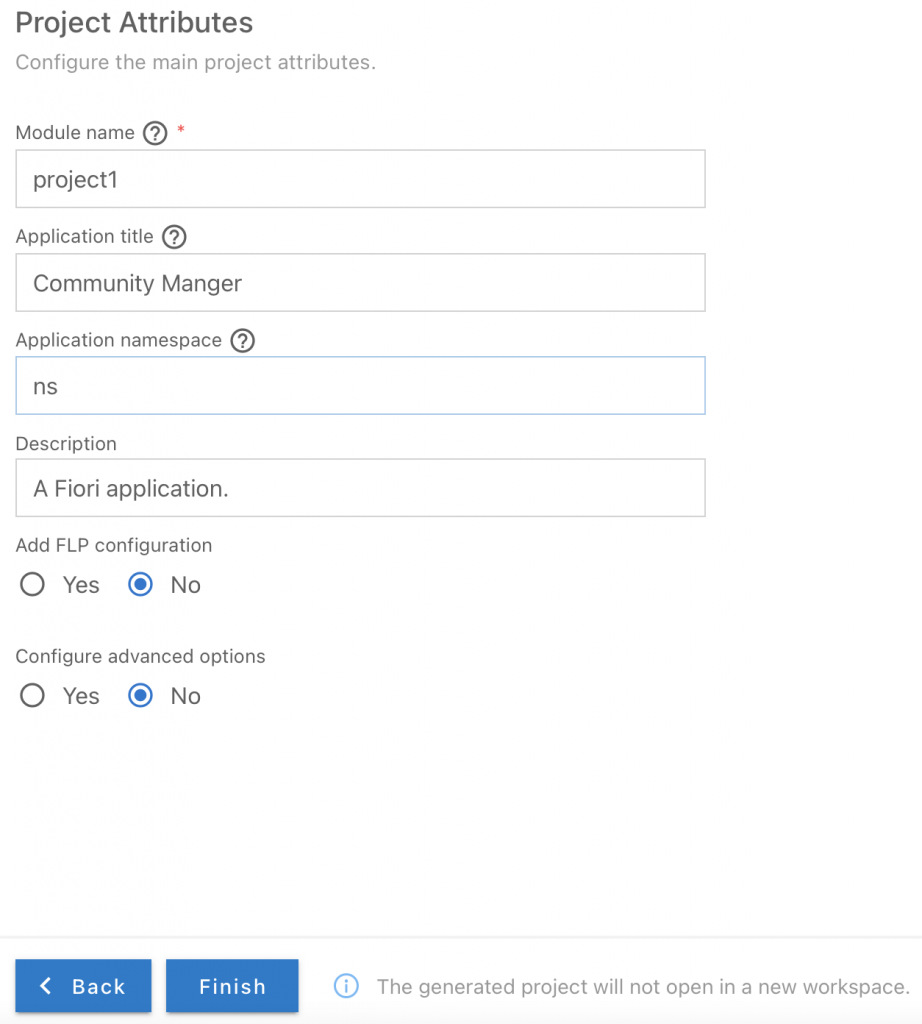
Configure project attributes as following:
In the Terminal, follow the link to the App:
Open the SAPUI5 Web Application “/community-manager/webapp/index.html”:
And see the first draft:
6. Modify Worklist and use event handler
Open Worklist.view.xml:
and add the following code to bring the table in a better shape:
<mvc:View xmlns="sap.m" xmlns:mvc="sap.ui.core.mvc" xmlns:semantic="sap.f.semantic" controllerName="ns.communitymanager.controller.Worklist"><semantic:SemanticPage id="page" headerPinnable="false" toggleHeaderOnTitleClick="false">
<semantic:titleHeading>
<Title text="Community Manager"/>
</semantic:titleHeading>
<semantic:content>
<Table id="table" width="auto" items="{ path: '/Buckets', sorter: { path: 'title', descending: false } }" noDataText="{worklistView>/tableNoDataText}" growing="true" growingScrollToLoad="true" updateFinished=".onUpdateFinished">
<headerToolbar>
<Toolbar>
<Title id="tableHeader" text="Buckets"/>
<ToolbarSpacer/>
<SearchField id="searchField" tooltip="{i18n>worklistSearchTooltip}" search=".onSearch" width="auto">
</SearchField>
</Toolbar>
</headerToolbar>
<columns>
<Column id="nameColumn">
<Text text="Bucket ID" id="columnID"/>
</Column>
<Column xmlns:mvc="sap.ui.core.mvc" xmlns:semantic="sap.f.semantic" xmlns="sap.m" id="unitNumberColumn_copy3" hAlign="Left">
<header>
<Text xmlns="sap.m" text="Title" id="columnTitle"/>
</header>
</Column>
<Column id="unitNumberColumn" hAlign="Left">
<header>
<Text xmlns="sap.m" text="Location" id="columnLocationID"/>
</header>
</Column>
<Column xmlns:mvc="sap.ui.core.mvc" xmlns:semantic="sap.f.semantic" xmlns="sap.m" id="unitNumberColumn_copy2" hAlign="Left">
<header>
<Text xmlns="sap.m" text="Level" id="columnServiceCall"/>
</header>
</Column>
</columns>
<items><ColumnListItem type="Navigation" press=".onPress">
<cells>
<ObjectIdentifier title="{ID}" id="identifier0"/>
<ObjectAttribute text="{ path: 'title', formatter: '.formatter.textUnit' }" id="attribute0"/>
<ObjectNumber number="{ path: 'locationName', formatter: '.formatter.integerUnit' }" unit="{location}" id="number0"/>
<ObjectStatus xmlns="sap.m" id="status0" state="{= ${level} === 'Yes' ? 'Error' : 'Success'}" text="{= ${level} === 'Yes' ? 'Full' : 'Empty'}"/>
</cells>
</ColumnListItem>
</items>
</Table>
</semantic:content>
<semantic:sendEmailAction>
<semantic:SendEmailAction id="shareEmail" press=".onShareEmailPress"/>
</semantic:sendEmailAction>
</semantic:SemanticPage>
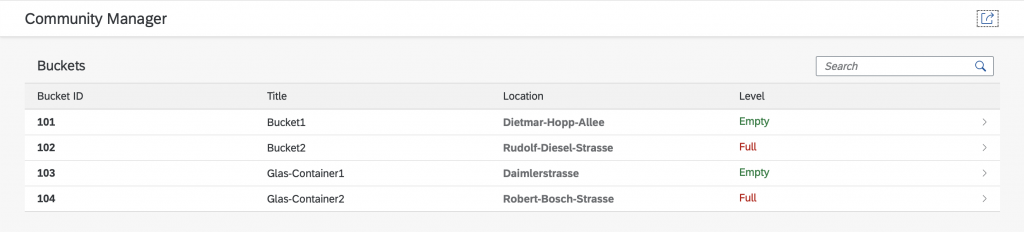
</mvc:View>And see the changes in the app:
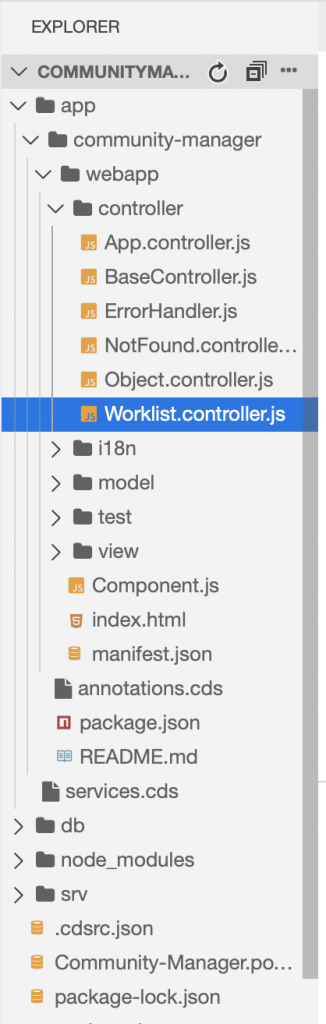
Open “Worklist.controller.js”:
and add the onRefresh() call to the onUpdateFinished function, that the function looks like this:
onUpdateFinished : function (oEvent) {
// update the worklist's object counter after the table update
var sTitle,
oTable = oEvent.getSource(),
iTotalItems = oEvent.getParameter("total");
// only update the counter if the length is final and
// the table is not empty
this.onRefresh();
if (iTotalItems && oTable.getBinding("items").isLengthFinal()) {
sTitle = this.getResourceBundle().getText("worklistTableTitleCount", [iTotalItems]);
} else {
sTitle = this.getResourceBundle().getText("worklistTableTitle");
}
this.getModel("worklistView").setProperty("/worklistTableTitle", sTitle);
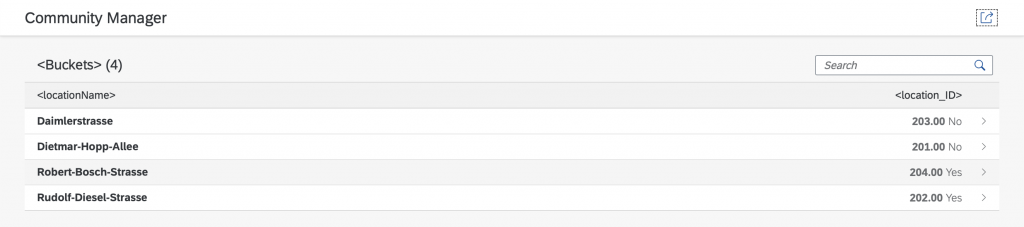
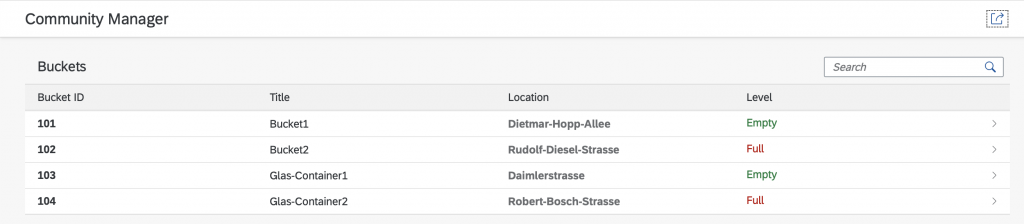
},Check the app once again. It should still look like this:
Open SQLite in a second terminal window:
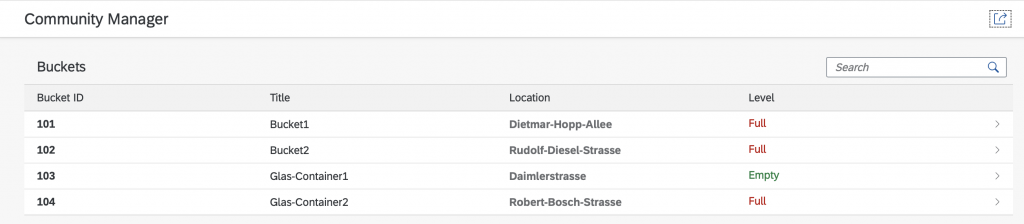
sqlite3 db/my-communitymanager.db -cmd .dumpChange the Level of Bucket 101:
sqlite> UPDATE my_communitymanager_Buckets SET level = 1 WHERE ID = 101;The Level in Bucket 101 changes from Empty to Full:
7. Run app on localhost
Now the OData service can be used by either deploy it in the cloud and expose it, or run it locally.
To keep things simple, I choose to run it locally here.
Go to your DevSpace, download the sources and save it to a folder of your choice on your local machine:

Navigate to the folder where you saved the sources, extract it, navigate inside the root folder of the project and install the CDS development kit:
npm i -g @sap/cds-dkOn Linux/Mac follow the steps here.
Run Node Package Manager installation, to install the dependencies defined in package.json:
npm installInstall SQLite3 packages:
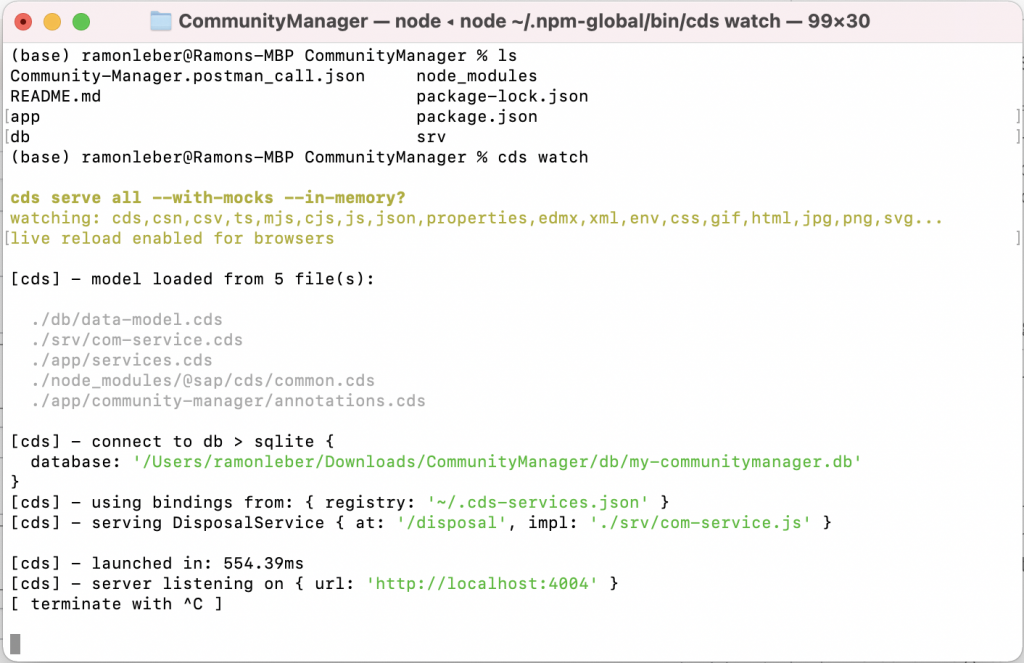
npm i sqlite3 -DStart CDS server:
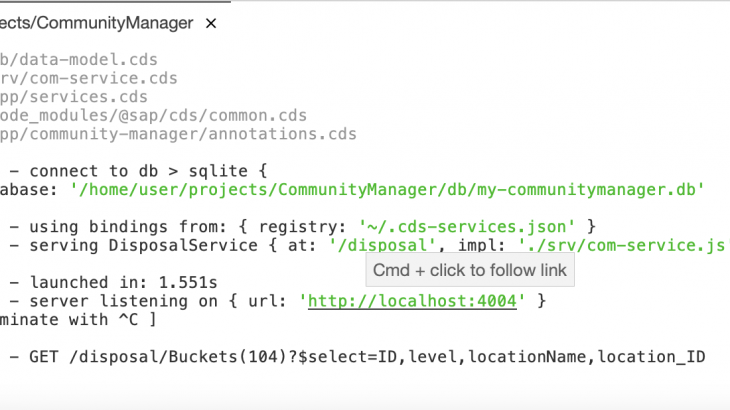
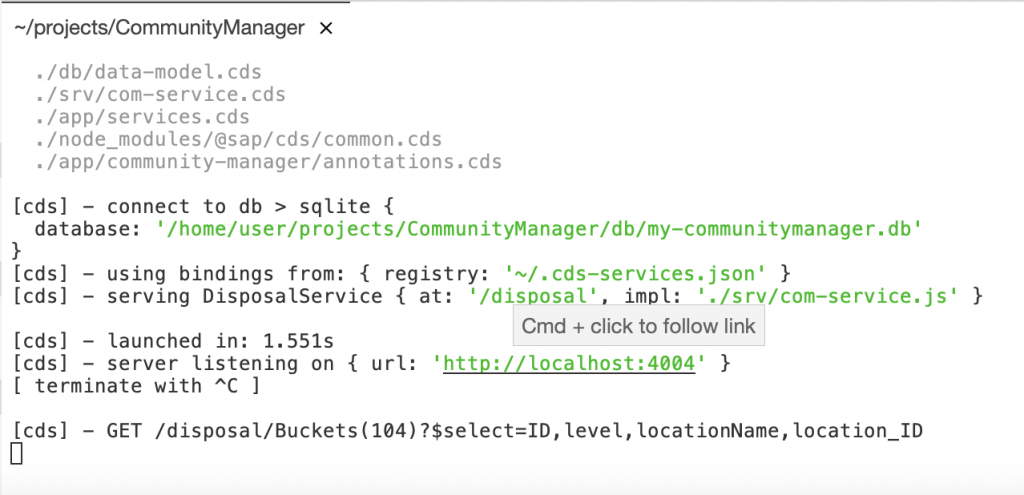
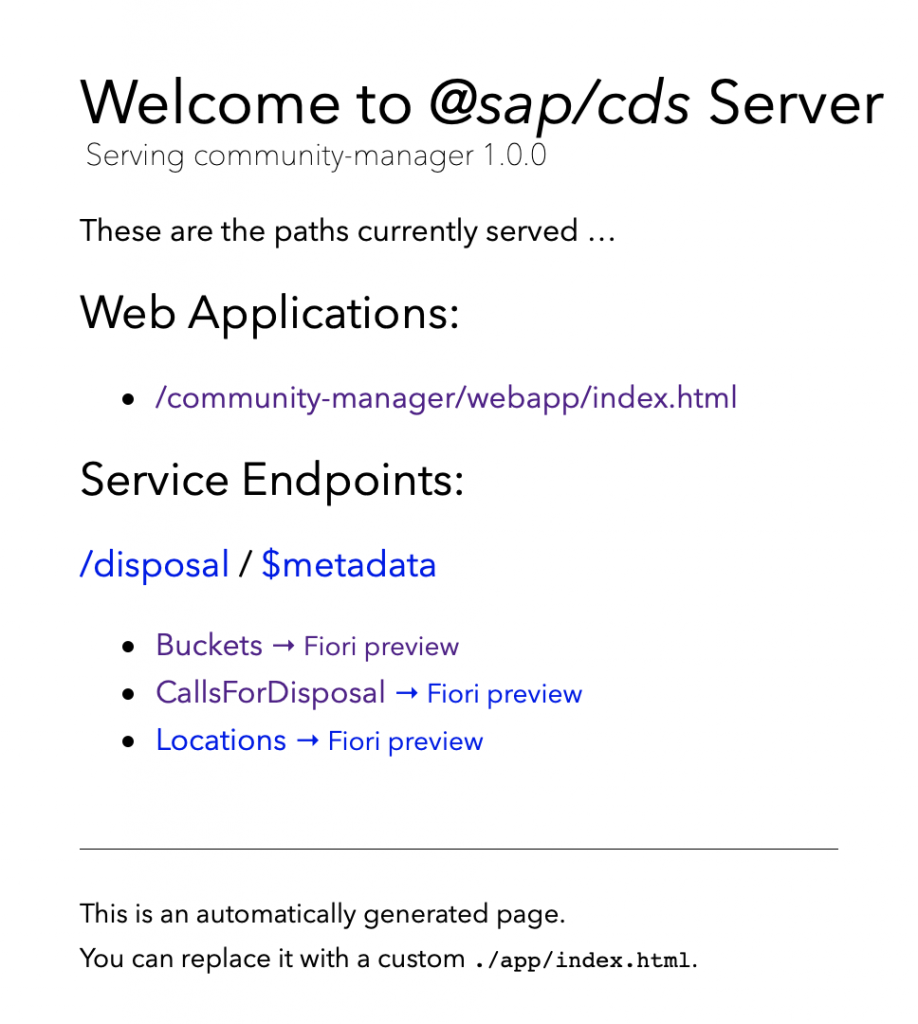
cds watchOpen the Web Application in your browser by following the link provided by the CDS server:
You can see the Community Manger running locally on your machine:
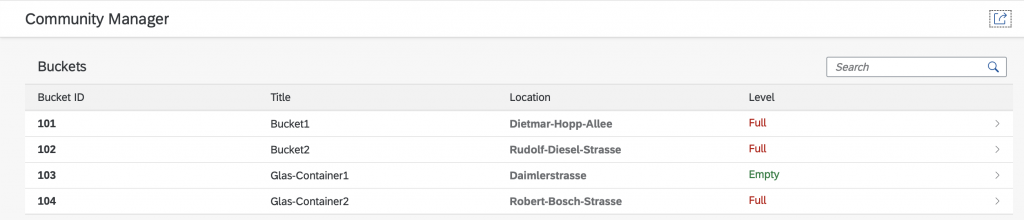
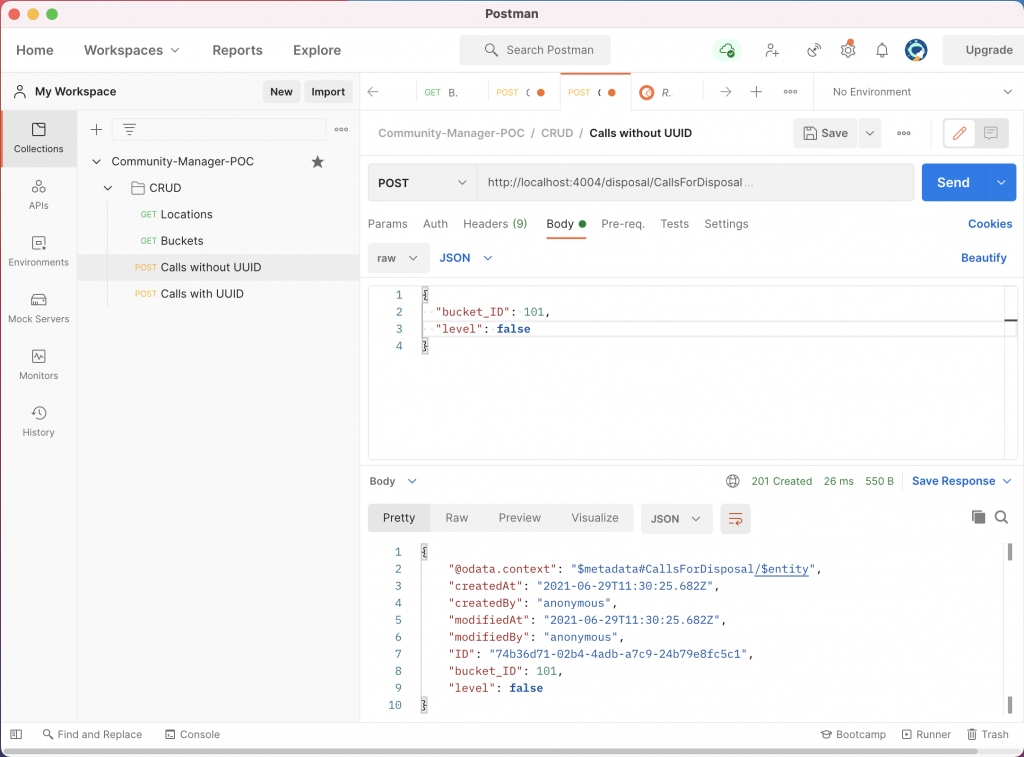
Download the Postman app and import the postman.json to the postman collection and send the “Calls without UUID” request. (When CDS server is listening on localhost:4004, just click send. Otherwise use the right port):
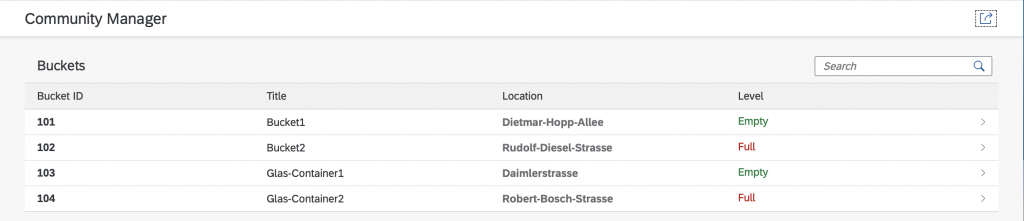
See how the Level in the Web Application changes from Full to Empty(level : false -> Empty, level : true -> Full):
Congratulations, you have created a basic business service with a OData service and a SAPUI5 app. You have learned how to use the SAP Business Application Studio, to use and modify a template and how to trigger a service with a REST API.


