
Introduction
Before we get into the details of setting up connections between SAP Build Apps and SAP Systems, I intend to introduce a couple of SAP technology components in each post that are relevant for the use cases covered in the series.
BTP Destinations
The common building block for connectivity on the SAP Business Technology Platform is called BTP Destination. A BTP Destination is a predefined endpoint that enables you to connect to different cloud and on-premise applications and services.
For creating a destination, we have the following options:
- Using the Destinations Editor in the BTP cockpit
- Destination Service REST API
- Using the MTA Descriptor
- On Service Instance Creation
MTA
In the scenario described in this blog post, we will make use of a CAP service created in SAP Business Application Studio. Deployment of the service is done through an MTA (Multi-Target Application) deployment that allows you to deploy applications consisting of several modules. The MTA descriptor includes information about the destination to be created. Alternatively, we could also manually create a destination via the Destinations Editor available in the BTP cockpit.
Use case A : consuming a basic CAP service with SAP Build Apps
For this use case, we will create a very basic CAP project in SAP Business Application Studio using Productivity Toolkit as a starting point.
For those who want to follow along, here are the steps:
1. To set up a tenant (subaccount) that has both SAP Build Apps, as well as SAP Business Application Studio, please run the following boosters, in the order below, to ensure a custom IAS is set up:
- Get Started with SAP Build Apps – Detailed Account Setup
- Get started with SAP Business Application Studio
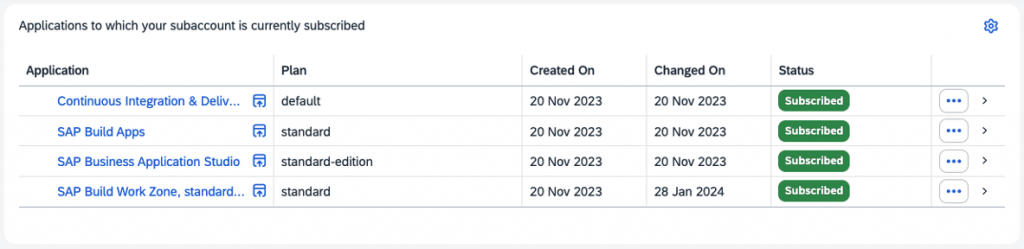
The following subscriptions should be visible in the subaccount’s cockpit after running both boosters. Note: I assume you have access to an enterprise account. Trial or free-tier users will see different plans.
2. Go to the SAP Business Application home page by opening the link to SAP Business Application Studio and create a DevSpace based on “Full-Stack Application Using Productivity Tools”.

3. Open the DevSpace and select “Create Project” in the Project Explorer.
4. Select the default “Full-Stack Project (Productivity Toolkit)” template, provide some basic project information (e.g. name BlogProducts) and click Finish. Your CAP project will be created and opened. At this point, the project and hence the storyboard are pretty much empty.
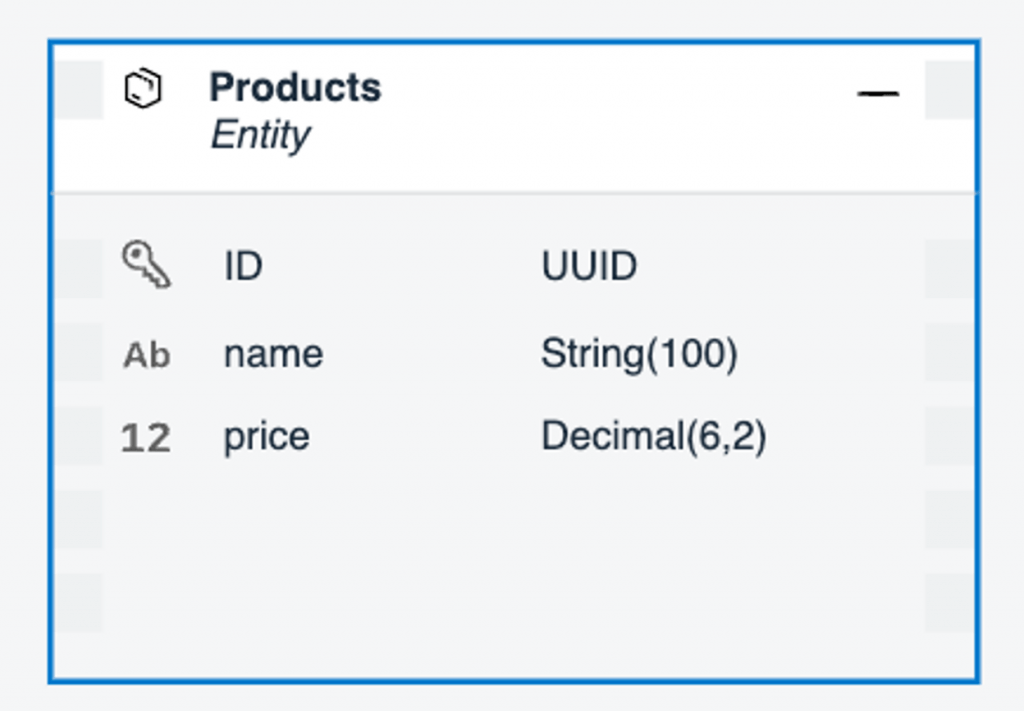
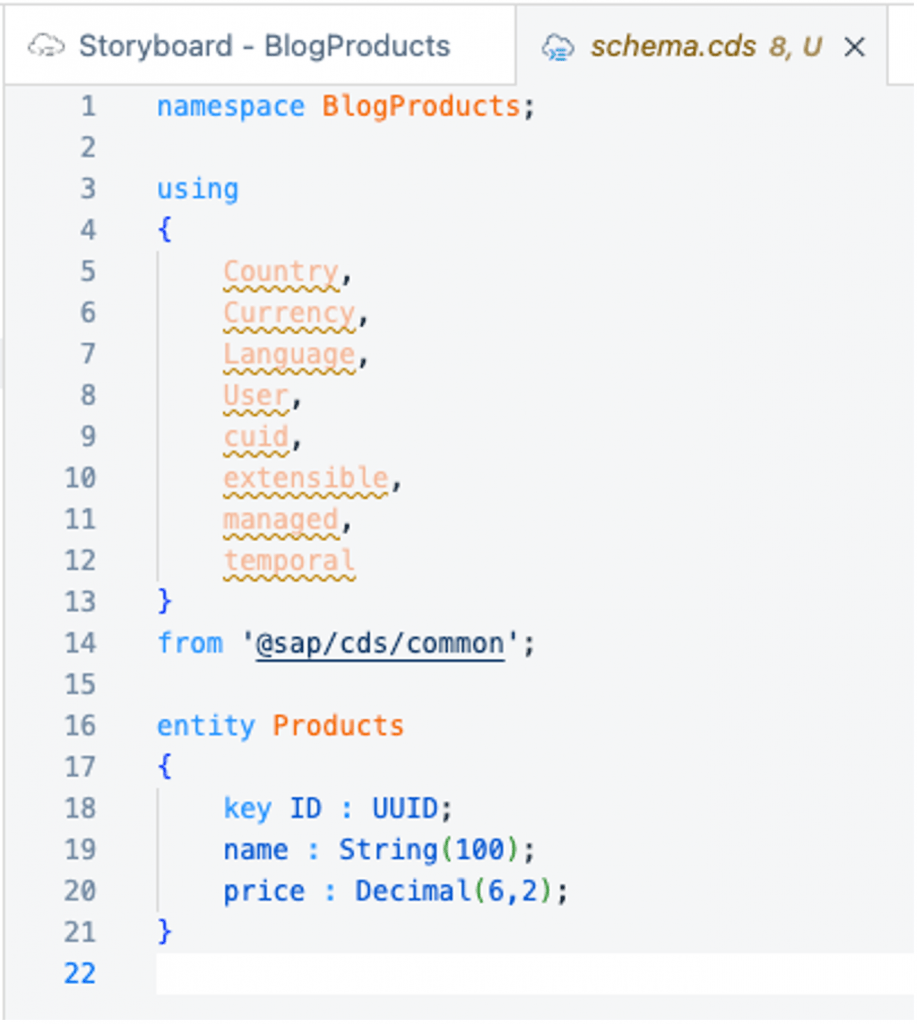
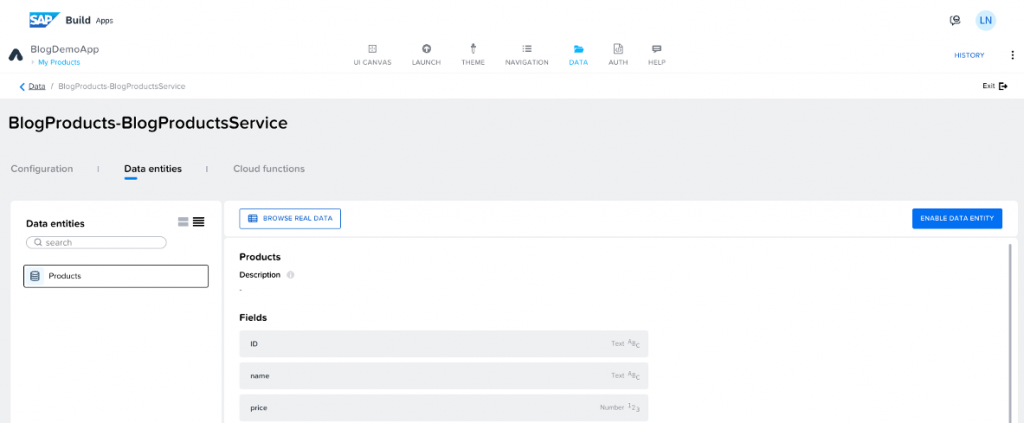
5. In the data model add an entity called “Products”, with properties “name” and “price”.
The result of this, is the creation of the CDS file called schema.cds such as below:
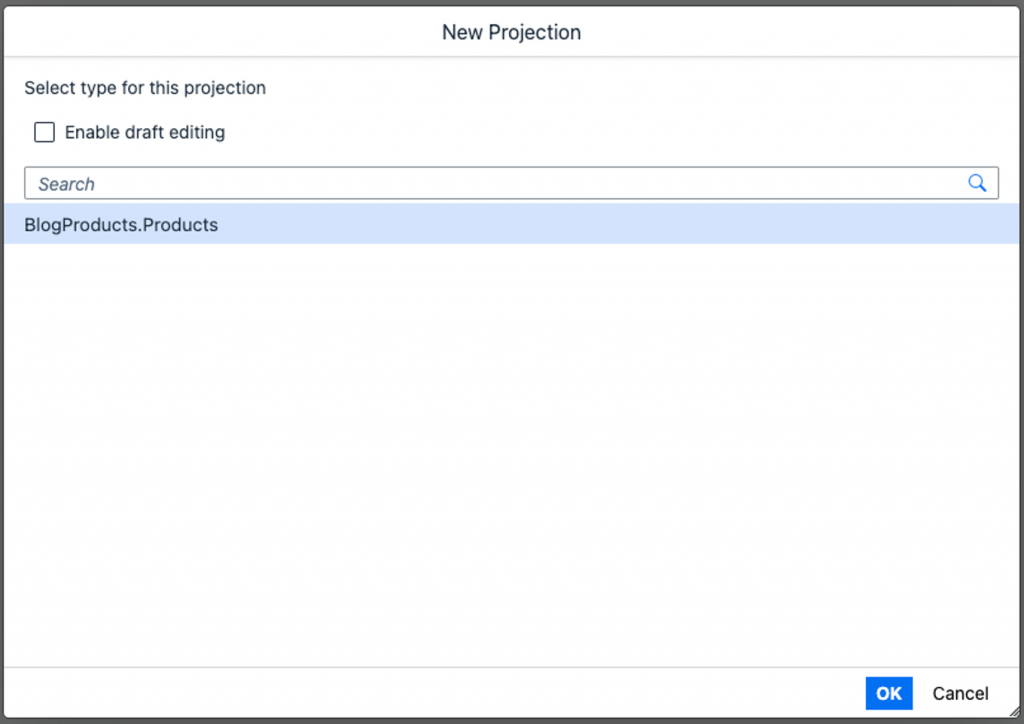
6. Create a service based on this data model. Select <yourservicename>.Products. Make sure to disable draft editing. A service that supports draft editing allows end-users of the application to save draft versions of their entries on the server, so they can interrupt and continue later, possibly from different places and/or devices. UI applications based on Fiori Elements or MDK can handle draft editing. However, apps created with SAP Build Apps do not (yet) support this feature.
The result of the above steps is a CDS file called service.cds such as below:
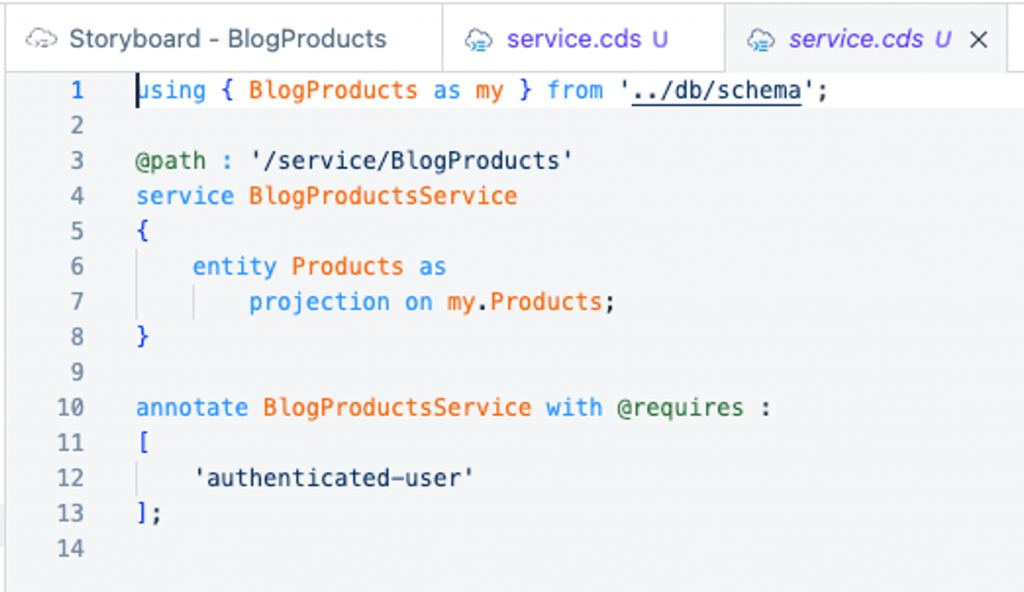
As you can see, access to the service requires an authenticated user. This blocks anonymous users from accessing the service. In the next use case we will add access through Roles.
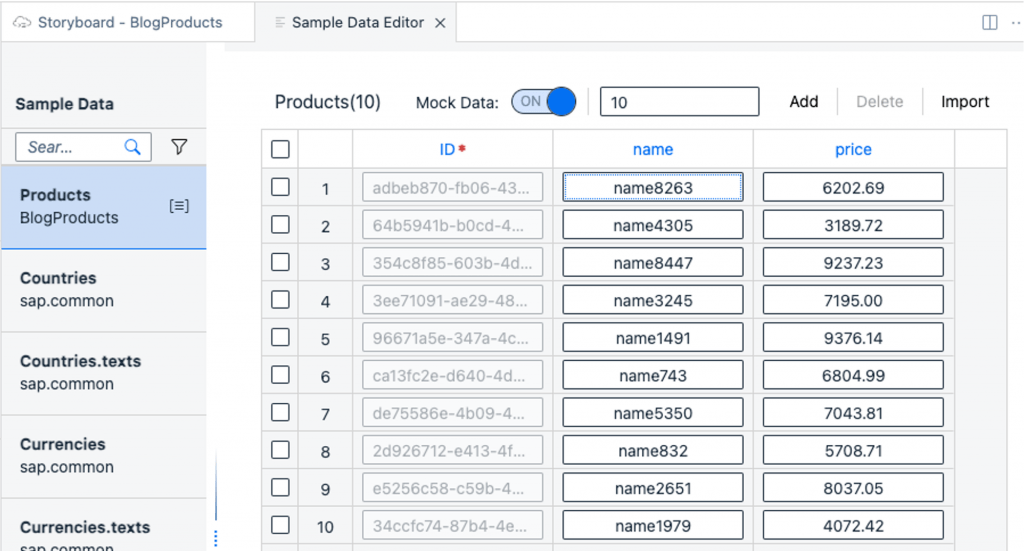
7. Going back to the Storyboard, select the Products entity in the Data Models and select Add Sample Data.
8. For the Products entity, enter a number in the field to generate some sample data for product names and prices.
Note that we did not create any UI application until now. For testing purposes, we could add an app. However, for our use case, we don’t need it. We are going to build a UI application using SAP Build Apps anyway.
Deploying the service to the cloud
We will now proceed to deploy the service onto BTP, by following the steps below:
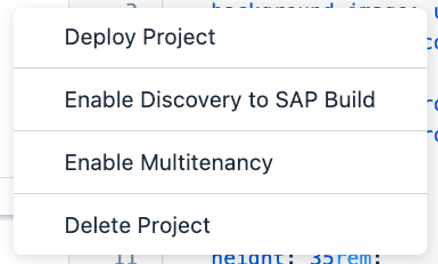
1. Go to the Project Explorer tab and select the 3-dots visible when you hover over the project’s name. This will show you the project actions available to you.

2. Select Deploy Project from the popup menu. This will trigger the creation of an MTAR archive, used to deploy with the MTA tools.

3. Before you can deploy the MTAR, you will be required to select the deployment target. For this, you’ll need to log in into Cloud Foundry, select the subaccount and the Cloud Foundry space where you want to have your service deployed.
4. Once the target selection is applied, the MTA deployment will proceed. This can take several minutes to complete.
Once the build and deploy process succeeds, you will be provided with a URL to the project overview page. (https://<yourtargetsubaccount>.launchpad.cfapps.<yourtargetregion>.hana.ondemand.com/lcap<servicename.servicename>Launchpad-1.0.0)
Let’s try to open this in a new incognito browser tab. You will be required to sign in. Only authenticated users will be able to access the launchpad application on BTP.
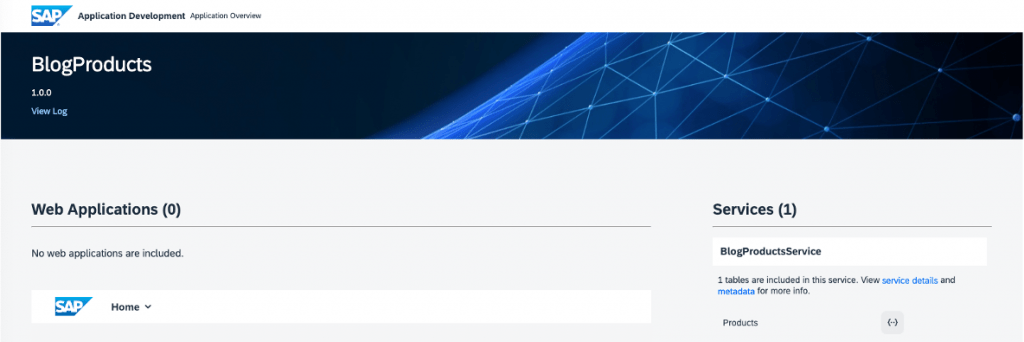
When you click on the Products service’s ‘code’ button, you will see information about the OData context, and the sample data available in the service.

Current security configuration
During the deployment, some files were created that are related to the security configuration of your service.
In the File Explorer, you will find the following files in the project’s folder structure:
- xs-security.json
- package.json
- mta.yaml
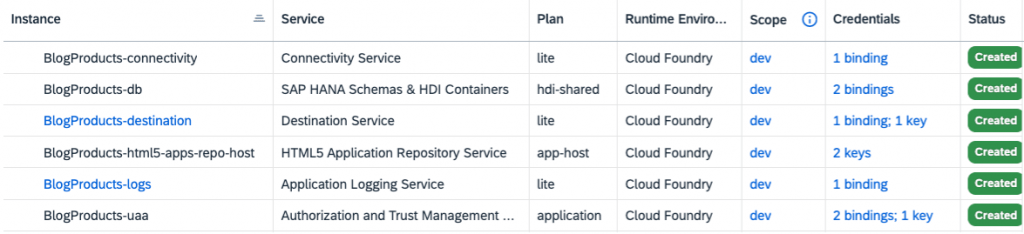
In the subaccount’s “Services > Instances and Subscriptions” list, you will find instances for:
In your BTP subaccount, you will notice that the deployment process has created several Destinations that are defined in the mta.yaml file. Some are related to a UI application that we actually did not create, so please ignore those.
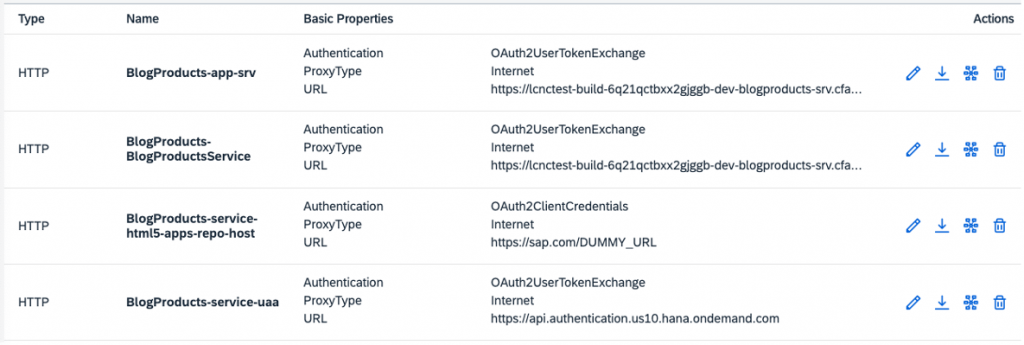
Checking the configuration of the destination “BlogProducts-BlogProductsService” shows:
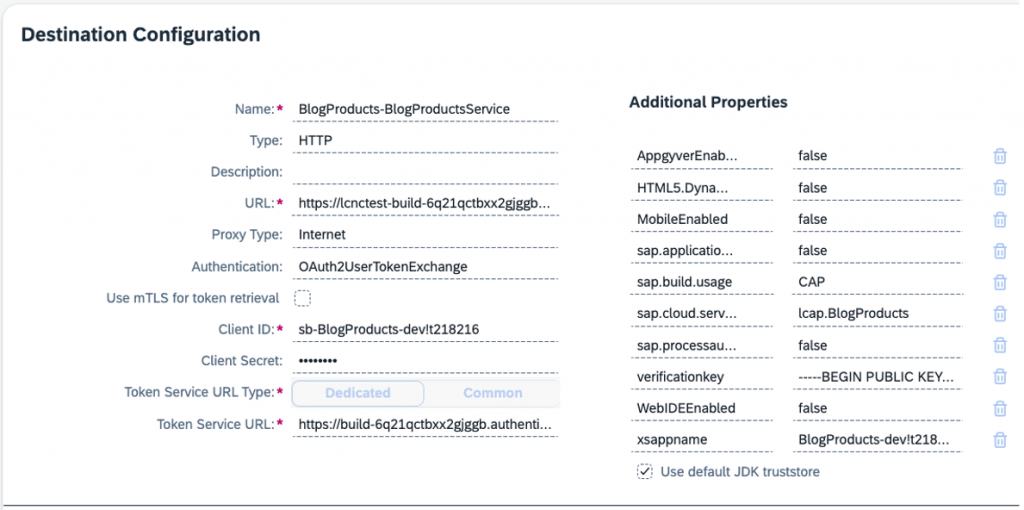
A few things to notice here:
- The destination is of type HTTP and using OAuth2UserTokenExchange for the Authentication method. This method allows for user token exchange within a single tenant (subaccount). This means our SAP Build Apps application has to run in the same subaccount to be able to authenticate with the data service.
- The token service URL type is dedicated. This is specified in the file xs-security.json and indicates that the token service URL serves only a single tenant.
- The properties AppGyverEnabled, MobileEnabled, sap.processautomation.enabled and WebIDEEnabled are set to false by default. This means applications like SAP Business Application Studio and SAP Build Apps will ignore this destination during discovery of potential services available for consumption.
Enable Discovery to SAP Build
In order to easily consume the service in SAP Build, we will need to reconfigure the destination. To help you with that, you might have seen an item in the popup menu where we had triggered the deployment.
Go back to the Project Explorer, click on the 3 dots behind the project name and select “Enable Discovery to SAP Build”.
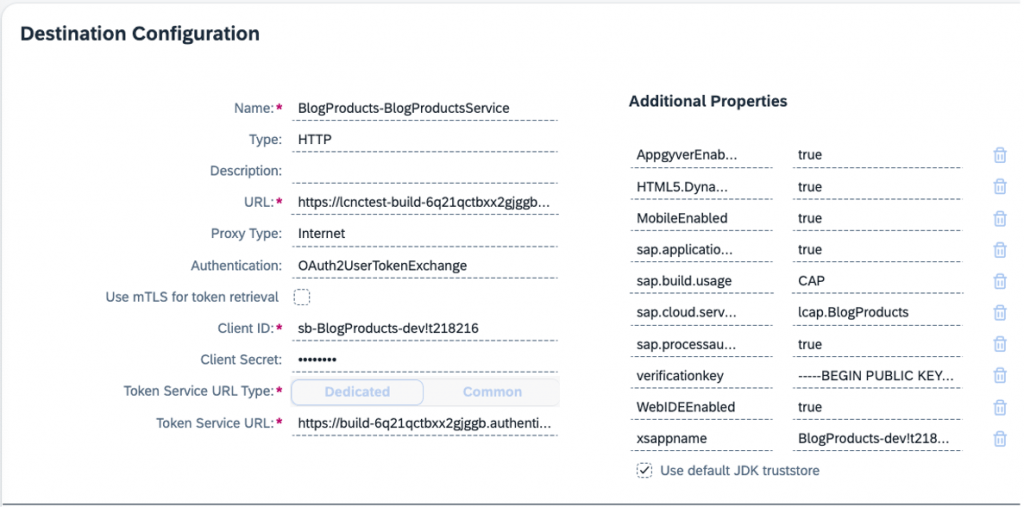
The changes will only take effect after deployment. Hence, you are asked whether you want to deploy now. Click Yes to confirm this.
After deployment, the destination’s properties will be updated (you might have to reload the web page):
Using the service in SAP Build Apps
We will now move to SAP Build Apps and create a UI application on top of the CAP service we have created in SAP Business Application Studio. Open the link to SAP Build Apps in the subaccount’s list of subscribed applications. This will open the SAP Build landing page (aka Lobby). From here, create a new project by selecting the “Create” button, selecting “Build an Application”, followed by “Web & Mobile Application”.
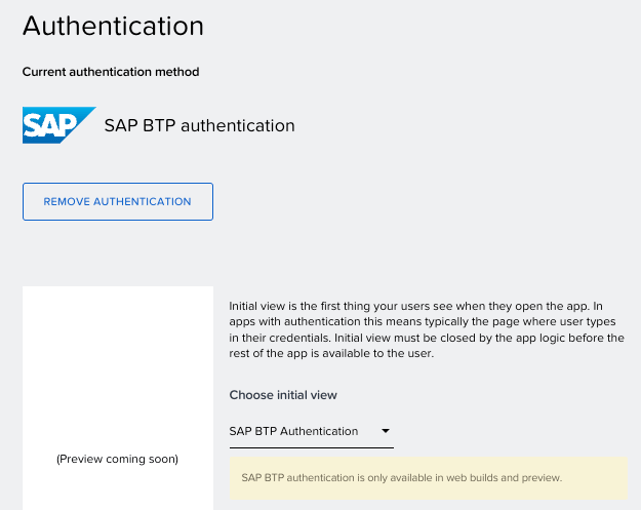
Before we try to add the data sources, we first need to enable authentication. Please select the “Auth” tab.
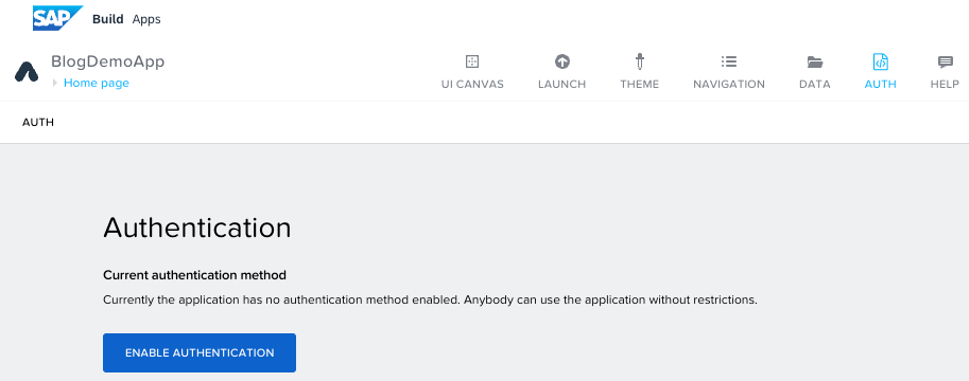
Select “ENABLE AUTHENTICATION”.
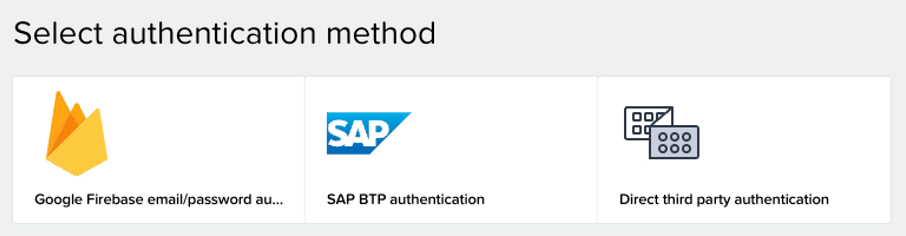
Select “SAP BTP Authentication” and select OK.
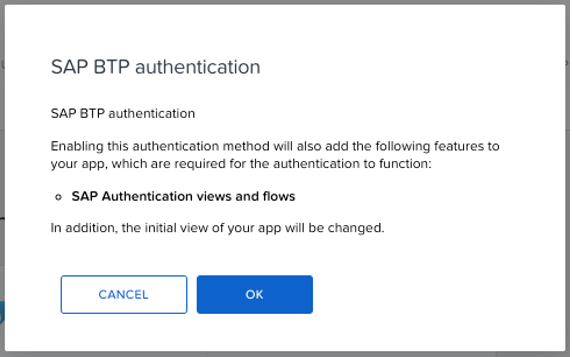
As a result, the current authentication method changes to SAP BTP Authentication, as shown below. This will also add an additional page to your app to handle the authentication.
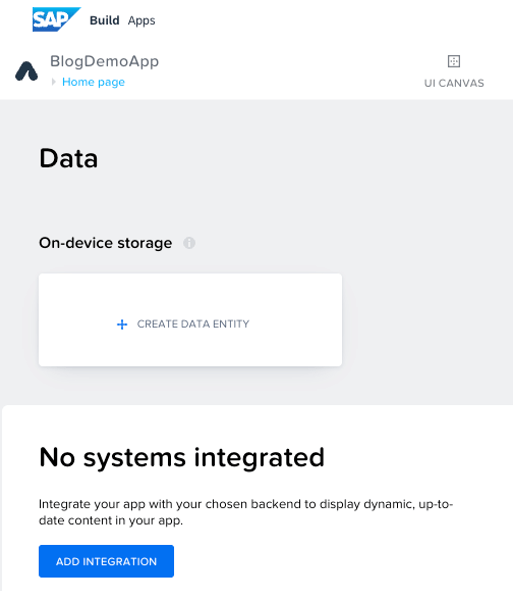
After this, we will navigate to the Data tab, where we can see “No systems integrated”. Select the “ADD INTEGRATION” button.
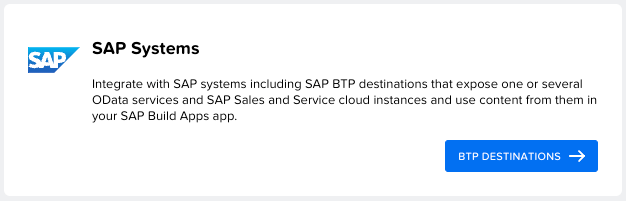
Select SAP Systems, followed by BTP DESTINATIONS.
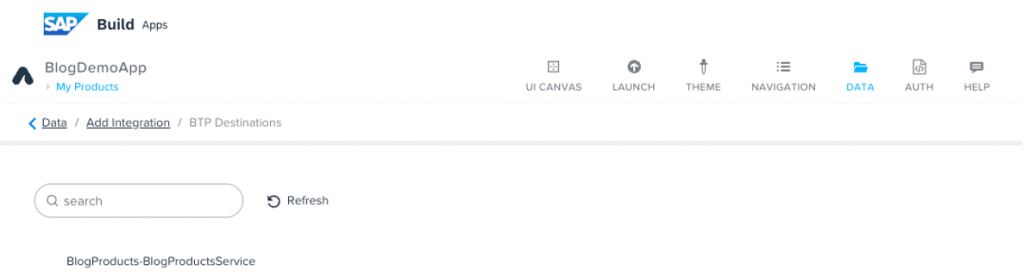
In the list, you will see the destination we have created and updated to make it visible here.
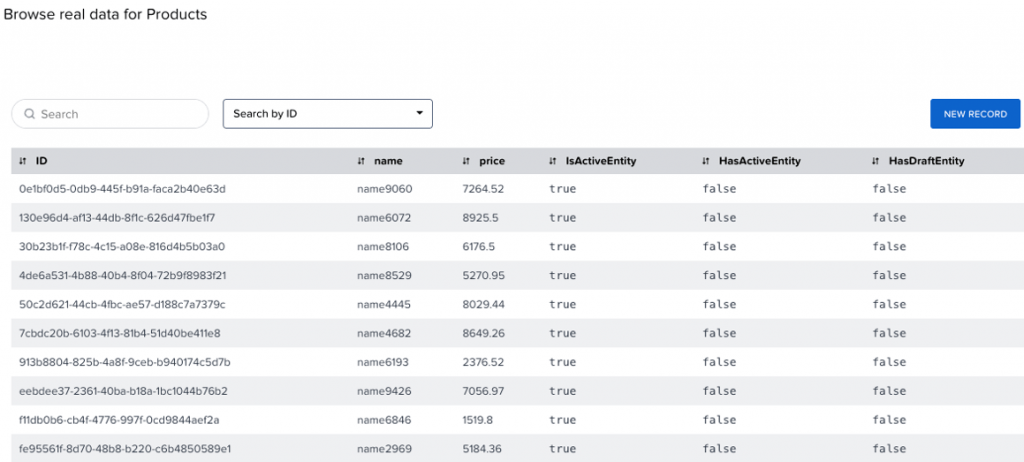
After selecting the destination, you can browse the details. In this case, you will see the Products entity, its fields and capabilities.

We can browse the data stored in the service, and we can even add another record.
To use your destination in your application, select “INSTALL INTEGRATION”. Also select the button ENABLE DATA ENTITY.
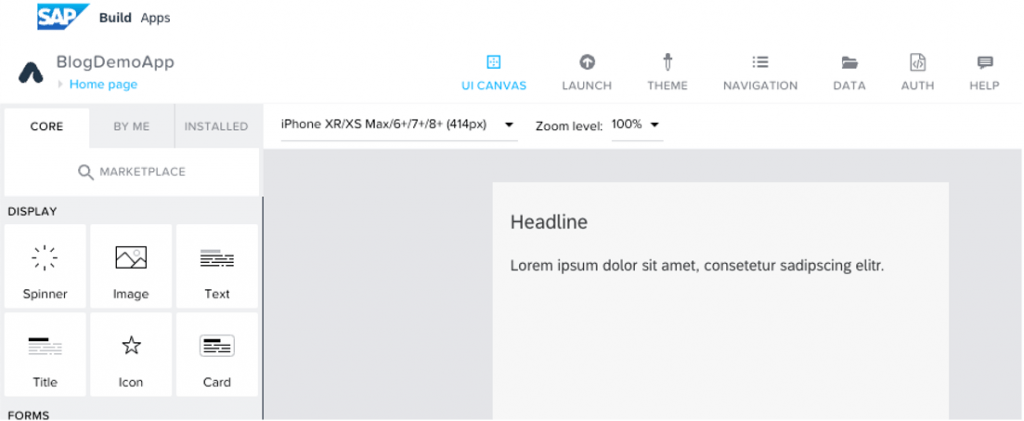
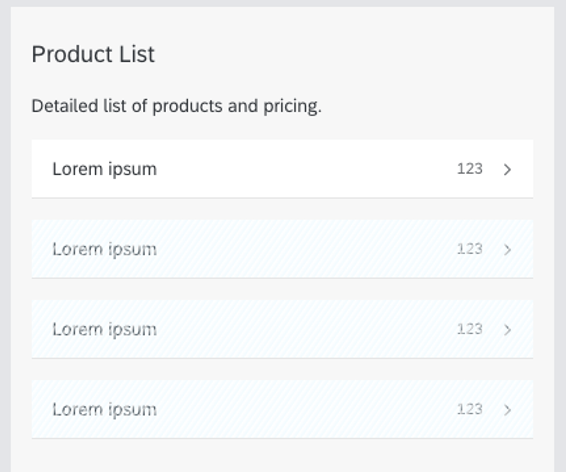
Let’s create a simple UI application that shows the Products available in the service. On the UI CANVAS tab, toggle from VIEW to VARIABLES.

Select the DATA VARIABLES tab and select ADD DATA VARIABLE. Select the Products and provide a name for the data variable. As data variable type, keep the default “Collection of data records” selected.
The list of products shown in your application will not automatically update once you add new products. In order to see an updated list after adding new products, please connect the EVENT “Page focused” to the DATA “Get record collection” in the logic canvas.

Switch the UI CANVAS back to VIEW and drag and drop a List item onto the canvas. Select the property Repeat with and select the ProductList.
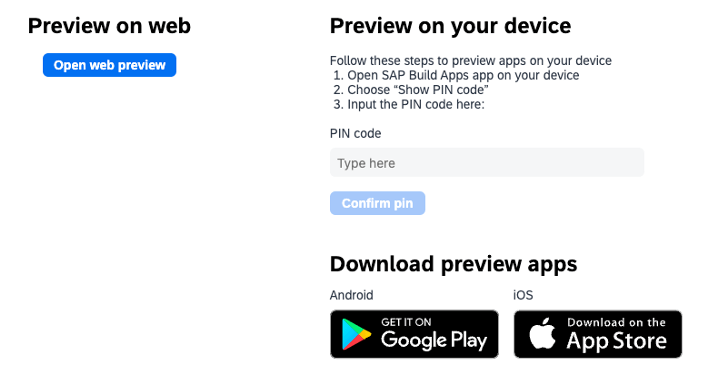
Now that we have our initial app, let’s see how this runs. For this, we will use the Preview. Select the Launch tab and select Preview your app. Then select Open preview portal. This will make the app available in the preview portal.
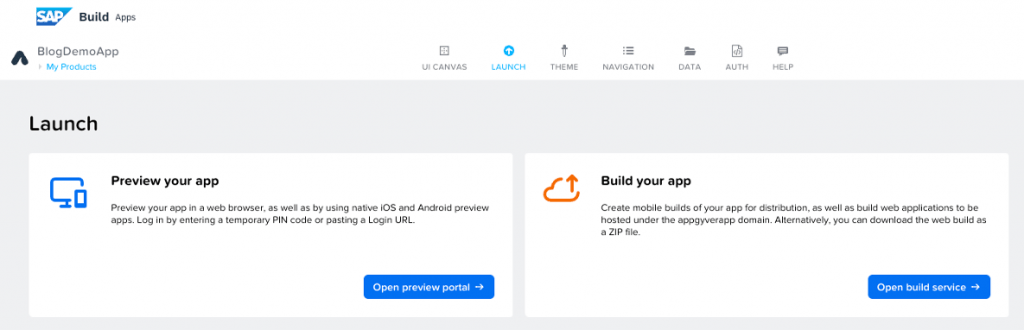
There are two ways to consume the app available on the preview portal: using your PC’s browser, or via a mobile preview app you can download from the public app stores.
As an authenticated user, you should be able to preview your app and add more product records.
Summary – use case A
In this use case we have created a simple CAP-based service that only requires a user to authenticate with the platform to access the data exposed through this service. We have exposed the service to the platform users through a BTP destination and made it discoverable for SAP Build Apps. In SAP Build Apps, we have added an integration to the CAP service through the destination. The destination forms the bridge between the CAP-based service and the applications consuming it.


