In this Blog Post I am going to Explain about the Configuring Roles to Applications in BTP and able to access in Launchpad Service which are deployed to HTML5 Application Repository in Cloud Foundry.
Introduction:
what is Launchpad Service?
Launchpad Service is one of the Services available in SAP BTP Subscriptions. With this Service, Organizations can build a central entry point on BTP for all the Fiori Applications configured and provide efficient, wide enterprise, security, role-based and personalized Launchpad Site Access to SAP and Non-SAP Applications to the Business Users.
Capabilities of Launchpad Service:
- Home Page Personalization.
- Central Point of Access to Apps, Tasks & Notifications.
- Role based Access to Content( Eg: From S/4 HANA Systems).
- Smooth App Integration for different UI Technologies and third party web apps.
- Extensible Framework for Customization and branding.
Let us take an 2 Apps one is Employee App and other one is Manager, Admin Apps and try to configure the roles based on the User.
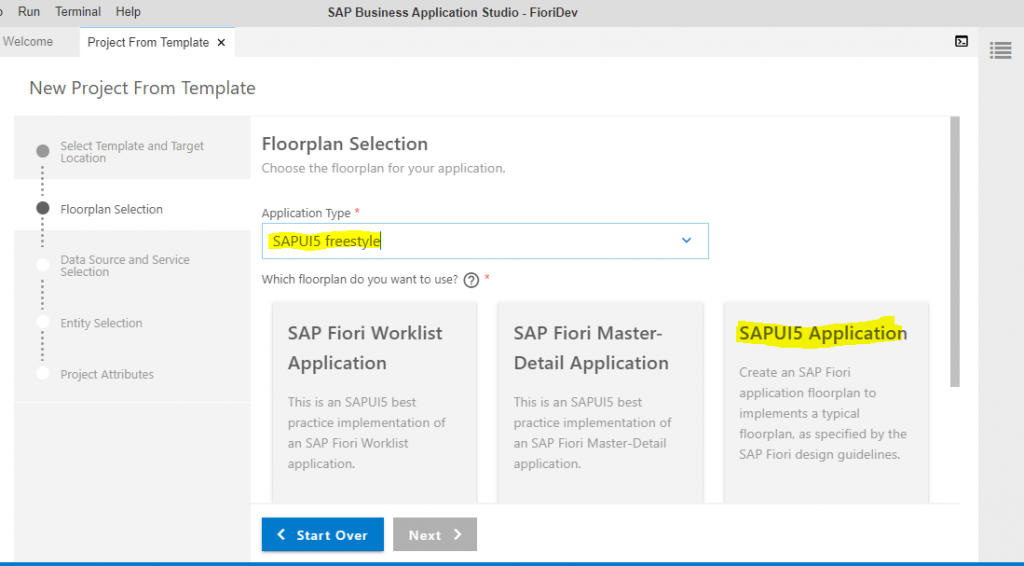
Step 1: Open Dev Space in BAS take the new Project from Template and Select the SAP Fiori Application.

Step 2: Select SAP UI5 Freestyle for sample Application you can go with Fiori Elements also.
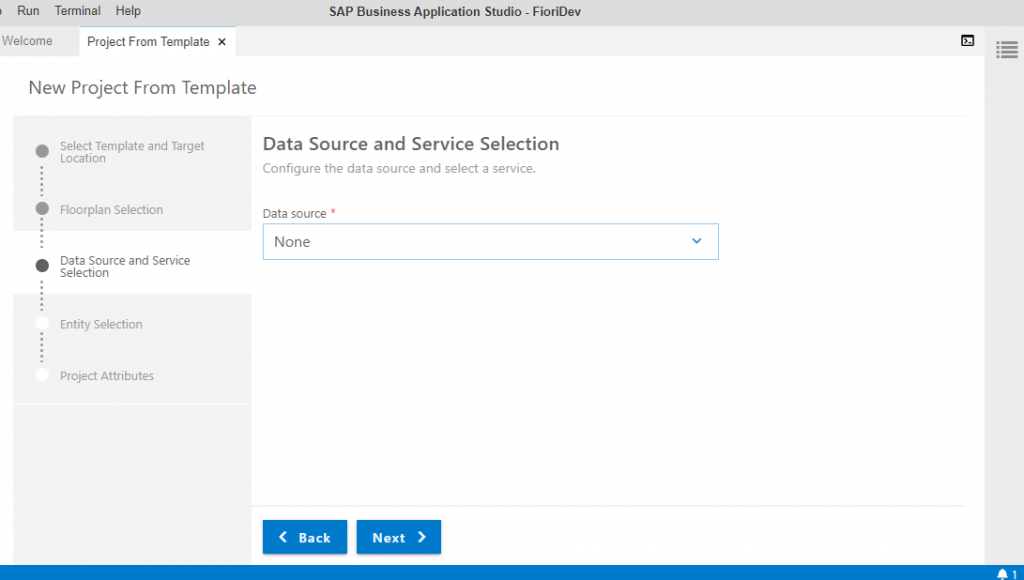
Step 3: Select Data Source as None not connecting to any destinations for sample Application. You can connect to Backend and select OData Services also.
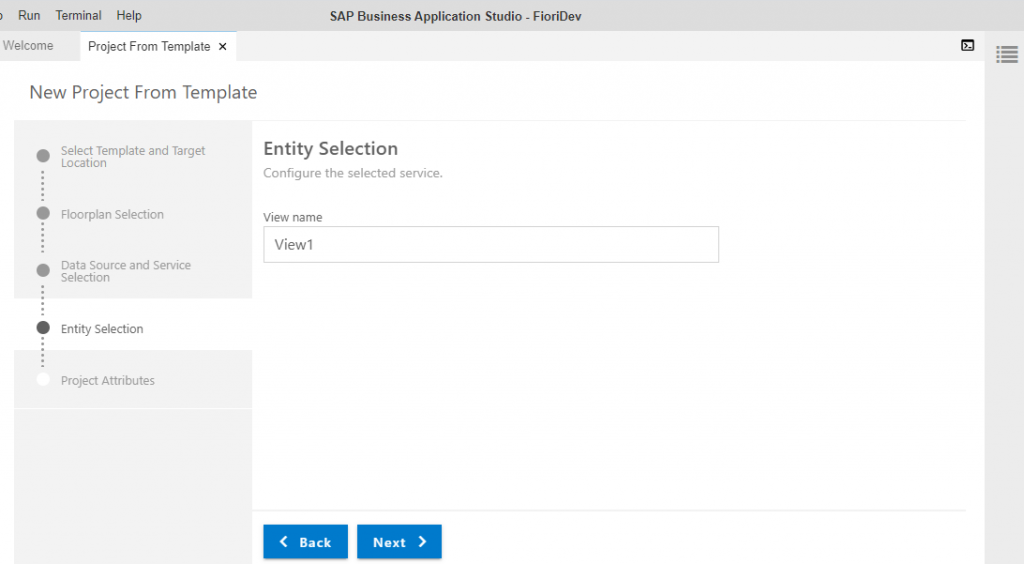
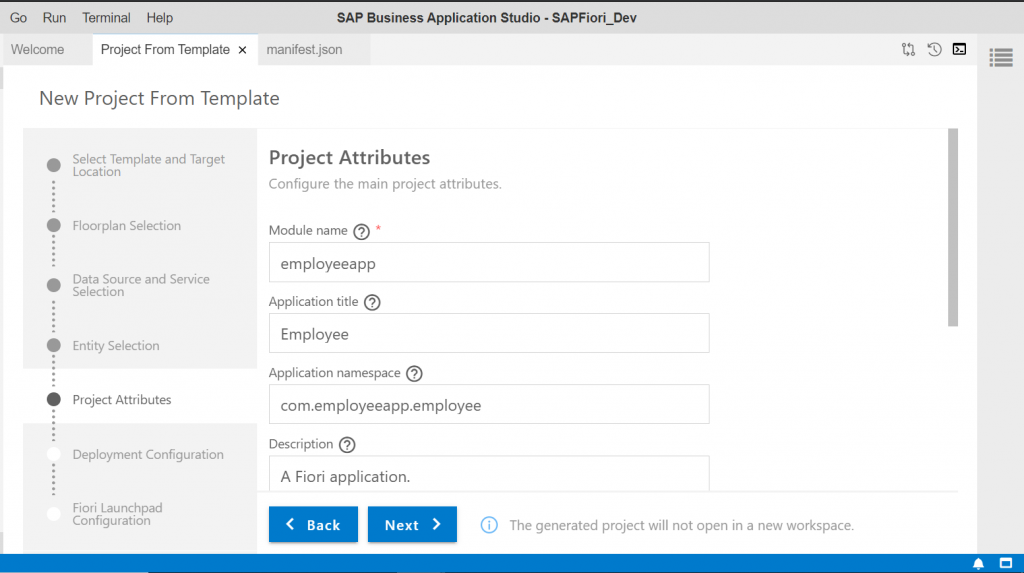
Step 4: Give the View Name and the project details like Module name (Project Name), select yes for deployment and FLP Configuration options.
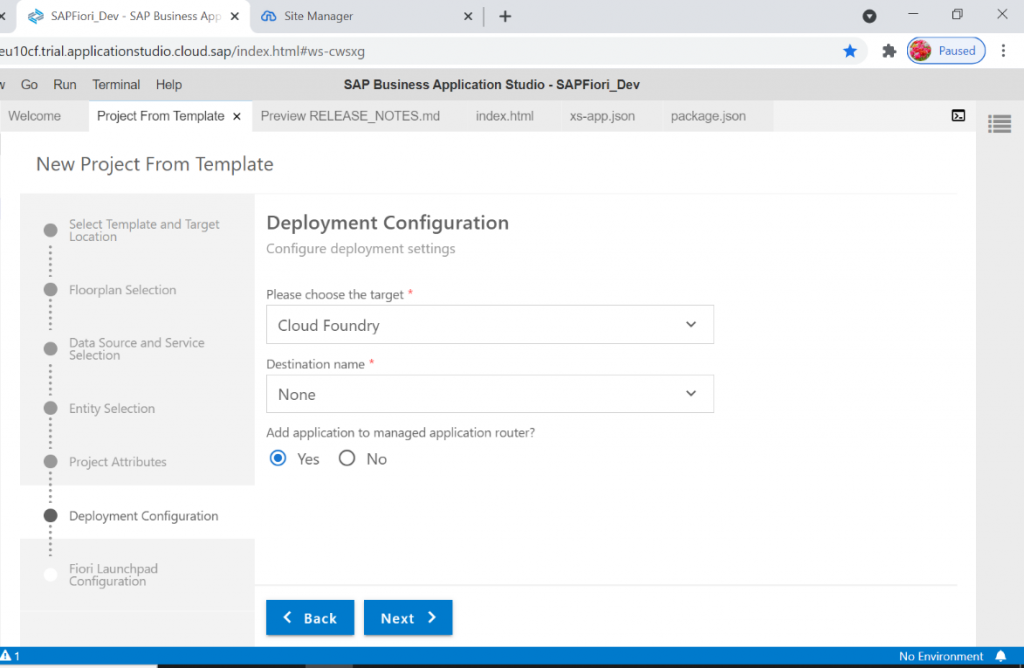
Step 5: Choose the Target as Cloud Foundry or ABAP Environment, based on your requirement Launchpad service can access different targets also and Select yes for Managed Application router which creates the “mta.yaml” file while generating the application.
This mta.yaml file acts as deployment descriptor for app to deploy to Cloud Foundry.
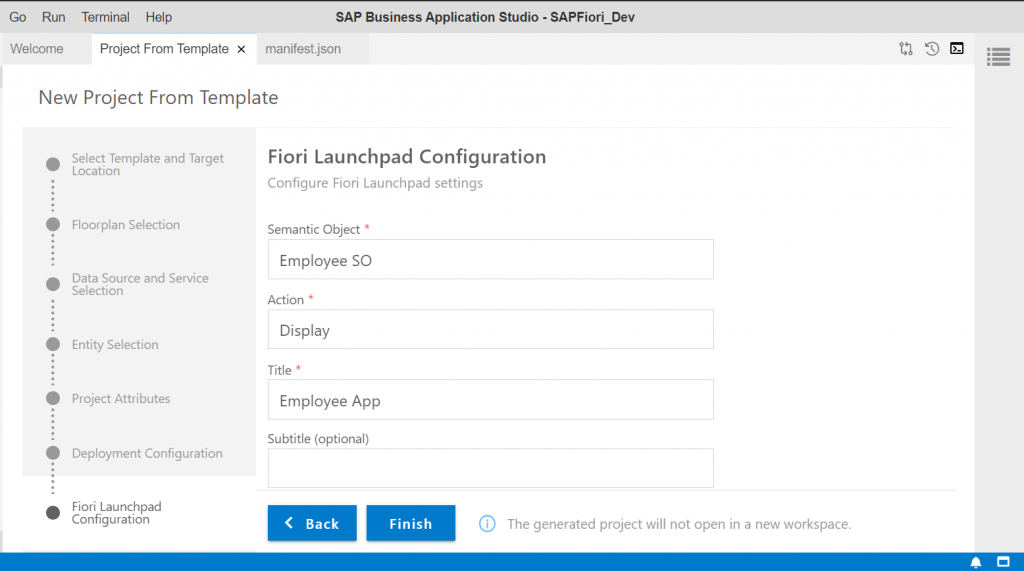
Step 6: Give Semantic Object, Action, Title which will be displayed in Launchpad Service. Click on
Finish project will be created successfully.
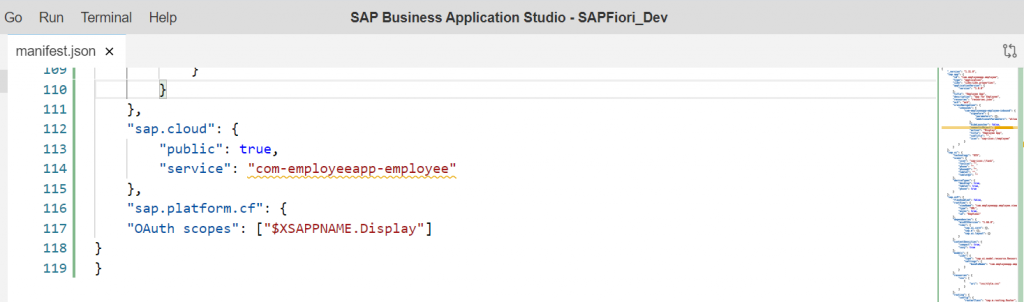
Step 7: Project will be created successfully. Now open the manifest.json file add the below piece of code for Authorization part in cloud(SAP BTP).
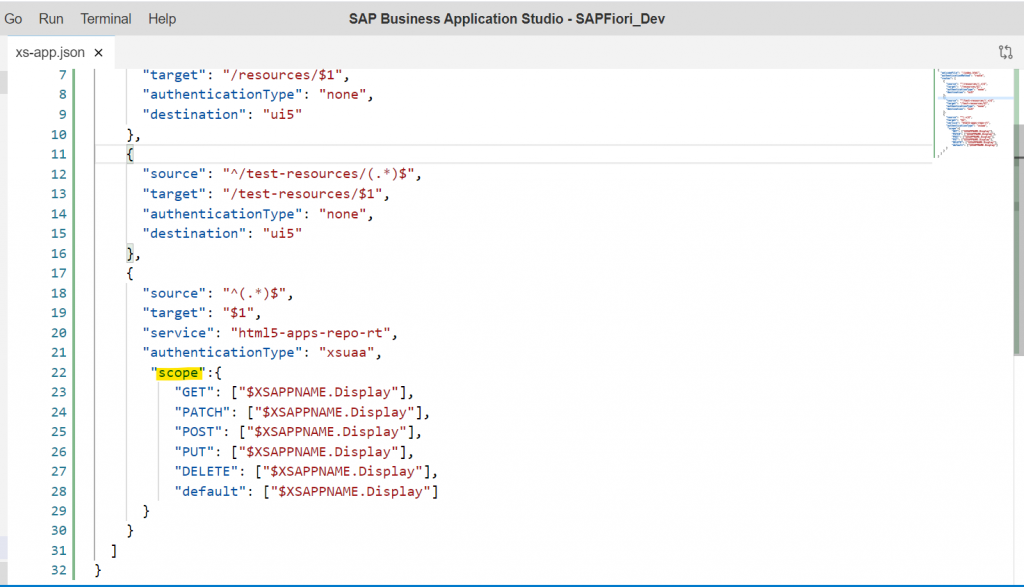
Step 8: To Add the Roles to Application first we have add the scopes in “Xs-App.json” file as shown below:
Step 9:
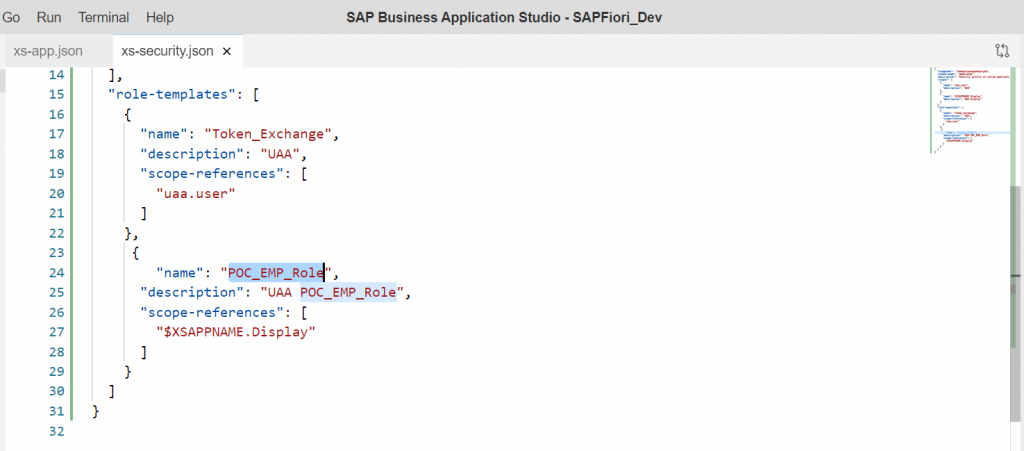
Now According to Scope Defined in Xs-app.json, call that Scope name in Xs-security.json file. The name of the Scope is “$XSAPPNAME.Display”
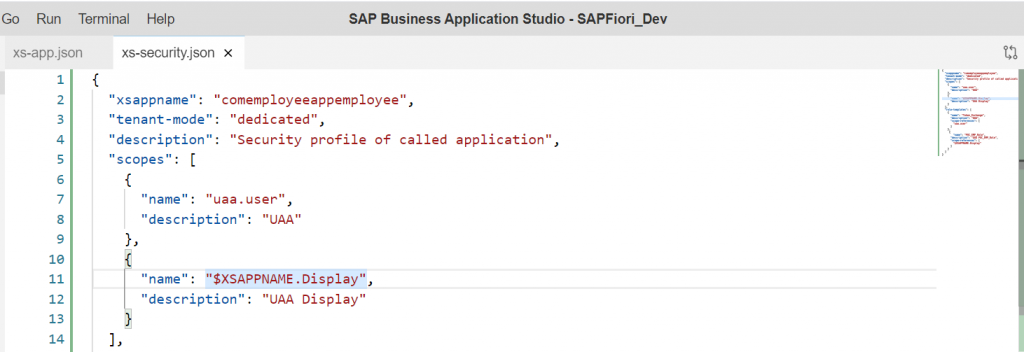
Along with the Scopes Add the “Role Templates “ with Appropriate Name Related to your Application here I have taken as “POC_EMP_Role” and called the Scope Reference also.
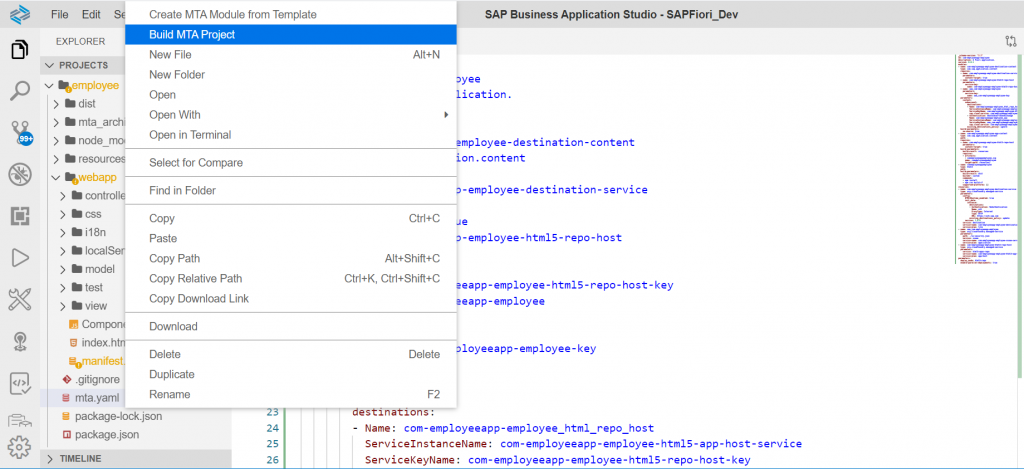
Step 10:
Right click on mta.yml file and select “Build MTA Project”.
Once Build is completed you can find the generated Mtar Archive Folder.
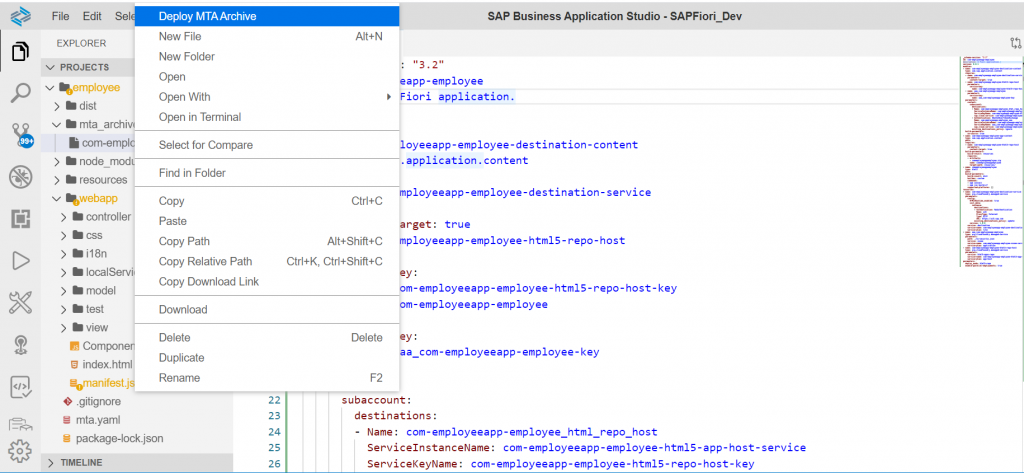
Step 11: Now click on MTAR generated folder and select Deploy MTA Archive file to the cloud foundry.
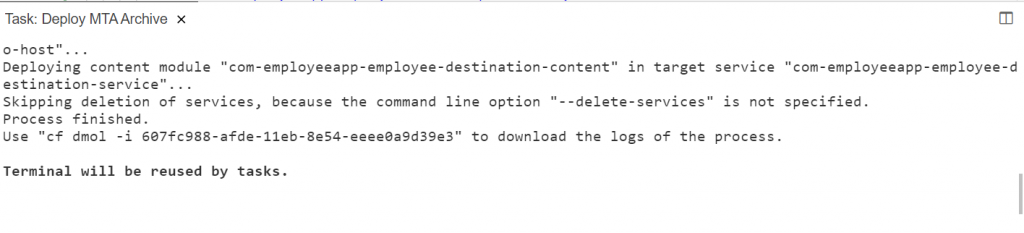
Step 12: After successful deployment Process, the finished message appears in Terminal.
CONFIGURING DEPLOYED APPS TO LAUNCHPAD SERVICE.
Step 13:
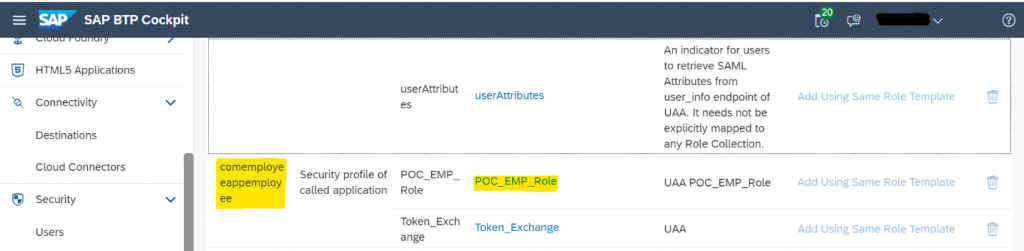
The Role Template Created in Application will be appeared in:
In SAP BTP Cockpit under Security Roles Section. You will find the Application Name and Role Name created in xs-security.json file in BAS.
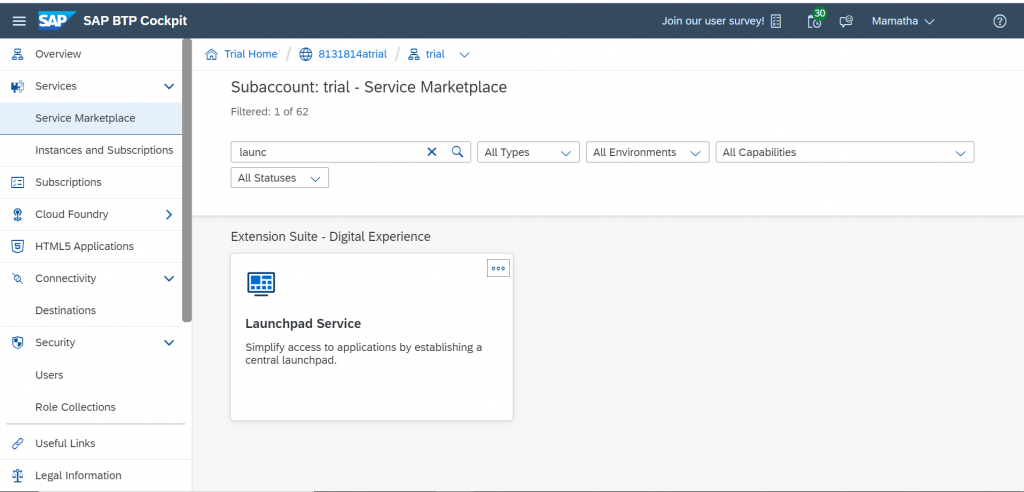
Step 14:
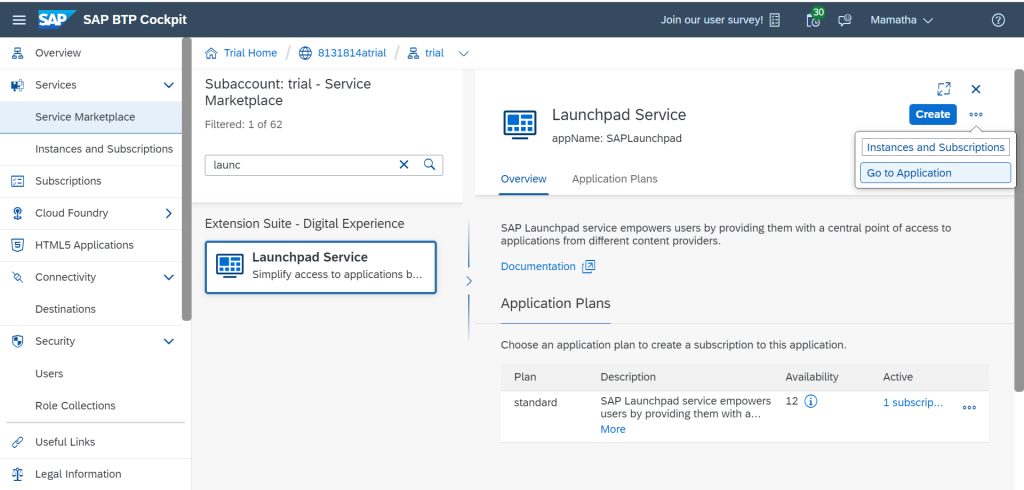
In BTP Cockpit Go to “Service Market Place” and search for “Launchpad Service”.
Step 15:
Now click on Tile and then select “Go to Application”. It will navigate you to Launchpad service.
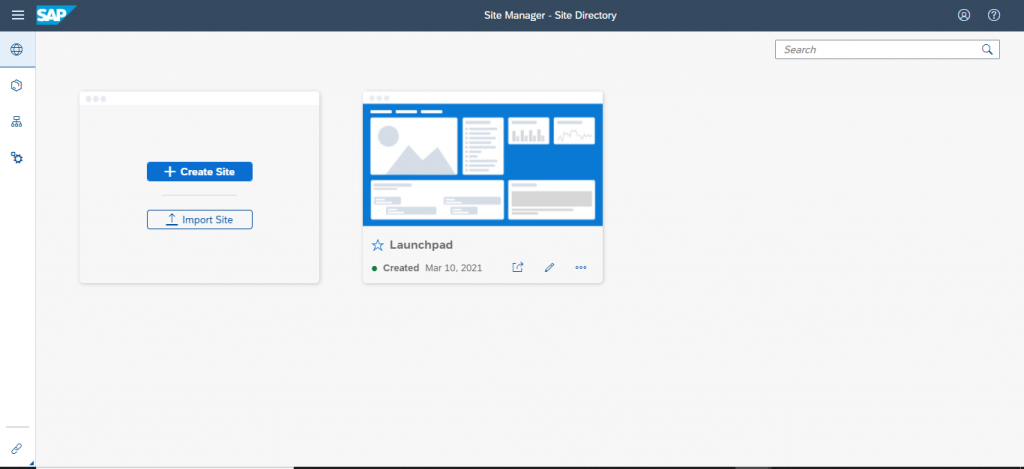
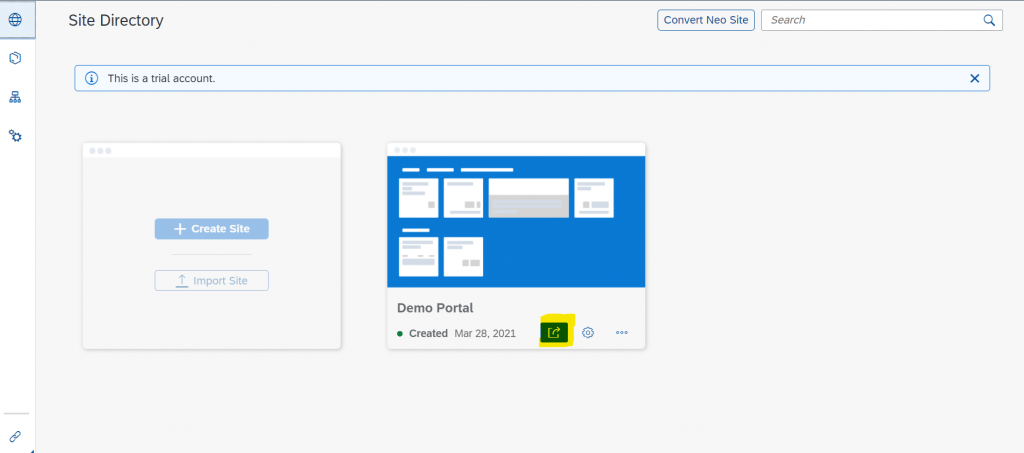
Create a New Site in for Launchpad.
Step 16:
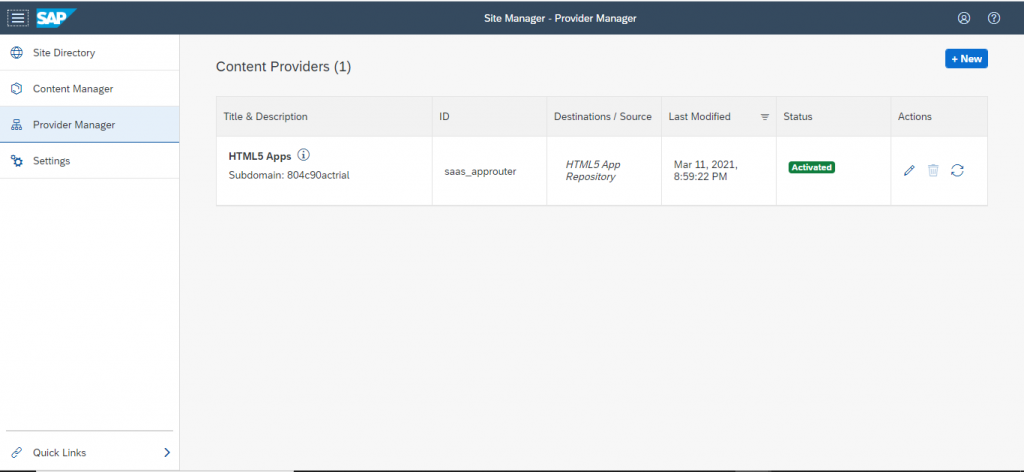
Now go to “Provider Manager” and Activate, click on refresh icon to get the latest Deployed HTML5 Apps in Actions Tab.
Step 17:
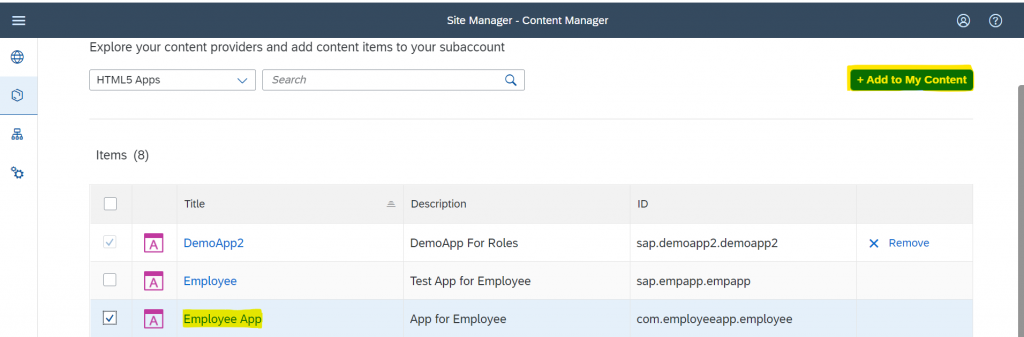
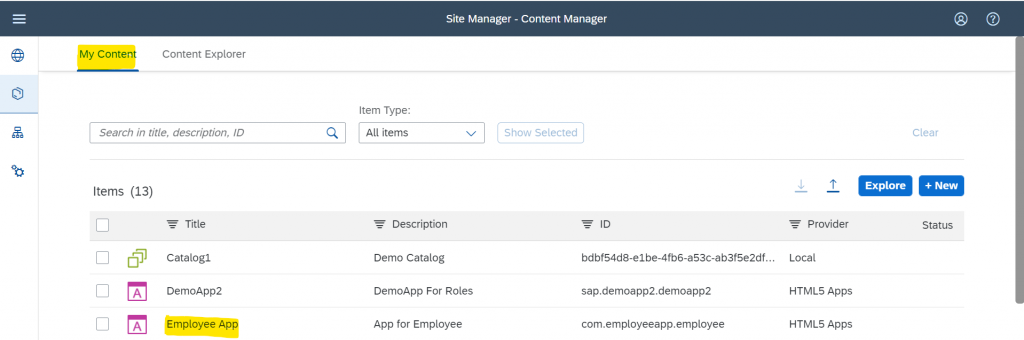
Select Content Manager in left Side panel, in combo box select HTML Apps you will find the Apps Deployed to Cloud Foundry in BAS.
All the Deployed Apps will appear here you can select the Required App for Role Configuration and click on “Add to My content” Button on top right corner. Then that App will be Added in the Content Explorer Tab.
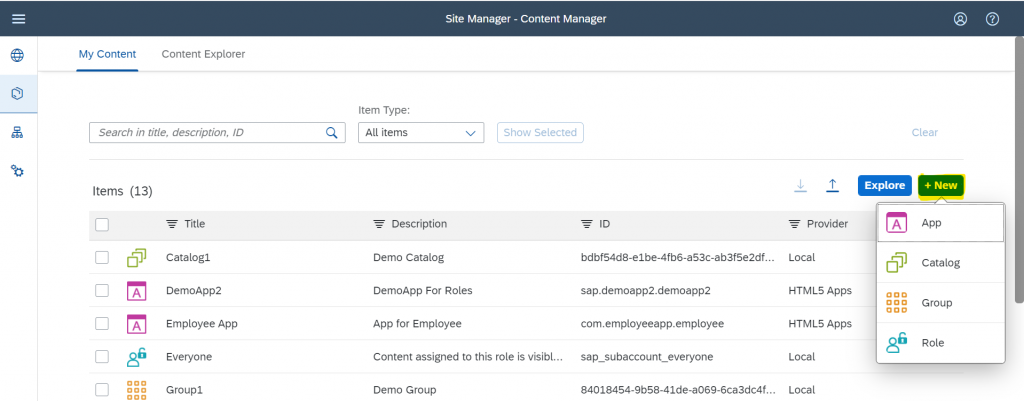
Step 18: Now go to “Mycontent” select the Deployed App now add the Catalog, Group, Role to that Application.
Step 19: By clicking on “New” Button you can create the Catalog, Group, Role as shown below:
Step 20: Create Catalog, Click on Edit and Assign the EmployeeApp to Catalog as shown below:
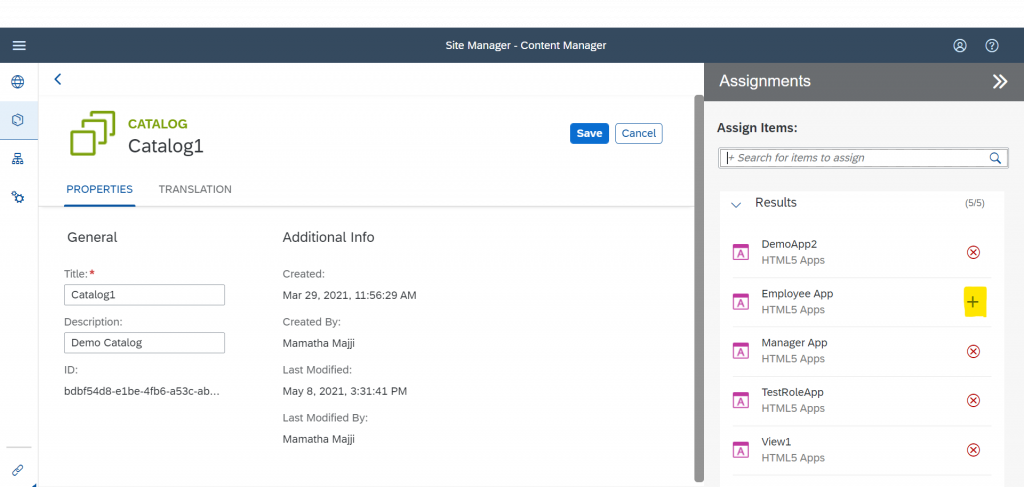
So that EmployeeApp will be added to that Catalog.
Step 21:
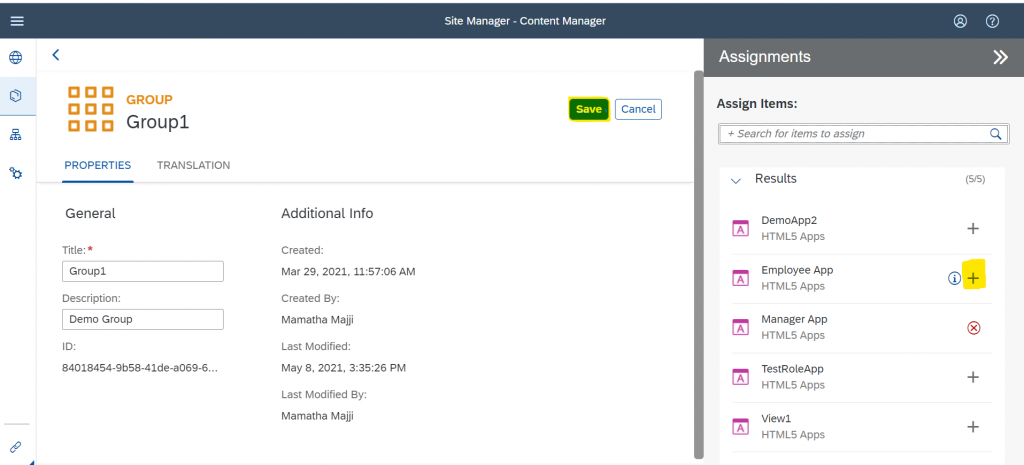
Create the Group, Click on Edit and assign the EmployeeApp to that group as shown below:
We can create different groups to place our apps in that particular group.
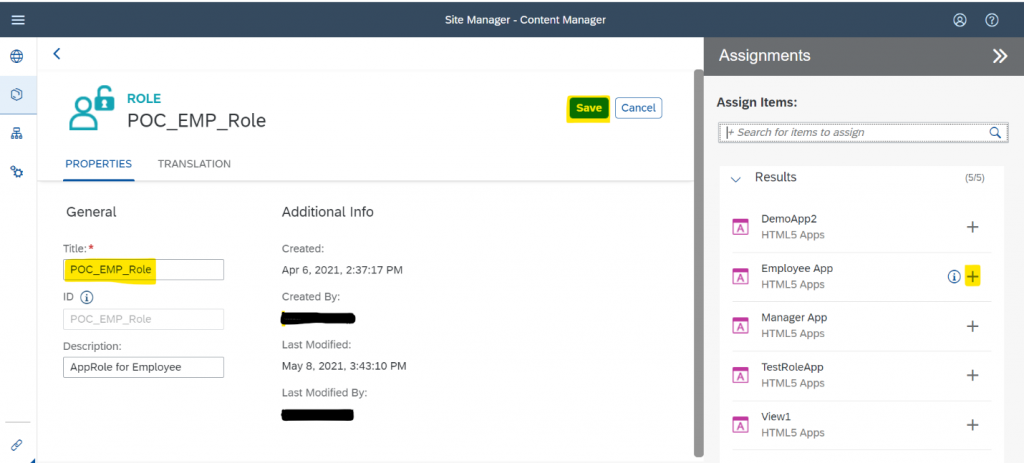
Step 22: Create a Role, Add the EmployeeApp to that Role as shown below:
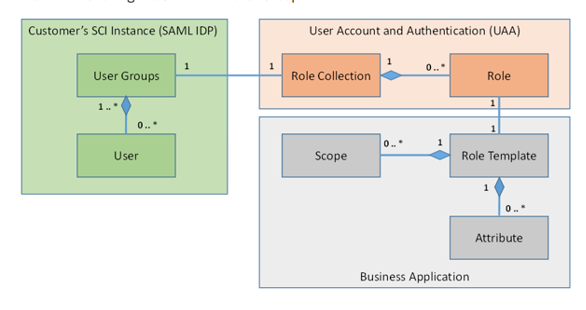
To Provide Authorization using users, Role Template in BTP as shown in below Architecture.
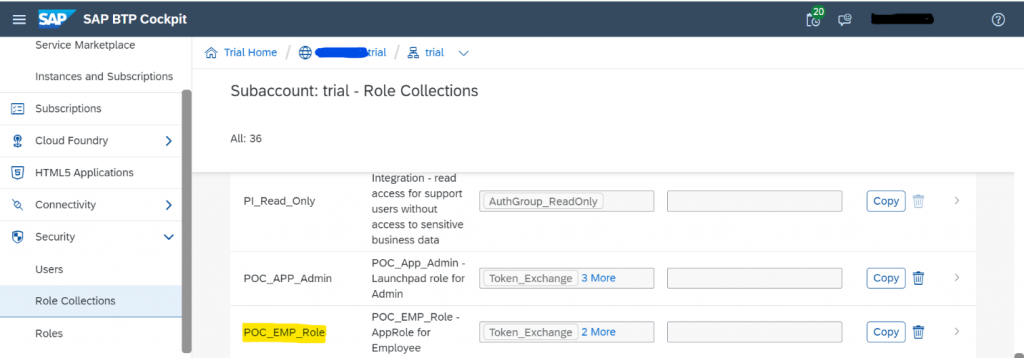
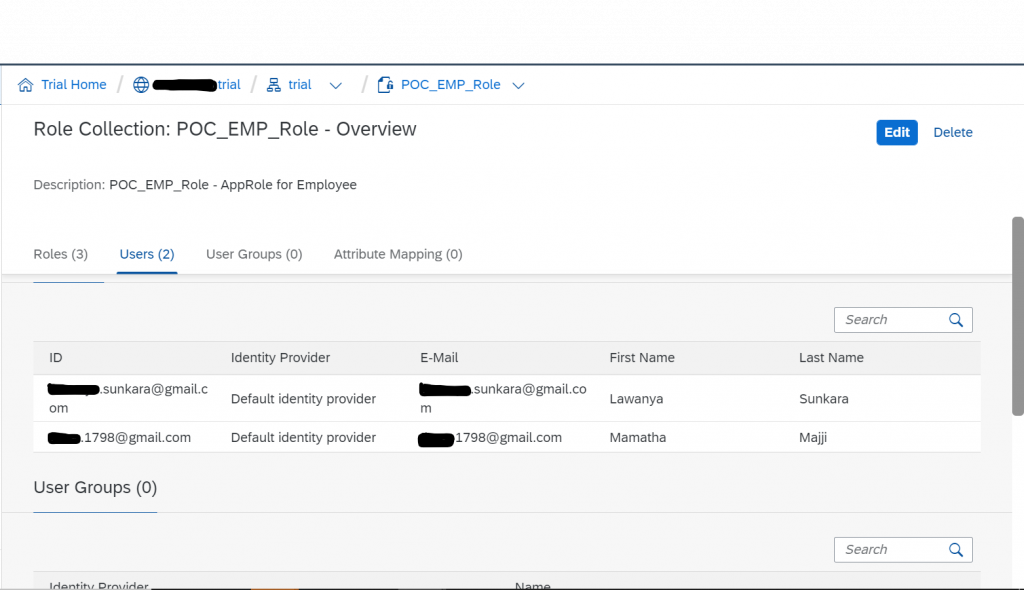
Step 23: The created Role Title will be automatically created in SAP BTP Cockpit under Role Collection Section as shown below:
For one Role we can add multiple Apps which all comes under that role.
Step 24:
Click on that Role created in FLP for that role, now Add created role in BAS(Xs-security.json) to this Application and add the Role Template and User Names who want to Access the Application for Application identifier.
Click on Edit button and in Roles Tab, Role Name as Value help Request click on that, here you can Search for the created role in comboBox and the deployed application namespace from BAS will available here as Application Id.

Click on Add then RoleName ,Role Template and Application Identifier will be added as shown in Step 24 image.
Step 25:
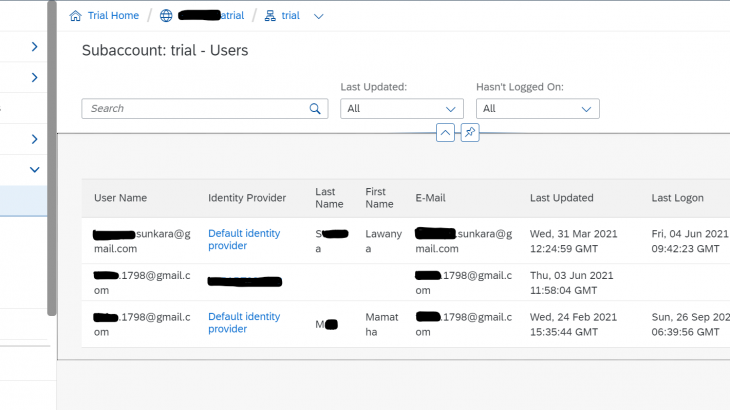
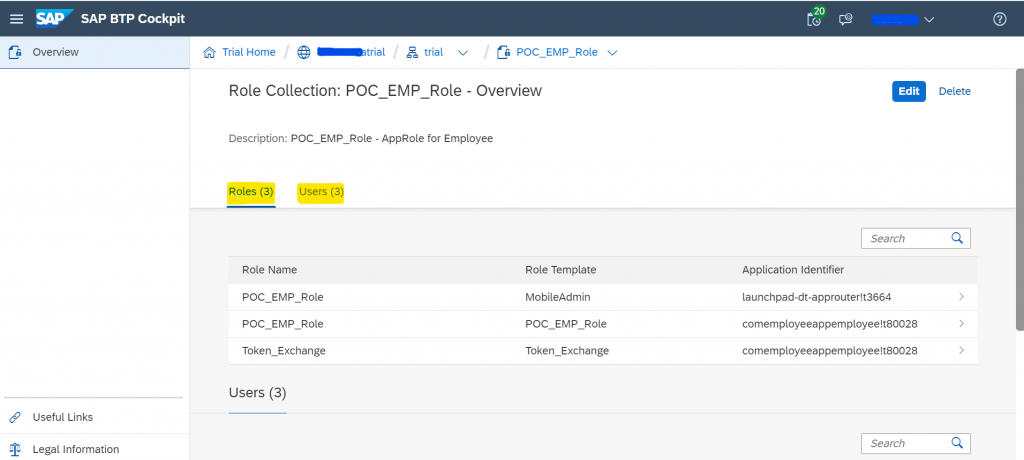
In BTP under Security>Users we can create the list of Users with their BTP Usernames or MailId, only these added users can able to add to different Role Template applications.
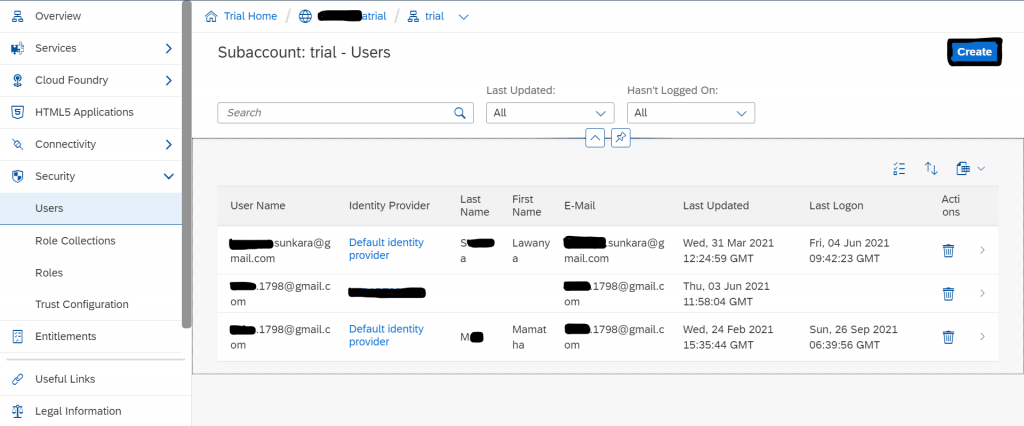
Under Users Tab added two user names for that Role Collection and Application identifier which are BTP Account User names are added in Users Section.
The users which are added for this Role Template and Application Identifier are able to see the Apps in Launchpad.
Repeat the Steps from 1 to 25 for another App called Manager App and Admin App.
In that Manager App create the another role in scopes and add that App to same catalog (Either we can add in Different or Same Catalog) and for different group in Launchpad Service.
Step 26: Now go to Site Directory it will take you to Launchpad. This Launchpad URL can be given to other users who are added in BTP Security>Users. According to their role added in related applications are visible to those users.
Step 27:
For the MM User who has only Access to Employee and Admin Apps.
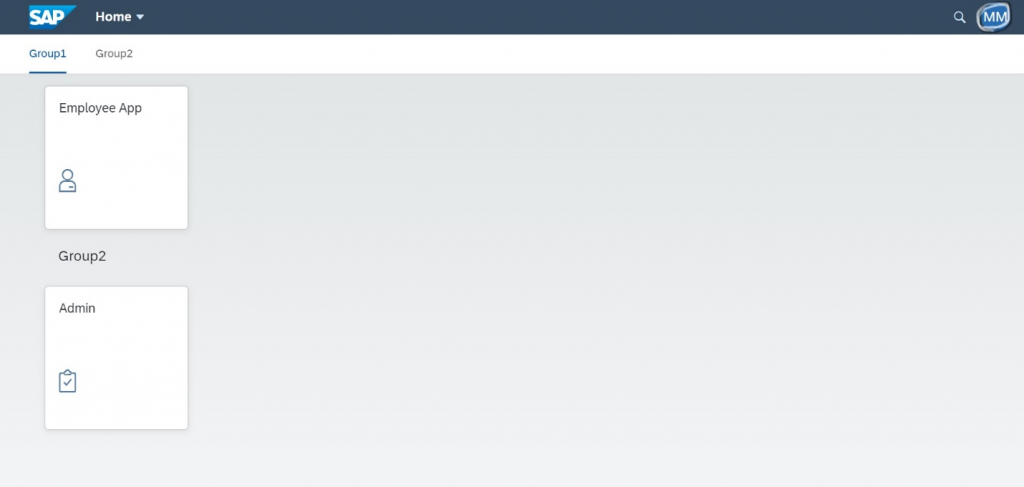
- The User LS who has Access to Both Manager, Employee and Admin Apps.
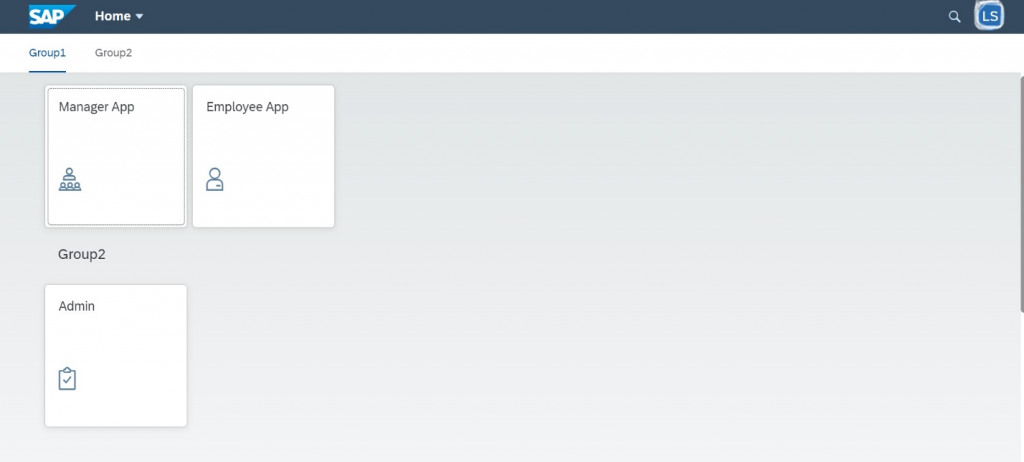
This is the Launchpad site for Configured Apps for FLP under catalog and group. Displaying the tiles(apps) according to the user’s role.


