Single SignON is common ask of business to enable users to login with centralized authentication mechanism, usually it is AD credentials. This blog post talks about configuring Single Sign ON (SSO) for SAP S/4HANA Fiori application for an enterprise. The protocol used is SAML2 that is ideal for HTTPS connection.
This procedure contains steps for components individually such as Web dispatcher and SAP S/4HANA ABAP stack. As result of this procedure, end users are expected to use Windows AD credentials to gain access to Fiori login page.
Following factors are assumed to improve the understanding :
- Fiori is embedded in SAP S/4HANA.
- SAP S/4HANA is a Production environment with High Availability on Azure Infrastructure platform.
- Use Azure AD as Identity Provider.
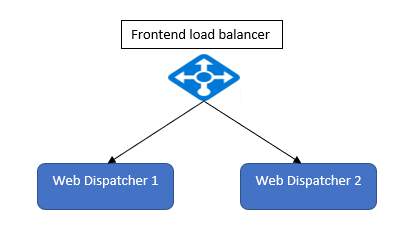
- High availability for Fiori URL is setup as per below diagram.
- Load balancer backend pool pointing to two web dispatchers.
- Operating system is SUSE Linux.
- Engage Azure Cloud Security team for meta data and certificate files.
- Fiori Launchpad URL should not contain port information e.g. to use 443 port.
Web dispatcher Configurations
[For reference purposes we use following sample naming conventions
- Two web dispatchers as WP1 and WP2
- Common name of SAP S/4HANA Front end URL as PRDS4.DOMAIN.COM
- SID of Production SAP S/4HANA as S4P]
Step 1: Apply configurations SAP Web Dispatcher Kernels as per OSS note “421359 – ICM: Binding ports < 1024 on UNIX”
Step 2: Edit profile to include following parameters on both WP1 and WP2.
#———————————————————————–
# Back-end system configuration
#———————————————————————–
wdisp/system_0 = SID=S4P, MSHOST=lbs4pascs.domain.net, MSPORT=8100, SRCVHOST=prds4.domain.com: *
#———————————————————————–
# Configuration of maximum number of concurrent connections
#———————————————————————–
icm/max_conn = 500
#———————————————————————–
# SAP Web Dispatcher Ports
#———————————————————————–
icm/ssl_config_0 = CRED=S4PRD.PSE, SNI_CREDS=S4PRD.PSE
icm/server_port_0 = PROT=HTTPS, PORT=443, PROCTIMEOUT=600, SSLCONFIG=ssl_config_0, EXTBIND=1
icm/server_port_1 = PROT=HTTP, PORT=8080, PROCTIMEOUT=600
icm/HTTP/redirect_0 = PREFIX=/, FROM=*, FROMPROT=http, PROT=https, FOR= prds4.domain.com:*, HOST= prds4.domain.com,
wdisp/add_client_protocol_header = true
icm/HTTPS/forward_ccert_as_header = true
icm/trace_secured_data = TRUE
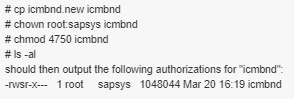
exe/icmbnd = /usr/sap/WP1/SYS/exe/run/icmbndStep 3: Create alias in DNS for lbs4prd.domain.net as prds4.domain.com.
Step 4: Generate CSR request :
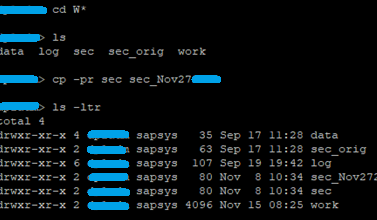
Login to WP1 host and backup security directory before CSR request generation.

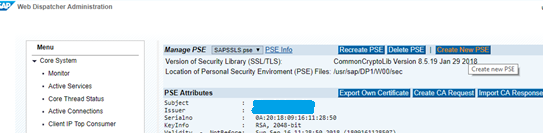
Open Web Dispatcher admin page
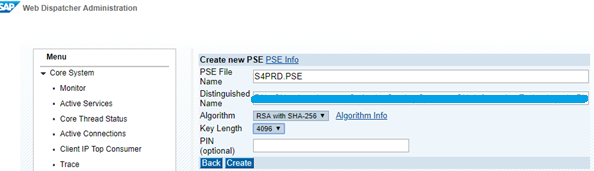
Example URL : https://<WP1 hostname>/sap/wdisp/admin/public/default.htmlClick Create New PSE
Distinguished Name convention:
CN=prds4.domain.com, O=<Org name>, OU=Information Technology, L=<Location>, SP=<State>, C=<Country>and click Create
Now Click on Create CA Request

This will generate the key.
Extract the CA request in notepad as .txt file.
Repeat steps for WP2.
Send email to Cloud Security with the following :
1. Attach both CSR files and request to generate a signed certificate. Note : You may choose to get it signed internally or externally based on customer requirement to have Fiori page hosted on intranet or internet respectively.
2. Request for certificate file created along with meta data generation.
3. Request metadata by giving following details.
S4HANA Production:
Single Sign ON URL : https://prds4.domain.com/s4
Identifier : Fiori_PRDS4
Reply URL : https://prds4.domain.com/s4
Step 5: Import SAP S/4HANA self-certificate to Web dispatchers.
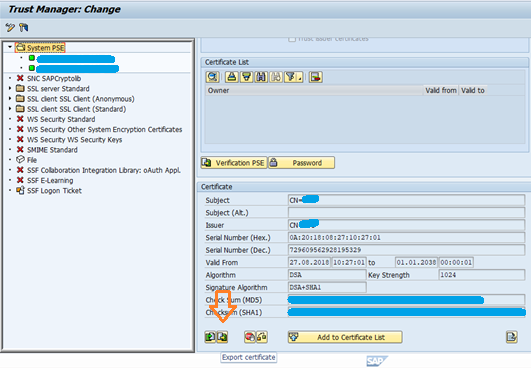
Login to SAP S/4HANA and go to STRUST Tcode.
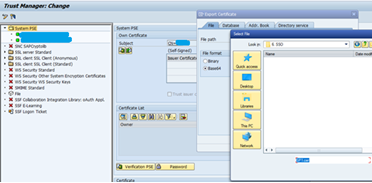
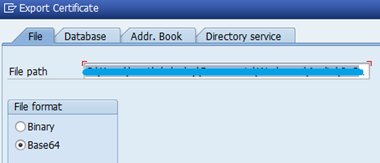
Select self certificate and click on Export Certificate.
Open WP1 admin page and click on Import Certificate.
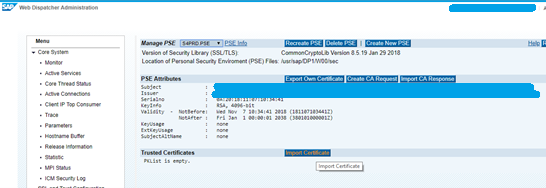
Select the exported file and click Import.
Imported Certificate message appears.
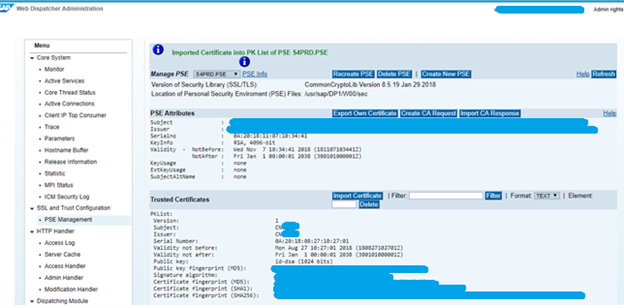
Repeat steps to import SAP S/4HANA self certificate into WP2.
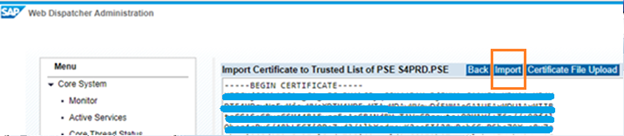
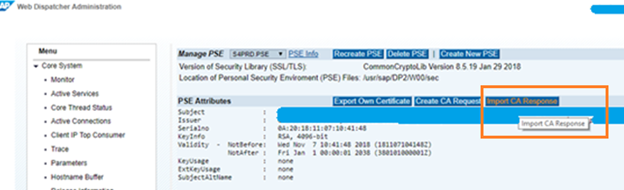
Step 6: Import CSR Signed certificates in respective web dispatchers
Take backup of security directory
To import the chain key, go to web dispatcher admin page
Open each file using notepad and carefully concatenate content of each certificate in following order into make chain key in a new txt file.
Sequence of certificates import.
- CA Root
- UserTRUST
- CA5
- Own certificate
Paste the concatenated entire certificate chain as shown below and click on Import.
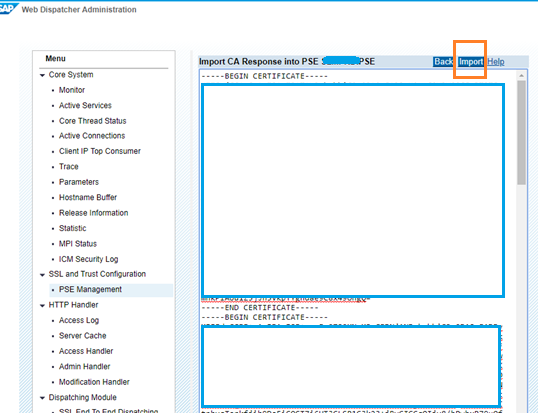
Imported response message appears.
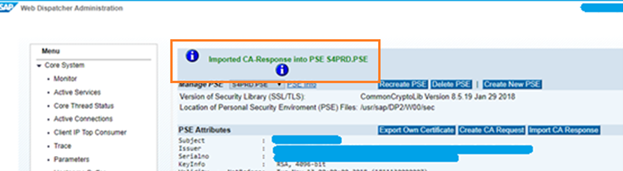
Repeat the steps in WP2
Verify the certificates by tying the Fiori URL on browser. https warning should not appear. That’s the indication that certificates are applied correctly.
S4HANA Configurations
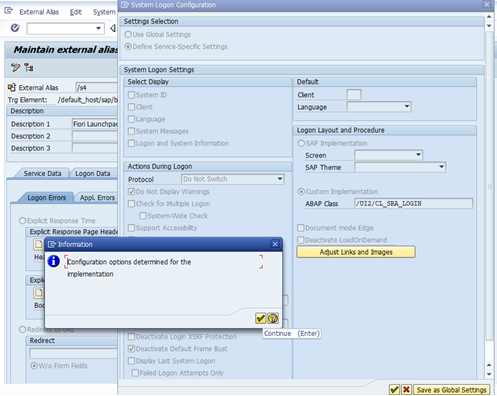
Step 1: Create shortcut SICF shortcut for S4
Login to S4HANA and goto Tcode SICF.
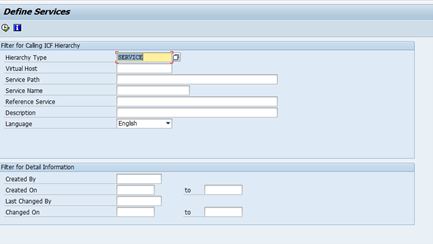
Click on External Aliases
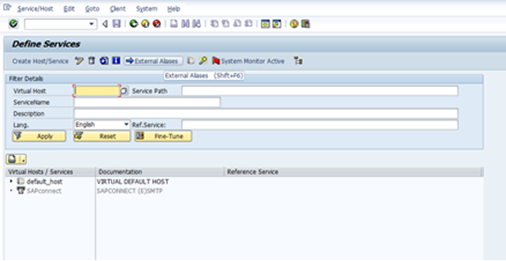
Click Create
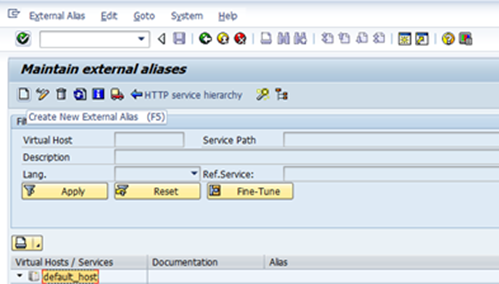
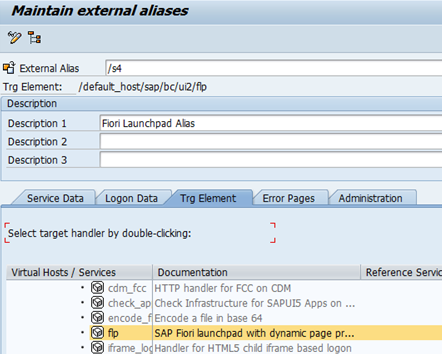
Here we’ve used /s4 as alias under /default_host/sap/bc/ui2/flp path.
Under Error Pages tab, Click on Configuration
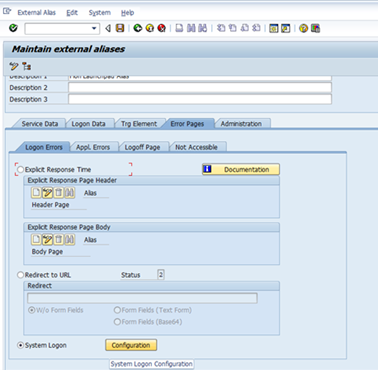
Select Protocol as Do NOT Switch
Check Do NOT Display Warnings checkbox and
Select Custom Implementation with ABAP Class as /UI2/CL_SRA_LOGIN
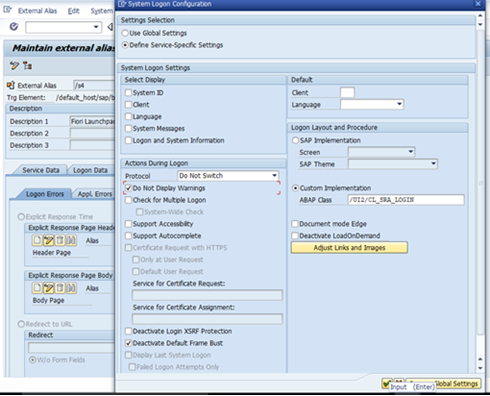
Click OK to continue.
Step 2: Activate SICF as per Notes:
- 1088717 – Active services for Web Dynpro ABAP in transaction SICF
- 2389051 – ICF service for Clickjacking Framing Protection is not active
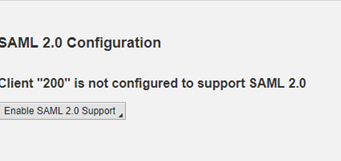
Step 3: Import XML Metadata file.
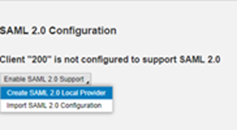
Login to SAP S/4HANAand go to Tcode SAML2 and click on Enable SAML2.0 Support
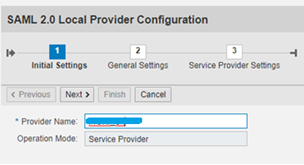
Click Create
Provide Name should be same as when requested. In our case it was Fiori_PRDS4.
Click Next
Selection Mode as Automatic and Artifact resolution Service Mode as Enabled.
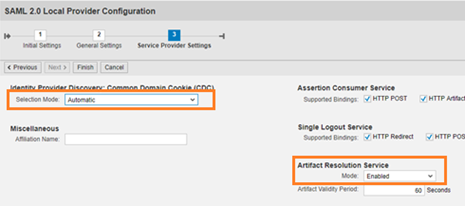
Click Finish
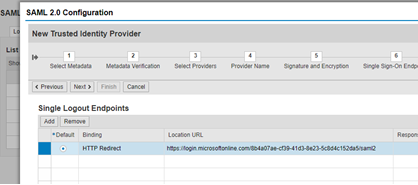
Next screen appears as below.
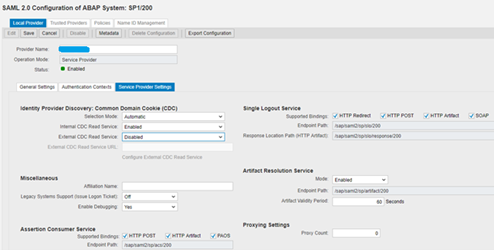
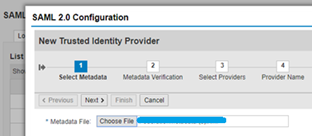
Click on Trusted providers and select Upload Metatdata file.
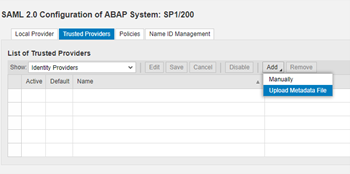
Select the metadata file downloaded.
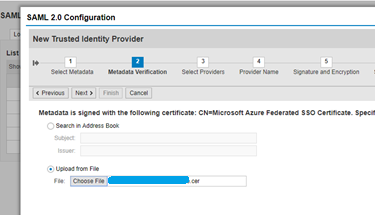
Click Next and select the certificate generated along with meta data.
Click Next (no change)
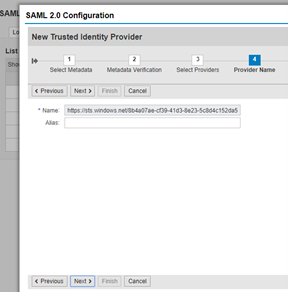
Click Next (no change)
Click Next (no change)
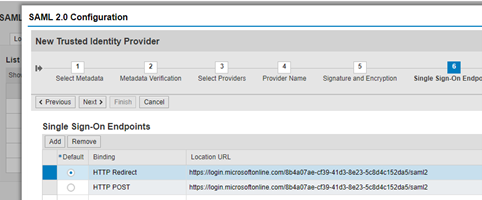
Click Next (no change)
Click Next (no change)
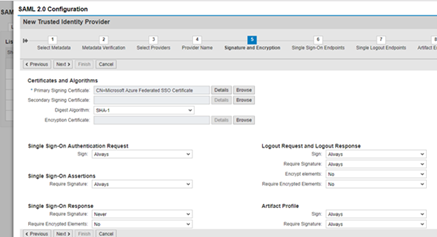
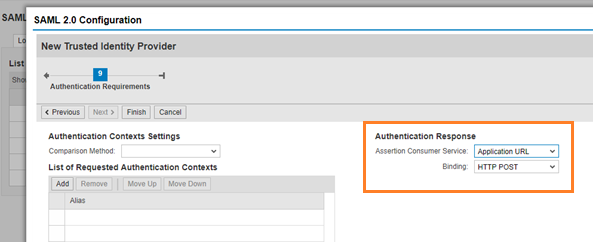
Select Assertion Consumer Service as Application URL
Binding as HTTP POST
Click Finish.
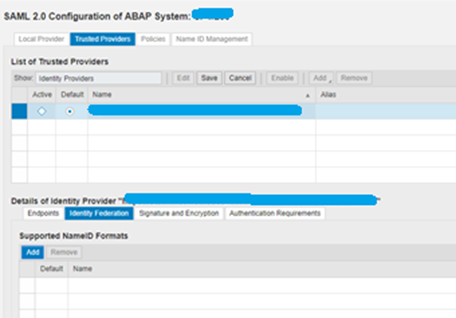
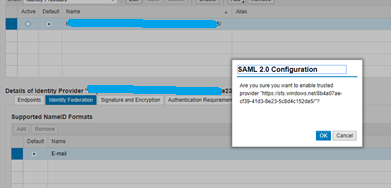
Add Identify Federation.
Under Trusted Providers tab, select Identify Federation and click on Add.
Select Email and Click Ok
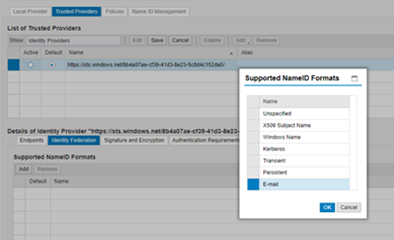
Entry for NameID is added now.
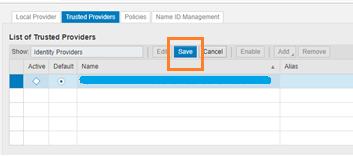
Click SAVE
Click Enable
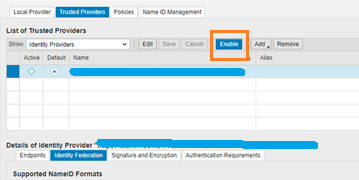
Click Ok.
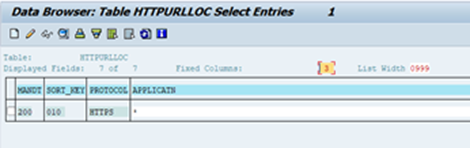
Step 3: Maintain table HTTPURLLOC
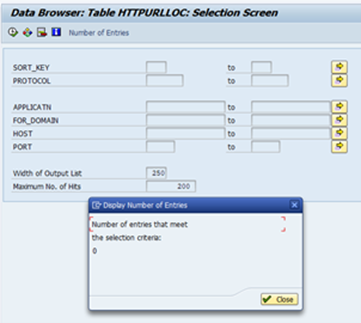
Go to SE16 Tcode and check for existing entries
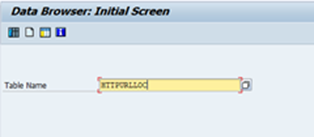
Since it is new install, no entries existing previously.
Maintain entry for port 443: For example: prds4.domain.com
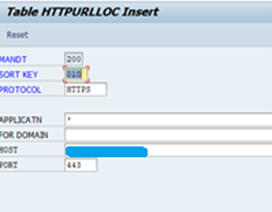
After adding entry, table looks as below.
SAP Security requirements
For a user to successfully get authenticated following factors should be complied from security perspective.
1. The Email ID maintained in S4HANA SU01 should be same email address as configured in Azure domain.
2. User should contain valid AD account for SSO to work in S4HANA.
3. (Optional) User to have relevant Fiori roles assigned for respective tile to be visible.
Test Sigle Sign ON
Steps to test the SSO URL :
1. Place Fiori URL i.e. https://<lb alias>.domain.com/s4 in our case example URL https://prds4.domain.com/s4 and hit Enter. Preferably browser with in-cognito mode to avoid cache related issues.

2. URL will automatically redirect to Microsoft login prompt to give AD login ID and password.

3. After authentication, Fiori Home page appears.
After following the individual steps for Web Dispatcher and S4HANA, you should be able to setup Single Sign ON is configured for SAP S/4HANA Fiori (on HA) launch pad.


