Configuring single sign-on to SAP systems is one of the most common procedures a basis consultant performs and more so in the era of hybrid IT landscapes. In this blog, you will learn how to configure SAML based Single Sign-on for SAP Fiori / SAP NetWeaver using Azure Active Directory (Azure AD). I will also talk about advanced scenarios like the use of reverse proxies as well as troubleshooting on some common issues.
Also Read: What is SAP Fiori System Administration Certification?
Scenario
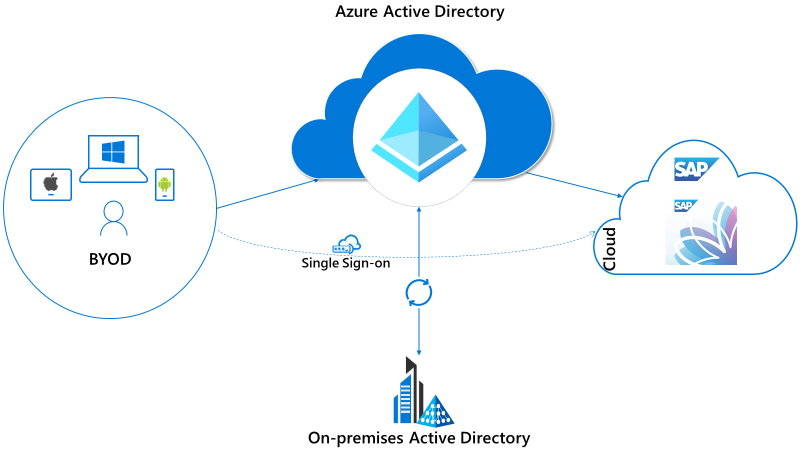
The scenario is SAML based Single Sign-on for SAP Fiori launchpad using Azure Active Directory. This is a Service Provider initiated single sign-on using front-channel communication and can be used for Fiori or NetWeaver web services.
- SP or Service Provider: SAP NetWeaver/ Fiori (NetWeaver 7.53)
- IdP or Identity Provider: Azure AD
- Service Provider initiated authentication
- SAML Mode: Front-channel communication – Front-channel communication is comparatively faster and does NOT need a direct connection between IdP and SP. Back-channel communication on the contrary, is slower as it needs more roundtrips to authenticate a user and needs a direct connection (firewalls) between IdP and SP.
- Azure Application Gateway as a Reverse Proxy: If you are using a reverse proxy in front of your SAP application, then refer to Special Scenarios and Troubleshooting section at the bottom.

Prerequisites
- You need an Azure AD Tenant that will act as SAML 2.0 identity provider and (someone with) appropriate permissions to make changes. In this blog, I will create one in my own Azure subscription.
- You have configured your SAP system to use HTTP security sessions. Adjust the parameters based on your organization requirements.
- Activate the following SICF services:
/sap/public/bc/sec/saml2
/sap/public/bc/sec/cdc_ext_service
/sap/bc/webdynpro/sap/saml2
- Optional: Activate the following SICF services to run the Security Diagnostic Tool and create traces for troubleshooting:
/sap/bc/webdynpro/sap/sec_diag_tool
/sap/public/bc
Procedure
Configure Azure AD
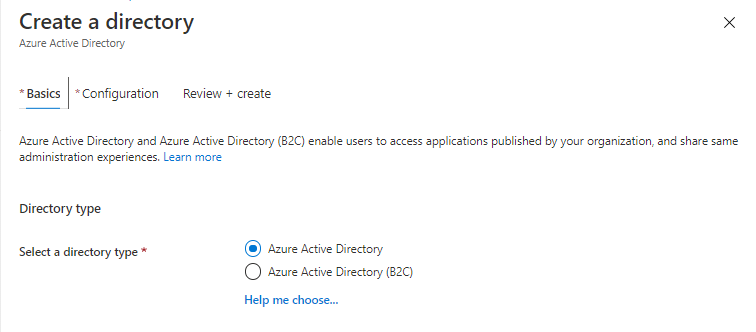
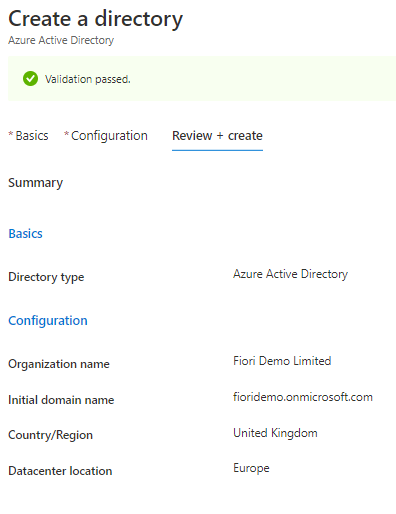
1. Create a tenant in Azure AD (If you don’t have one)
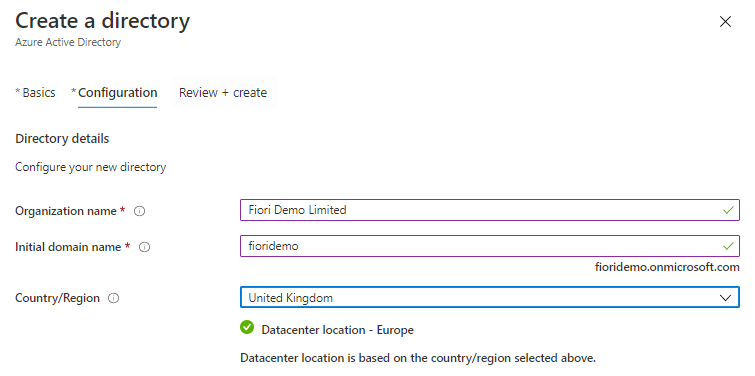
You will most likely have an Azure AD tenant in your organization which will act as a SAML 2.0 Identity Provider, I am creating one here for demo.
By default, you will create a basic domain name at ‘onmicrosoft.com’. You can add a domain name that your organization already uses, such as ‘contoso.com’.
Go to Microsoft Azure Portal –> Active Directory –> Create a Tenant
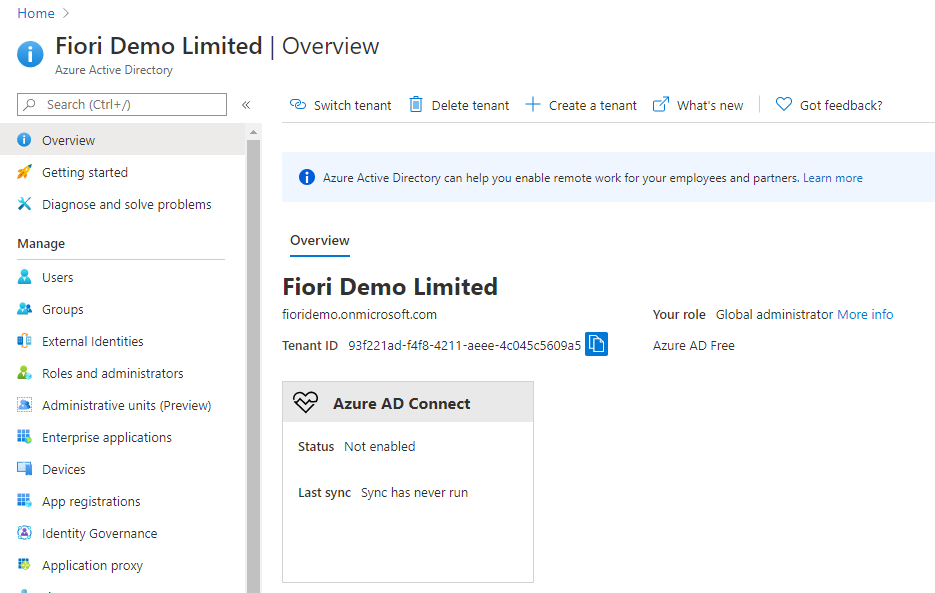
2. “Switch Tenant” to the new directory

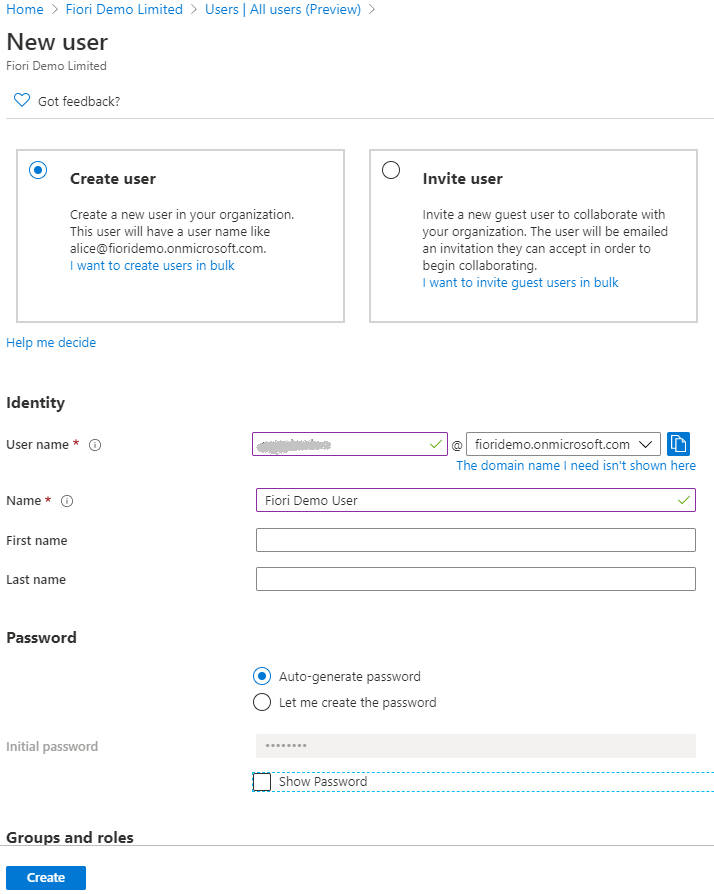
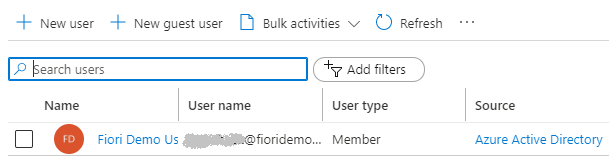
3. Create a new user in Azure AD
Go to Users –> New User
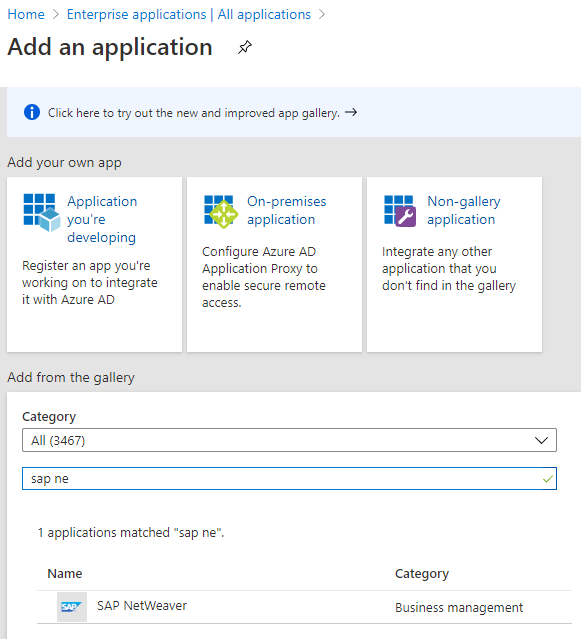
4. Add a new Enterprise Application from the gallery of type SAP NetWeaver or SAP Fiori
Go to Enterprise applications –> New application.
Find SAP NetWeaver or SAP Fiori. It doesn’t really matter which one you choose.
However, it is likely that you will have or will end up with multiple enterprise applications in your Azure AD tenant for the same category. Therefore, consider adding information such as environment (dev, prod, etc), SID, usage (Fiori), etc to the name of your new application. For instance, I named my application SAP NetWeaver Fiori – DEV.
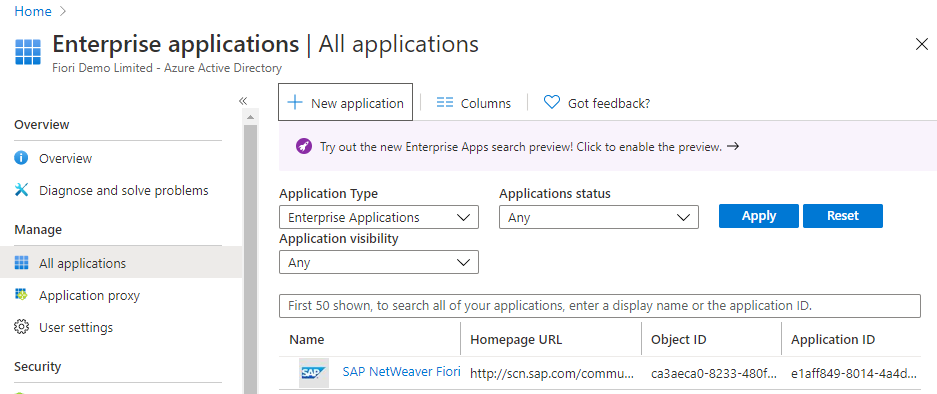
5. Assign your new user access to the newly created application
Go to Enterprise applications –> application.
Click on the new application.
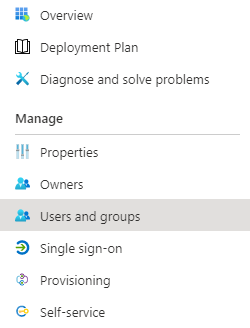
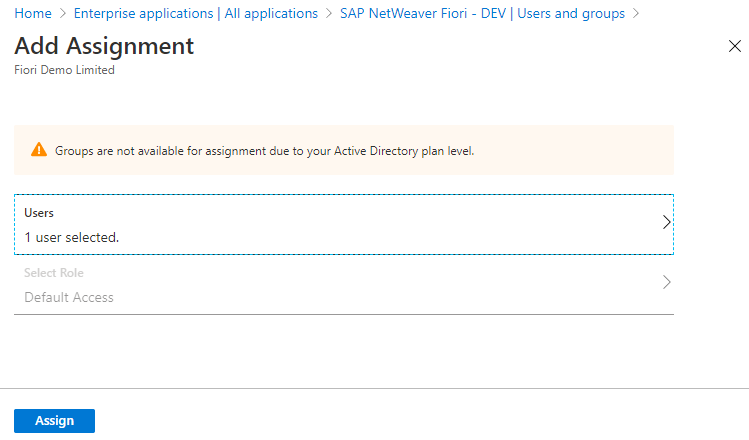
Then click Users and groups –> Add User.
Add the new user to your new application. I chose Default Access, but you can create and assign roles depending on your requirements.
6. Set up Single Sign-on with SAML in Azure AD
Go to your application, then click Single sign-on and then SAML.
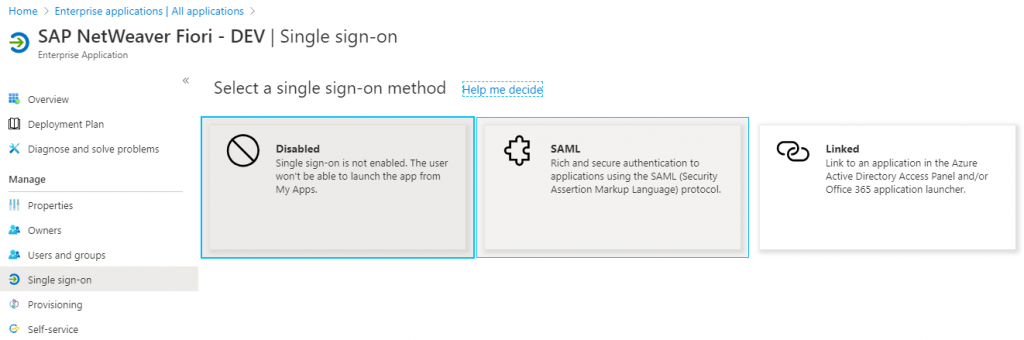
There are three key sub-steps here.
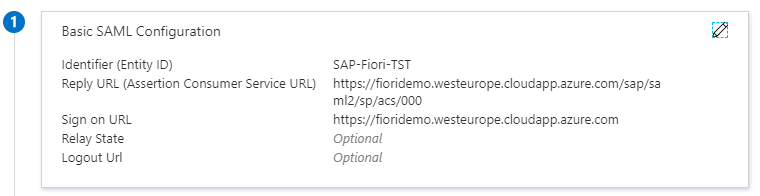
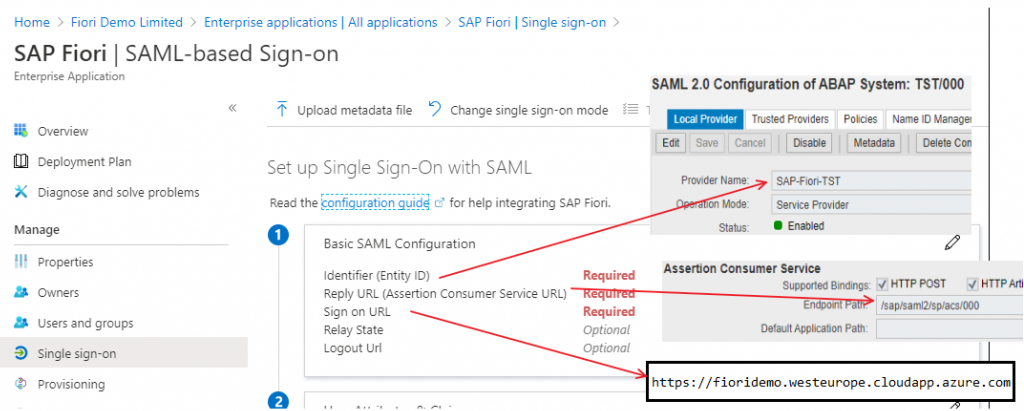
6.1 Basic SAML Configuration:
In this step, you assign Service Provider identity and URLs of your SAP NetWeaver system to your SAP Enterprise Application in Azure AD. I am performing all Azure AD configurations first before going into SAP configurations. However, it is also possible to perform the subsequent step “Create SAML 2 Local Provider” before this step.
Key points to note here are:
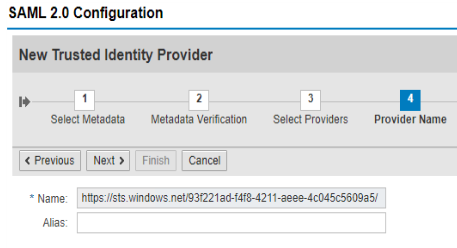
- The Identifier (Entity ID):
- The “Provider Name” in SAP SAML Local Provider (step 7) must be the same as this.
- It doesn’t have to be in the form of a URL as the on-screen hint suggests.
- The “Provider Name” in SAP SAML Local Provider (step 7) must be the same as this.
- ACS (Assertion Consumer Service) URL:
- Remember that this must be an HTTPS URL. HTTP isn’t allowed.
- Ensure that you use the correct SAP client number. I am using client 000, but in a real-life scenario, you will have a different client number.
- If you have a reverse proxy in front of your SAP application, then use the URL of reverse proxy.
- We are configuring this step manually. The other way is to first create local provider in SAP, download SAP Metadata File and then come here and upload the file. If you are importing Metadata File from SAP and if you are using a reverse proxy, then remember to access SAML 2.0 configuration UI via the reverse proxy URL. This will ensure that service provider metadata will contain the correct endpoint URLs.
- Remember that this must be an HTTPS URL. HTTP isn’t allowed.
Click the edit icon next to Basic SAML Configuration.
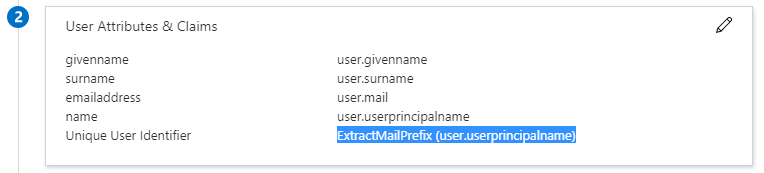
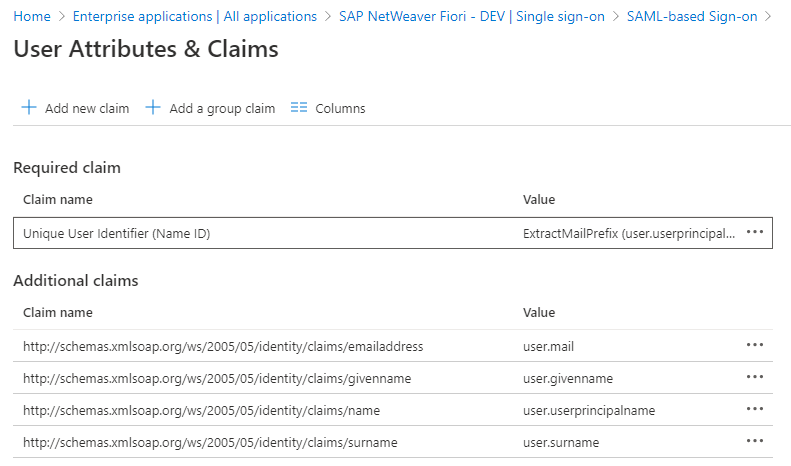
6.2 User Attributes & Claims
The SAP application expects the SAML assertions to be in a specific format.
When a user authenticates to the application, Azure AD issues the application a SAML token with information (or claims) about the user that uniquely identifies the user. By default, this information includes the user’s username, email address, first name, and last name. You might need to customize these claims if, for example, the application requires specific claim values or a Name format other than username.
During SAML single sign-on, by default, Azure AD will pass the user name or Name ID claim as <username>@yourdomain.onmicrosoft.com whereas the SAP User ID (user02.bname) will be <username>. There are several ways to map Azure AD claim to SAP user, the two main ones are:
- One way is to use Claim Transformation in Azure AD as below.
- Another way is to use the default (untransformed) Name ID claim (user.userprincipalname) and leverage Alias in SAP user account, in this case you will store <username>@yourdomain.onmicrosoft.com in alias field of the user.
I am choosing claim transformation. If you choose the second option, then you don’t need to change anything in this step.
Click edit button for User Attributes & Claims.
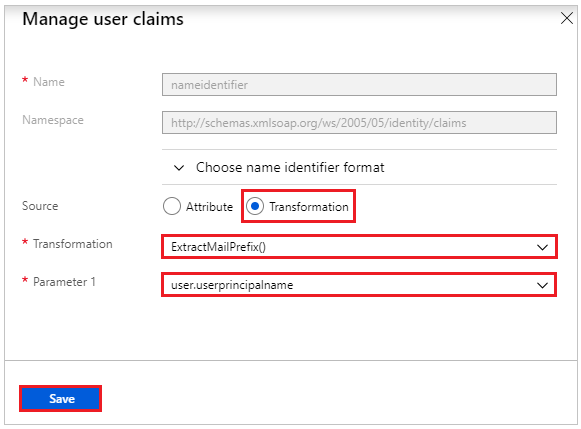
Click on Claim Name Unique User Identifier (Name ID) and apply the Transformation ExtractMailPrefix() to user.userprincipalname. This transformation will do exactly as its name suggests.
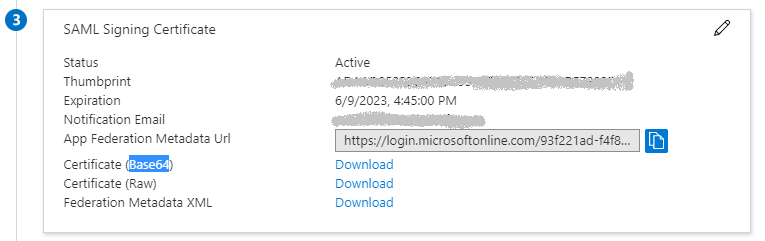
6.3 Download Certificate (Base64) and Federation Metadata XML
Next you need to download the Certificate (Base64) and Federation Metadata XML. You will need these later when adding Azure AD as a trusted provider in SAP.
Configure SAP NetWeaver for Single Sign-on using SAML
Now let’s configure SAP NetWeaver for SAML. There are two main steps, create a Local Provider (Service Provider) and add Azure AD as a Trusted Identity Provider.
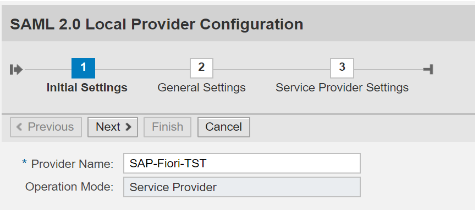
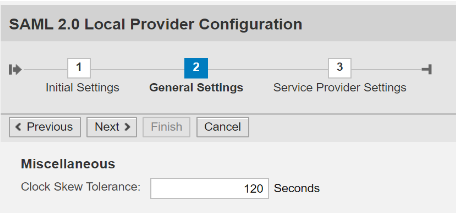
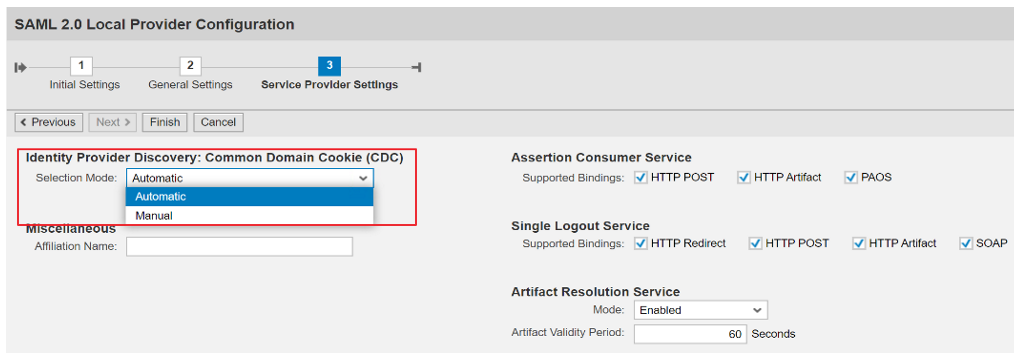
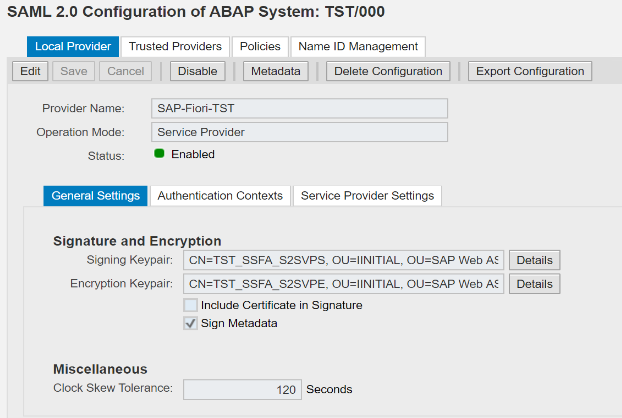
7. Create SAML 2.0 Local Provider
Launch SAML configuration by calling transaction code SAML2 from SAP or directly opening the following SAML URL in a browser and then click “Create SAML 2.0 Local Provider“.
https://<FQDN>/sap/bc/webdynpro/sap/saml2?sap-client=nnn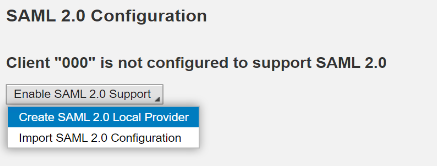
Next, choose Selection Mode Automatic, if you only have one single sign-on method.
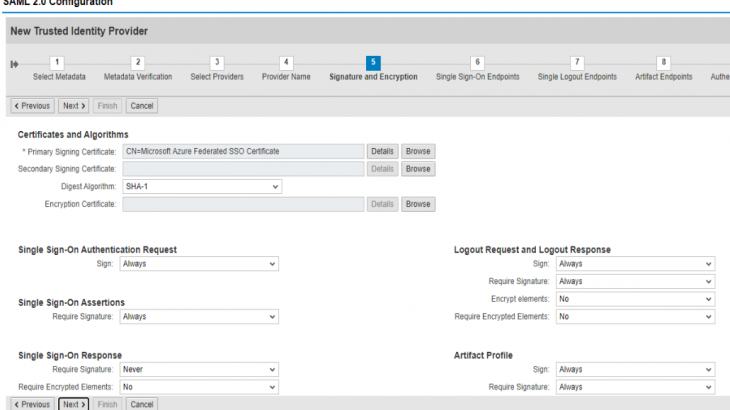
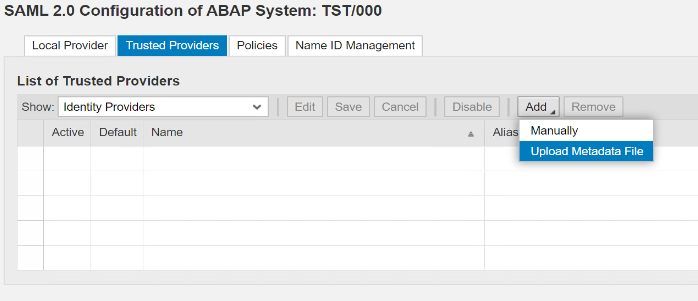
8. Add Azure AD as a Trusted Provider
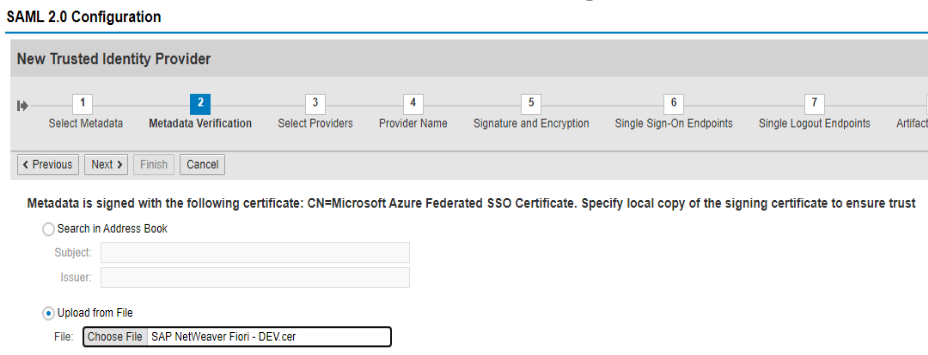
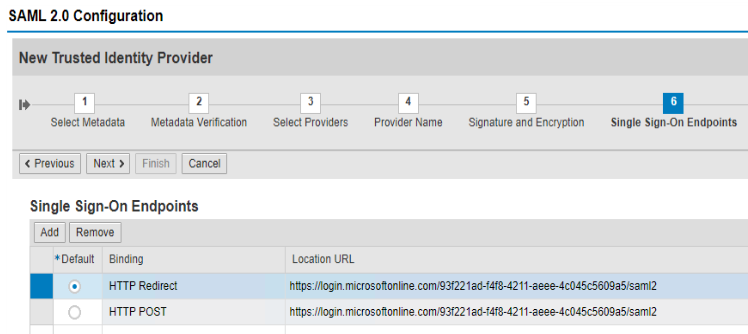
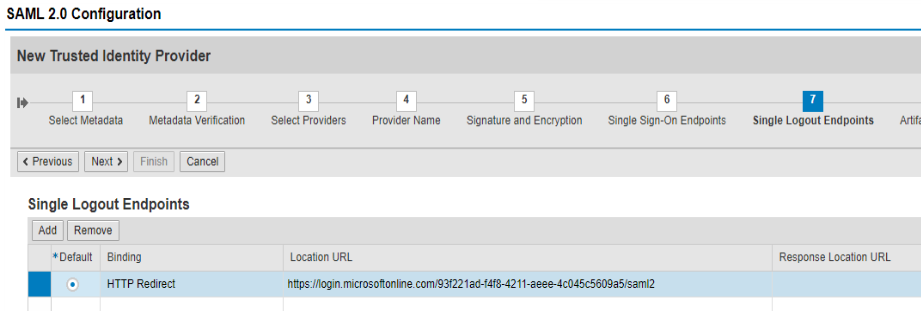
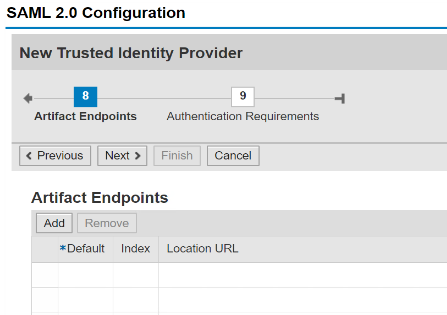
The next step is to introduce Azure AD to your SAP system and register as a trusted identity provider. Keep the Certificate and Federation Metadata XML files from Azure AD configuration handy as you will need them in this step.
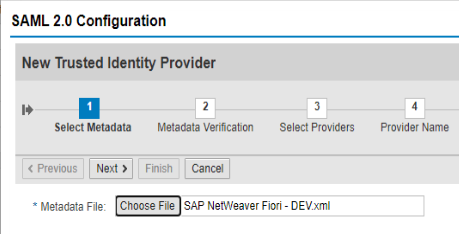
The easiest way is to choose Upload Metadata File. But I recommend using manual option at least once so you can become familiar with the configuration steps and various endpoints. It is also very easy and quick to delete the configuration and re-create before users start using SAML.
Go to Trusted Providers –> Add –> Upload Metadata File
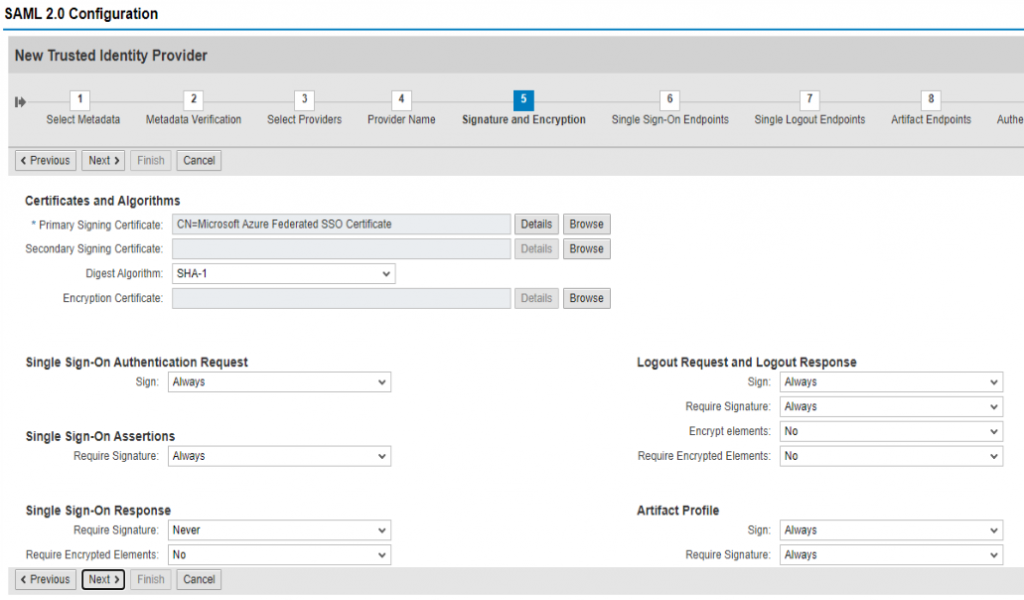
Add Requested Authentication Contexts, if necessary, for your requirements.

Click Finish to save. There is still one change required so click Edit.
Make sure you are on Trusted Providers –> Identity Federation tab. Click Add to add a supported NameID format.
I want to remind you that I chose the Claim Transformation approach. Therefore, I will accept the default User ID Mapping Mode as Logon ID.

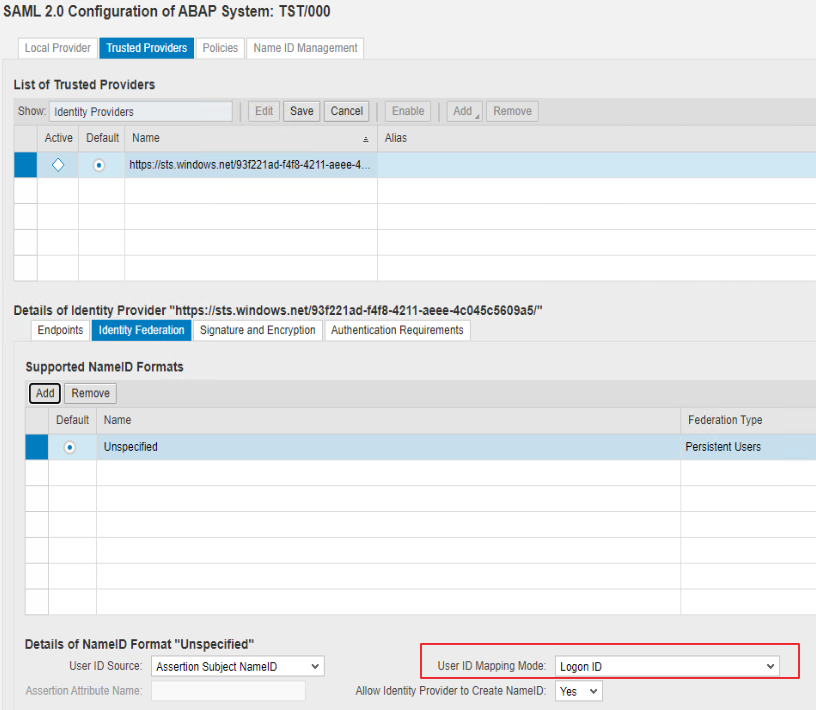
Conditional: If you are not using Claim Transformation in Azure AD, and want to leverage Alias in SAP user account for Azure AD to SAP user mapping (instead of claim transformations in Azure AD), then add E-mail as a supported NameID Format and change User ID Mapping Mode to Logon Alias.
In this case, remember to add the alias in SU01.

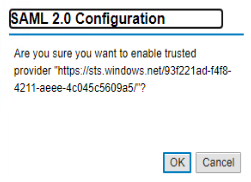
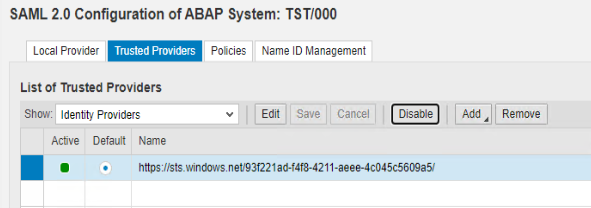
Finally click Save and Enable to activate your Trusted Provider configuration.
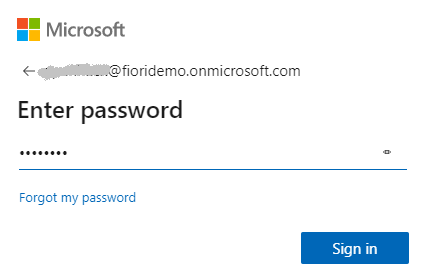
Test
Now that we have configured both Azure AD and SAP, it is time for a quick test.
Remember to test using:
- InPrivate (Edge) or incognito (Chrome) browser window to avoid false test results. (alternatively, clear your browsing cache, close the window, and open a new one)
- the SAP URL that your end users will use to access your SAP application
My Fiori launchpad URL via Azure Application Gateway and HTTPS is:
https://fioridemo.westeurope.cloudapp.azure.com/sap/bc/ui2/flpNavigate to SAP web URL. If Trusted Provider is configured correctly, you should be redirected to Azure AD Sign In screen. Login with your Azure AD credentials.
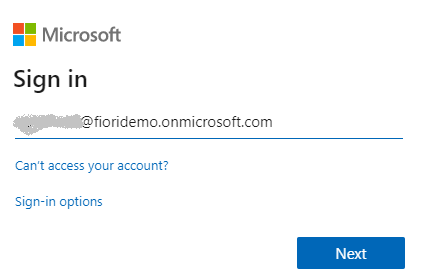
Once authenticated, you will be redirected to and single signed-on into SAP Fiori.


