Introduction:
This blog post shows the steps to create a simple CPI monitoring App using AppGyver.
Configuration Guide:
High level set up guide for AppGyver:
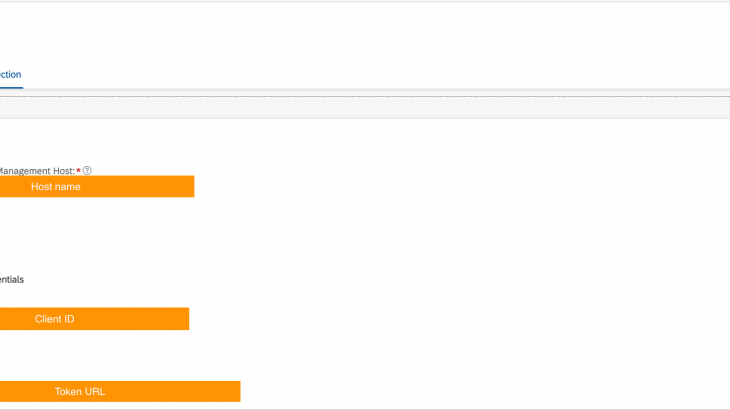
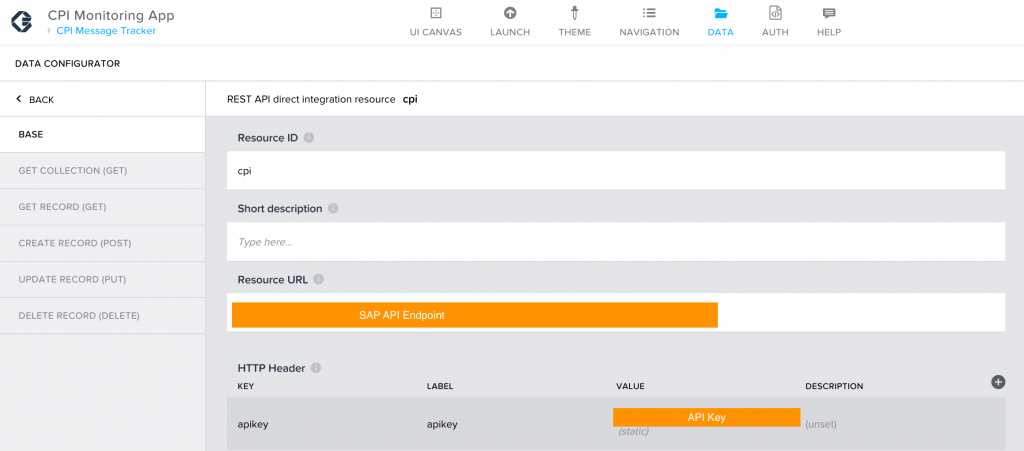
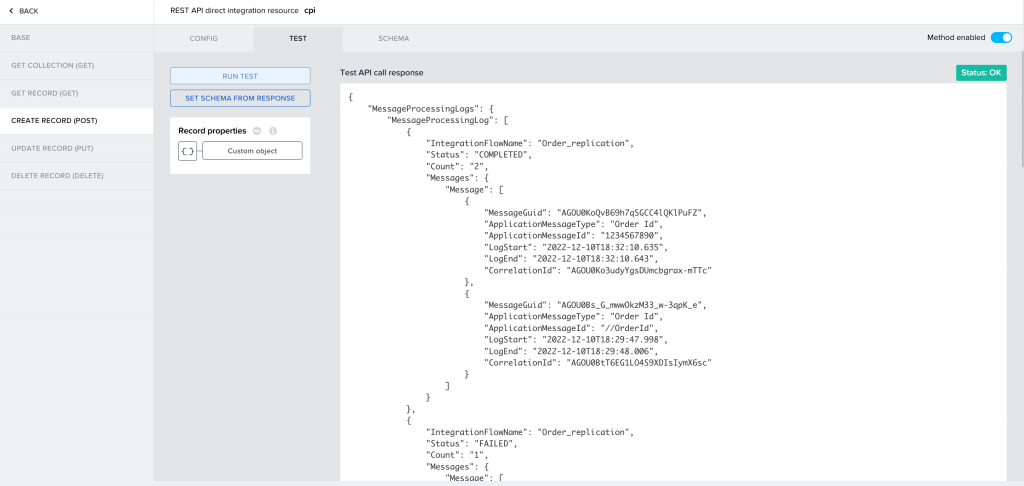
1. Use REST API Direct Integration to connect with API endpoint from SAP API Management, which is in turn connected to SAP CPI.
** Please note, the data used in the blog post, are fake/test data.
If no record is found for the inputted data, the response will look like below:

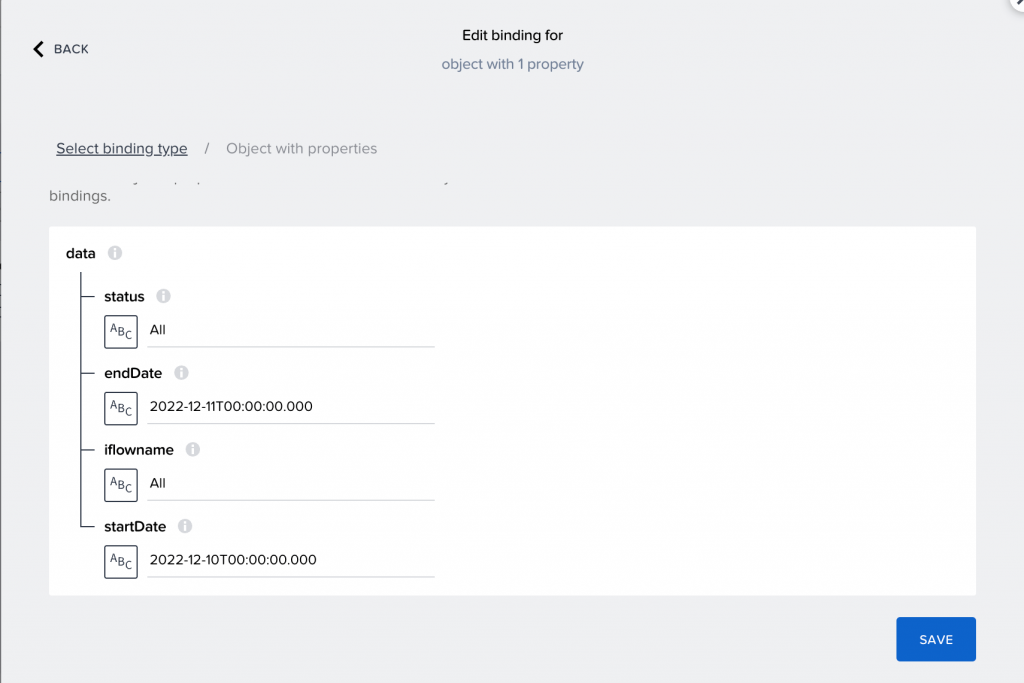
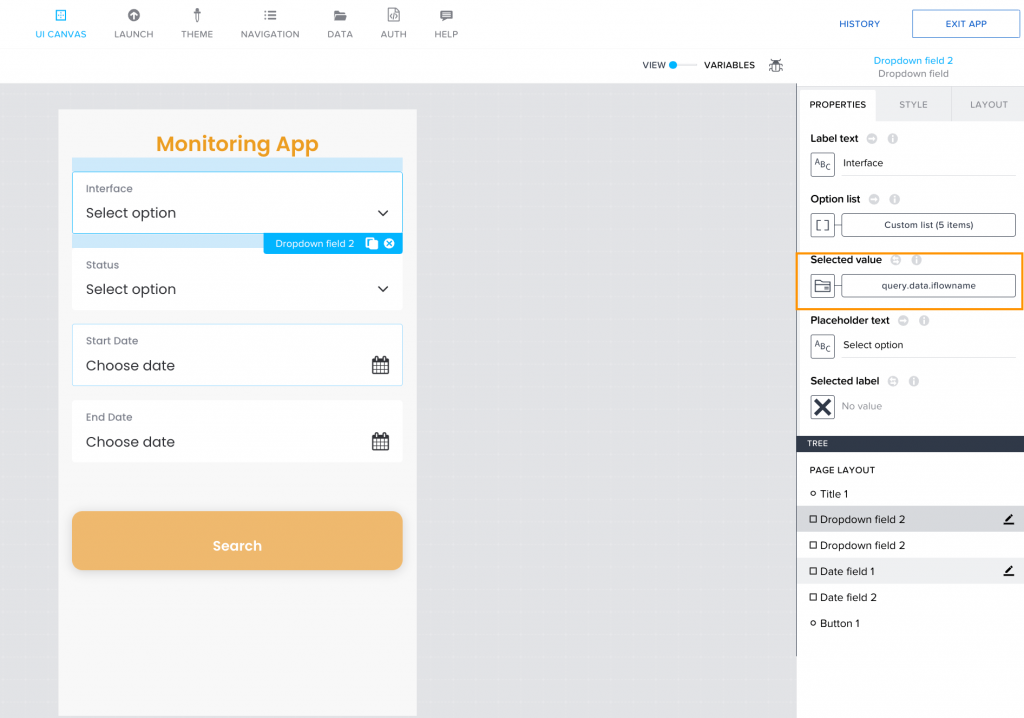
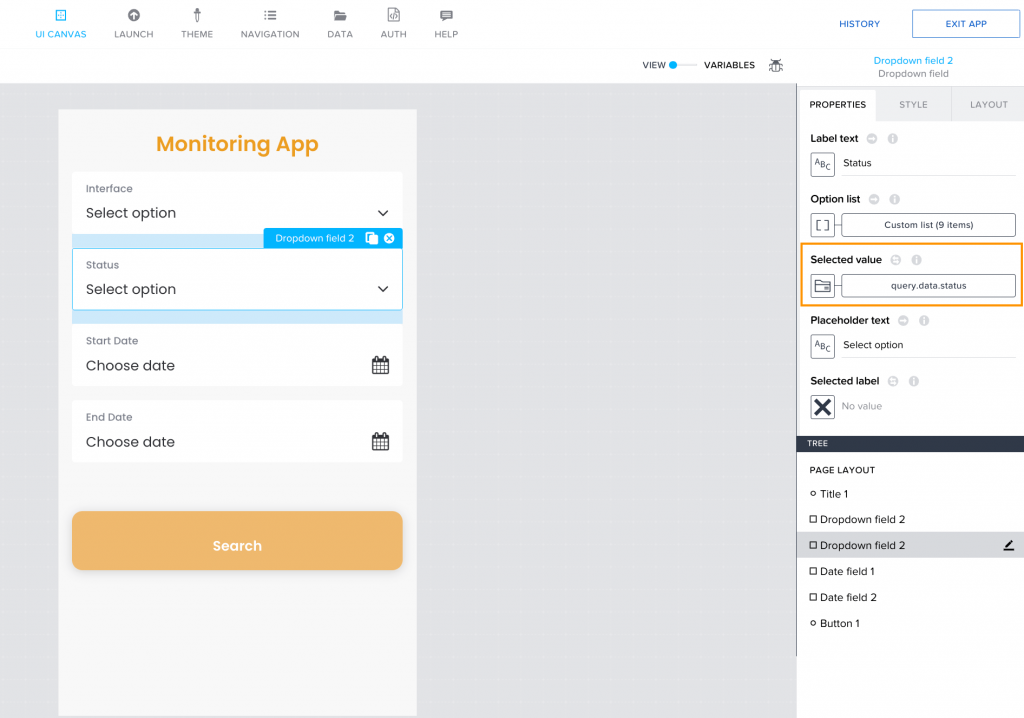
2. A data variable is created which will store the request data from user’s input.

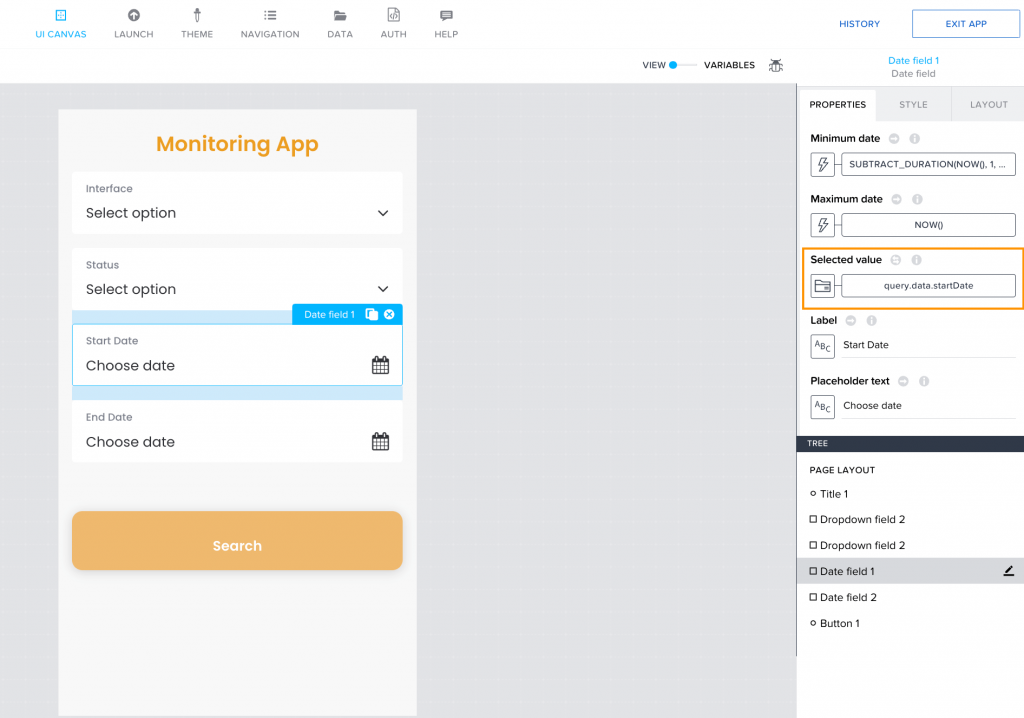
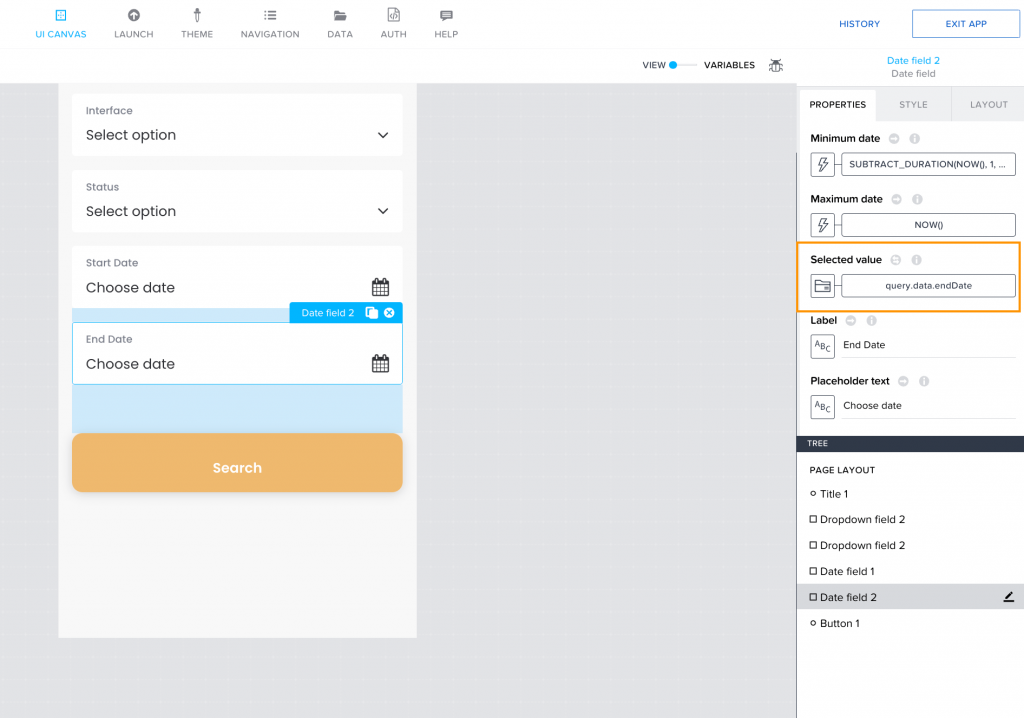
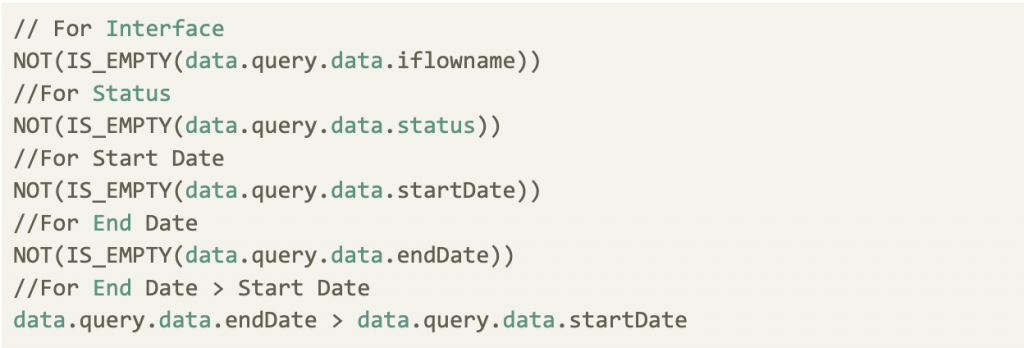
3. In ‘Search’ button component tap event, a few checks are done using IF conditions.
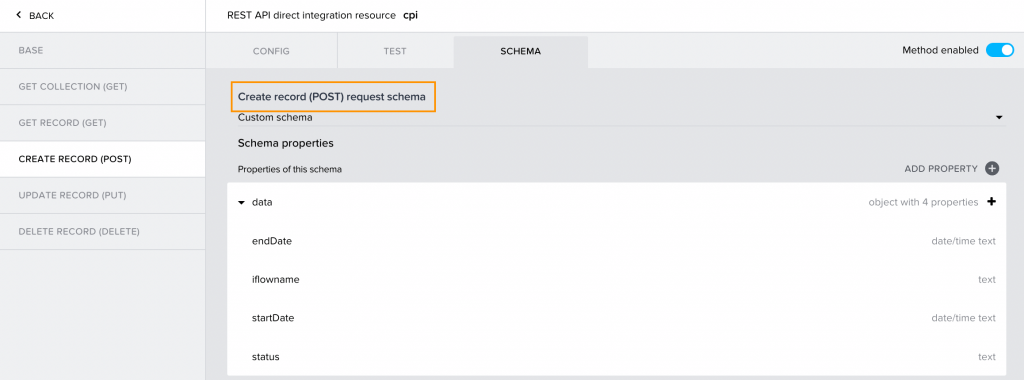
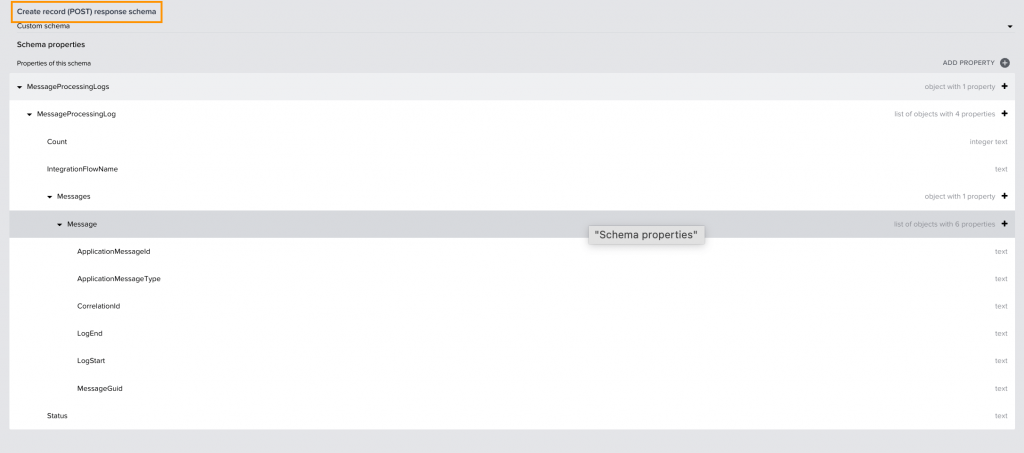
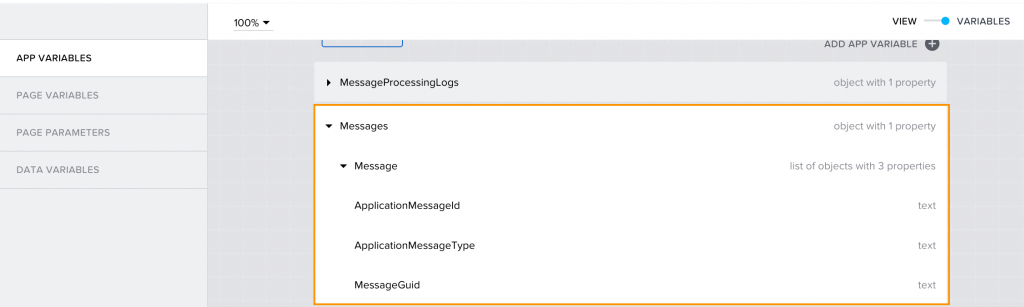
After that, ‘Create Record’ is used and the response is stored in App variable.
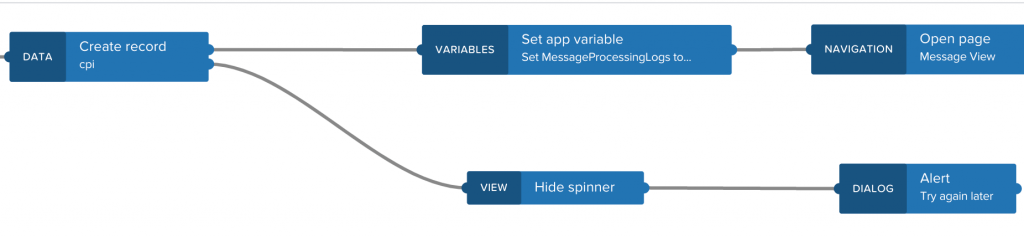
This app variable contains similar structure for success case. ‘Open Page’ will open the ‘Message View’ page.
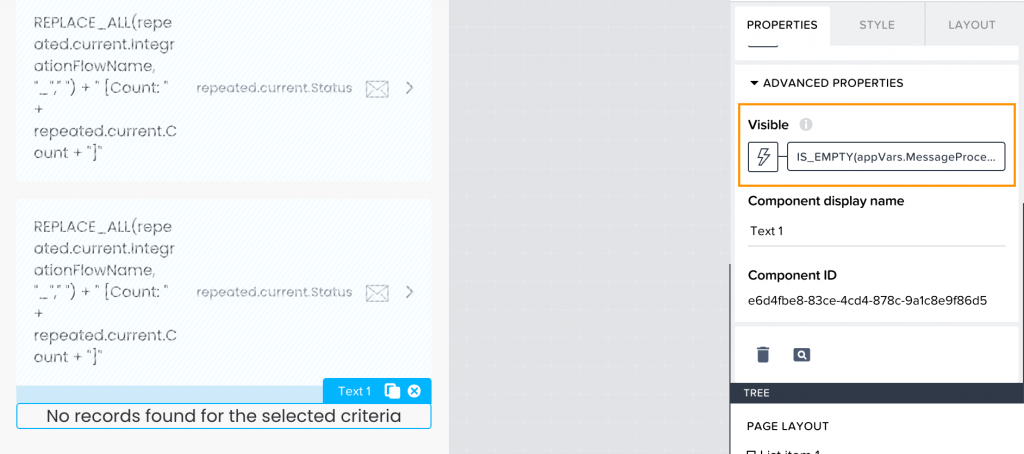
4. List Item in the ‘Message View’ will be repeated based on the number of occurrence of records in MessageProcessLog. This page also contains a text “No records found for the selected criteria” which will be populated if no record is found.

Visible Condition for Text: IS_EMPTY(appVars.MessageProcessingLogs.MessageProcessingLog)
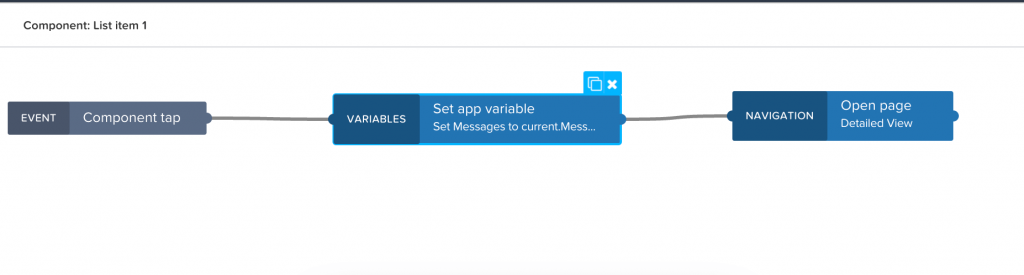
5. On component tap event of list item, the current item is stored to another app variable. ‘Open Page’ opens the ‘Detailed View’ page.
6. Container in ‘Detailed View’ page will be repeated based on the number of occurrences of Message.
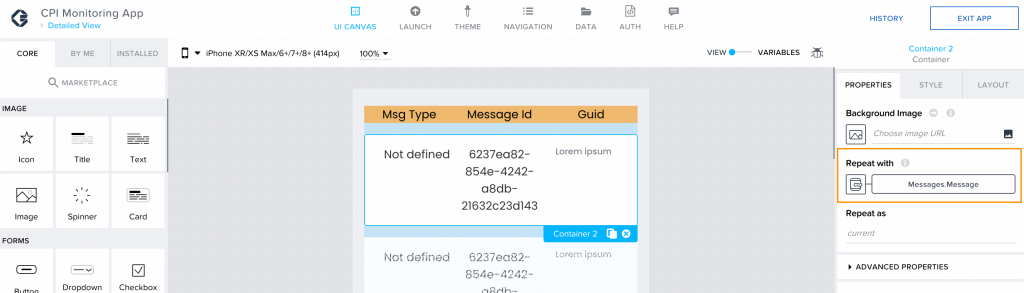
- Text Content (1st cell) : IF(IS_EMPTY(repeated.current.ApplicationMessageType),”Not defined”, repeated.current.ApplicationMessageType)
- Text Content (2nd cell) : IF(IS_EMPTY(repeated.current.ApplicationMessageId),”Not defined”, repeated.current.ApplicationMessageId)
- Text Content (3rd cell): current.MessageGuid
Implementation guide for Cloud Integration:
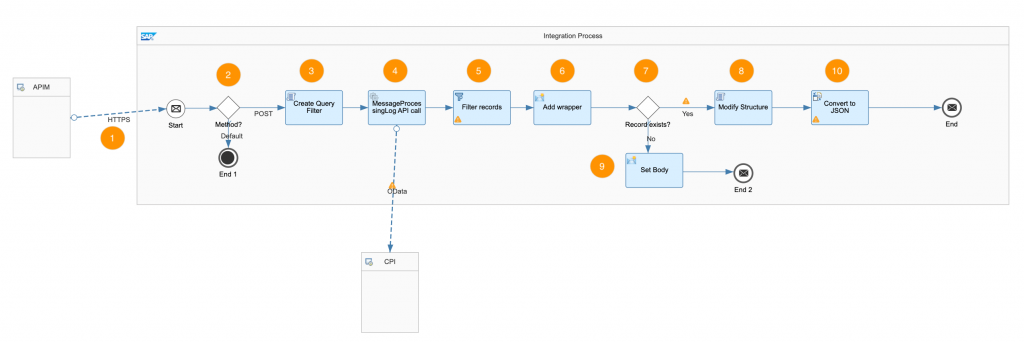
Step 1:
Configure HTTPS sender channel to get request data from SAP API Management.
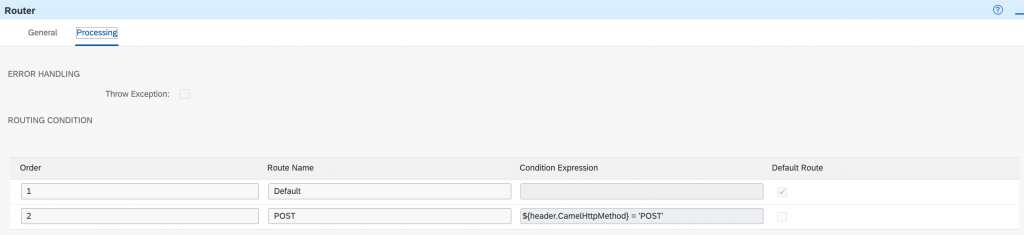
Step 2:
Use Router step to check if the method is POST or not.
If it is POST, then proceed, else terminate the message.
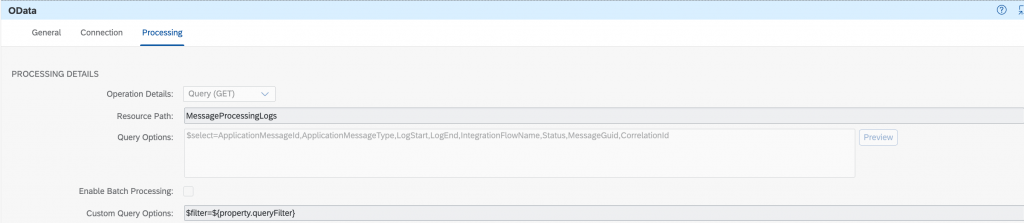
Step 3:
Use Groovy script to set filter criteria for ODATA API call.
import com.sap.gateway.ip.core.customdev.util.Message
def Message processData(Message message) {
  def body = message.getBody(String)
  def input = new JsonSlurper().parseText(body)
  def status = input.data.status
  def iflowname = input.data.iflowname
  def startDate = input.data.startDate.take(10) + 'T00:00:00.000'
  def endDate = input.data.endDate.take(10) + 'T00:00:00.000'
  StringBuffer str = new StringBuffer();
  str.append("LogStart ge datetime'" + startDate + "'")
  str.append(" and LogEnd le datetime'" + endDate + "'")
  if (!iflowname.equalsIgnoreCase('all'))
    str.append(" and IntegrationFlowName eq '" + iflowname + "'")
  if (!status.equalsIgnoreCase('all'))
    str.append(" and Status eq '" + status + "'")
  def queryFilter = str.toString()
  message.setProperty("queryFilter", queryFilter)
  return message
Step 4:
Use Request-Reply to call MessageProcessingLogs ODATA API.
Step 5:
Use Filter to remove records related to this iFlow.

Step 6:
Use Content Modifier to add root element.

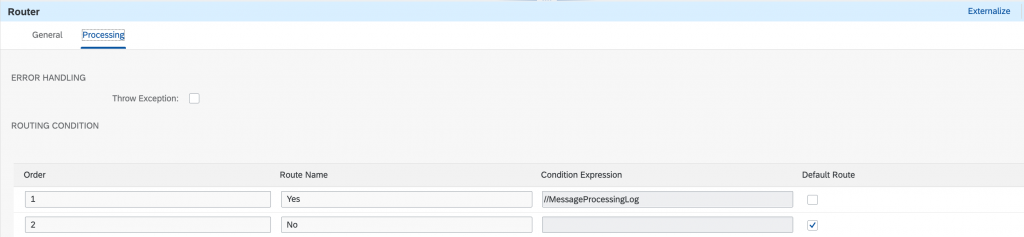
Step 7:
Use Router to check if any records exist.
Step 8:
Use Groovy Script to modify the structure.
import com.sap.gateway.ip.core.customdev.util.Message
import groovy.xml.MarkupBuilder
import groovy.xml.XmlUtil

def Message processData(Message message) {
  def body = message.getBody(String)
  def input = new XmlSlurper().parseText(body)
  Writer writer = new StringWriter()
  def xmlMarkup = new MarkupBuilder(writer)
  xmlMarkup.MessageProcessingLogs {
        def list = input.MessageProcessingLog.IntegrationFlowName.collect().unique()
        list.each { this_item ->
            def statusList = []
            input.MessageProcessingLog.IntegrationFlowName.each { this_flow ->
                if (this_flow == this_item) {
                    statusList.push(this_flow.parent().Status)
                }
            }
            def groups = statusList.groupBy { it }
            statusList.unique().each { this_status ->
                groups.each { key, value ->
                    if (key == this_status) {
                        MessageProcessingLog {
                            IntegrationFlowName(this_item)
                            Status(this_status)
                            Count(value.size())
                            Messages {
                                input.MessageProcessingLog.IntegrationFlowName.each { this_iflow ->
                                    if (this_iflow == this_item && this_iflow.parent().Status == this_status) {
                                        Message {
                                            MessageGuid(this_iflow.parent().MessageGuid)
                                            ApplicationMessageType(this_iflow.parent().ApplicationMessageType)
                                            ApplicationMessageId(this_iflow.parent().ApplicationMessageId)
                                            LogStart(this_iflow.parent().LogStart)
                                            LogEnd(this_iflow.parent().LogEnd)
                                            CorrelationId(this_iflow.parent().CorrelationId)
                                        }
                                    }
                                }
                            }
                        }
                    }
                }
            }
        }

    }
  message.setBody(XmlUtil.serialize(writer.toString()))
  return message
}
Step 9:
Use Content Modifier to set text body in case no record is found.

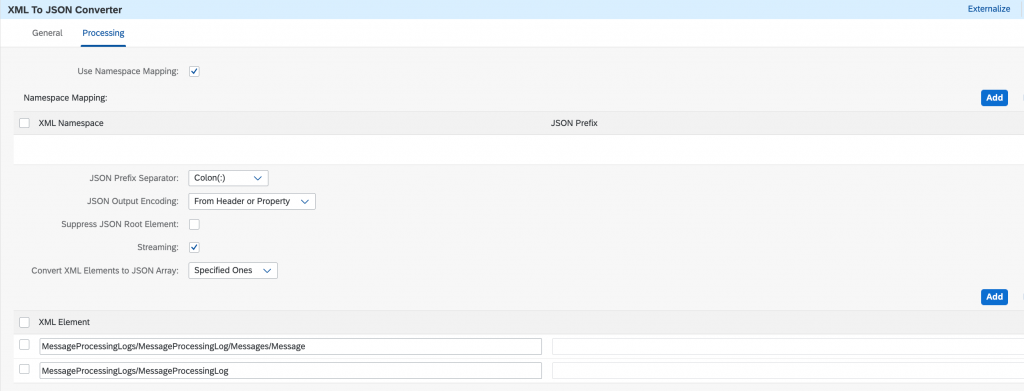
Step 10:
Use XML to JSON converter to convert it to JSON.
[Please note, instead of using Step 10, you can also directly convert to JSON structure using Groovy Script in Step 8 itself]
Set up guide for API Management:
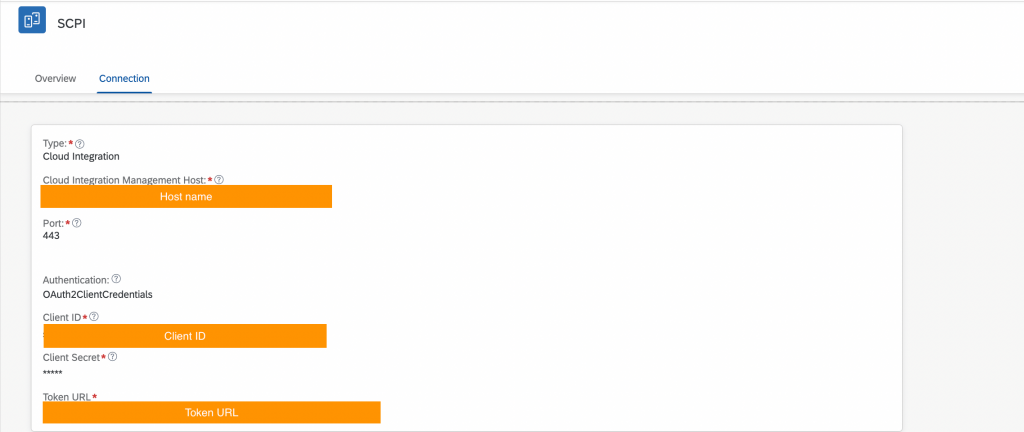
Step 1:
Create an API Provider for SCPI.
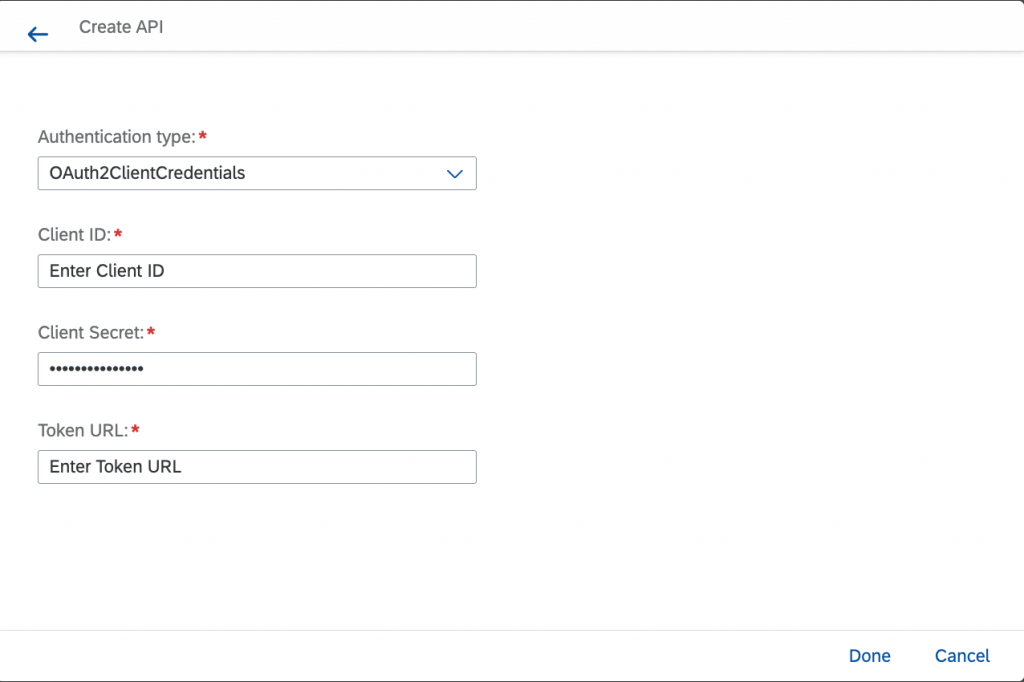
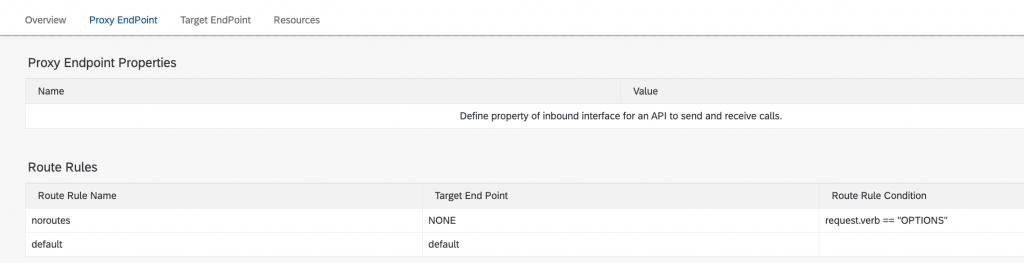
Step 2:
Create an API based on the SCPI endpoint and assign the route rules in the proxy endpoint as below.
Step 3:
Apply API policy to handle CORS.
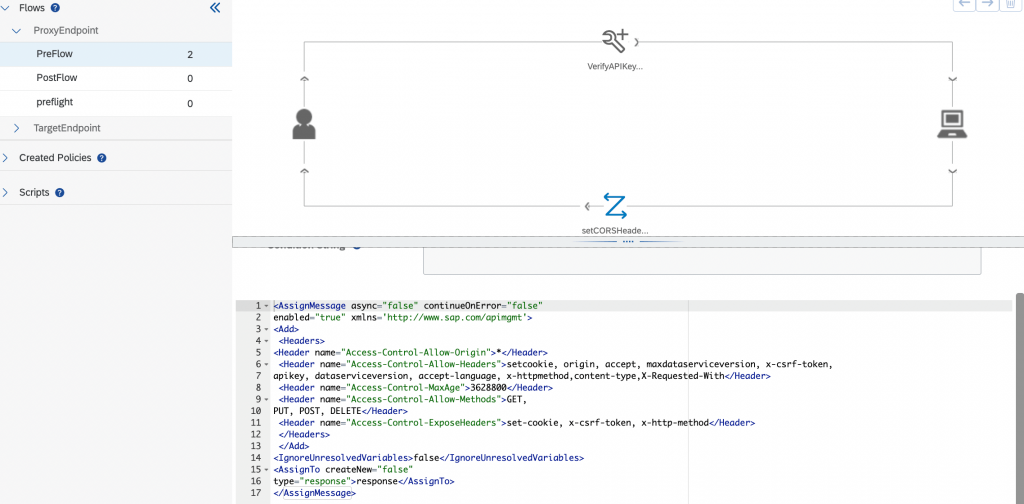
<AssignMessage async="false" continueOnError="false"
enabled="true" xmlns='http://www.sap.com/apimgmt'>
<Add>
 <Headers>
<Header name="Access-Control-Allow-Origin">*</Header>
 <Header name="Access-Control-Allow-Headers">setcookie, origin, accept, maxdataserviceversion, x-csrf-token,
apikey, dataserviceversion, accept-language, x-httpmethod,content-type,X-Requested-With</Header>
 <Header name="Access-Control-MaxAge">3628800</Header>
 <Header name="Access-Control-Allow-Methods">GET,
PUT, POST, DELETE</Header>
 <Header name="Access-Control-ExposeHeaders">set-cookie, x-csrf-token, x-http-method</Header>
 </Headers>
 </Add>
<IgnoreUnresolvedVariables>false</IgnoreUnresolvedVariables>
<AssignTo createNew="false"
type="response">response</AssignTo>
</AssignMessage>
Step 4:
Apply API policy to verify API key.
<!--Specify in the APIKey element where to look for the variable containing the api key-->
<VerifyAPIKey async='true' continueOnError='false' enabled='true'
xmlns='http://www.sap.com/apimgmt'>
	<APIKey ref='request.header.apikey'/>
</VerifyAPIKey>
Step 5:
Create a conditional flow for pre-flight request.
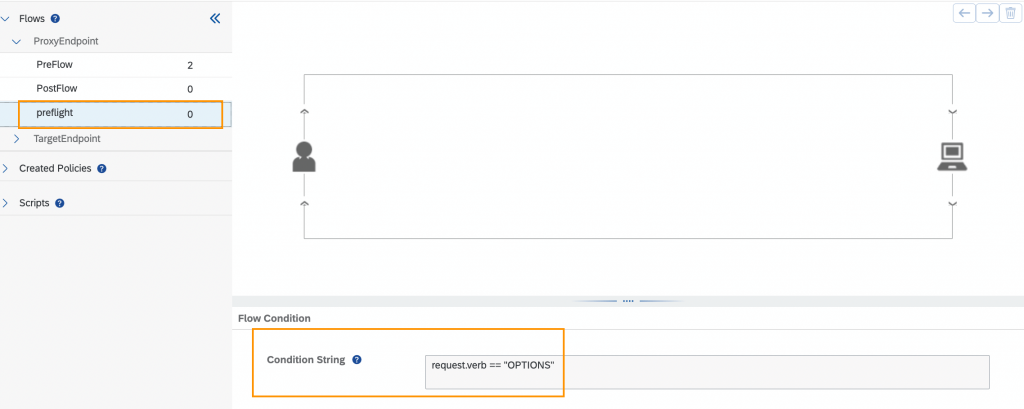
Step 6:
Create an API Product and then add the API to it and publish.
Step 7:
Subscribe to the published API product by creating an application in API Business Hub Enterprise. It will generate an API key.


