Introduction
FTP supports two modes. These modes are called Standard (or Active) and Passive (or “PASV”). The Standard mode FTP client sends PORT commands to the FTP server. The Passive mode client sends PASV commands to the FTP Server. These commands are sent over the FTP command channel.
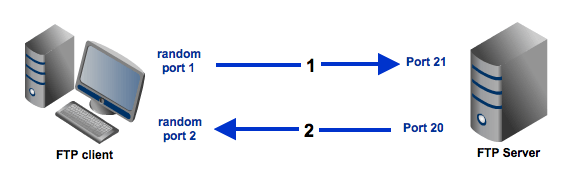
Standard mode FTP clients first establish a connection to TCP port 21 on the FTP server. This connection establishes the FTP command channel. The client sends a PORT command over the FTP command channel when the FTP client needs to receive data, such as a folder list or file. The PORT command contains information about on which port the FTP client receives the data. In PORT Mode, the FTP server always sends data from TCP port 20. The FTP server must open a new connection to the client when it sends data.
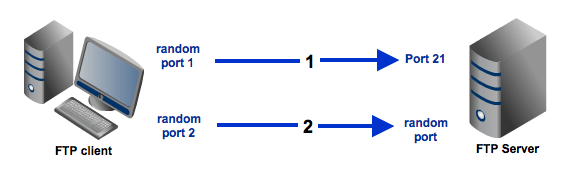
Passive mode FTP clients also start by establishing a connection to TCP port 21 on the FTP server to create the control channel. When the client sends a PASV command over the command channel, the FTP server opens an ephemeral port (between 1024 and 5000) and informs the FTP client to request data transfer from that port. The FTP server responds to the request by using the ephemeral port as the source port for data transfer. When this occurs, the FTP server does not need to establish a new inbound connection to the FTP client.
Prerequisites
Set-up FTP server with active mode or passive mode by enabling the ports at server side in case of passive mode
Active Mode FTP
Among the two connection modes, active mode is the older one. Active FTP was introduced in the early days of computing when mainframes were more common and attacks to information security were not as prevalent.
Here’s a simplified explanation on how an active mode connection is carried out, summarized in two steps. Some relevant steps (e.g. ACK replies) have been omitted to simplify things.
- A user connects from a random port on a file transfer client to FTP port 21 on the server. It sends the PORT command, specifying what client-side port the server should connect to. This port will be used later on for the data channel and is different from the port used in this step for the command channel.
- The server connects from port 20 to the client port designated for the data channel. Once the data connection is established, file transfers are then made through these client and server ports.
Passive Mode FTP
In passive mode, the client still initiates a command channel (control connection) to the server. However, instead of sending the PORT command, it sends the PASV command, which is basically a request for a server port to connect to for data transmission. When the FTP server replies, it indicates what data port number it has opened for the ensuing data transfer.
Here’s how passive mode works in a nutshell:
- The client connects from a random port to port 21 on the server and issues the PASV command. The server replies, indicating which (random) port it has opened for data transfer.
- The client connects from another random port to the random port specified in the server’s response. Once connection is established, data transfers are made through these client and server ports.
Prerequisites to enable FTP passive mode in windows server
- IIS Role must be installed
- FTP Site Name
- FTP Physical path where the data needs to be saved
- Service account for FTP authentication
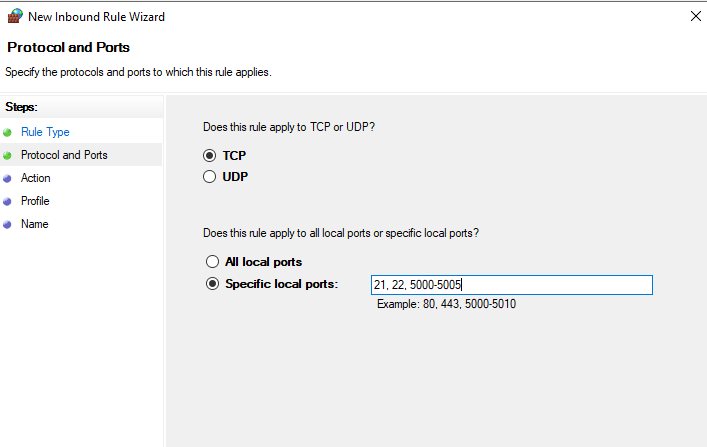
- Data Port Range for communication.
Set up FTP passive mode in windows server
Step 1: IIS Role must be installed for FTP site creation (Note: IIS Role installation is under Windows Scope)
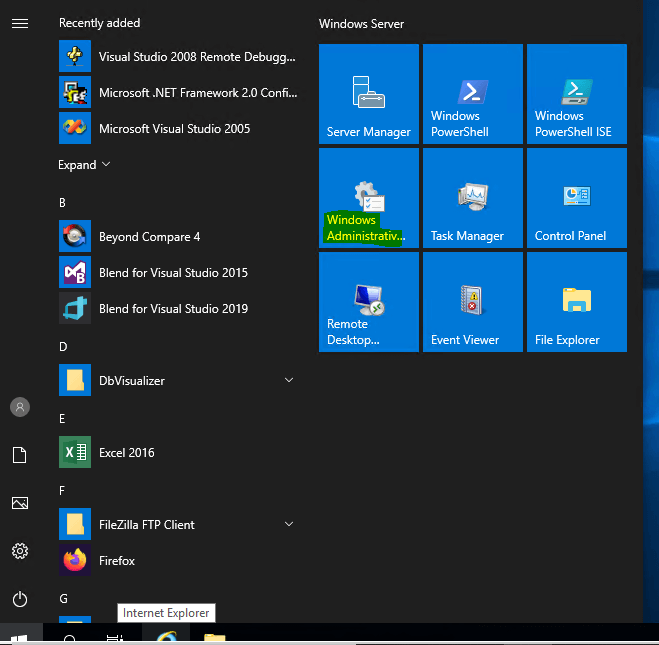
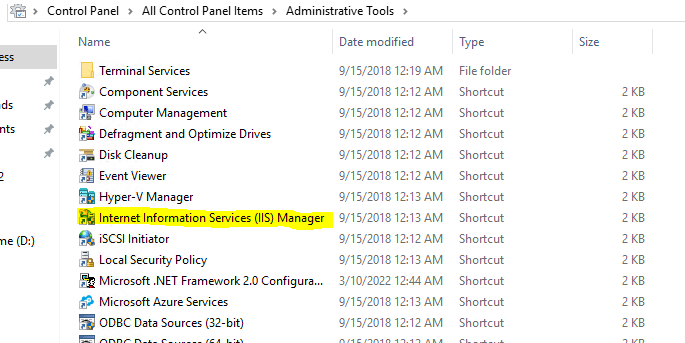
Step 2: Open Windows Administrative Tools
Step 3: Open IIS Manager
Step 4: Create FTP Site
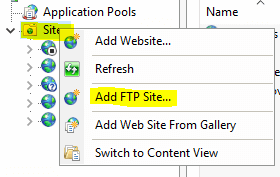
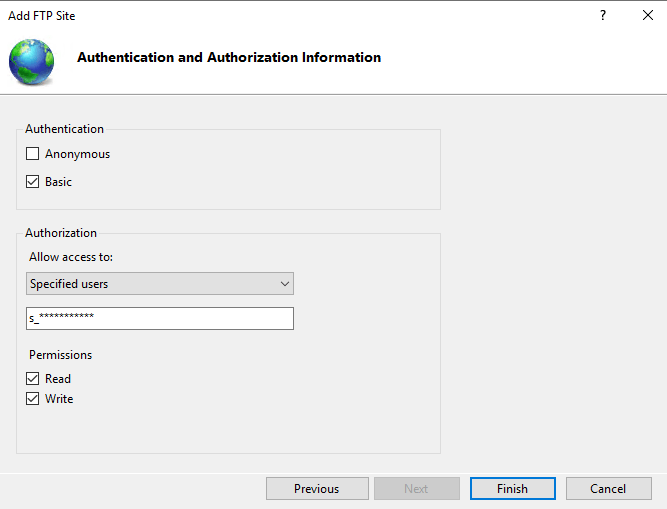
- Right Click on Site and Add FTP Site
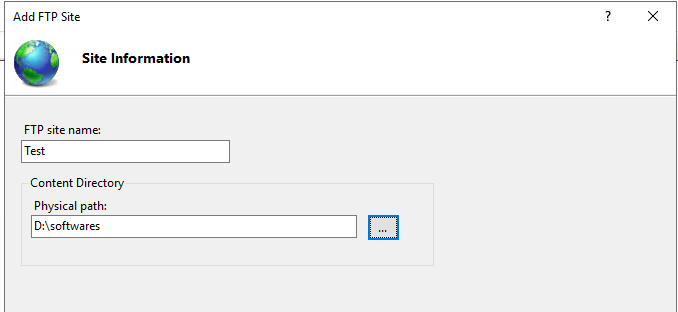
- Provide a Site Name in FTP Site Name Field and
- Physical Path – Create a Folder Path where you what the files needs to be placed browse here (Eg- i have provided a test Site name and created a share folder path in D:\Softwares)
- Unless there is a requirement of site pointing to specific IP address you can proceed with default option.
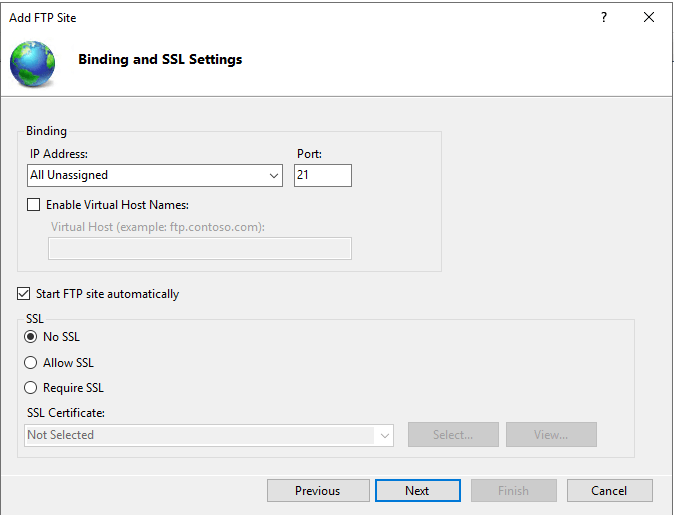
- You need to have a specific service account created for this ftp share access and update in the authorization of who and what type of access needs to be provided
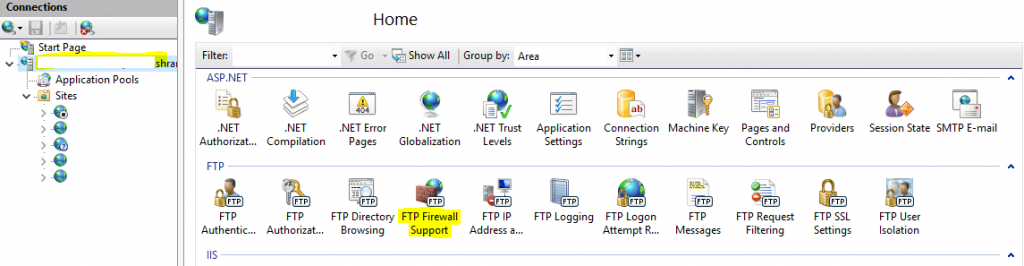
Step 5: Enabling passive mode
Go to Server Home page and select FTP Firewall Support
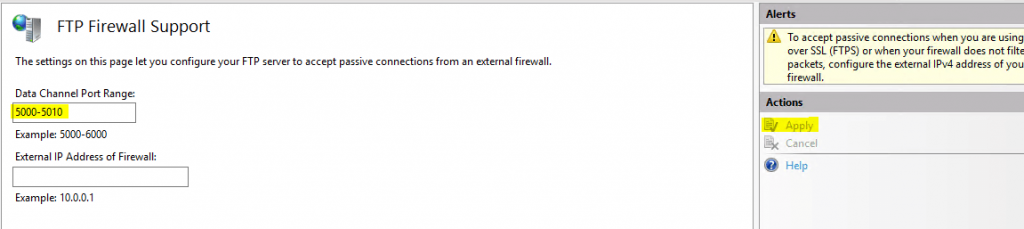
Select the Data Channel port range for communication and click on apply
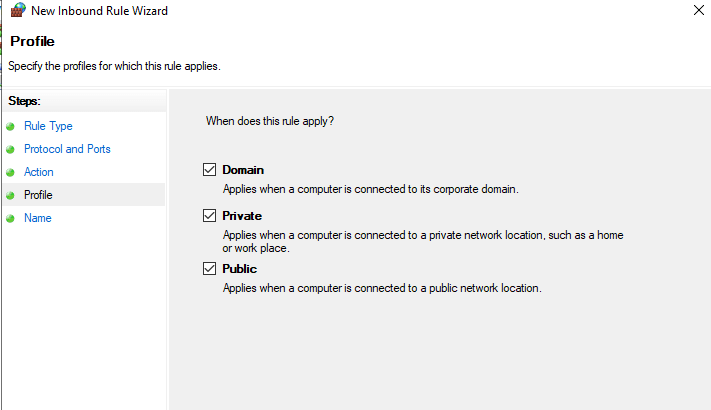
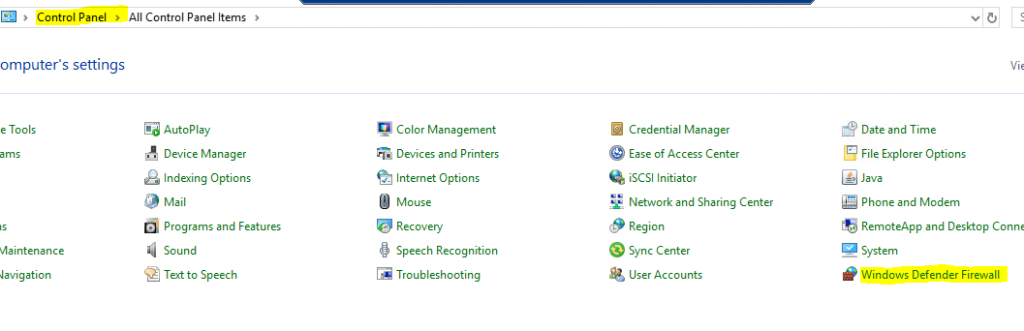
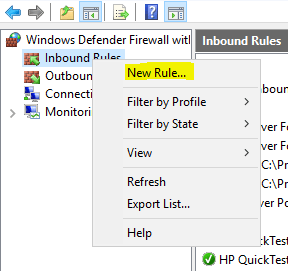
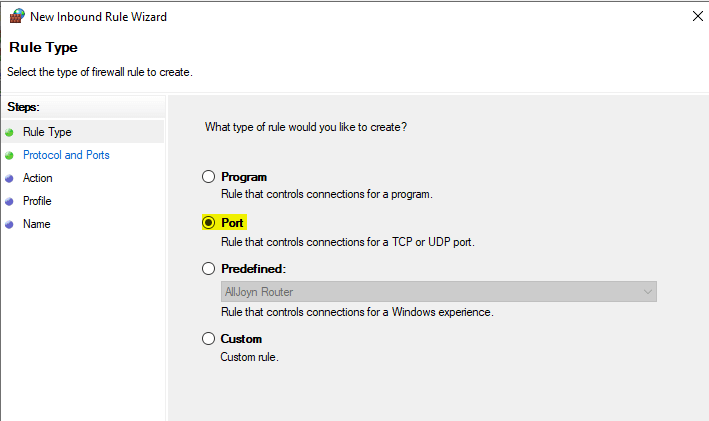
Step 6: Create Inbound and Outbound Rule in the Firewall
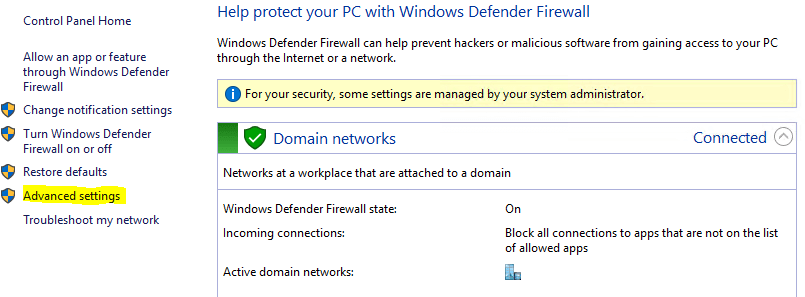
Open Control Panel and go to Windows Defender Firewall
- Go to advanced
- Follow the below screenshots
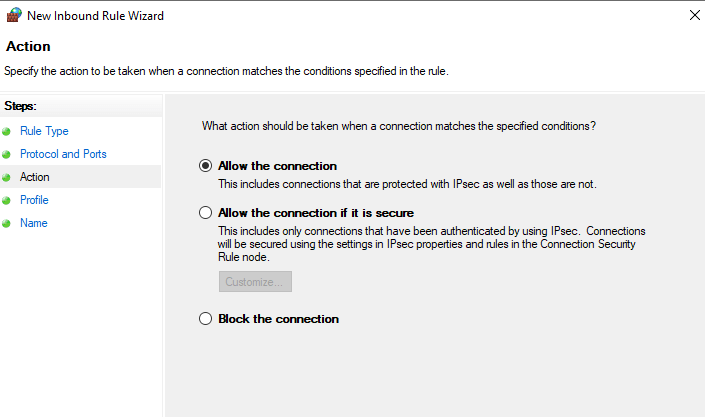
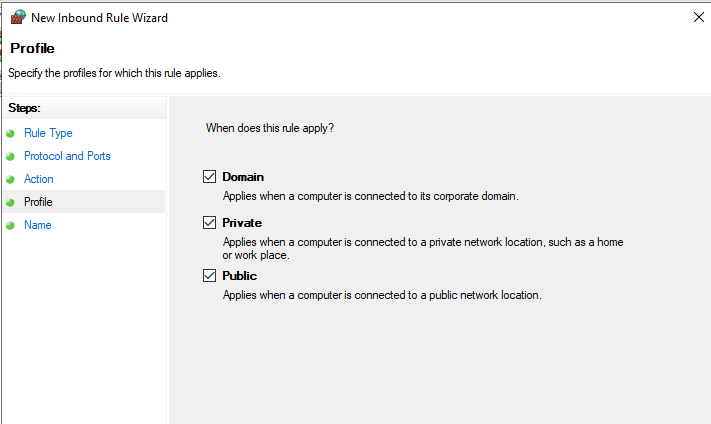
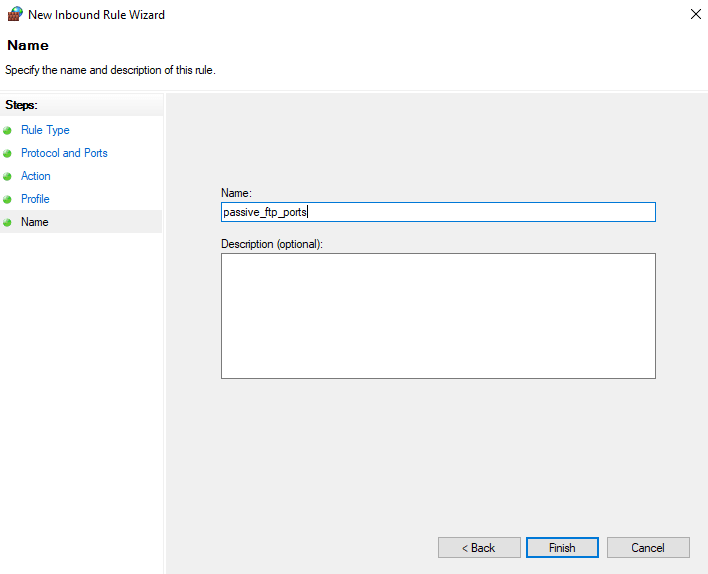
- Click Finish
- Follow the same procedure for Outbound Rule.
- Validate the connection.
Cloud connector setup
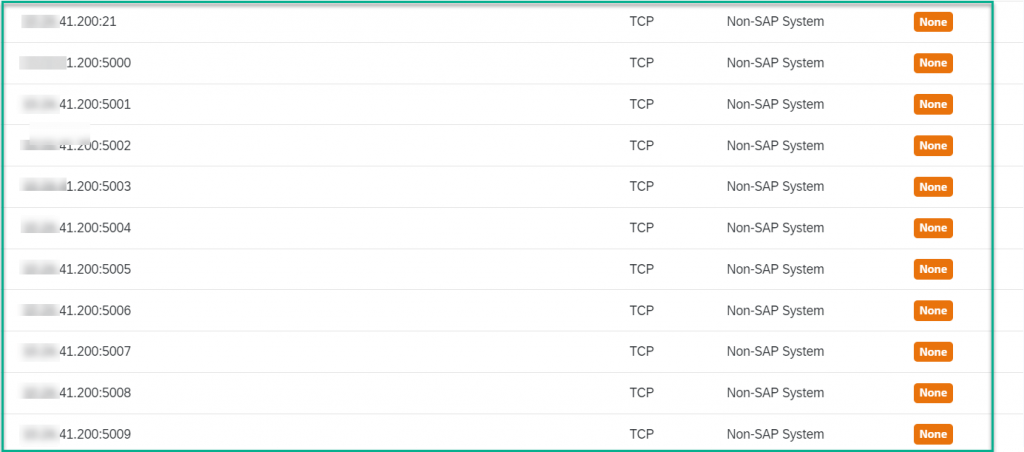
- Configure the host and port in the cloud connector (with “HOST/IP” and default port “21”)
- Set data port range as configured in the Step 5 (Note: With older cloud connector version port range will not support so exclusively we need to configure all the ports in the cloud connector).
- With latest version of cloud connector supports port range so with single entry we can configure the port range (Ex- 5000-5010)
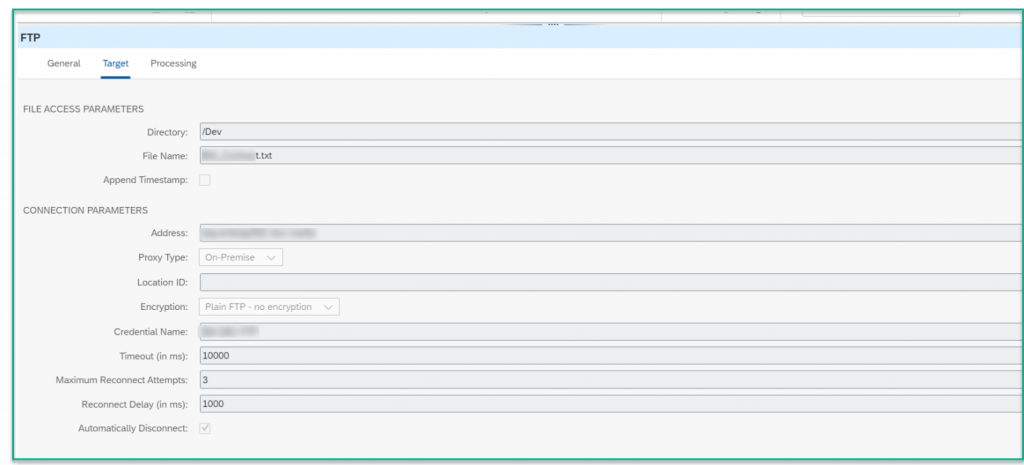
- Configure these virtual details in the BTP CI file adapter.
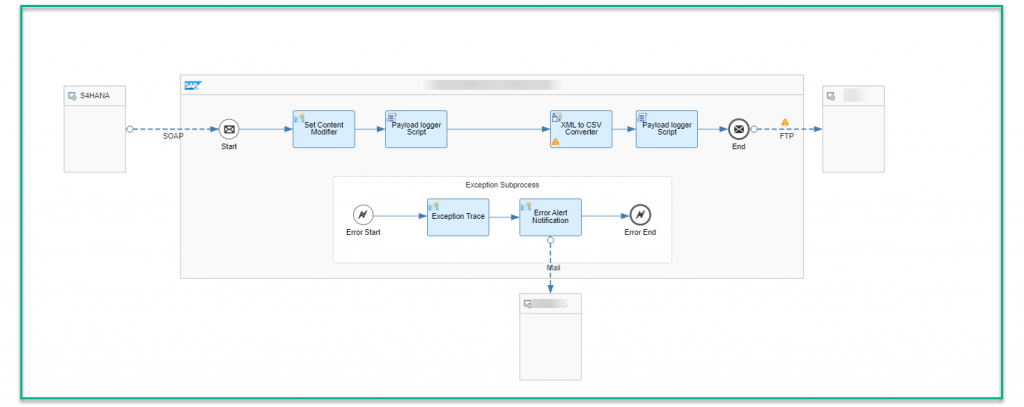
Sample Integration flow
Troubleshooting
- Error “SOCKS5 command failed with status: FORBIDDEN” occurs in connectivity test to On-premises FTP server
- Connectivity Issue CPI to FTP server via SAP Cloud Connector: Connection not allowed by ruleset


