Introduction
Budgets are arguably one of the most important elements of the Compensation Module configuration. It is where the business needs and requirements meet the module to define set rules that affect downstream guidelines and eligibility for the entire program. The budget can make or break the entire success of the program to ensure that it is compliant with what your organization needs are. Therefore, it is important to understand the options that the system has, along with the limitations, when making configuration decisions with your implementation partner such as Veritas Prime. Additionally, as our organization changes, we may find that we need to shift budget configurations for our templates year to year as things change.
We are going to focus on some of the most common budget configurations we have seen clients pursue and the pros and cons of each to help your organization better determine which is right for you. For some, a pro may be a con and visa versa. Keep all considerations mentioned in mind when researching and discussing options with your implementation partner. The top budget configurations that will be focused on in this blog are:
- Percent of Current Salary
- Custom Fields
- Target Amounts
- Direct Amounts
- Budget by Groups
- Budget on Guidelines
In addition, we will dive into the Guideline Modeling tool in reference to the Budget by Guidelines option.
Budget Options
Before we dive into the various configurations mentioned above, I want to dive into some additional options to consider that are relevant to any budget set up to keep in mind.
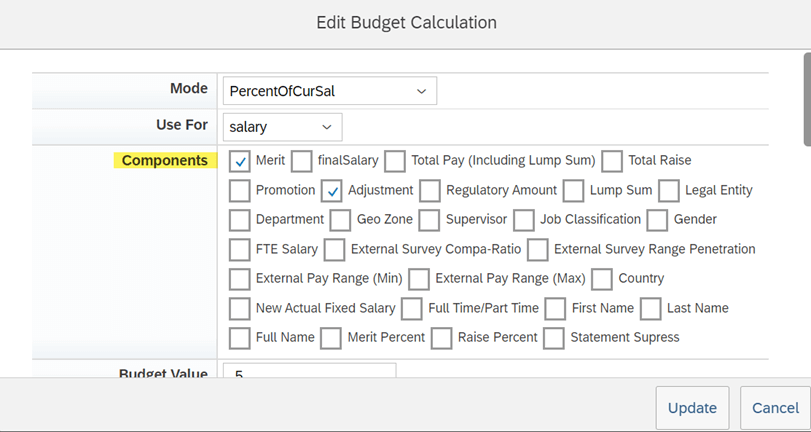
Budget Components: the components allow us to select which fields on the worksheet will affect the budget spend. This can be simply the merit field, bonus amount, or any other element you have built into your worksheet for planning. There is the ability to also multiselect which allows us to have multiple fields affect the spend of any single budget. Sometimes we see the same budget for Merit and Adjustments so we can select them both from the component options to accomplish this.
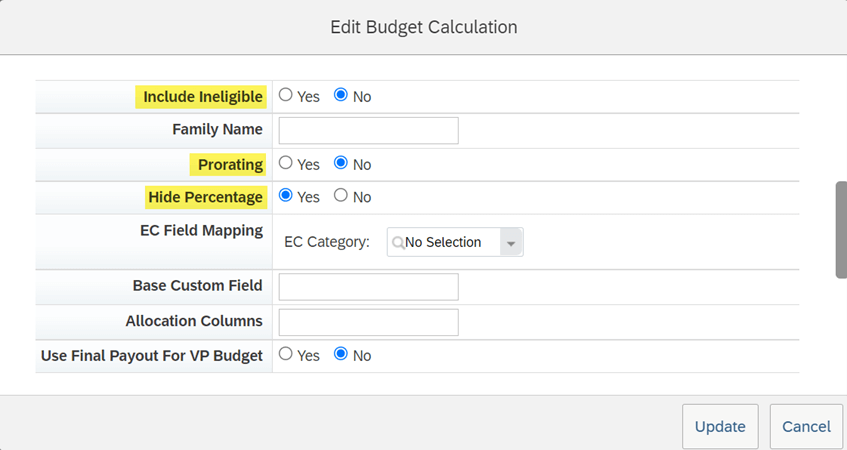
Include Ineligible: Simply put, this option allows us to include ineligible employee data in the budgeted amount. This is specific to each organization and is something to keep in mind to turn on and off based on your requirements.
Prorating: If you are using proration in your template, it is possible to flag whether the proration will affect the budgeted amount given for anyone who is prorated.
Hide Percentage: If there is a need, you can always hide the actual budgeted percentage and only show the amount on the budget pod in the compensation worksheet.
Budget Configurations
Percent of Current Salary
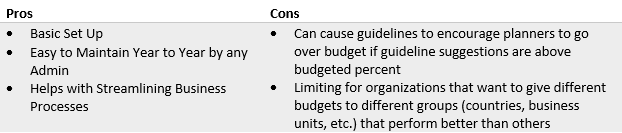
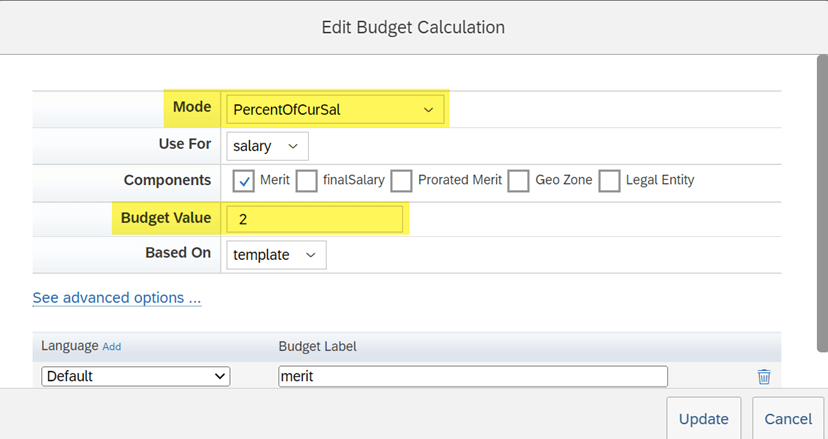
Possibly the most common and SAP best practice configuration, the percentage of current salary allows you to simply take a percentage of all the current employee populations salaries to build a budget amount. It is a very basic and easy set up that allows for quick changes to the percentage year over year by the basic admin.
The configuration is simply setting the mode to PercentofCurSal and entering in the percentage in the budget value as a whole number (i.e., 2 would indicate a budget of 2% of current salary).
The configuration is simply setting the mode to PercentofCurSal and entering in the percentage in the budget value as a whole number (i.e., 2 would indicate a budget of 2% of current salary).
Custom Fields
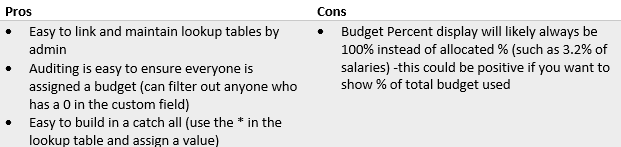
The custom field option allows for a large range of options for that actual output of the budgeted amounts. Typically, we would set up a field, it can be visible or hidden, on the worksheet and point to that field to pick up 100% of that field for the budget. It is important to consider that the amount we are granting is on the employee level, not the planner level. A common use of this is to use a lookup table to find a percentage based on a specific data point (such as country), then multiplying that by current salary. This is a good way to have varying budget percentages based on the varying employee data. One of the biggest considerations is that you will never be able to display the exact percentage for the budget (such as 3%) in the budget pod. With this set up the percent will always display as 100%, alternatively, we can use the hide percentage field and only display the amounts.
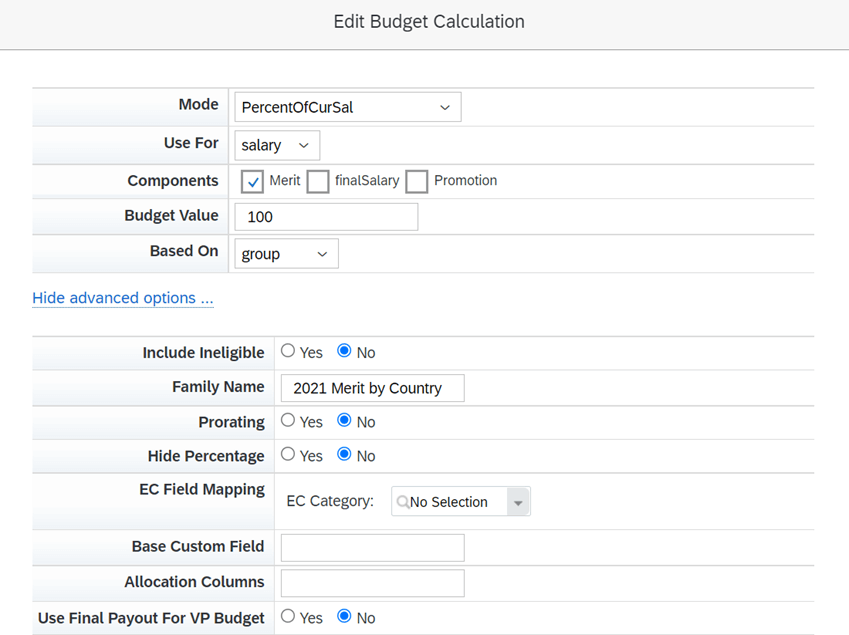
The configuration requires us to create a field on the template via Design Worksheet that we can point to for the budget. This can be a calculated field such as the lookup table method described above or an import field if you want to control the amounts via the UDF import per employee. The field should always be of Money type and Reportable. Again, we can choose to display or hide this column on the worksheet.

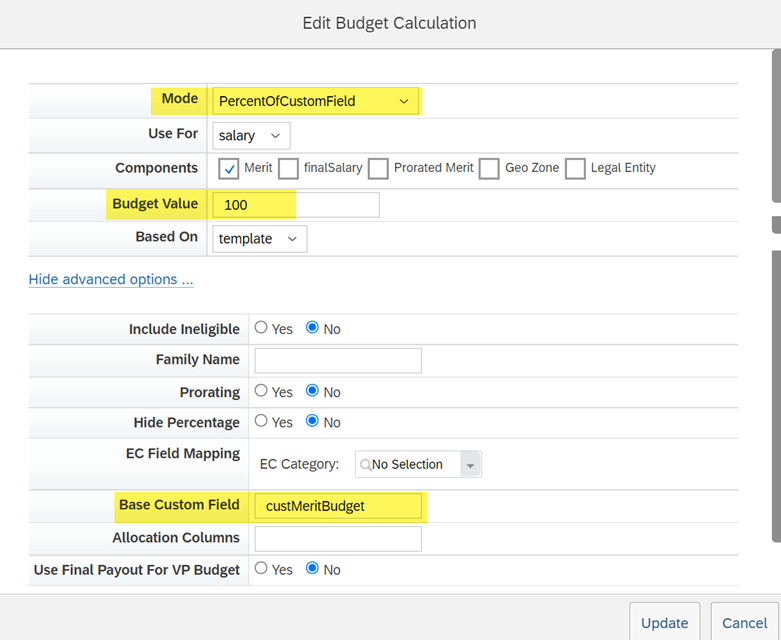
Once the field is created and set up, we can use the Column ID from the field to configure the budget and point the field. We will want to set the Mode to PercentOfCustomField and the value to 100 indicating that we want to take 100% of the value coming from the custom field. We will then need to set the Column ID of the field in the Base Custom Field input on the budget to connect to our budget field.
Target Amounts
To budget based on targets allows us to load a target increase or lump sum amount per employee and use that as the baseline for the budget. This allows for large-scale variation by the individual employee as each employee is loaded with their own target amount. There are standard fields on the User Data File available, such as MERIT_TARGET, that the admin would load with an amount. Based on this amount, we can set the percentage of that amount to be used for the budget. Typically, we would give the exact budget amount and set the budget value percent to 100. This option should only ever be used if we need to get to the granular level of setting budget per employee as it is admin intensive to load and validate the values every process.

The general set up is straightforward for this option as we just need to set to the target mode. There are four different standard target fields and corresponding modes available to be used, Merit Target, Lump Sum Target, Lump Sum 2 Target, and Bonus Target. The standard fields in the User Data File must be used and generated for the configuration to work.

Direct Amounts
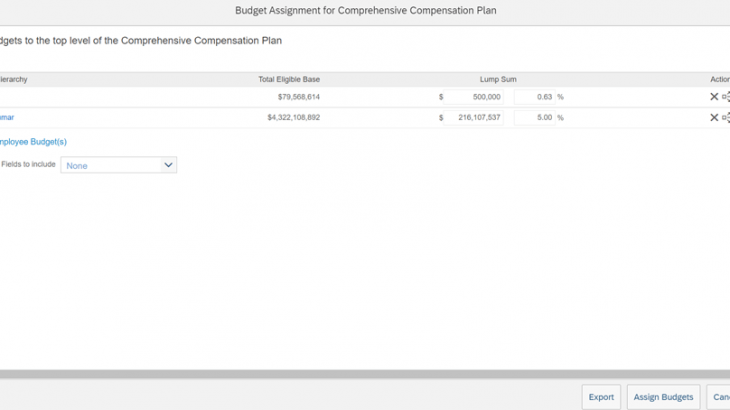
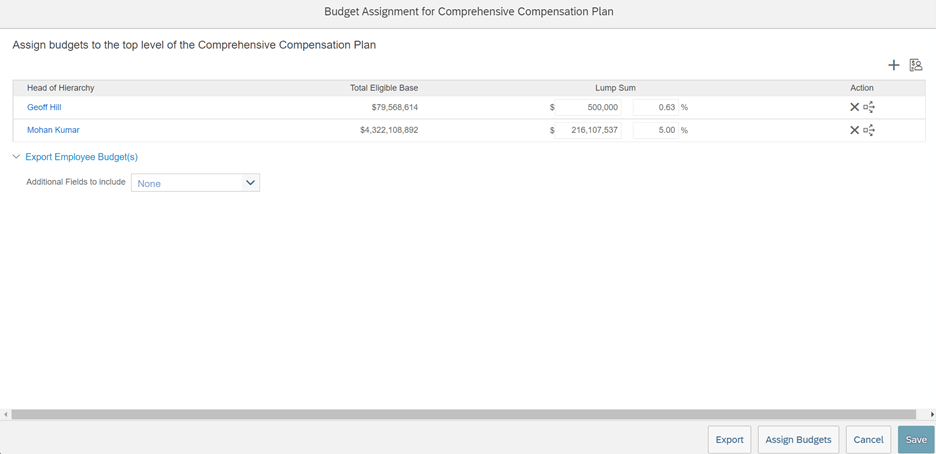
The direct amount feature allows us to set an amount, per compensation planner, to be distributed. This allows for flexibility of varying budgets at the planner level. It is particularly helpful for organizations that follow a top-down budget methodology. There is a lot of set up and work on the admin side to assign individual budgets per planner. If you have a large population of planners intended for the compensation cycle, this can be particularly time consuming. Once the actual budget is set up for the direct amount option, there is an additional budget distribution tool that needs to be utilized to set the budget per planner.

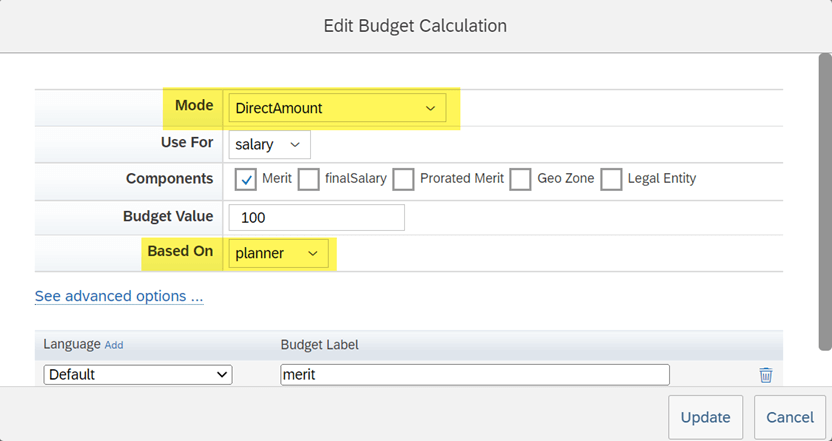
From the basic configuration level, the budget needs to be set to Mode DirectAmount and given a value of 100 and Based On the planner.
Once this general configuration is set up, you can dive into the budget distribution options. The tool is located by following Compensation Home > Plan Template > Manage Worksheets > Budget Assignment. You will need to use the plus button in the upper right corner to add each of the planners to assign their budget. You will see the ability to add budget for each planner based on amounts and percent.
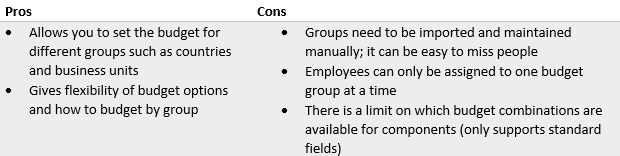
Budget by Groups
The budget by group feature really combines the ability of the different budget modes while allowing the variation ability of custom field budgets. From a basic perspective, it allows you to create groups, whether that be countries, business units, etc. to give these groups varying budget percentages. The biggest benefit of this option is that you can display the budget percent in the pod unlike the custom field option. When you are displaying the budget from a higher level, you can see a combined budget or break the budgets out by group. Below you can see where we have distributed varying budgeted amounts based on countries and then split those into the country groups.

The configuration requires us to create the Family and Groups that we assign the budgets for. This is done in the Action For All Plans >> Group Assignment tool. You create the family as the overall budget group to be assigned then the individual groups that employees will be assigned to.
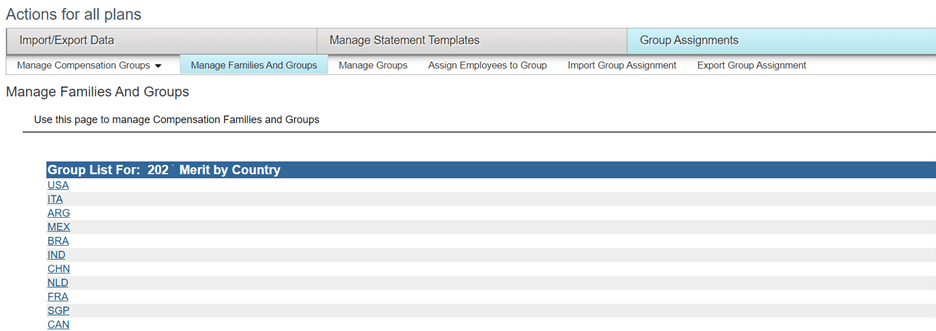
When you create a new group, you can select it and set the individual budget value assignments.

There are some options to manually assign the groups or do a mass import for the groups. I recommend using groups names for data that can be easily extracted for each employee to make the import option for the groups easy to work with. Once the groups assignment and budget values are set up, we can set the options for the budget assignment on the template. The flexibility comes in here with the ability to do different modes. For this example, we are doing percent of current salary. The budget value should always be 100 to indicate 100% of the group assigned percent. Based on should be set as group and we will then need to use the Family Name field to indicate the family we have just created.
Budgets by Guidelines
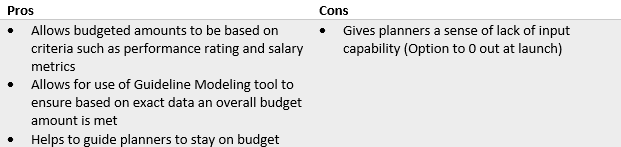
Guidelines help moderate a program and ensure that planners are staying within the policies set by the compensation team and leadership. Guidelines are typically a range of increase recommendations based on a set of criteria such as the employees Performance Rating and Range Penetration. When we talk about using these guidelines that are set to create a budget, we are referring to the default value of the guideline table to establish budget values by employee. The table must be created first in the tool to then drive the budget. As an example of how this works, you can have a guideline of 3-5% increase for a specific employee and say the default value is 4% of their current salary. One of the biggest challenges when you enter in a default value, is that the field will populate with this recommendation. What this means is our remaining budget for this option will ALWAYS display as $0 upon launching the program. There is one work around to this which requires us to re-enter the values as 0 after launch for every user via Executive Review Import feature.
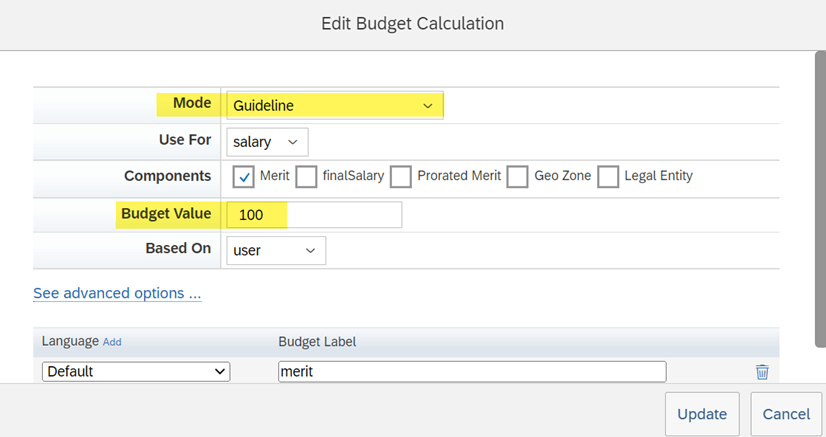
The configuration is very easy given that the table is created and generated by the admin team with default values. We will talk shortly about the Guideline Modeling tool that can be used to assist the admin in creating guidelines. The key set up of the budget includes setting the mode to Guideline, the value to 100% of the guideline default, and Based on User. One consideration, you do not need to set the value to 100, you could inflate it to give extra budget to give the sense of input and not have the budget default to zero as discussed above.
Guideline Modeling
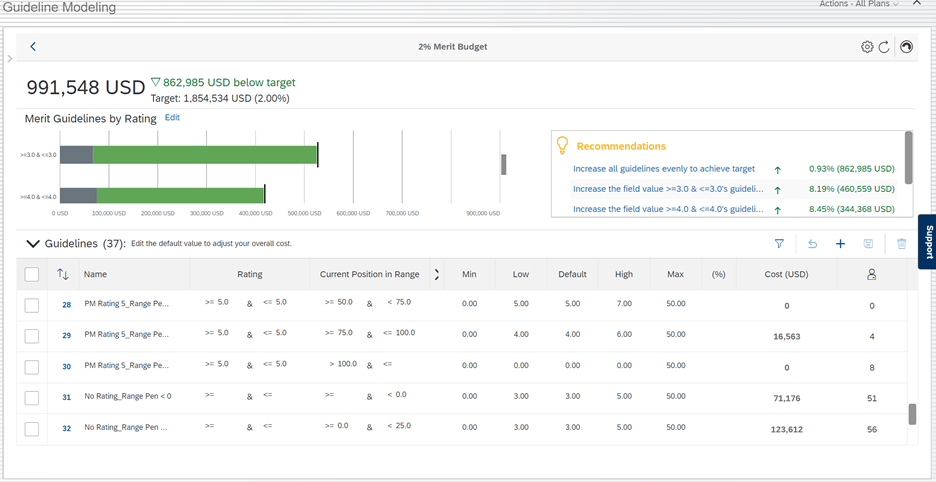
Guideline modeling is a tool that can be used regardless of which budget option you choose. However, I want to highlight the use case particularly when using the budget by guidelines option as this tool can help you drive your budget using the guidelines to get an exact budget amount. The tool at its core for this use case is to set an overall budget amount for your organization and use real employee data to create guidelines that equal up to that intended budgeted amount. The tool allows you to set an intended budgeted amount based on one of the guideline criteria such as Rating.

Once you have your budget set, you can then enter the tool to adjust your guidelines based on where your real employees fall within the guidelines. This will help you adjust the guidelines to hit your targeted budget. The system will additionally provide you with some recommendations that you can auto select to automatically update the guidelines for you. Once you have created your ideal guideline model, you can push it back to the template table automatically and thus create the budget for the system based on guidelines.
We could talk about guideline modeling for days, but it is important to note here the key limitations with guideline modeling. This is simply an additional available tool for you to utilize but should not drive which budget you go with as none are dependent on this tool.
Key Limitations:
- Models can only be made on one budget type at a time, meaning, if you have a combined budget for Merit and Adjustment, you won’t be able to get a true model
- Sorting and assignment of budgets can be only on one pivot point. If you have guidelines based on rating and salary benchmarks, you will need to set the budget percent on only one of those criteria.
- The tool itself can be difficult to get started and working, there has been little to no improvement on the tool from SAP in years and nothing indicated on the road map
Wrap Up
There are plenty of ways to get creative and find a budget solution that works for your organization. It is always important to keep in mind and fully test and discuss any limitations the solution presents. Keep in mind that if you go with an approach one year and it doesn’t work out, there is always an opportunity to change to something new!


