As most of the folks are aware of the ECR and ECO functionality for the change Management for the BOM, Master recipe, Material Master etc. This functionality was phased out in S4/HANA, and Engineering Record was introduced. This too had some things missing like analyzing the impact etc., so from HANA 2020 SAP introduced Change record for the entire Change management Process which is more flexible. This Blog Captures the functionality of Change record from HANA 2020. There are few additional things like Impact Analyzer, change number Creation at Item Level etc. which is possible only in HANA 2021 The main purpose of this Blog is to setup a base for the future consultants in order to help them in achieving the functionality.
Benefits of Change Record
Key Features
Fiori App Required
- Global Process route Workbench
- Myinbox
- Manage Change Record / engineering Changes,
- Manage Team and Responsibilities
Required configuration
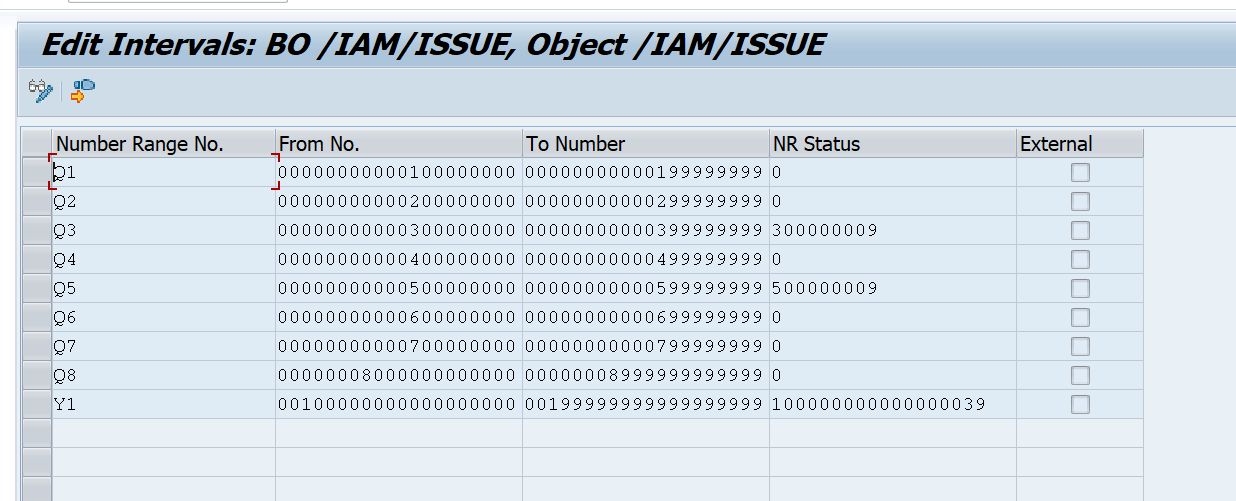
1. Define Number Range for the change Record
Path : SPRO > Logistics General > PLM > Change Record > Basic Settings > Define Number Range Interval for Change Record
2. Define Object types
Path : SPRO > Logistics General > PLM > Change Record > Basic Settings > Define Object types
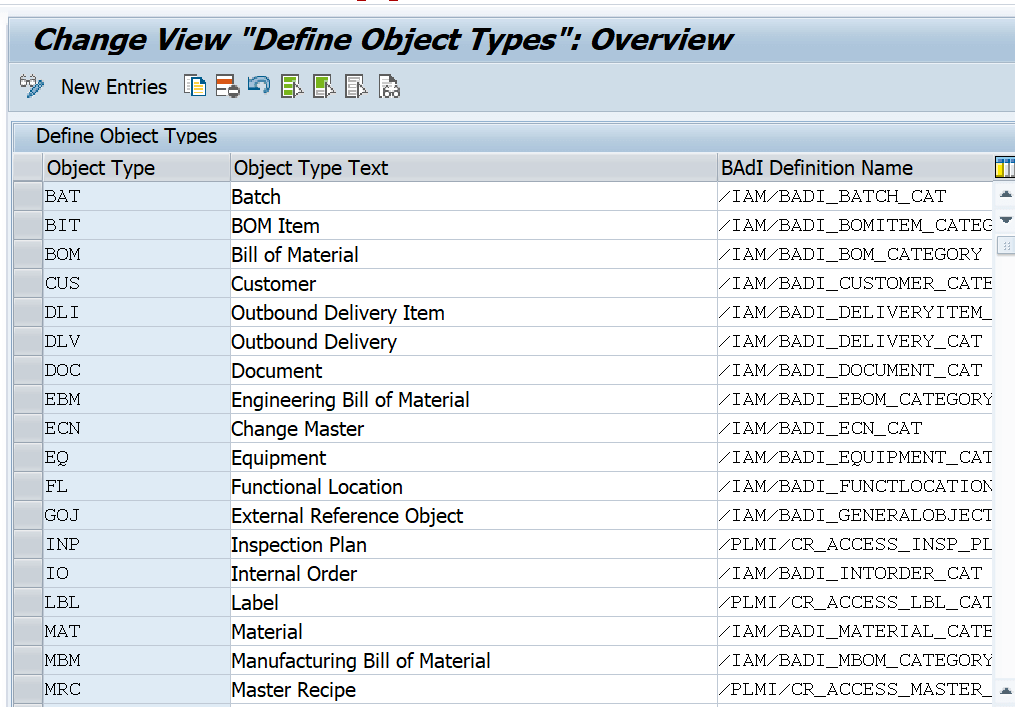
Note : The object types are predefined
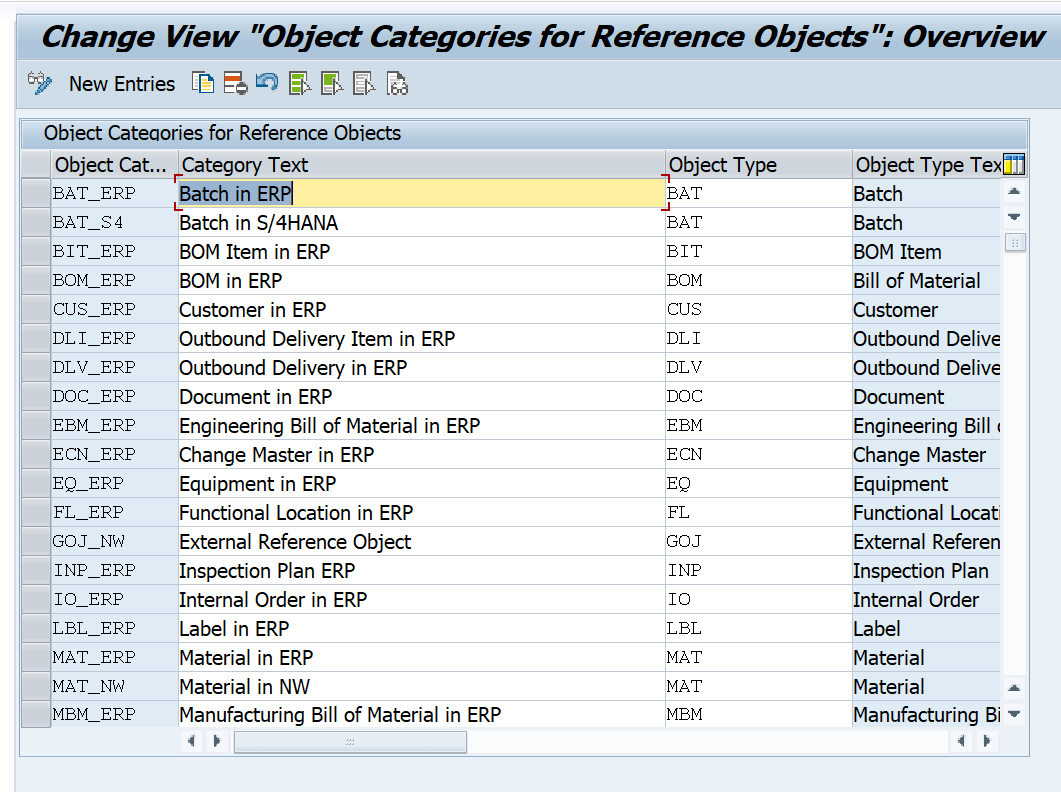
3. Define Object Categories
Path : SPRO > Logistics General > PLM > Change Record > Basic Settings > Define Object Categories

Note: These are predefined Category
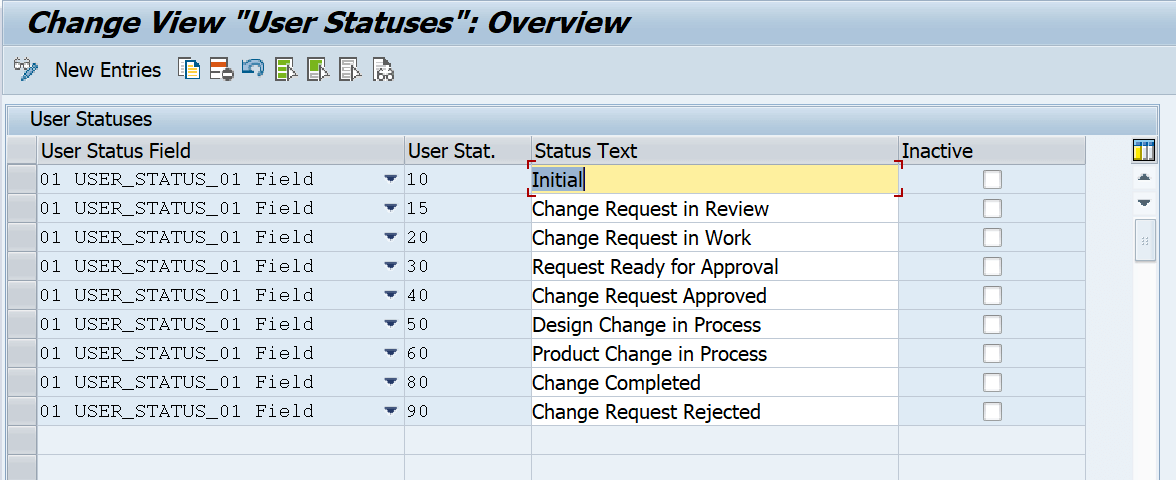
4. Define User Status
Path : SPRO > Logistics General > PLM > Change Record > User status > Define User Status
5. Define User Action
Path : SPRO > Logistics General > PLM > Change Record > User status > Define User Action
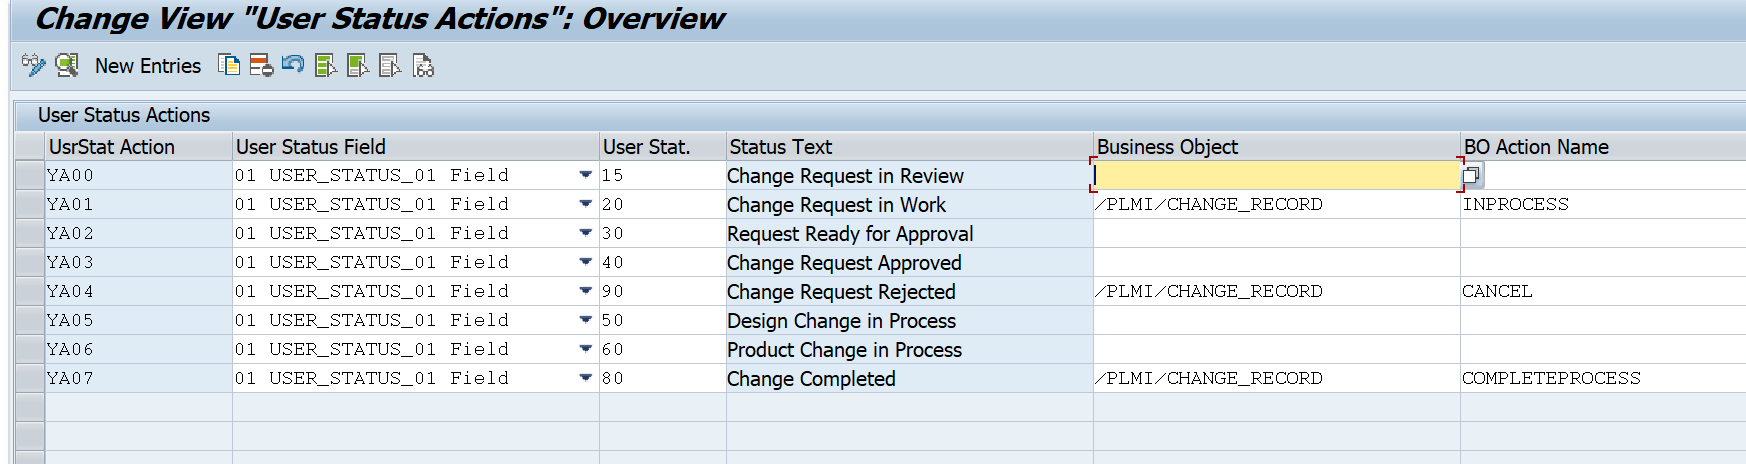
The User Action Text Defined appear on the front end screen of the Change Record
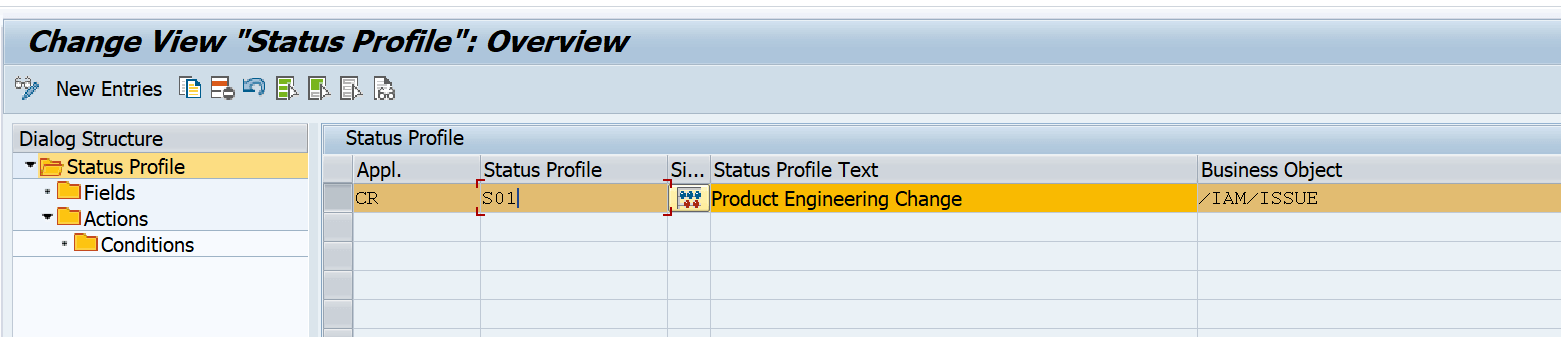
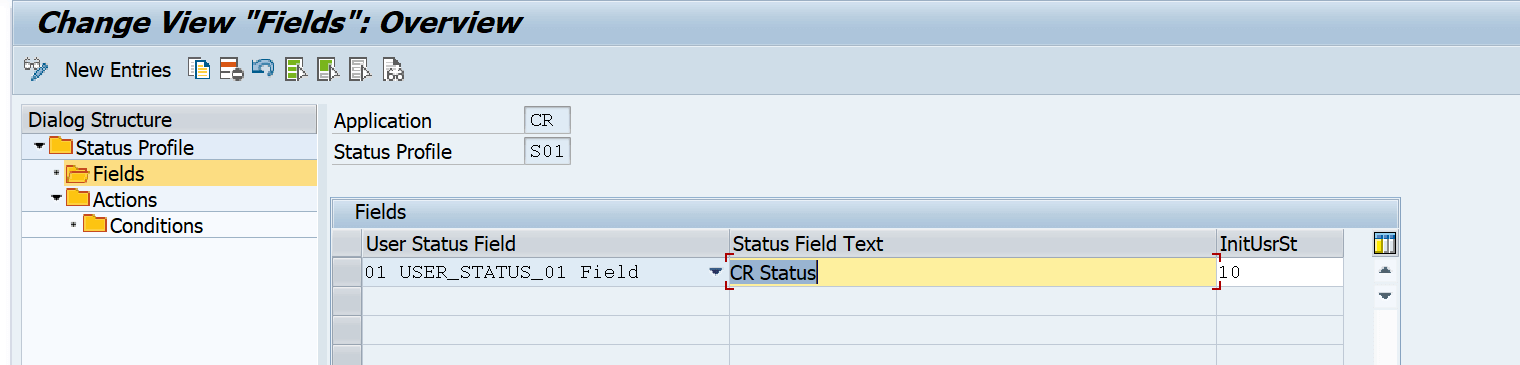
6. Define User Action Profile
Path : SPRO > Logistics General > PLM > Change Record > User status > Define User Status Profile
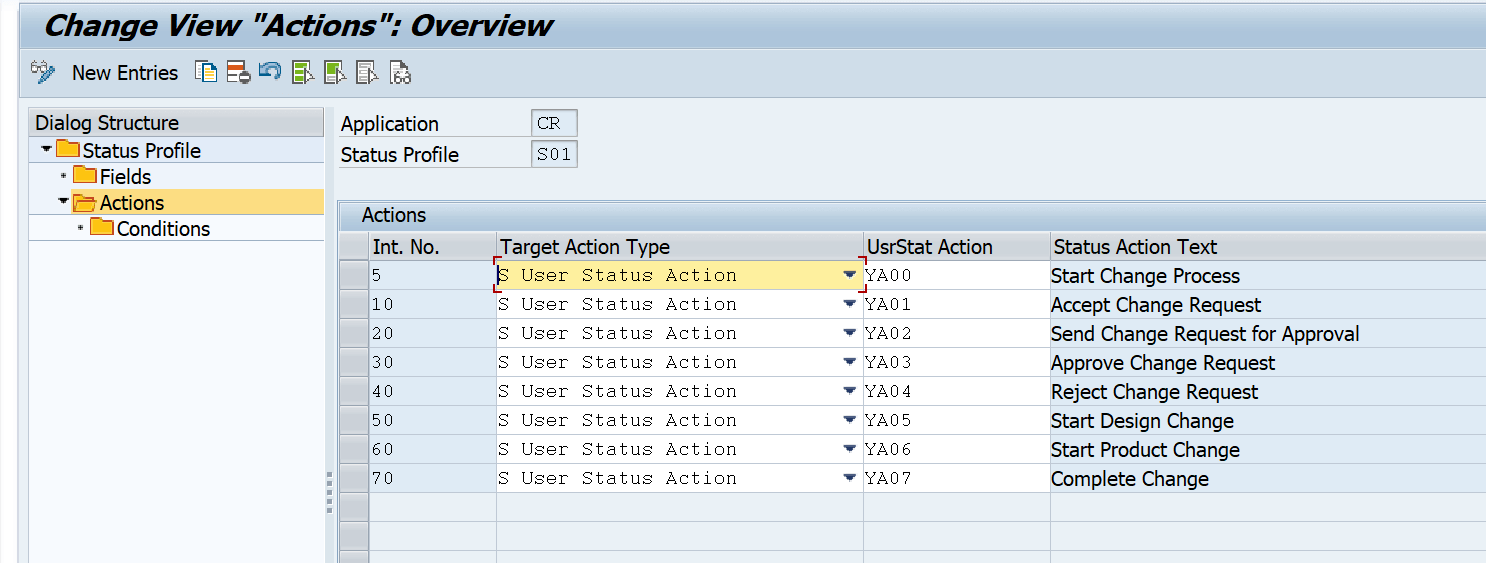
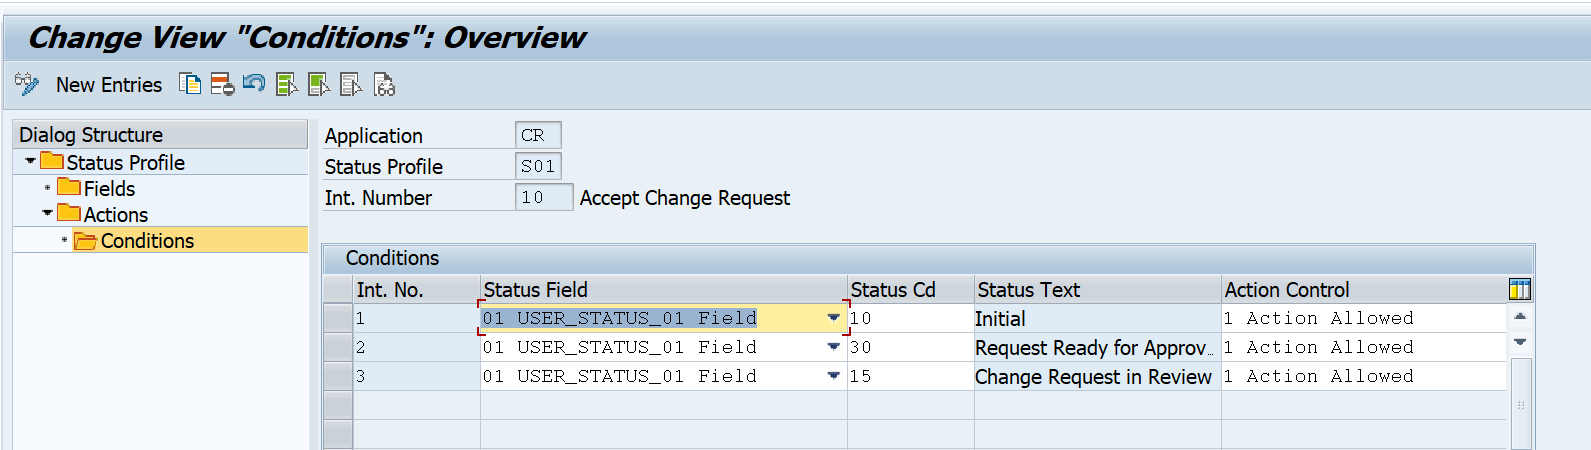
As seen in the above screenshot, conditions help to navigate to different status from the current status, as in this case the status is 10, so when the change record is in status 10, then it can be moved to either 10,30,15 manually or via background task.
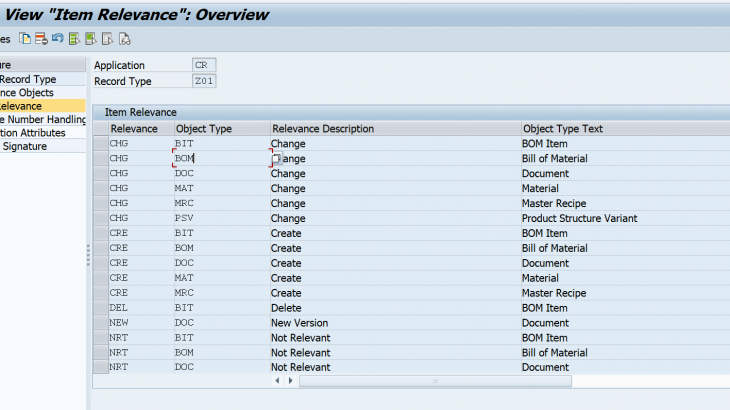
7. Define Item Relevance
Path : SPRO > Logistics General > PLM > Change Record > Setting for engineering Changes > Define Item Relevance.
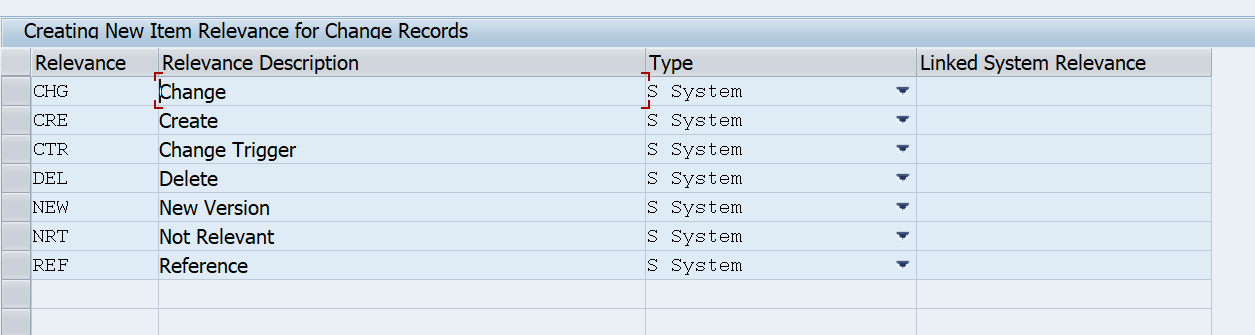
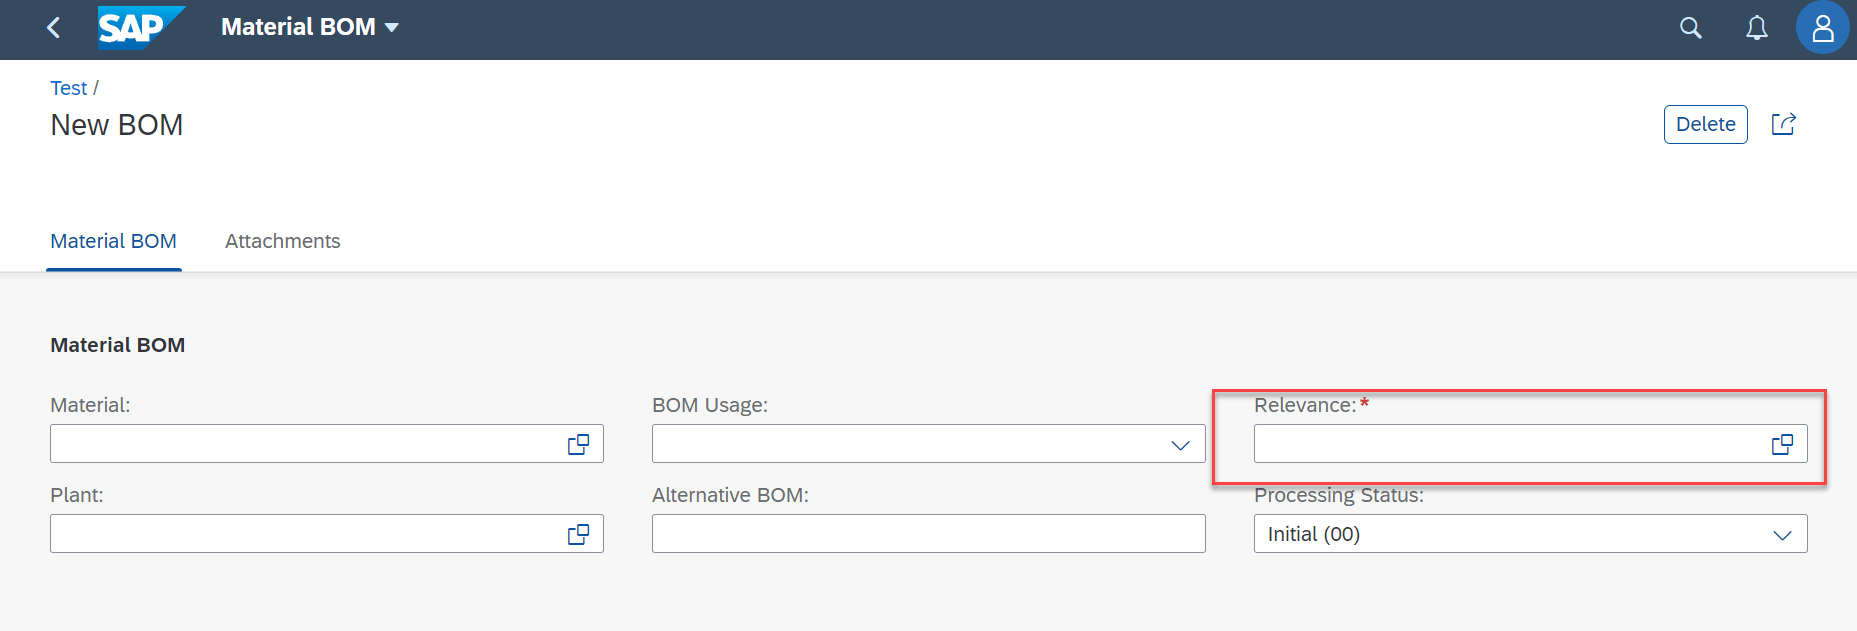
This item relevance is used for the Items mentioned in the change record as shown in the image below for each of the object types. The control whether the enable the display the field of change relevance is covered by the configuration Define Engineering Record Type Section in Image 18
8. Define Engineering Record types.
Path : SPRO > Logistics General > PLM > Change Record > Setting for engineering Changes > Define Engineering Record Types
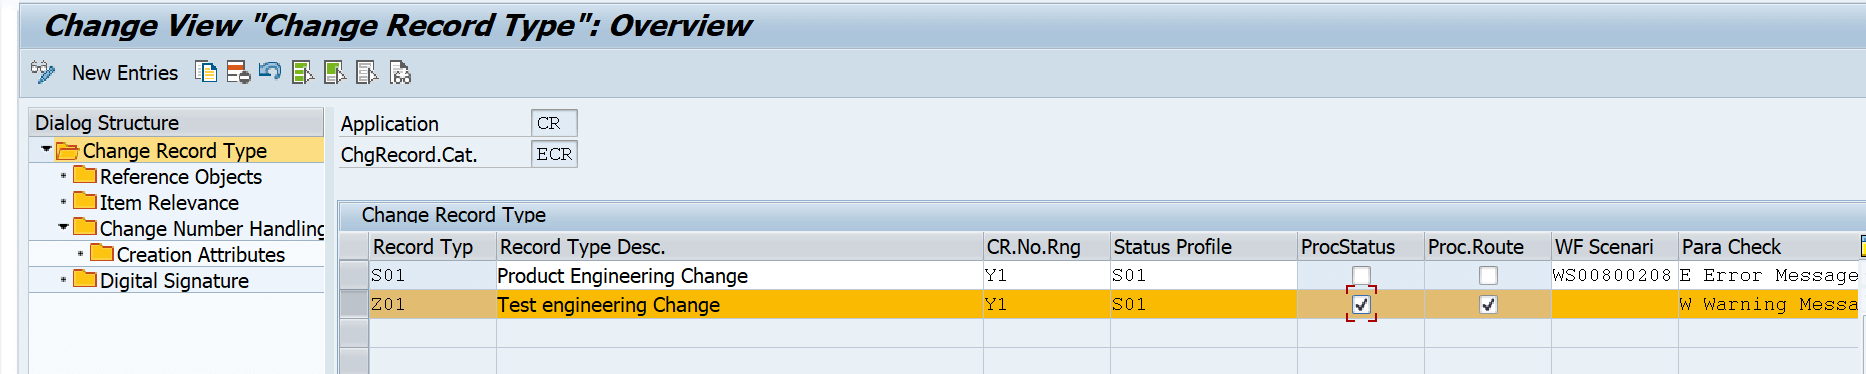
The change number and the status profile defined are assigned to the change record type Z01.
The check “ProcStatus” is used to control whether the item processing status is required or not as shown in the below image
SAP recommends the use of Process route for the Engineering change’s so the Check box Proc Route is enable for the Change record type : Z01.
Para Check column is used to enable the check whether same Object is used parallelly in other change number which is open or in process
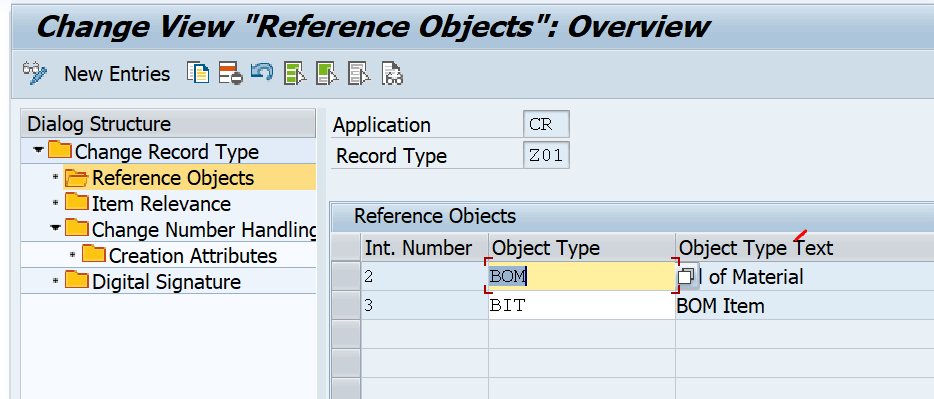
The Reference Object that will be used for the change record type are updated. You can create Multiple change record type having different Reference Object
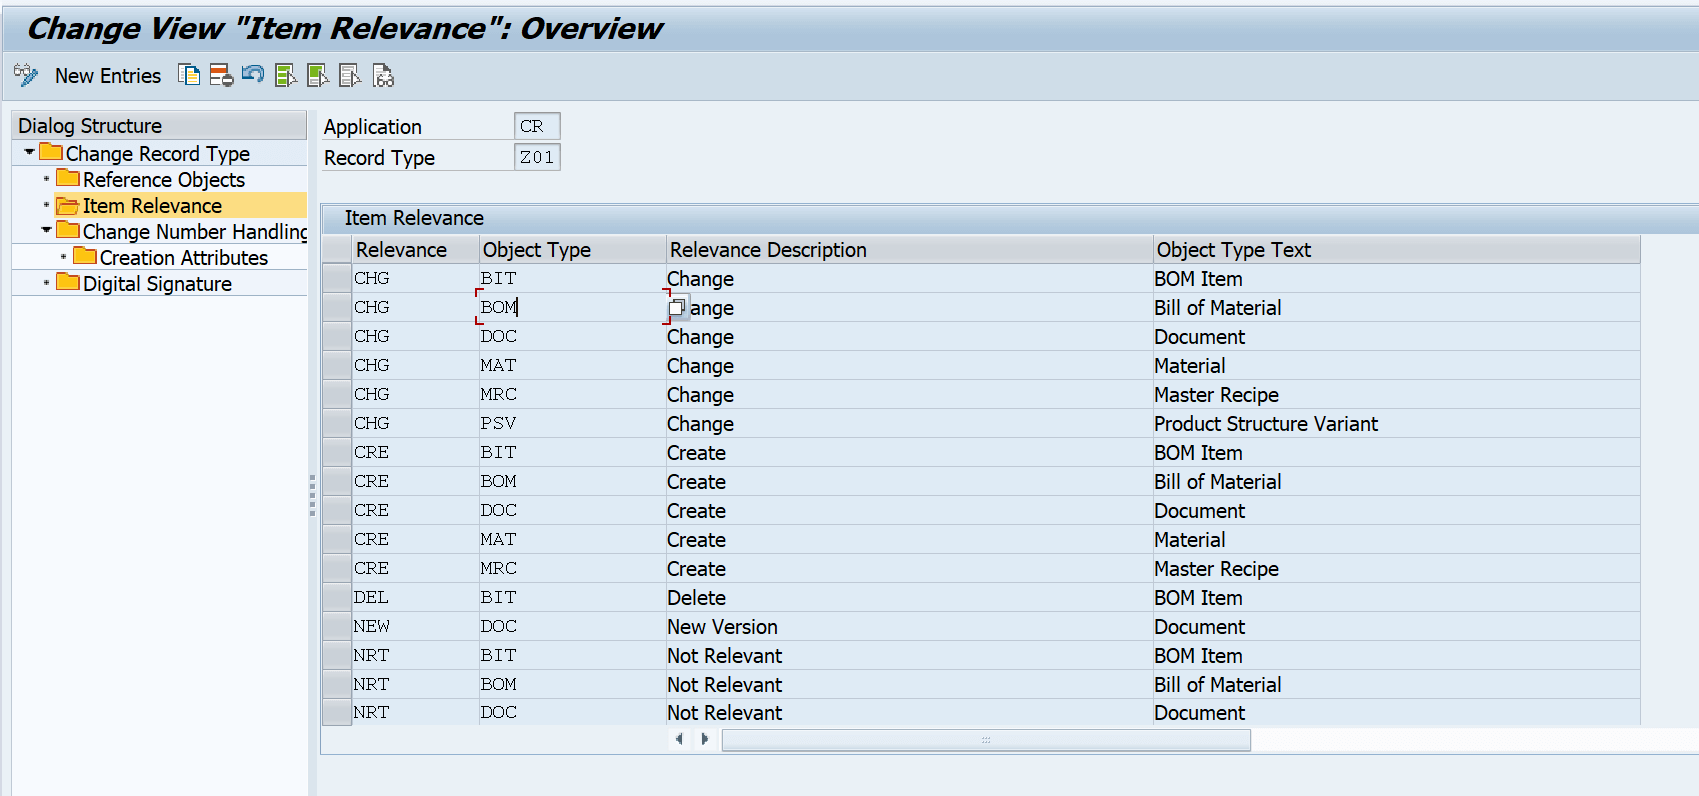
Mapping of the Item Relevance with Refence object category is done in this node. As per the mapping only the relevant item relevance will be shown.
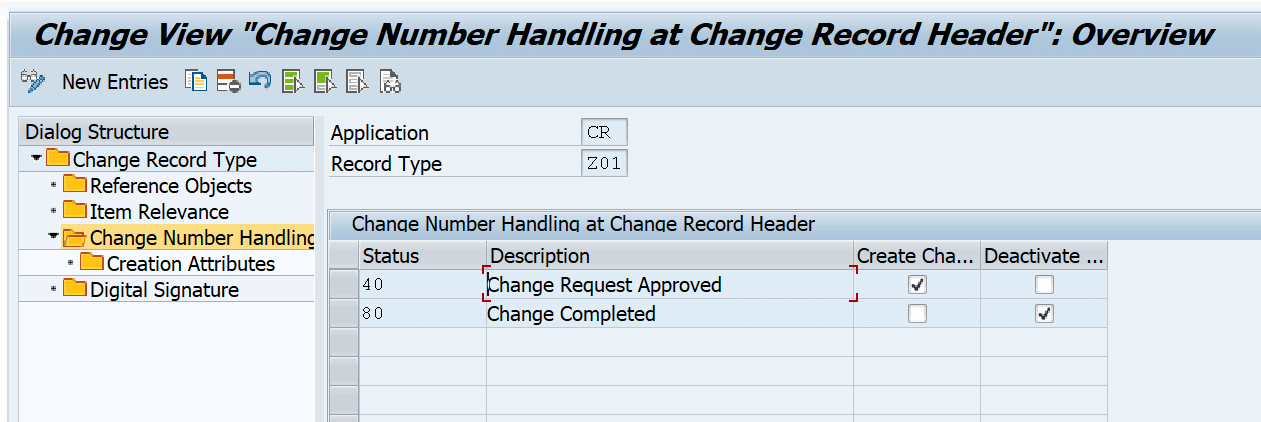
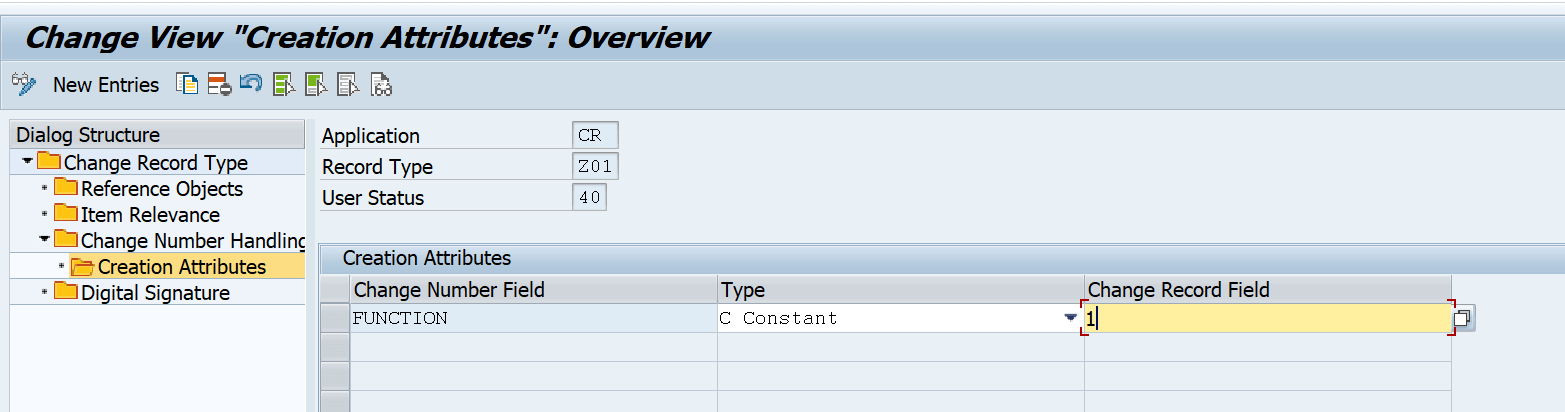
The Configuration in this Node decide, control at which user status the Change number is created in SAP and at which user status the change number created in SAP is marked as completed. The Change number created in SAP is seen at the header of the change record also via the cc03 transaction.

It is also possible to control whether the change number should be created with released key or without release key. The below parameter defined in the creation attribute decides whether the change number creation attribute, if its blank its “without release key” and if its set to 1 its ”Release Key”
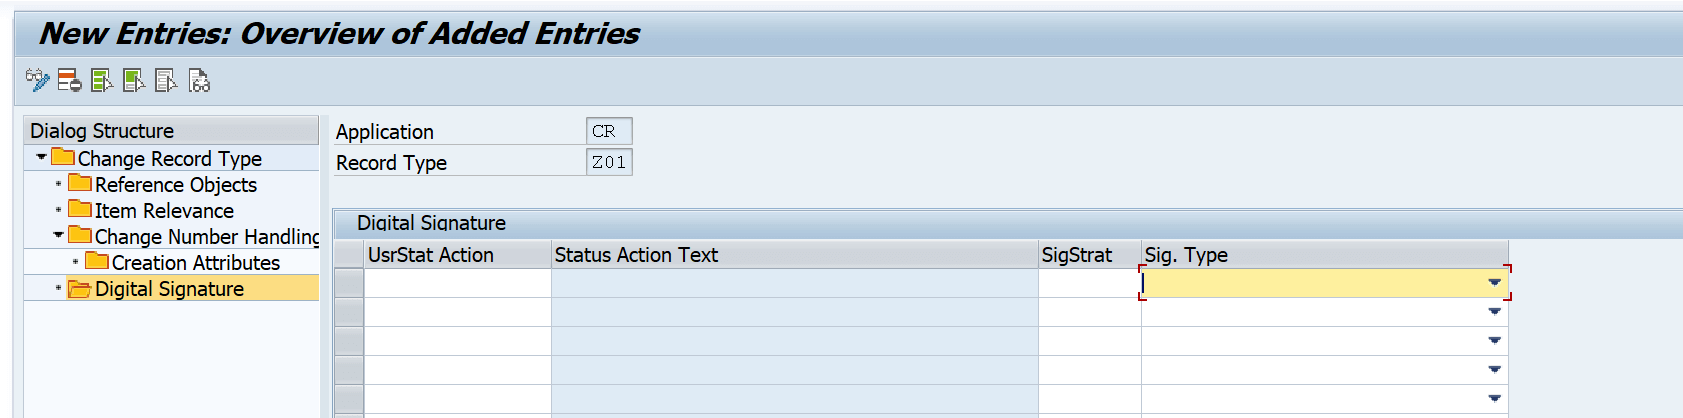
it is possible to define the digital based on the User action as defined in Section 6
9. User Assignment to Receive Task
Transaction : PFTC
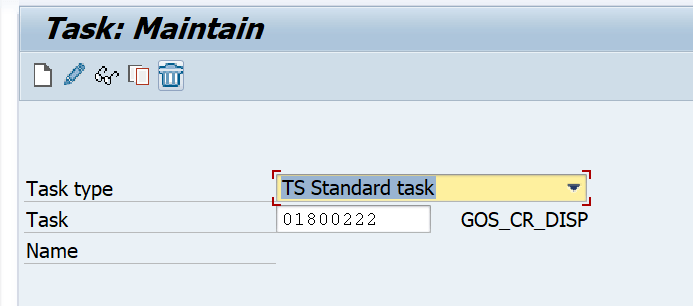
If you want to control the Work items from the change record to be displayed to specific set of People then assign the user by navigating to
Additional Data > Assignment > Maintain

if you want the workflow task to create workitem as per the user id mentioned in the task created for the process route then Change the attribute of the task to General task as shown above by clicking on the Attribute button.
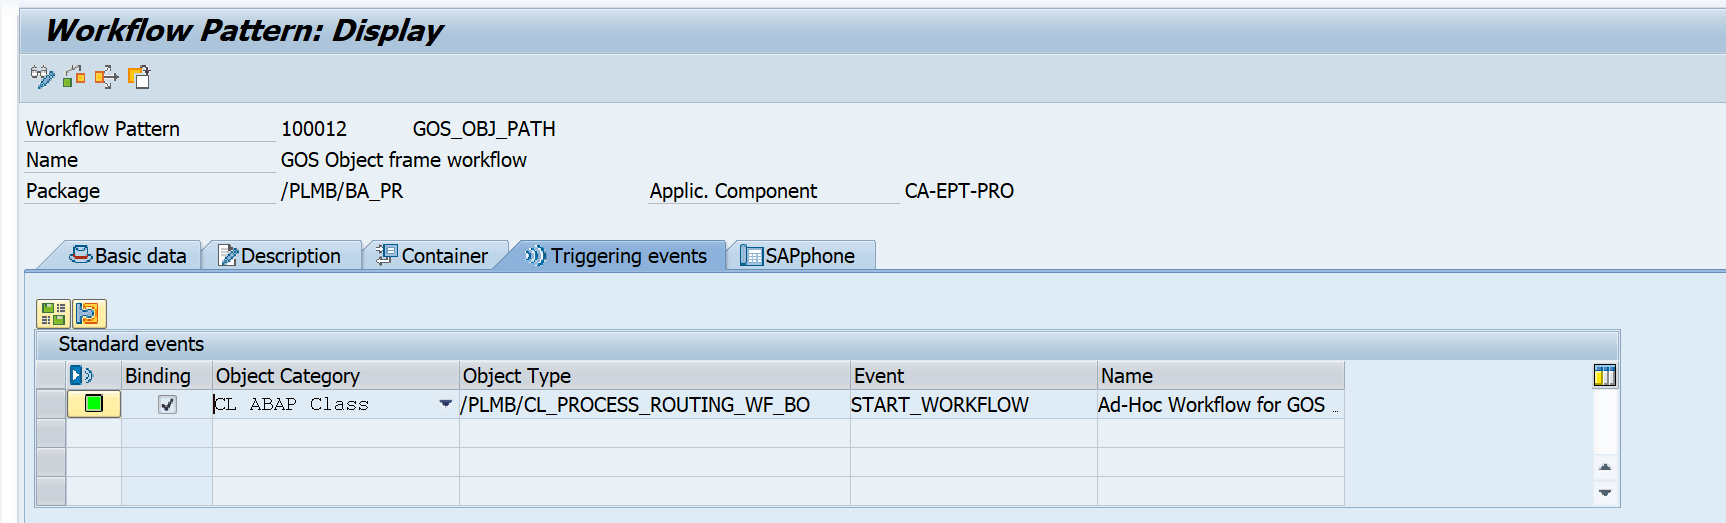
10. Activate Event linkage
Transaction : PFTC
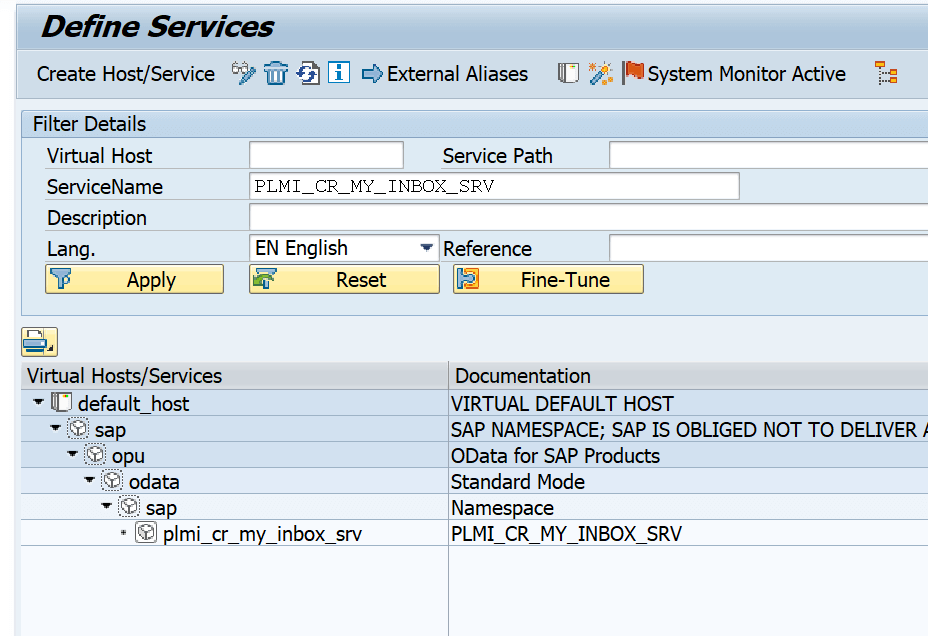
11. Enabling Service for MyInbox
This service is used to allow the processing of the work items generated, for the change Record.via the MyInbox App. if this service is not enabled you will be able to see the work items in the list of the Myinbox app but you cannot open / Process it
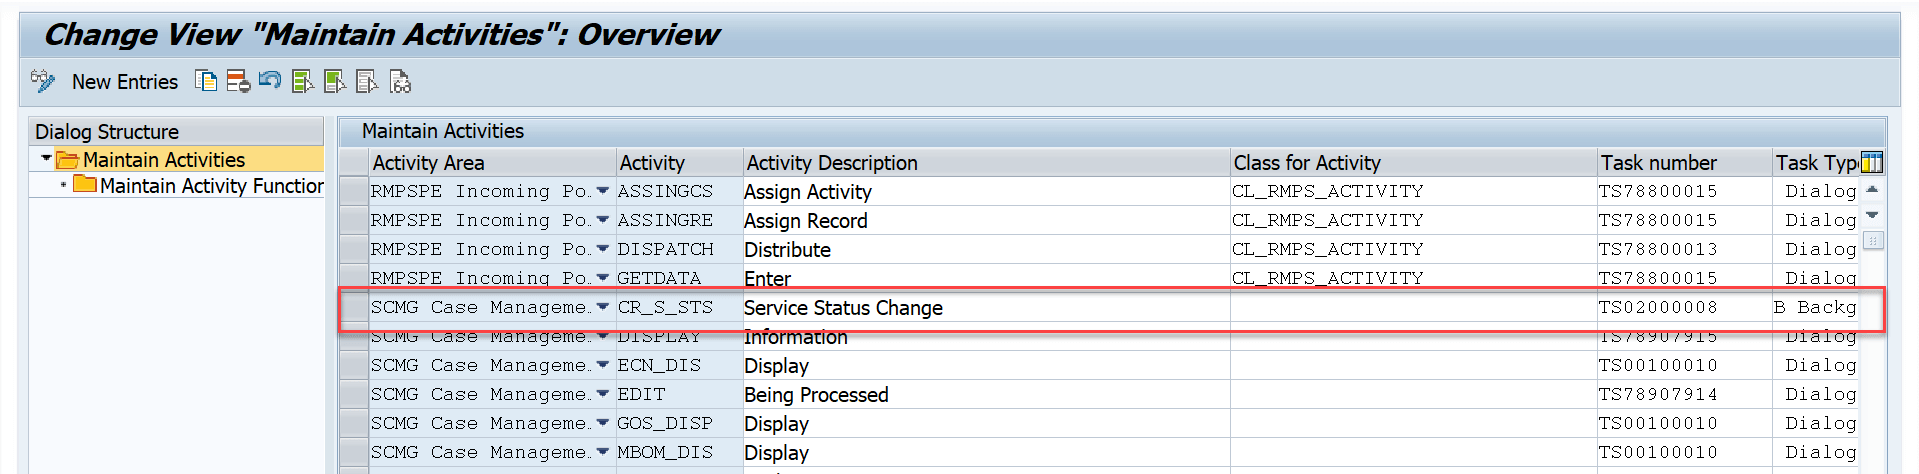
13. Define Activities for the Change Record Processing
Path : SPRO > Net weaver > Application Server > Basis Service > Records Management > Customization for Process Route > Create or change Activities and Activity Functions
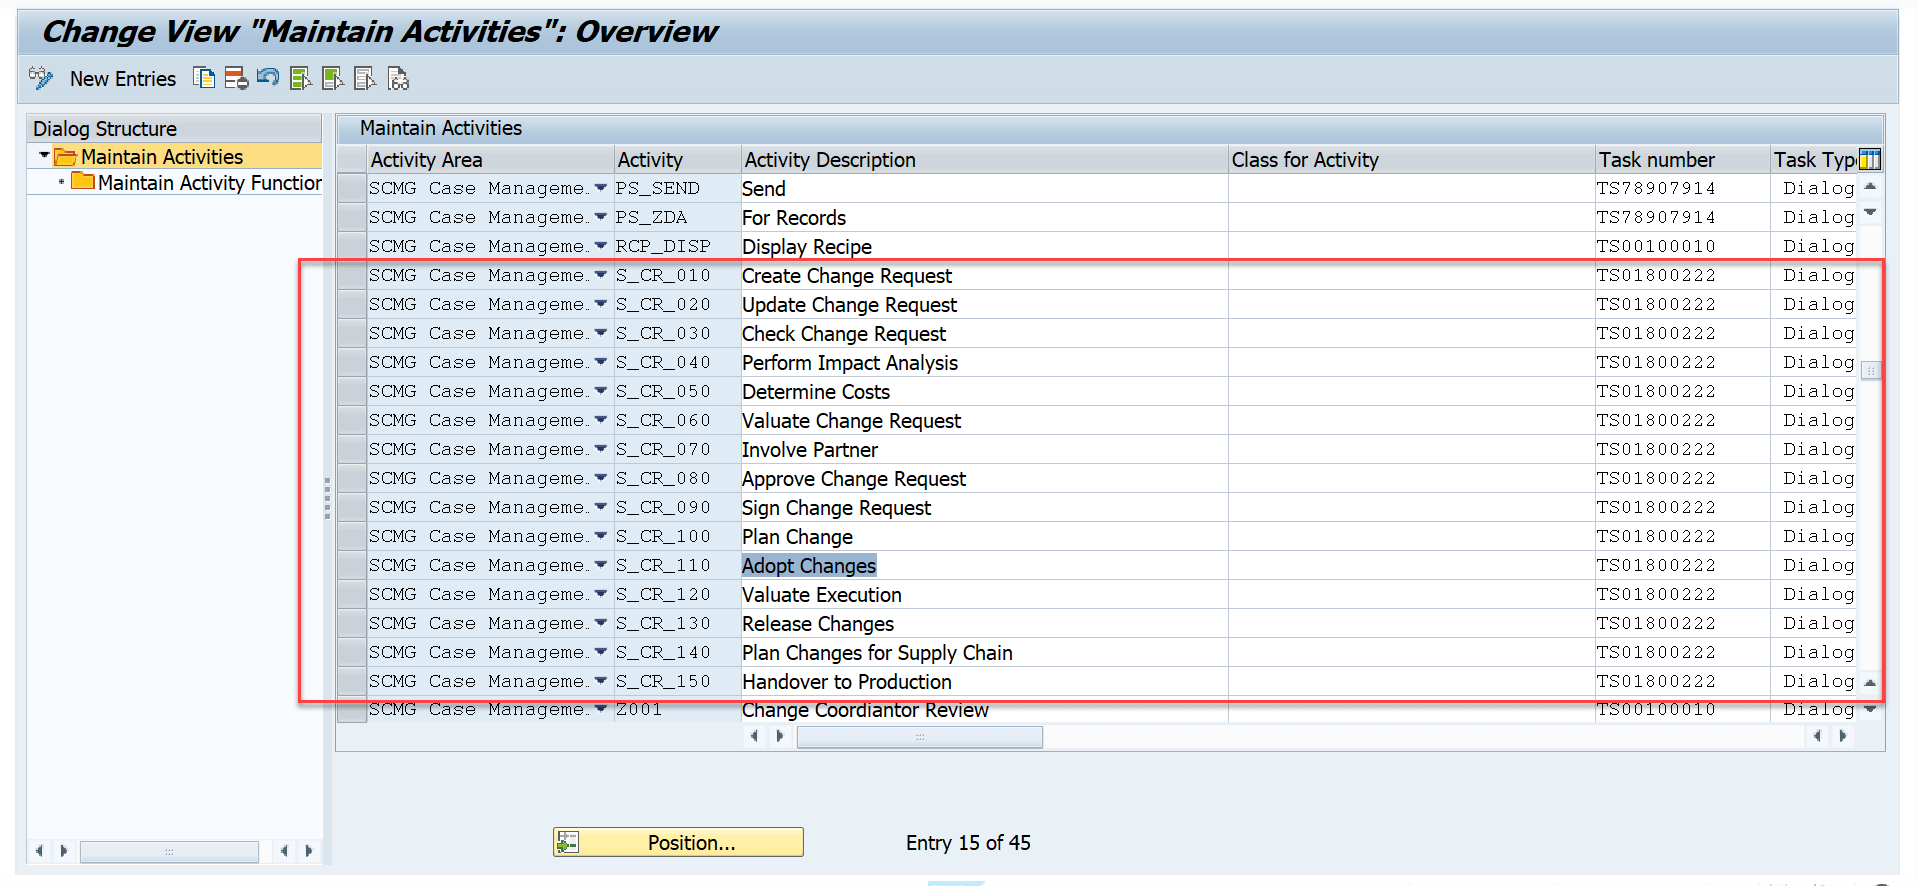
Here all the Activities for the case management are defined but to filter out the relevant activities for the change record the below configuration is required, only after which you can the activities in the change record.

the above activity is required to change the status of the change record automatically based on the rules defined in the BRF+ application.
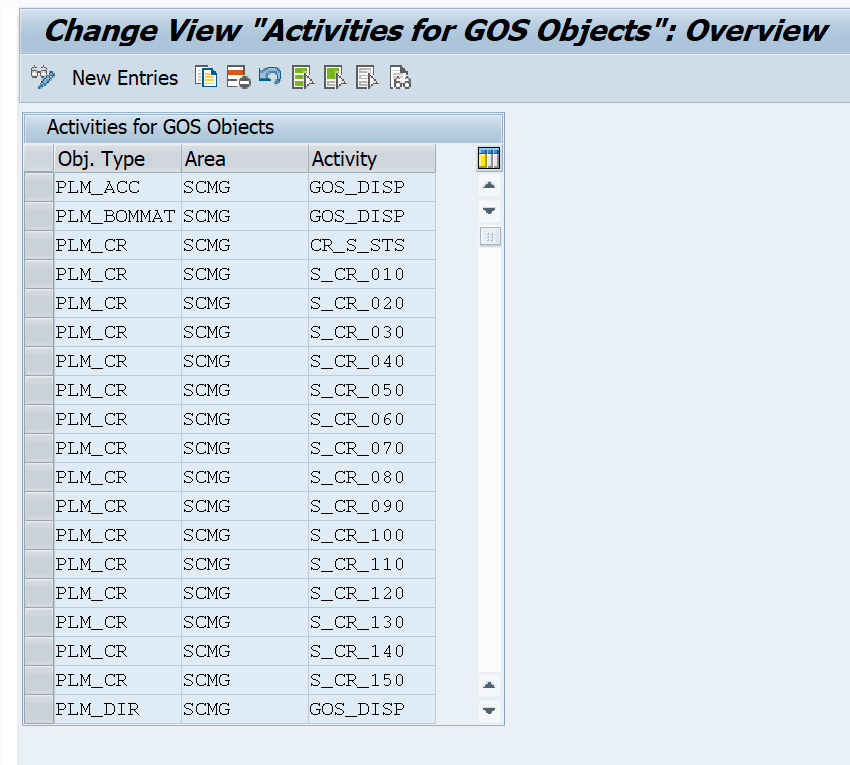
14. Define Activities for GOS Objects
Path : Spro > Logistics General > PLM > Change Record > Process route > Define Activities for GOS Objects for Process Route
Change Record Processing
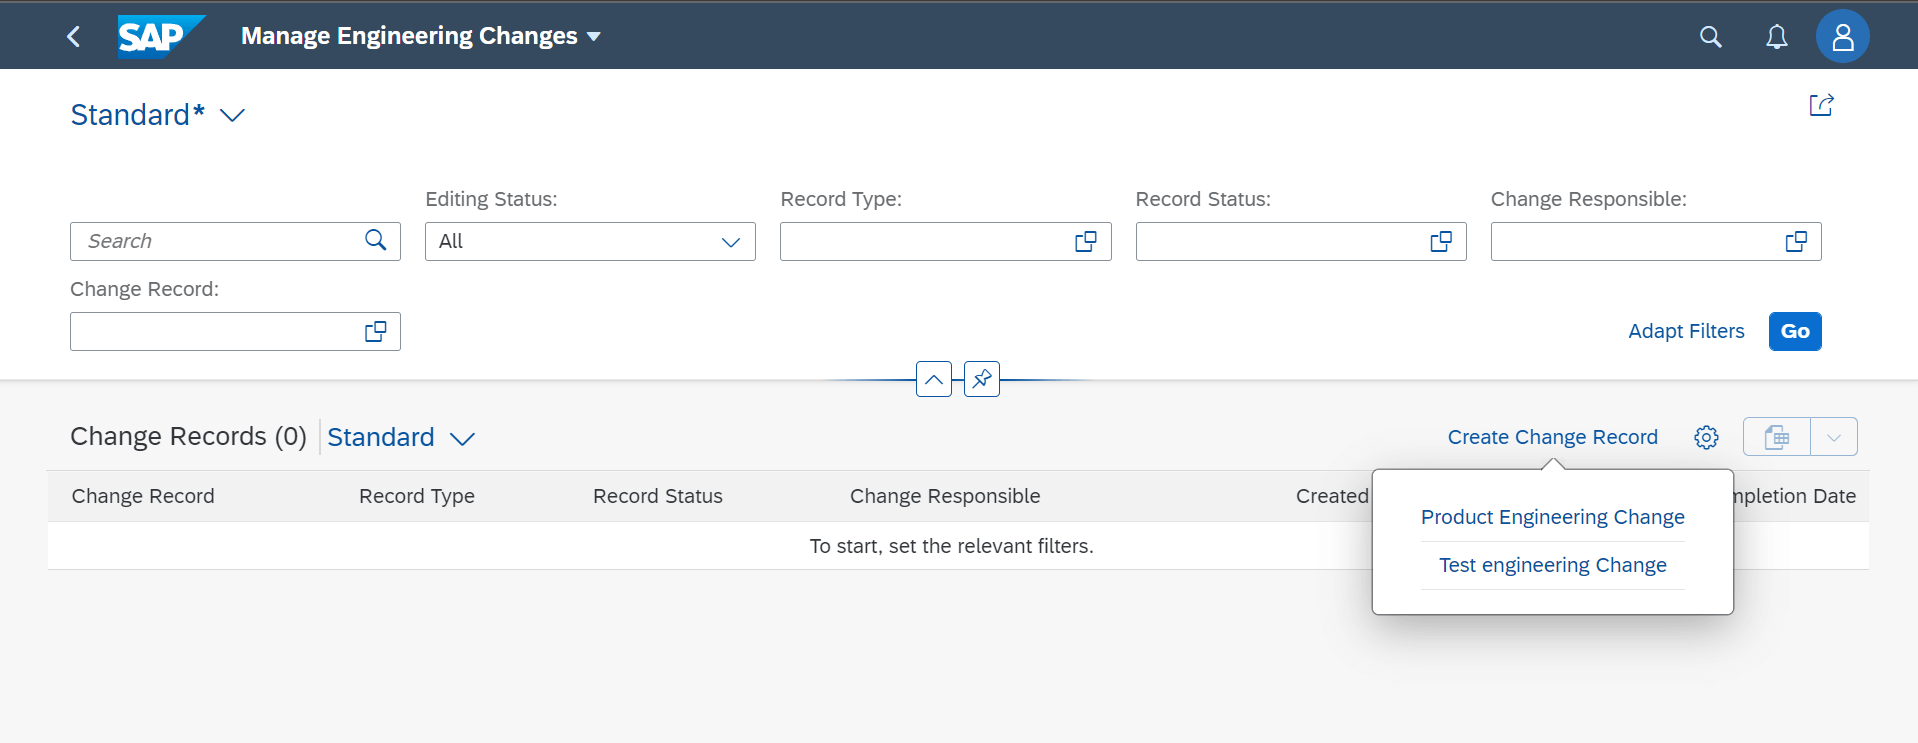
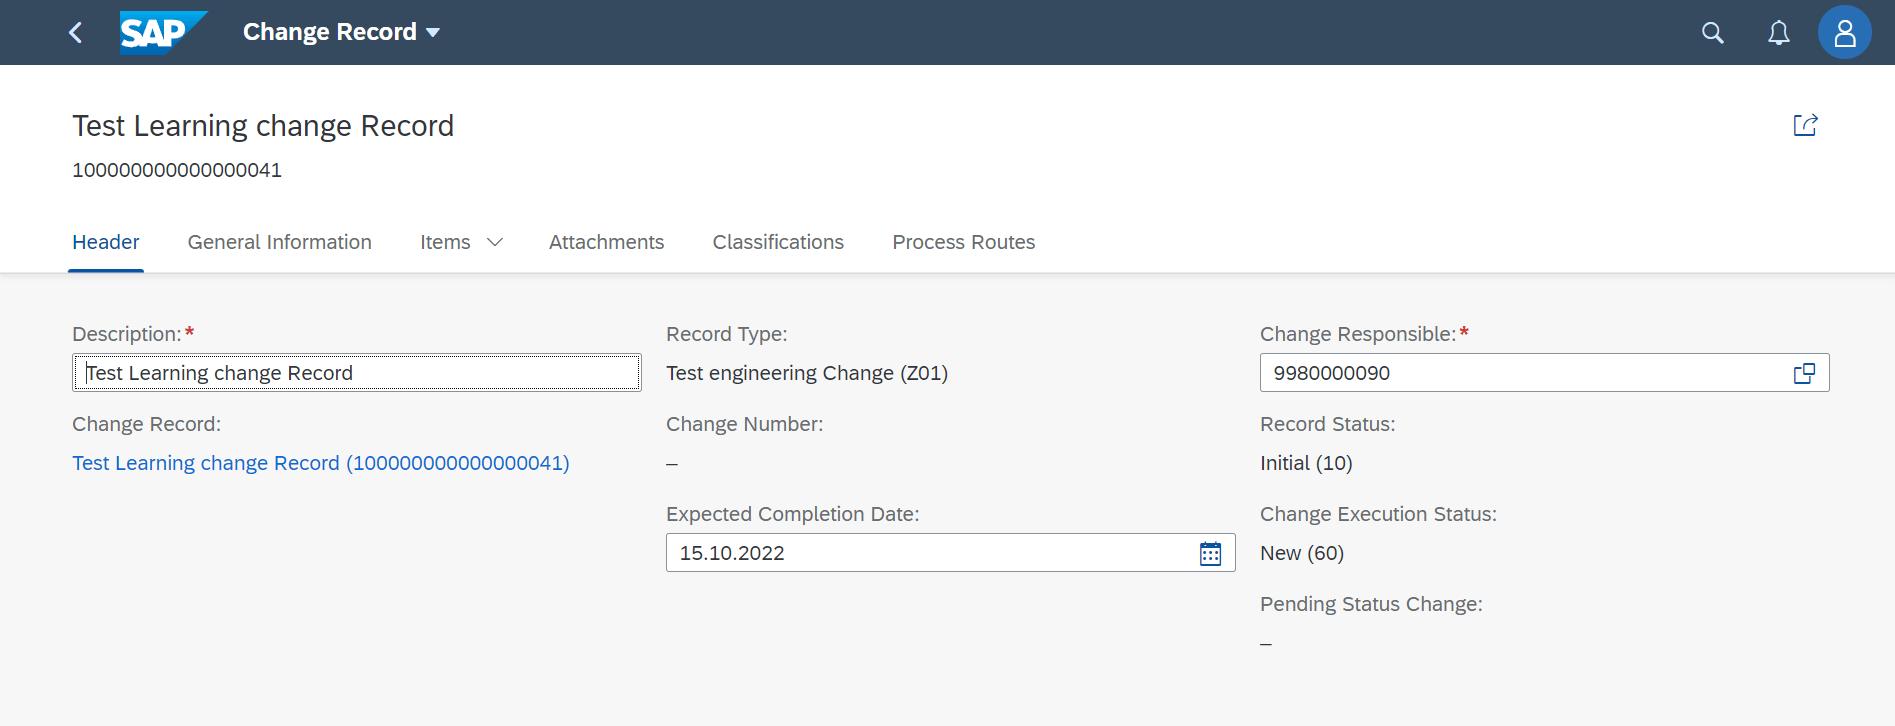
1. Create Change Record
2. Fill the details in the Change Record
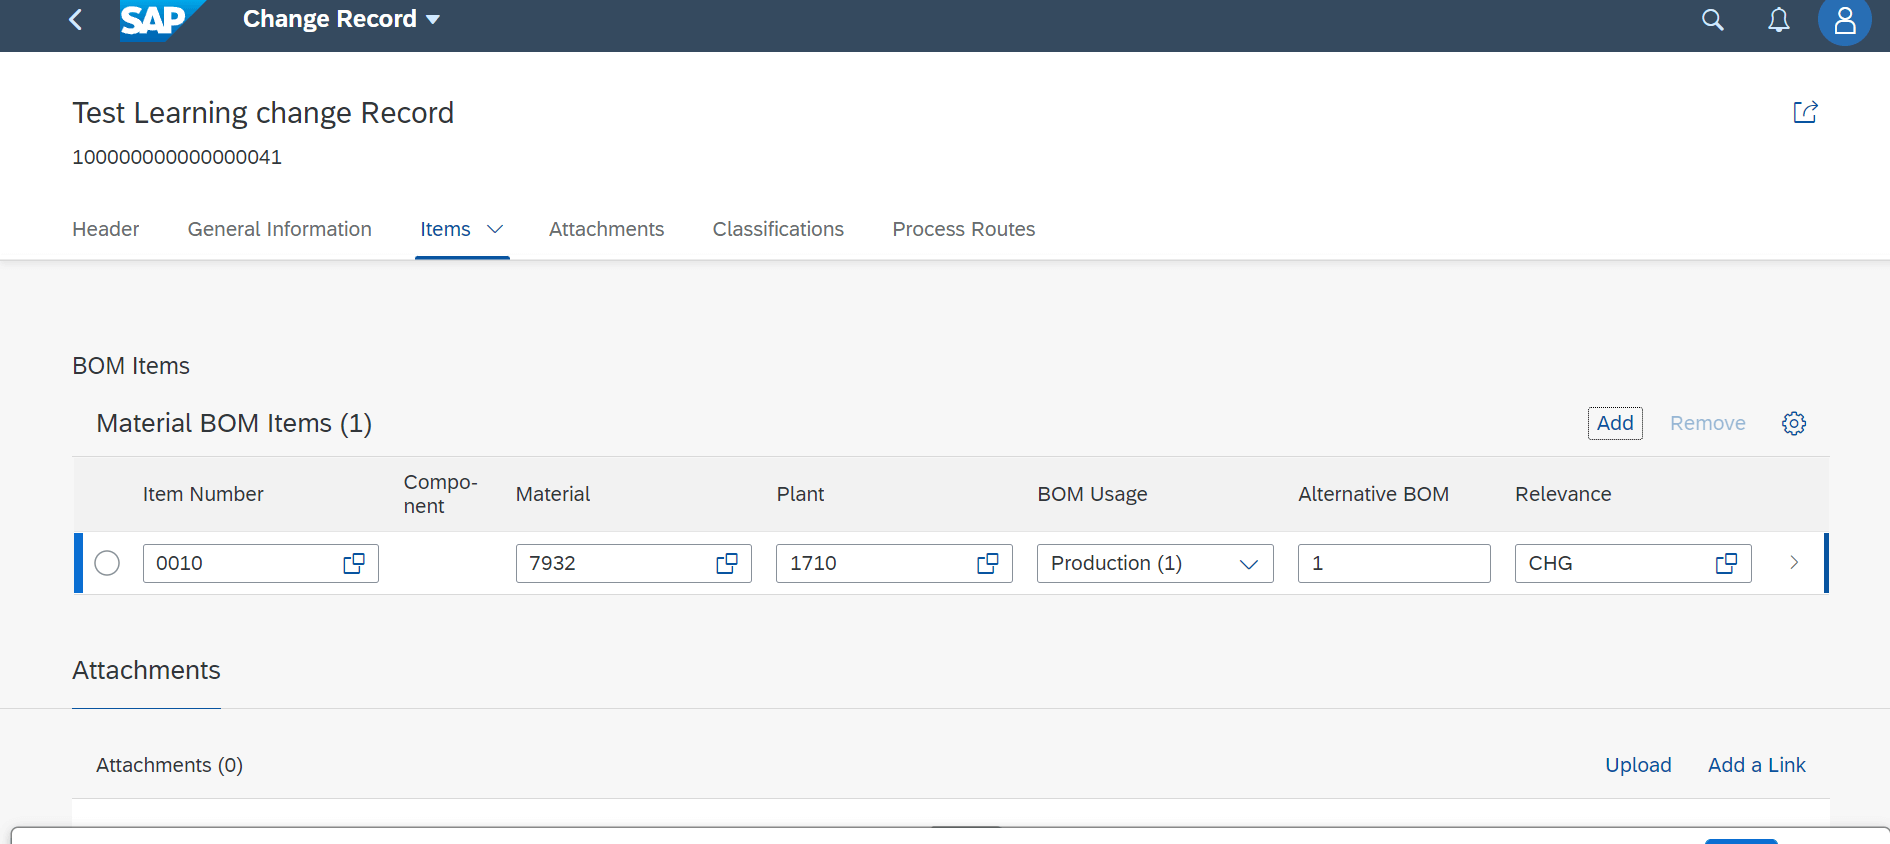
Add Objects to be changed via the change record
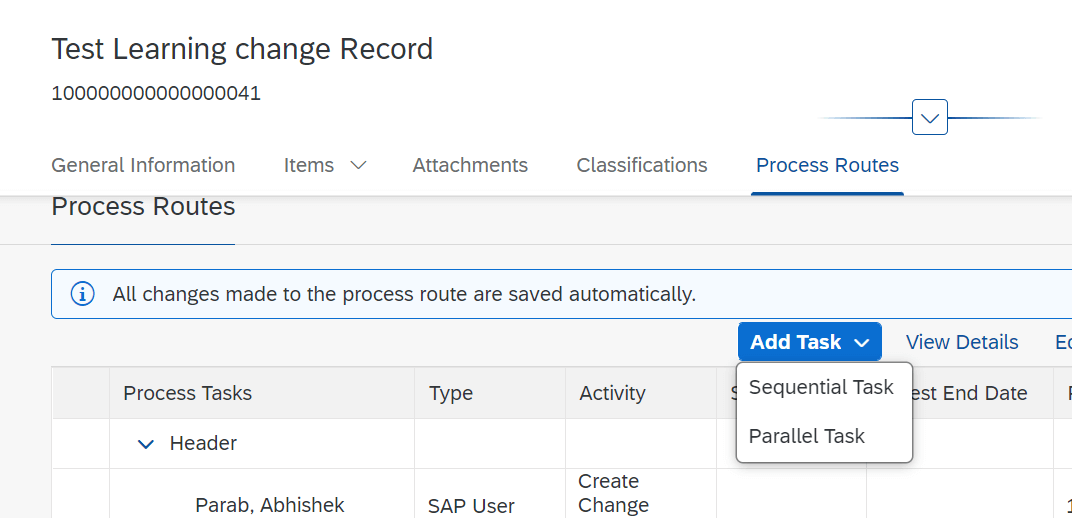
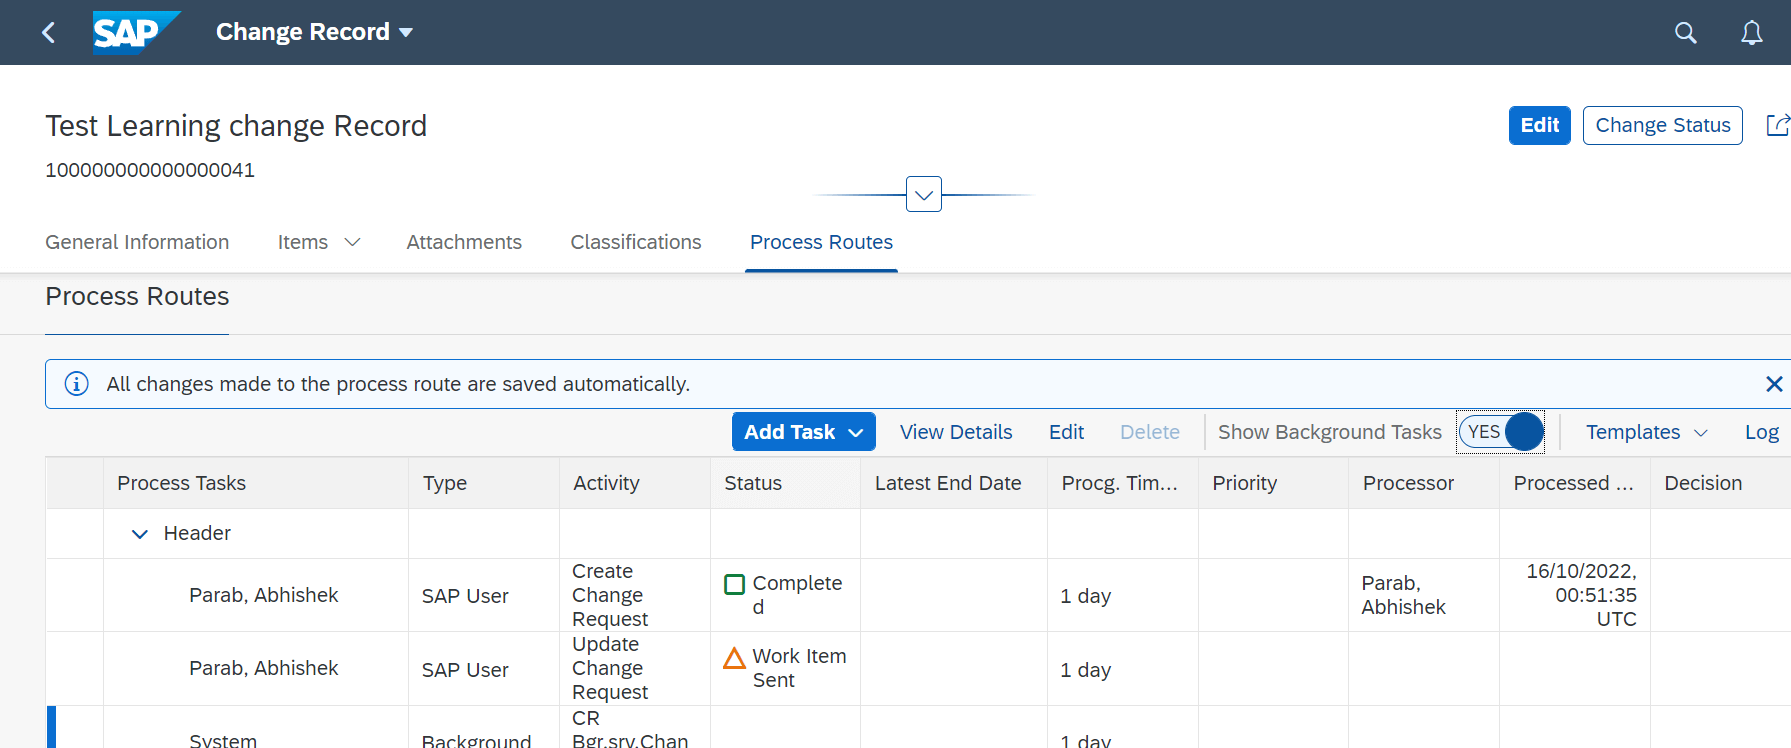
Add activities that needs to be performed for the change record. the task Can be performed Sequential, Parallel or in Background, for the sake of the Simplicity i have added the Agent for the task as a user there are other options that can be explored of, From HANA 2021, there is provision to update the Team as well which is created via the Fiori App : Manage Team and Responsibilities
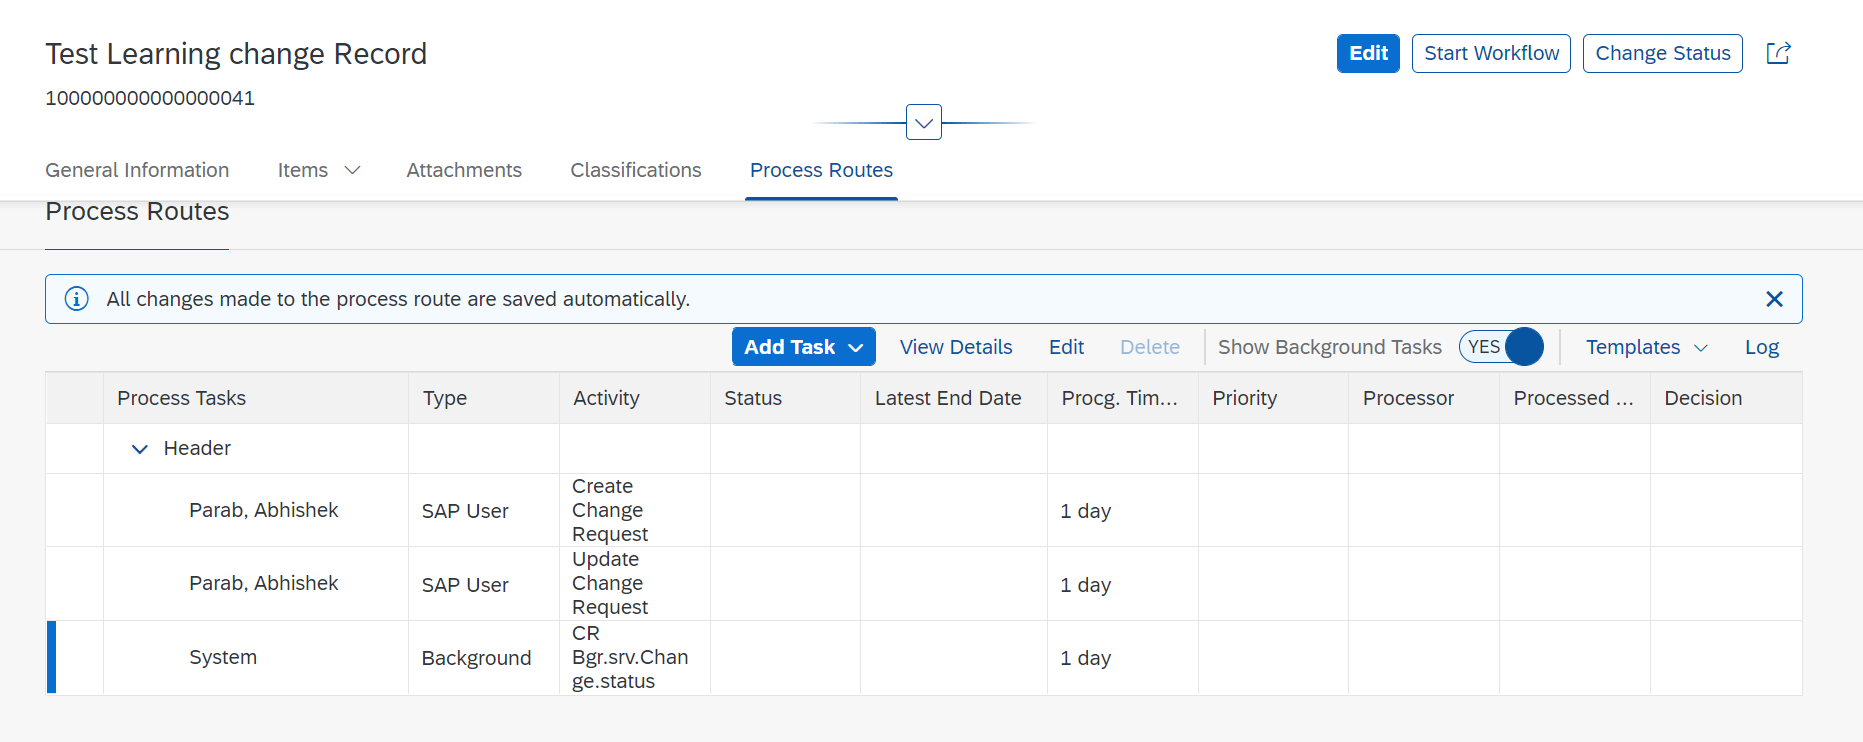
the background task are not automatically added they are added as either a sequential task or parallel task, the task shown in the below image is to update the status of the change record Automatically based on the condition, which is explained further.
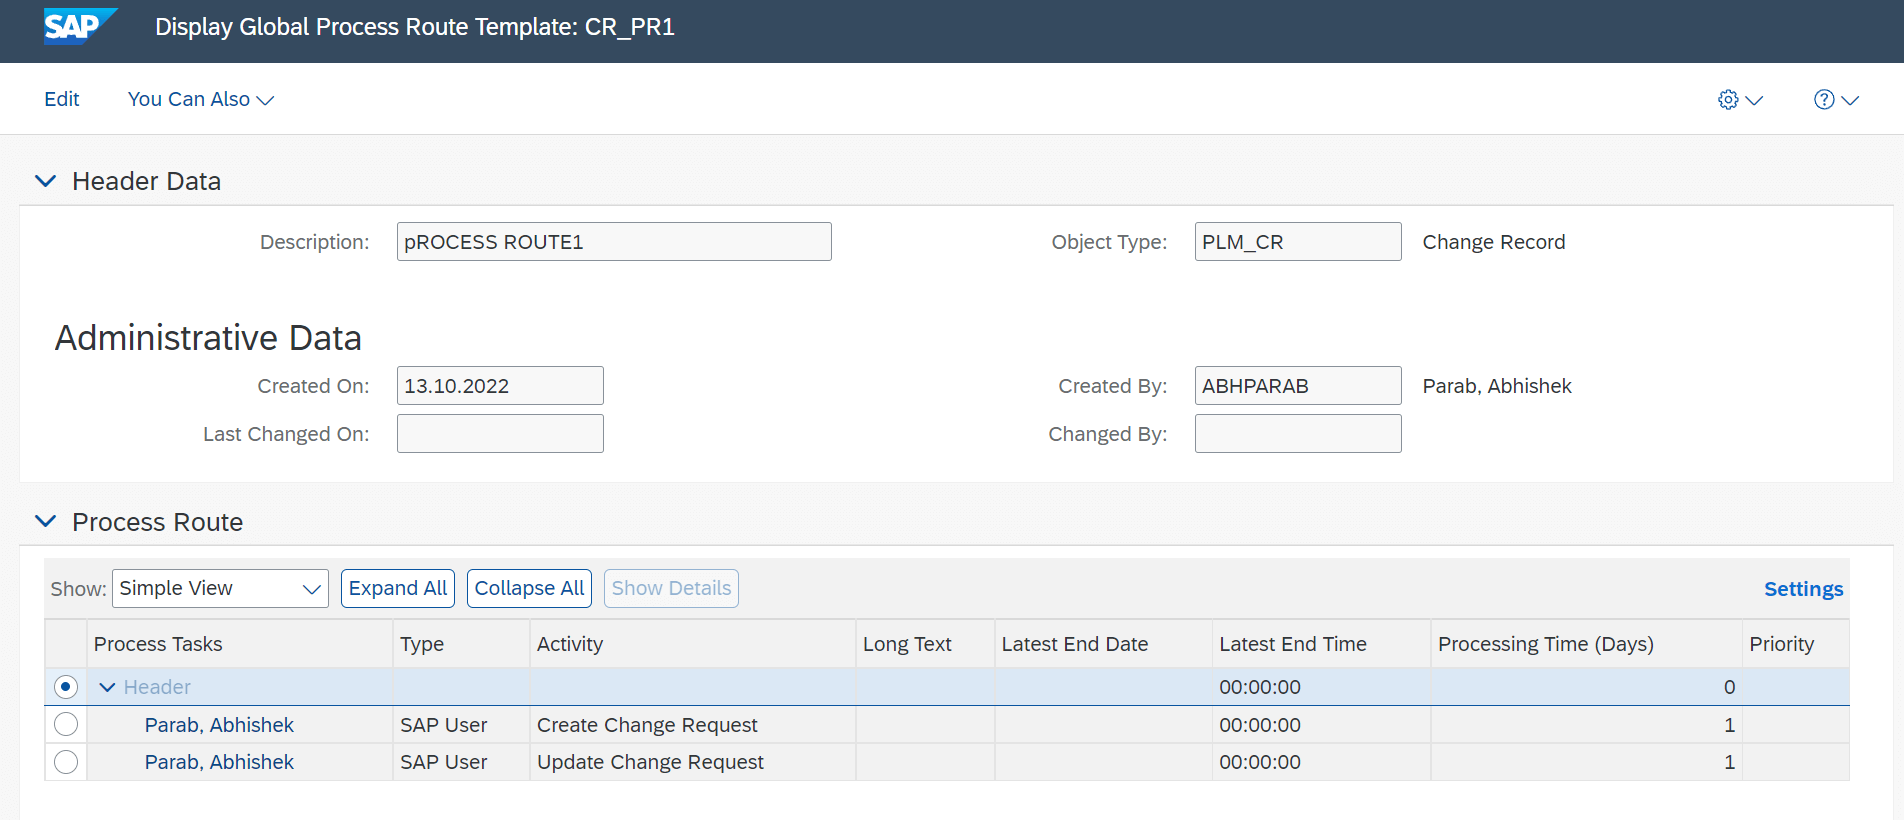
The task can also be added via the Template method. To Create Template Fiori App : Global Process Route Workbench is used
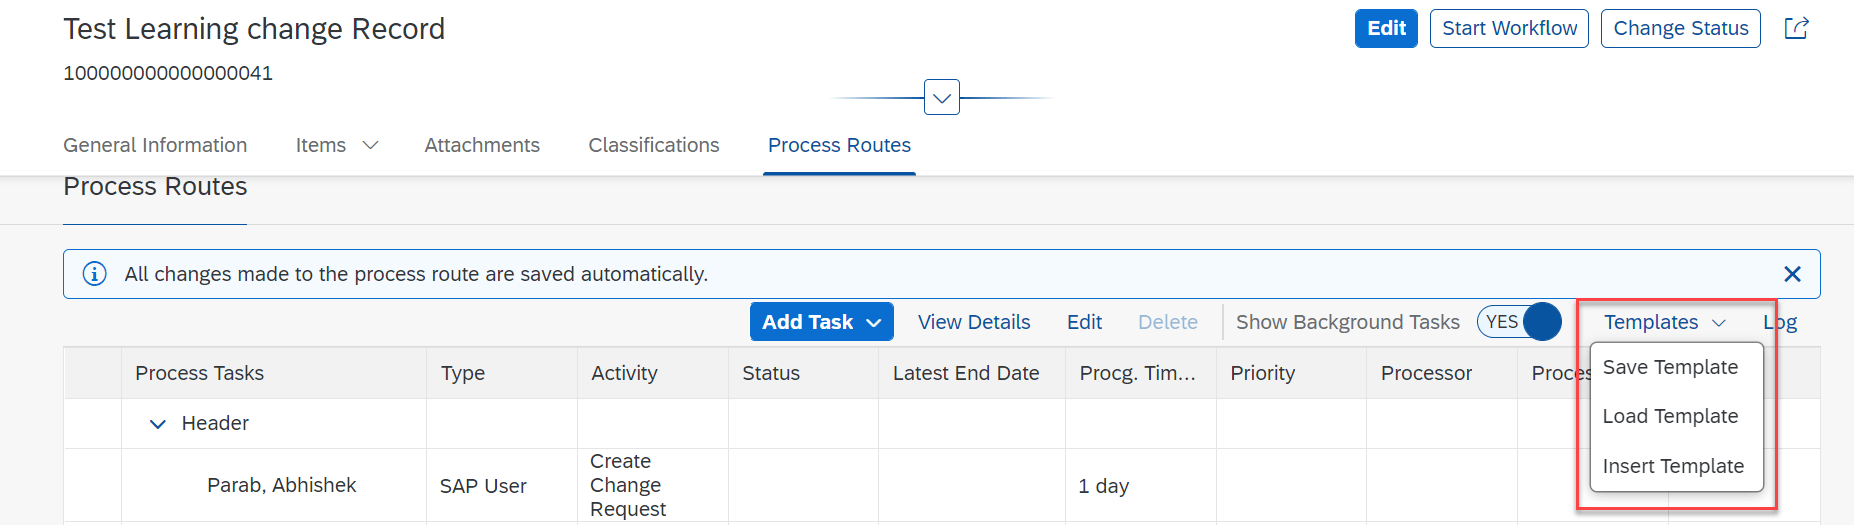
Template Created via the Global Process Route Workbench. The Task / Activity shown below are just for demonstration in this example are not in sync as per the status of the change record.
If there is further requirement which is almost certain. to have the template loaded automatically in the change record based on certain condition like record type, status etc, that can be done via the BRF+ Application.
The BRF + application and its functions need to be assigned in the configuration. Note: The BRF + application needs to be activated in order to have it working
BRF+ Application Creation and Assignment
Create a BRF+ Application and add a function to it by right clicking. Set the mode of the function to either functional mode or Functional or event mode.
Note: for the folks who are new to BRF+ or still not aware of the functionality. Context is the input part and result data object is the output part.
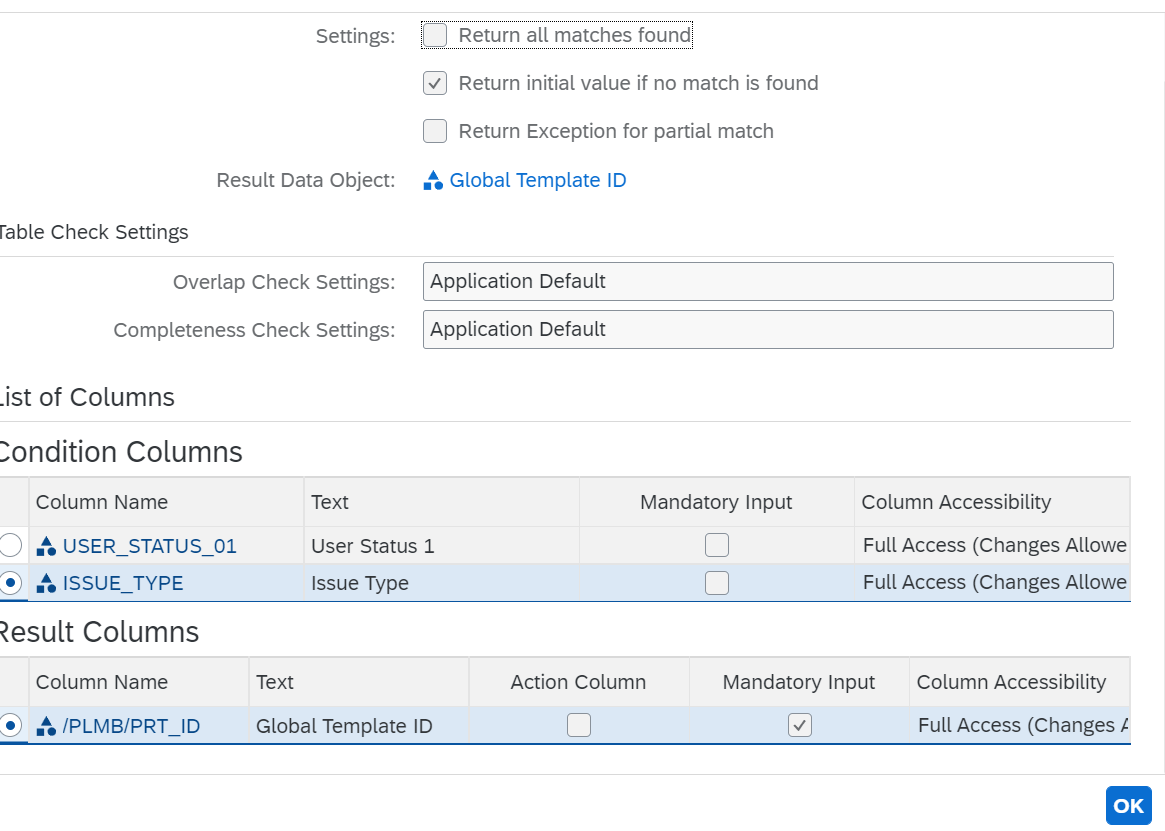
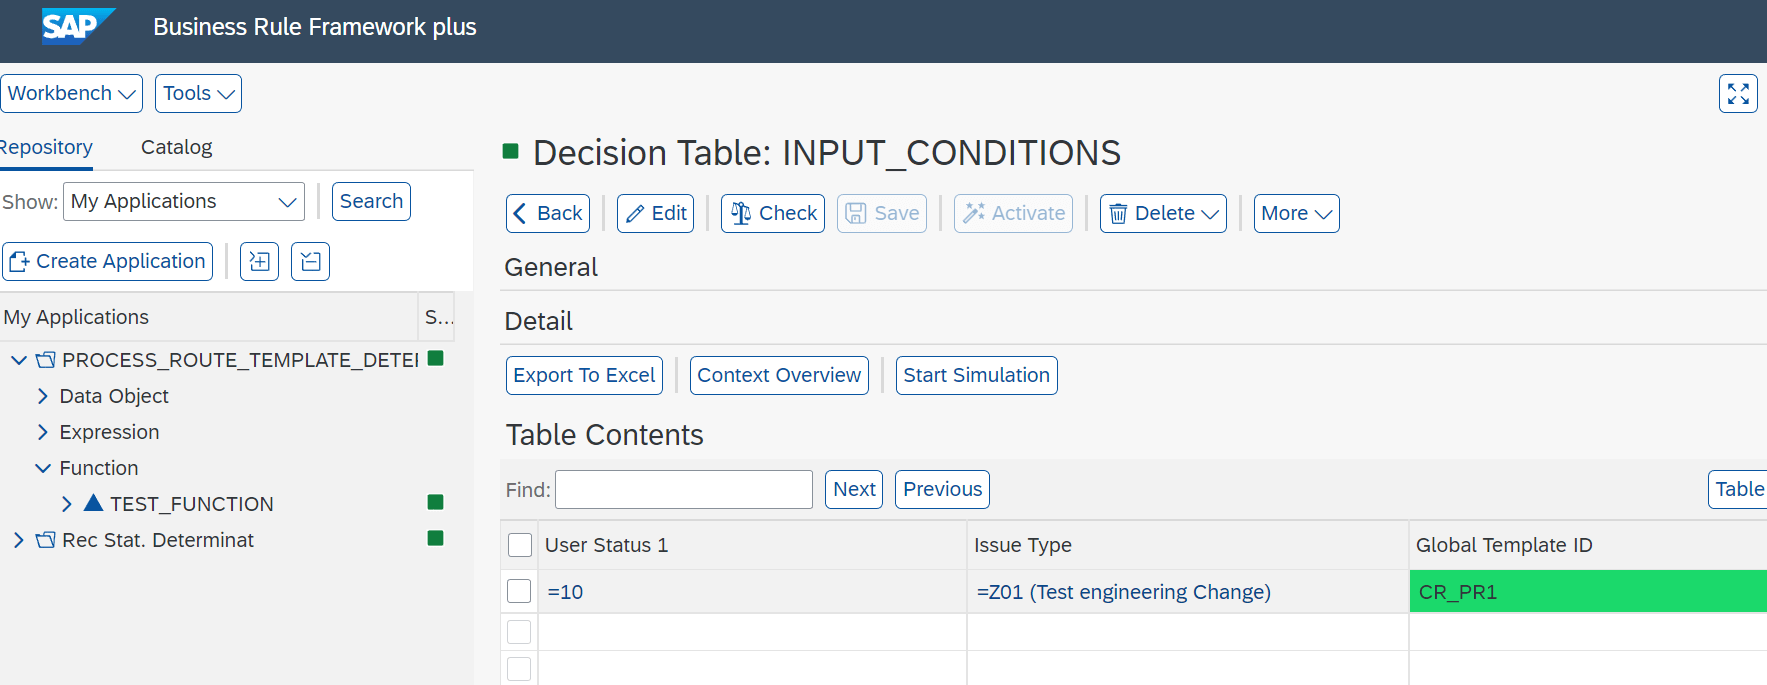
the translation of the data from the input to output is done via the expression. In the image below the Input conditions acts as a expression
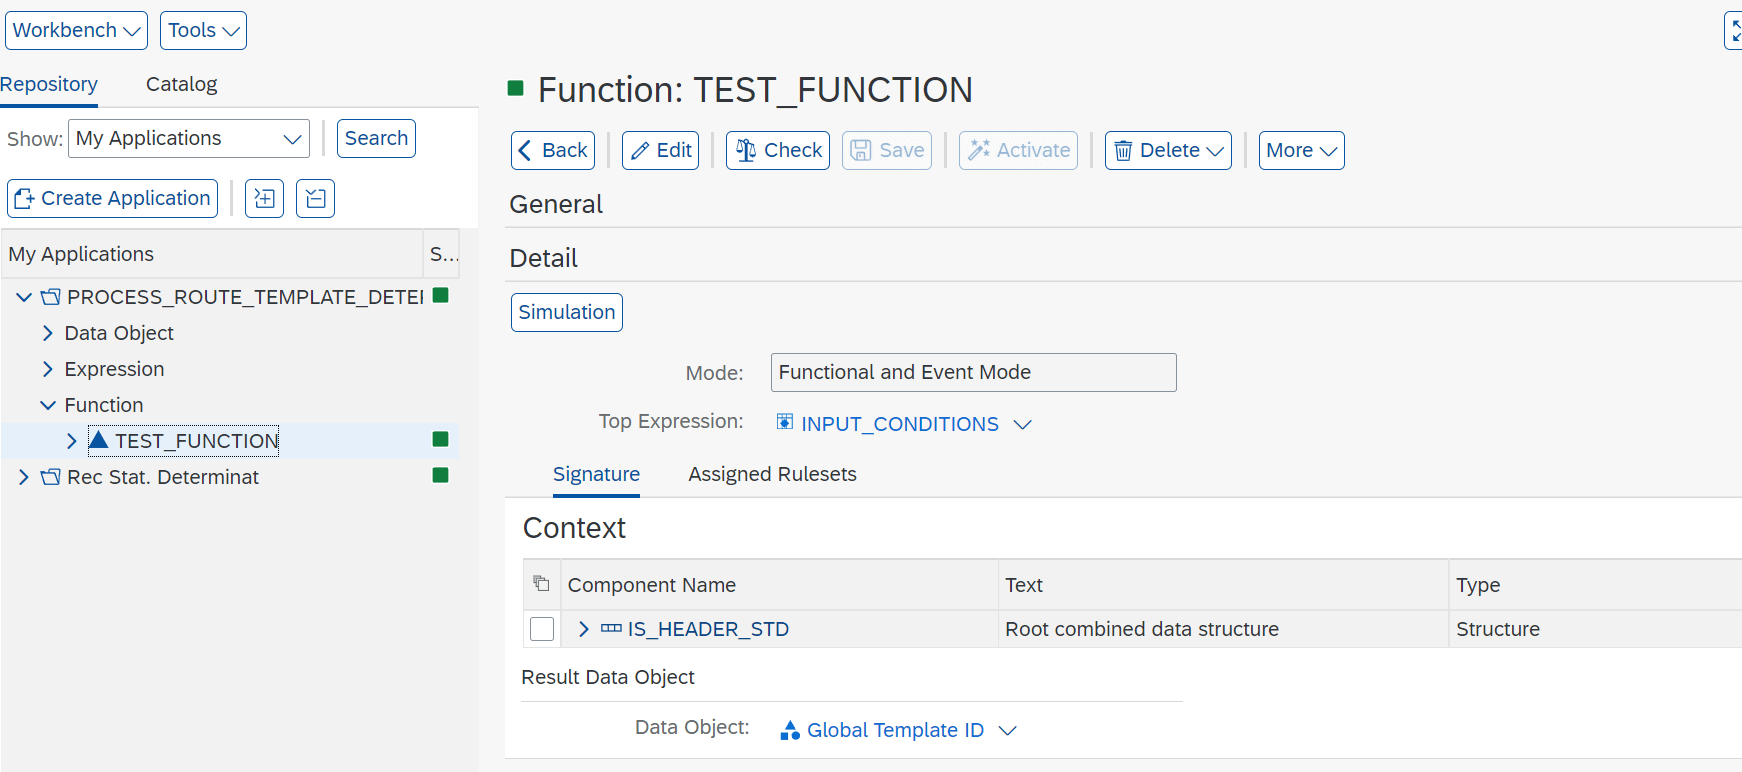
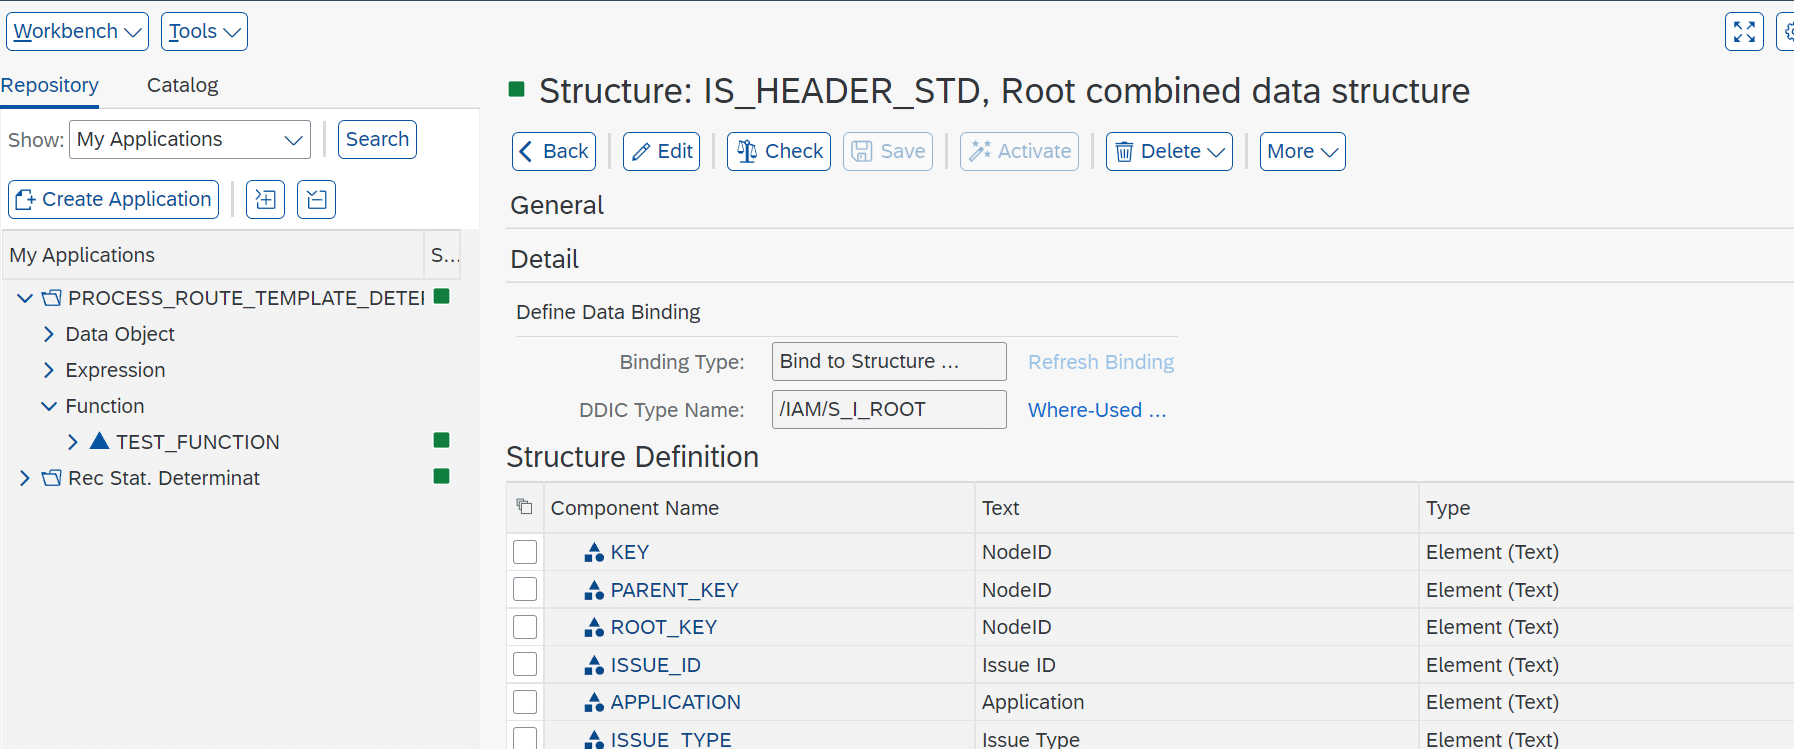
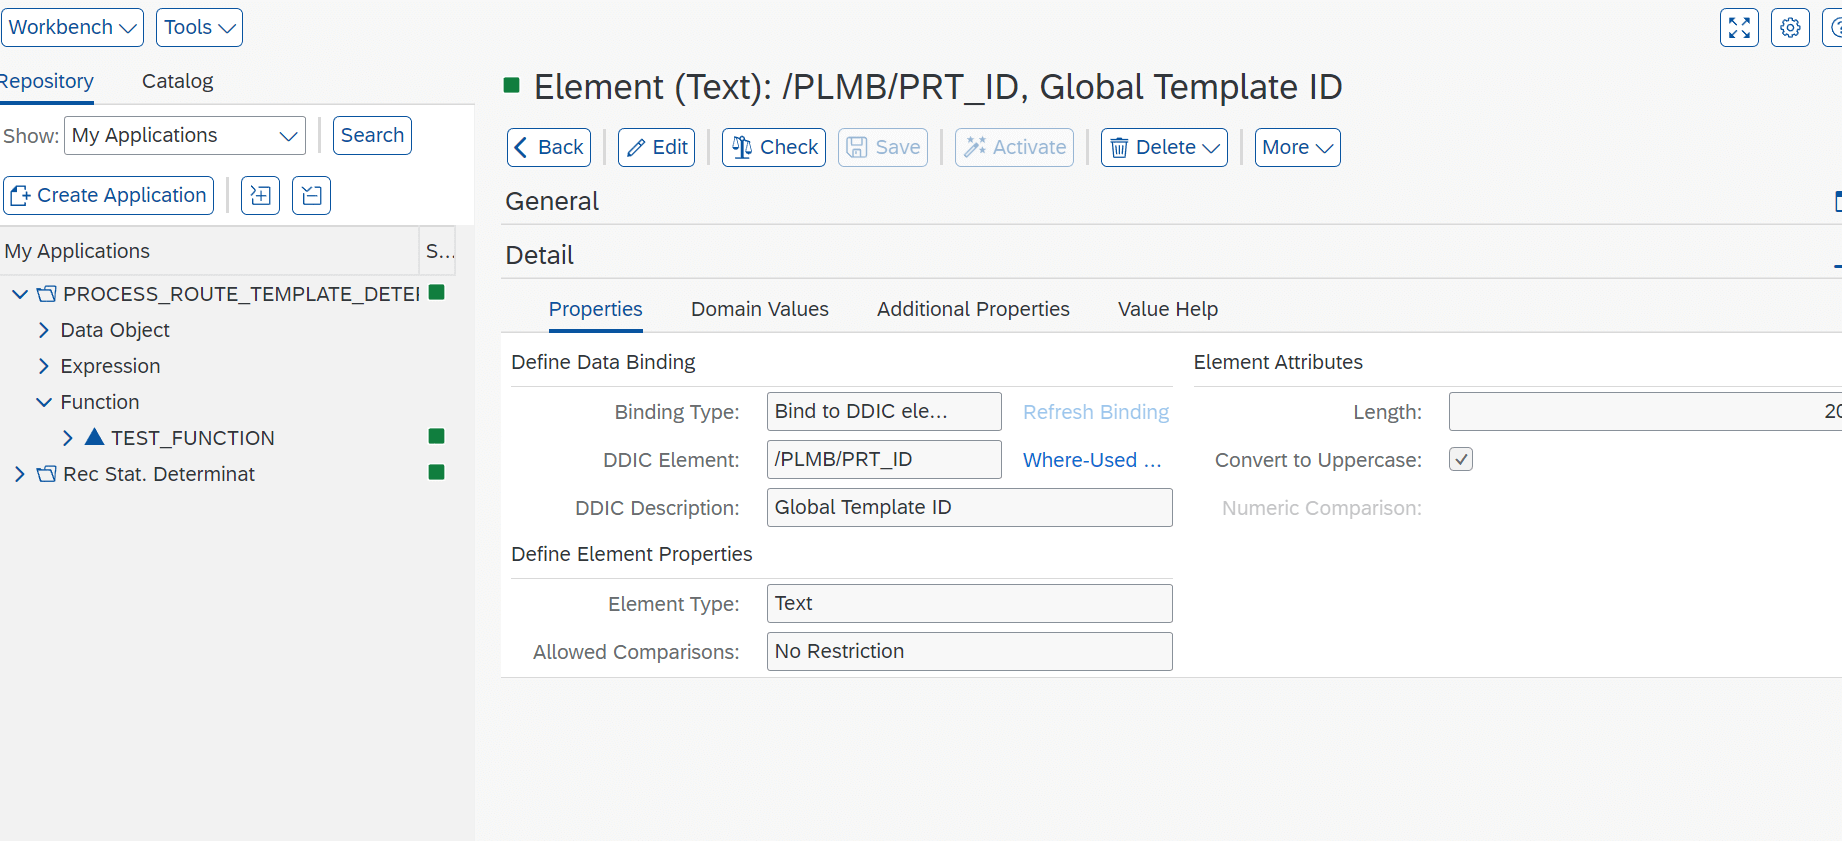
Define the Context: its a structure with binding to DDIC
the output is defined as Element and has a DDIC Binding
Create a Decision table as a Top Expression, the inputs fields to the Decision table is from the context and the output is from the Results Data object.
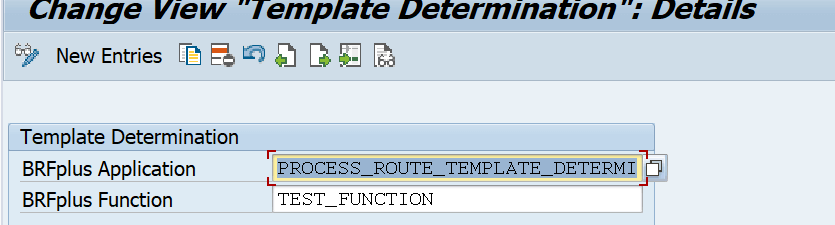
Assign the BRF Application in the configuration Path
Path : SPRO > Logistics General > PLM > Change Record > Process Route > Define Template
Change Record Process Continuation.
Start the workflow in the change record.

the work item will be received in the my inbox App or in the SO01 Transaction. Complete the Task to move the change record to the next task as per the process route.

Change the status of the Change record. The status of the change record are as per the Section 6 ( User Action Profile )

if the request it to Update the Change record status based on the previous task decision that can be done via the BRF + Application. SAP has Predelivered standard task for the Changing the Changing status automatically based on the BRF+ Setup
Create Background Task
SPRO > Netweaver > application server > basis service > Records Management > customization for process route > Create or Change activity and activity type.
Create Background Service
Path > SPRO > Logistics General > PLM > Change record > Process route > Define Background Service


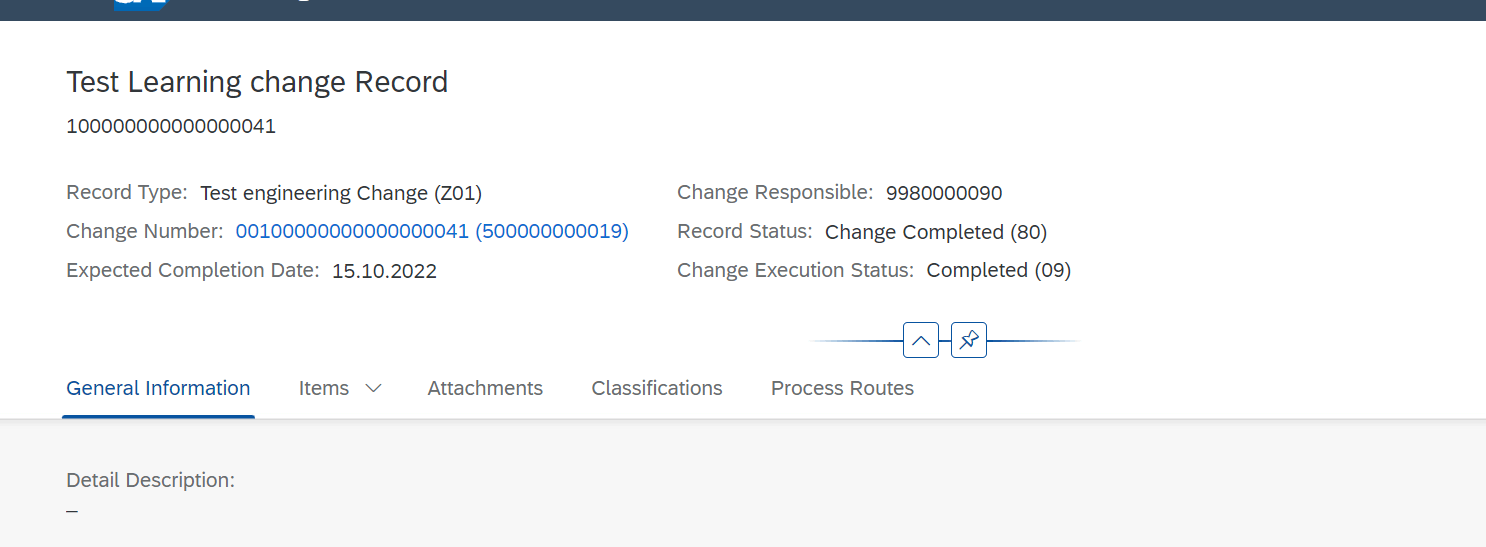
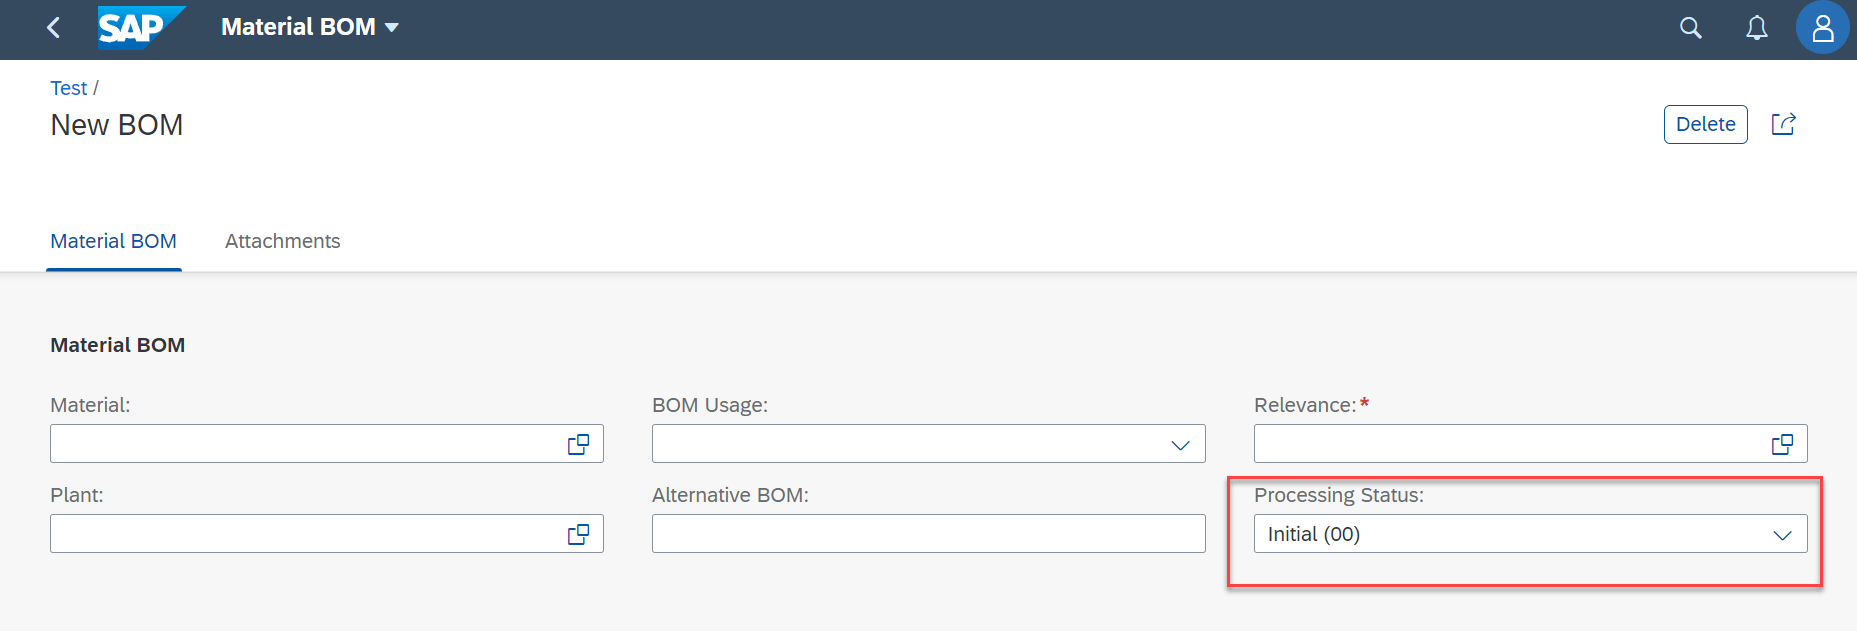
Now as per the above image the change number is not created yet for the change record, but if we see the configuration defined for the change Record Image 19,20, 21, We can see that the change number is created only once it reaches the status 40. Please refer the below image where the change record is updated with change number of attribute with release key.
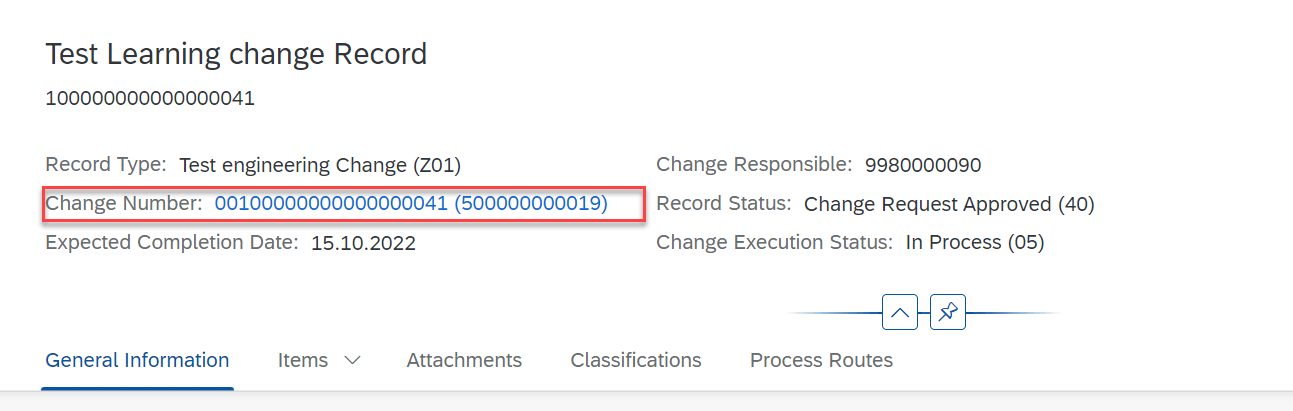
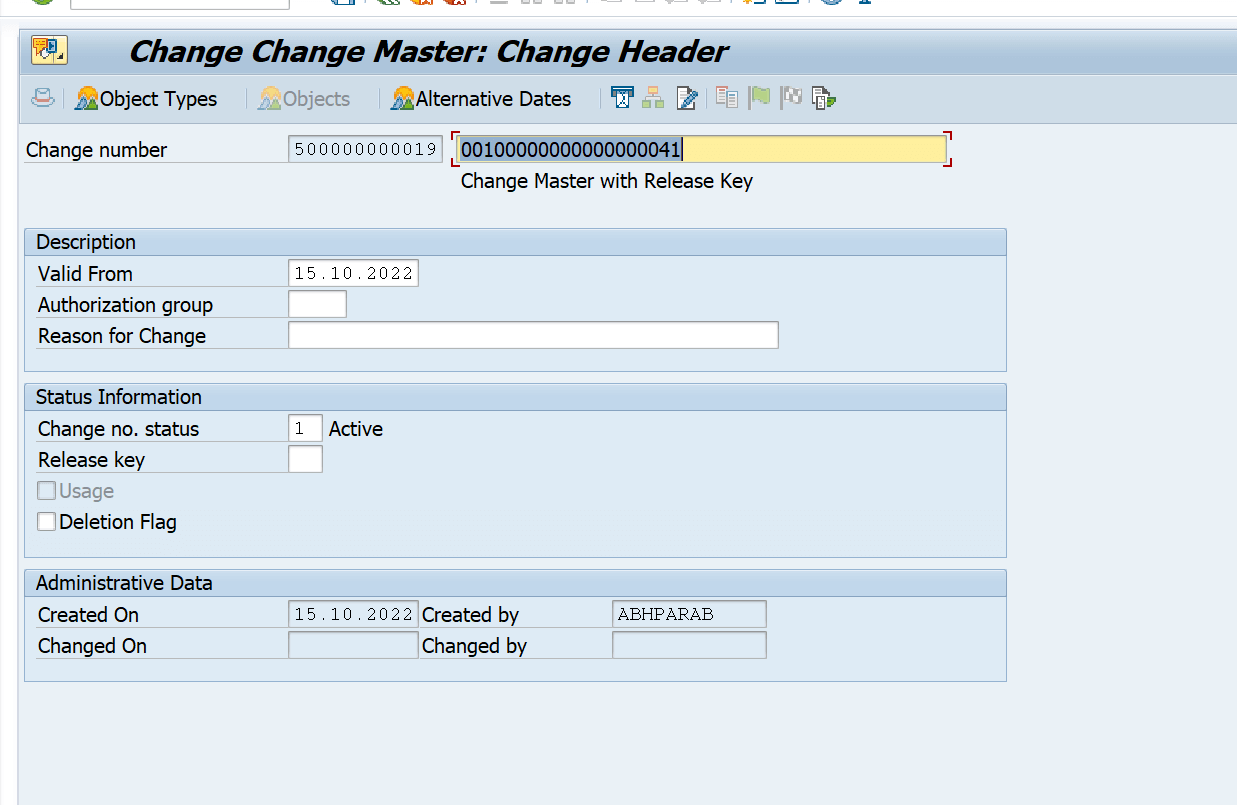
Perform the changes via the change number and Release the change number. After the changes are performed, the change record is updated. Once the change reord reaches the status complete the change number created is also completed.
Refer the Configuration Section Engineering Record type : Image 19