In Onboarding 2.0 we can use the MDF object to collect the additional information from the candidate during the Onboarding Process. As per the company requirement user or company can configure multiple MDF Object.
Please find the below scenario of custom MDF Object with one field.
Pre-requisite
Basic configuration and Permission should be in place before configuring the Custom Data collection Object.
Read More: SAP SF ONB Certification Preparation Guide
Onboarding Process should be defined and it should have custom data collection step.
First, the step is to create a Custom MDF Object.
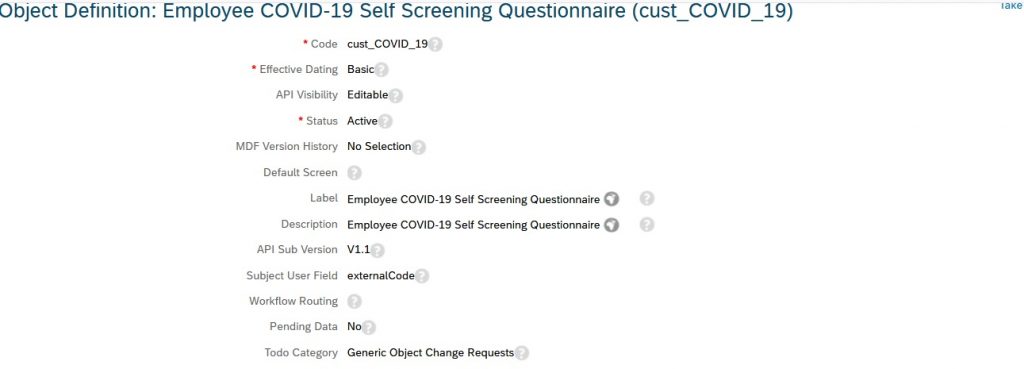
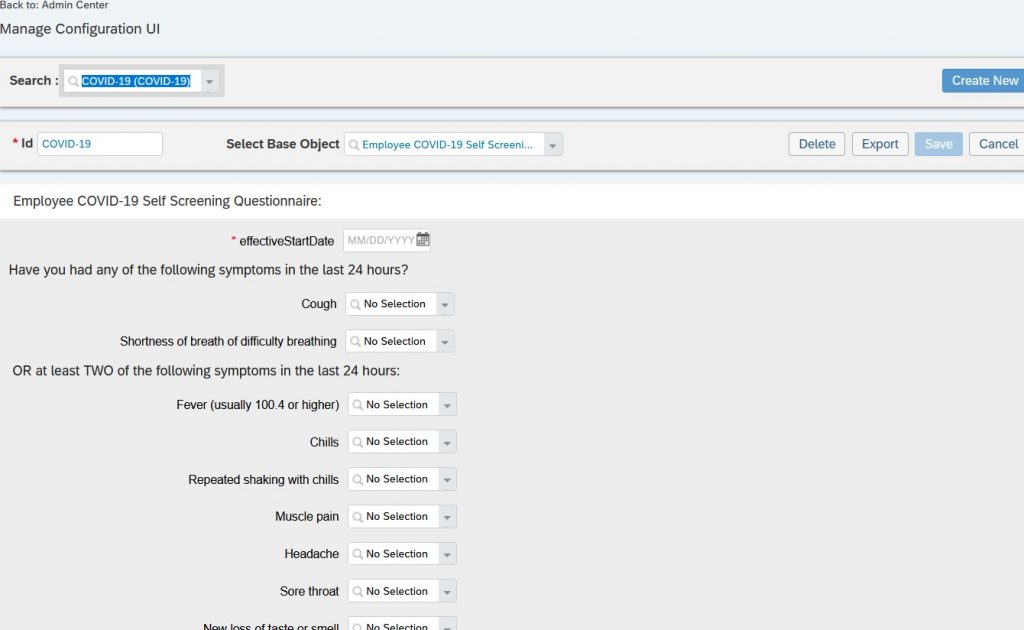
I am creating a New hire self Covid details custom object with the covid symptoms fields.
Go to Admin Center> Configure Object Definition> Create New> From the drop-down select Object Definition.
Please make sure you have maintained the same value as shown in the screenshot below ( Code and the Label can be given anything based on the requirement).
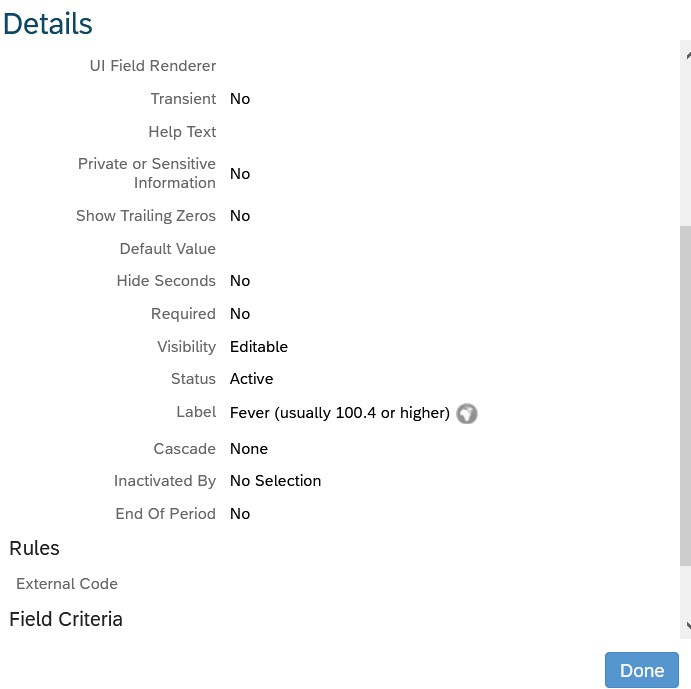
In the Field Section, I have added few questionnaire fields which is type String and yes or no picklist as well.

Once the Custom field is added to the Object next step is to create a ConfigUI for that we need to add more fields in the Custom Object. The field name should be userConfig, this field should be configured exactly shown in the below screenshot.
Once the custom field and UserConfig field is configured save the custom object.
Start the Configuring the UI for Custom Objects.
1. a) Go to Admin Center> Manage Configuration UI
2. b) Click on Create New
C) Enter the Name and Select your MDF Custom Object that you have created in this case I am selecting my custom MDF object which is created in Step 1. Delete the system field and keep only your custom field which is created in step1
1. f) Once it is done click on save.
Once all custom objects are created, you must add them to a meta-object that is referenced during the data Collection page load for rendering.
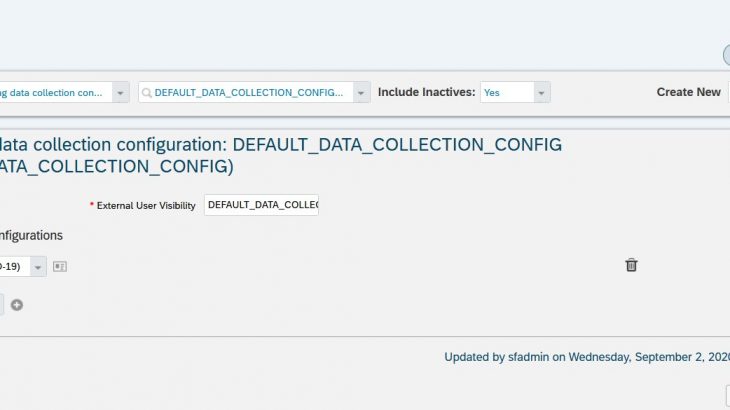
1. a) Go to Admin Center> Manage Data
2. b) in the first dropdown select Onboarding data collection configuration, in the second dropdown select DEFAULT_DATA_COLLECTION_CONFIG…
c) Take Action>Make Correction
d) Associate the UI for Custom Objects which is created.
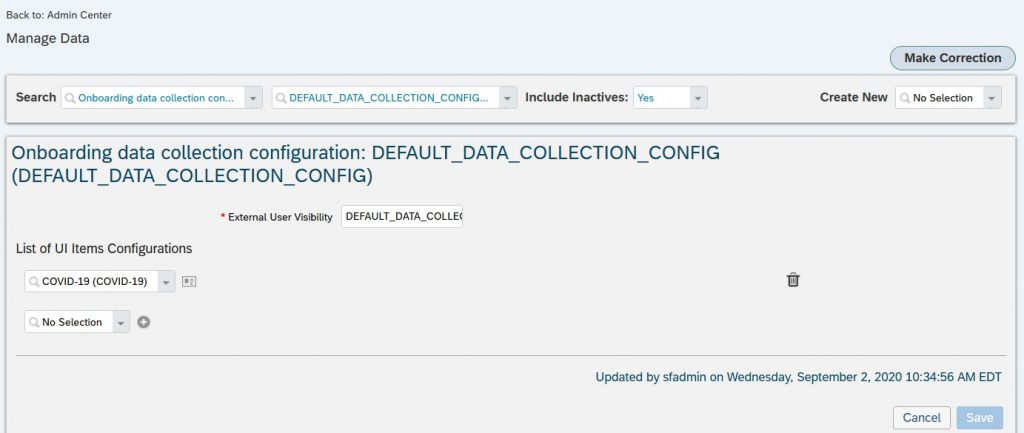
Click on save.
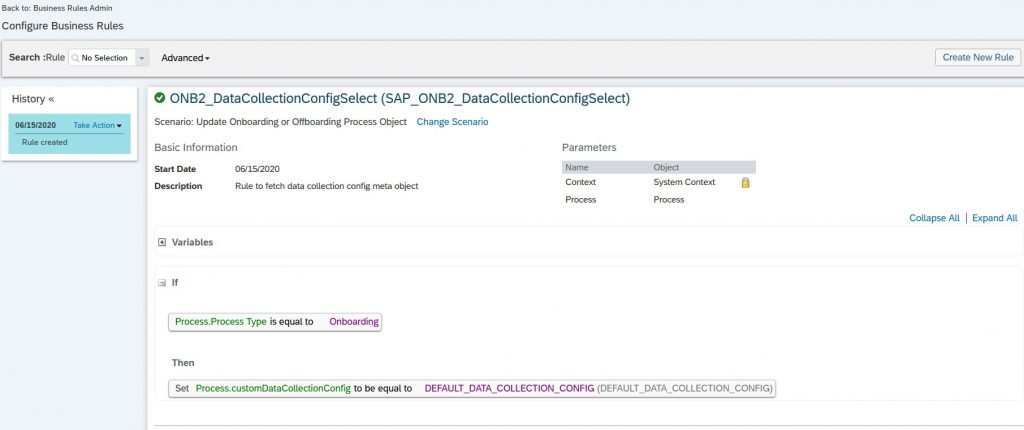
Once the above step is done please verify the rules once for custom data collection
1. a) Admin Center> Configure Business Rule
2. b) Select SAP_ONB2_DataCollectionConfigSelect and verify the rule
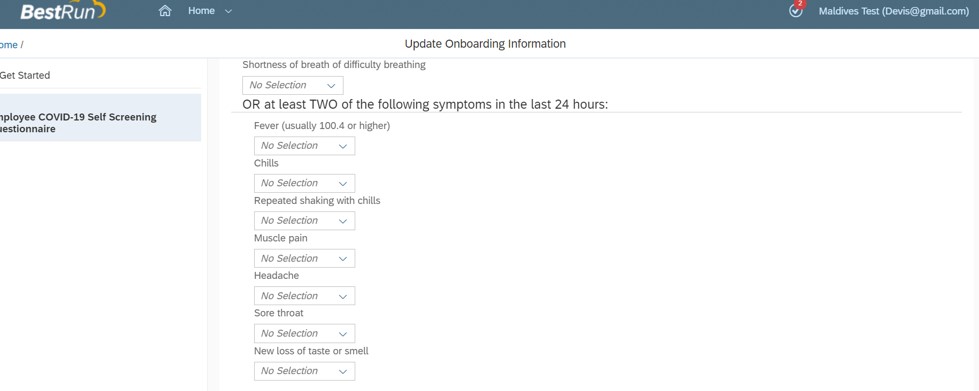
Once all the configuration is done candidate will complete the Additional Paperwork or custom data collection step and will see the below screen.