Introduction: Adobe Forms are used frequently in SAP to generate Portable Document Format(PDF) files of various business documents like Invoices, Order Confirmations, Account Statements etc. PDF files have got below advantages over other file formats.
- It is an Open Standard Universal File Format that ensures its appearance same independent of application and platform used to create it or display it.
- It provides security like Digital Signature Validation, Disable Save Button, Disable Select Option and Disable Print Option.
There are many cases we don’t want to display purchase order details in the format provided by standard Adobe Form attached to its standard print program. So in this article we are going to learn how to call or configure custom developed Adobe Form to standard T Code: ME23N (Purchase Order).
Also Read: SAP ABAP 7.4 Certification Preparation Guide
For this lets find out the standard print program for T Code ME23N (Purchase Order Display) with below steps:
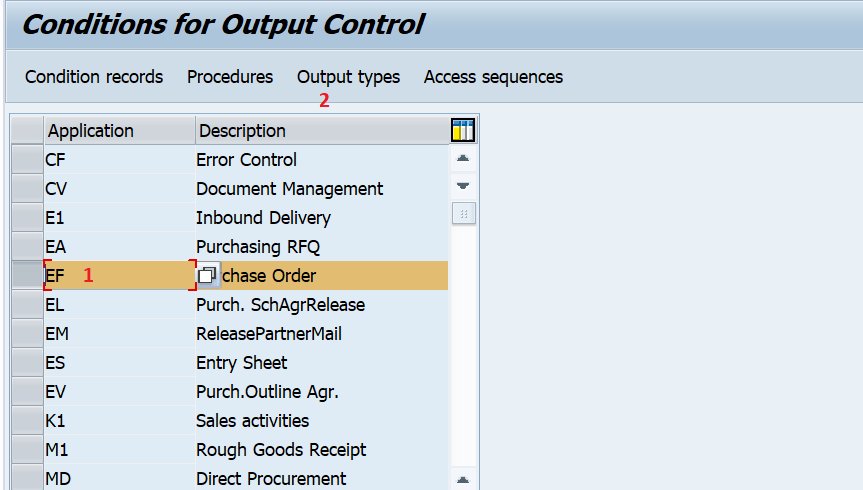
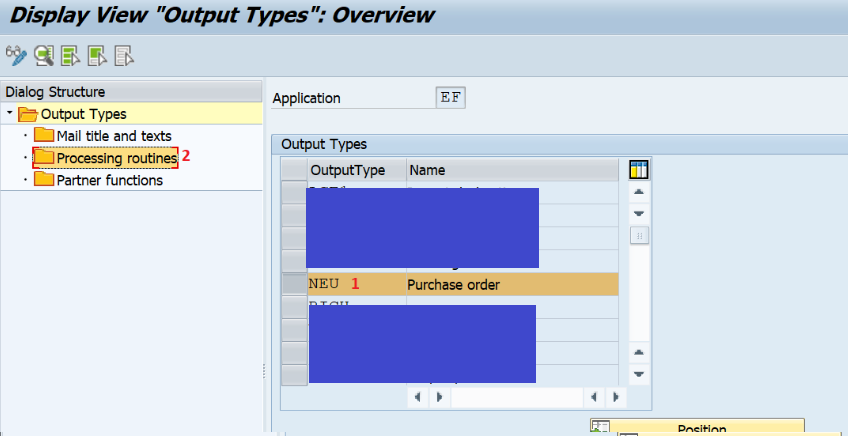
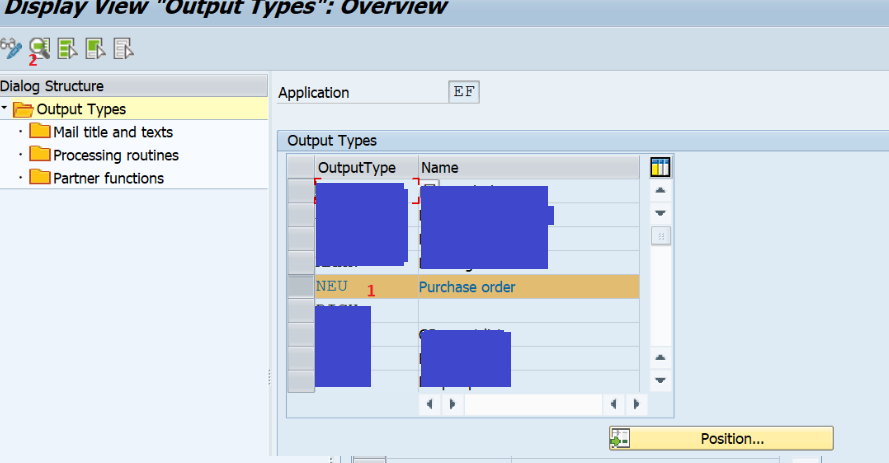
1. Go to T Code NACE ->select application ‘EF’ (Purchase Order) then click on ‘Output Types’.
2. Select the output Type ‘NEU’ (Purchase order) and then double click on ‘Processing routines’.
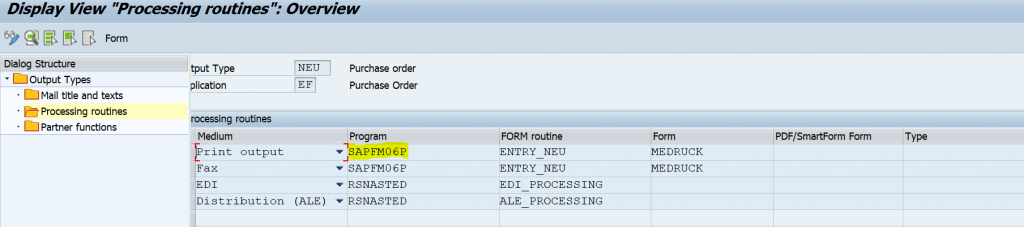
3. From the below screen you can come to know that driver program name is ‘SAPFM06P’.
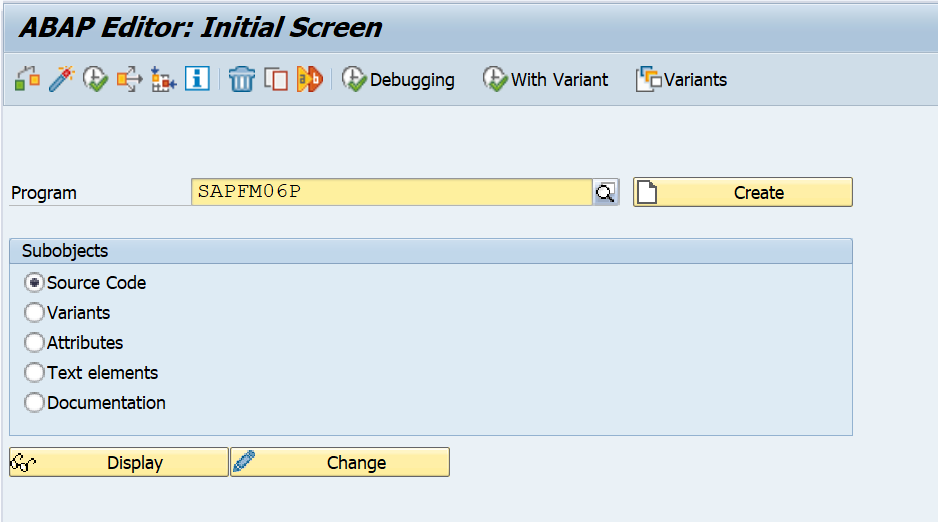
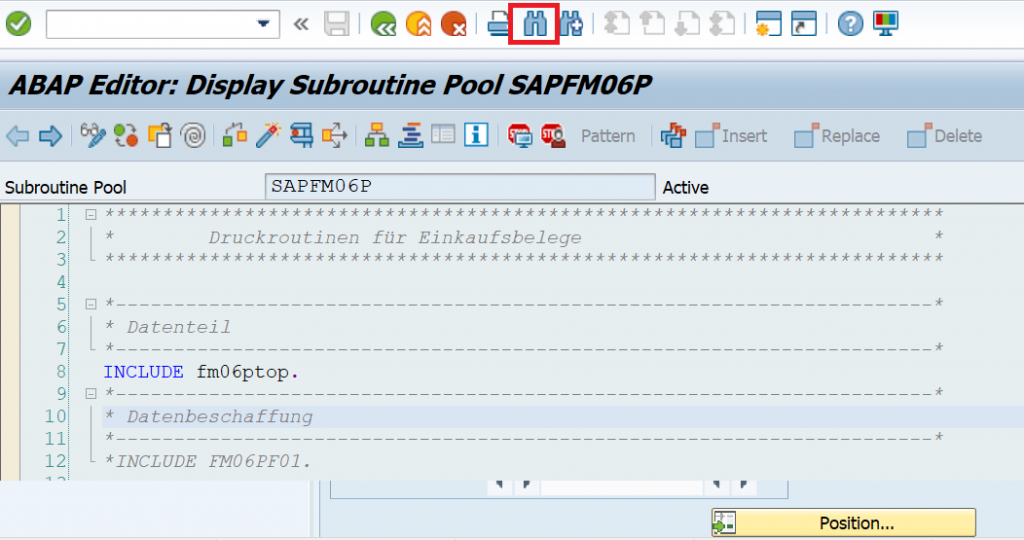
4. Go to T Code SE38 -> give program name as ‘SAPFM06P’ -> click on ‘Display’ button.
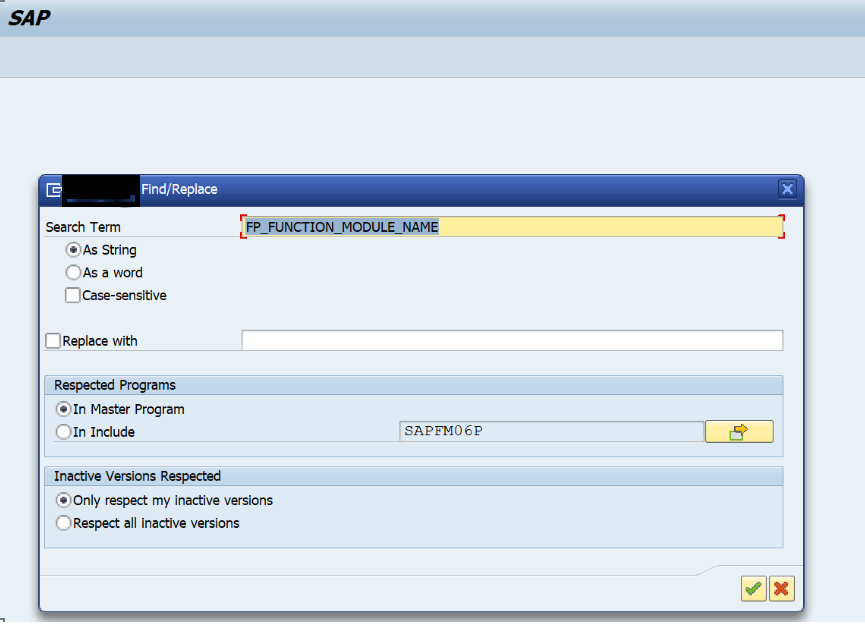
5. Click on global find and find in Search Term ‘FP_FUNCTION_MODULE_NAME’.
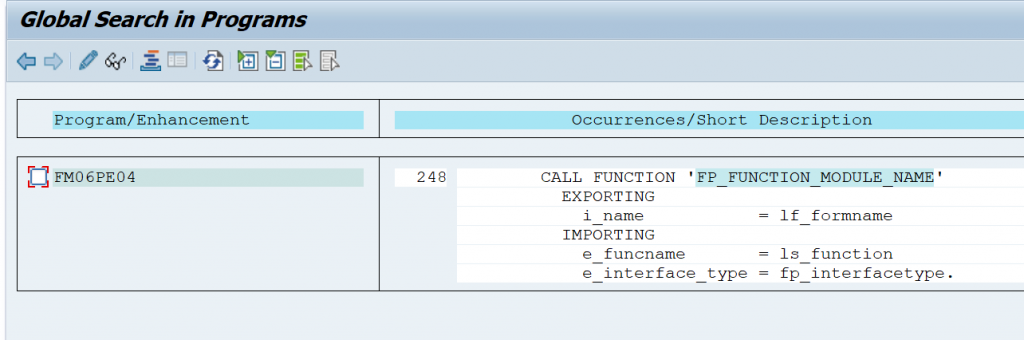
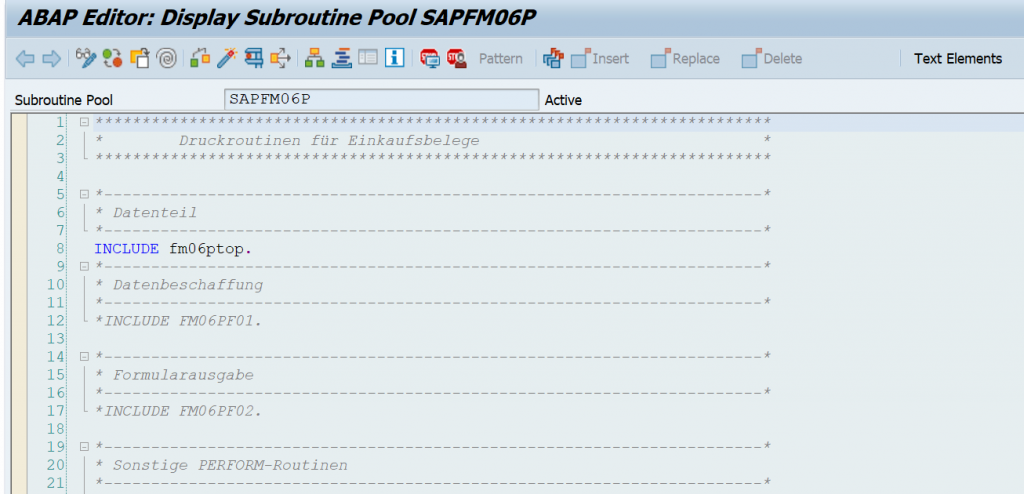
6. Double click on above program to go to source code.
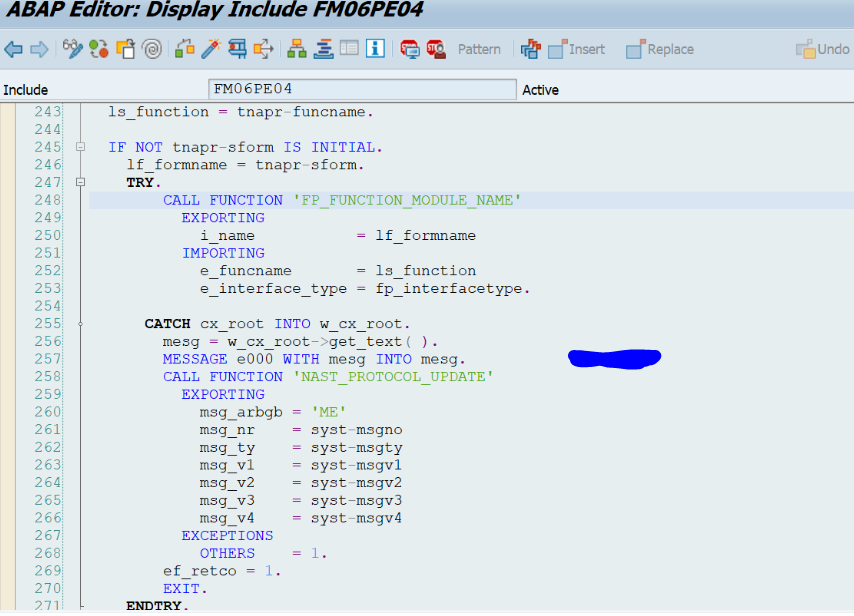
7. Find out all call function ls_function statements in include ‘FM06PE04’ and note down all its exporting parameters.
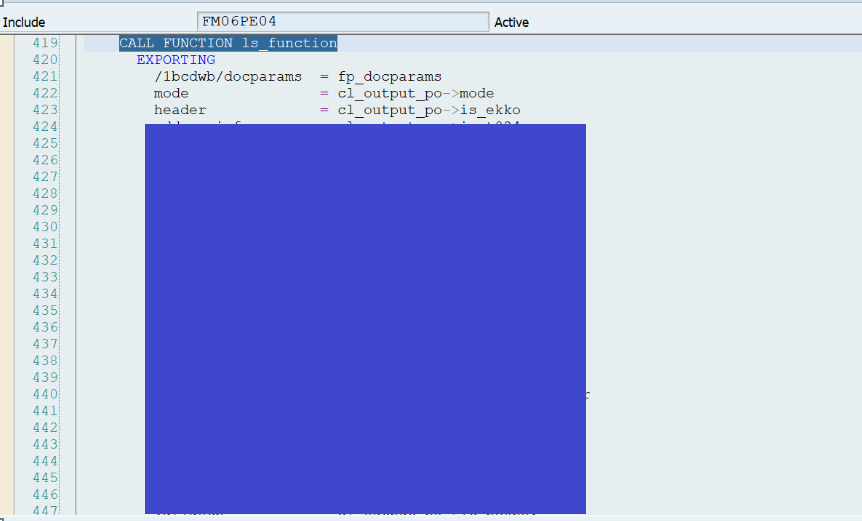
Note: We should pass all the above exporting parameters as importing parameters in our custom developing interface of Adobe Form.
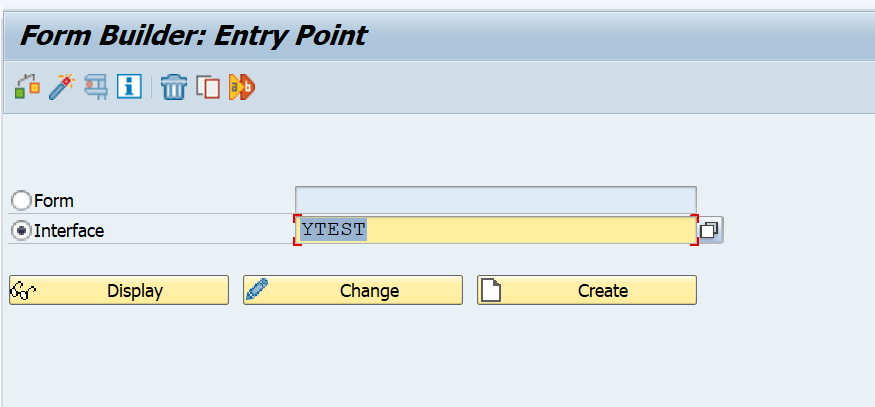
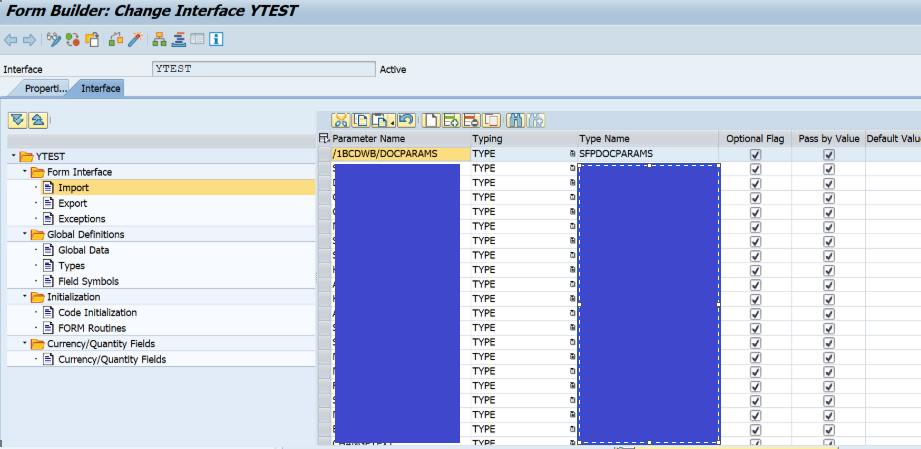
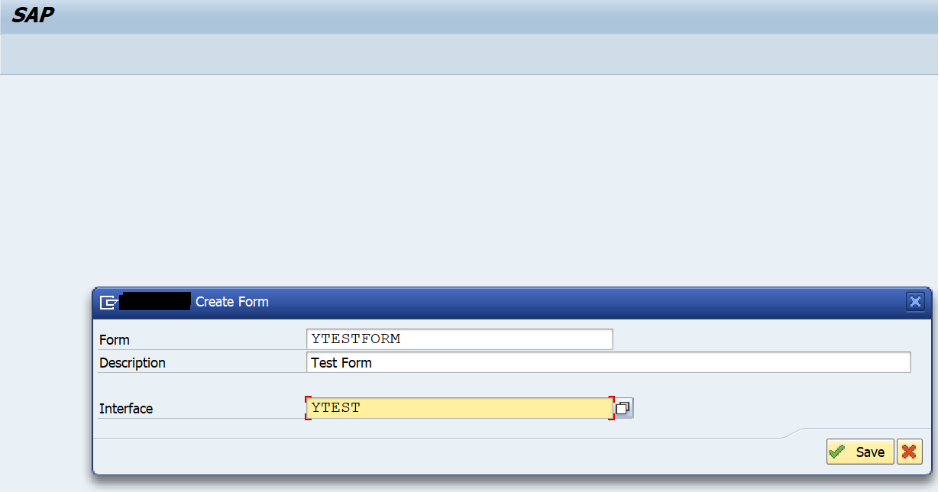
8. Create an interface ‘YTEST’ with all above noted parameters as importing parameters and active using T Code SFP.
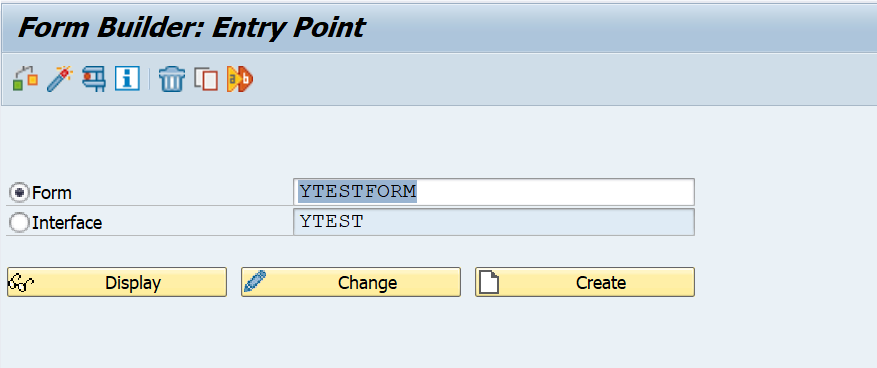
9. Now create Form ‘YTESTFORM’ by giving interface name as ‘YTEST’.
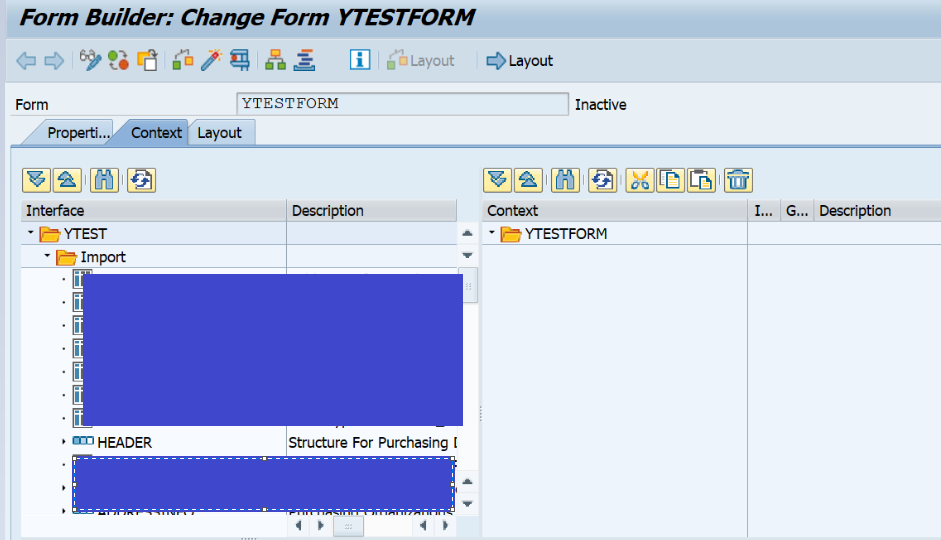
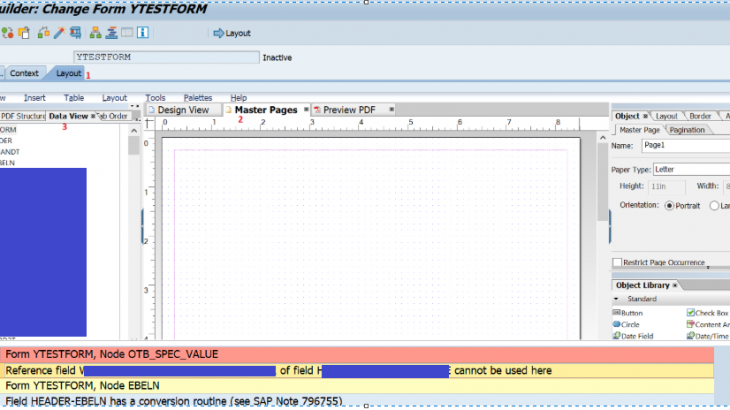
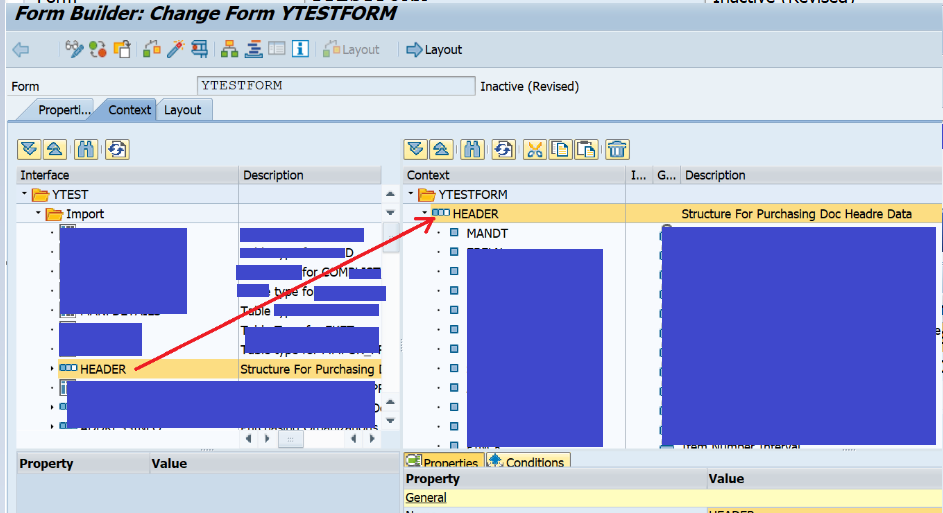
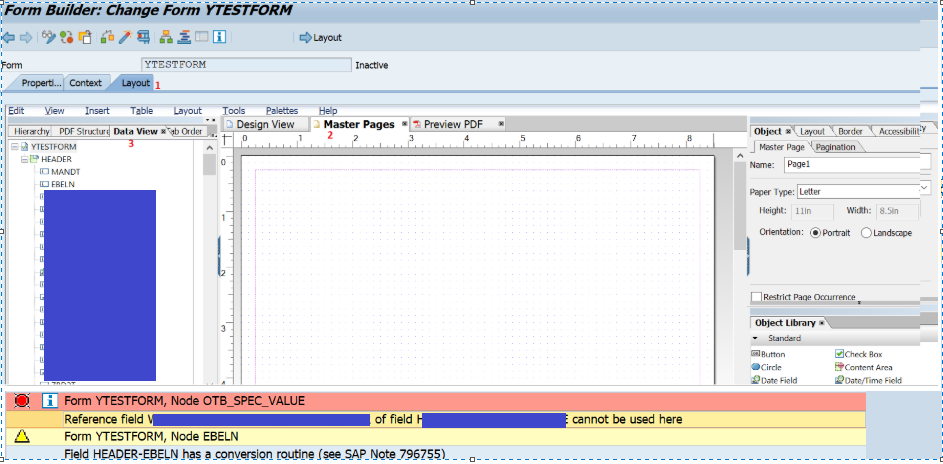
10. Here for demo purpose i am going to show few header fields only in output, considering this drag and drop import parameter ‘HEADER’ from ‘YTEST’ to ‘YTESTFORM’ and click on ‘SAVE’ button.
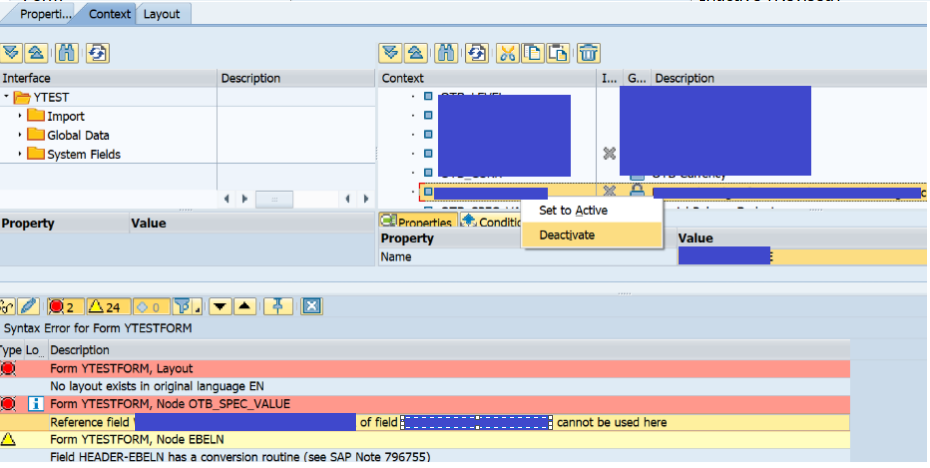
11. Deactivate all the fields under ‘HEADER’ node which are giving errors as below and correct other issues if any exists.
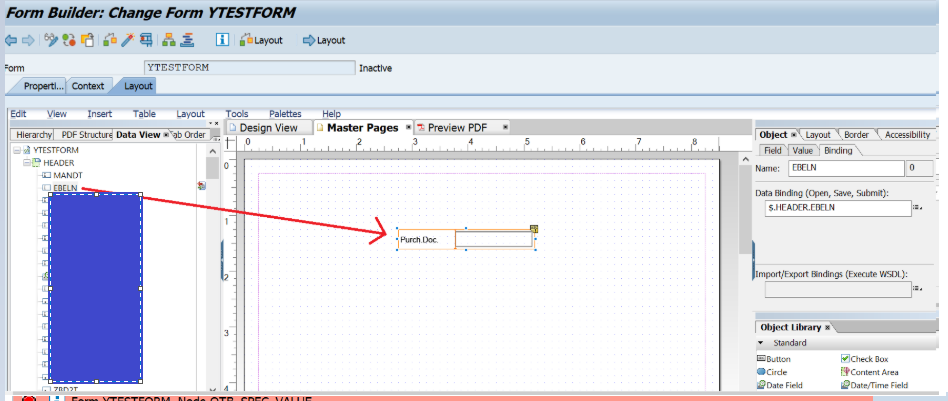
12. Click on ‘Layout’ Tab ->click on ‘Master Pages’->click on ‘Data View’ Tab.
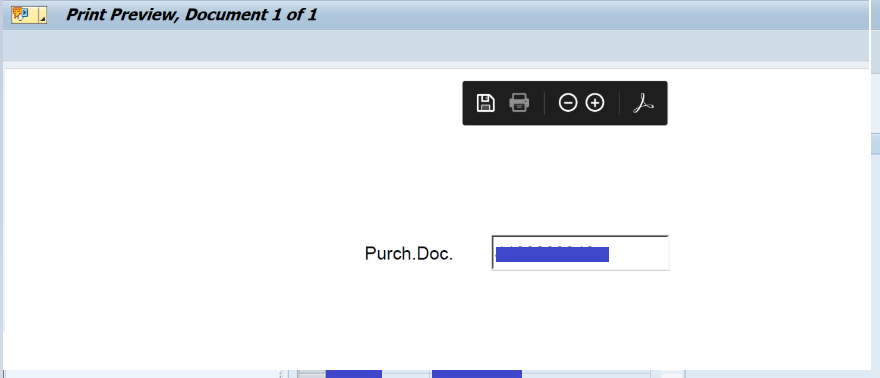
13. Select field ‘EBELN’ and drag and drop into Main Pages ->check in Preview PDF -> click on ‘Save’ icon then ‘Activate’ icon. Here for demo purpose, only one field is selected.

14. To Configure the custom developed Adobe Form ‘YTESTFORM’ to standard print program ‘SAPFM06P’ of application ‘EF’ (Purchase Order) , Go to T Code NACE->Select application ‘EF’ ->Click on ‘Output Types’.

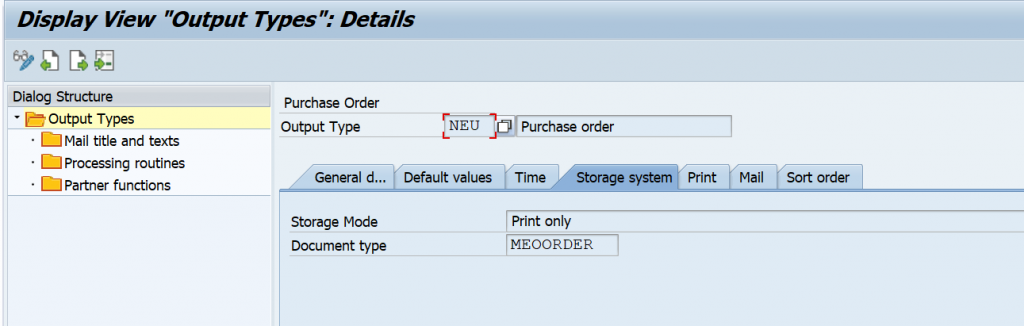
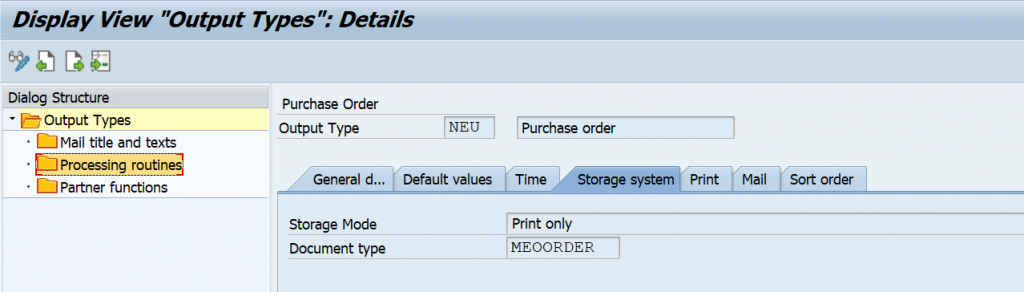
15. Select Existing Standard Output Type ‘NEU’ -> Click on ‘Details’ ->Click on ‘Storage System’ Tab
->Give Storage Mode as ‘Print Only’ and Document Types as ‘MEOORDER’->Click on ‘Save’.
16. Double click on ‘Processing routines’ ->Replace the existing values with new values and save.

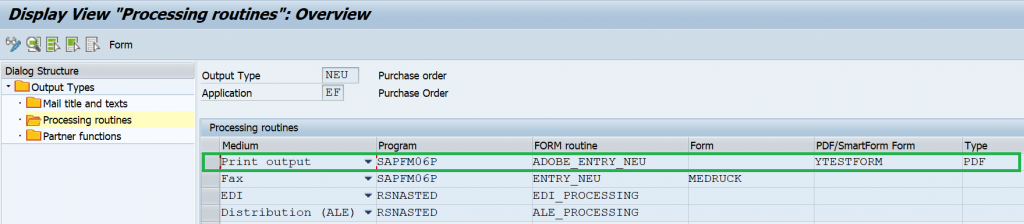
Note: Here we have replaced Form routine field value ‘ENTRY_NEU’ to ‘ADOBE_ENTRY_NEU’, removed Form field value ‘MEDRUCK’ , gave PDF/SmartForm Form value as ‘YTESTFORM’ and gave Type field value as ‘PDF’.
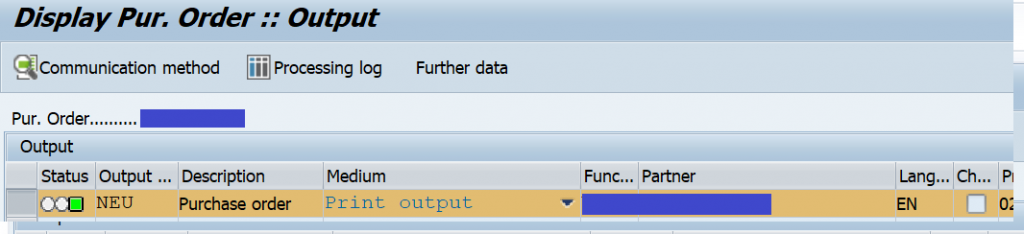
17. Go to T Code ME23N -> Open any purchase order ->click on ‘Print Preview’
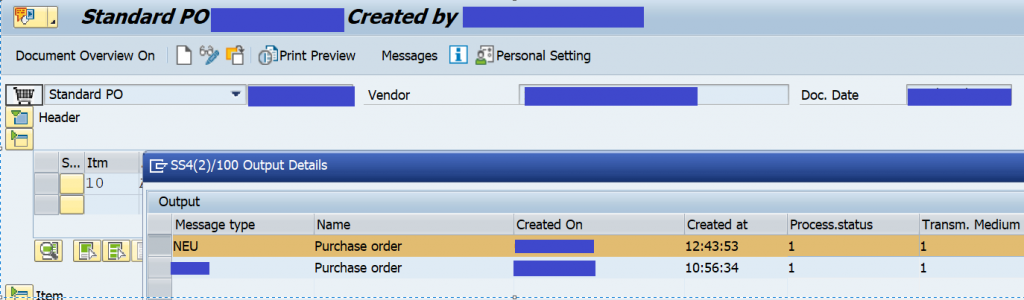
18. Select our newly created output type ‘NEU’ and click on ‘Print Preview’

(Ctrl_Shift+F1), then it will call out custom developed Adobe Form for preview only.
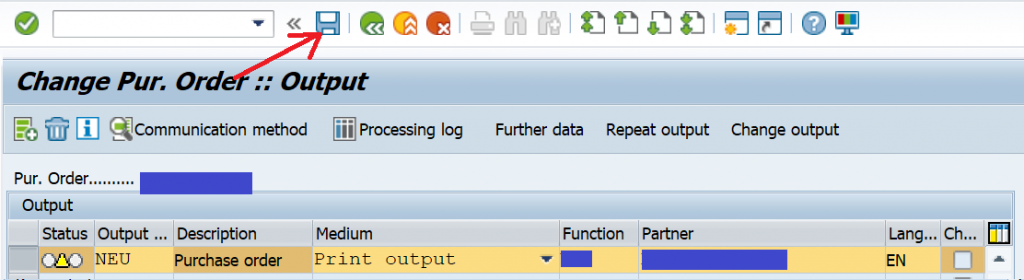
19. To give the print, click on ‘Messages’ ->click on new entries

and give below details.
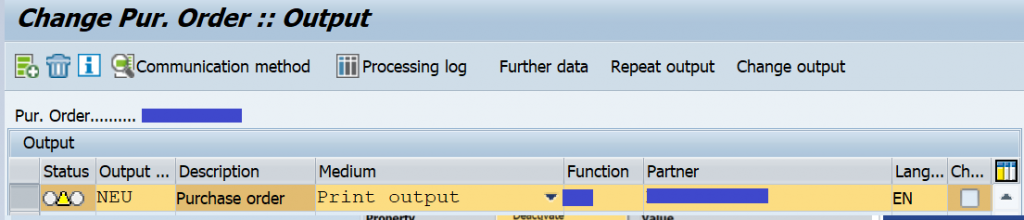
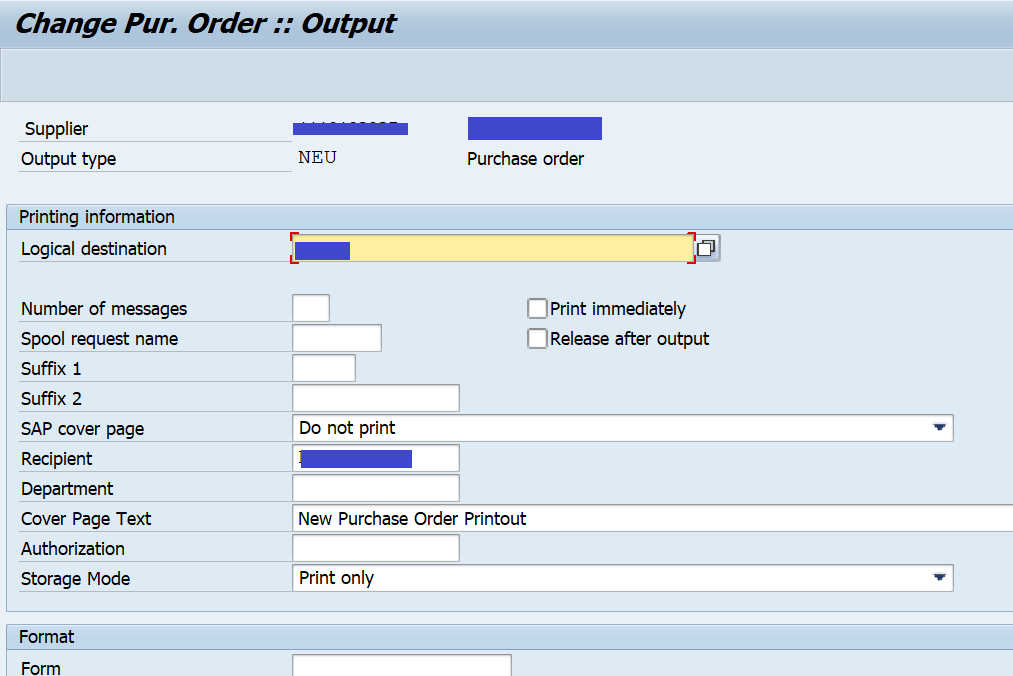
20. select new entry and click on communication method

and select appropriate details and go back (F3).
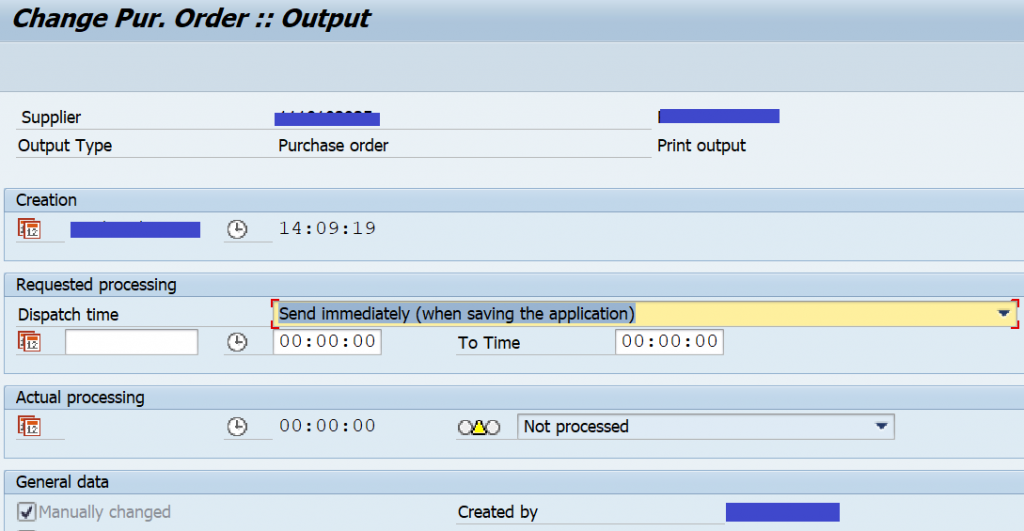
21. click on ‘Further Data’ then select Dispatch time as ‘Send Immediately’ and go back (F3).
22. Finally select the new entry and click on ‘Save’ button then it will be dispatched to configured printer successfully.