This blog post is to walk you through the process to send SAP BW data into Amazon S3 bucket using BODS.
Introduction:
As we all knew that, to work on any source/target using BODS we need to have a connection between that source/target and Data services. Connection can be created using Datastores or Formats in BODS local object library.
Here our source is BW and it is a database so we need to create a datastore connection but AWS S3 bucket is not a database and it is a file system so we need to create file location using BODS File Locations option in Formats from Local Object Library to store the files into AWS S3 bucket.
Also Read: SAP HANAIMP 16 Certification Preparation Guide
Usually in BW data will store as tables, so we first need to import the required table from BW and then store the table data into a .json/.csv file (because AWS S3 bucket is a file storage) using Data Services to send it into AWS S3 bucket and if required compress (because of the billing policy in AWS is based on the size of the files we transfer), here I used zgip logic to compress the files.
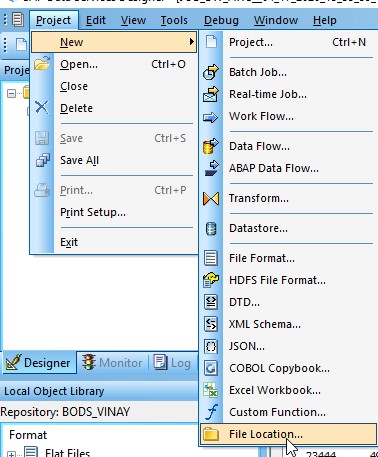
1. Creating Connections:
1.1 Source Connection creation:
To create a datastore in BODS, there are multiple ways but here we will see the simplest way
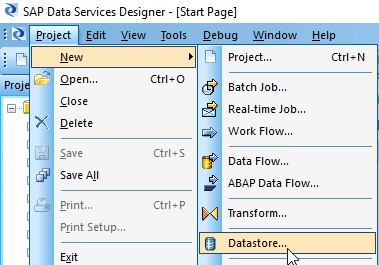
Click on Project -> New -> Datastore
Fill the required information when the popup appeared as below screen and then click on Apply and then OK.
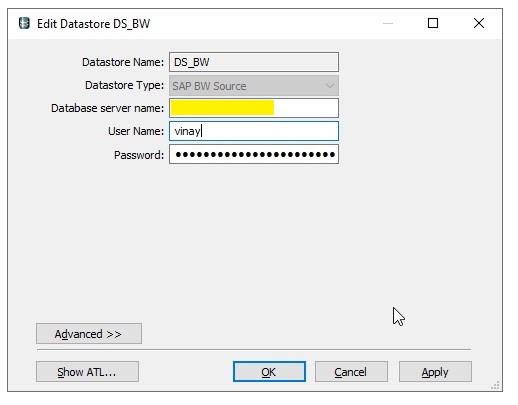
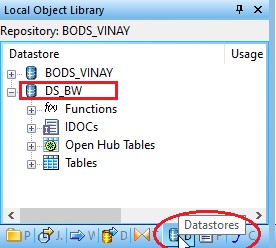
This will create connection between BW source and BODS with the name DS_BW. We can see and edit the connection any time from local object library -> Datastores tab.
1.2 Target Connection creation:
To create target connection with BODS, go to Project -> New -> File Location
A popup appears and fill the required information to create file location.

Once selecting the Protocol as Amazon S3 Cloud Storage from droop down, other details will appear in those some are having default value.
The below details are must and should to have to create S3 bucket connection.
Access Key – Which can be provided by the AWS S3 admin, to get public access to the bucket.
Secret Key – this key is valid only along with the assigned Access key
Region – Location, where the cloud server exists physically
Compression Type – None/gzip
Remote Directory – Name of the Directory, where the files should store.
Bucket – Name of the S3 bucket which is having the Remote Directory.
Once the required information is filled click on Apply then click on OK.
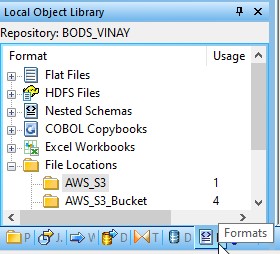
To edit the existing file location, go to File Locations in Formats of Local Object Library as shown below then click on file locations and select the file location which needs to be changed and modify accordingly.
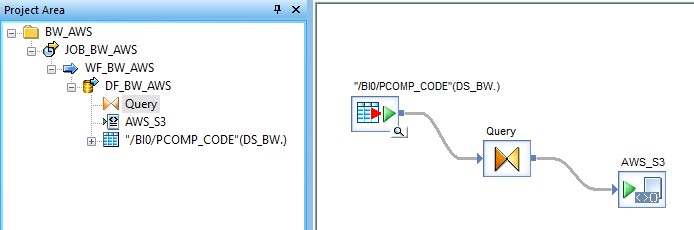
With this we completed the first step, now major part of our work comes. We need to import the required table into BODS. To import the required table first we need to go to the data store which we have created earlier(DS_BW).
2. Importing a table into Data store and creating the BODS JOB
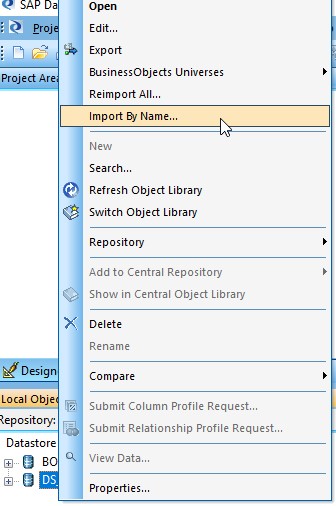
Right click on DS_BW datastore and click on Import By Name, then select the type as Table in the popup drop down and provide the table name at the Name field then click on import to import the BW table into DS data store.

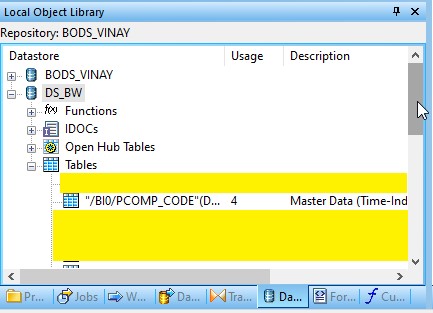
Once import is successful, that table should be visible through data store tables list as below
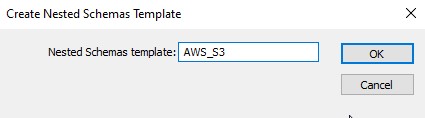
After importing the source table, need to have a target file. To create a target file, select nested schema template. Once selecting the nested schema template, provide the file name. Here the name is AWS_S3.
need to add the same table in to a job as source as below
Here the target is created using nested schema template. Once selecting the nested schema template, provide the file name. Here the name is AWS_S3.

Double click on AWS_S3 file and it will open as below.
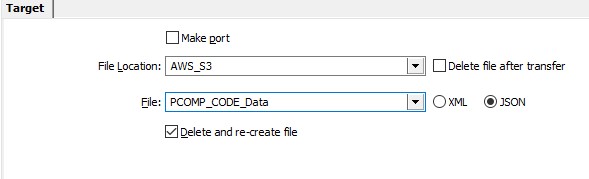
Provide File Location using drop down. File name can be any, but I used the source table name with json extension.
If Delete and re-create file check box is checked, every time new file is generated and old file gets deleted. If that check box is unchecked then every time it’s gets appended to the existing file.
Every time we run the job, internally BODS creates a target file in it’s server location usually the location would be c:/ProgrammFiles/SAP BusinessObjects/Data Services/workspace/
If Delete file after transfer is checked then the local file gets deleted else not.
Before running the job just check for validation errors and check if any file exists in AWS S3 location.
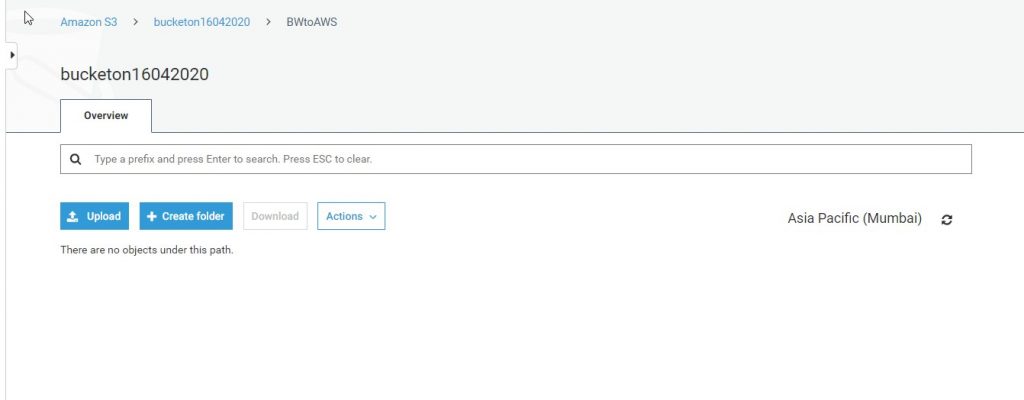
Here bucketon16042020 is the bucket name and BWtoAWS is the root directory name which we have provided while creating the connection to the target in the BODS.
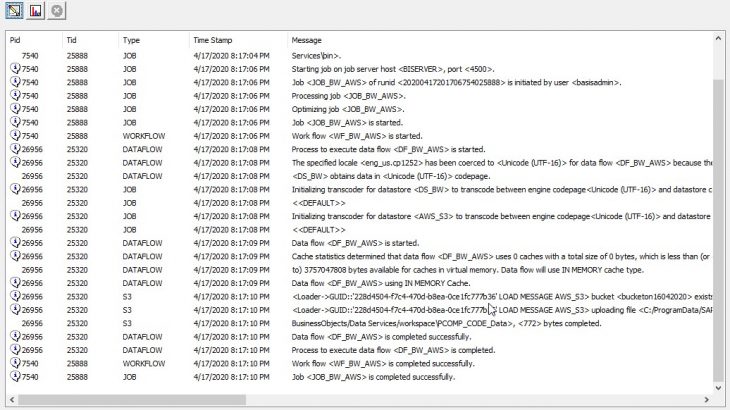
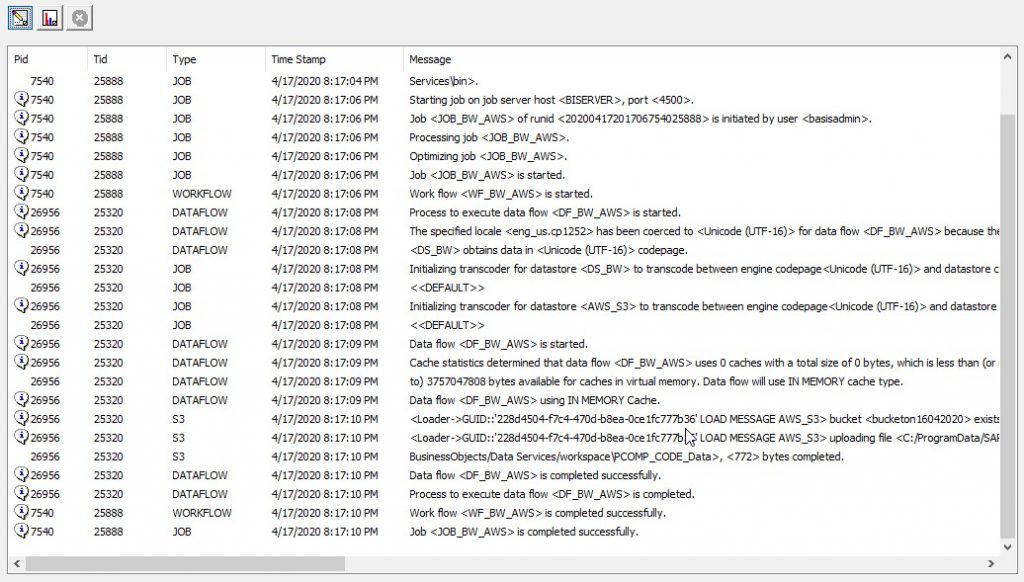
Below is the trace log of the job completion.
After successful run of the job checking the AWS S3 bucket and expecting the file with the name of PCOMP_CODE_Data.gz as I have used Compression Type as gzip. As it s a zip file it is occupying less disk space.


