Purpose:
The Purpose of this blog to provide step by step procedure to auto update the Inspection results values to batch characteristics.
Introduction:
Most of PP/QM consultant get the requirement to update the QM inspection results to batch characteristics, especially when they work for Pharmaceutical projects. To Perform MQC, QM inspection results should be updated at batch level that means it is like prerequisite. This blog explains the step by step procedure to auto update the Inspection results values.
Business scenario:
Business want to update the assay, LOD and Potency (potency based on assay & LOD) values to batch characteristics so we must create Master inspection characteristics like Assay, LOD and potency with refence to batch class characteristics. These MICs to be update in Inspection plan of the materials so that these MICs will become part of inspection lot where QM team enter the results so the entered results will be populated in material batch characteristics after performing of usage decision for the inspection lot.
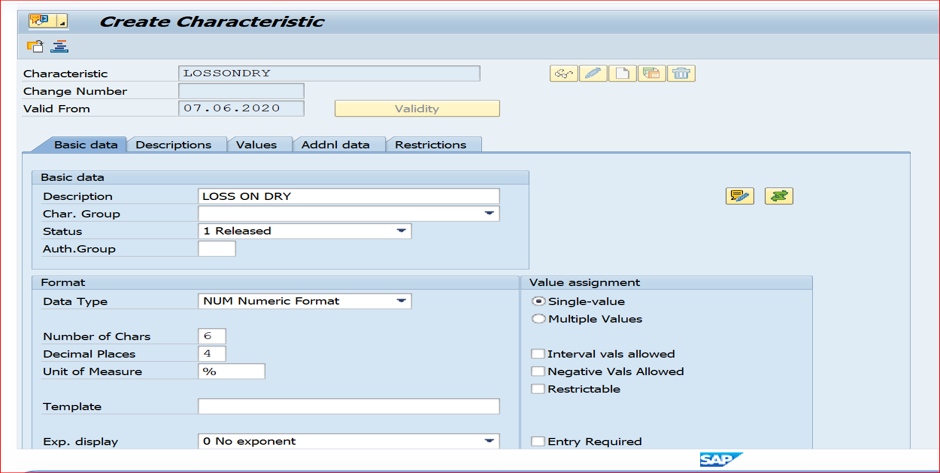
Step-1 Create Batch Characteristics:
We must create of Batch characteristics through Transaction-CT04. This characteristic will be assigning to Batch class and it will be used for creation of MIC.
Step-2 Creation of batch class:
Create the batch class by using class type 023 through transaction CL01 and assign the required batch characteristics to this batch class as shown below

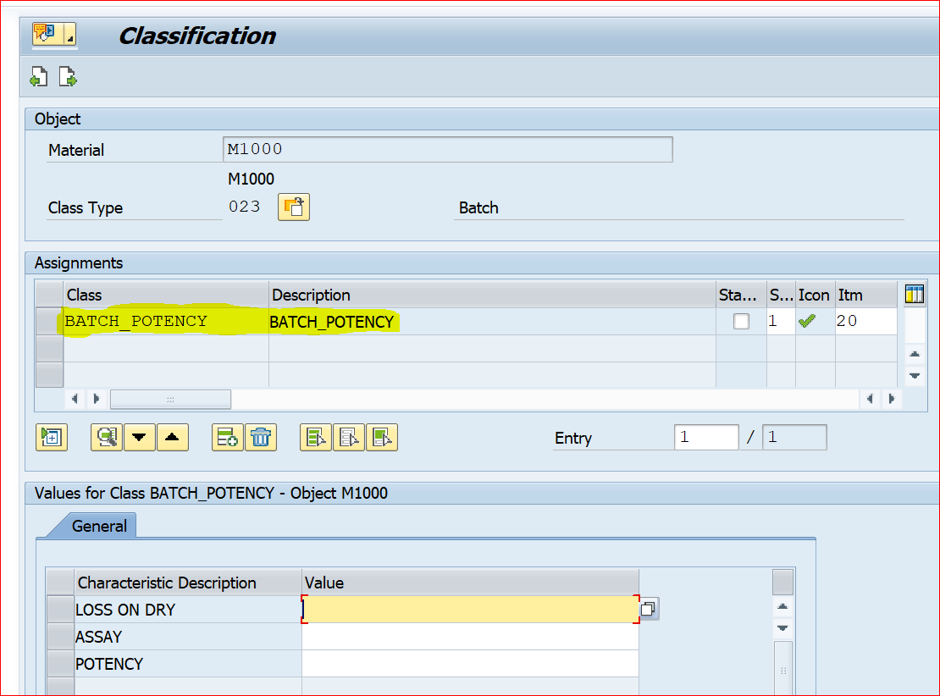
Step-3 Assigning batch class to material in classification view:
We must assign this batch class in classification tab of Material master while creation of material (T-Code MM01).
Step-4 Create MIC with Batch Characteristics:
Now we must create the Master inspection characteristics with reference to Batch characteristics through transaction QS21.
Enter T-code QS21 and press enter then system will open the below screen. Enter plant, MIC, Valid from and Class characteristic.

Press enter or click on continue. Now system open next screen. Since we entered class characteristic in initial screen, system automatically select “X Reference Characteristic”
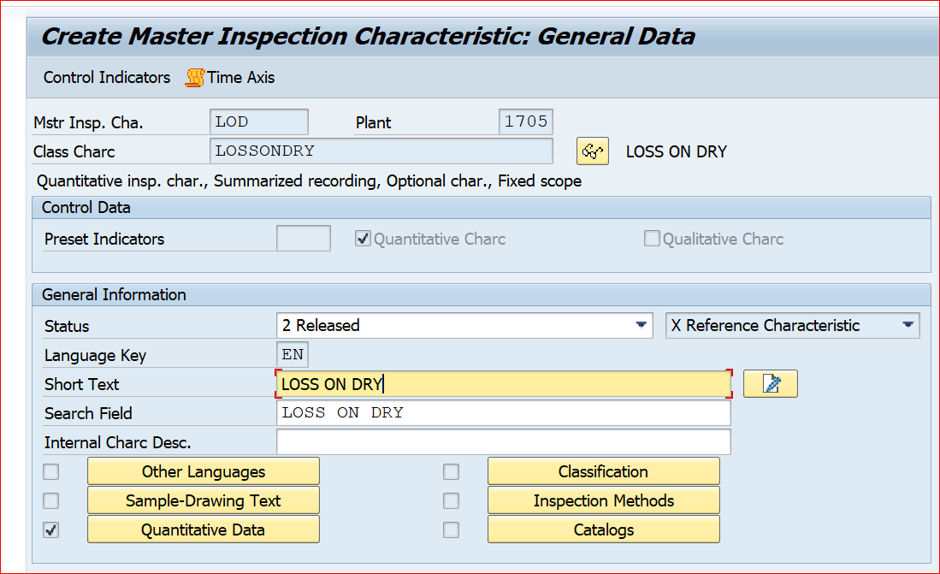
Enter the description and search filed values and then click on control indicator

Here we select the “Calc.formula” control indicator and save it.
Step-5 Create Inspection plan with normal MIC as well as with Batch Characteristics MIC:
After Creation of MICs with reference to batch characteristics (LOD, assay & Potency), we must assign these MICs in the inspection plan through transaction QP01.
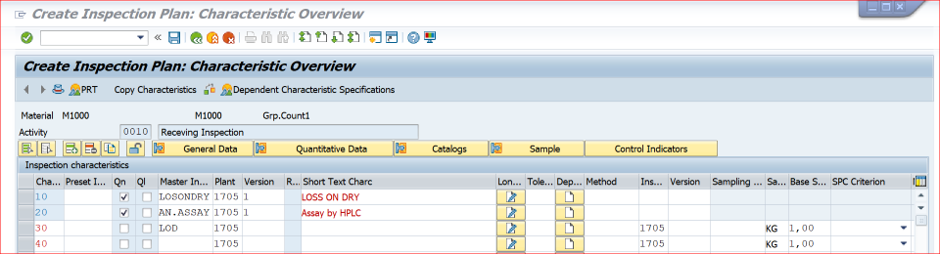
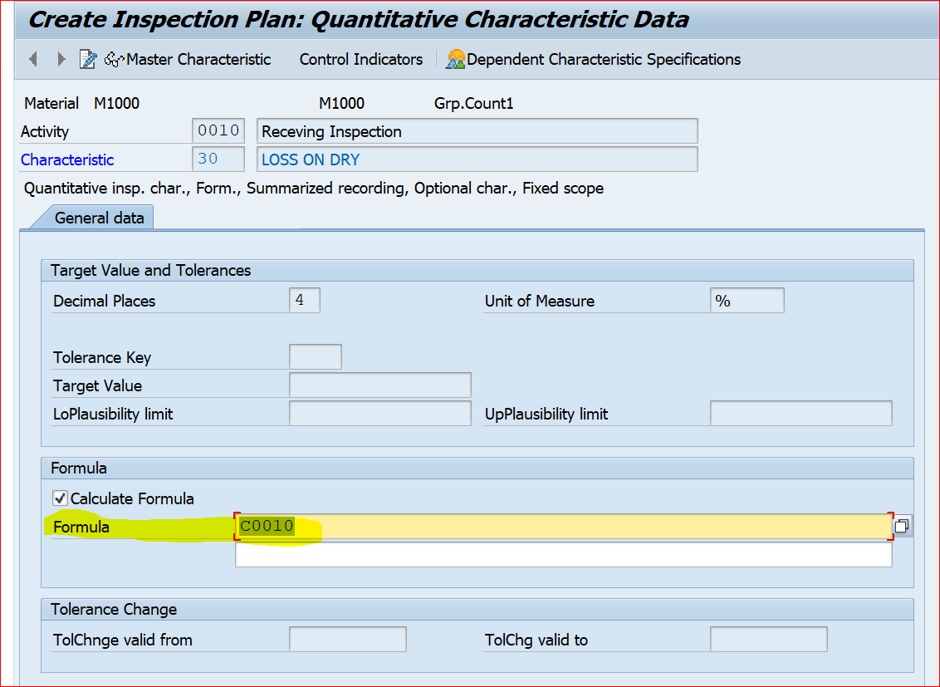
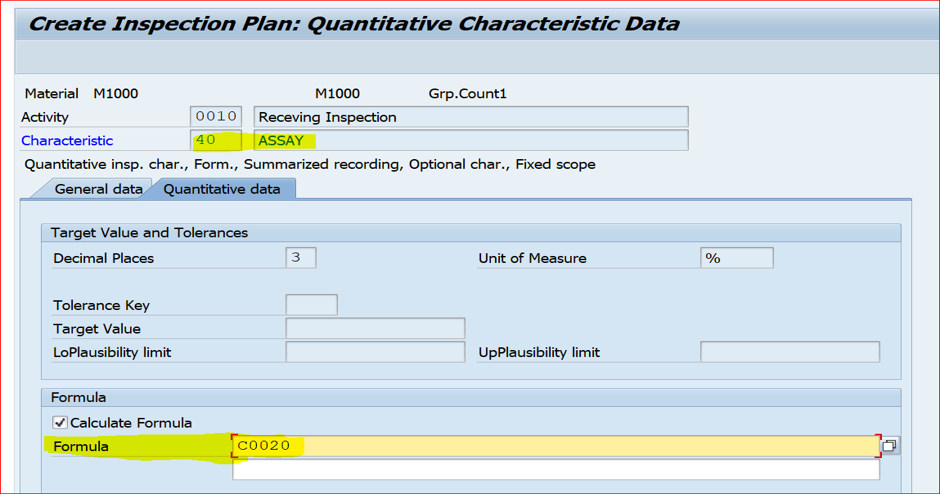
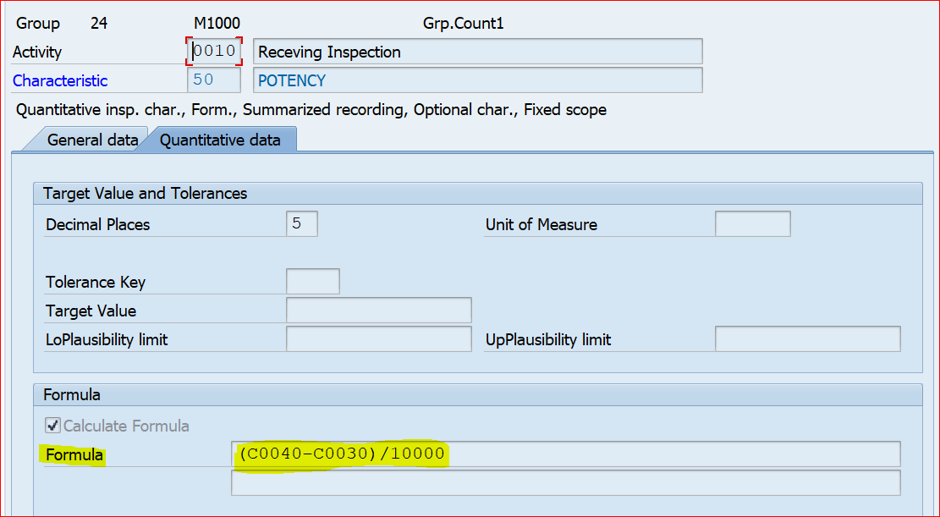
Here initially we need to enter the normal MIC from where values should be captured to Batch characteristics MICs then we must enter the batch characteristics MIC. Once you enter Batch Characteristic MIC, System will ask for Formula since we select the “Calc.formula” control indicator.
LOD value should be get from “LOSONDRY” MIC value. Since LOSONDRY is 0010 item in the inspection plan so we must enter C0010.
ASSAY value should get from “ANHASSAY” MIC value. Since ANHASSY is 0020 item in the inspection plan so we must enter C0020
Same as LOD and ASSAY, we must provide the formula for POTENCY Based on Business requirement. Here Business following formula i.e. Potency: (Assay-LOD)/10000 so we must maintain formula accordingly in formula field for Potency
Step-6 Goods receipt for material against purchase order:
Logistics team need to do goods receipt so that stock will be posted to QI stock and system will generate the inspection lot


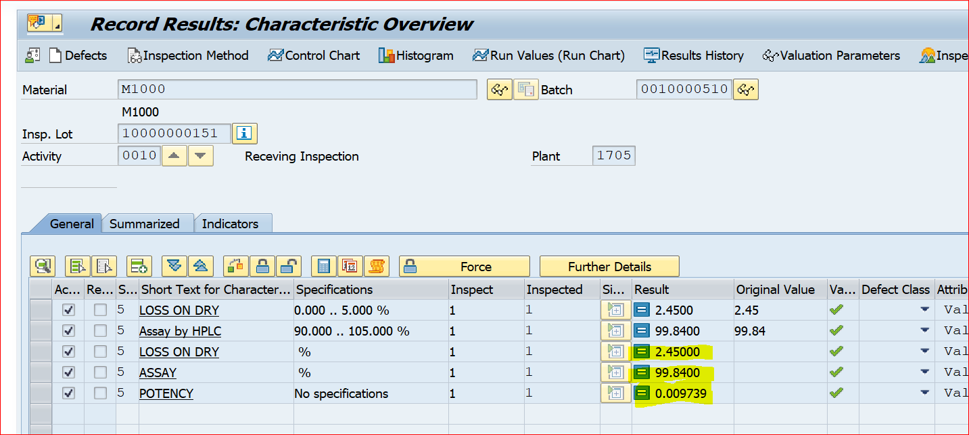
Step-7 Results recording for the inspection lot:
We must enter the results for only Loss on Dry and Assay by HPLC (Which are not batch characteristics MIC). Based on values we entered, system automatically calculate the results for batch characteristic inspection characteristics.
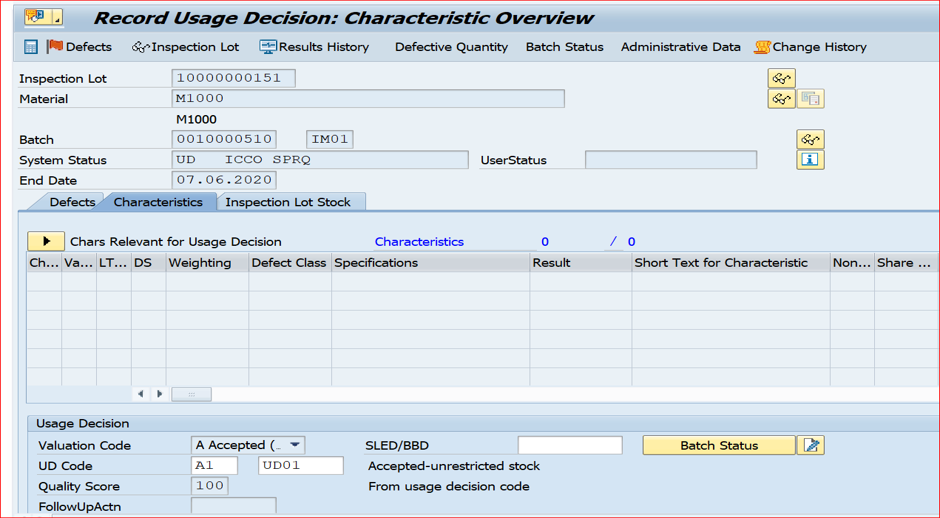
Step-8 Usage decision for inspection lot:
After result recording, we must do the usage decision for the inspection lot. Once usage decision performed, Inspection results will be auto populated to Batch characteristics of that batch.
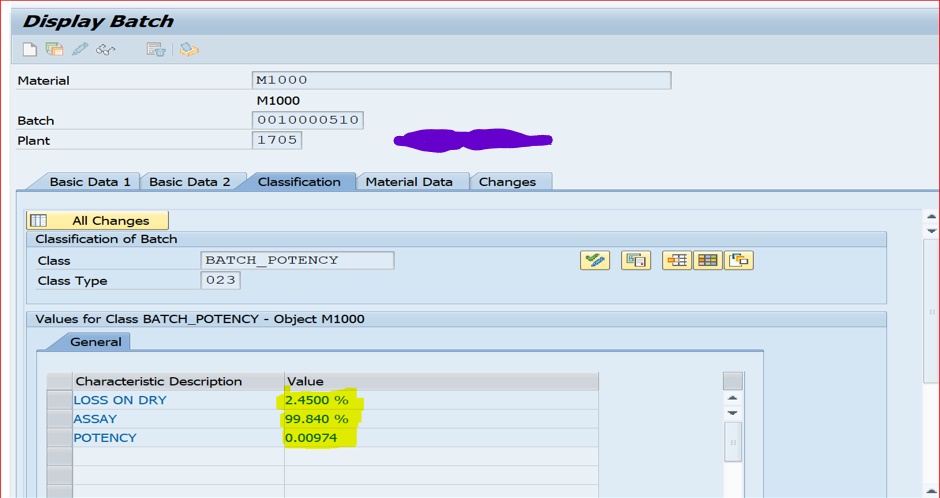
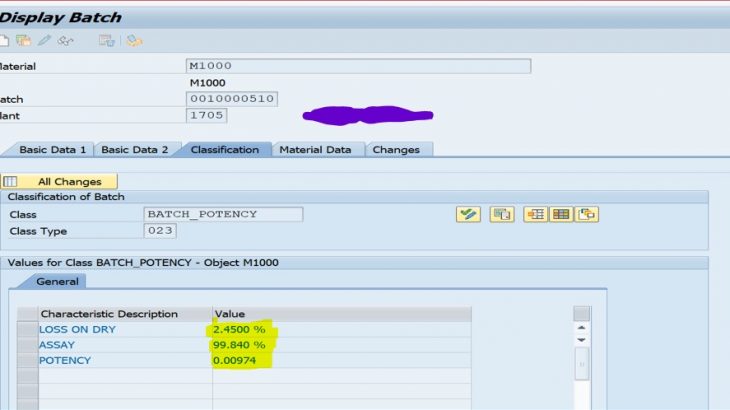
Step-9 Display batch:
Go to MSC3N, Enter Material, Batch & plant and click on classification so that we can see the values which were auto calculated during results recording.