The Data Transition Validation (DTV) Tool is a new tool available for SAP S/4HANA conversion projects targeting S/4HANA 2021: DTV allows the establishment of a project that spans the entire conversion process. Within the DTV project specific reports can be identified and configured to capture key financial data before and after system conversion. The pre- and post-system conversion data is then compared by DTV to help determine if the conversion was successful. A successful conversion (from a finance perspective) has the pre- and post-system conversion data matching.
Historically, system conversion to SAP S/4HANA has required a significant amount of time and effort for the Finance team to reconcile financial balances before and after the conversion process. The reconciliation process is an important step to be able to determine the correctness of the conversion (from a financial perspective). Only after the reconciliation is completed and found to be adequate should the signal to reopen the newly converted S/4HANA system be announced. Once the S/4HANA system is reopened, business users may restart normal business operations.
Several SAP pre-delivered reports are recommended by SAP (see SAP Note 2332030 – Conversion of accounting to SAP S/4HANA, section 6.3 Document Your Posting Data) to “snapshot” key financial positions before and after conversion. Historically the comparison of before/after conversion reports had to be performed through manual processes. Companies with many company codes, customers, and/or vendors may be required to generate hundreds of reports to adequately document the financial data in the system. The level of effort required to compare each of the pre- and post-system conversion reports with each other is typically a major effort requiring days and sometimes weeks to accomplish.
The Data Transition Validation (DTV) Tool is available as of the SAP S/4HANA 2021 release (it cannot currently be used for target releases prior to S/4HANA 2021). DTV Tool (accessed via t-code DVF) allows you to automate the comparison of financial data before and after a system conversion from SAP ECC to SAP S/4HANA.
The validation tool offers following key capabilities:
- Identify which reports are relevant for conversion validation. Standard SAP reports are pre-loaded into the tool and may be selectively imported into an active validation project.
- Global Parameters may be defined and automatically applied to all reports.
- Test specifications may be defined for each report. The test specification defines key report parameters (such as Company Code, Key Dates, GL Accounts, etc.). Individual parameter fields can be defined as values ranges, specific values, or even exclusion values for each report selection.
- Optional report variants may be defined and used as well.
- All test specifications can be simulated to determine anticipated output. View up to the first 100 rows of generated data in the Simulation option.
- Full control on when and how (simulation or actual execution) each report is executed to extract the results of the source and target systems. Compare the source and target release data and analyze the comparison (before conversion and after conversion) results.
- Project level statuses and individual steps statuses provide high level project management
To help you get started using this tool I’ve prepared the following guide for a simple DTV project. Please note that significantly more complex scenarios can be developed. This quick project is presented to show a very simple use case.
Key configuration steps to implement a simple DTV project:
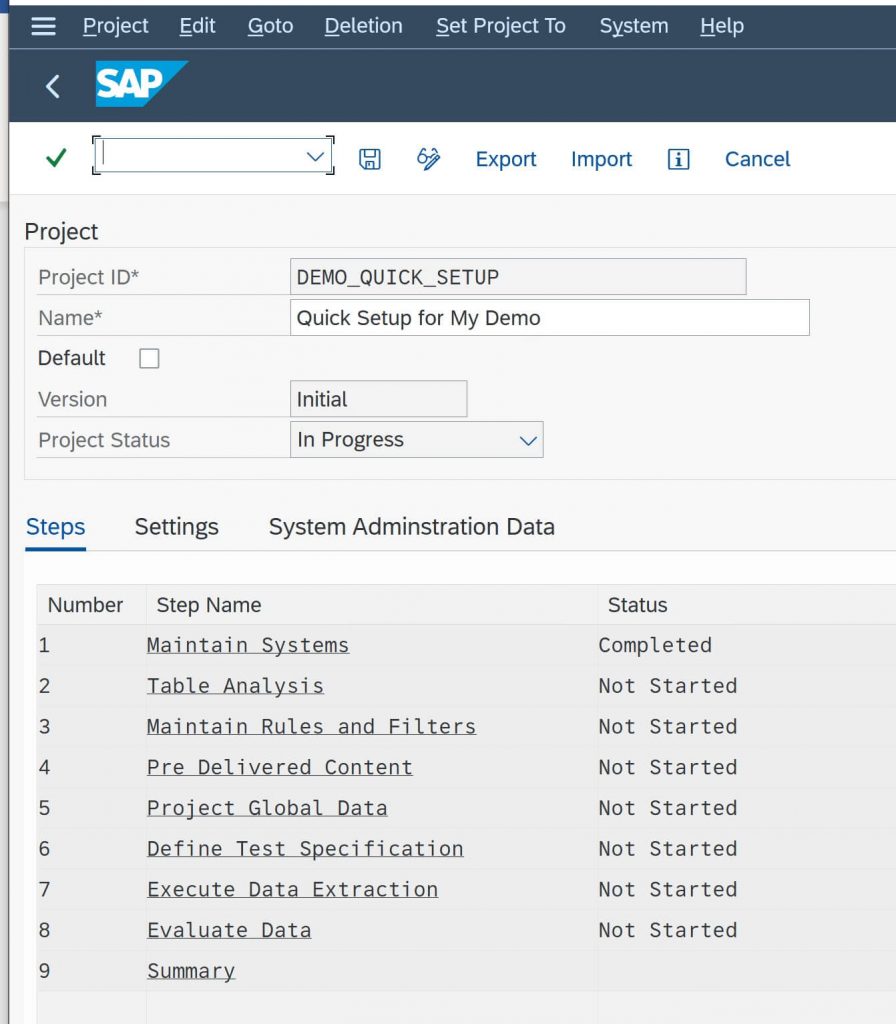
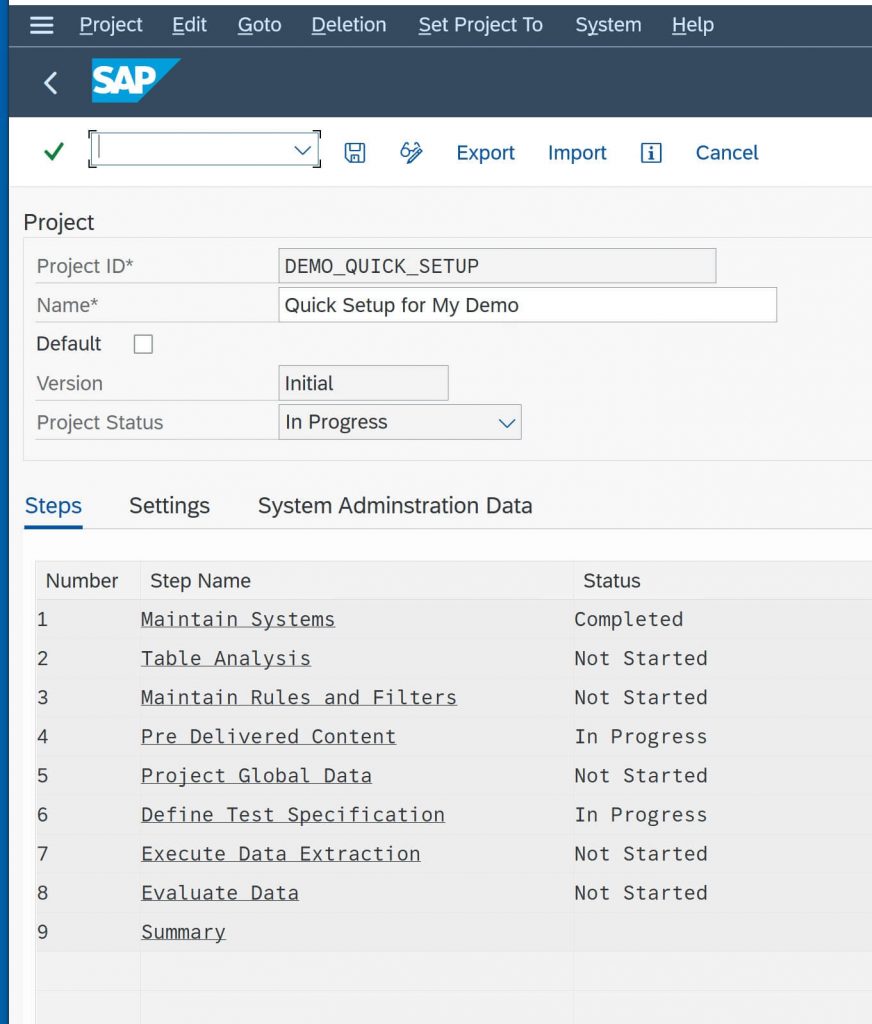
1. Establish a project to contain the definition of the overall process
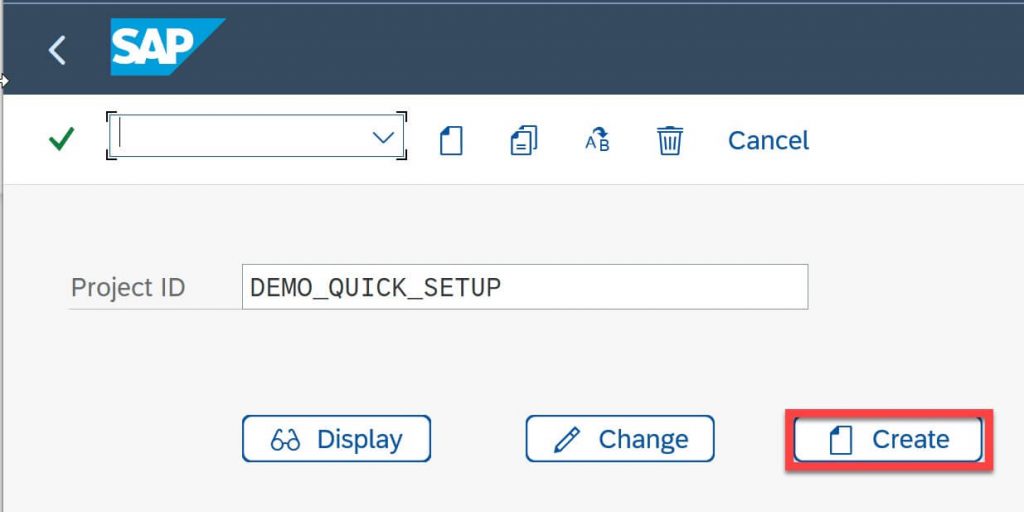
2. Enter a description and Save to initialize the process
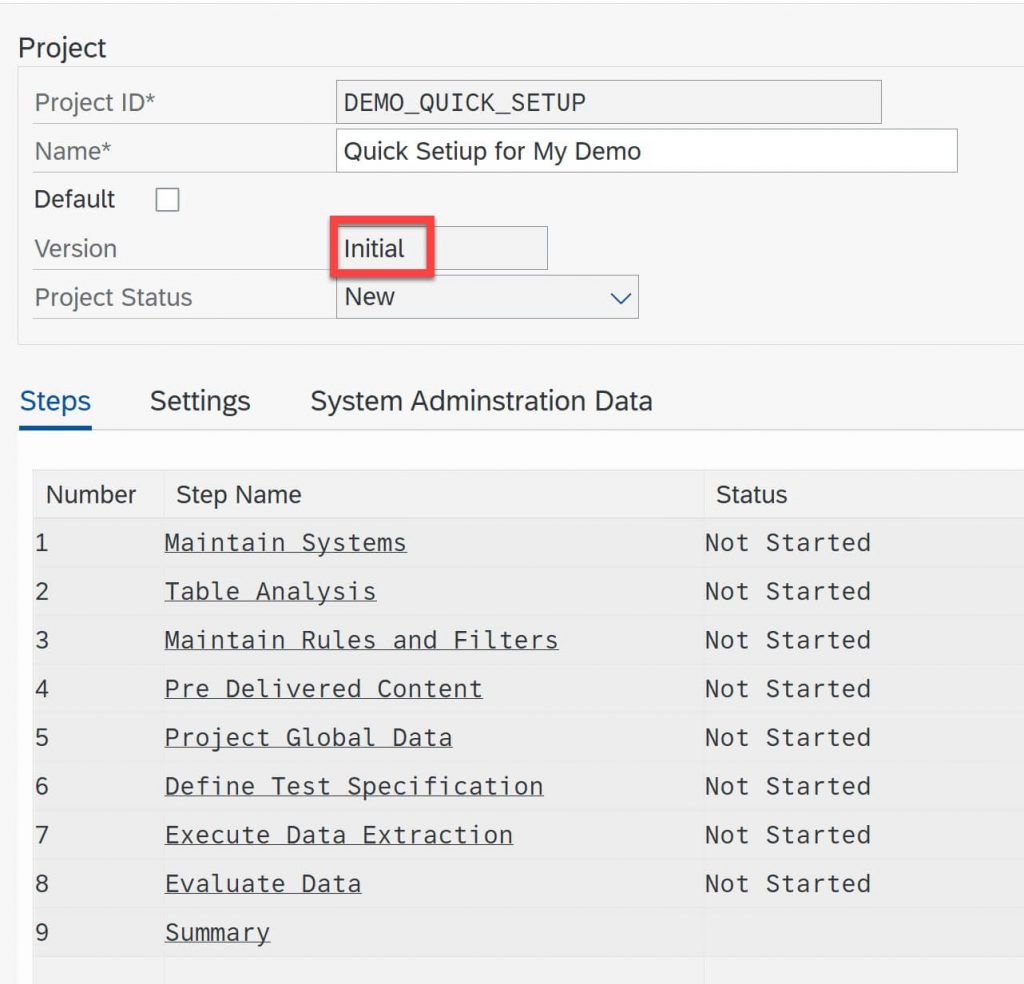
3. Double click on “Maintain System” step to establish source and target (receiver) system naming

(for this project source system is named ERP and target system is S/4HANA)
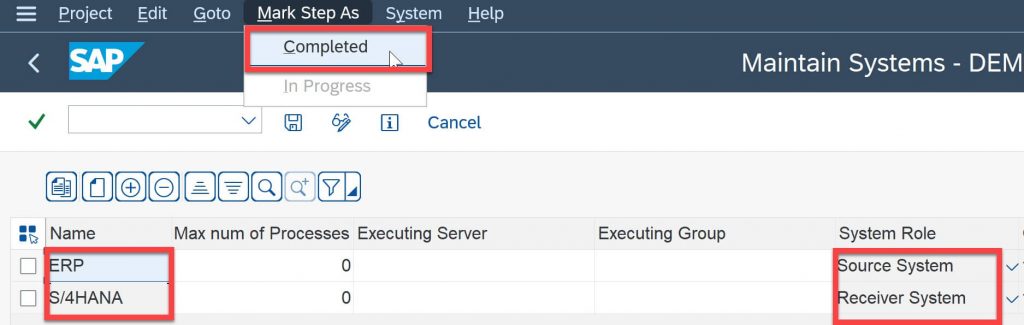
Save settings.
Mark Step as Completed
Return to project overview screen.
Note that status of the Maintain Systems step is now identified as “Completed” and project Status is “In Progress”.
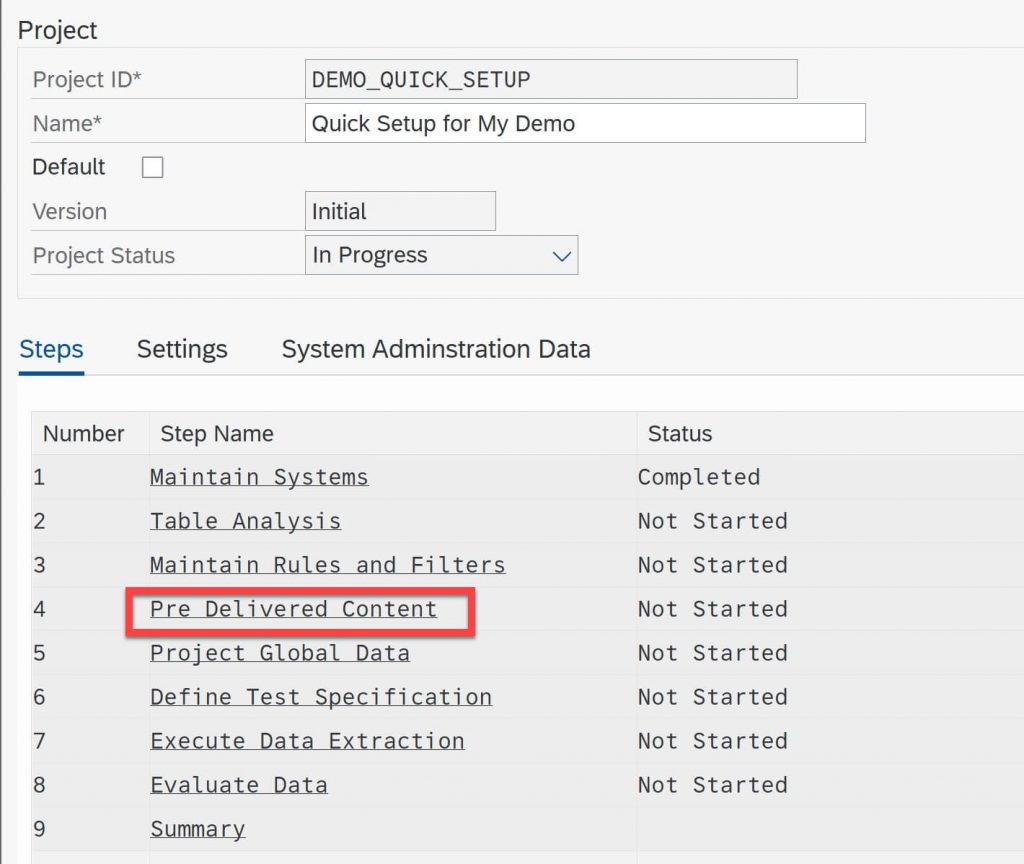
4. Click on “Pre-Delivered Content” step to identify which reports should be executed for the comparisons:
A list of all available delivered reports is displayed (for this quick project I selected only one report and then imported the specification into the project)
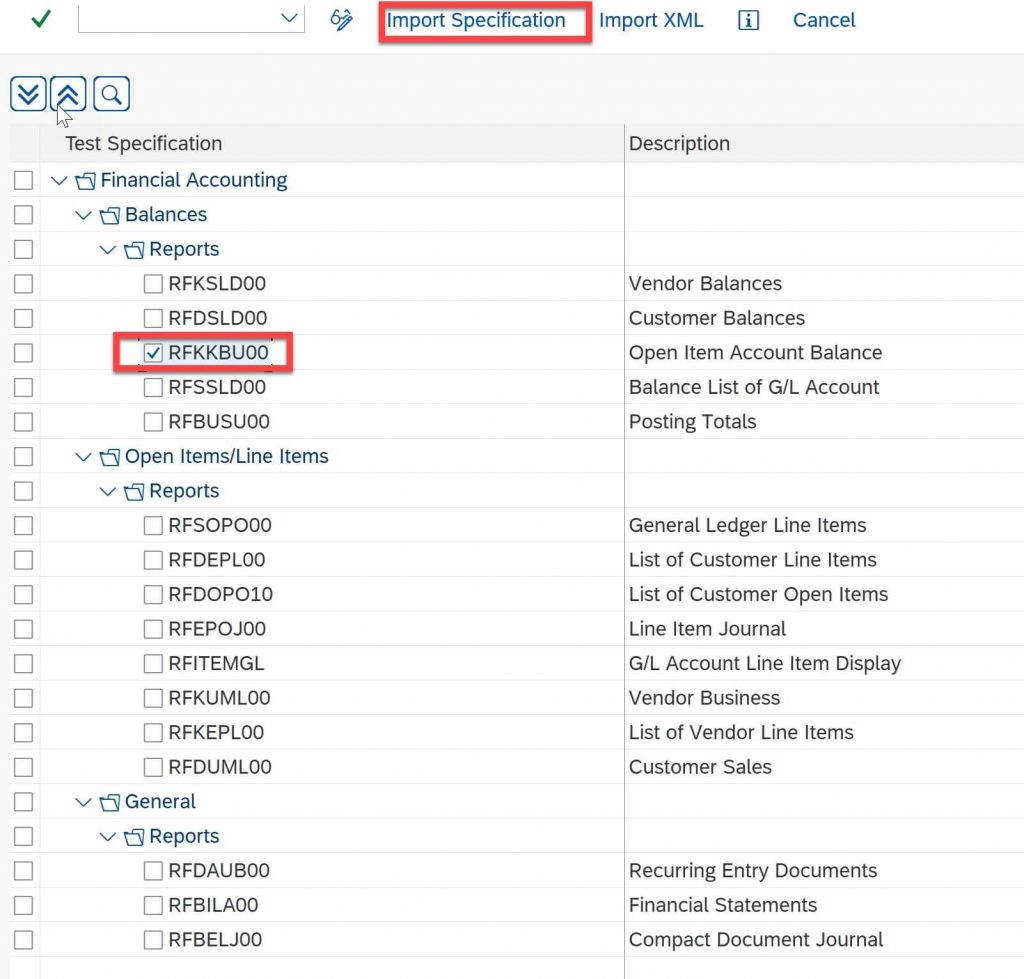
System will message when import is complete.
Exit and return to main project overview screen:

5. Select Define Test Specifications and select one the imported report:

Enter report variant for each system (note using a variant is only one way to specify the report conditions, other options include:
- Global Variables (to specify conditions across all reports in project),
- Identify specific value and value ranges for specific value fields in the Condition tab
- Identify specific value and value ranges for specific value fields that should be excluded from the report
Note the warnings if using a variant, system will ignore some report conditions in favor of a variant definition:
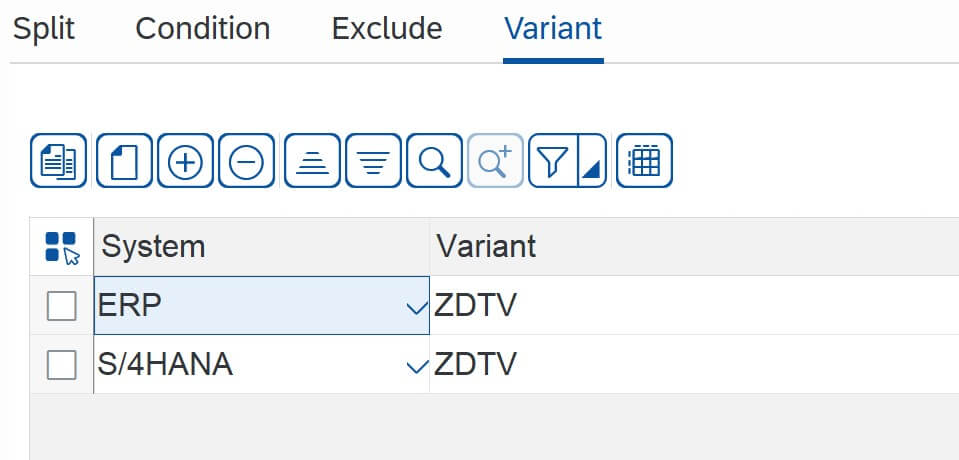
If using a variant, you may need to remove all Split, Condition, and Exclusion conditions to allow system to display data correctly.
Acknowledge warnings and Save.
6. Test report operation by selecting the Simulation option:
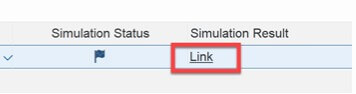
View simulated report results by scrolling to the far right of the selected report line. The initial state will indicate that no simulation has been executed with a clear flag and the Simulation Link will be non-functional:

After executing the Simulation, the flag will appear dark and the resulting Link will hyperlink to open simulation results:
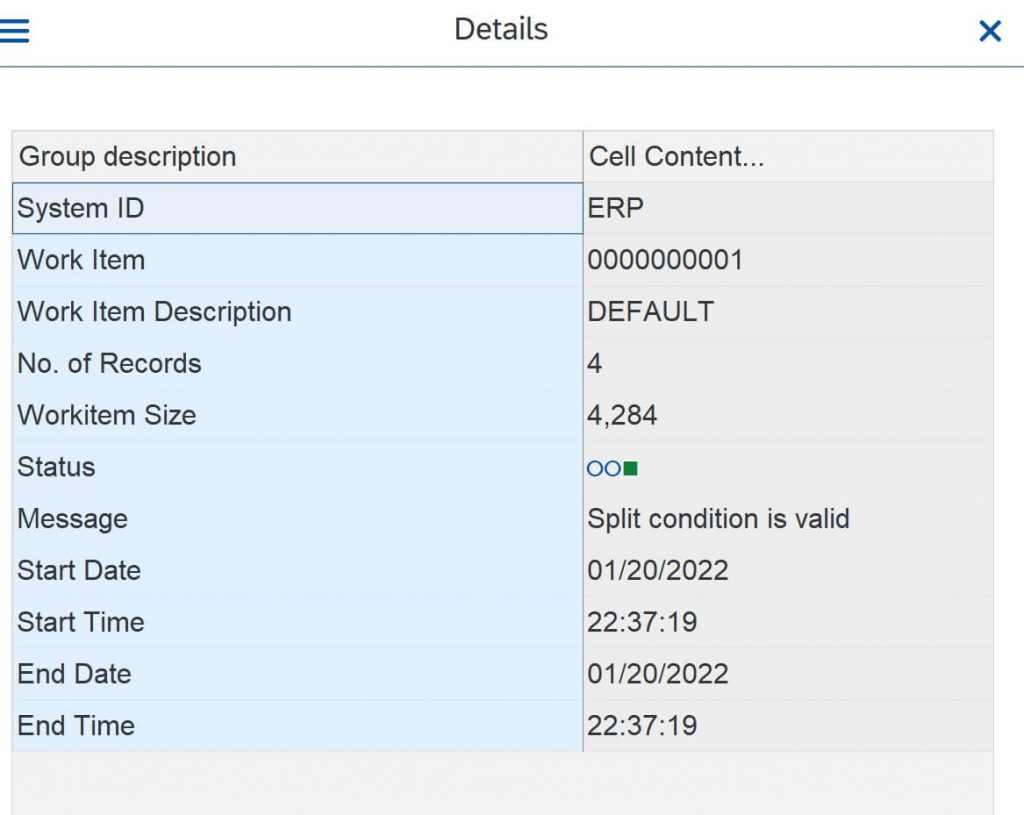
Simulation Result Link provides a summary view (up to a maximum of 100 rows) of the data generated (in this simple case four records were generated by the report execution in the pre-converted system, ERP):
7. Exit Define Test Specification and return to the project overview page
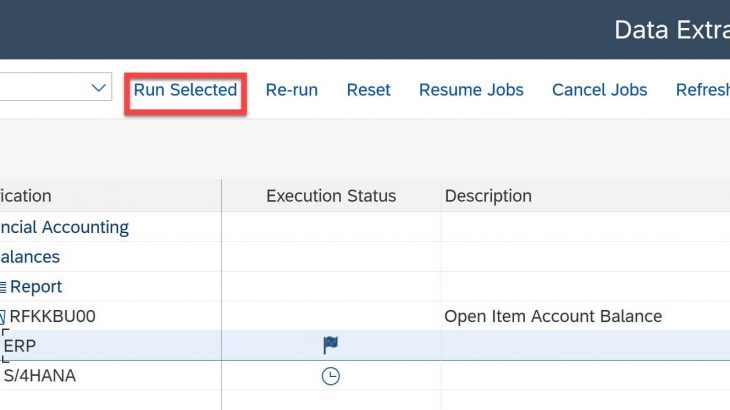
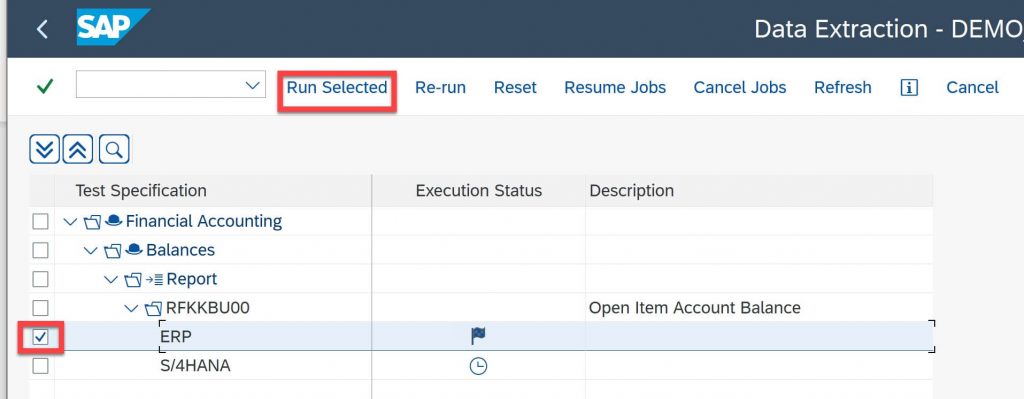
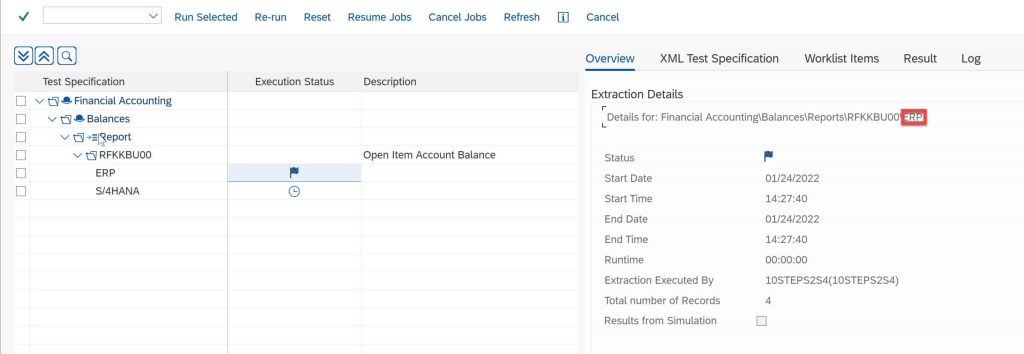
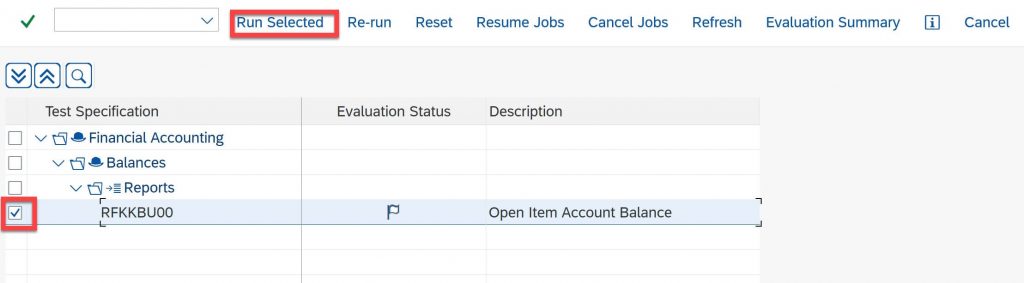
8. Enter the “Execute Data Extraction” step
Highlight specific report and system to “Run Selected” data extraction
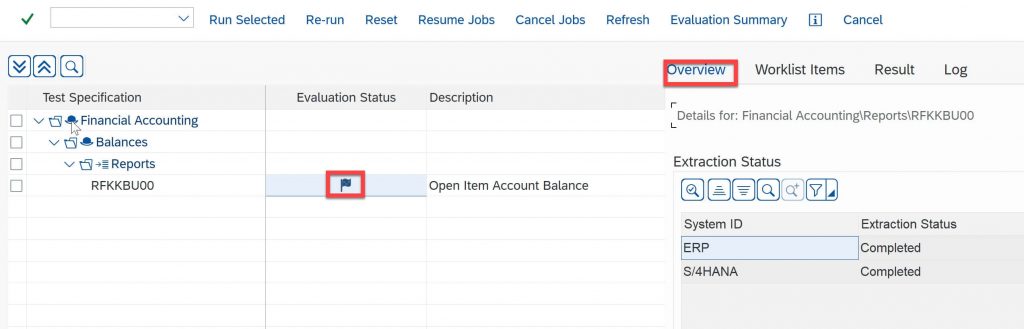
View data extraction results:
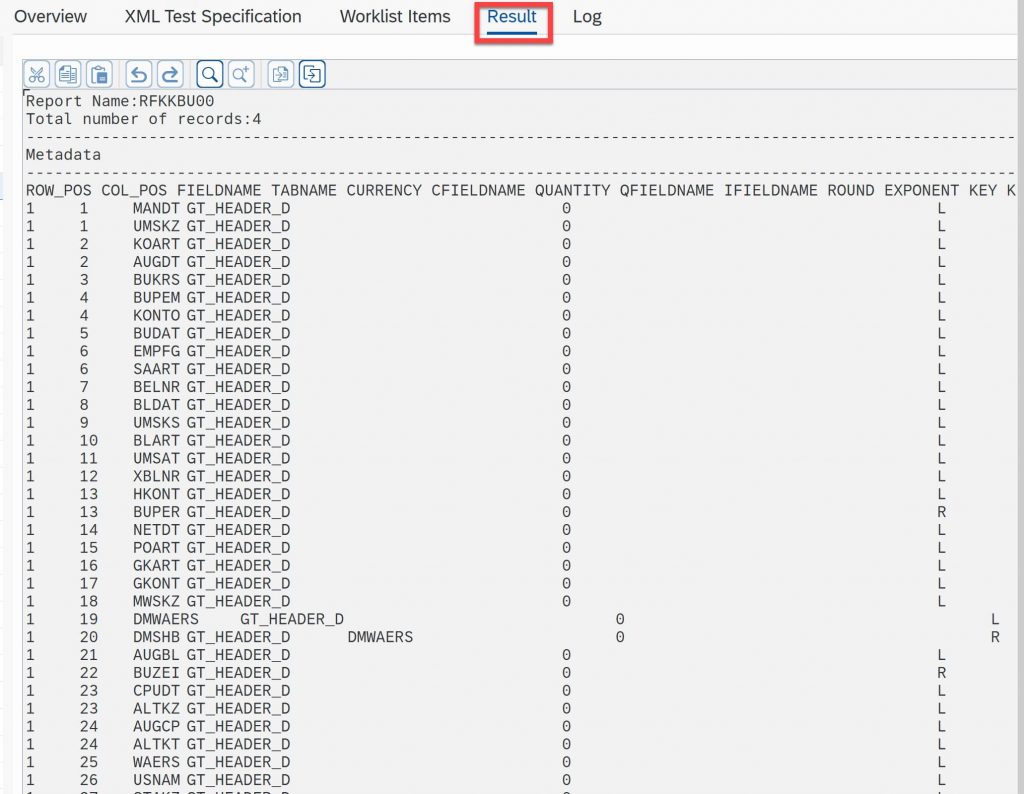
Scroll down to visualize up to 100 rows generated by the report:

9. Perform the system conversion to S/4HANA. The DVT project and all associated data is preserved during the conversion process. After system conversion to S/4HANA and the subsequent Financial data conversion process has been completed, the same DVT project started before the conversion will still be available in the newly converted S/4HANA system.
10. Return to the DVT project, adjust the parameters for the report execution if necessary, and execute the data extraction for the converted (S/4HANA) system
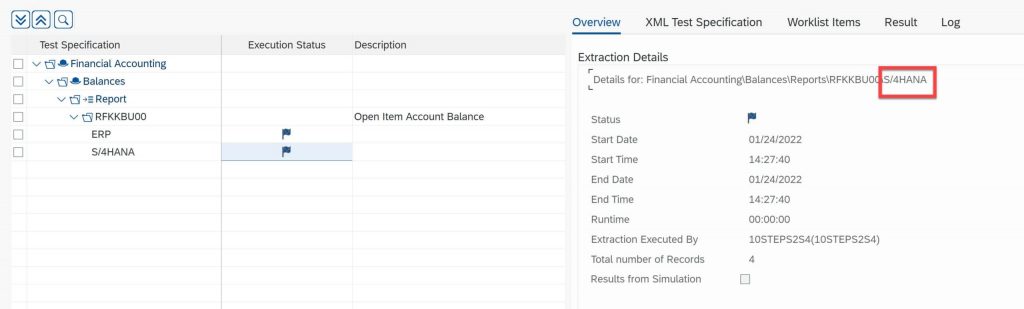
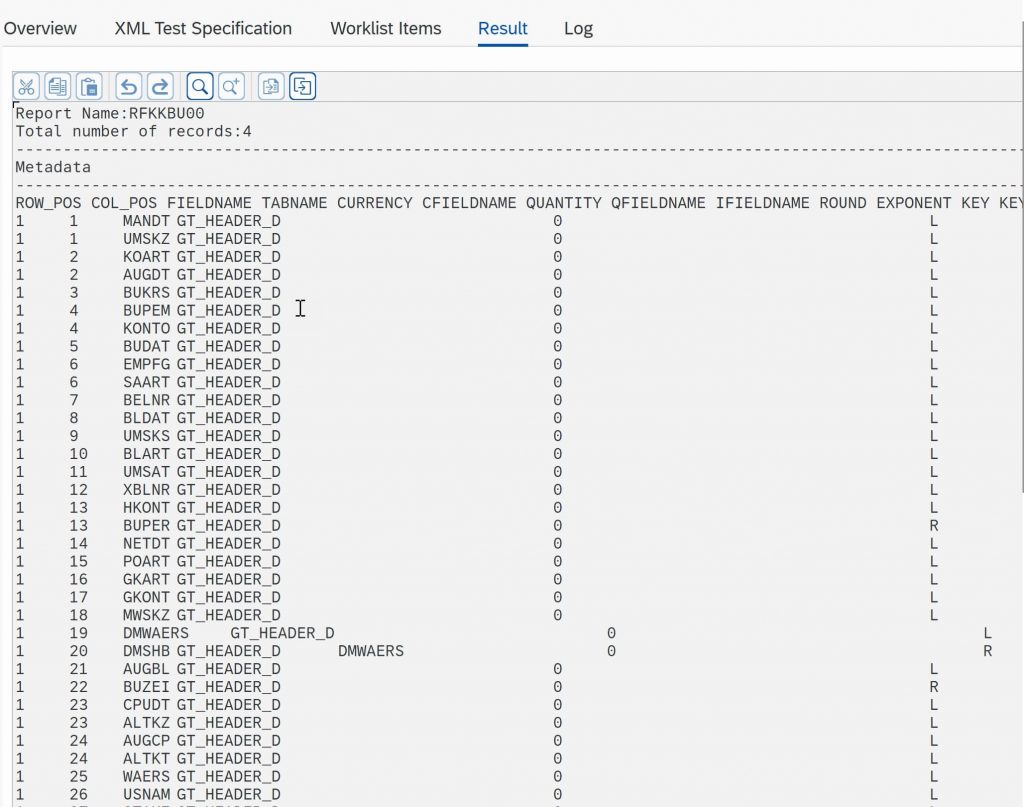
Scroll down to see first 100 rows generated:

Exit and return to main display

Mark Step as “Completed” – notice project status changes to “Extracted”.

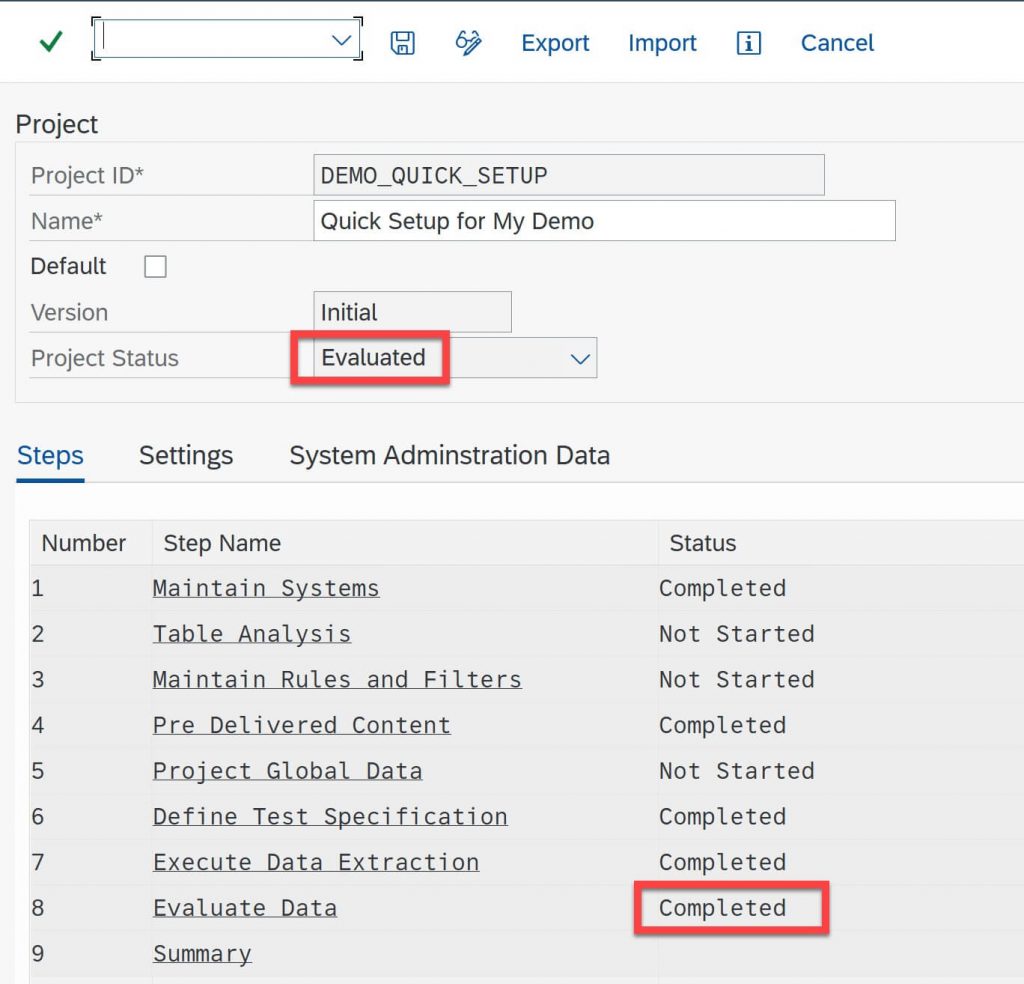
11. Enter the “Evaluate Data” step
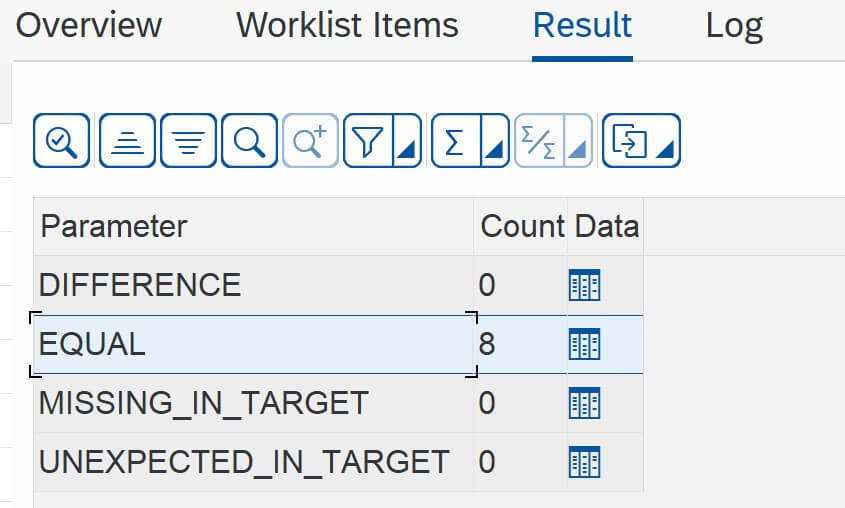
Upon completion of the evaluation view the evaluation results:
The Result tab identifies differences, equal, missing, and other unexpected results observed during the comparison of the before and after conversion reports.
In this simple project, all results were the same (equal).
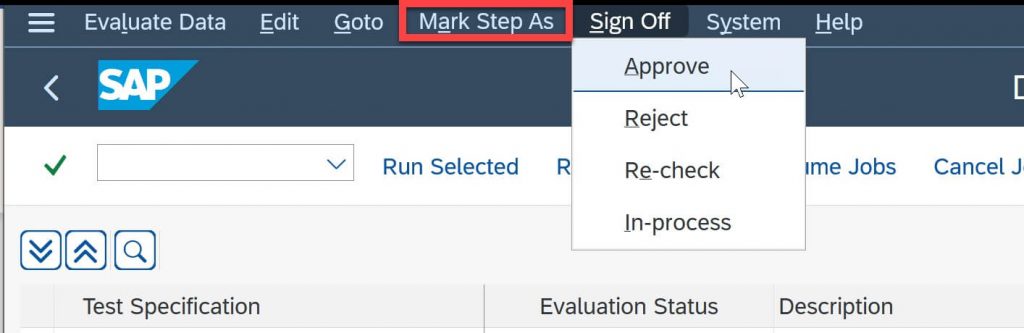
Check results and Sign-Off test item results.
Mark Step As “Completed”
Exit and return to main display. Note that project status is now “Evaluated”.
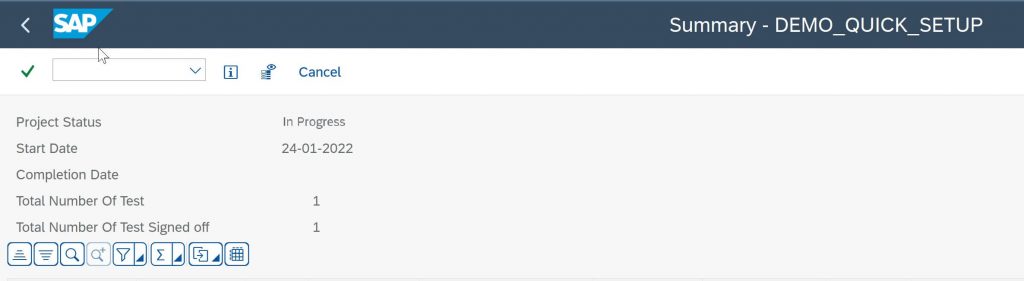
12. View project “Summary”

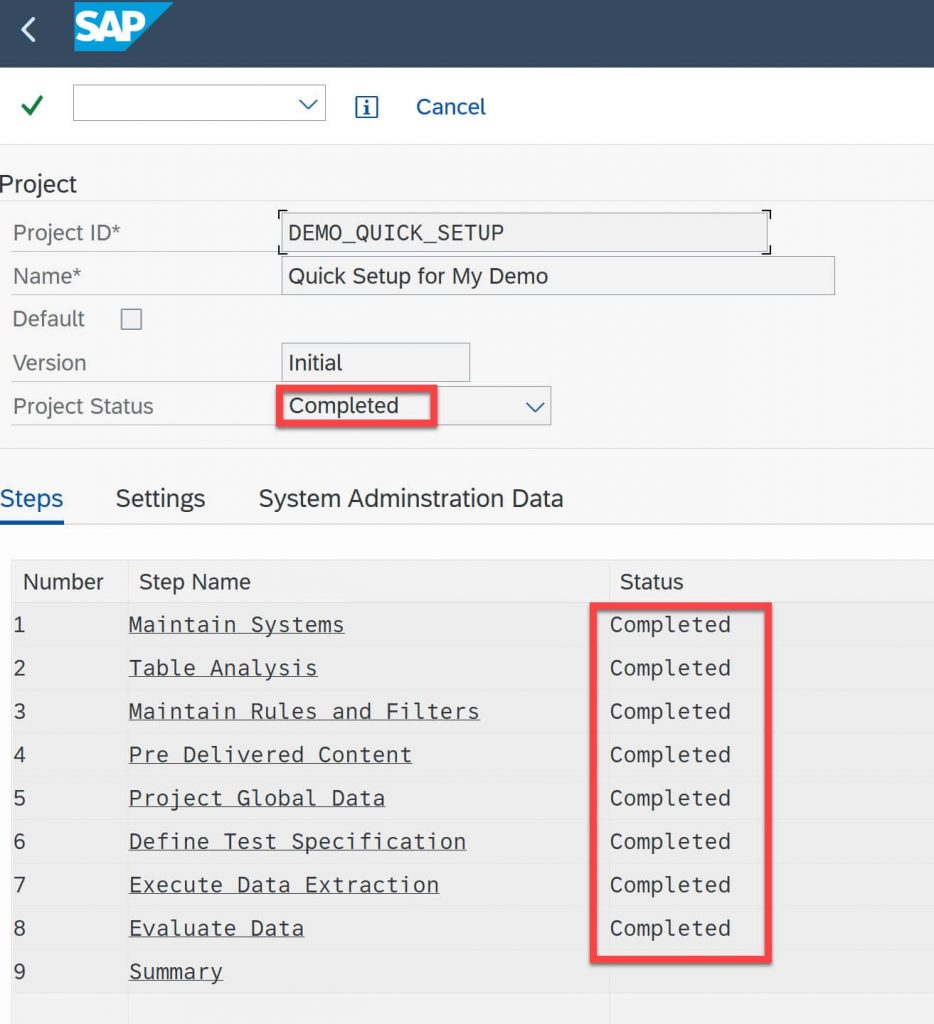
13. Once all project steps are marked as complete, the entire project status is set to Completed.
This blog is intended to be an introduction to the DVT tool. Additional deeper dives into the tool’s capabilities can be expected in future blogs.


