
How to Add, Delete and Save Deep Structure in SAPUI5 Applications?
Users want a screen where they can add multiple lines in the table. If they find some issue in the row of the input table then they want the ability to delete the entry from the screen and add a new entry. And in the end, they would like to save these table entries in some database tables or use these entries to post some transactions like sales order, purchase orders, handling units etc. Remember, if you want to use a BAPI to post sales or purchase orders, you need to provide header information, item information, condition records etc. I mean to say, you need to provide a complex input from the SAPUI5 screen to SAP OData.
As long as there is just work area or single line (structure), developers have no issue. As soon as there are multiple views and the table becomes deep, developers are in the soup. In this series of 3 Parts, we will deal with Deep Structures in SAPUI5. In part 3 we would explain how we can redefine CREATE_DEEP_ENTITY method in the Data Provider Class of the OData Service.
Although this is a very common requirement and simple too, but for conventional ABAPers like me, who has no prior knowledge of Java/JavaScript/jQuery, it takes a while to understand the concept and implement them in real project scenarios. In this series, I would like to hand hold all freshers in SAPUI5/OData and provide them step by step help to achieve this functionality. So be ready for a long article.
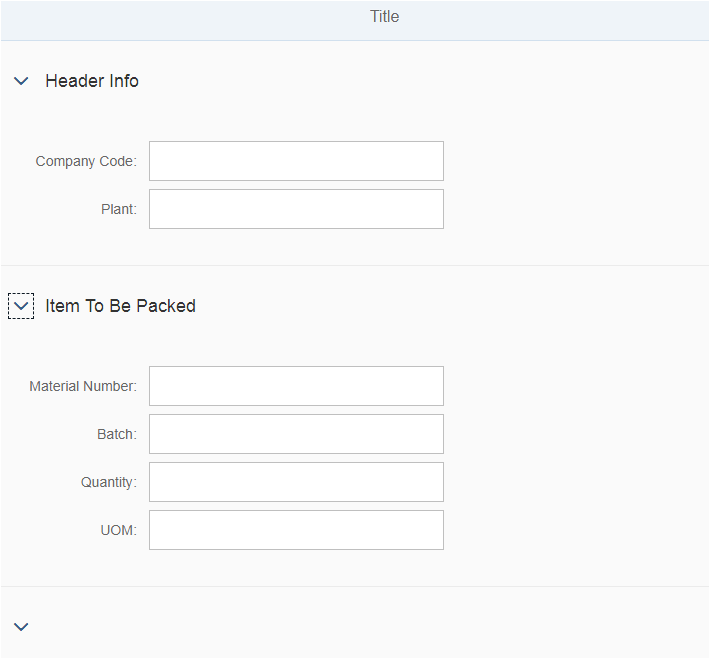
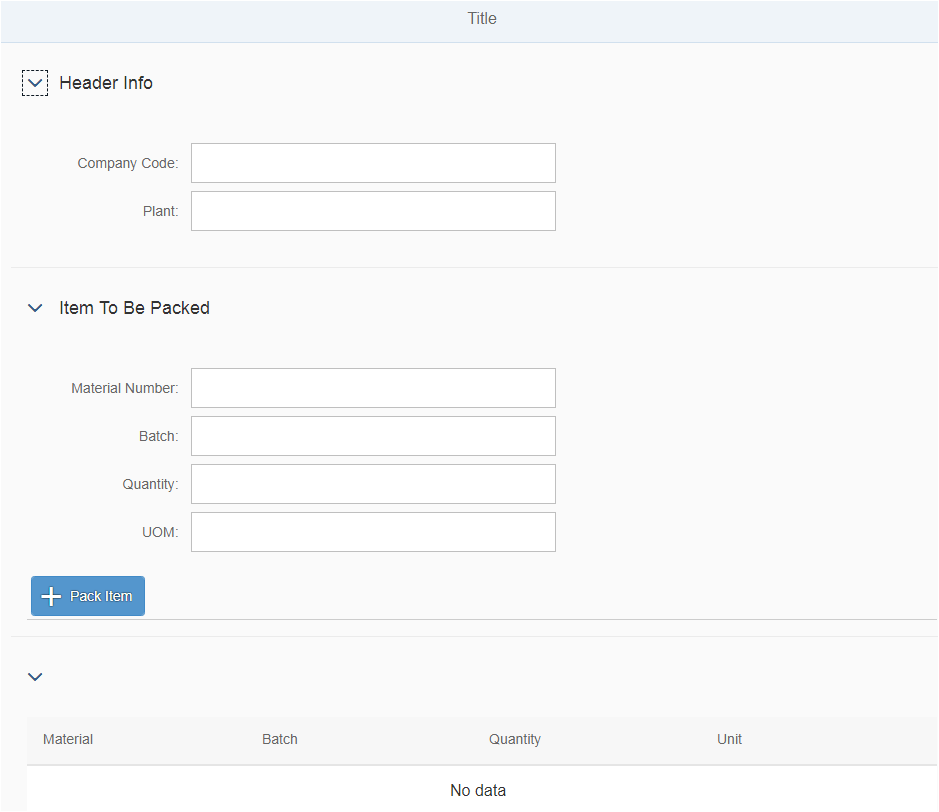
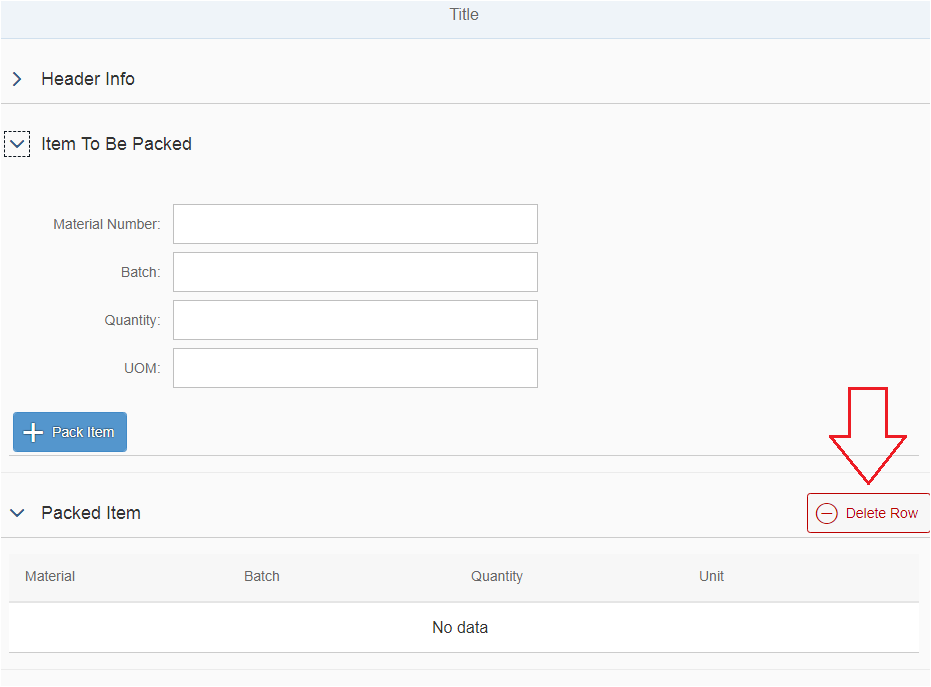
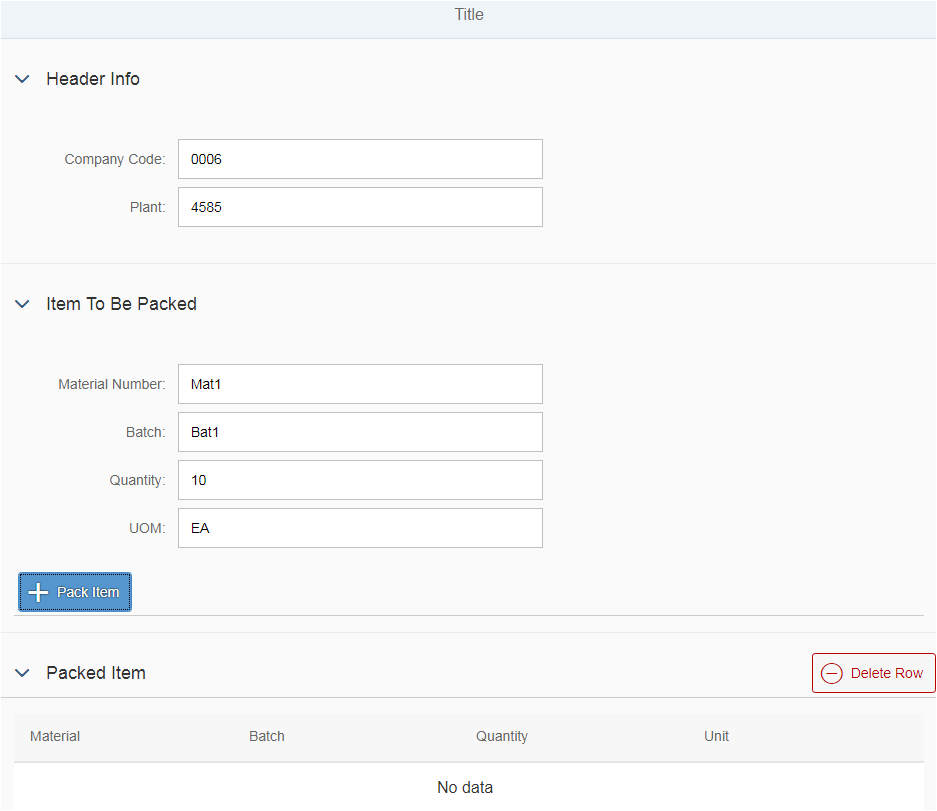
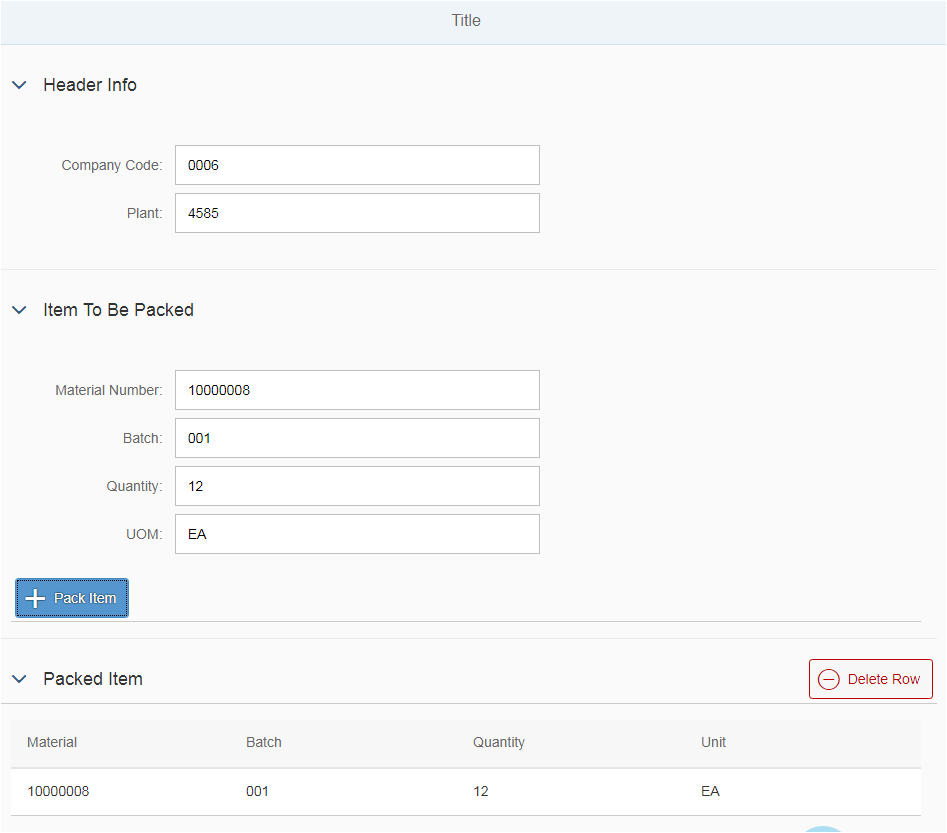
In our exercise, we would learn end to end design and implementation of SAPUI5 App which would look something like below screen:
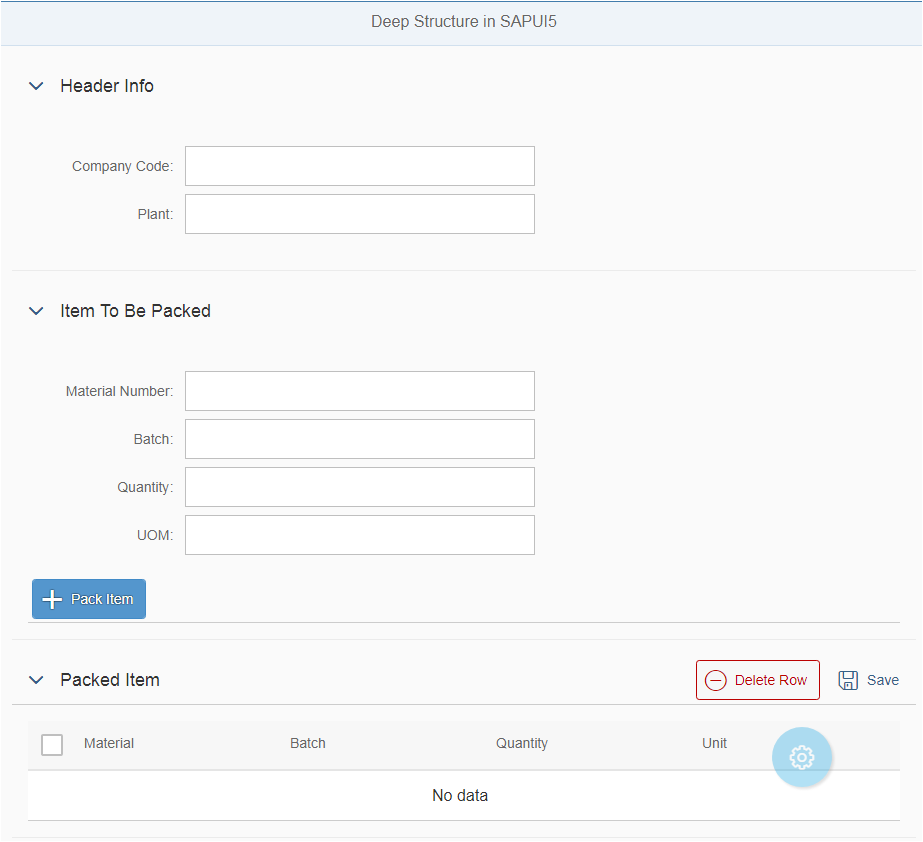
Header Info would be common for all Items. When Pack Item Button is clicked, the bottom table would be populated on the screen. When Delete Row Button would be clicked, the selected row entry in the table would be deleted. When Save Button would be clicked, the Header info and Packet Item table would be sent in Deep structure to OData and updated in SAP backend using the CREATE_DEEP_ENTITY method.
I am sure; this step by step exercise would make you ready for such common applications in real SAPUI5 projects.
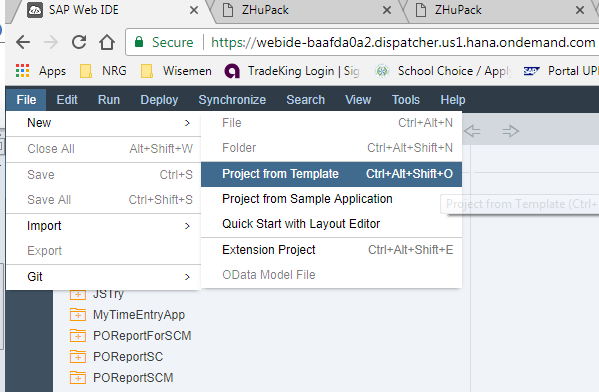
Let us go to SAP WebIDE and create our project. If you have Eclipse, you can do the same thing in Eclipse too. If this is your first SAPUI5 App, do not worry, follow these steps and you would be able to create your first App today.
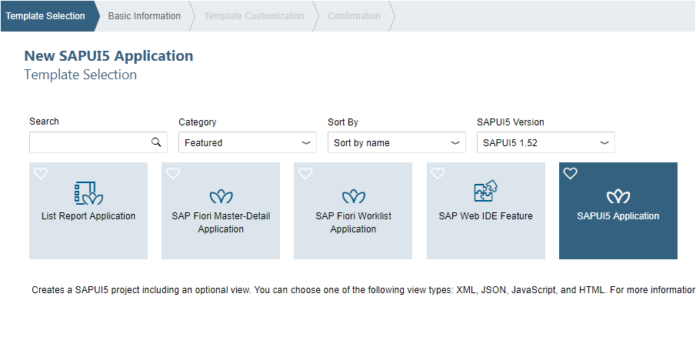
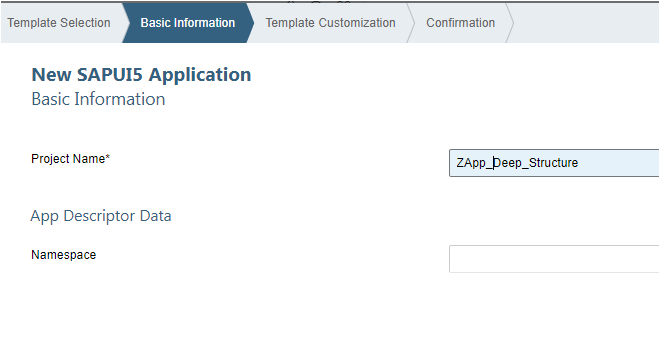
Step 1 – Go to SAP WebIDE and create a Project from Template.
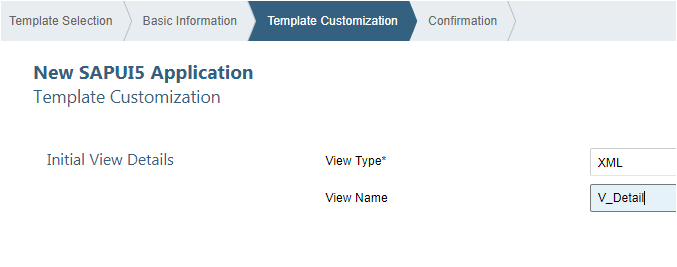
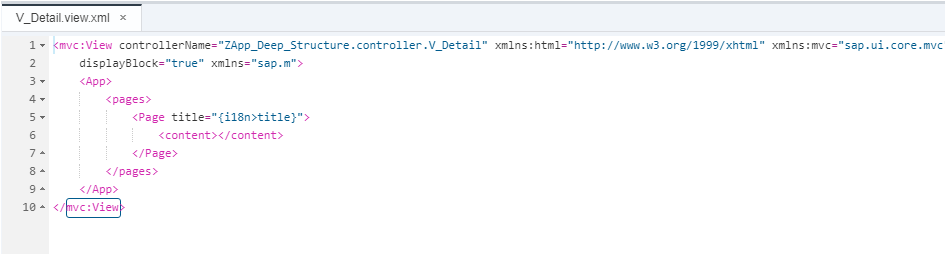
Default View V_Detail.view.xml
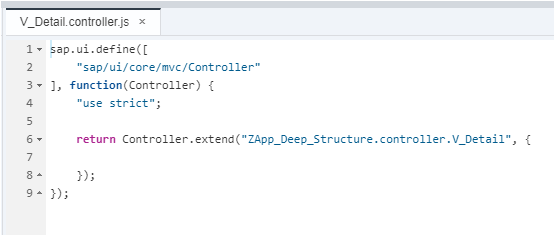
Default Controller V_Detail.controller.js
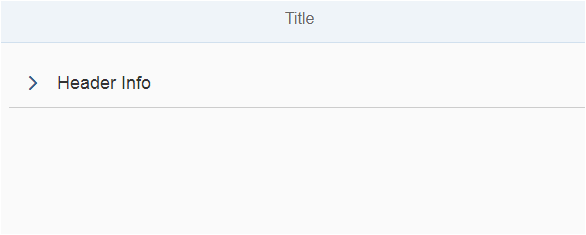
Step 2 – Create the Panels for the Screen.
<Panel expandable=”true” expanded=”false” headerText=”Header Info” width=”auto” class=”sapUiResponsiveMargin”> </Panel>
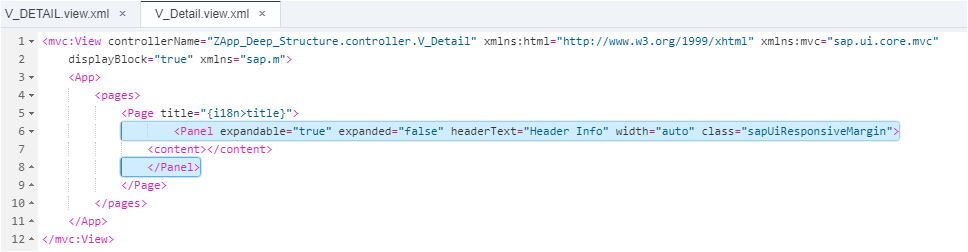
Save and Test the Screen. It should look like below.
Tips – If you are new to SAPUI5, always test the application after every step (after you make any change). So that you know if there is any issue. If you complete the app and then try to test at the end, you might not know which part has the issue.
Let us put the next two Panels.
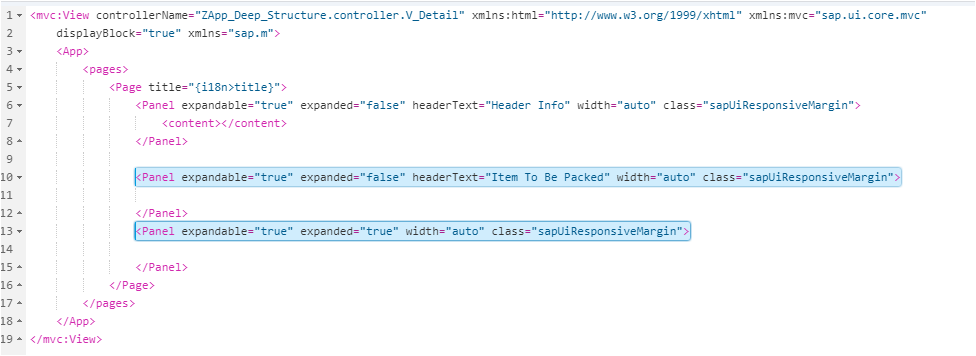
It would look like below.
Play with the Panel properties like Expandable, HeaderText etc to customize your Screen.
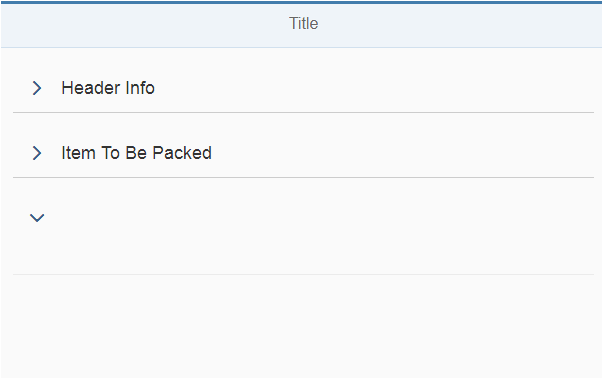
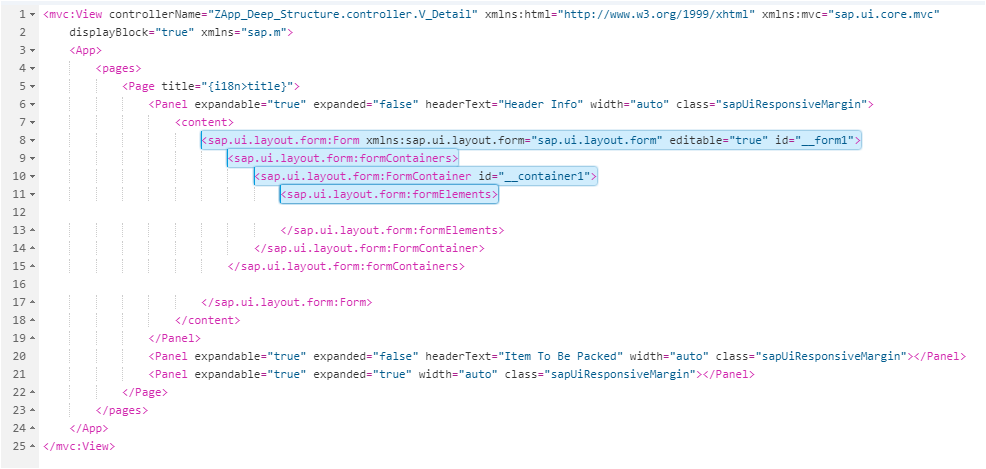
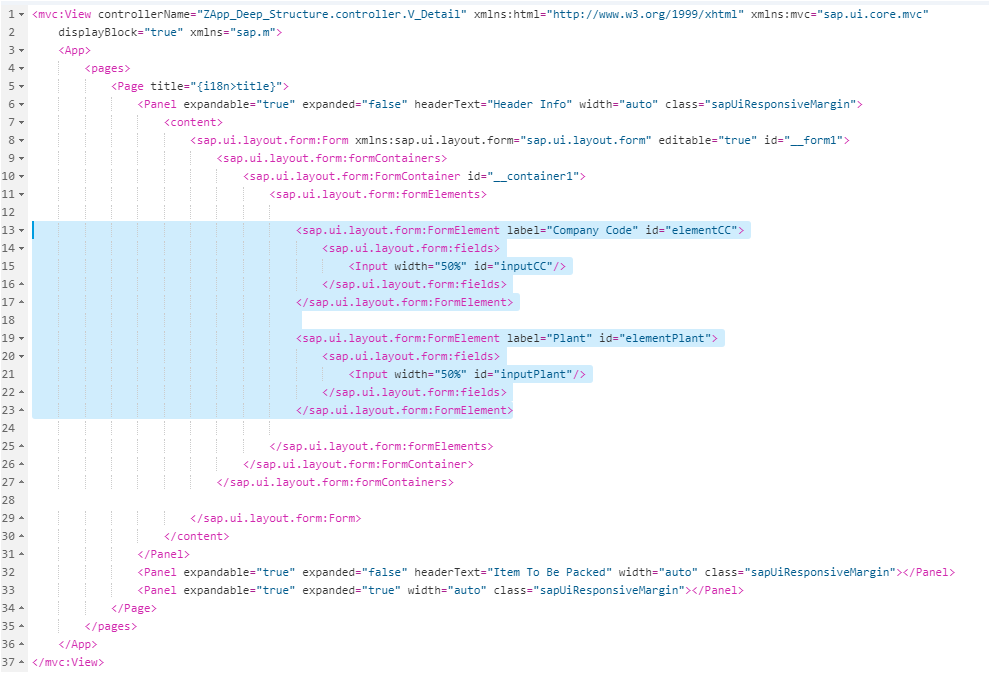
Step 3 – Create the Form, FormContainers, FormContainer, FormElements in the View Screen inside the Contents of the Panels.
<Panel expandable=”true” expanded=”false” headerText=”Header Info” width=”auto” class=”sapUiResponsiveMargin”>
<content>
<sap.ui.layout.form:Form xmlns:sap.ui.layout.form=”sap.ui.layout.form” editable=”true” id=”__form1″>
<sap.ui.layout.form:formContainers>
<sap.ui.layout.form:FormContainer id=”__container1″>
<sap.ui.layout.form:formElements>
</sap.ui.layout.form:formElements>
</sap.ui.layout.form:FormContainer></sap.ui.layout.form:formContainers>
</sap.ui.layout.form:Form></content></Panel>
Step 4 – Finally Create the Input Fields Element inside the FormElements of the Contents of the Panels.
<sap.ui.layout.form:FormElement label=”Company Code” id=”elementCC”><sap.ui.layout.form:fields>
<Inputwidth=”50%” id=”inputCC”/>
</sap.ui.layout.form:fields>
</sap.ui.layout.form:FormElement>
<sap.ui.layout.form:FormElement label=”Plant” id=”elementPlant”><sap.ui.layout.form:fields>
<Inputwidth=”50%” id=”inputPlant”/>
</sap.ui.layout.form:fields>
</sap.ui.layout.form:FormElement>
Let us check our screen again.
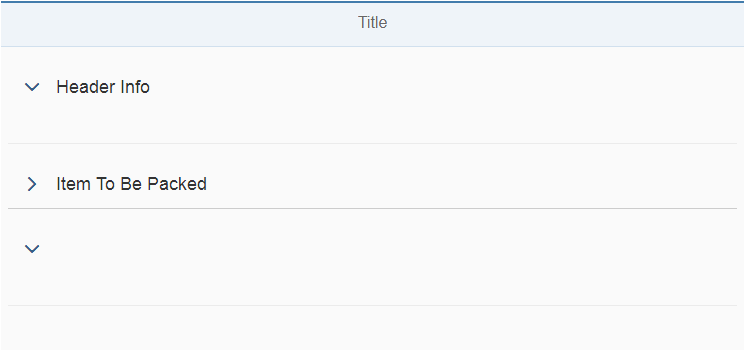
OOPs, the Company Code and Plant input fields are not there. Check the next step for resolution.
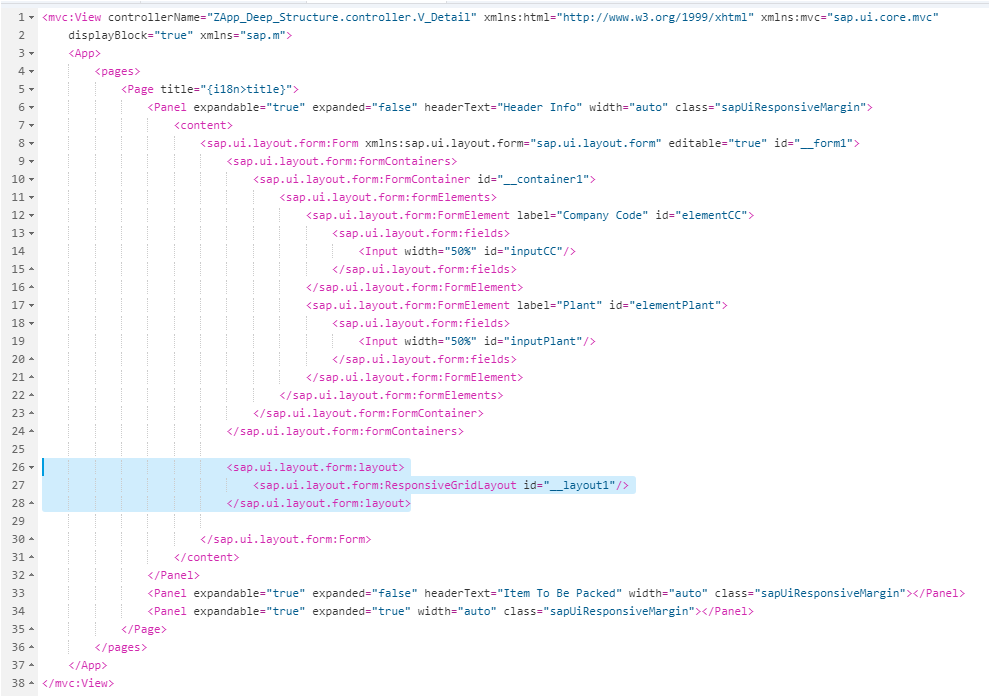
Step 5 – Specify the Form Layout
<sap.ui.layout.form:layout>
<sap.ui.layout.form:ResponsiveGridLayout id=”__layout1″/></sap.ui.layout.form:layout>
Let us test again.
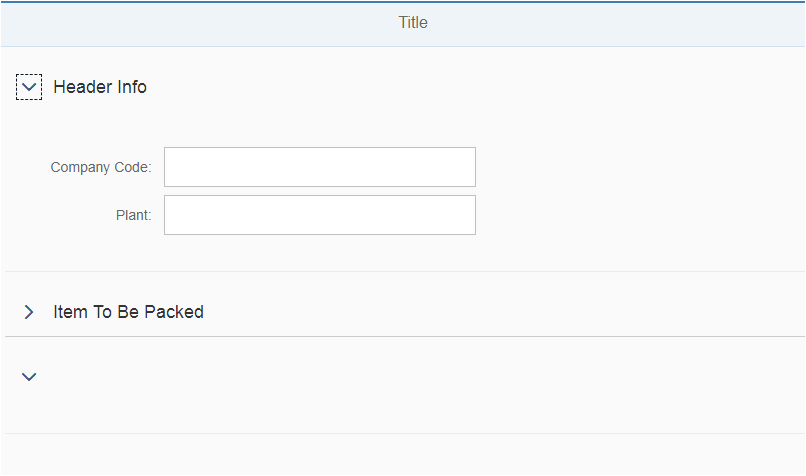
We have the Header Info input screen elements. Let us go to the next Panel to create input fields for Item to be Packed.
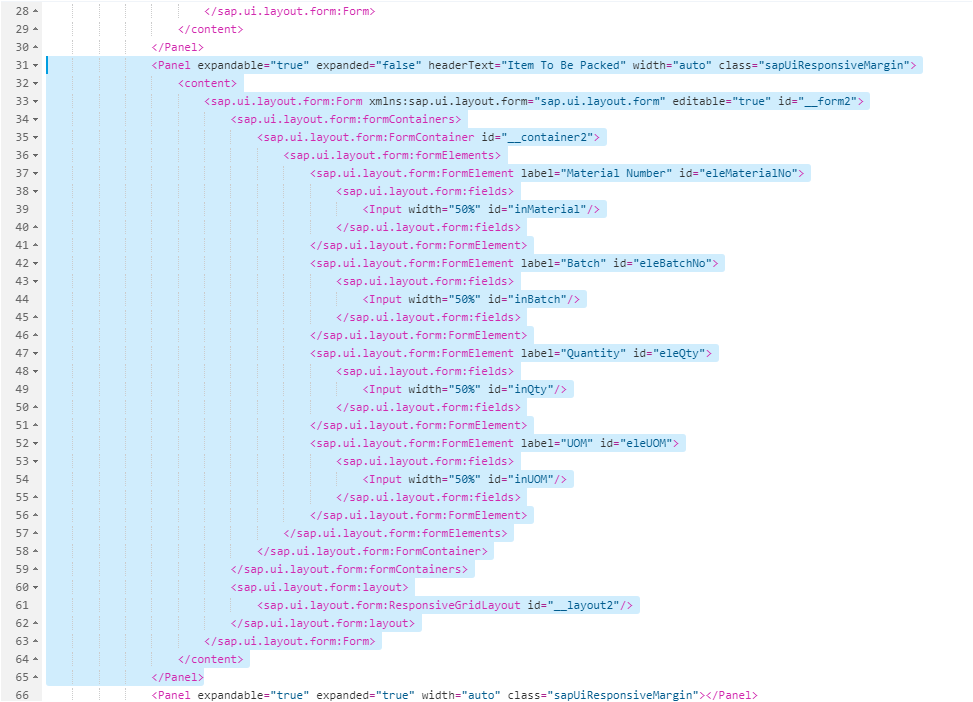
Step 6 – Create the next Panel for Item Details input fields.
| <Panel expandable=”true” expanded=”false” headerText=”Item To Be Packed” width=”auto” class=”sapUiResponsiveMargin”><content> <sap.ui.layout.form:Form xmlns:sap.ui.layout.form=”sap.ui.layout.form” editable=”true” id=”__form2″> <sap.ui.layout.form:formContainers> <sap.ui.layout.form:FormContainer id=”__container2″> <sap.ui.layout.form:formElements> <sap.ui.layout.form:FormElement label=”Material Number” id=”eleMaterialNo”> <sap.ui.layout.form:fields> <Input width=”50%” id=”inMaterial”/> </sap.ui.layout.form:fields> </sap.ui.layout.form:FormElement> <sap.ui.layout.form:FormElement label=”Batch” id=”eleBatchNo”> <sap.ui.layout.form:fields> <Input width=”50%” id=”inBatch”/> </sap.ui.layout.form:fields> </sap.ui.layout.form:FormElement> <sap.ui.layout.form:FormElement label=”Quantity” id=”eleQty”> <sap.ui.layout.form:fields> <Input width=”50%” id=”inQty”/> </sap.ui.layout.form:fields> </sap.ui.layout.form:FormElement> <sap.ui.layout.form:FormElement label=”UOM” id=”eleUOM”> <sap.ui.layout.form:fields> <Input width=”50%” id=”inUOM”/> </sap.ui.layout.form:fields> </sap.ui.layout.form:FormElement> </sap.ui.layout.form:formElements> </sap.ui.layout.form:FormContainer> </sap.ui.layout.form:formContainers> <sap.ui.layout.form:layout> <sap.ui.layout.form:ResponsiveGridLayout id=”__layout2″/> </sap.ui.layout.form:layout> </sap.ui.layout.form:Form> </content> </Panel> |
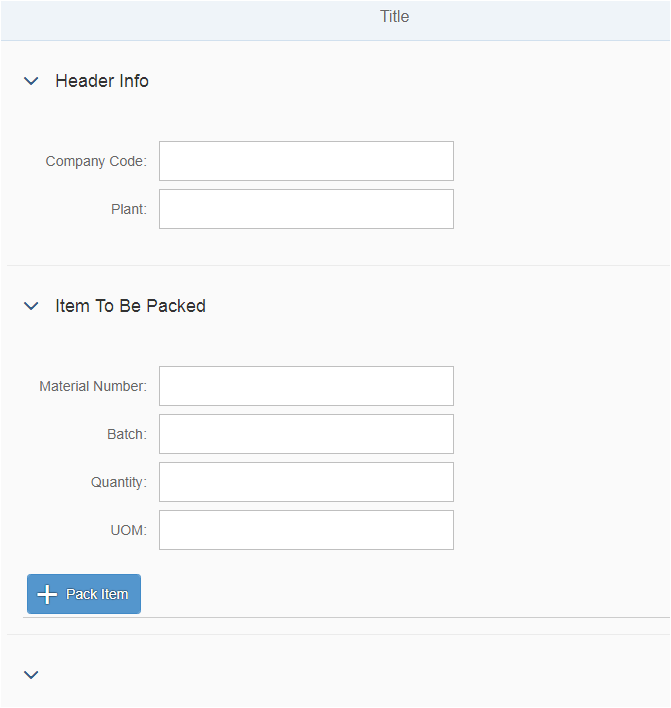
Step 7 – Add a Toolbar with Button ‘Pack Item’ in 2nd Panel.
onAdd is the function name attached to the Button which is triggered when the user presses it.
<Toolbar height=”3rem”><Button icon=”sap-icon://add” text=”Pack Item” type=”Emphasized” press=”onAdd”/></Toolbar>

Icon, Button Text, Type and Press function can be specified in the Button.
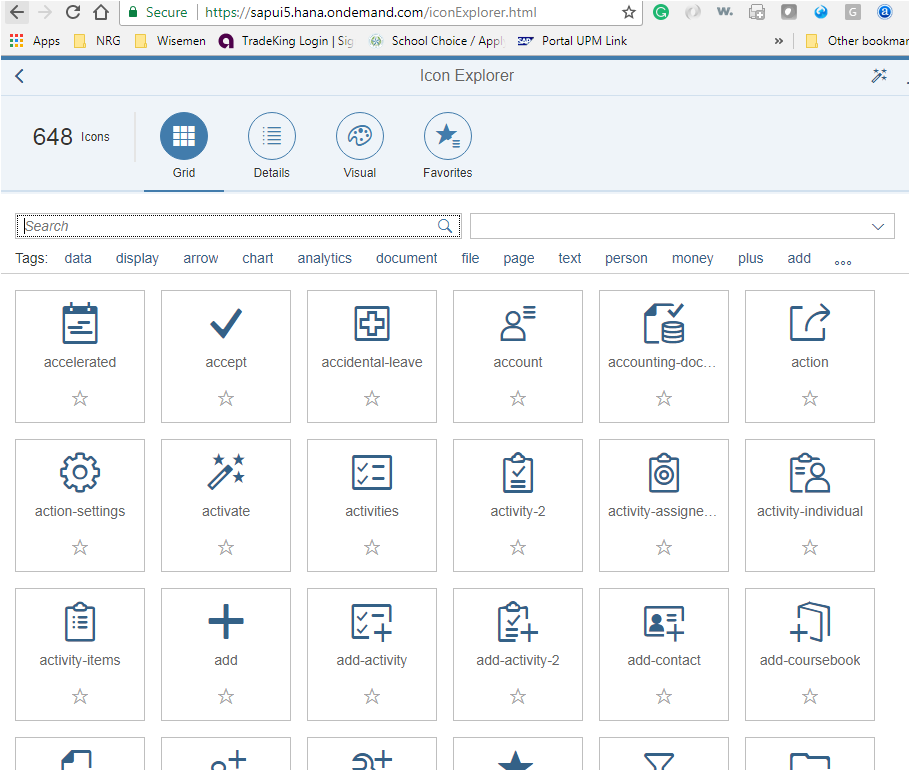
Tip – You can find the list of SAPUI5 Icons in the Demo Kit.
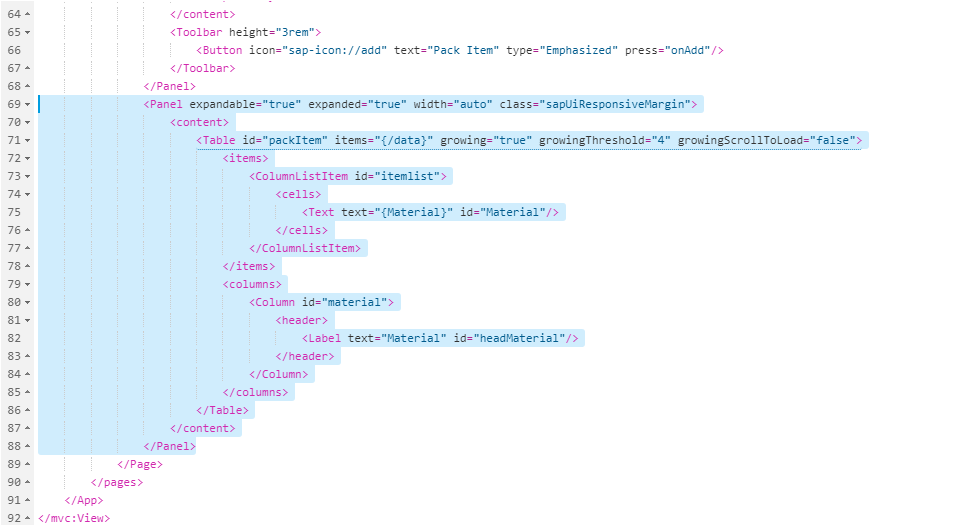
Step 8 Create a Table in the last Panel.
Let us first create a table with one Column (Material) and one Header (Material).
<Panel expandable=”true” expanded=”true” width=”auto” class=”sapUiResponsiveMargin”>
<content>
<Tableid=”packItem” items=”{/data}” growing=”true” growingThreshold=”4″ growingScrollToLoad=”false”>
<items>
<ColumnListItem id=”itemlist”>
<cells>
<Text text=”{Material}” id=”Material”/>
</cells>
</ColumnListItem>
</items>
<columns>
<Columnid=”material”>
<header>
<Label text=”Material” id=”headMaterial”/>
</header>
</Column>
</columns>
</Table>
</content>
</Panel>
<items> </items> -Anything with the tag is the structure of the table.
items=”{/data}” Shows the binding to the data.
<Text text=”{Material}” id=”Material”/> Shows the binding at column level.
Let’s see the output.
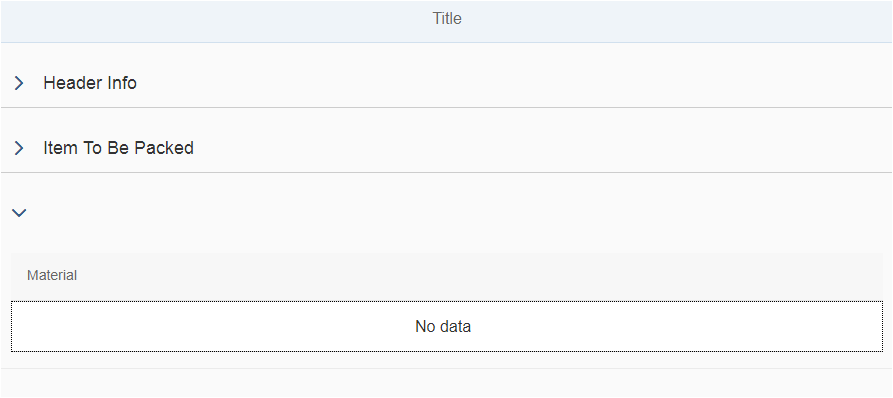
As expected, we see a table with one Column with no data and have header text ‘Material’.
Now, let us include three more columns in the table and its corresponding headers.

Check the output again.
Step 9. Put Delete Button on the Table
<headerToolbar>
<Toolbar height=”3rem”>
<Title text=”Packed Item”/>
<ToolbarSpacer/>
<Button icon=”sap-icon://sys-minus” text=”Delete Row” type=”Reject” press=”ondelete”/>
</Toolbar>
</headerToolbar>
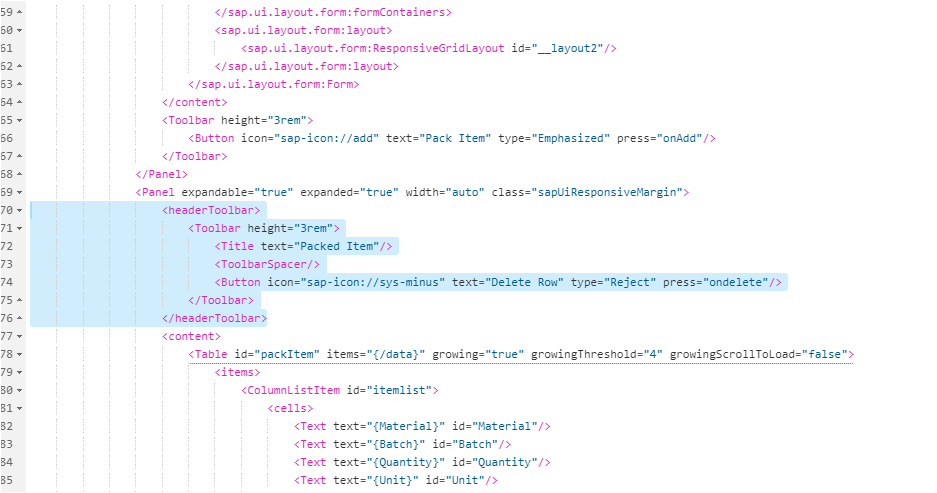
We need to put the header Toolbar code in the Panel above the Content area.
is the tag. Please note, when we created PackItem button, we did not use . We used tag there.
Let’s confirm if the button is available.
Our screen design is more or less done for today (in part 3 we will add SAVE button). You could have designed better using multiple views. But for beginners like us, this should be enough.
Now we would move our focus to the Controller.
Step 10 Capture Header Info from the screen.
As per our design, when Pack Item is hit, the Header Info should also be there. So we would put out code at the “onAdd” function.
sap.ui.define([
“sap/ui/core/mvc/Controller”
], function(Controller) {
“use strict”;
return Controller.extend(“ZApp_Deep_Structure.controller.V_Detail”, {
// ADD Function //
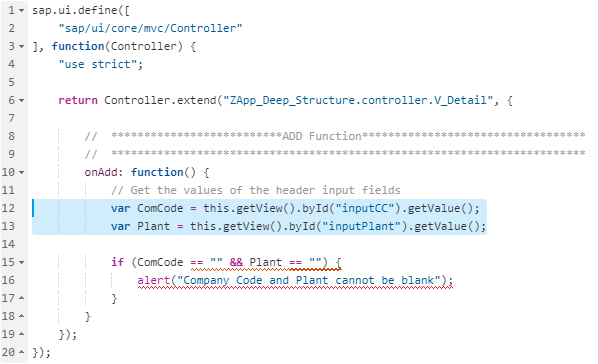
onAdd: function() {
// Get the values of the header input fields
var ComCode = this.getView().byId(“inputCC”).getValue();
var Plant = this.getView().byId(“inputPlant”).getValue();
if (ComCode == “” && Plant == “”) {
alert(“Company Code and Plant cannot be blank”);
}
}
});
});
Check how .getValue function is being implemented to capture the View input field values.
Let us hit the PackItem button. It correctly throws the message ‘Company Code and Plant cannot be blank’.
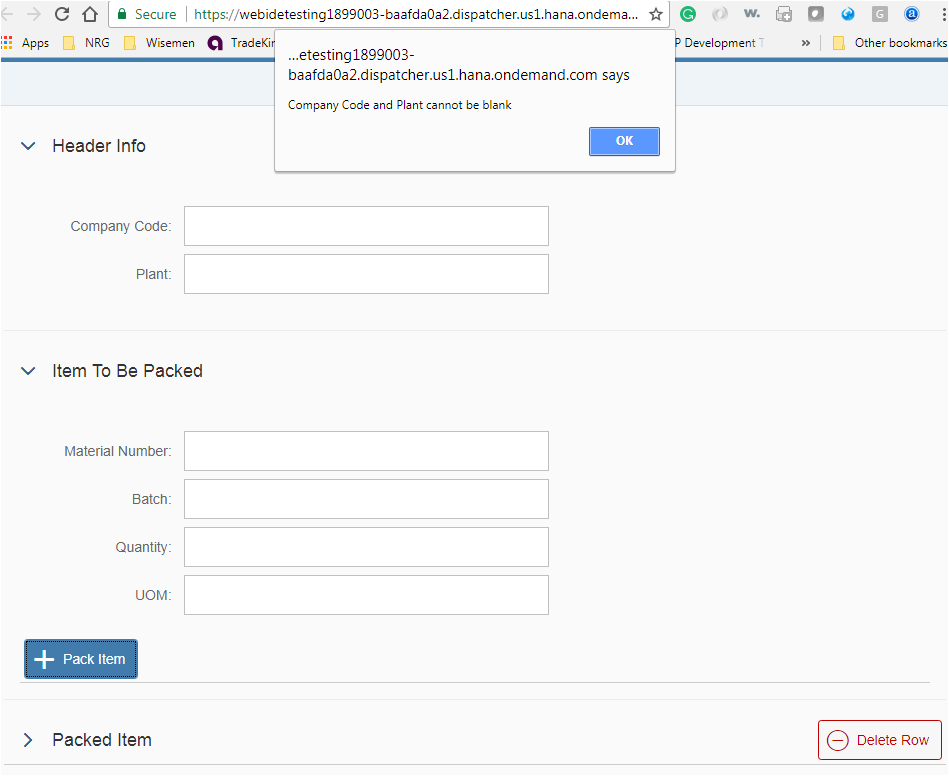
This means, our function “onAdd” works perfectly.
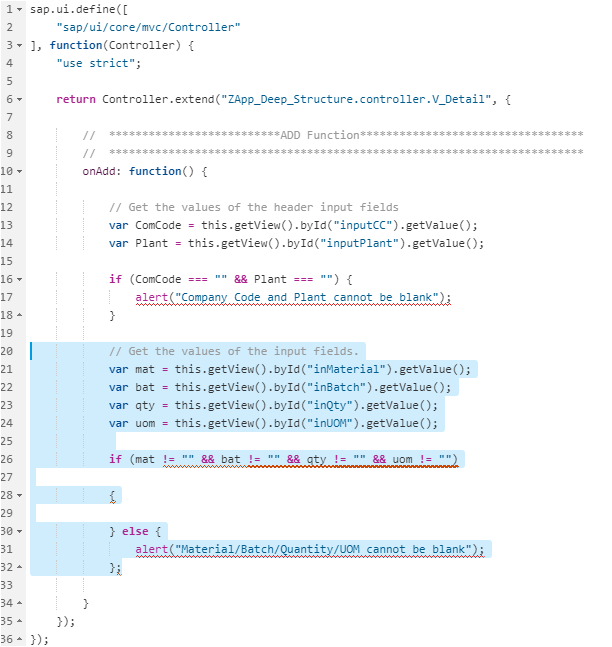
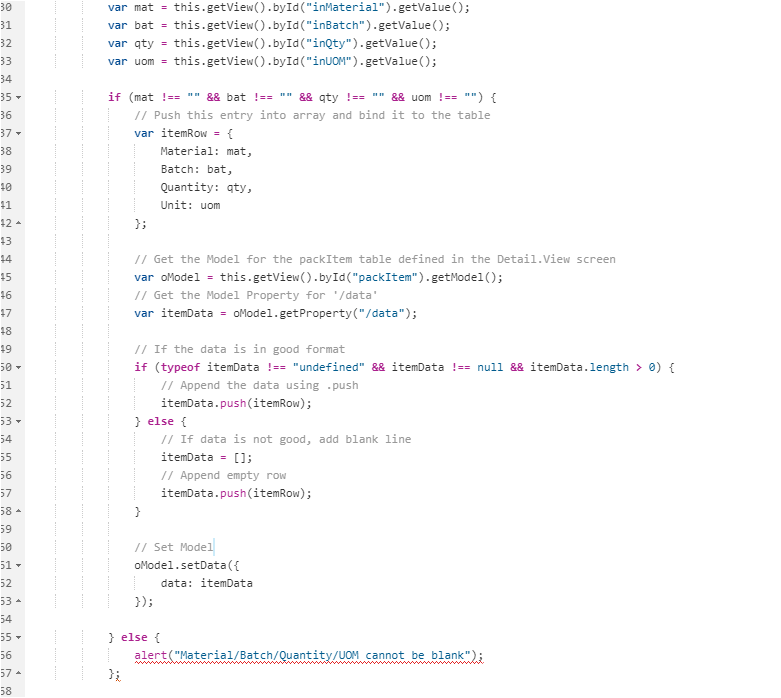
Step 11 Capture the Item Details from the screen.
// Get the values of the input fields.
var mat = this.getView().byId(“inMaterial”).getValue();
var bat = this.getView().byId(“inBatch”).getValue();
var qty = this.getView().byId(“inQty”).getValue();
var uom = this.getView().byId(“inUOM”).getValue();
if (mat != “” && bat != “” && qty != “” && uom != “”)
{
} else {
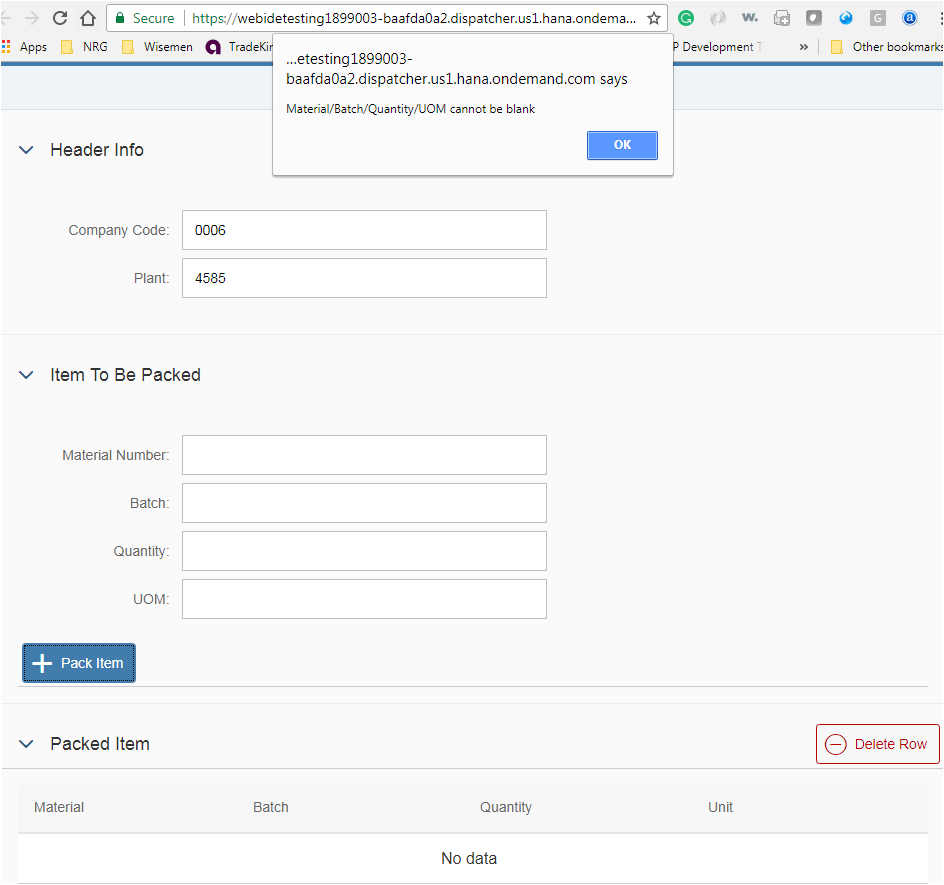
alert(“Material/Batch/Quantity/UOM cannot be blank”);
};
Let’s test our code.
In Step 10 we showed ‘==’ or ‘===’ syntax. Here we are showing ‘!=’ or ‘!==’ syntax.
Step 12 Put the Item input field values to the Pack Item Table on Press of ‘PackItem’ button.
Here comes a little difficult part for ABAPer with no JavaScript knowledge. Do not worry, we will provide the code. But think in ABAP what would you do to put 4 different variables data in into an internal table?
Ans: We need to put the variables in the work area which has the structure as the table and then do an APPEND table. Right? We will do the same thing in JavaScript now.
We will put the Material Number, Batch, Qty and UoM field values into an Array (Internal Tables). Although the below code looks more like putting into a structure or a work area.
// Push this entry into array and bind it to the table
var itemRow = {
Material: mat,
Batch: bat,
Quantity: qty,
Unit: uom
};
Now get the model for the Table which we defined in the view with id = ‘packItem’ using below syntax.
var oModel = this.getView().byId(“packItem”).getModel();
Then get the property “/data” of the model.
var itemData = oModel.getProperty(“/data”);
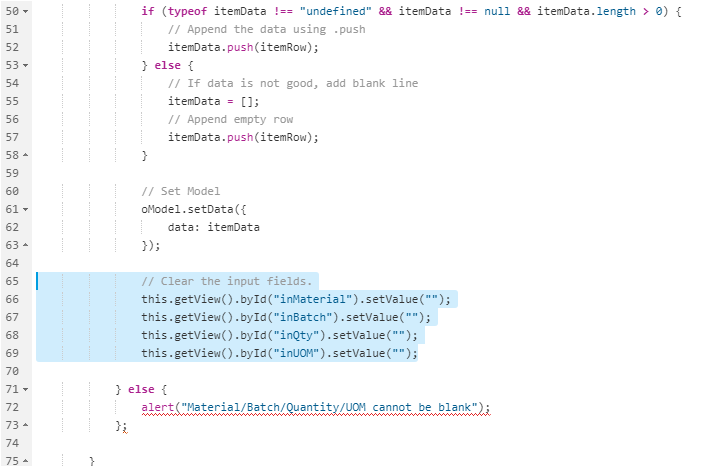
If the data type is of the property is correct, append the itemRow value to the itemData using the .push function.
// Append the data using .push
itemData.push(itemRow);
Finally SET the model to reflect the data in the View/Screen.
// Set Model
oModel.setData({
data: itemData
});
Let us test it again.
OOPs, the button is not working. The Item to be Packed data did not get appended in the Packed Item table in Panel 3.
Let us debug. Press F12 in Chrome and set a breakpoint at the V_Detail.controller.js file at relevant places. You need to go to Sources ->Controller -> V_Detail.controller.js and set the breakpoint.
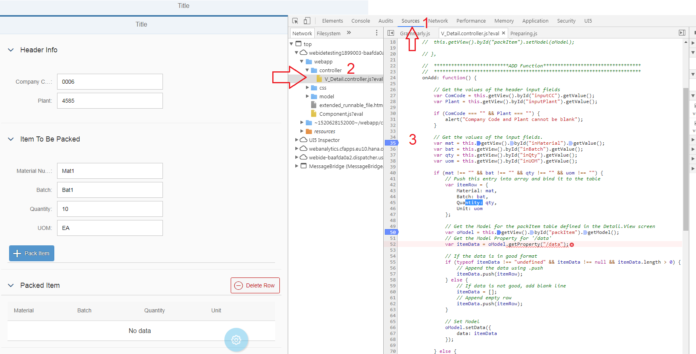
Hit the +PackItem button after you set the breakpoint. Press F10 to traverse one step at a time in Debug (It is like F5 in SAP ABAP debug).
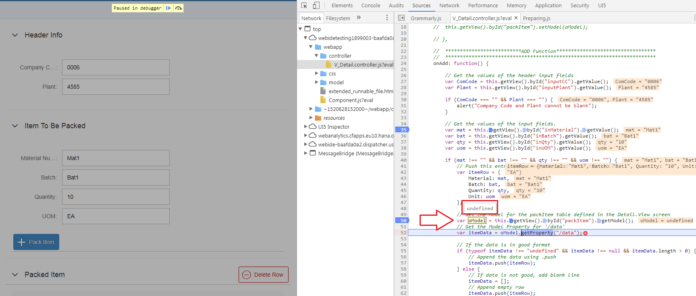
Check oModel is still undefined. If you cannot fetch the Model value, you would not be able to work in JavaScript and SAPUI5.
WHY IS MODEL UNDEFINED?
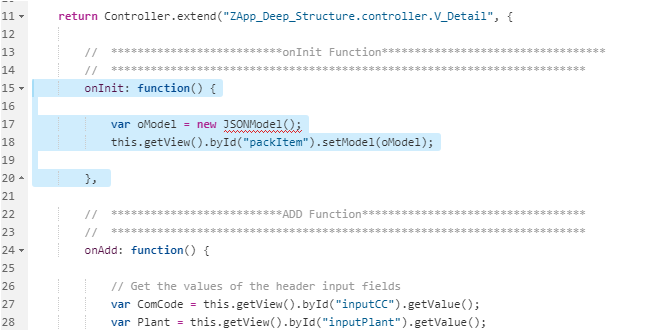
After breaking our heads for some hours, we figured out that the model has to be SET in the very beginning. Just like we have INITIALIZATION in SAP ABAP or INIT methods in Web Dynpro ABAP, similarly we have an “onInit” function in SAPUI5/JavaScript. We need to make use of it.
onInit: function() {
var oModel = new JSONModel();
this.getView().byId(“packItem”).setModel(oModel);
},
Now we get another error: Possible Error: ESLint(no-undef):”JSONModel” is not defined
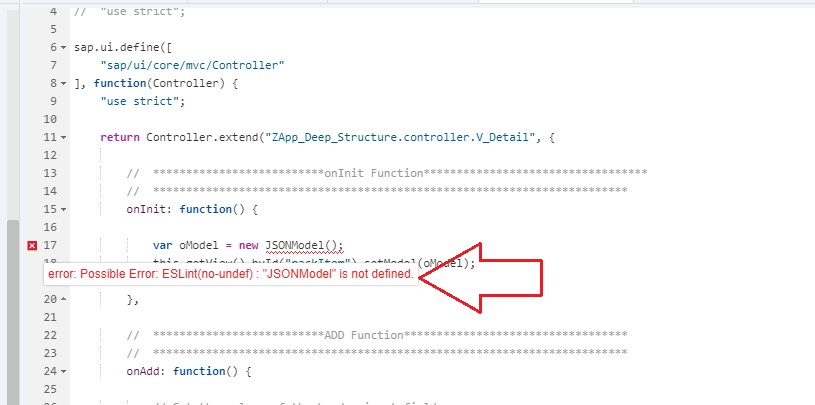
WHY IS JSONMODEL NOT DEFINED?
Ans – Because we have not defined it on the top define and function.
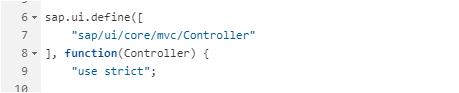
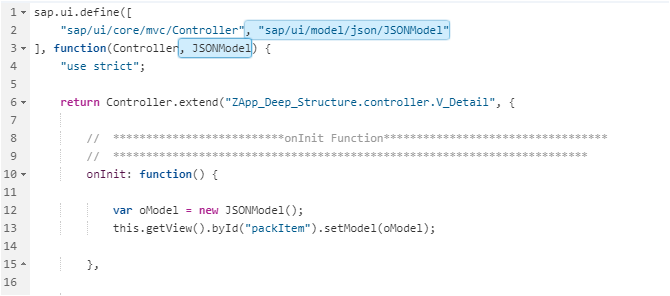
Let us define it as shown below. Add “sap/ui/model/json/JSONModel” and function JSONModel.
sap.ui.define([
“sap/ui/core/mvc/Controller”, “sap/ui/model/json/JSONModel”
], function(Controller, JSONModel) {
“use strict”;
Save and test again. This time the data from the Item to be Packed Panel is inserted into the Pack Item table.
Step 13 Clear the input field values once the entry is updated in the Packed Item Table.
In ABAP we use CLEAR statement to remove the values from the variables. In SAPUI5/JavaScript, we use setValue function with blank.
// Clear the input fields.
this.getView().byId(“__input5”).setValue(“”);
this.getView().byId(“__input6”).setValue(“”);
this.getView().byId(“__input7”).setValue(“”);
this.getView().byId(“__input1”).setValue(“”);
Let’s test it again. It works. The entries have appended the table and the four input fields are cleared after the entries are added. We can add multiple lines to the table.

OK. Let us stop here today. We learned how to create different Panels in one View. You now know how to read the values of the screen in SAPUI5. You also know how to Append entries in a table. You know how to Set the Model to reflect the data in the Screen.


