Overview:
In this series of posts I will examine common issues that can be addressed through the Plateau Report Designer (PRD) custom reporting tool for the Successfactors Learning Management Sysetm (LMS.) The reporting task addressed in this post will be extending the last post’s solution for reporting on scheduled offering start and end times by developing a custom scheduled offering report. You can download the report import file here to follow along or for use.
A common report I have seen requested is a simple listing of scheduled offerings with their start and end times as well as some basic enrollment information. There are a few reports that have some information like this in them. The Scheduled Offering Data (CSV) report and the Scheduled Offering Roster (CSV) report come to mind. Both of these report however bring in segment information which make the reports clunky for those admins that just want basic scheduled offering information.
The Scheduled Offering Roster (CSV) report will provide the basic frame for the report that will be built.
In the custom report the following fields will be coming through:
Scheduled Offering ID
Scheduled Offering Description/Title
Scheduled Offering Start Date /Time
Scheduled Offering End Date / Time
Scheduled Offering Location ID
Scheduled Offering Primary Instructor
Scheduled Offering Waitlist Total
Scheduled Offering Enrolled Total
Scheduled Offering Pending Total
Scheduled Offering Cancelled Total
Items Needed for Solution:
- Working knowledge of Successfactor Learning Management Systems and Plateau Report Designer(PRD.)
- Rights to import and export reports from your LMS instance.
- A working knowledge of SQL as it applies to PRD.
- A working copy of the most up to date version of Plateau Report Designer(PRD.)
Note: If you need more information on how to use Plateau Report designer, please read the following post.
Actions:
The steps involved in this process are:
- Export the Scheduled Offering Roster (CSV) report.
- Clear out the existing table from the view.
- Clear out the existing SQL, and replace the the SQL code specific to the new
- custom report.
- Copy the new SQL data to the layout.
- Clean up labels, and setup data formatting for the report in the layout.
- Import the report to the LMS Instance and test.
I will go into details on steps two through five, the Export and Import of the report is something you should be familiar with, and if you are not I recommend the following post.
The reasons I chose the Scheduled Offering Roster (CSV) report as simply to get the basic report parameters and framework of the type of report I am creating.
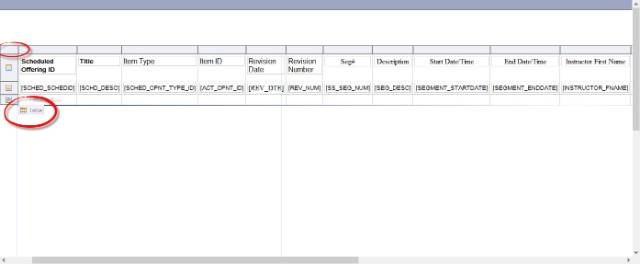
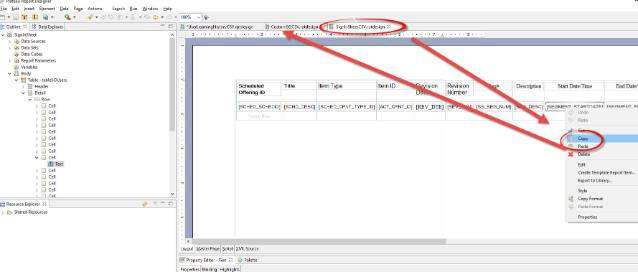
After you have opened the roster report in Plateau Report Designer (PRD) you will highlight and delete the main table from the layout. Once the SQL has been rewritten a new table will be created. The reason I choose to remove the table is to stop any column binding issues that can arise from removing old SQL code. It provides a cleaner starting point (especially if you plan to add to this report later.)
To do the deletions highlight the entire table and press your delete key, You can right click and delete if you click on the Table area circled below, but the delete key works just as well.
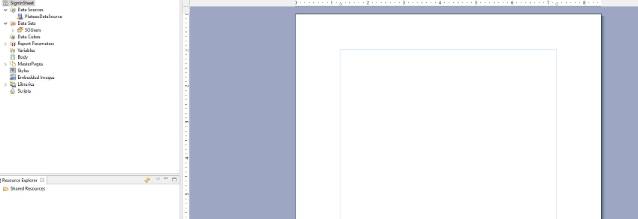
Once you have deleted the table the layout should appear completely blank like below:
There are two more quick things to do to get the report ready, the first is to save this report as a new name. You want to do this to ensure you do not overwrite your standard report when you import it back into your LMS instance.
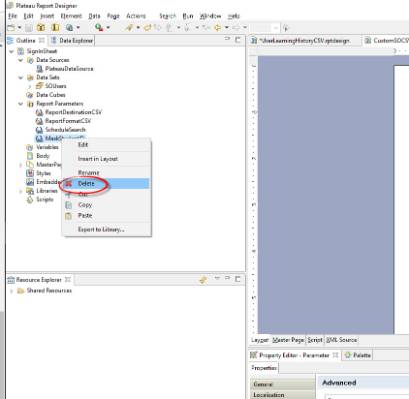
After you have saved the report as a new name you will want to click on the report parameter drop down in the Outline area of PRD and delete the paramenter MaskStudentID. This report will not be using any student/user data other than a calculation of enrollments.
Right click on MaskStudentID and select delete as pictures below:
After this is done it is time to get on to working on the SQL code for this report. You will go into the existing data set SOUsers (You can rename this if you like) and clear out the existing SQL code by highlighting all of the code in the editor and deleting it.
When you double click or right click and edit the SOUsers data set (in the Data Sets area of your Outline Pane in PRD,) the SQL editor will appear like below:

The next several steps of this process will be editing the SQL text in the Query Text area of the SQL editor window.
The first data and most basic that is required for this custom report is the scheduled offering (SO) id. To get this data you will need to use the
PA_SCHED table. So the first code to put in the query text in this process will be:
SELECT
ps.schd_id as SOID
FROM
PA_SCHED ps
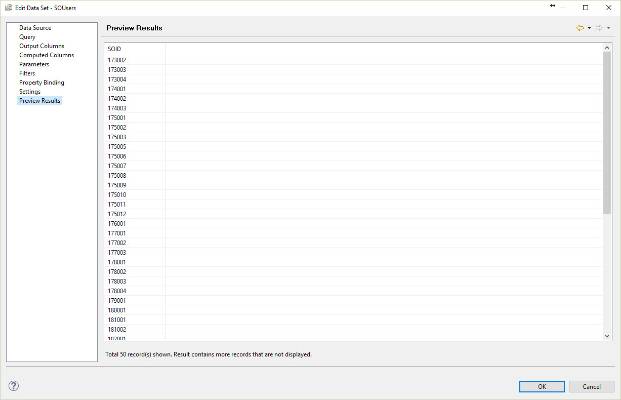
I recommend starting out and doing previews along the way to make sure you are getting the data you expect. Below is a sample of the data I get from the code above as the starting point for this report.
The only other data that is needed from this table is the SO description, and a couple of timezone fields (for use later) which changes the code to:
SELECT
ps.schd_id as SOID,
ps.schd_desc as SODESC,
ps.timezone_id TIMEZONE,
ps.display_in_schd_tz displaytimezone
FROM
PA_SCHED ps
For the next few pieces of data that are needed for this report we will be joining the PA_SCHED table with the PS_SCHD_RESOURCES table. The columns we need from the resources table are: instructor id (inst_id,) location id (locn_id,) start date/time (start_dte) and end date/time (end_dte.)
The code for the report now looks like:
SELECT
ps.schd_id as SOID,
ps.schd_desc as SODESC,
ps.timezone_id TIMEZONE,
ps.display_in_schd_tz displaytimezone,
psr.inst_id as INSTID,
psr.locn_id as LOCID,
psr.start_dte as SOSDANDTIME,
psr.end_dte as SOEDANDTIME
FROM
PA_SCHED ps,
PS_SCHD_RESOURCES psr
WHERE
ps.schd_id = psr.schd_id ( + )
You should test your code after changes like this to make sure you are pulling in the data as expected. When I hit preview the following information populates so I know I do not have errors in my code.

The report now almost has all the data we set out to fetch, except for the calculated data on the various enrollment status types. In order to get this data we will need to use the PA_ENROLL_SEAT table. We will be using this table inside of four SQL subqueries. The ease of use for the subqueries is why I chose to use them. The code will look like this now:
SELECT
ps.schd_id as SOID,
ps.schd_desc as SODESC,
ps.timezone_id TIMEZONE,
ps.display_in_schd_tz displaytimezone,
psr.inst_id as INSTID,
psr.locn_id as LOCID,
psr.start_dte as SOSDANDTIME,
psr.end_dte as SOEDANDTIME,
(select count(q.enrl_stat_id)
from pa_enroll_seat q
where q.schd_id = ps.schd_id
and q.enrl_stat_id = ‘ENROLL’) as enrolled,
(select count(q.enrl_stat_id)
from pa_enroll_seat q
where q.schd_id = ps.schd_id
and q.enrl_stat_id = ‘WAITLIST’) as waitlisted,
(select count(q.enrl_stat_id)
from pa_enroll_seat q
where q.schd_id = ps.schd_id
and q.enrl_stat_id = ‘PENDING’) as pending,
(select count(q.enrl_stat_id)
from pa_enroll_seat q
where q.schd_id = ps.schd_id
and q.enrl_stat_id = ‘CANCELLED’) as cancelled
FROM
PA_SCHED ps,
PS_SCHD_RESOURCES psr
WHERE ps.schd_id = psr.schd_id ( + )
When I run this code against my instance data in the preview I get the following output which lets me know there are no SQL errors and that the data is coming through as expected:

The only thing left to add to the code at this point before adding this new SQL Table to the report layout are the report filter and security statements. For this report the completed SQL Code with these will look like:
SELECT
ps.schd_id as SOID,
ps.schd_desc as SODESC,
ps.timezone_id TIMEZONE,
ps.display_in_schd_tz displaytimezone,
psr.inst_id as INSTID,
psr.locn_id as LOCID,
psr.start_dte as SOSDANDTIME,
psr.end_dte as SOEDANDTIME,
(select count(q.enrl_stat_id)
from pa_enroll_seat q
where q.schd_id = ps.schd_id
and q.enrl_stat_id = ‘ENROLL’) as enrolled,
(select count(q.enrl_stat_id)
from pa_enroll_seat q
where q.schd_id = ps.schd_id
and q.enrl_stat_id = ‘WAITLIST’) as waitlisted,
(select count(q.enrl_stat_id)
from pa_enroll_seat q
where q.schd_id = ps.schd_id
and q.enrl_stat_id = ‘PENDING’) as pending,
(select count(q.enrl_stat_id)
from pa_enroll_seat q
where q.schd_id = ps.schd_id
and q.enrl_stat_id = ‘CANCELLED’) as cancelled
FROM
PA_SCHED ps,
PS_SCHD_RESOURCES psr
WHERE ps.schd_id = psr.schd_id ( + )
/** and s.SCHD_ID in [ScheduleSearch]
and [security:PA_SCHED ps] */
For the next part we will be copying our newly generated SQL table to the layout portion of the report in preparation for importing it into the LMS instance for testing.
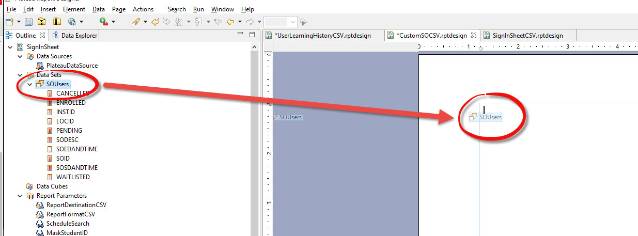
First you simply drag the SOUsers Data set onto your blank layout:
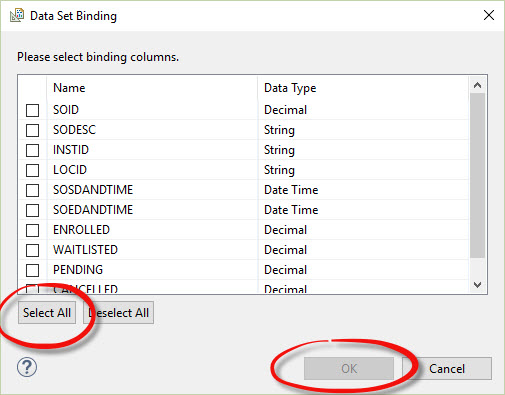
You will get a popup like pictured below, Simply choose select all and click Ok,
Your layout should now look like this(I have already deleted the TIMEZONE and displaytimezone fields in the picture below):
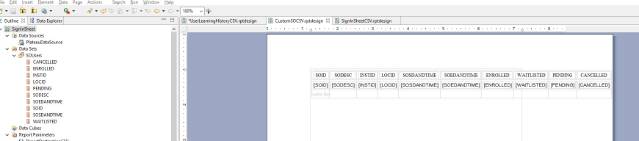
Note: The order of the table is the order in which we formed the SQL query.
So there are a few small steps before this report is ready to be re-imported. Some I will show and some I will not.
- Delete the two timezone data fields. (Highlight the columns, right click and delete, this is already done in the image above.)
- Localize the labels where possible, change them to the text you want otherwise. (You should be familiar with this.)
- Change the time/date fields so that the report will generate times from the timezones of the SOs themselves as opposed to the system time of the SQL server.
- Ensure the SO Description field is formatted for localized data returns.
So the first and second steps of localizing/renaming and delete two fields I am not going to get into. You will see I have done this and edited the labels from the additional screen captures.
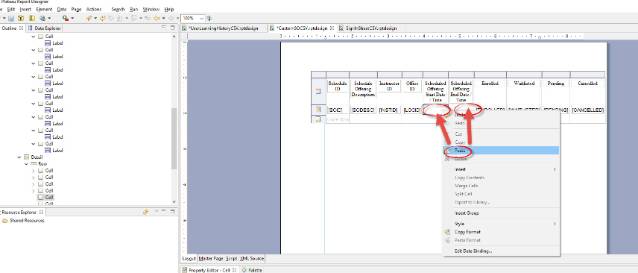
Changing the data for the two time fields is a little bit of a process. The easiest way I have found is to copy a data element from another report that already has the formatting. In this case the original Scheduled Offering Roster (CSV) had a SO date/time field that can be copied and edited for this purpose. Simply open up the original roster report in a tab. You will delete the SOSD and SOEDANDTIME fields from the custom report and paste in the SEGMENT_STARTDATE from the original report.
Right click on the field element and copy like below:
You are going to navigate to you custom report, right click in both the fields and paste in this data element.
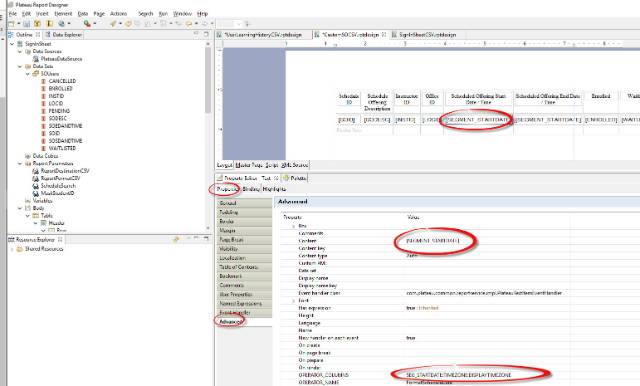
Next you will want to right click on the SEGMENT_STARTDATE in the Start Date/Time column. Navigate in the properties tab to Advanced and change the Content to SOSDANDTIME, and change the OPERATOR_COLUMNS field to SOSDANDTIME:TIMEZONE:DISPLAYTIMEZONE.
You will also repeat this process for the end time field, but instead of SOSDANDTIME you will substitute SOEDANDTIME.
The following picture is before the change:
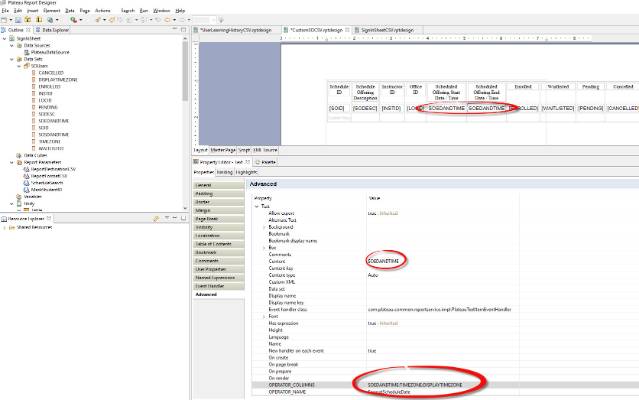
This is what it looks like after both changes:
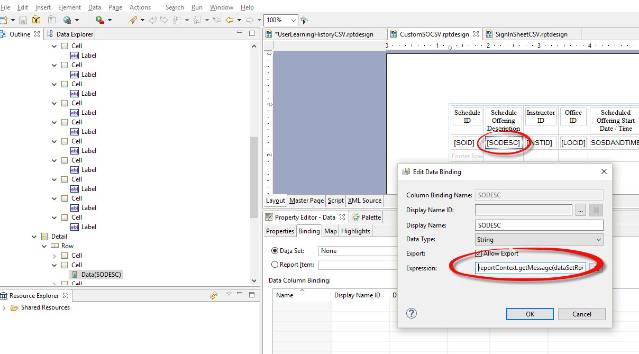
Finally you need to ensure that the localized date in the SO description is formatted correctly so that it will generate the right localized data when the report is run. For example, if you run the report without doing this the SO Description might appear as: title.Item.47190fd9f383fa06c453e5ba3f18465e, however after you add the formatting it could be: Microsoft Word Tutorial Session in your English locale or MSFT Word Tutorial in your English (UK) locale.
The way to fix this issue is to add reportContext.getMessage(dataSetRow[“SODESC”], reportContext.getLocale()) into the expression field of the data binding for the SO Description. This will replace what is already there: dataSetRow[“SODESC”].
You simply double click on the SODESC data element to bring up the data binding window and paste in the reportContext above to fix this issue, as pictured below:
After completing this step you are ready to save, save to zip and import your report into the system for testing. As I mentioned above this part of the process you should already be familiar with.
Some same data I generated in an LMS instance from the report looked like this:


