SAP Build Process Automation offers the capability to automate your business processes efficiently. To ensure the stability of your processes, it is crucial to have the ability to read from and write data to third-party systems using APIs. In a typical SAP landscape, some of the systems you need to interface with are located on-premises. To securely access these on-premises systems, the SAP Cloud Connector is the recommended solution. This blog post will guide you through the process of setting up an Actions Project in SAP Build Process Automation to connect through the Cloud Connector.
Scenario:
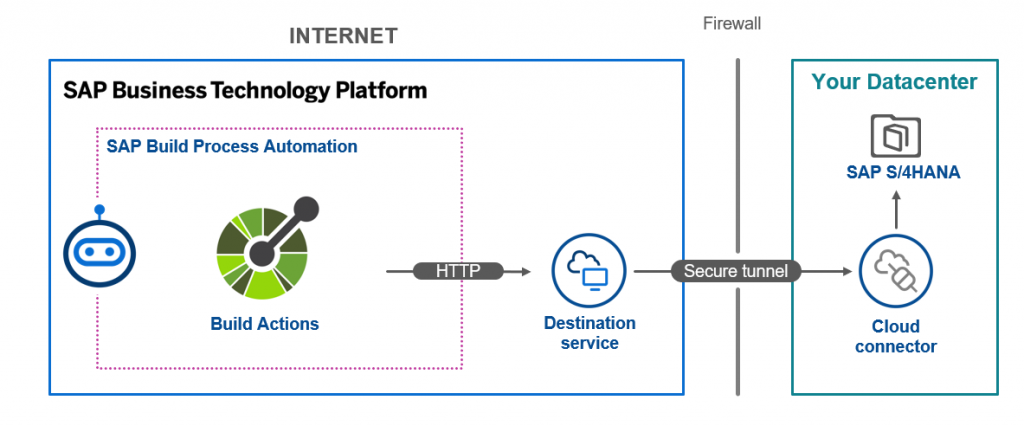
The scenario is as follows: We have SAP Build Process Automation running on the SAP Business Technology Platform (BTP), while the on-premises systems expose their endpoints. In order to establish the connection, we will configure the Cloud Connector, create a destination, create a Build Actions project, and test it in a Build Business Process.
Let’s dive into the steps required to set up this integration and leverage the power of SAP Build Process Automation in conjunction with the SAP Cloud Connector.
Prerequisite
Before proceeding with the steps outlined in this guide, it is essential to have an instance of the SAP Cloud Connector installed. While it is possible to install the Cloud Connector on a server, for the purposes of this demonstration, we will be using a Windows machine.
Second requirement is a BTP subaccount with a SAP Build Process Automation instance. To this subaccount we will connect the Cloud Connector.
1. Cloud Connector Configuration
The first step is to create a configuration in the Cloud Connector that connects to our subaccount and exposes the HTTP resource. For the purpose of this demonstration, I ran a small Node.js server on my Windows machine that outputs “Hello World”.

To create the configuration, navigate to the admin interface of the Cloud Connector and create a “Cloud to On-Premise” configuration.

In the provided screenshot, you will notice that I have exposed the internal host “localhost” on port 3333 using a virtual host named “internalhost”. This virtual host will be used for making requests from the BTP side. Currently, I have configured an unrestricted access policy, allowing access to all paths. However, in production scenarios, it is recommended to define access policies with more granular control.
Please note that it is crucial to ensure that you have exposed the necessary resources in your configuration. This ensures that the required endpoints are accessible and allows for successful communication between the cloud and on-premises environments.

The type of system in this case is Non-SAP System with the protocol HTTP. Notice – the internalhost is the virtual host that is mapping to the accessible host in the on-premises environment. To verify its reachability, you can utilize the “Check availability of internal host” button. This step is crucial as it helps ensure the correctness of your setup and validates the connectivity between the cloud and on-premises environments.

On the BTP end, we can check the cockpit and the connected Cloud Connectors in the respective menu tab. If you cannot see this tab, you may be missing some roles. In the image, you see my registered Cloud Connector and the backend system internalhost:3333 available.
2. Create Destination
After successfully registering the Cloud Connector, the next step is to create a destination. A destination serves as a means for services to access an API by handling the authentication and networking aspects.
By configuring a destination, you can simplify the process of accessing APIs by abstracting the underlying technical details. The destination takes care of handling authentication, network communication, and other necessary configurations, allowing services to focus on consuming the API and performing business logic without worrying about the underlying implementation.
Creating a destination provides a convenient way to encapsulate the necessary information, such as the API endpoint URL, authentication credentials, and other relevant settings. This abstraction helps streamline the integration process and facilitates secure and reliable communication between your services and the targeted API.

When creating the destination, there are several important details to specify. These include the name of the destination, the URL you want to access, and the type of destination. In this case, we will specify the URL as the virtual host “http://internalhost:3333”. To utilize the Cloud Connector, we set the proxy type to on-premise.
Additionally, when working with Build Process Automation, we require two additional properties to ensure the destination can be accessed from the Build Actions end:
- sap.processautomation.enabled – Set this property to true.
- sap.applicationdevelopment.actions.enabled – Set this property to true as well.
Once the destination configuration is complete, it is crucial to use the “Check Connection” button to verify that everything is configured correctly and the connection can be established successfully. This step ensures that the destination is functioning as expected and is ready to be utilized in your automation processes.

In the ideal case you get the green checkmark! But there are some common errors we need to discuss:

The “Backend not available” error occurs when the connectivity service is unable to locate the host you are trying to access. This could be due to the host not being exposed in the Cloud Connector configuration or a potential misspelling in the URL. To resolve this issue, it is important to revisit the URL and ensure that you are using the correct virtual host specified in the Cloud Connector configuration. Verify that the URL is accurate and matches the virtual host configuration to establish the necessary connectivity.

The second common issue that may arise is the “Resource not accessible” error. This occurs when the connectivity service successfully locates the backend you intend to connect to, but the specific resource (such as the subpath “/hello”) either does not exist or is not allowed to be accessed based on the rules defined in the configuration. To resolve this, ensure that you have included the correct path in the Cloud Connector’s resource configuration.
3. Create Actions Project
Now, let’s dive into SAP Build Process Automation and create an Actions project. In this case, since my API is not a standard one, I will create a custom API Specification. However, if you are working with a target system like S/4HANA, you can leverage the pre-defined API Specifications available in the SAP Business Accelerator Hub.
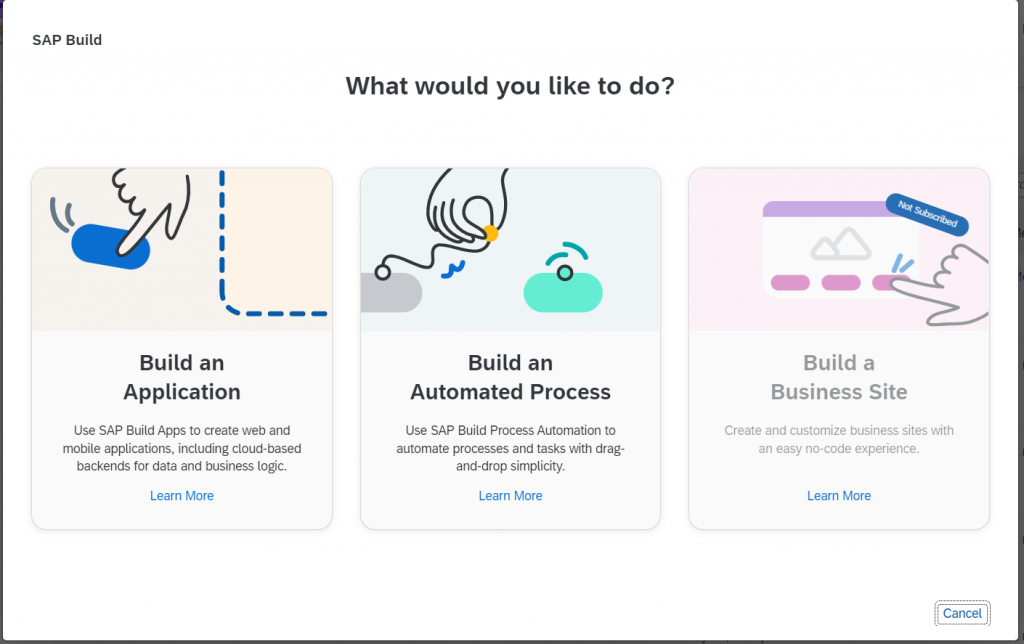
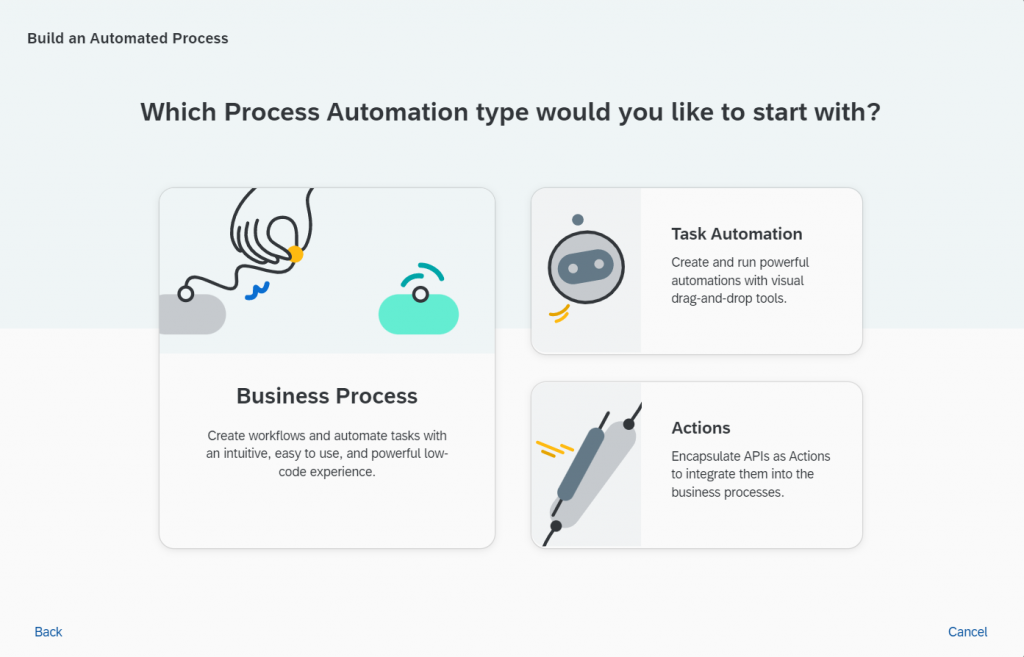
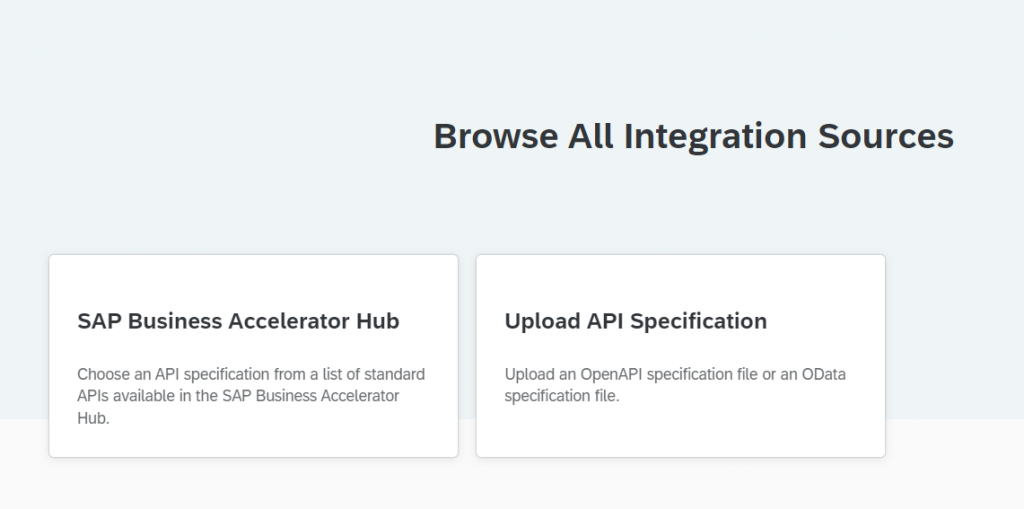
To proceed, navigate to “Build an Automated Process” > “Actions” > “Upload API Specification”.
{
  "openapi": "3.0.0",
  "info": {
    "description": "Demonstration Hello World",
    "title": "helloworld",
    "version": "1.0.0"
  },
  "servers": [
    {
      "url": "empty"
    }
  ],
  "paths": {
    "/hello": {
      "get": {
        "summary": "get hello",
        "description": "get a hello world message",
        "operationId": "get.hello",
        "responses": {
          "200": {
            "description": "Successful response",
            "content": {
              "application/json": {
                "schema": {
                  "type": "object",
                  "title": "Message Object",
                  "properties": {
                    "message": {
                      "type": "string"
                    }
                  }
                }
              }
            }
          }
        }
      }
    }
  }
}
The provided code snippet represents the API Specification, where I define the necessary details. In this case, the servers section is left empty as the URL will be retrieved from the destination configuration at a later stage. Additionally, I specify the available path as “/hello”.
It’s important to note that the path mentioned in the API specification will be preceded by the destination’s URL. Therefore, in our scenario, the complete URL for the request will be “http://internalhost:3333/hello”.
Another crucial aspect for the functionality within the low-code environment is defining the expected response structure. In this case, the response payload will consist of a plain object with the key “message”. To build and test specifications, you can utilize the website https://editor.swagger.io/. Be aware, that the response structure must match the specification; if, for example, fields are missing, you will be prompted with a schema error.
Once you have finalized the specification, save the file as a .json format and proceed to upload it to the Actions project.
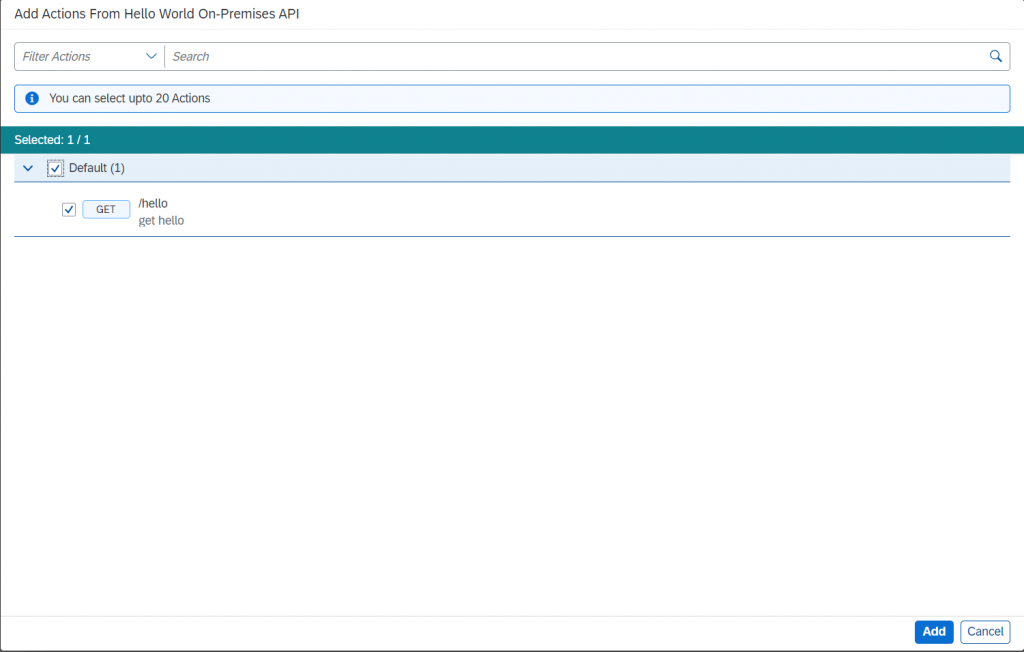
Within the Actions Project, you will be prompted to add the desired actions, which you can proceed to do. Now, let’s move on to testing:
Within the selected Action, navigate to the “Test” tab. Here, you have the option to select the destination that serves as the basis for the request. For this demonstration, I will choose the ON_PREM_HELLO_WORLD destination that I created earlier. Once the test is executed, you will find the response payload displayed at the bottom. In this particular case, the test is successful, and I receive the expected message from my on-premises server.
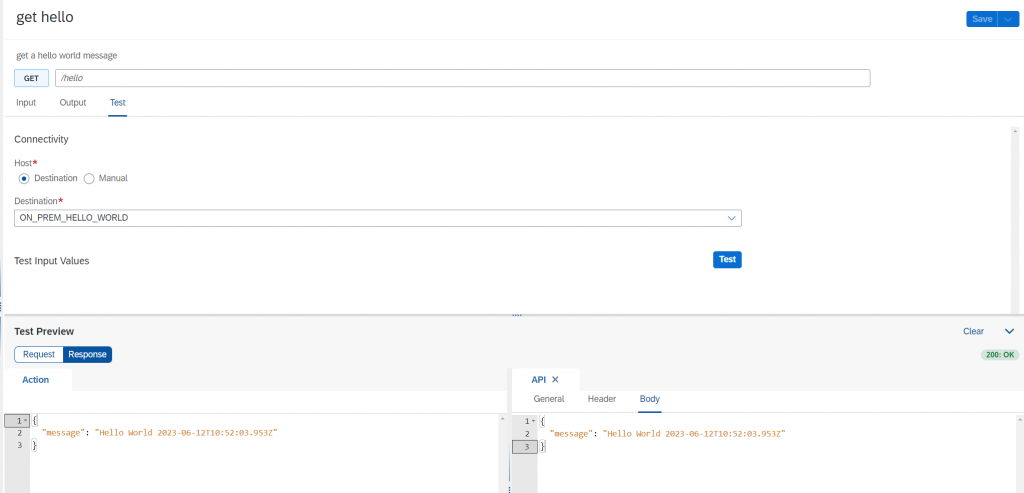
If you encounter an error during the process, make sure to check the “View API” Section for any response body that might provide insights into the cause of the issue.
In the final step, we need to release and publish the Action to ensure its availability for consumption in an Automation Project. To accomplish this, locate the buttons located at the top right-hand side of the Actions editor. Click on these buttons and ensure that the status indicates “published.”

4. Add Action to Process
Lets create a Build Business Process Project and invoke the Action. Do so by adding a step in the Process on the + symbol.
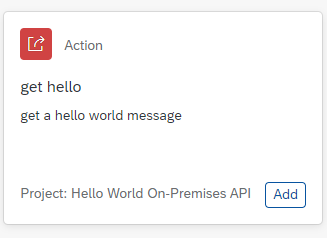
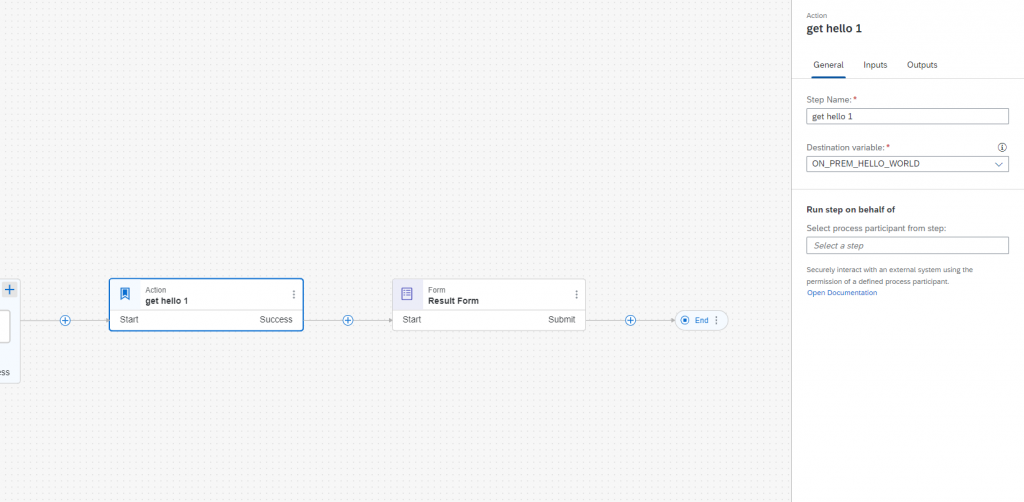
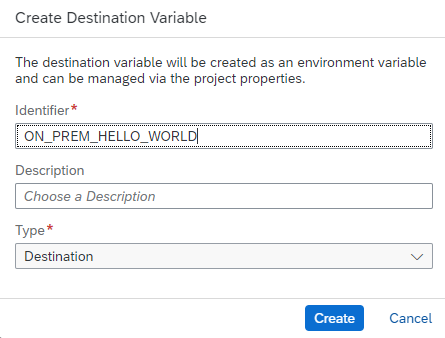
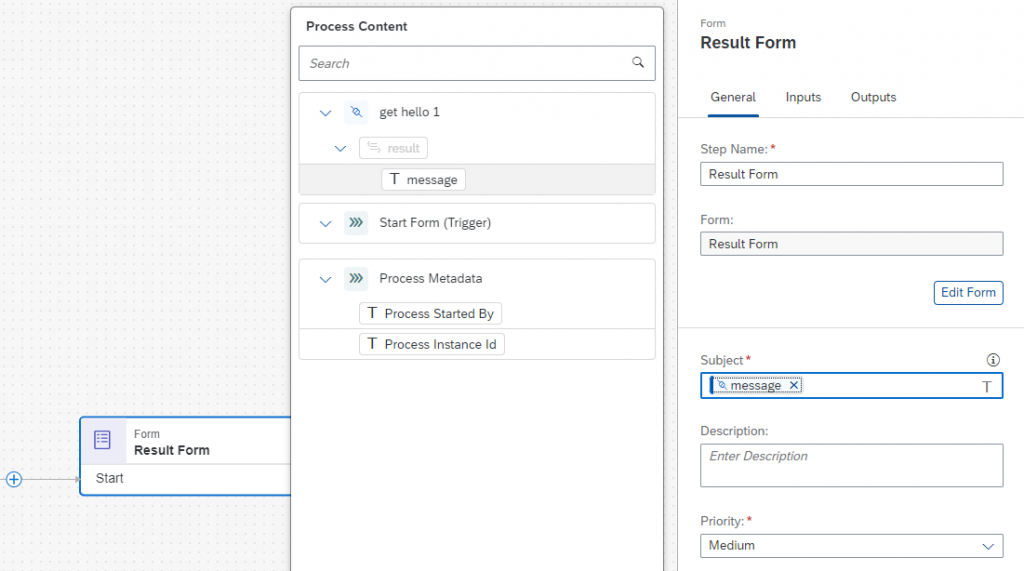
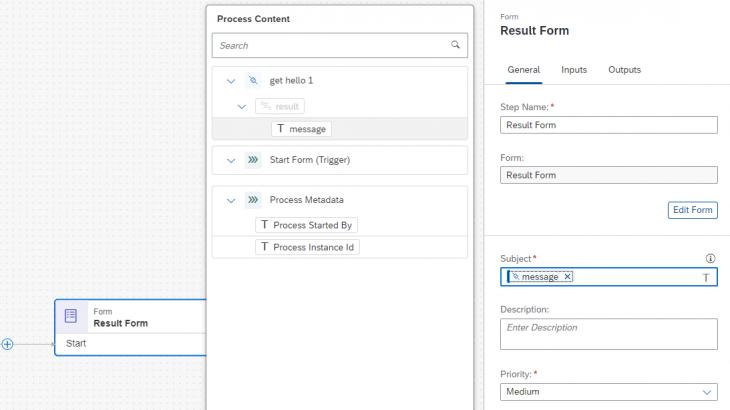
We add a Action to the Process, configure its Destination field by creating a new Destination Variable we call in this case the same name as our real destination. To prove that we can now also use the data from the API, I created another Form and put its subject to the message variable from the payload. Go through the regular process to release and deploy this project.
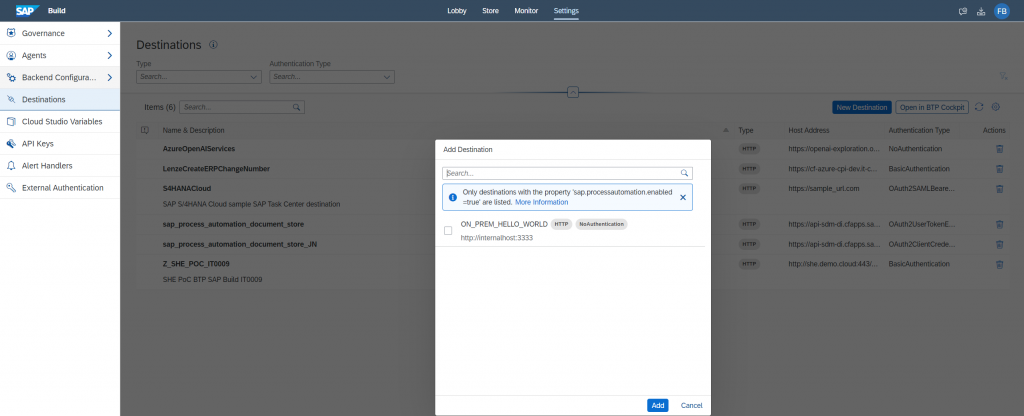
In the Build Lobby we need to add this destination before we can also use it finally in the deployment.
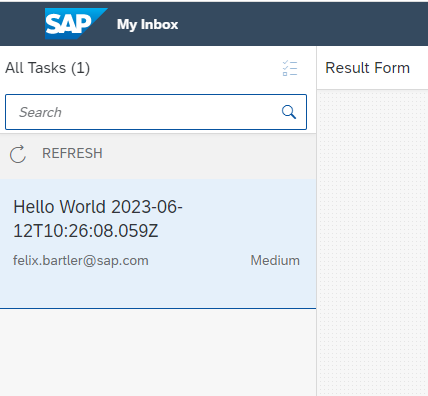
Now when executing the start form, the process will trigger the API call and we should recieve a new Form in the Inbox (Can be found in the Build Lobby). We can see that the Result Forms has our message from the On-Premises HTTP Server as subject. Nice!
