This blog post include the understand of architecture of Restful Application Programming Model and implementation codes step by step.
Firstly, We can look at the evolution of ABAP RAP.

In the technology environment, everything changes and evolving. ABAP is changing also, specially for frontend services faster changer. When we look at the diagram, our CDS based ABAP is our future. I think developers will have to adopt this environment, maybe this not obligatory for now hence in future it will be must.
Secondly, We can analyze general architecture of RAP.
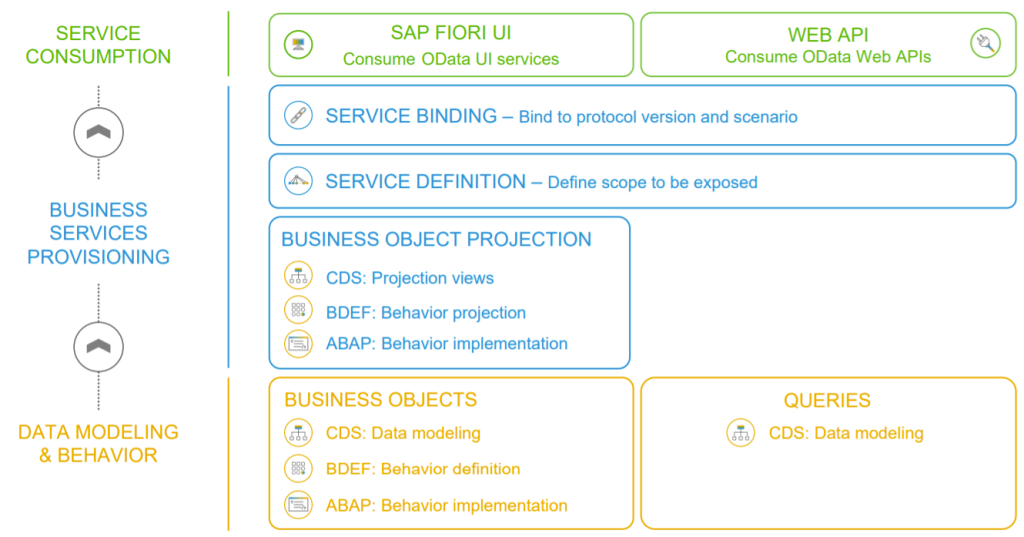
The architecture can be split 3 main parts. First one is Data Definitions, we can create our tables and CDS data models and behavior definitions. Secondly, Business Service Providers. We can implement business object projections and can be expose with service definitions. Service definition and binding are important step for us to decide which protocol we used and where can be used. In this part we decide actions, authorizations and CRUD Operations etc. Third part is Consumption, we can use SAP FIORI UI or standard Web API. All UI Annotations are used for FIORI UI, we can easily create FIORI Apps.
Then, We can continue to Coding Part. We will create 2 database table and ABAP Class to set datas.
First of all, lets create a package which superpackage is ZLOCAL. Let all objects stay in this package.
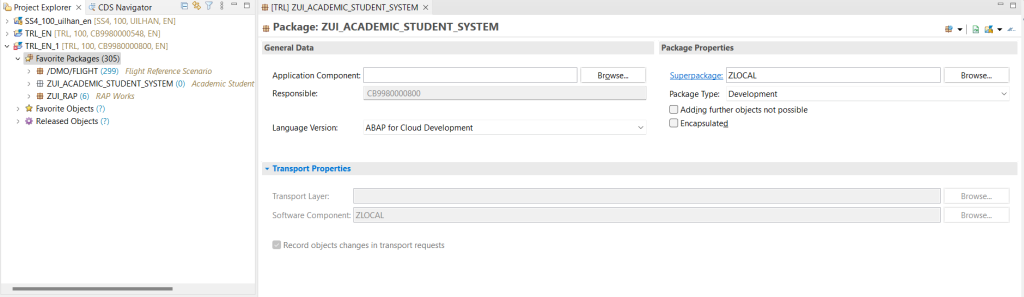
Just right click to Favorite Packages -> New-> ABAP Package
After that, We can create our Database Tables, First one is Lesson table second one is Student General data table, third one is keeps student names and surnames.
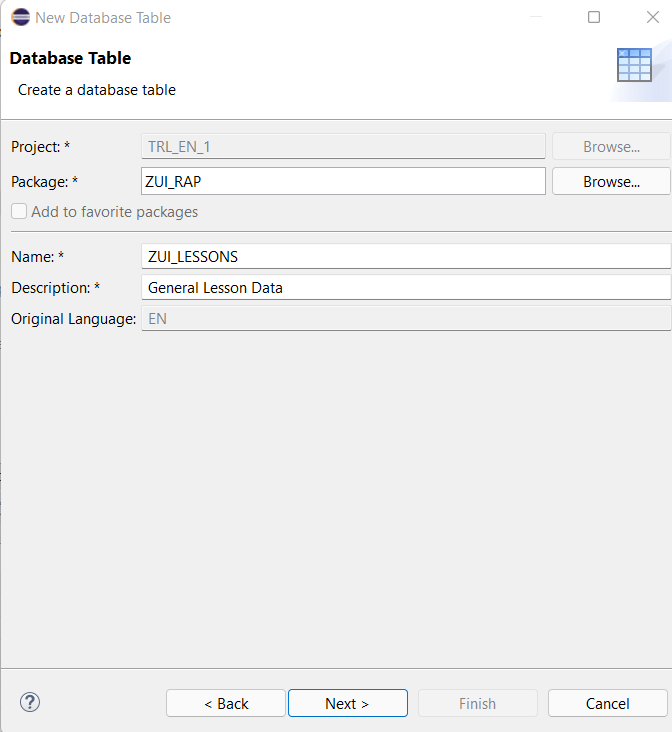
We can create-> Right click of our package->New->Other Repository Objects-> Database Table
Student Table
@EndUserText.label : 'General Student Data'
@AbapCatalog.enhancement.category : #NOT_EXTENSIBLE
@AbapCatalog.tableCategory : #TRANSPARENT
@AbapCatalog.deliveryClass : #A
@AbapCatalog.dataMaintenance : #RESTRICTED
define table zui_students {
  key client      : abap.clnt not null;
  key student_num : abap.int1 not null;
  key lesson_num  : abap.int1 not null;
  lesson_point    : abap.int1;
  lesson_score    : abap.char(1);

}
Lesson table
@EndUserText.label : 'General Lesson Data'
@AbapCatalog.enhancement.category : #NOT_EXTENSIBLE
@AbapCatalog.tableCategory : #TRANSPARENT
@AbapCatalog.deliveryClass : #A
@AbapCatalog.dataMaintenance : #RESTRICTED
define table zui_lessons {
  key client     : abap.clnt not null;
  key lesson_num : abap.int1 not null;
  lesson_name    : abap.char(40);
  effect         : abap.char(1);
  fields         : abap.char(20);

}
Student Name Table
@EndUserText.label : 'Student Names and Surnames'
@AbapCatalog.enhancement.category : #NOT_EXTENSIBLE
@AbapCatalog.tableCategory : #TRANSPARENT
@AbapCatalog.deliveryClass : #A
@AbapCatalog.dataMaintenance : #RESTRICTED
define table zui_student_name {
  key client      : abap.clnt not null;
  key student_num : abap.int1 not null;
  student_name    : abap.char(40);
  student_surname : abap.char(40);

}
Then, We can create our class to fill database tables.
CLASS zui_fill_tables DEFINITION
PUBLIC
FINAL
CREATE PUBLIC .
PUBLIC SECTION.
INTERFACES if_oo_adt_classrun.
PROTECTED SECTION.
PRIVATE SECTION.
ENDCLASS.
CLASS zui_fill_tables IMPLEMENTATION.
METHOD if_oo_adt_classrun~main.
* Clear Database Tables
DELETE FROM zui_students.
DELETE FROM zui_lessons.
DELETE FROM zui_student_name.
"Table and Structure Def.
DATA: ls_students TYPE zui_students,
lt_students TYPE TABLE OF zui_students,
ls_lessons TYPE zui_lessons,
lt_lessons TYPE TABLE OF zui_lessons,
ls_names TYPE zui_student_name,
lt_names TYPE TABLE OF zui_student_name.
"Append internal table for Lessons
ls_lessons-lesson_num = 100.
ls_lessons-lesson_name = 'Calculus'.
ls_lessons-effect = '4'.
ls_lessons-fields = 'MATHS'.
APPEND ls_lessons TO lt_lessons.
CLEAR ls_lessons.
ls_lessons-lesson_num = 101.
ls_lessons-lesson_name = 'Algorithm'.
ls_lessons-effect = '5'.
ls_lessons-fields = 'CS'.
APPEND ls_lessons TO lt_lessons.
CLEAR ls_lessons.
ls_lessons-lesson_num = 102.
ls_lessons-lesson_name = 'Electronics'.
ls_lessons-effect = '3'.
ls_lessons-fields = 'Physics'.
APPEND ls_lessons TO lt_lessons.
CLEAR ls_lessons.
"fill dbtable
INSERT zui_lessons FROM TABLE @lt_lessons .
COMMIT WORK AND WAIT.
"Append internal table for Students
ls_students-student_num = 200.
ls_students-lesson_num = 100.
ls_students-lesson_point = 80.
ls_students-lesson_score = 'A'.
APPEND ls_students TO lt_students.
CLEAR ls_students.
ls_students-student_num = 200.
ls_students-lesson_num = 101.
ls_students-lesson_point = 60.
ls_students-lesson_score = 'C'.
APPEND ls_students TO lt_students.
CLEAR ls_students.
ls_students-student_num = 200.
ls_students-lesson_num = 102.
ls_students-lesson_point = 40.
ls_students-lesson_score = 'D'.
APPEND ls_students TO lt_students.
CLEAR ls_students.
ls_students-student_num = 201.
ls_students-lesson_num = 100.
ls_students-lesson_point = 60.
ls_students-lesson_score = 'C'.
APPEND ls_students TO lt_students.
CLEAR ls_students.
ls_students-student_num = 201.
ls_students-lesson_num = 101.
ls_students-lesson_point = 70.
ls_students-lesson_score = 'B'.
APPEND ls_students TO lt_students.
CLEAR ls_students.
ls_students-student_num = 201.
ls_students-lesson_num = 102.
ls_students-lesson_point = 90.
ls_students-lesson_score = 'A'.
APPEND ls_students TO lt_students.
CLEAR ls_students.
ls_students-student_num = 202.
ls_students-lesson_num = 100.
ls_students-lesson_point = 30.
ls_students-lesson_score = 'F'.
APPEND ls_students TO lt_students.
CLEAR ls_students.
ls_students-student_num = 202.
ls_students-lesson_num = 101.
ls_students-lesson_point = 60.
ls_students-lesson_score = 'C'.
APPEND ls_students TO lt_students.
CLEAR ls_students.
ls_students-student_num = 202.
ls_students-lesson_num = 102.
ls_students-lesson_point = 80.
ls_students-lesson_score = 'A'.
APPEND ls_students TO lt_students.
CLEAR ls_students.
"fill dbtable
INSERT zui_students FROM TABLE @lt_students .
COMMIT WORK AND WAIT.
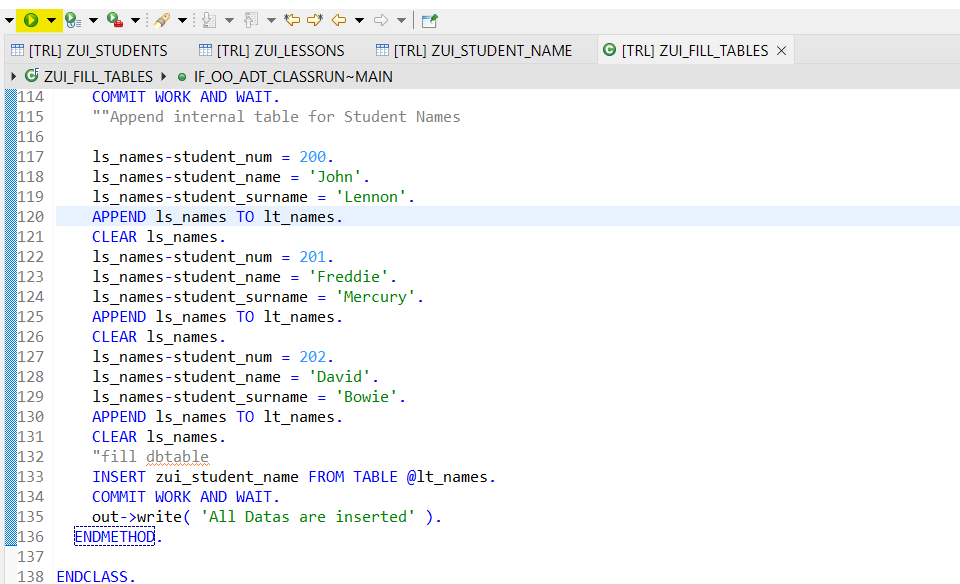
""Append internal table for Student Names
ls_names-student_num = 200.
ls_names-student_name = 'John'.
ls_names-student_surname = 'Lennon'.
APPEND ls_names TO lt_names.
CLEAR ls_names.
ls_names-student_num = 201.
ls_names-student_name = 'Freddie'.
ls_names-student_surname = 'Mercury'.
APPEND ls_names TO lt_names.
CLEAR ls_names.
ls_names-student_num = 202.
ls_names-student_name = 'David'.
ls_names-student_surname = 'Bowie'.
APPEND ls_names TO lt_names.
CLEAR ls_names.
"fill dbtable
INSERT zui_student_name FROM TABLE @lt_names.
COMMIT WORK AND WAIT.
out->write( 'All Datas are inserted' ).
ENDMETHOD.
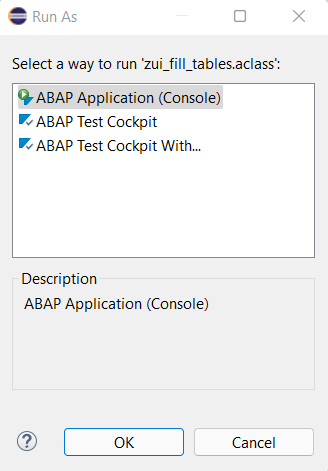
ENDCLASS.You can run your code as console applications, please click the highlighted button and select the ABAP Application. You can add your own data easily.
Next step is prepare our CDS Views. Let’s go with details.
Add Other Repository object, choose data definitions.
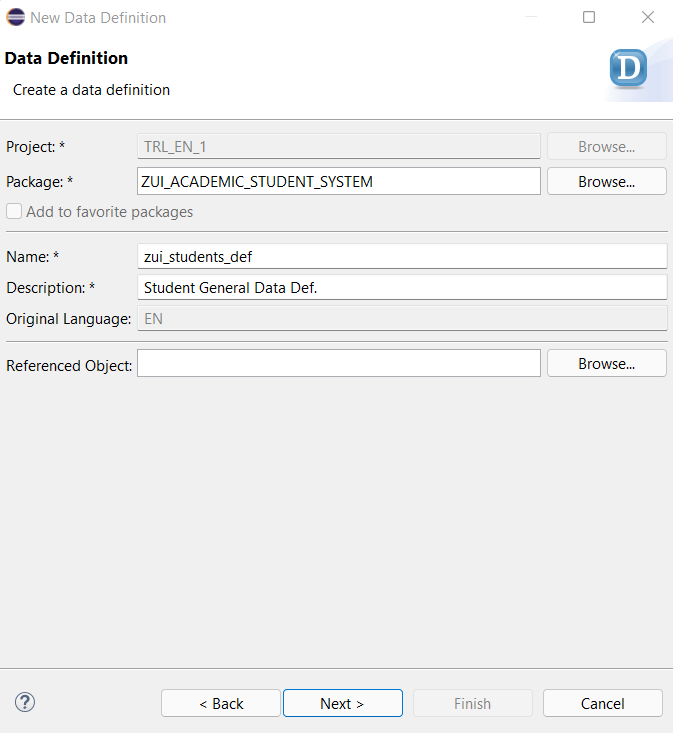
Then we can continue to develop our codes, first CDS is on the below.
@AccessControl.authorizationCheck: #CHECK
@EndUserText.label: 'Student General Data Def.'
define root view entity zui_students_def
as select from zui_students as students
association [0..*] to zui_lessons as _lessons on $projection.lesson_num = _lessons.lesson_num
association [0..*] to zui_student_name as _sname on $projection.student_num = _sname.student_num
{
key student_num,
key lesson_num,
_lessons.lesson_name,
lesson_point,
lesson_score,
_lessons.effect,
@Semantics.name.givenName
_sname.student_name,
@Semantics.name.familyName
_sname.student_surname
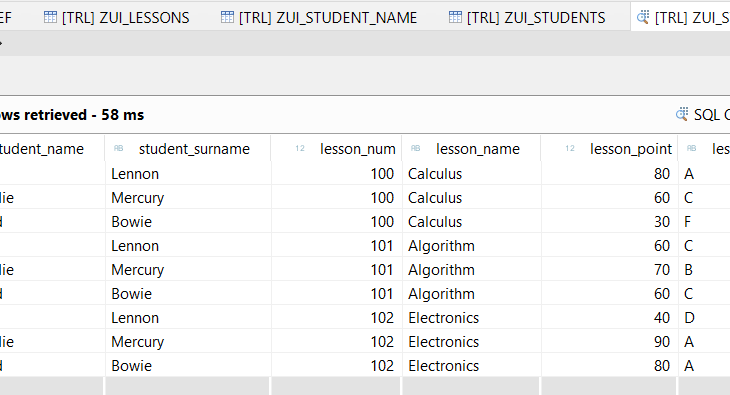
}The data looks like in the figure.

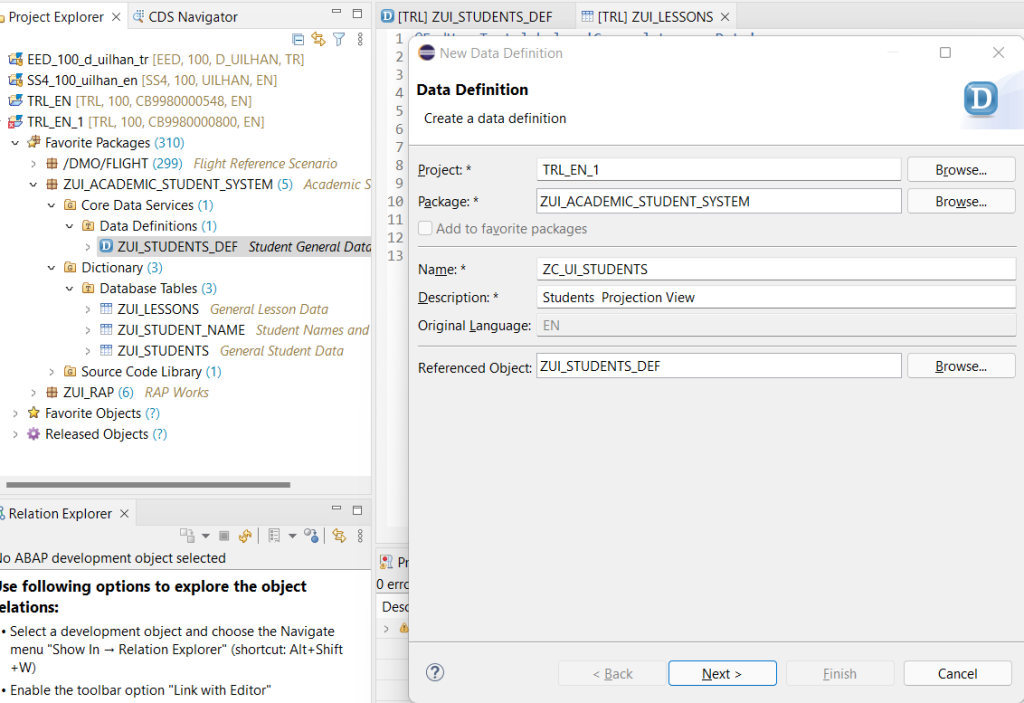
Next we will create CDS Model projection. Firstly, Right click our students data definition and create new data def. The new data definitions referenced our students view. Then click next, select a transport req and continue .
Then choose projection view.
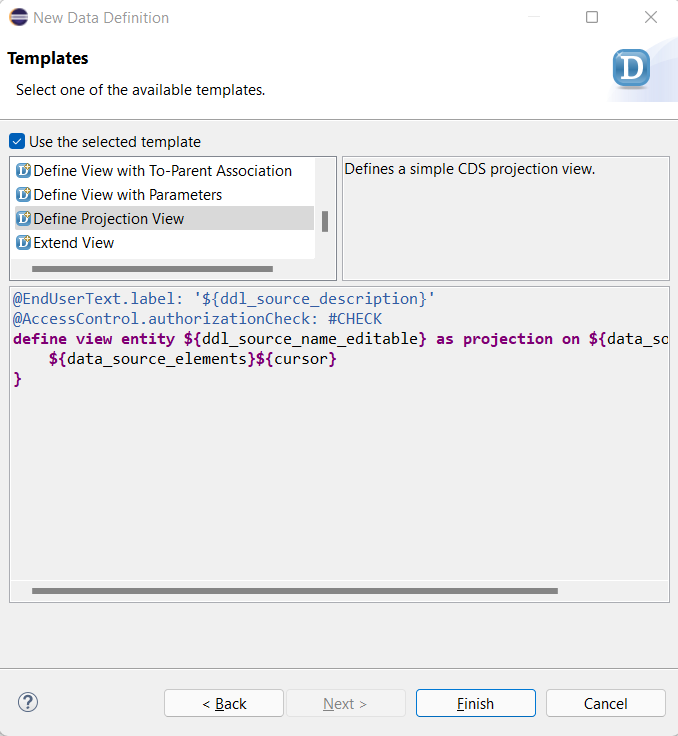
Projection View
@EndUserText.label: 'Students  Projection View'
@AccessControl.authorizationCheck: #CHECK
@Search.searchable: true
@Metadata.allowExtensions: true
define root view entity ZC_UI_STUDENTS
  as projection on zui_students_def as Student
{
  key student_num,
  key lesson_num,
      lesson_name,
      lesson_point,
      @Search.defaultSearchElement: true
      lesson_score,
      effect,
      student_name,
      student_surname
}
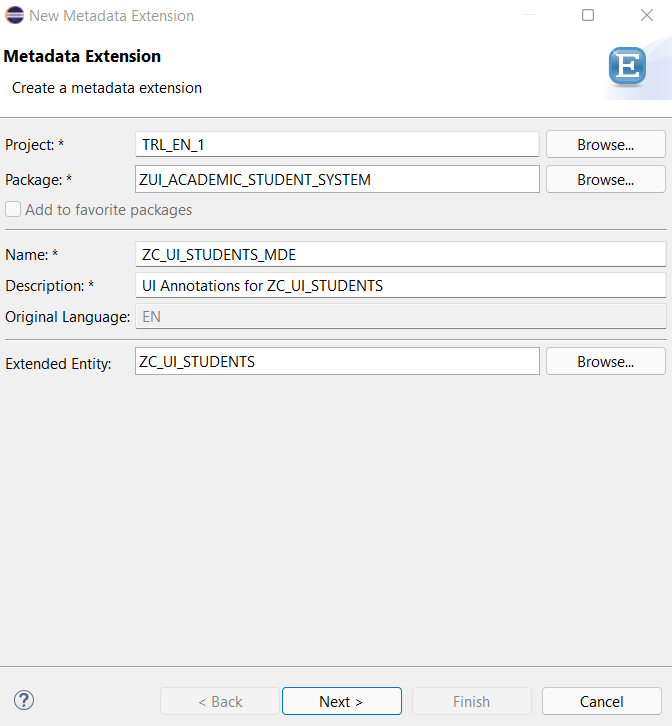
And this step, We set our MetaData Extansions(shortly MDE) for UI Metadata Semantics. We use CDS Annotations. Let’s create our MDE. We give name for extended entity to our projection View.
The Codes
@Metadata.layer: #CORE
@UI : { headerInfo : { typeName: 'Student',
                       typeNamePlural: 'Informations of Students',
                       title : { type: #STANDARD , label: 'Student Data', value: 'student_num' } } ,
                       presentationVariant: [{ sortOrder: [{ by: 'student_num', direction: #DESC }] }]}
annotate view ZC_UI_STUDENTS with
{
  @UI.facet: [ { id:              'student_num',
                  purpose:         #STANDARD,
                  type:            #IDENTIFICATION_REFERENCE,
                  label:           'Student-Num',
                  position:        10 } ]

  @UI:{ identification: [{ position: 1, label: 'Student Number' }] }
  student_num;
  @UI: {  lineItem:       [ { position: 10 } ],
         identification: [ { position: 10 } ],
         selectionField: [ { position: 10 } ] }
  lesson_num;
  @UI: {  lineItem:       [ { position: 20 } ],
          identification: [ { position: 20 } ],
          selectionField: [ { position: 20 } ] }
  lesson_name;
  @UI: {  lineItem:       [ { position: 30 } ],
       identification: [ { position: 30 } ],
       selectionField: [ { position: 30 } ] }
  lesson_point;
  @UI: {  lineItem:       [ { position: 40 } ],
      identification: [ { position: 40 } ],
      selectionField: [ { position: 40 } ] }
  lesson_score;
  @UI: {  lineItem:       [ { position: 50 } ],
  identification: [ { position: 50 } ],
  selectionField: [ { position: 50 } ] }
  effect;
  @UI: {  lineItem:       [ { position: 60 } ],
  identification: [ { position: 60 } ],
  selectionField: [ { position: 60 } ] }
  student_name;
  @UI: {  lineItem:       [ { position: 70 } ],
  identification: [ { position: 70 } ],
  selectionField: [ { position: 70 } ] }
  student_surname;
}
We will create a service definition and bind this service to our CDS and preview our resulting app.
Right-Click of our Projection view than select Create Service Definition.
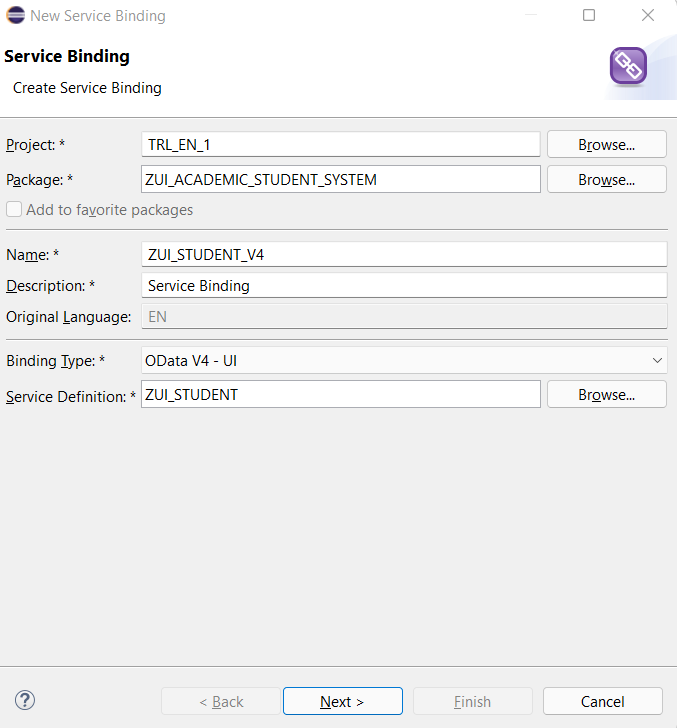
Service definition is created easily. Then Create Service binding.

Just right click od service definition adn press the Create Service Binding.
After Create the binding, please activate the tab and click the highlighted yellow part.
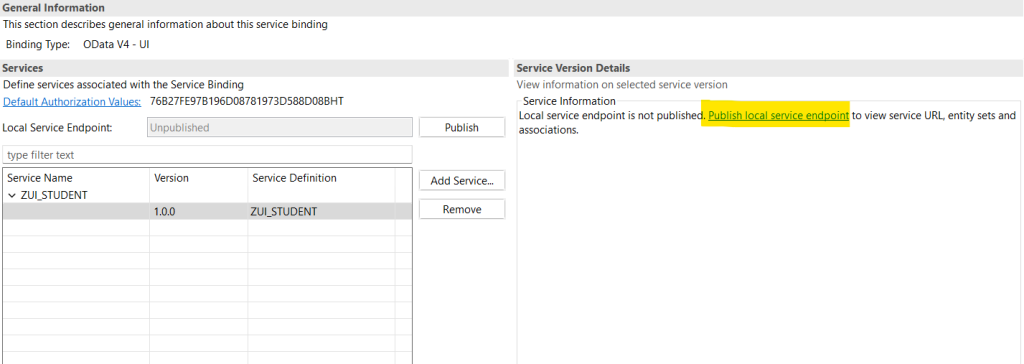
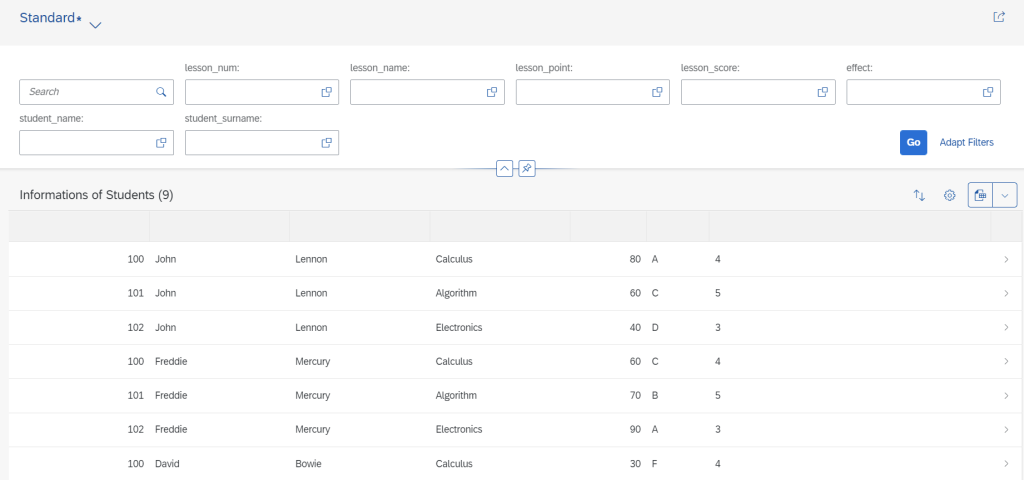
Then We can preview Our first Fiori App thanks to the Restful Application Programming Model. Just Click the Preview Button and see what we did.
And test our results, click go to get the data.
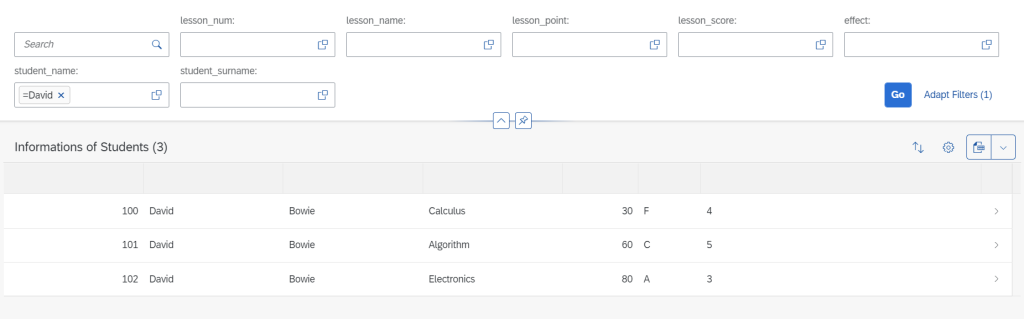
And we can test the search parameters.
In this blog post, We create a Fiori App powered by Restfull Application Programming Model.


