
Objective
The objective of this document is to provide a basic list of steps that will be helpful while starting with the Integration of SAP ECC with SAP Ariba.
Introduction to the Process
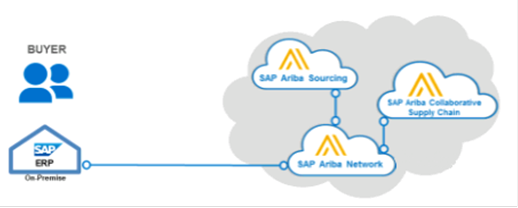
Hopefully, you know, SAP Ariba is a Cloud Based Solution. Looking at the title, you would have guessed correctly, in this article, we will be discussing the integration steps to be followed for SAP ECC to SAP Ariba Integration. No brainer, right? There are two ways of doing this Integration:
1. Through Standard Ariba Network Adapter – Standard Ariba Network Adapter is provided by Ariba which communicates with Ariba Network through cXML.
2. Through Integration Tool Kit (ITK) – ITK is a shell script based approach using which a web service is triggered and we get data in .csv file.
Let me set the expectation correct. I will not be able to cover both the methods today. We will only discuss regarding the first approach in this document i.e Ariba SAP Integration through Standard Ariba Network Adapter. The second method has to wait for some other holy day.
Steps to be performed in SAP PI (Process Integration) side
1. Standard Ariba Network Adapter
Process flow that we will be discussing as an example will start from Request For Quotation (RFQ) creation in ECC and simultaneous sourcing Request Creation in Ariba. Following are the steps to be followed to achieve this integration using standard AribaNetworkAdapter:
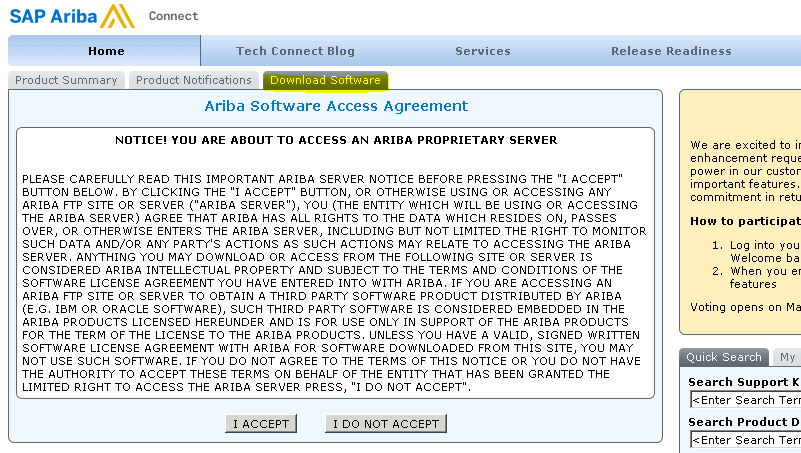
- Logon to connect.ariba.com. We will be required to download adapter package from this site.
- After Login following screen will appear.
- Open Download Software Tab and click on ‘I ACCEPT’ button.
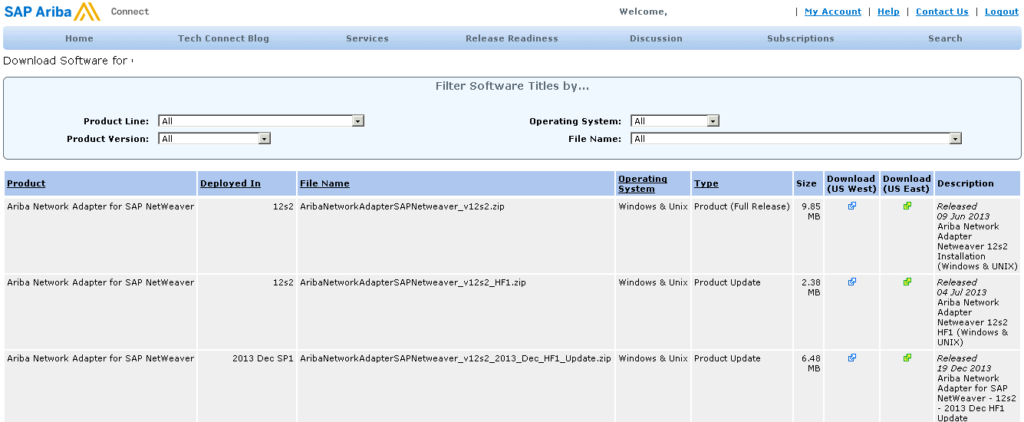
4. Download the latest adapter version having the name similar to zip where XX is the version number like vCI_6 and extract it.
5. (Steps 5 to 9 are activities performed by Basis Team) Deploy the adapter file called “sca” on PI J2EE engine using JSPM or SUM tool.
6. Extract the cXML configuration files for Adapter called “FileStruct.zip*” into a folder on PI server.
7. Copy “xml” and “CanonicalCatalog.xml” files into folder /etc/catalog/. (Root is the location where AribaNetworkAdapterSAPNetweaver.FileStruct.zip is extracted)
8. Import Ariba Network Product and software component Definitions called “SoftwareCatalog.zip” into SLD. So that, SAP NetWeaver will now be recognized by the Enterprise Services Repository and Integration Directory.
9. Ariba will provide 3 certificates that will be imported on PI server using keystore view and in TrustedCAs view in NWA.
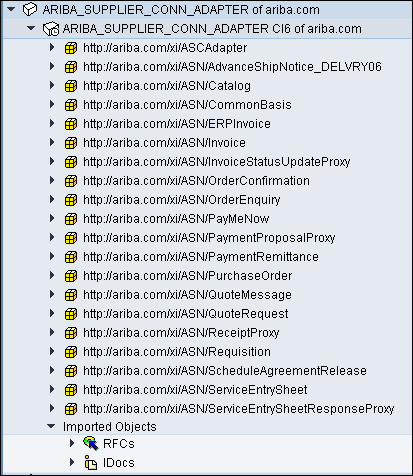
10. Import the “AribaNetworkAdapterSAPNetweaver.Design.tpz” into ESR, which has the design packages and data mappings for all the transactions. After importing the .tpz file, ESR will look like:
11. First, we will create a Technical System for Ariba.
- Select Technical Systems from the main SLD page to open the Technical System page.
- Click New Technical System to open the Technical System Wizard.
- In the Wizard, select Third-Party as the Technical System Type to set up a third-party (non-SAP) application such as Ariba Network, and then click Next.
- Specify the system details as follows:
System Name: Specify a user-defined system name here. E.g. TS_ASN Host Name: Enter a host name here. E.g. an
- Click Next. Associate the ASC Connector product and component to the system. Scroll down the list to select the product, ASN, defined earlier, and then click Add. You can also filter to select the product to associate. Ensure that the component ARIBA_SUPPLIER_CONN_ADAPTER, is selected.
- Click Finish.
12. We will now create a Business System.
- Select Business System from the main SLD page to open the Business System page.
- Click New Business System here to open the Business System Wizard.
- In the Wizard, select Third-Party as the technical system type to associate the business system with, and then click Next.
- Select the technical system, TS_ASN, created in the previous procedure, from the System field, and then click Next.
- Enter the business system name, e.g. BS_ASN, in the Name field, and click Next.
- Specify the installed products. Make sure that the product ASN, NW04.1 and the related component ARIBA_SUPPLIER_CONN_ADAPTER, CIX of ariba.com, installed on the technical system, are selected, and then click Next.
- Click Finish.
13. Now we need to setup the Integration Builder portion for the communication between ECC and Ariba. The first step to configure the integration scenario for the Request for Quotation transaction is to transfer the integration scenario loaded into the Integration Repository when the Design package is imported.
- In the Integration Builder menu, select Tools–>Apply Model from ES Repository.

- In the first screen of the Transfer Model from ES Repository wizard, Select Process Integration Scenario, click the Name field, then click the Display Input Help drop down list and select Input Help. Select the following Process Integration Scenario from the Enterprise Services Repository screen:
- Name: Scenario name like AR_QuoteRequest_Receive
- Namespace: Namespace name like http://ariba.com/xi/ASN/QuoteRequest○
- Software Component Version: Software Component Version like ARIBA_SUPPLIER_CONN_ADAPTER, CI6 of ariba.com.
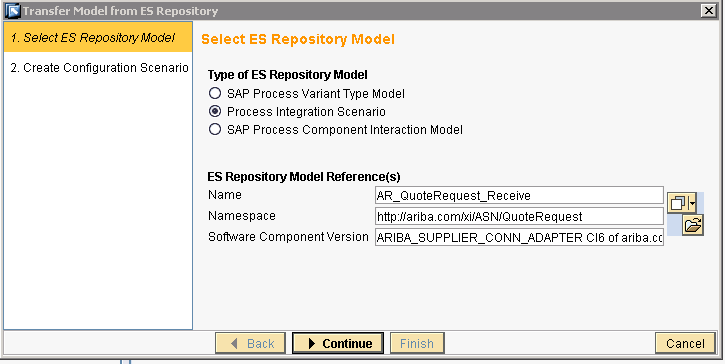
- Click Continue. If required, change the name of the scenario for the Integration Directory. Click Finish.
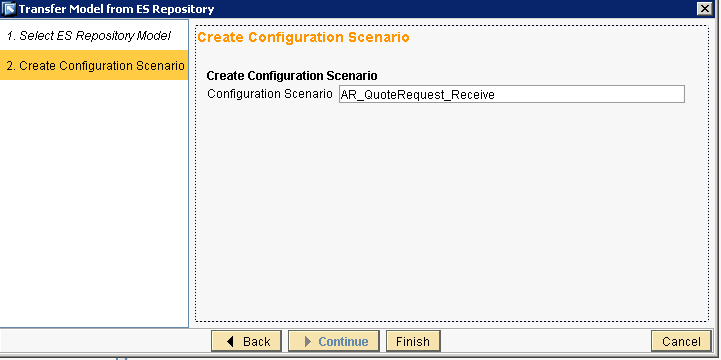
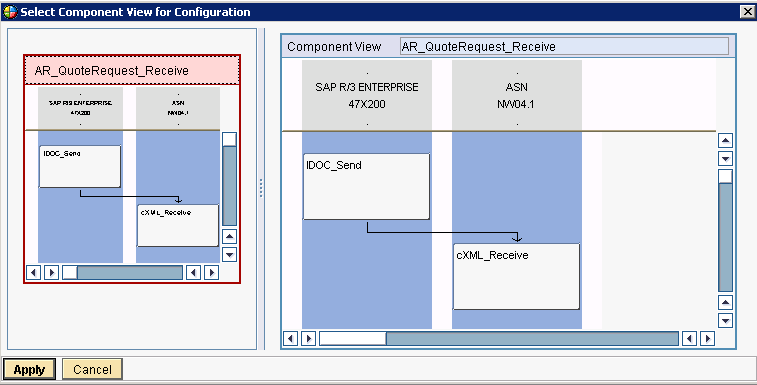
- Once the transfer is completed, the Model Configurator window appears.
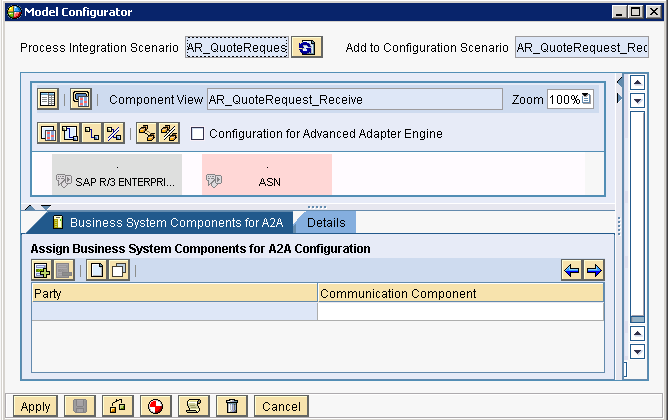
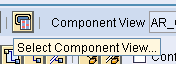
- In the Model Configurator window, click the Select Component View button, and then click Apply to select the unique component view that is selected by default.
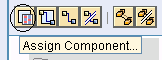
- In the Model Configurator, click the Assign Component button.
- In the Assign Components window, select the Business System Components for A2A tab to assign components for Ariba Network.
- Click on the Insert Line button (‘+’) to add a component entry in the table if no component entry line is present.
- Click on the row under the Communication Component column, then click on the Value List drop down and select Value List . Select the communication component name for ECC like BS_SAPR3, from the selection list and click Apply.

- Click the Next Role button (the right arrow) to go to the next screen in the window.
- Click the Insert Line button (’+’) to add a component entry in the table if no component entry line is present.
- Click on the row under the Communication Component column, then click on the Value List drop down and select Value List . Select the communication component name for Ariba like BS_ASN, from the selection list and click Apply.

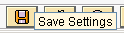
- Click the Save Settings button to save the changes.
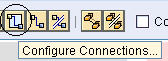
- In the Model Configurator, click the Configure Connections button. You must assign Communication Channels to set up the connections.
- In the Connections from Component Assignment tab in the Configure Connection window, click the empty Communication Channel cell corresponding to BS_ASN in the Receiver Business System Components table.
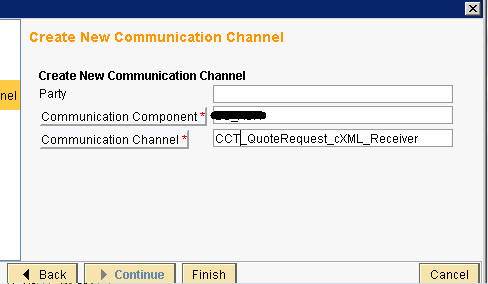
- Click the New Communication Channel button (the icon at the top left), and then select Create Communication Channel with Template to start the Create Communication Channel wizard.

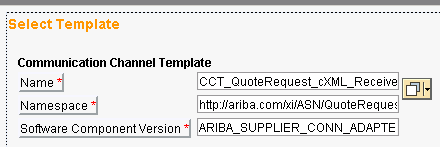
- Click Continue, and in the next page click the Name field, then click the Display Input Help drop down list and select Input Help. Select the
- following Communication Channel Template:
- Name: Template Name eg. CCT_QuoteRequest_cXML_Receiver
- Namespace: Namespace name eg. http://ariba.com/xi/ASN/QuoteRequest
- Software Component Version: Software Component Version name eg. ARIBA_SUPPLIER_CONN_ADAPTER, CI6 of ariba.com
- Click Continue, modify the channel name according to the naming convention, and then click Finish.
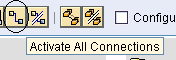
- Click the Activate All Connections button, and then click OK in the dialog box.
- Click the Save Settings button to save the changes.
- In the Model Configurator, click the Create Configuration Object button.

- In the Create Configuration Object window, make the following settings:
- General: Generation (select the radio button for this option)
- Scope of Generation: Select both the active check boxes – Receiver Determination, and Interface Determination.
- Select the Create New radio button under Change List for Generated Objects and use the proposed name or modify it.
- Click on Start to begin generating objects.
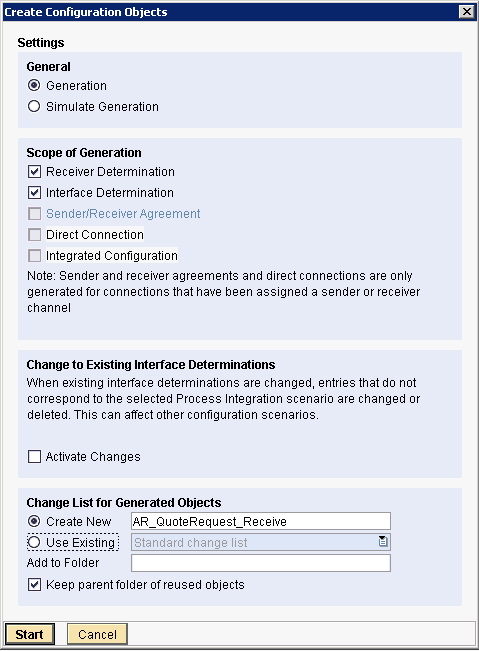
- After the object generation is complete, click Apply to save the new configuration settings.
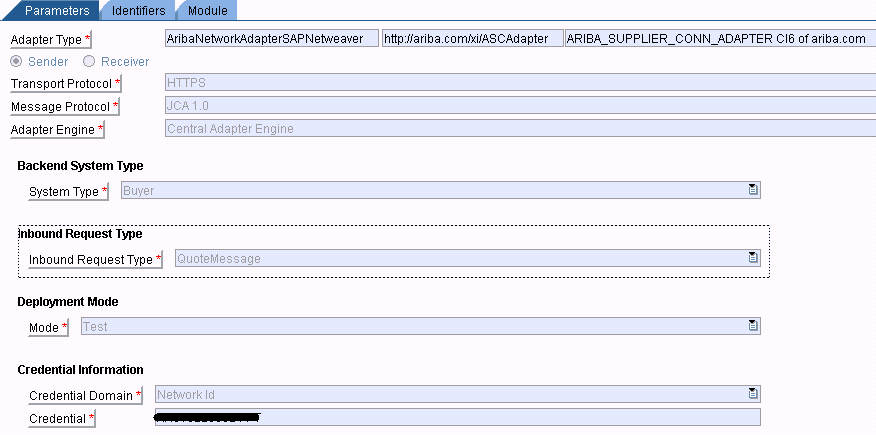
14. After completion of mentioned steps, we will need to do changes in parameters of the Communication Channel. Enter the parameters as per the sender and receiver channel screenshots.
- Sender Channel
- Receiver Channel
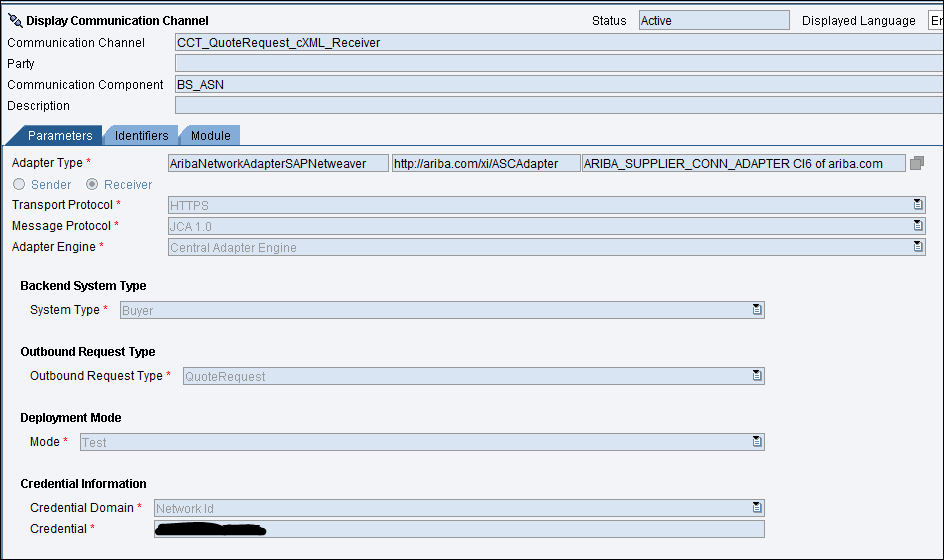
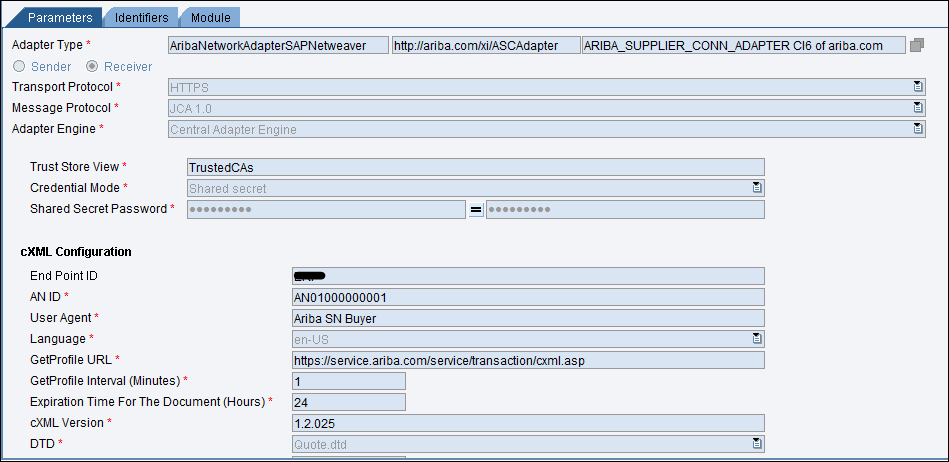
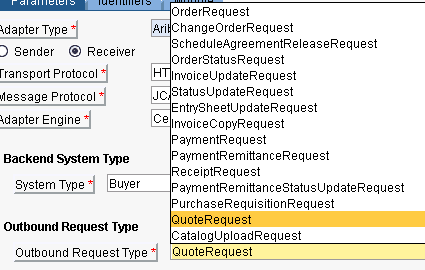
15. Ariba Specific Communication Channel Parameters:
- System Type: The value depends on the module of Ariba purchased by the client.

- Outbound Request Type: The value depends on the scenario. For example, in the case of RFQ, we use QuoteRequest.
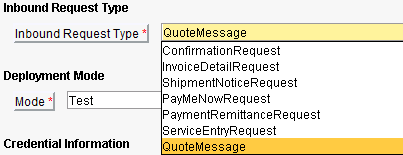
- Inbound Request Type: The value depends on the scenario. For example, in the case of inbound PO from Ariba, we use QuoteMessage.
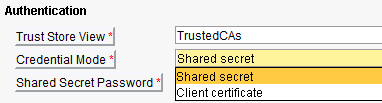
- Credential: The value will have unique Id of your client’s Ariba Sourcing Site.
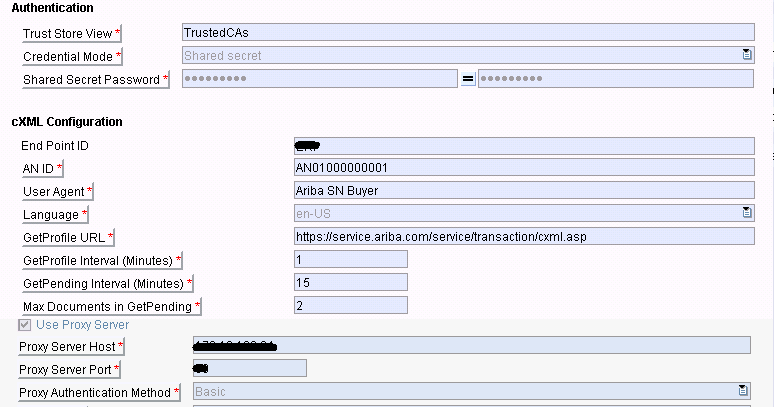
- Credential Mode: The value depends on the configuration on Ariba Sourcing. If Shared Secret is configured then they will provide Shared Secret Password to be used in the channel. In the case of Client Certificate approach, they will provide a certificate to be added in keystore of the server.
- End Point ID: The value will be provided by Ariba counterpart as they configure end points on Ariba Networks.
- AN ID: AN01000000001 should be maintained for Ariba Network which is common for all the clients.
- User Agent: The value depends on the module of Ariba purchased by the client eg. Ariba SN Buyer.
- GetProfile URL: https://service.ariba.com/service/transaction/cxml.asp should be maintained for Ariba Network which is common for all the clients.
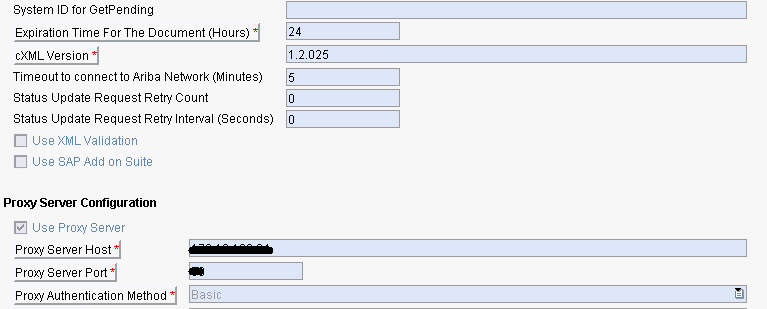
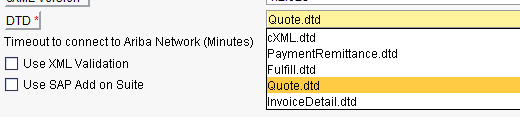
- DTD: The value depends on the scenario. For eg. for RFQ Quote.dtd is used.
16. Also, do relevant changes in the sender ECC channel. Activate all the components.


